service MITSUBISHI SHOGUN 2017 Owner's Manual (in English)
[x] Cancel search | Manufacturer: MITSUBISHI, Model Year: 2017, Model line: SHOGUN, Model: MITSUBISHI SHOGUN 2017Pages: 394, PDF Size: 19 MB
Page 2 of 394
ForewordE09200106777
Thank you for selecting a SHOGUN as your new vehicle.
This owner’s manual will add to your understanding and full enjoyment of
the many fine features of this vehicle.
It contains information prepared to acquaint you with the proper way to oper-
ate and maintain your vehicle for the utmost in driving pleasure.
MITSUBISHI MOTORS Europe B.V. reserves the right to make changes in
design and specifications and/or to make additions to or improvements in
this product without obligation to install them on products previously manu- factured.
It is an absolute requirement for the driver to strictly observe all laws and
regulations concerning vehicles.
This owner’s manual has been written in compliance with such laws and reg- ulations, but some of the contents may become contradictory with later amendment of the laws and regulations.
Please leave this owner’s manual in this vehicle at time of resale. The next
owner will appreciate having access to the information contained in this
owner’s manual.
Repairs to your vehicle:
Vehicles in the warranty period:
All warranty repairs must be carried out by a MITSUBISHI MOTORS Au-
thorized Service Point.
Vehicles outside the warranty period:
Where the vehicle is repaired is at the discretion of the owner.
Throughout this owner’s manual the words WARNING and CAUTION
appear.
These serve as reminders to be especially careful. Failure to follow instruc-
tions could result in personal injury or damage to your vehicle.WARNING
indicates a strong possibility of severe personal injury or death if in- structions are not followed.
CAUTION
means hazards or unsafe practices that could cause minor personal in-
jury or damage to your vehicle.
You will see another important symbol:
NOTE:gives helpful information.*:indicates optional equipment.
It may differ according to the sales classification; refer to the sales catalogue.
Abbreviations used in this owner’s manual:
LHD: Left-Hand Drive
RHD: Right-Hand Drive
M/T: Manual transmission
A/T: Automatic Transmission
The symbol used on the vehicles:
: See owner’s manual
Information for station service
E09300104338
Fuel
Capacity3-door models69 litres5-door models88 litres
Fuel requirements
Petrol-powered vehiclesUnleaded petrol octane number (EN228)90 RON or higher
If the “PREMIUM FUEL ONLY” label is attached to the fuel tank filler door,
fill it up with premium fuel.
Diesel-powered vehicles Cetane number (EN590)51 or higher
Refer to “General information” section for the fuel selection.Engine oilRefer to the “Maintenance”section for the selection of engine oil.Tyre inflation pressureRefer to the “Maintenance” section for the tyre inflation pressure.
© 2016 Mitsubishi Motors Corporation
17
OVWX17E1
BLO-16-000629
Page 14 of 394
Fuel selectionE00200104901
Recom-
mended
fuel
Petrol-powered vehicles Unleaded petrol octanenumber (EN228) 90 RON or higher
If the “PREMIUM FUEL
ONLY” label is attached to the fuel tank filler door, fill
it up with premium fuel.
Diesel-powered vehicles Cetane number (EN590)51 or higherCAUTIONl For petrol-powered vehicles, the use of lea-
ded fuel can result in serious damage to the engine and catalytic converter. Do not use leaded fuel.
l Diesel-powered vehicles are designed to use
only diesel fuel that meets the EN 590 stand-
ard.
Use of any other type of diesel fuel would adversely affect the engine’s performance
and durability.CAUTIONl For diesel-powered vehicles, if proper “win-
ter” fuel is not used in winter, the diesel pre-
heat indication lamp may blink and the en- gine speed may not rise above the idling speed because of fuel freezing. In this case,
keep the engine idling for about ten minutes,
then turn off the ignition switch and immedi- ately turn it on again to confirm that the die-
sel preheat indication lamp is off. (Refer to “Diesel preheat indication lamp” on page
5-09.)
NOTEl It is advisable to sufficiently warm up the
engine after starting it when the outside tem-
perature is below zero °C.
l Due to the separation of paraffin, the fluidity
of the fuel decreases considerably as the
temperature falls.
Because of this fact there are two kinds of
fuel: “summer” and “winter”.
This must be considered in winter use. Select either of the two kinds of fuel in ac- cordance with ambient temperature. Above -5 °C: “Summer” diesel
Below -5 °C: “Winter” diesel
When travelling abroad, find out in advance
about the fuels served in local service sta- tions.NOTEl In petrol-powered vehicles, repeatedly driv-
ing short distances at low speeds can cause deposits to form in the fuel system and en-
gine, resulting in poor starting and poor ac-
celeration.
If these problems occur, you are advised to
add a detergent additive to the gasoline when you refuel the vehicle. The additive
will remove the deposits, thereby returning the engine to a normal condition. Be sure to
use a MITSUBISHI MOTORS GENUINE
FUEL SYSTEM CLEANER. Using an un-
suitable additive could make the engine mal-
function. For details, please contact your MITSUBISHI MOTORS Authorized Serv-
ice Point.
l Poor quality petrol can cause problems such
as difficult starting, stalling, engine noise and hesitation. If you experience these prob-lems, try another brand and/or grade of pet-
rol.
If the check engine warning lamp flashes,
have the system checked as soon as possible
at a MITSUBISHI MOTORS Authorized
Service Point.
Fuel selection
2-02OVWX17E1General information2
Page 15 of 394
NOTElIn diesel-powered vehicles, poor-quality die-
sel fuel can cause deposits form in the injec- tor, resulting in black smoke and rough
idling.
If these problems occur, you are advised to add a cleaning additive to the diesel fuel
when you refuel the vehicle.
The additive will break up and remove the deposits, thereby returning the engine to anormal condition.
Be sure to use a MITSUBISHI MOTORS
GENUINE DIESEL FUEL SYSTEM CLEANER. Using an unsuitable additive
could make the engine malfunction. For de- tails, please contact your MITSUBISHI
MOTORS Authorized Service Point.E10 type petrol
E00203200019
The petrol engines are compatible with E10
type petrol (containing 10 % ethanol) con- forming to European standards EN 228.
CAUTIONl Do not use more than 10 % concentration of
ethanol (grain alcohol) by volume.
Use of more than 10 % concentration may lead to damage to your vehicle fuel system,
engine, engine sensors and exhaust system.Filling the fuel tank
E00200204087WARNINGlWhen handling fuel, comply with the safe-
ty regulations displayed by garages and filling stations.
l Before removing the fuel tank filler tube
cap, be sure to get rid of your body’s stat-
ic electricity by touching a metal part of the car or fuel pump. Any static electricity
on your body could create a spark that ig-
nites fuel vapour.
l Perform the whole refueling process
(opening the fuel tank filler door, remov-
ing the fuel tank filler tube cap, etc.) by yourself. Do not let any other person come
near the fuel tank filler. If you allowed a
person to help you and that person was carrying static electricity, fuel vapour
could be ignited.
l Do not move away from the fuel tank fill-
er door until refueling is finished. If you moved away and did something else (for
example, cleaning your windscreen) part- way through the refueling process, you
could pick up a fresh charge of static elec-
tricity.
l If the fuel tank filler tube cap must be re-
placed, use only a MITSUBISHI
MOTORS genuine part.
Fuel tank capacity
3-door models: 69 litres
5-door models: 88 litres
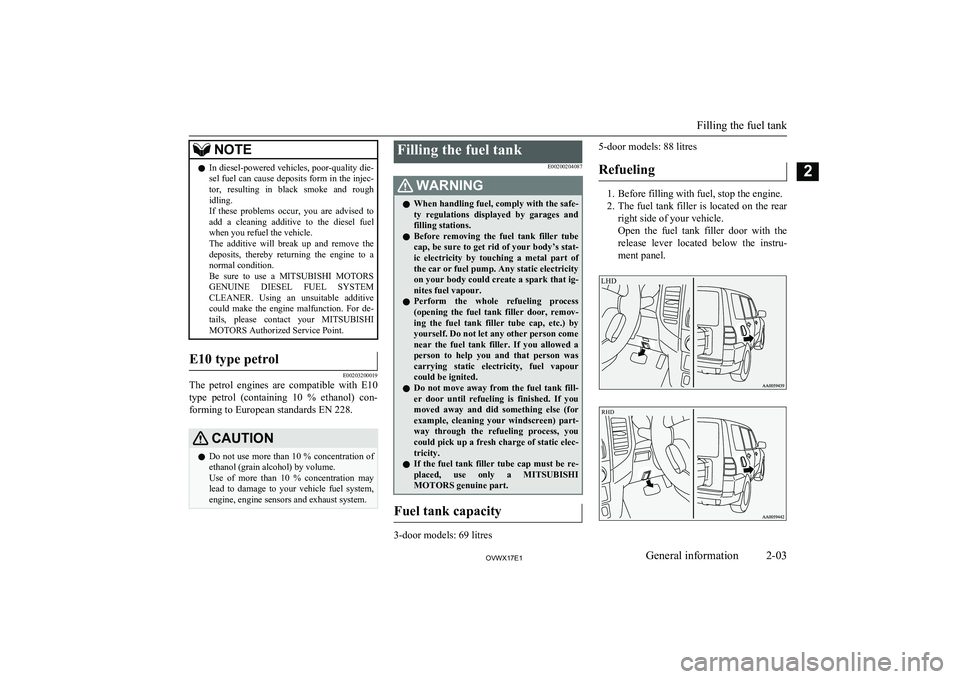
Refueling
1. Before filling with fuel, stop the engine.
2. The fuel tank filler is located on the rear
right side of your vehicle.
Open the fuel tank filler door with the
release lever located below the instru- ment panel.
LHD
Filling the fuel tank
2-03OVWX17E1General information2 RHD
Page 16 of 394
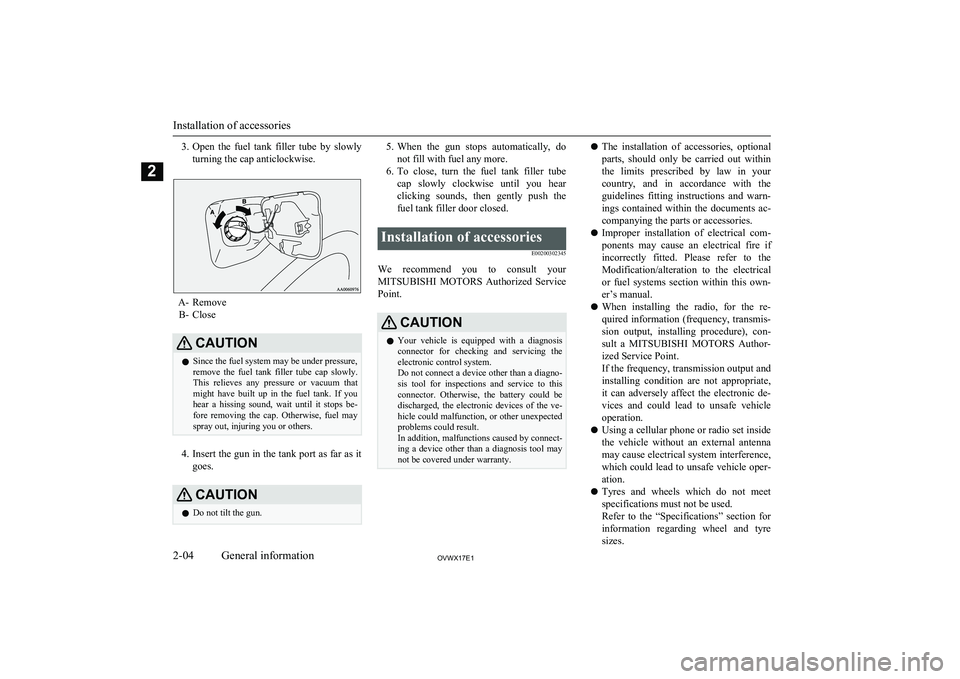
3.Open the fuel tank filler tube by slowly
turning the cap anticlockwise.
A- Remove B- Close
CAUTIONl Since the fuel system may be under pressure,
remove the fuel tank filler tube cap slowly. This relieves any pressure or vacuum that
might have built up in the fuel tank. If you
hear a hissing sound, wait until it stops be- fore removing the cap. Otherwise, fuel may
spray out, injuring you or others.
4. Insert the gun in the tank port as far as it
goes.
CAUTIONl Do not tilt the gun.5.
When the gun stops automatically, do
not fill with fuel any more.
6. To close, turn the fuel tank filler tube
cap slowly clockwise until you hear clicking sounds, then gently push the
fuel tank filler door closed.Installation of accessories
E00200302345
We recommend you to consult yourMITSUBISHI MOTORS Authorized Service
Point.
CAUTIONl Your vehicle is equipped with a diagnosis
connector for checking and servicing theelectronic control system.
Do not connect a device other than a diagno-
sis tool for inspections and service to this connector. Otherwise, the battery could be
discharged, the electronic devices of the ve- hicle could malfunction, or other unexpected
problems could result.
In addition, malfunctions caused by connect-
ing a device other than a diagnosis tool may not be covered under warranty.l The installation of accessories, optional
parts, should only be carried out within
the limits prescribed by law in your
country, and in accordance with the guidelines fitting instructions and warn-
ings contained within the documents ac-
companying the parts or accessories.
l Improper installation of electrical com-
ponents may cause an electrical fire if
incorrectly fitted. Please refer to the Modification/alteration to the electrical
or fuel systems section within this own-
er’s manual.
l When installing the radio, for the re-
quired information (frequency, transmis-
sion output, installing procedure), con- sult a MITSUBISHI MOTORS Author-
ized Service Point.
If the frequency, transmission output and installing condition are not appropriate,
it can adversely affect the electronic de- vices and could lead to unsafe vehicle operation.
l Using a cellular phone or radio set inside
the vehicle without an external antenna
may cause electrical system interference, which could lead to unsafe vehicle oper-ation.
l Tyres and wheels which do not meet
specifications must not be used.
Refer to the “Specifications” section for
information regarding wheel and tyre
sizes.
Installation of accessories
2-04OVWX17E1General information2
Page 17 of 394
lWhen fitting accessories, ensure that
maximum gross vehicle weight and maximum axle weight are not exceeded.
Important points!
Due to large number of accessory and re- placement parts of different manufactures
available in the market, it is not possible, not
only for MITSUBISHI MOTORS , but also
for a MITSUBISHI MOTORS Authorized
Service Point, to check whether the attach- ment or installation of such parts affects theoverall safety of your MITSUBISHI-vehicle.
Even when such parts are officially author-
ized, for example by a “general operators permit” (an appraisal for the part) or throughthe execution of the part in an officially ap-
proved manner of construction, or when a single operation permit following the attach-
ment or installation of such parts, it cannot be deduced from that alone, that the driving
safety of your vehicles has not been affected.
Consider also that there basically exists no li- ability on the part of the appraiser or the offi-
cial. Only in the case of parts ( MITSUBISHI
MOTORS original replacement or exchange
parts as well as MITSUBISHI MOTORS
genuine accessories) that are recommended and released by a MITSUBISHI MOTORS
Authorized Service Point and that are attach- ed or installed by a MITSUBISHI MOTORS
Authorized Service Point can you assume, that optimal safety has been provided. Thesame also pertains to modifications of
MITSUBISHI vehicles with respect to the
production specifications. For your own safe-
ty, in such cases, you should only undertake
modifications according to the recommenda-
tions of a MITSUBISHI MOTORS Author-
ized Service Point.Modification/alterations to
the electrical or fuel systems E00200400254
MITSUBISHI MOTORS has always manu-
factured safe, high quality vehicles. In order to maintain this safety and quality, it is im-
portant that any accessory that is to be fitted, or any modifications carried out which in-
volve the electrical or fuel systems, should be carried out in accordance with MITSUBISHI
MOTORS guidelines.
CAUTIONl If the wiring interferes with any part of the
vehicle bodywork or improper installation methods are used, i.e. protective fuses not
installed, etc.), electronic devices may be ad- versely affected, possibly resulting in an
electrical fire or other failures that may cause an accident.Genuine parts
E00200500617
MITSUBISHI MOTORS has gone to great
lengths to bring you a superbly crafted auto-
mobile offering the highest quality and de- pendability.
Use MITSUBISHI MOTORS genuine parts,
designed and manufactured to maintain your MITSUBISHI MOTORS automobile at top
performance. MITSUBISHI MOTORS genu-
ine parts are identified by this mark and are available at all MITSUBISHI MOTORS Au-
thorized Service Points.
Modification/alterations to the electrical or fuel systems
2-05OVWX17E1General information2
Page 23 of 394
NOTElIf the remote control switch is operated at
the correct distance from the vehicle, but thedoors (including the backdoor) are not
locked/unlocked in response, the battery may be exhausted.
For further information, please consult your
MITSUBISHI MOTORS Authorized Serv-
ice Point.
If you replace the battery yourself, refer to “Procedure for replacing the remote control
switch battery” on page 3-05.
l If your remote control switch is lost or dam-
aged, please contact your MITSUBISHI
MOTORS Authorized Service Point for a re-
placement remote control switch.
l If you wish to add a remote control switch,
we recommend you to contact your
MITSUBISHI MOTORS Authorized Serv-
ice Point.
A maximum of 4 remote control switches
are available for your vehicle.Procedure for replacing the re-
mote control switch battery
E00309501298
WARNINGl Danger of explosion if battery is incor-
rectly replaced.
Replace only with the same battery or an equivalent type.CAUTIONl Never disassemble or remove any inside
parts of the keyless entry key other than de-
scribed below.
Because there is a possibility that it may be-
come impossible to reassemble.
l When the remote control switch case is
opened, be careful to keep water, dust, etc. out.NOTEl You may purchase a replacement battery at
an electric appliance store.
l A
MITSUBISHI MOTORS Authorized
Service Point can replace the battery for you
if you prefer.
1. Before replacing the battery, remove
static electricity from your body by touching a metal part such as doorknob
of the room.
2. With the MITSUBISHI mark facing
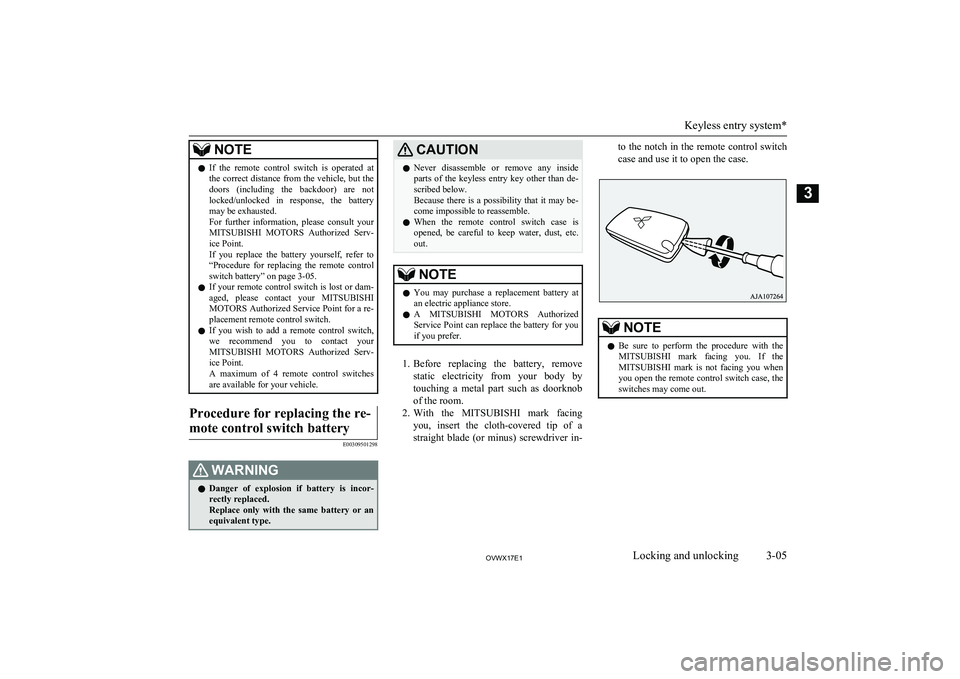
you, insert the cloth-covered tip of a
straight blade (or minus) screwdriver in-
to the notch in the remote control switch case and use it to open the case.NOTEl Be sure to perform the procedure with the
MITSUBISHI mark facing you. If the
MITSUBISHI mark is not facing you when
you open the remote control switch case, the switches may come out.
Keyless entry system*
3-05OVWX17E1Locking and unlocking3
Page 29 of 394
Security alarm system*E00301500657
The security alarm system is designed to pre- vent unlawful entry into the vehicle. It will
alert people nearby if a door, the backdoor, or the bonnet is opened when the vehicle has
not been unlocked using the keyless entry system.
Also, the alarm will be activated if any of the
following occur.
l Attempt an unlawful moving of the vehi-
cle. (the vehicle inclination detection function)
l Detect a motion in the vehicle. (the inte-
rior intrusion detection function)
l Disconnect the battery terminal.
The security alarm system is set to “active” when the vehicle leaves the factory.
When making changes to the settings, please
follow the procedure listed in the section ti- tled “Changing the system settings” on page
3-12.CAUTIONl Do not modify or add parts to the security
alarm system.
Doing so could cause the security alarm to malfunction.NOTEl The alarm system will not be activated if the
doors (including the backdoor) have been
locked using a key or the central door lock switch (instead of the keyless entry system).
l If the turn-signal lamps do not blink after the
locking and unlocking operation using thekeyless entry system, the security alarm sys-
tem may be malfunctioning.
Have the vehicle inspected at a MITSUBISHI MOTORS Authorized Serv-
ice Point.
l In the following situations, the security
alarm system could be more likely to be ac-
cidentally activated.
• Using a car wash
• Taking the vehicle on a ferry
• Parking in an automated car park
• Leaving someone or a pet in the vehicle
• Leaving a window, door, or the sunroof
open
• Leaving an unstable object such as a stuf-
fed toy or accessory in the vehicle
• Suffering a continuous impact or vibra-
tion by hail, thunder, etc.
l The sensitivity of the vehicle inclination de-
tection function and the interior intrusion de-
tection function can be adjusted. For details,
please contact a MITSUBISHI MOTORS
Authorized Service Point.The security alarm has four
modes:
System preparation mode (ap- prox. 20 seconds)
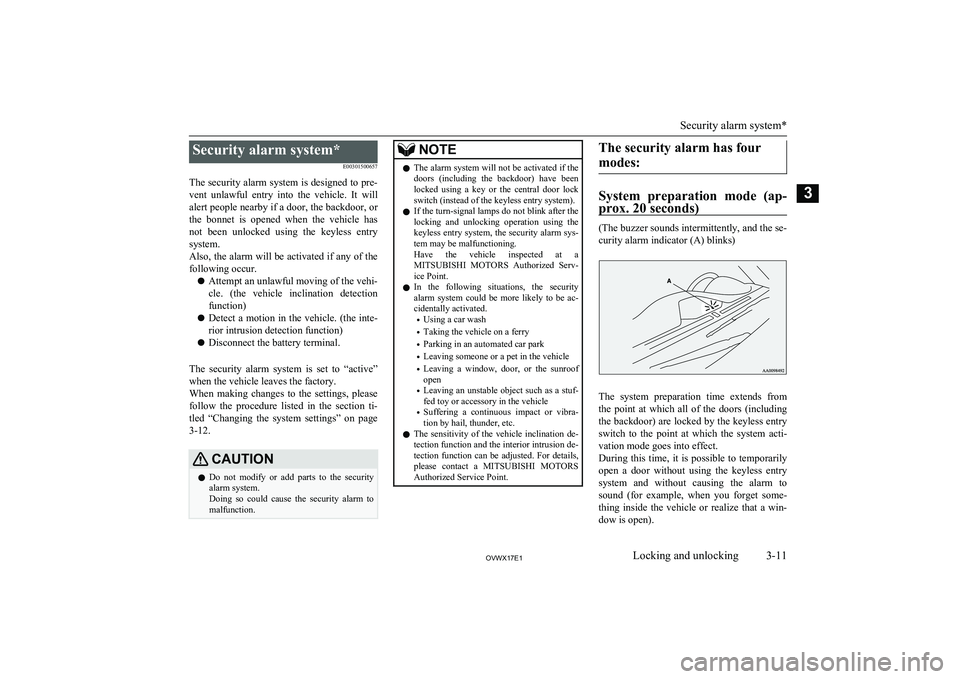
(The buzzer sounds intermittently, and the se-
curity alarm indicator (A) blinks)
The system preparation time extends from the point at which all of the doors (including the backdoor) are locked by the keyless entry
switch to the point at which the system acti- vation mode goes into effect.
During this time, it is possible to temporarily
open a door without using the keyless entry system and without causing the alarm to sound (for example, when you forget some-
thing inside the vehicle or realize that a win- dow is open).
Security alarm system*
3-11OVWX17E1Locking and unlocking3
Page 31 of 394
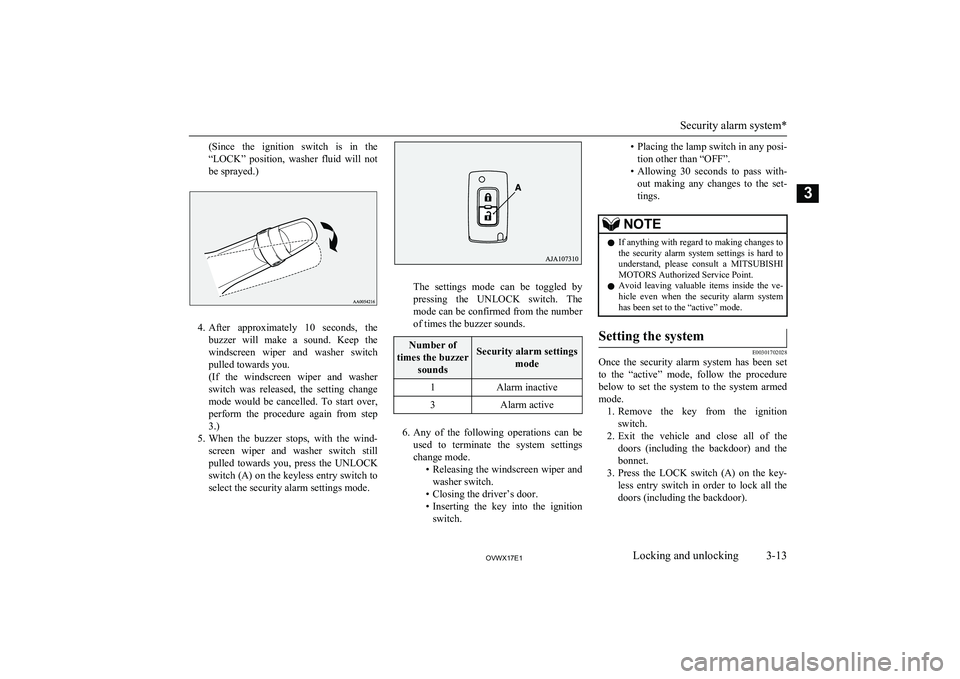
(Since the ignition switch is in the
“LOCK” position, washer fluid will not be sprayed.)
4. After approximately 10 seconds, the
buzzer will make a sound. Keep the windscreen wiper and washer switch
pulled towards you.
(If the windscreen wiper and washer
switch was released, the setting change
mode would be cancelled. To start over, perform the procedure again from step
3.)
5. When the buzzer stops, with the wind-
screen wiper and washer switch stillpulled towards you, press the UNLOCKswitch (A) on the keyless entry switch toselect the security alarm settings mode.
The settings mode can be toggled by
pressing the UNLOCK switch. The mode can be confirmed from the numberof times the buzzer sounds.
Number of
times the buzzer soundsSecurity alarm settings mode1Alarm inactive3Alarm active
6.Any of the following operations can be
used to terminate the system settings change mode. •Releasing the windscreen wiper and
washer switch.
• Closing the driver’s door.
• Inserting the key into the ignition
switch.
• Placing the lamp switch in any posi-
tion other than “OFF”.
• Allowing 30 seconds to pass with-
out making any changes to the set-
tings.NOTEl If anything with regard to making changes to
the security alarm system settings is hard to understand, please consult a MITSUBISHI
MOTORS Authorized Service Point.
l Avoid leaving valuable items inside the ve-
hicle even when the security alarm system has been set to the “active” mode.Setting the system
E00301702028
Once the security alarm system has been set
to the “active” mode, follow the procedure below to set the system to the system armed
mode. 1. Remove the key from the ignition
switch.
2. Exit the vehicle and close all of the
doors (including the backdoor) and the
bonnet.
3. Press the LOCK switch (A) on the key-
less entry switch in order to lock all thedoors (including the backdoor).
Security alarm system*
3-13OVWX17E1Locking and unlocking3
Page 33 of 394
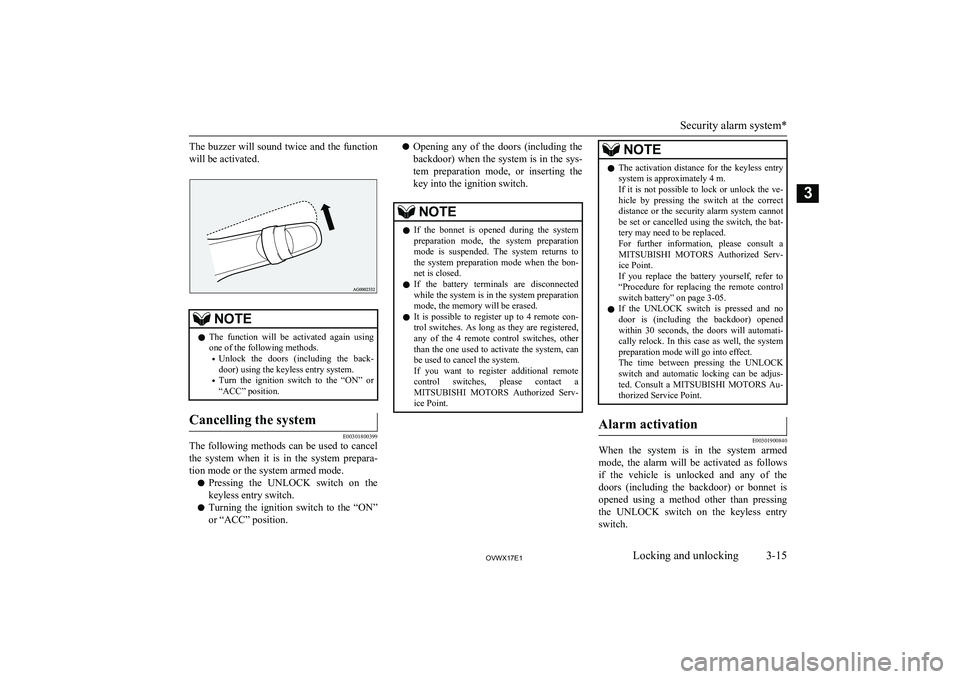
The buzzer will sound twice and the functionwill be activated.NOTEl The function will be activated again using
one of the following methods.
• Unlock the doors (including the back-
door) using the keyless entry system.
• Turn the ignition switch to the “ON” or
“ACC” position.Cancelling the system
E00301800399
The following methods can be used to cancel
the system when it is in the system prepara- tion mode or the system armed mode.
l Pressing the UNLOCK switch on the
keyless entry switch.
l Turning the ignition switch to the “ON”
or “ACC” position.
l Opening any of the doors (including the
backdoor) when the system is in the sys-
tem preparation mode, or inserting the
key into the ignition switch.NOTEl If the bonnet is opened during the system
preparation mode, the system preparationmode is suspended. The system returns to
the system preparation mode when the bon- net is closed.
l If the battery terminals are disconnected
while the system is in the system preparation
mode, the memory will be erased.
l It is possible to register up to 4 remote con-
trol switches. As long as they are registered, any of the 4 remote control switches, otherthan the one used to activate the system, can
be used to cancel the system.
If you want to register additional remote control switches, please contact aMITSUBISHI MOTORS Authorized Serv-
ice Point.NOTEl The activation distance for the keyless entry
system is approximately 4 m.
If it is not possible to lock or unlock the ve-
hicle by pressing the switch at the correct
distance or the security alarm system cannot be set or cancelled using the switch, the bat-
tery may need to be replaced.
For further information, please consult a
MITSUBISHI MOTORS Authorized Serv-
ice Point.
If you replace the battery yourself, refer to “Procedure for replacing the remote control
switch battery” on page 3-05.
l If the UNLOCK switch is pressed and no
door is (including the backdoor) opened within 30 seconds, the doors will automati-
cally relock. In this case as well, the system preparation mode will go into effect.
The time between pressing the UNLOCK
switch and automatic locking can be adjus- ted. Consult a MITSUBISHI MOTORS Au-
thorized Service Point.Alarm activation
E00301900840
When the system is in the system armed
mode, the alarm will be activated as follows
if the vehicle is unlocked and any of the doors (including the backdoor) or bonnet is opened using a method other than pressing the UNLOCK switch on the keyless entry
switch.
Security alarm system*
3-15OVWX17E1Locking and unlocking3
Page 65 of 394
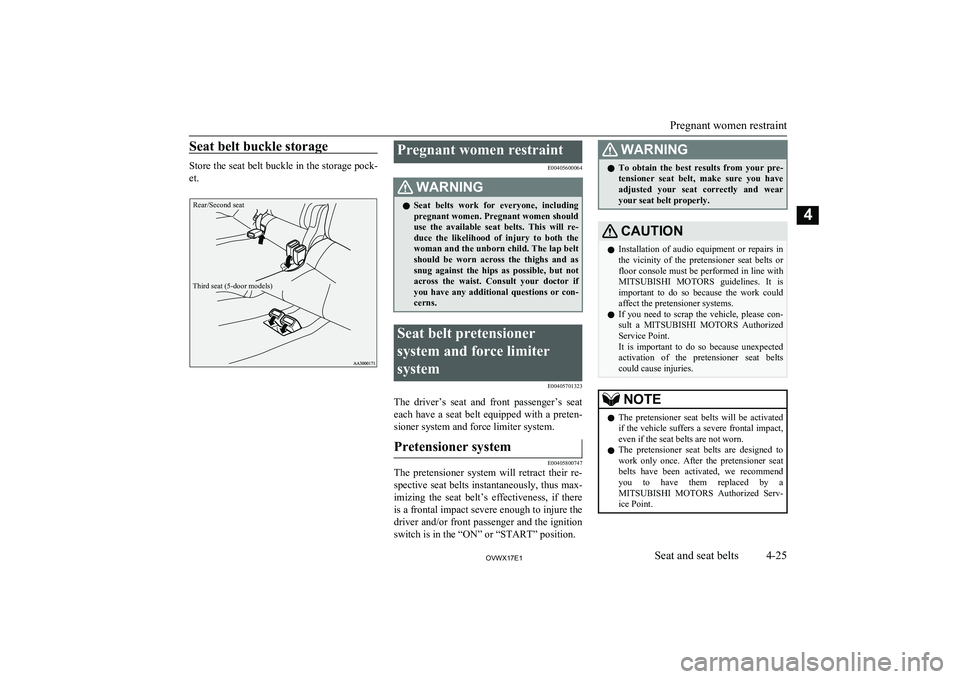
Seat belt buckle storage
Store the seat belt buckle in the storage pock-
et.
Rear/Second seatThird seat (5-door models)
Pregnant women restraint
E00405600064WARNINGlSeat belts work for everyone, including
pregnant women. Pregnant women should
use the available seat belts. This will re- duce the likelihood of injury to both thewoman and the unborn child. The lap belt
should be worn across the thighs and as snug against the hips as possible, but not
across the waist. Consult your doctor if you have any additional questions or con-
cerns.Seat belt pretensioner
system and force limiter
system E00405701323
The driver’s seat and front passenger’s seateach have a seat belt equipped with a preten- sioner system and force limiter system.
Pretensioner system
E00405800747
The pretensioner system will retract their re-
spective seat belts instantaneously, thus max-imizing the seat belt’s effectiveness, if there
is a frontal impact severe enough to injure the
driver and/or front passenger and the ignition
switch is in the “ON” or “START” position.
WARNINGl To obtain the best results from your pre-
tensioner seat belt, make sure you have
adjusted your seat correctly and wear your seat belt properly.CAUTIONl Installation of audio equipment or repairs in
the vicinity of the pretensioner seat belts or
floor console must be performed in line with MITSUBISHI MOTORS guidelines. It is
important to do so because the work could affect the pretensioner systems.
l If you need to scrap the vehicle, please con-
sult a MITSUBISHI MOTORS Authorized
Service Point.
It is important to do so because unexpected activation of the pretensioner seat belts
could cause injuries.NOTEl The pretensioner seat belts will be activated
if the vehicle suffers a severe frontal impact, even if the seat belts are not worn.
l The pretensioner seat belts are designed to
work only once. After the pretensioner seat
belts have been activated, we recommend you to have them replaced by a
MITSUBISHI MOTORS Authorized Serv-
ice Point.
Pregnant women restraint
4-25OVWX17E1Seat and seat belts4