NISSAN ALMERA TINO 2001 Service Repair Manual
Manufacturer: NISSAN, Model Year: 2001, Model line: ALMERA TINO, Model: NISSAN ALMERA TINO 2001Pages: 3051, PDF Size: 46.38 MB
Page 2141 of 3051
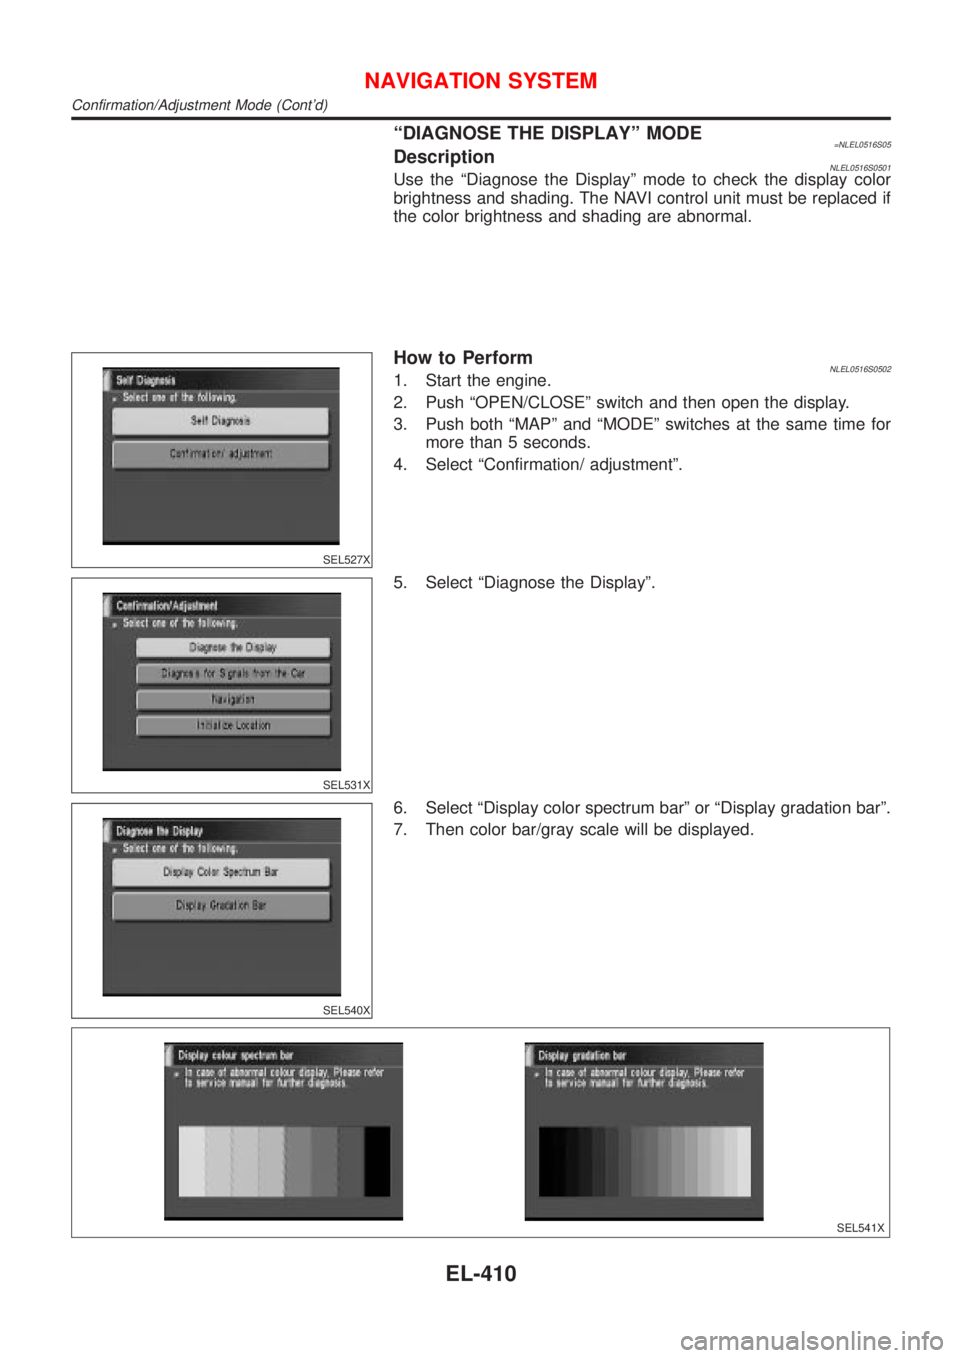
ªDIAGNOSE THE DISPLAYº MODE=NLEL0516S05DescriptionNLEL0516S0501Use the ªDiagnose the Displayº mode to check the display color
brightness and shading. The NAVI control unit must be replaced if
the color brightness and shading are abnormal.
SEL527X
How to PerformNLEL0516S05021. Start the engine.
2. Push ªOPEN/CLOSEº switch and then open the display.
3. Push both ªMAPº and ªMODEº switches at the same time for
more than 5 seconds.
4. Select ªConfirmation/ adjustmentº.
SEL531X
5. Select ªDiagnose the Displayº.
SEL540X
6. Select ªDisplay color spectrum barº or ªDisplay gradation barº.
7. Then color bar/gray scale will be displayed.
SEL541X
NAVIGATION SYSTEM
Confirmation/Adjustment Mode (Cont'd)
EL-410
Page 2142 of 3051
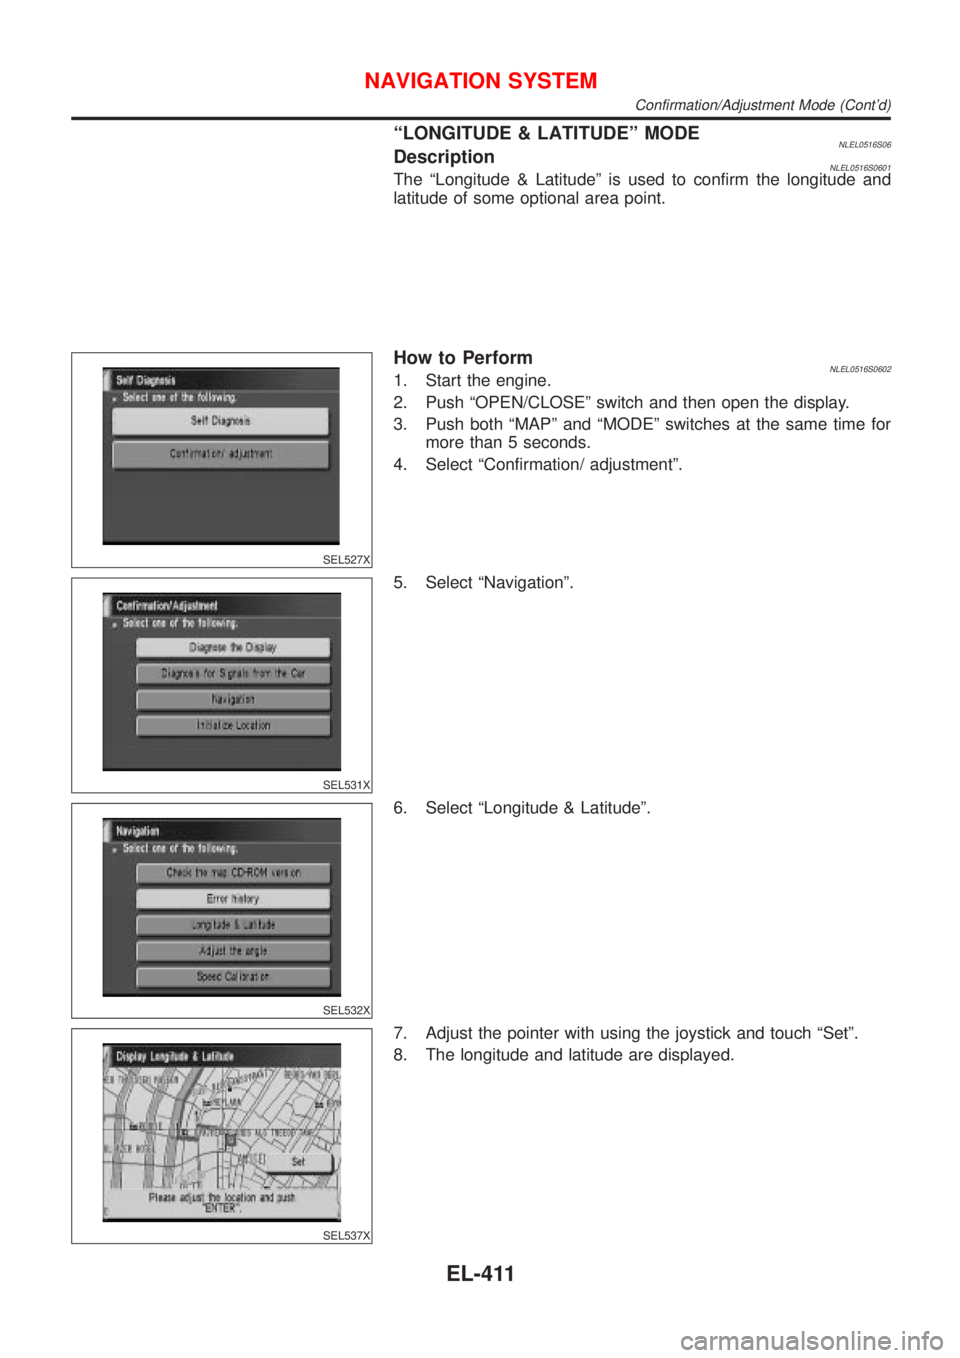
ªLONGITUDE & LATITUDEº MODENLEL0516S06DescriptionNLEL0516S0601The ªLongitude & Latitudeº is used to confirm the longitude and
latitude of some optional area point.
SEL527X
How to PerformNLEL0516S06021. Start the engine.
2. Push ªOPEN/CLOSEº switch and then open the display.
3. Push both ªMAPº and ªMODEº switches at the same time for
more than 5 seconds.
4. Select ªConfirmation/ adjustmentº.
SEL531X
5. Select ªNavigationº.
SEL532X
6. Select ªLongitude & Latitudeº.
SEL537X
7. Adjust the pointer with using the joystick and touch ªSetº.
8. The longitude and latitude are displayed.
NAVIGATION SYSTEM
Confirmation/Adjustment Mode (Cont'd)
EL-411
Page 2143 of 3051
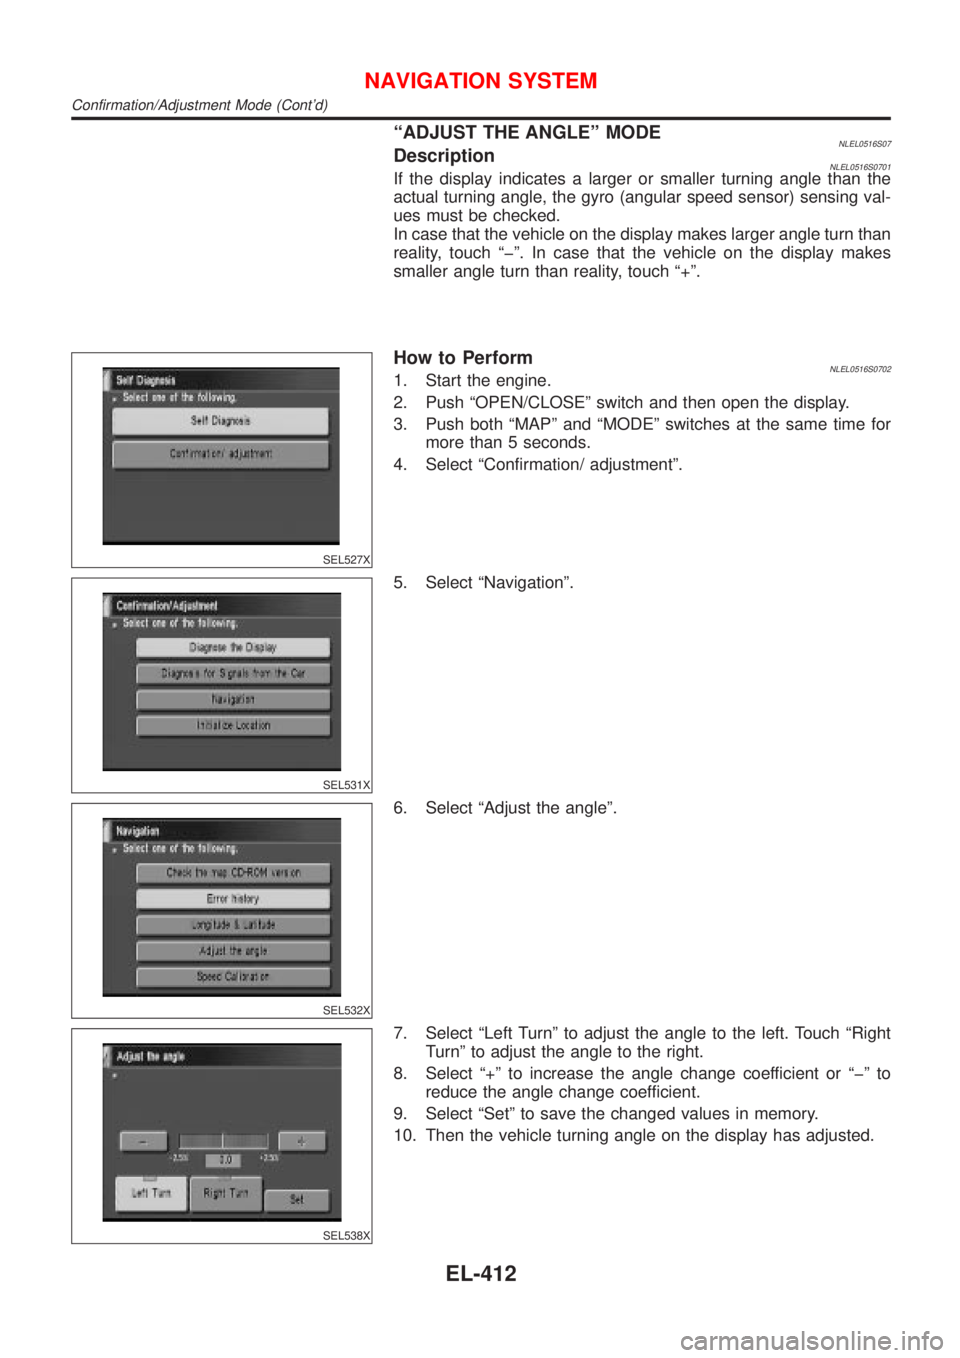
ªADJUST THE ANGLEº MODENLEL0516S07DescriptionNLEL0516S0701If the display indicates a larger or smaller turning angle than the
actual turning angle, the gyro (angular speed sensor) sensing val-
ues must be checked.
In case that the vehicle on the display makes larger angle turn than
reality, touch ªþº. In case that the vehicle on the display makes
smaller angle turn than reality, touch ª+º.
SEL527X
How to PerformNLEL0516S07021. Start the engine.
2. Push ªOPEN/CLOSEº switch and then open the display.
3. Push both ªMAPº and ªMODEº switches at the same time for
more than 5 seconds.
4. Select ªConfirmation/ adjustmentº.
SEL531X
5. Select ªNavigationº.
SEL532X
6. Select ªAdjust the angleº.
SEL538X
7. Select ªLeft Turnº to adjust the angle to the left. Touch ªRight
Turnº to adjust the angle to the right.
8. Select ª+º to increase the angle change coefficient or ªþº to
reduce the angle change coefficient.
9. Select ªSetº to save the changed values in memory.
10. Then the vehicle turning angle on the display has adjusted.
NAVIGATION SYSTEM
Confirmation/Adjustment Mode (Cont'd)
EL-412
Page 2144 of 3051
SEL527X
ªSPEED CALIBRATIONº MODENLEL0516S08How to PerformNLEL0516S08011. Start the engine.
2. Push ªOPEN/CLOSEº switch and then open the display.
3. Push both ªMAPº and ªMODEº switches at the same time for
more than 5 seconds.
4. Select ªConfirmation/ adjustmentº.
SEL531X
5. Select ªNavigationº.
SEL532X
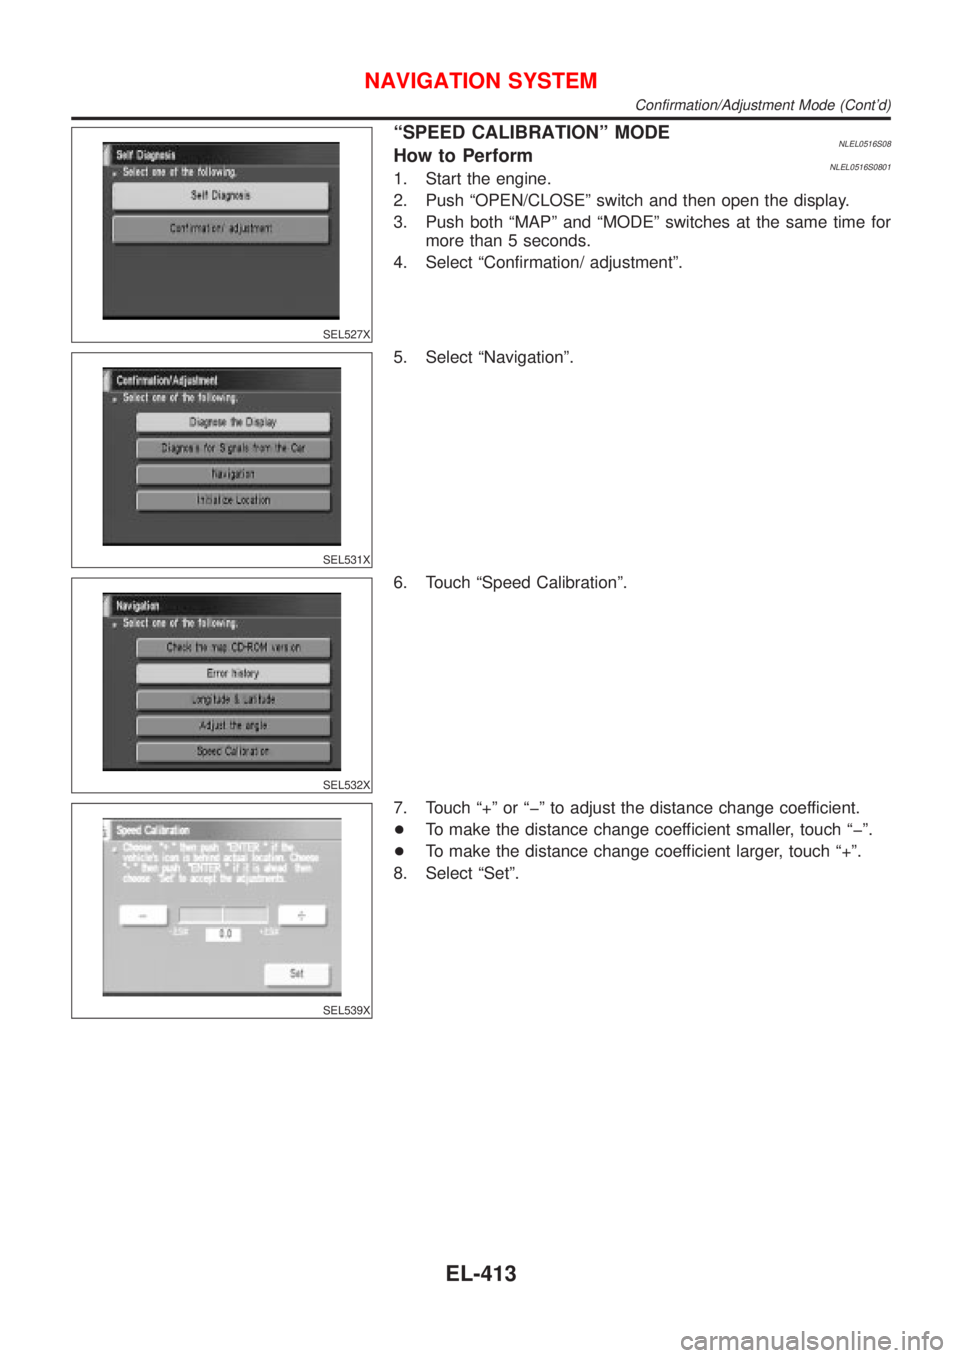
6. Touch ªSpeed Calibrationº.
SEL539X
7. Touch ª+º or ªþº to adjust the distance change coefficient.
+To make the distance change coefficient smaller, touch ªþº.
+To make the distance change coefficient larger, touch ª+º.
8. Select ªSetº.
NAVIGATION SYSTEM
Confirmation/Adjustment Mode (Cont'd)
EL-413
Page 2145 of 3051
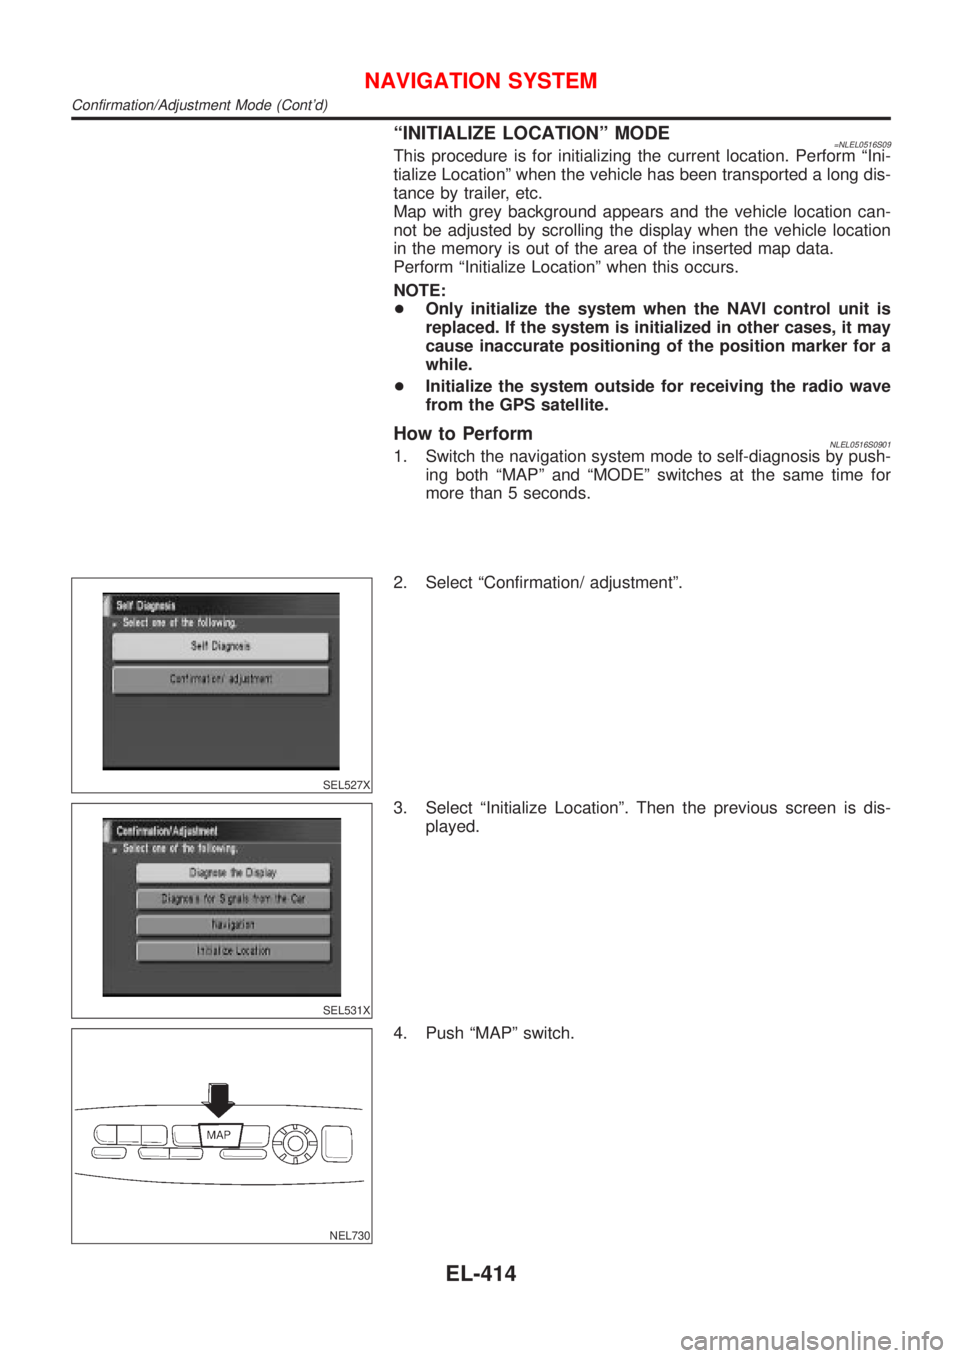
ªINITIALIZE LOCATIONº MODE=NLEL0516S09This procedure is for initializing the current location. Perform ªIni-
tialize Locationº when the vehicle has been transported a long dis-
tance by trailer, etc.
Map with grey background appears and the vehicle location can-
not be adjusted by scrolling the display when the vehicle location
in the memory is out of the area of the inserted map data.
Perform ªInitialize Locationº when this occurs.
NOTE:
+Only initialize the system when the NAVI control unit is
replaced. If the system is initialized in other cases, it may
cause inaccurate positioning of the position marker for a
while.
+Initialize the system outside for receiving the radio wave
from the GPS satellite.
How to PerformNLEL0516S09011. Switch the navigation system mode to self-diagnosis by push-
ing both ªMAPº and ªMODEº switches at the same time for
more than 5 seconds.
SEL527X
2. Select ªConfirmation/ adjustmentº.
SEL531X
3. Select ªInitialize Locationº. Then the previous screen is dis-
played.
NEL730
4. Push ªMAPº switch.
NAVIGATION SYSTEM
Confirmation/Adjustment Mode (Cont'd)
EL-414
Page 2146 of 3051
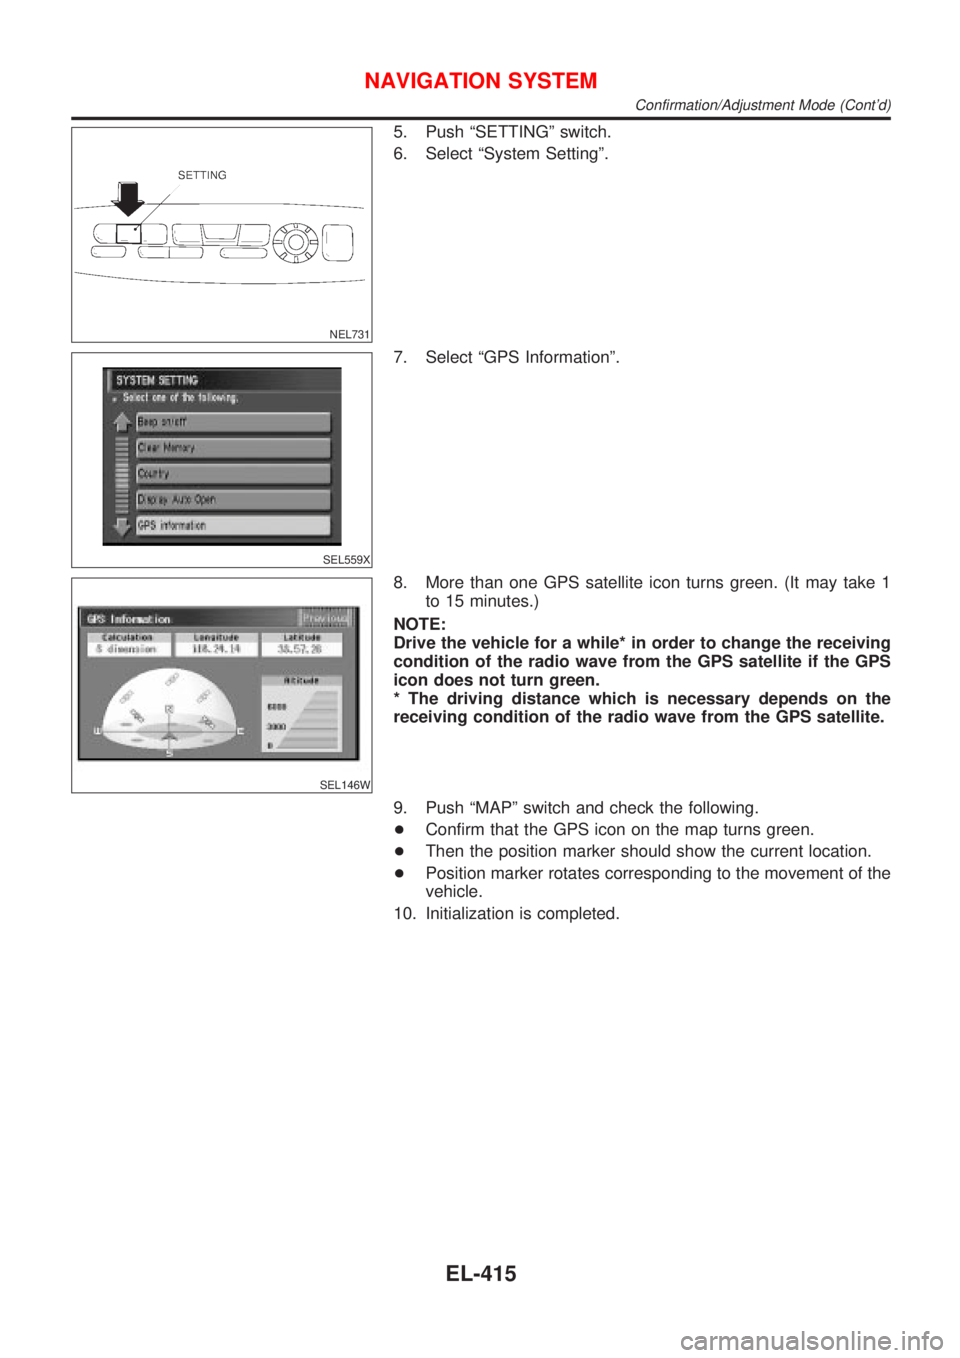
NEL731
5. Push ªSETTINGº switch.
6. Select ªSystem Settingº.
SEL559X
7. Select ªGPS Informationº.
SEL146W
8. More than one GPS satellite icon turns green. (It may take 1
to 15 minutes.)
NOTE:
Drive the vehicle for a while* in order to change the receiving
condition of the radio wave from the GPS satellite if the GPS
icon does not turn green.
* The driving distance which is necessary depends on the
receiving condition of the radio wave from the GPS satellite.
9. Push ªMAPº switch and check the following.
+Confirm that the GPS icon on the map turns green.
+Then the position marker should show the current location.
+Position marker rotates corresponding to the movement of the
vehicle.
10. Initialization is completed.
NAVIGATION SYSTEM
Confirmation/Adjustment Mode (Cont'd)
EL-415
Page 2147 of 3051
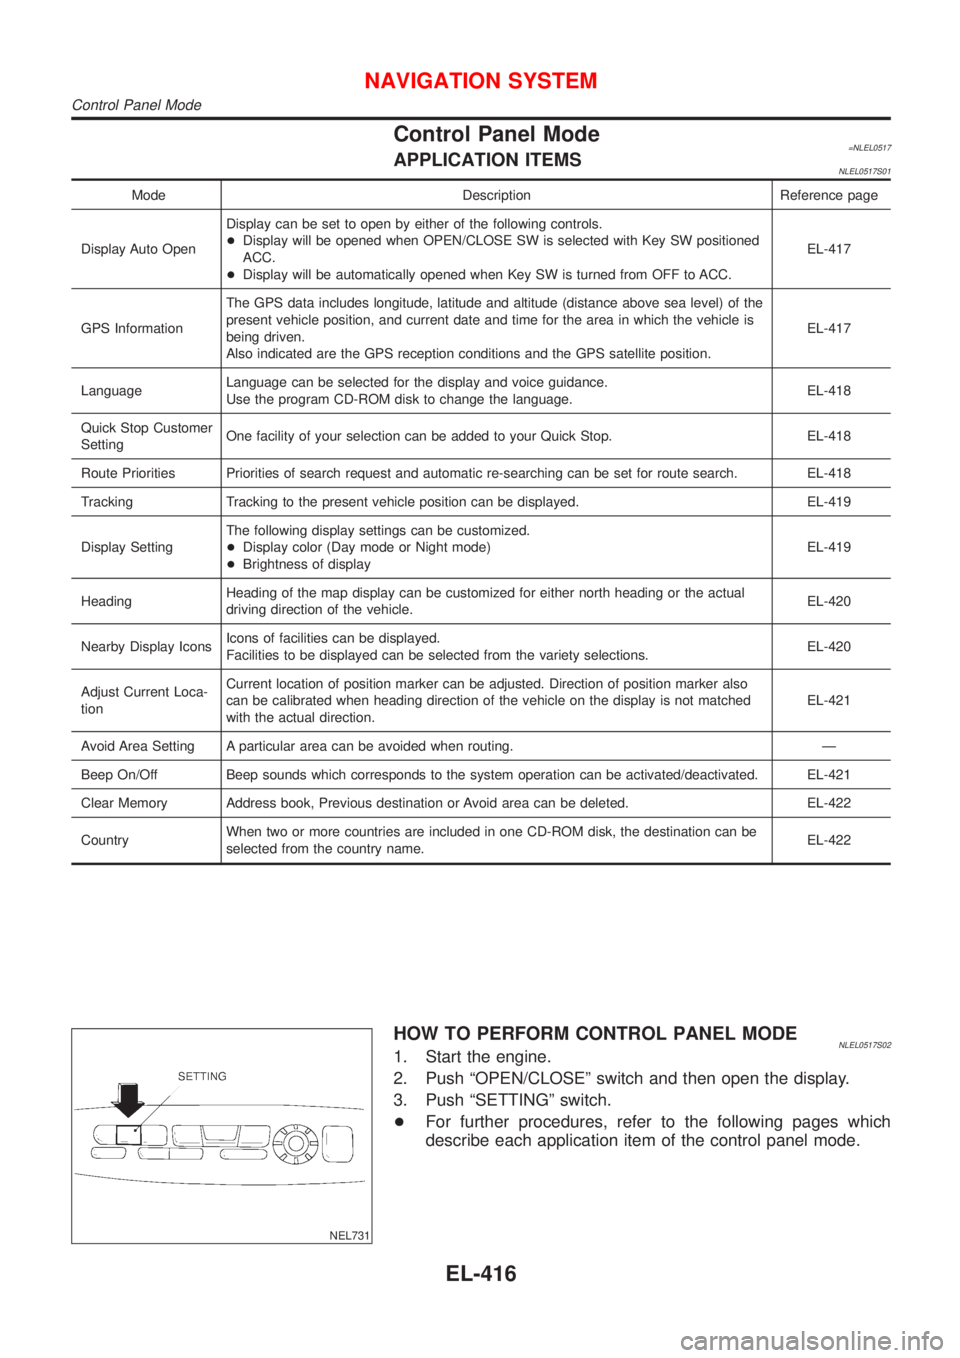
Control Panel Mode=NLEL0517APPLICATION ITEMSNLEL0517S01
Mode Description Reference page
Display Auto OpenDisplay can be set to open by either of the following controls.
+Display will be opened when OPEN/CLOSE SW is selected with Key SW positioned
ACC.
+Display will be automatically opened when Key SW is turned from OFF to ACC.EL-417
GPS InformationThe GPS data includes longitude, latitude and altitude (distance above sea level) of the
present vehicle position, and current date and time for the area in which the vehicle is
being driven.
Also indicated are the GPS reception conditions and the GPS satellite position.EL-417
LanguageLanguage can be selected for the display and voice guidance.
Use the program CD-ROM disk to change the language.EL-418
Quick Stop Customer
SettingOne facility of your selection can be added to your Quick Stop. EL-418
Route Priorities Priorities of search request and automatic re-searching can be set for route search. EL-418
Tracking Tracking to the present vehicle position can be displayed. EL-419
Display SettingThe following display settings can be customized.
+Display color (Day mode or Night mode)
+Brightness of displayEL-419
HeadingHeading of the map display can be customized for either north heading or the actual
driving direction of the vehicle.EL-420
Nearby Display IconsIcons of facilities can be displayed.
Facilities to be displayed can be selected from the variety selections.EL-420
Adjust Current Loca-
tionCurrent location of position marker can be adjusted. Direction of position marker also
can be calibrated when heading direction of the vehicle on the display is not matched
with the actual direction.EL-421
Avoid Area Setting A particular area can be avoided when routing. Ð
Beep On/Off Beep sounds which corresponds to the system operation can be activated/deactivated. EL-421
Clear Memory Address book, Previous destination or Avoid area can be deleted. EL-422
CountryWhen two or more countries are included in one CD-ROM disk, the destination can be
selected from the country name.EL-422
NEL731
HOW TO PERFORM CONTROL PANEL MODENLEL0517S021. Start the engine.
2. Push ªOPEN/CLOSEº switch and then open the display.
3. Push ªSETTINGº switch.
+For further procedures, refer to the following pages which
describe each application item of the control panel mode.
NAVIGATION SYSTEM
Control Panel Mode
EL-416
Page 2148 of 3051
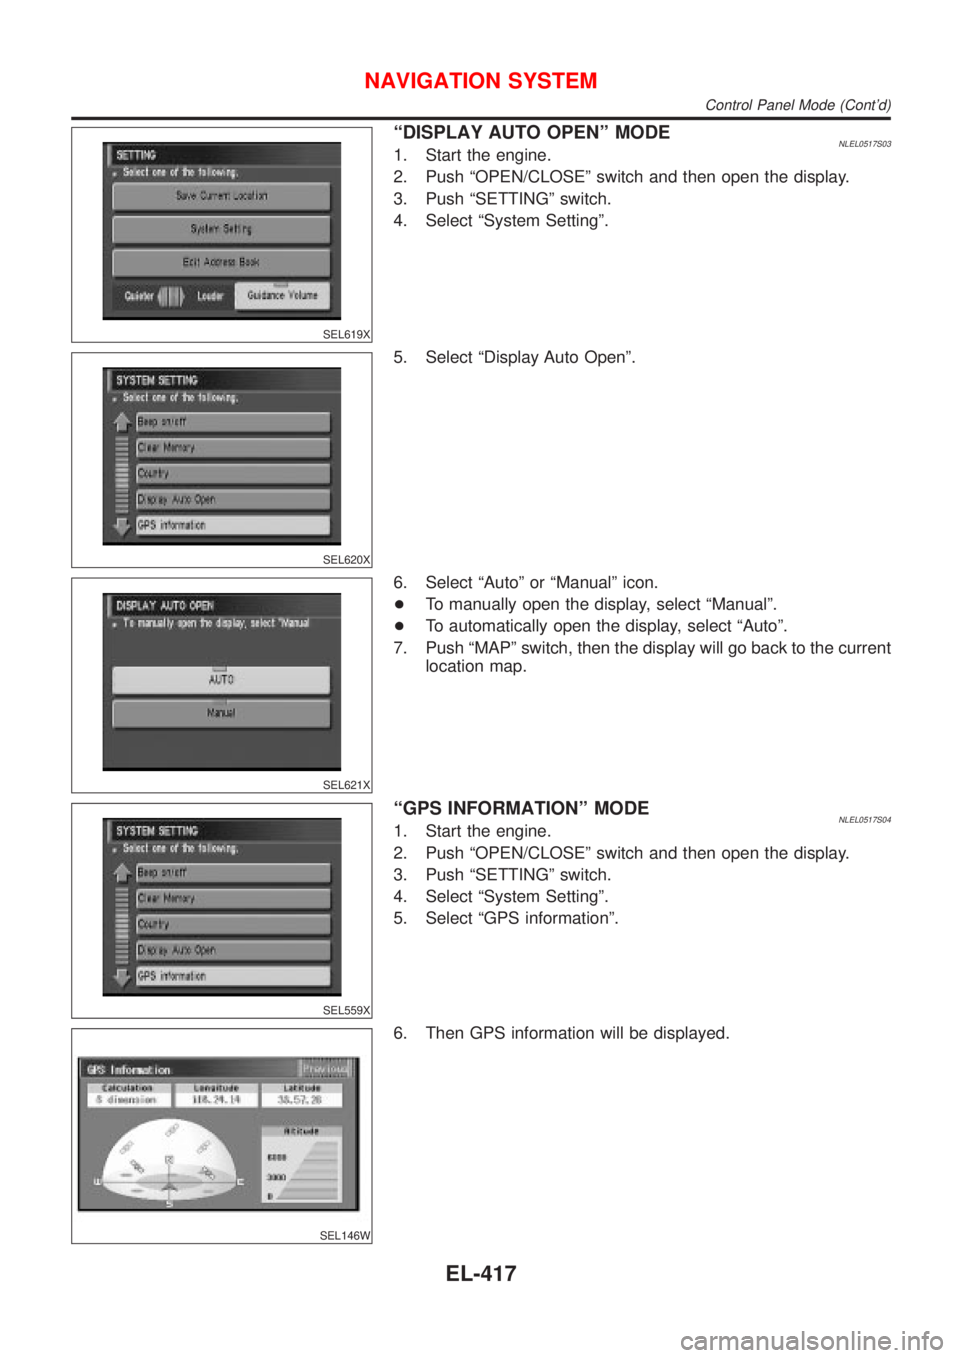
SEL619X
ªDISPLAY AUTO OPENº MODENLEL0517S031. Start the engine.
2. Push ªOPEN/CLOSEº switch and then open the display.
3. Push ªSETTINGº switch.
4. Select ªSystem Settingº.
SEL620X
5. Select ªDisplay Auto Openº.
SEL621X
6. Select ªAutoº or ªManualº icon.
+To manually open the display, select ªManualº.
+To automatically open the display, select ªAutoº.
7. Push ªMAPº switch, then the display will go back to the current
location map.
SEL559X
ªGPS INFORMATIONº MODENLEL0517S041. Start the engine.
2. Push ªOPEN/CLOSEº switch and then open the display.
3. Push ªSETTINGº switch.
4. Select ªSystem Settingº.
5. Select ªGPS informationº.
SEL146W
6. Then GPS information will be displayed.
NAVIGATION SYSTEM
Control Panel Mode (Cont'd)
EL-417
Page 2149 of 3051
SEL565X
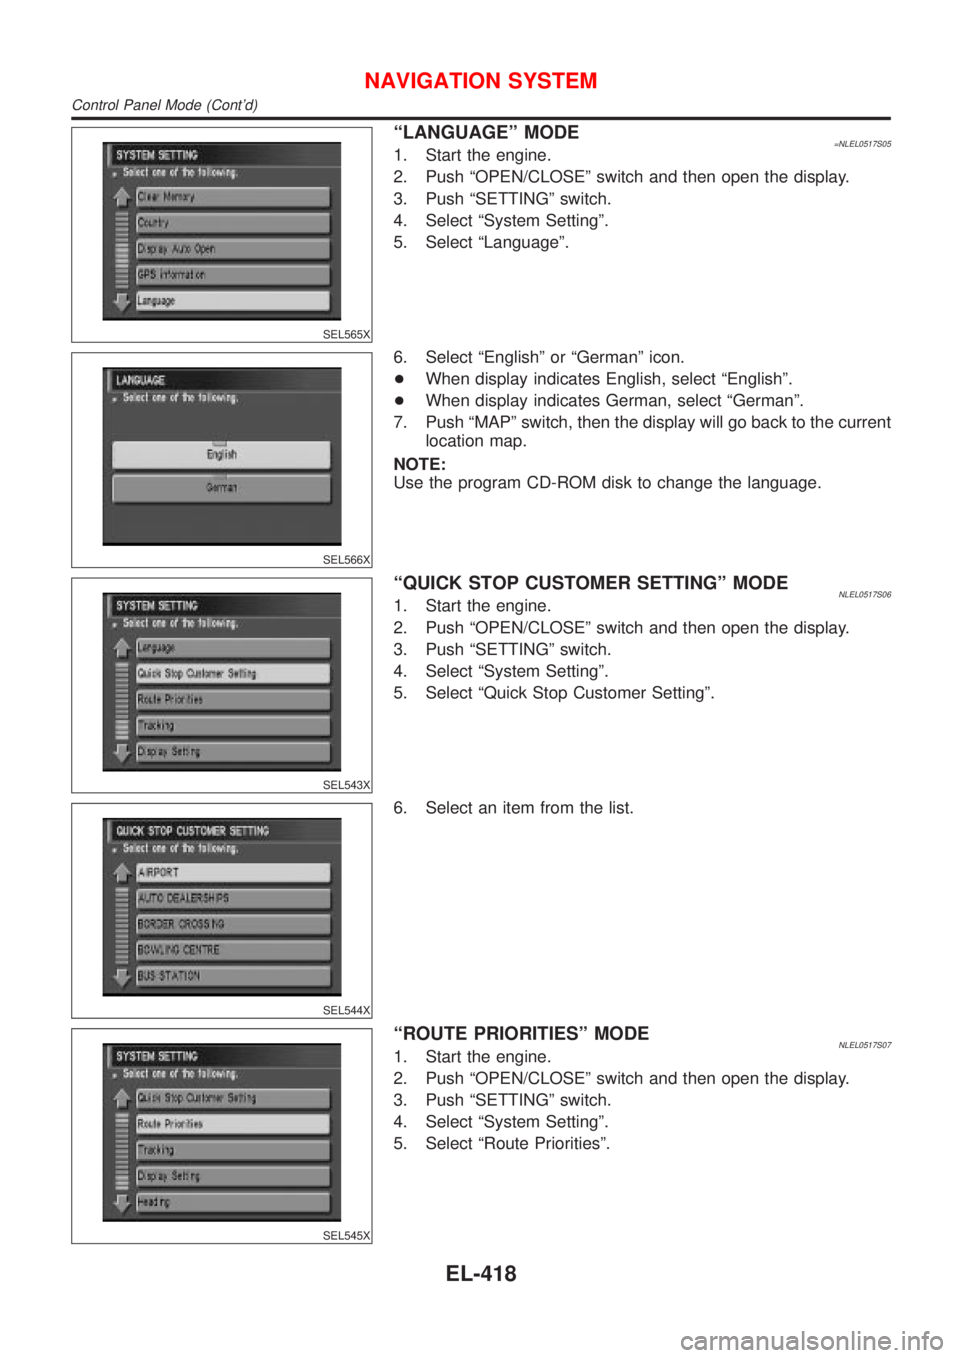
ªLANGUAGEº MODE=NLEL0517S051. Start the engine.
2. Push ªOPEN/CLOSEº switch and then open the display.
3. Push ªSETTINGº switch.
4. Select ªSystem Settingº.
5. Select ªLanguageº.
SEL566X
6. Select ªEnglishº or ªGermanº icon.
+When display indicates English, select ªEnglishº.
+When display indicates German, select ªGermanº.
7. Push ªMAPº switch, then the display will go back to the current
location map.
NOTE:
Use the program CD-ROM disk to change the language.
SEL543X
ªQUICK STOP CUSTOMER SETTINGº MODENLEL0517S061. Start the engine.
2. Push ªOPEN/CLOSEº switch and then open the display.
3. Push ªSETTINGº switch.
4. Select ªSystem Settingº.
5. Select ªQuick Stop Customer Settingº.
SEL544X
6. Select an item from the list.
SEL545X
ªROUTE PRIORITIESº MODENLEL0517S071. Start the engine.
2. Push ªOPEN/CLOSEº switch and then open the display.
3. Push ªSETTINGº switch.
4. Select ªSystem Settingº.
5. Select ªRoute Prioritiesº.
NAVIGATION SYSTEM
Control Panel Mode (Cont'd)
EL-418
Page 2150 of 3051
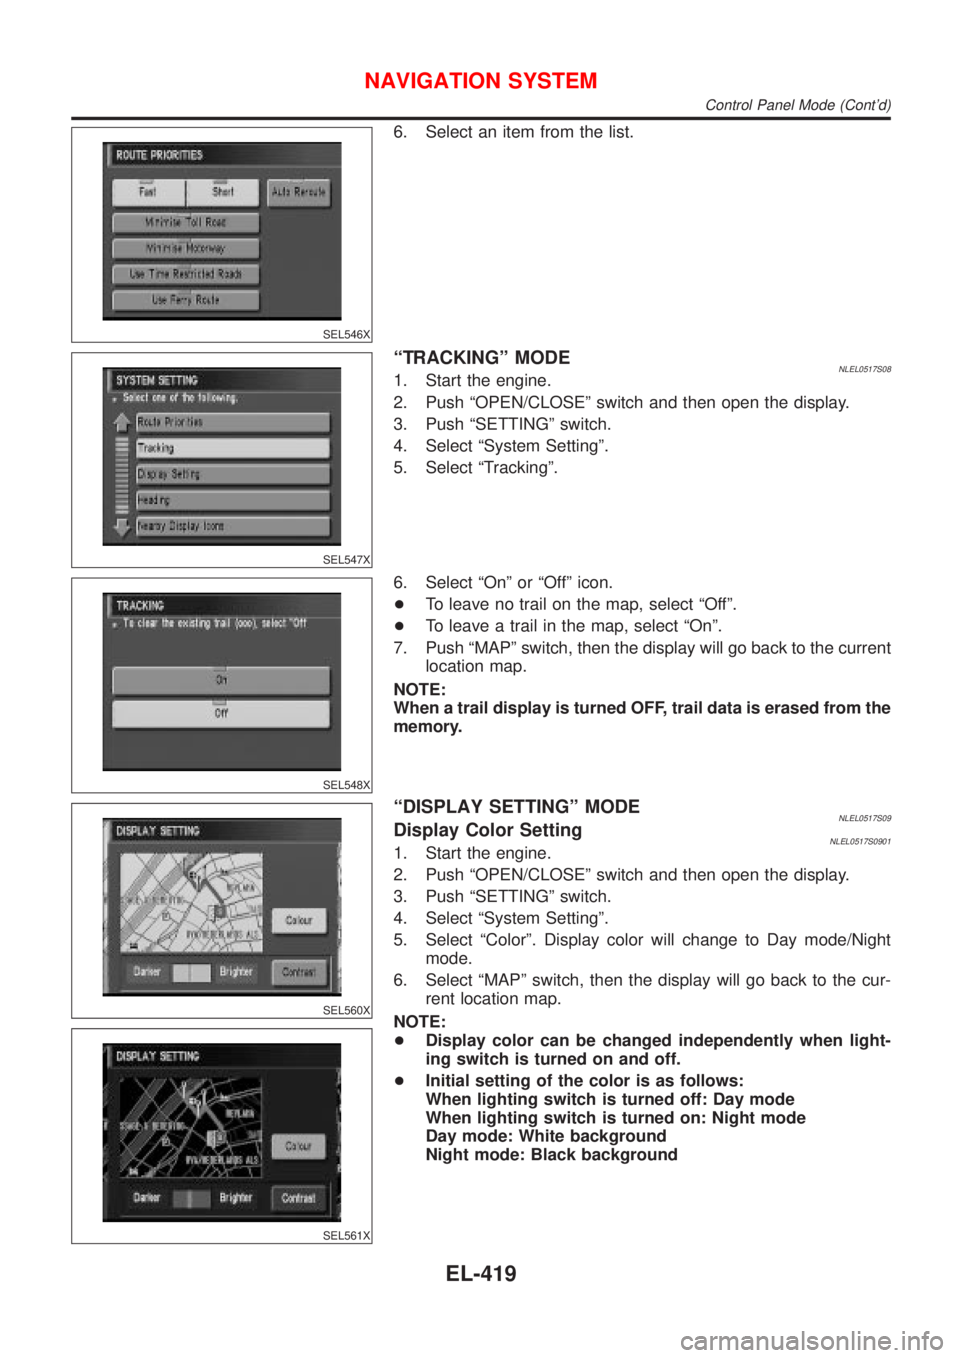
SEL546X
6. Select an item from the list.
SEL547X
ªTRACKINGº MODENLEL0517S081. Start the engine.
2. Push ªOPEN/CLOSEº switch and then open the display.
3. Push ªSETTINGº switch.
4. Select ªSystem Settingº.
5. Select ªTrackingº.
SEL548X
6. Select ªOnº or ªOffº icon.
+To leave no trail on the map, select ªOffº.
+To leave a trail in the map, select ªOnº.
7. Push ªMAPº switch, then the display will go back to the current
location map.
NOTE:
When a trail display is turned OFF, trail data is erased from the
memory.
SEL560X
SEL561X
ªDISPLAY SETTINGº MODENLEL0517S09Display Color SettingNLEL0517S09011. Start the engine.
2. Push ªOPEN/CLOSEº switch and then open the display.
3. Push ªSETTINGº switch.
4. Select ªSystem Settingº.
5. Select ªColorº. Display color will change to Day mode/Night
mode.
6. Select ªMAPº switch, then the display will go back to the cur-
rent location map.
NOTE:
+Display color can be changed independently when light-
ing switch is turned on and off.
+Initial setting of the color is as follows:
When lighting switch is turned off: Day mode
When lighting switch is turned on: Night mode
Day mode: White background
Night mode: Black background
NAVIGATION SYSTEM
Control Panel Mode (Cont'd)
EL-419