change time NISSAN QASHQAI 2017 Owner´s Manual
[x] Cancel search | Manufacturer: NISSAN, Model Year: 2017, Model line: QASHQAI, Model: NISSAN QASHQAI 2017Pages: 508, PDF Size: 2.68 MB
Page 300 of 508
.The cargo room area is not included in the
operating range but the Intelligent Key may
function.
.If the Intelligent Key is placed on the
instrument panel, inside the glove box or
door pocket, the Intelligent Key may not
function.
.If the Intelligent Key is placed near the door
or window outside the vehicle, the Intelligent
Key may function.
PUSH-BUTTON IGNITION SWITCH
OPERATION
CAUTION
.Do not leave the vehicle for ex-
tended periods of time when the
ignition switch is in the ON position
and the engine is not running. This
can discharge the battery.
.Use electrical accessories with the
engine running to avoid discharging
the vehicle battery. If you must use
accessories while the engine is not
running, do not use them for ex-
tended periods of time and do not
use multiple electrical accessories
at the same time.
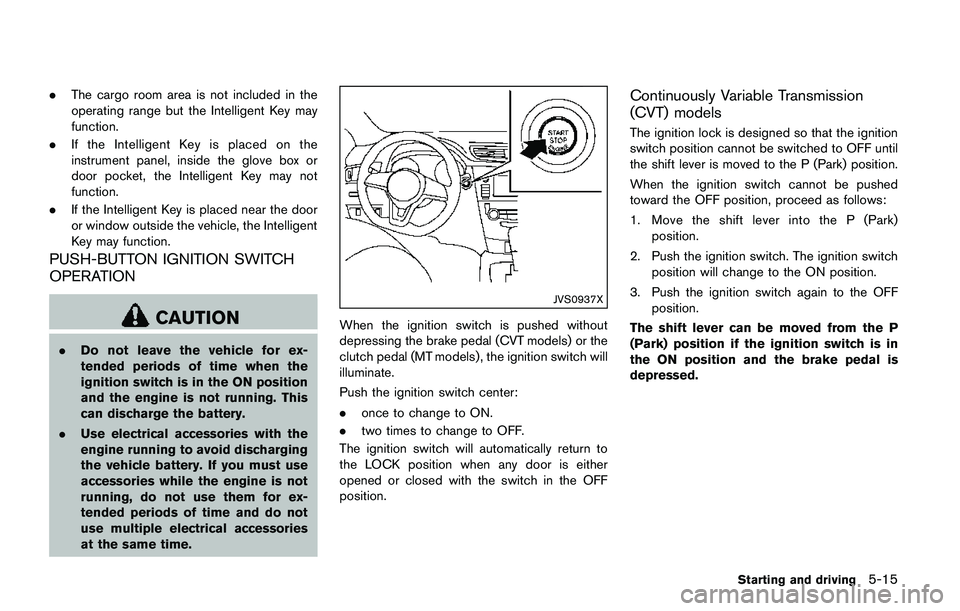
JVS0937X
When the ignition switch is pushed without
depressing the brake pedal (CVT models) or the
clutch pedal (MT models) , the ignition switch will
illuminate.
Push the ignition switch center:
.once to change to ON.
.two times to change to OFF.
The ignition switch will automatically return to
the LOCK position when any door is either
opened or closed with the switch in the OFF
position.
Continuously Variable Transmission
(CVT) models
The ignition lock is designed so that the ignition
switch position cannot be switched to OFF until
the shift lever is moved to the P (Park) position.
When the ignition switch cannot be pushed
toward the OFF position, proceed as follows:
1. Move the shift lever into the P (Park)
position.
2. Push the ignition switch. The ignition switch
position will change to the ON position.
3. Push the ignition switch again to the OFF
position.
The shift lever can be moved from the P
(Park) position if the ignition switch is in
the ON position and the brake pedal is
depressed.
Starting and driving5-15
Page 301 of 508
5-16Starting and driving
PUSH-BUTTON IGNITION SWITCH
POSITIONS
LOCK (Normal parking position)
The ignition switch can only be locked at this
position.
The ignition switch will lock when any door is
opened or closed with the ignition switched off.
ON (Normal operating position)
The ignition system and the electrical accessory
power activate at this position without the
engine turned on.
The ON position has a battery saver feature that
will place the ignition switch in the OFF position,
if the vehicle is not running, after some time
under the following conditions:
.all doors are closed.
.shift lever is in P (Park) position (CVT model)
or N (Neutral) position (MT model) .
The battery saver feature will be cancelled if any
of the following occur:
.any door is opened.
.shift lever is moved out of the P (Park)
position (CVT model) .
.ignition switch changes position.
OFF position
The engine is turned off in this position.
Auto ACC position
With the vehicle in the P (Park) position (CVT
models) or the N (Neutral) position (MT models) ,
the Intelligent Key with you and the ignition
placed from ON to OFF, the radio can still be
used for a period of time, or until the driver’s
door is opened. After a period of time, functions
such as radio, navigation (if so equipped) , and
Bluetooth
�ŠHands-Free Phone System may be
restarted by turning on the audio system (See
“Audio system” (P.4-38) in this manual) , or by
the UNLOCK button on the Intelligent Key for up
to a total of 30 minutes.
EMERGENCY ENGINE SHUT OFF
To shut off the engine in an emergency situation
while driving, perform the following procedure:
.Rapidly push the push-button ignition switch
3 consecutive times in less than 1.5
seconds, or
.Push and hold the push-button ignition
switch for more than 2 seconds.
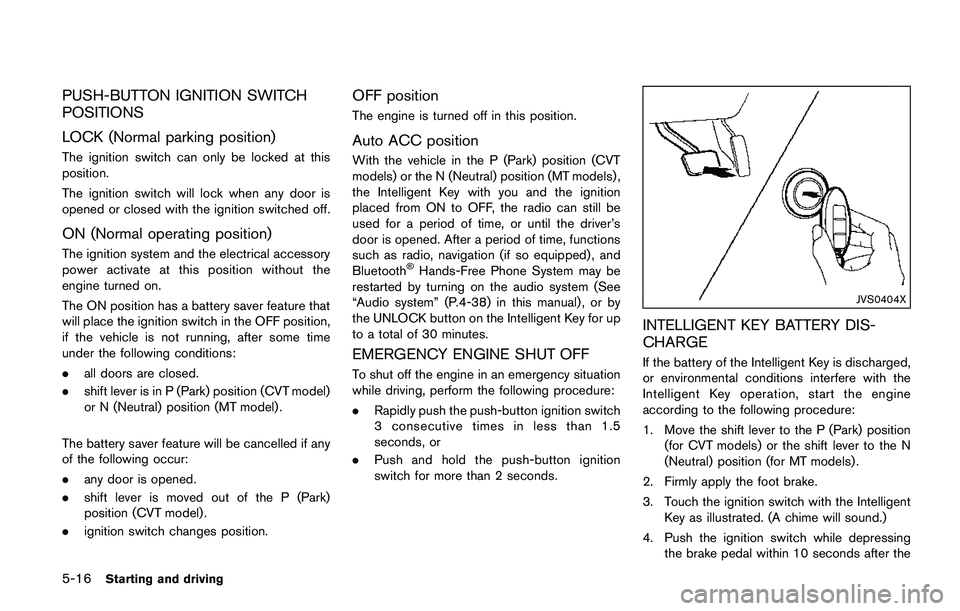
JVS0404X
INTELLIGENT KEY BATTERY DIS-
CHARGE
If the battery of the Intelligent Key is discharged,
or environmental conditions interfere with the
Intelligent Key operation, start the engine
according to the following procedure:
1. Move the shift lever to the P (Park) position
(for CVT models) or the shift lever to the N
(Neutral) position (for MT models) .
2. Firmly apply the foot brake.
3. Touch the ignition switch with the Intelligent
Key as illustrated. (A chime will sound.)
4. Push the ignition switch while depressing
the brake pedal within 10 seconds after the
Page 310 of 508
MANUAL TRANSMISSION (MT)
WARNING
.Do not downshift abruptly on slip-
pery roads. This may cause a loss of
control.
.Do not over-rev the engine when
shifting to a lower gear. This may
cause a loss of control or engine
damage.
.When the high fluid temperature
protection mode or fail-safe opera-
tion occurs, vehicle speed may be
gradually reduced. The reduced
speed may be lower than other
traffic, which could increase the
chance of a collision. Be especially
careful when driving. If necessary,
pull to the side of the road at a safe
place and allow the transmission to
return to normal operation, or have
it repaired if necessary.
CAUTION
.Do not rest your foot on the clutch
pedal while driving. This may da-
mage the clutch.
.Fully depress the clutch pedal be-
fore shifting to help prevent trans-
mission damage.
.Stop your vehicle completely before
shifting into R (Reverse) .
.When the vehicle is stopped for a
period of time, for example at a stop
light, shift to N (Neutral) and release
the clutch pedal with the foot brake
applied.
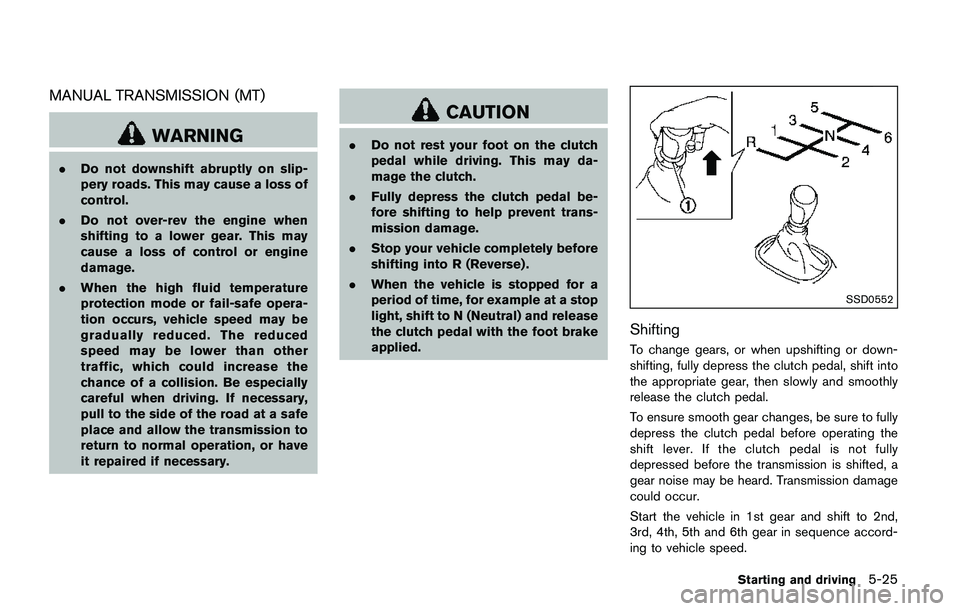
SSD0552
Shifting
To change gears, or when upshifting or down-
shifting, fully depress the clutch pedal, shift into
the appropriate gear, then slowly and smoothly
release the clutch pedal.
To ensure smooth gear changes, be sure to fully
depress the clutch pedal before operating the
shift lever. If the clutch pedal is not fully
depressed before the transmission is shifted, a
gear noise may be heard. Transmission damage
could occur.
Start the vehicle in 1st gear and shift to 2nd,
3rd, 4th, 5th and 6th gear in sequence accord-
ing to vehicle speed.
Starting and driving5-25
Page 319 of 508
5-34Starting and driving
3. Use thebuttons to navigate in the menu
and use the “OK” button to select or change
an item:
.Select “Lane” and press the “OK” button.
Use the “OK” button to check/uncheck
the box for “Warning”.
NOTE:
If you disable the LDW system, the system
will remain disabled the next time you start
the vehicle’s engine.
LDW SYSTEM LIMITATIONS
WARNING
Listed below are the system limitations
for the LDW system. Failure to follow
the warnings and instructions for prop-
er use of the LDW system could result in
serious injury or death.
.The system will not operate at
speeds below approximately 37
MPH (60 km/h) or if it cannot detect
lane markers.
.Excessive noise will interfere with
the warning chime sound, and the
chime may not be heard..Do not use the LDW system under
the following conditions as it may
not function properly:
— During bad weather (rain, fog,
snow, etc.) .
— When driving on slippery roads,
such as on ice or snow.
— When driving on winding or
uneven roads.
— When there is a lane closure due
to road repairs.
— When driving in a makeshift or
temporary lane.
— When driving on roads where
the lane width is too narrow.
— When driving without normal
tire conditions (for example, tire
wear, low tire pressure, installa-
tion of spare tire, tire chains,
non-standard wheels) .
— When the vehicle is equipped
with non-original brake parts or
suspension parts.
.The system may not function prop-
erly under the following conditions:— On roads where there are multi-
ple parallel lane markers; lane
markers that are faded or not
painted clearly; yellow painted
lane markers; non-standard lane
markers; or lane markers cov-
ered with water, dirt, snow, etc.
— On roads where discontinued
lane markers are still detect-
able.
— On roads where there are sharp
curves.
— On roads where there are shar-
ply contrasting objects, such as
shadows, snow, water, wheel
ruts, seams or lines remaining
after road repairs. (The LDW
system could detect these items
as lane markers.)
— On roads where the traveling
lane merges or separates.
— When the vehicle’s traveling di-
rection does not align with the
lane marker.
— When traveling close to the
vehicle in front of you, which
obstructs the lane camera unit
Page 324 of 508
LDP SYSTEM LIMITATIONS
WARNING
Listed below are the system limitations
for the LDP system. Failure to follow
the warnings and instructions for prop-
er use of the LDP system could result in
serious injury or death.
.The LDP system may activate if you
change lanes without first activating
your turn signal or, for example, if a
construction zone directs traffic to
cross an existing lane marker. If this
occurs you may need to apply cor-
rective steering to complete your
lane change.
.Because the LDP may not activate
under the road, weather, and lane
marker conditions described in this
section, it may not activate every
time your vehicle begins to leave its
lane and you will need to apply
corrective steering.
.The LDP system will not operate at
speeds below approximately 37
MPH (60 km/h) or if it cannot detect
lane markers..Do not use the LDP system under
the following conditions as it may
not function properly:
— During bad weather (rain, fog,
snow, etc.) .
— When driving on slippery roads,
such as on ice or snow.
— When driving on winding or
uneven roads.
— When there is a lane closure due
to road repairs.
— When driving in a makeshift or
temporary lane.
— When driving on roads where
the lane width is too narrow.
— When driving without normal
tire conditions (for example, tire
wear, low tire pressure, installa-
tion of spare tire, tire chains,
non-standard wheels) .
— When the vehicle is equipped
with non-original brake parts or
suspension parts.
.The system may not function prop-
erly under the following conditions:— On roads where there are multi-
ple parallel lane markers; lane
markers that are faded or not
painted clearly; yellow painted
lane markers; non-standard lane
markers; or lane markers cov-
ered with water, dirt, snow, etc.
— On roads where discontinued
lane markers are still detect-
able.
— On roads where there are sharp
curves.
— On roads where there are shar-
ply contrasting objects, such as
shadows, snow, water, wheel
ruts, seams or lines remaining
after road repairs. (The LDP
system could detect these items
as lane markers.)
— On roads where the traveling
lane merges or separates.
— When the vehicle’s traveling di-
rection does not align with the
lane marker.
— When traveling close to the
vehicle in front of you, which
obstructs the lane camera unit
Starting and driving5-39
Page 353 of 508
5-68Starting and driving
JVS1073X
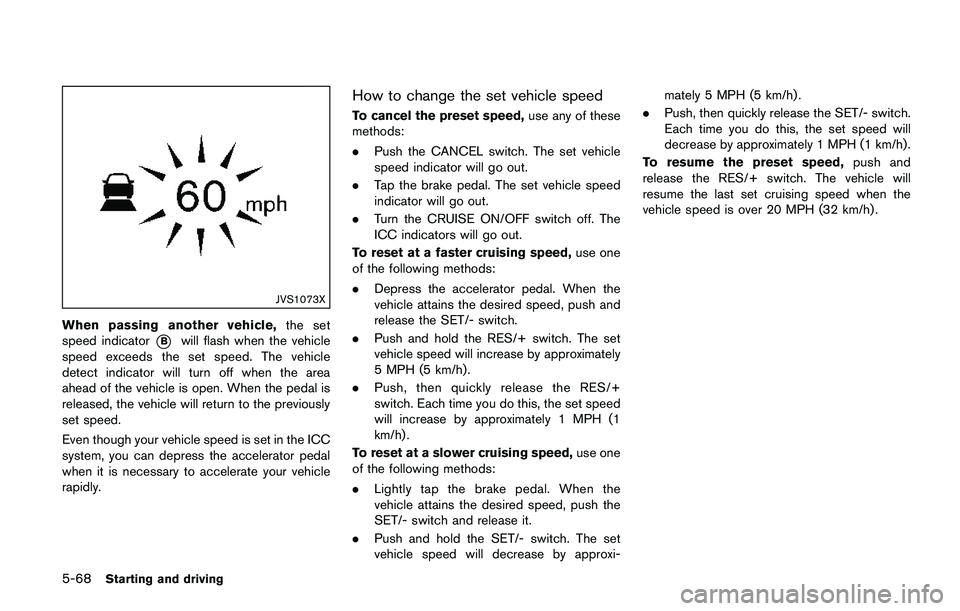
When passing another vehicle,the set
speed indicator
*Bwill flash when the vehicle
speed exceeds the set speed. The vehicle
detect indicator will turn off when the area
ahead of the vehicle is open. When the pedal is
released, the vehicle will return to the previously
set speed.
Even though your vehicle speed is set in the ICC
system, you can depress the accelerator pedal
when it is necessary to accelerate your vehicle
rapidly.
How to change the set vehicle speed
To cancel the preset speed,use any of these
methods:
.Push the CANCEL switch. The set vehicle
speed indicator will go out.
.Tap the brake pedal. The set vehicle speed
indicator will go out.
.Turn the CRUISE ON/OFF switch off. The
ICC indicators will go out.
To reset at a faster cruising speed,use one
of the following methods:
.Depress the accelerator pedal. When the
vehicle attains the desired speed, push and
release the SET/- switch.
.Push and hold the RES/+ switch. The set
vehicle speed will increase by approximately
5 MPH (5 km/h) .
.Push, then quickly release the RES/+
switch. Each time you do this, the set speed
will increase by approximately 1 MPH (1
km/h) .
To reset at a slower cruising speed,use one
of the following methods:
.Lightly tap the brake pedal. When the
vehicle attains the desired speed, push the
SET/- switch and release it.
.Push and hold the SET/- switch. The set
vehicle speed will decrease by approxi-mately 5 MPH (5 km/h) .
.Push, then quickly release the SET/- switch.
Each time you do this, the set speed will
decrease by approximately 1 MPH (1 km/h) .
To resume the preset speed,push and
release the RES/+ switch. The vehicle will
resume the last set cruising speed when the
vehicle speed is over 20 MPH (32 km/h) .
Page 354 of 508
JVS0965X
How to change the set distance to the
vehicle ahead
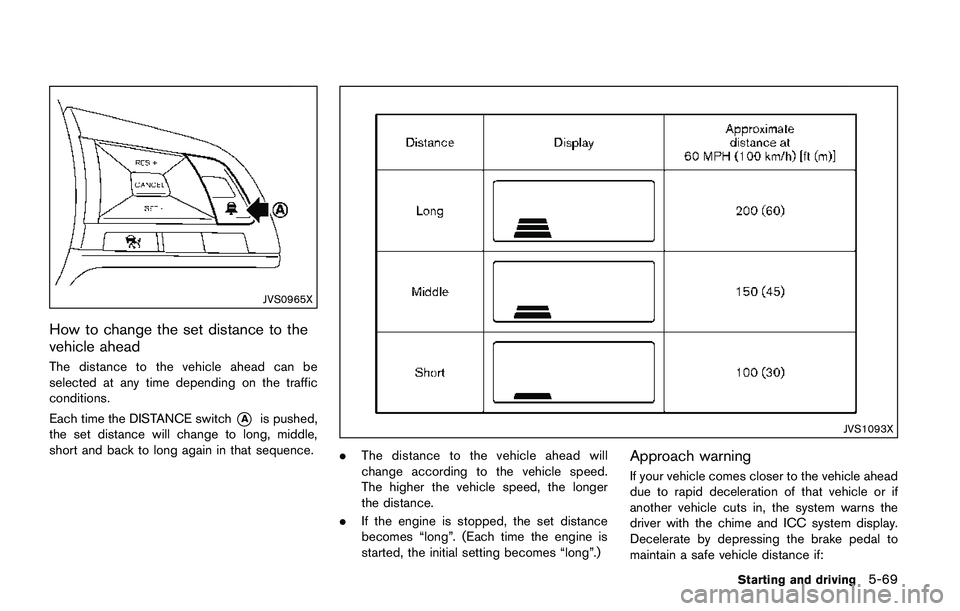
The distance to the vehicle ahead can be
selected at any time depending on the traffic
conditions.
Each time the DISTANCE switch
*Ais pushed,
the set distance will change to long, middle,
short and back to long again in that sequence.JVS1093X
.The distance to the vehicle ahead will
change according to the vehicle speed.
The higher the vehicle speed, the longer
the distance.
.If the engine is stopped, the set distance
becomes “long”. (Each time the engine is
started, the initial setting becomes “long”.)Approach warning
If your vehicle comes closer to the vehicle ahead
due to rapid deceleration of that vehicle or if
another vehicle cuts in, the system warns the
driver with the chime and ICC system display.
Decelerate by depressing the brake pedal to
maintain a safe vehicle distance if:
Starting and driving5-69
Page 363 of 508
5-78Starting and driving
system completely off.
When the ignition switch is placed in the OFF
position, the system is also automatically turned
off.
To use the ICC system again, quickly push and
release the CRUISE ON/OFF switch (vehicle-
to-vehicle distance control mode) or push and
hold it (conventional cruise control mode) again
to turn it on.
CAUTION
To avoid accidentally engaging cruise
control, make sure to turn the CRUISE
ON/OFF switch off when not using the
ICC system.JVS1077X
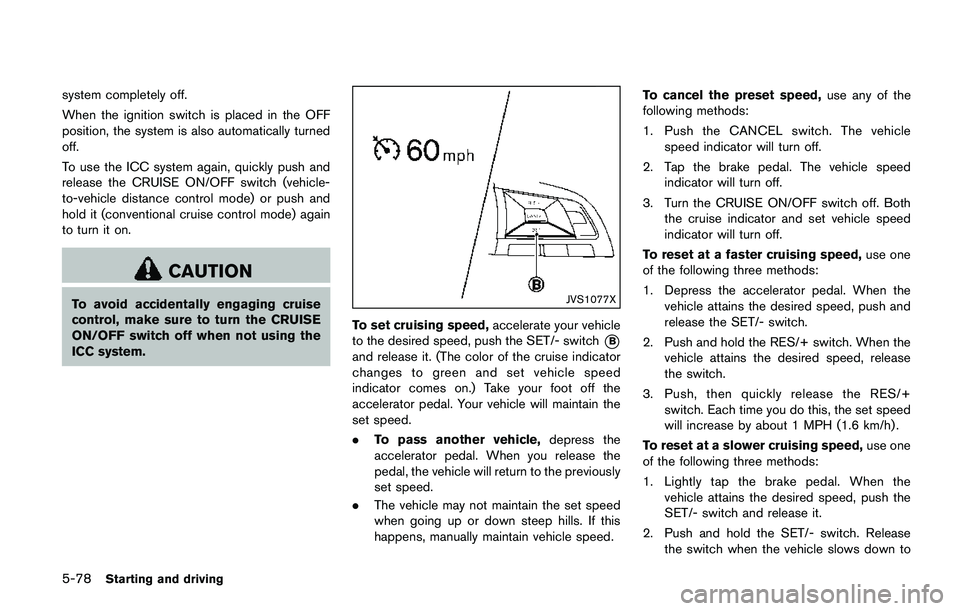
To set cruising speed,accelerate your vehicle
to the desired speed, push the SET/- switch
*B
and release it. (The color of the cruise indicator
changes to green and set vehicle speed
indicator comes on.) Take your foot off the
accelerator pedal. Your vehicle will maintain the
set speed.
.To pass another vehicle,depress the
accelerator pedal. When you release the
pedal, the vehicle will return to the previously
set speed.
.The vehicle may not maintain the set speed
when going up or down steep hills. If this
happens, manually maintain vehicle speed.To cancel the preset speed,use any of the
following methods:
1. Push the CANCEL switch. The vehicle
speed indicator will turn off.
2. Tap the brake pedal. The vehicle speed
indicator will turn off.
3. Turn the CRUISE ON/OFF switch off. Both
the cruise indicator and set vehicle speed
indicator will turn off.
To reset at a faster cruising speed,use one
of the following three methods:
1. Depress the accelerator pedal. When the
vehicle attains the desired speed, push and
release the SET/- switch.
2. Push and hold the RES/+ switch. When the
vehicle attains the desired speed, release
the switch.
3. Push, then quickly release the RES/+
switch. Each time you do this, the set speed
will increase by about 1 MPH (1.6 km/h) .
To reset at a slower cruising speed,use one
of the following three methods:
1. Lightly tap the brake pedal. When the
vehicle attains the desired speed, push the
SET/- switch and release it.
2. Push and hold the SET/- switch. Release
the switch when the vehicle slows down to
Page 364 of 508
the desired speed.
3. Push, then quickly release the SET/- switch.
Each time you do this, the set speed will
decrease by about 1 MPH (1.6 km/h) .
To resume the preset speed,push and
release the RES/+ switch. The vehicle will
resume the last set cruising speed when the
vehicle speed is over 25 MPH (40 km/h) .
System temporarily unavailable
A chime sounds under the following conditions
and the control is automatically canceled.
.When the vehicle slows down more than 8
MPH (13 km/h) below the set speed
.When the shift lever is not in the D (Drive) or
manual shift mode
.When the parking brake is applied.
.When the VDC (including the traction
control system) operates
.When a wheel slips
JVS1003X
Warning
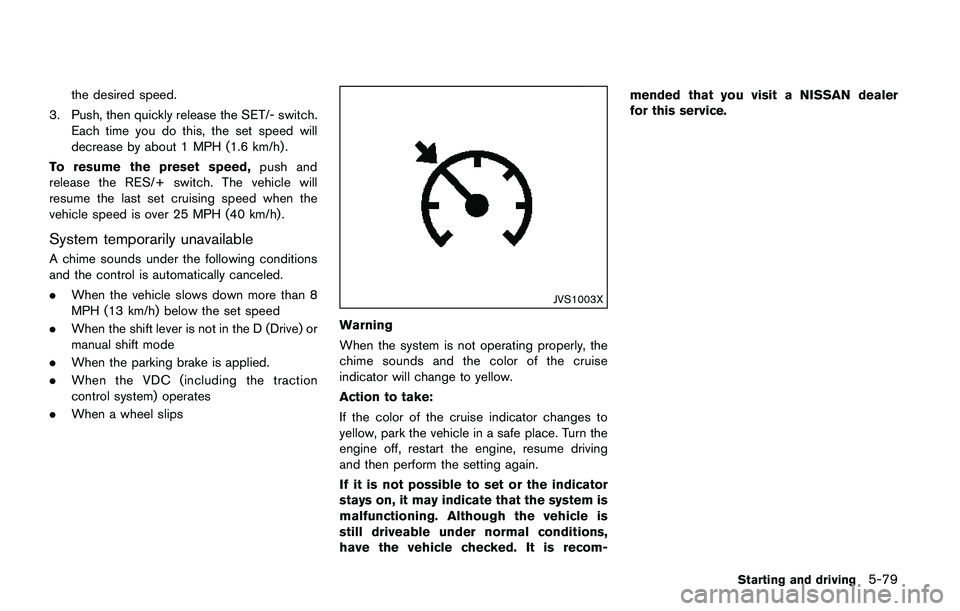
When the system is not operating properly, the
chime sounds and the color of the cruise
indicator will change to yellow.
Action to take:
If the color of the cruise indicator changes to
yellow, park the vehicle in a safe place. Turn the
engine off, restart the engine, resume driving
and then perform the setting again.
If it is not possible to set or the indicator
stays on, it may indicate that the system is
malfunctioning. Although the vehicle is
still driveable under normal conditions,
have the vehicle checked. It is recom-mended that you visit a NISSAN dealer
for this service.
Starting and driving5-79
Page 380 of 508
CAUTION
During the first 1,200 miles (2,000 km) ,
follow these recommendations to ob-
tain maximum engine performance and
ensure the future reliability and econo-
my of your new vehicle. Failure to
follow these recommendations may
result in shortened engine life and
reduced engine performance.
.Avoid driving for long periods at constant
speed, either fast or slow. Do not run the
engine over 4,000 rpm.
.Do not accelerate at full throttle in any gear.
.Avoid quick starts.
.Avoid hard braking as much as possible.Follow these easy-to-use Fuel Efficient Driving
Tips to help you achieve the most fuel economy
from your vehicle.
1. Use smooth accelerator and brake pedal
application.
.Avoid rapid starts and stops..Use smooth, gentle accelerator and
brake application whenever possible.
.Maintain constant speed while commut-
ing and coast whenever possible.
2. Maintain constant speed.
.Look ahead to try and anticipate and
minimize stops.
.Synchronizing your speed with traffic
lights allows you to reduce your number
of stops.
.Maintaining a steady speed can minimize
red light stops and improve fuel effi-
ciency.
3. Use air conditioning (A/C) at higher vehicle
speeds.
.Below 40 MPH (64 km/h) , it is more
efficient to open windows to cool the
vehicle due to reduced engine load.
.Above 40 MPH (64 km/h) , it is more
efficient to use A/C to cool the vehicle
due to increased aerodynamic drag.
.Recirculating the cool air in the cabin
when the A/C is on reduces cooling load.
4. Drive at economical speeds and distances.
.Observing the speed limit and not ex-
ceeding 60 MPH (97 km/h) (where
legally allowed) can improve fuel effi-
ciency due to reduced aerodynamic
drag.
.Maintaining a safe following distance
behind other vehicles reduces unneces-
sary braking.
.Safely monitoring traffic to anticipate
changes in speed permits reduced brak-
ing and smooth acceleration changes.
.Select a gear range suitable to road
conditions.
5. Use cruise control.
.Using cruise control during highway
driving helps maintain a steady speed.
.Cruise control is particularly effective in
providing fuel savings when driving on
flat terrains.
6. Plan for the shortest route.
.Utilize a map or navigation system to
determine the best route to save time.
7. Avoid idling.
.Shutting off your engine when safe for
stops exceeding 30-60 seconds saves
Starting and driving5-95
BREAK-IN SCHEDULE FUEL EFFICIENT DRIVING TIPS