air condition NISSAN SENTRA 2003 B15 / 5.G Owner's Manual
[x] Cancel search | Manufacturer: NISSAN, Model Year: 2003, Model line: SENTRA, Model: NISSAN SENTRA 2003 B15 / 5.GPages: 224, PDF Size: 3.12 MB
Page 100 of 224

1. CD button
2. ON·OFF/Volume control knob
3. CD insert slot
4. Audio button
5. CD eject button6. Radio manual tuning button/clock set
buttons
7. FF button
8. REW button
9. FF APS button
10. RPT button11. REW APS button
12. Seek/Scan button
13. Clock button
14. Band select button
FM-AM RADIO WITH COMPACT
DISC (CD) PLAYER (if so equipped)
ON·OFF/VOL control knob
Turn the ignition key to the ACC or ON position,
then push the ON·OFF/VOL control knob. If you
listen to the radio with the engine not running,
turn the key to the ACC position. The mode (radio
or CD) that was playing immediately before the
system was turned off resumes playing.
When no CD is loaded, the radio comes on.
Pushing the ON·OFF/VOL control knob again
turns the system off.
Turn the ON·OFF/VOL control knob to the right
to increase volume or to the left to decrease
volume
WHA0202
4-12Heater, air conditioner and audio systems
ZREVIEW COPY:Ð2003 Sentra(b15)
Owners Manual(owners)ÐUSA English(nna)
12/10/02Ðdebbie
X
Page 101 of 224

Adjusting tone quality and speaker balance
To adjust BAS/TRE or FAD/BAL (Bass/Treble or
Fader/Balance) , press the AUDIO button until
the desired mode (BAS, TRE, FAD, or BAL) ap-
pears in the display. Press the
orbutton to adjust Bass (BAS) and Treble (TRE) to
the desired level. Use theorbutton
also to adjust Fader (FAD) or Balance (BAL)
modes. Fader (FAD) adjusts the sound level be-
tween the front and rear speakers and Balance
(BAL) adjusts the sound between the right and
left speakers.
Clock operation
Pressing the clock button alternates the clock
and the radio/CD player options in the display.
Clock set
Depressing the clock and
buttons to-
gether sets hours. Depressing the clock
and
buttons together sets minutes.
Clock priority mode
In this mode the clock is shown in the display. If
any radio or CD functions are activated, the radio
or CD display illuminates for 10 seconds then
returns to the clock mode.
LHA0033
Heater, air conditioner and audio systems4-13
ZREVIEW COPY:Ð2003 Sentra(b15)
Owners Manual(owners)ÐUSA English(nna)
12/10/02Ðdebbie
X
Page 102 of 224
NOTE:
After clock adjustment, the radio is in the
clock priority mode.
FM-AM radio operation
FM/AM band select
Push the button to change from AM to FM recep-
tion.
The FM stereo indicator, ST, illuminates during
FM stereo reception. When the stereo broadcast
signal is weak, the radio automatically changes
from stereo to monaural reception.
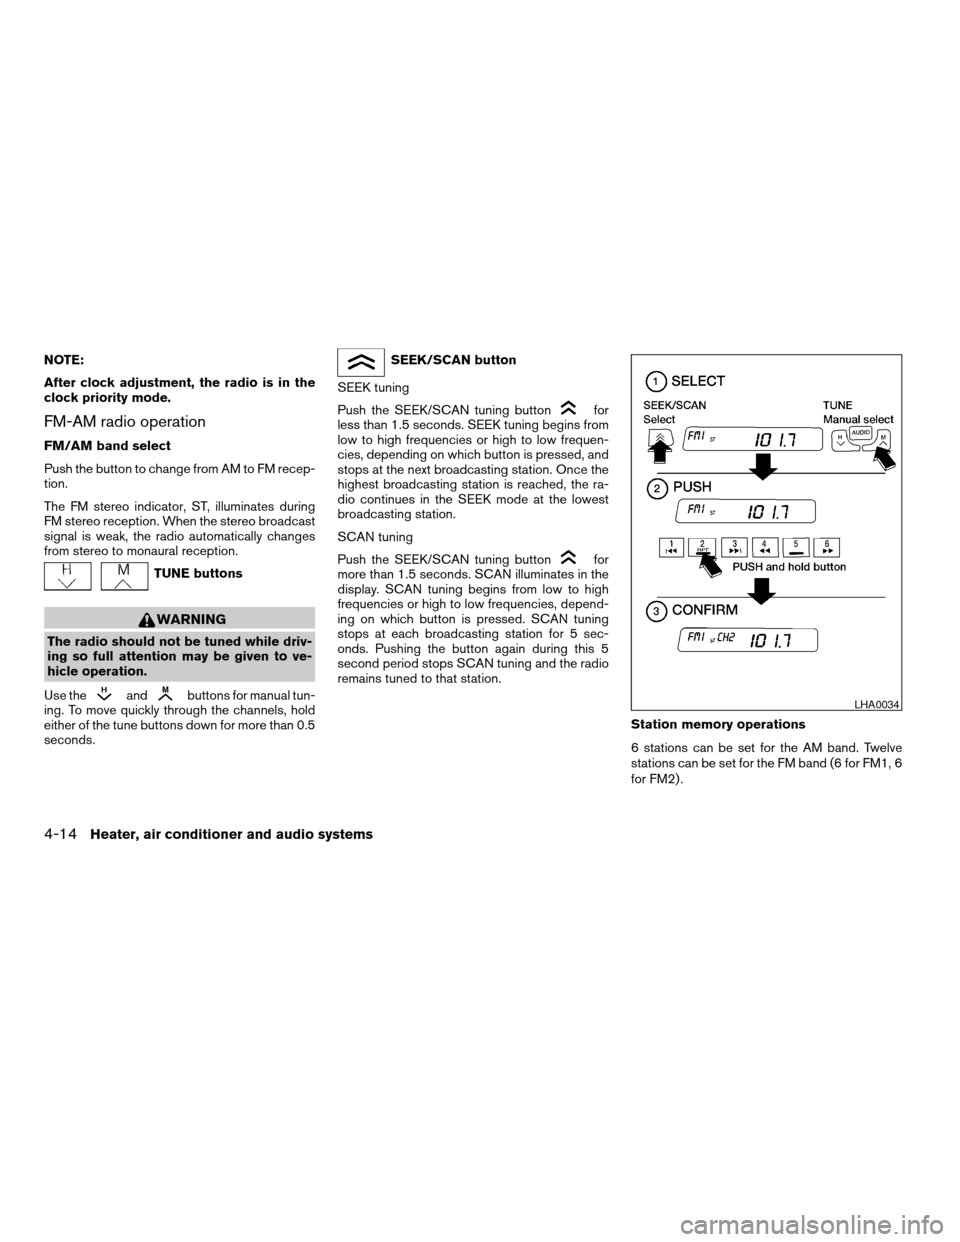
TUNE buttons
WARNING
The radio should not be tuned while driv-
ing so full attention may be given to ve-
hicle operation.
Use the
andbuttons for manual tun-
ing. To move quickly through the channels, hold
either of the tune buttons down for more than 0.5
seconds.
SEEK/SCAN button
SEEK tuning
Push the SEEK/SCAN tuning button
for
less than 1.5 seconds. SEEK tuning begins from
low to high frequencies or high to low frequen-
cies, depending on which button is pressed, and
stops at the next broadcasting station. Once the
highest broadcasting station is reached, the ra-
dio continues in the SEEK mode at the lowest
broadcasting station.
SCAN tuning
Push the SEEK/SCAN tuning button
for
more than 1.5 seconds. SCAN illuminates in the
display. SCAN tuning begins from low to high
frequencies or high to low frequencies, depend-
ing on which button is pressed. SCAN tuning
stops at each broadcasting station for 5 sec-
onds. Pushing the button again during this 5
second period stops SCAN tuning and the radio
remains tuned to that station.
Station memory operations
6 stations can be set for the AM band. Twelve
stations can be set for the FM band (6 for FM1, 6
for FM2) .
LHA0034
4-14Heater, air conditioner and audio systems
ZREVIEW COPY:Ð2003 Sentra(b15)
Owners Manual(owners)ÐUSA English(nna)
12/10/02Ðdebbie
X
Page 103 of 224
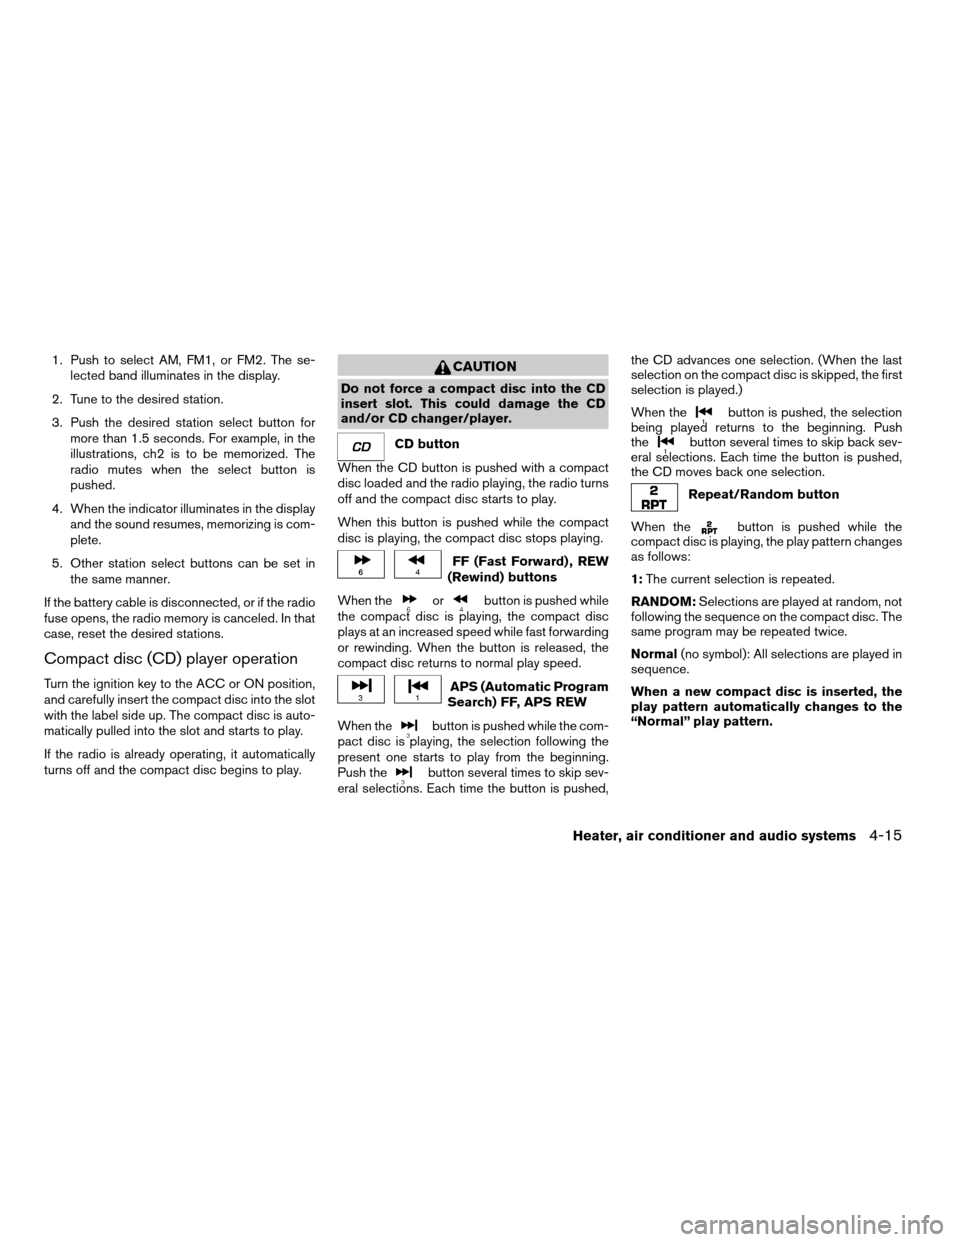
1. Push to select AM, FM1, or FM2. The se-
lected band illuminates in the display.
2. Tune to the desired station.
3. Push the desired station select button for
more than 1.5 seconds. For example, in the
illustrations, ch2 is to be memorized. The
radio mutes when the select button is
pushed.
4. When the indicator illuminates in the display
and the sound resumes, memorizing is com-
plete.
5. Other station select buttons can be set in
the same manner.
If the battery cable is disconnected, or if the radio
fuse opens, the radio memory is canceled. In that
case, reset the desired stations.
Compact disc (CD) player operation
Turn the ignition key to the ACC or ON position,
and carefully insert the compact disc into the slot
with the label side up. The compact disc is auto-
matically pulled into the slot and starts to play.
If the radio is already operating, it automatically
turns off and the compact disc begins to play.
CAUTION
Do not force a compact disc into the CD
insert slot. This could damage the CD
and/or CD changer/player.
CD button
When the CD button is pushed with a compact
disc loaded and the radio playing, the radio turns
off and the compact disc starts to play.
When this button is pushed while the compact
disc is playing, the compact disc stops playing.
FF (Fast Forward) , REW
(Rewind) buttons
When the
orbutton is pushed while
the compact disc is playing, the compact disc
plays at an increased speed while fast forwarding
or rewinding. When the button is released, the
compact disc returns to normal play speed.
APS (Automatic Program
Search) FF, APS REW
When the
button is pushed while the com-
pact disc is playing, the selection following the
present one starts to play from the beginning.
Push the
button several times to skip sev-
eral selections. Each time the button is pushed,the CD advances one selection. (When the last
selection on the compact disc is skipped, the first
selection is played.)
When the
button is pushed, the selection
being played returns to the beginning. Push
the
button several times to skip back sev-
eral selections. Each time the button is pushed,
the CD moves back one selection.
Repeat/Random button
When the
button is pushed while the
compact disc is playing, the play pattern changes
as follows:
1:The current selection is repeated.
RANDOM:Selections are played at random, not
following the sequence on the compact disc. The
same program may be repeated twice.
Normal(no symbol): All selections are played in
sequence.
When a new compact disc is inserted, the
play pattern automatically changes to the
“Normal” play pattern.
Heater, air conditioner and audio systems4-15
ZREVIEW COPY:Ð2003 Sentra(b15)
Owners Manual(owners)ÐUSA English(nna)
12/10/02Ðdebbie
X
Page 104 of 224

CD EJECT button
When the
button is pushed with a com-
pact disc loaded, the compact disc ejects.
When the
button is pushed while the com-
pact disc is playing, the compact disc ejects and
the system turns off.
If the compact disc ejects and is not re-
moved within 10 seconds, it is pulled back
into the slot.
DISC indicator light
CD IN appears in the display when a CD is
loaded with the system ON.
1. APS (Automatic Program Search) FF,
APS REW buttons
2. Display
3.
FF (Fast Forward) , REW (Rewind) buttons
4. Repeat button
5. Disc eject button6. Load indicator light
7. Door
8. Disc selection button
9. Disc indication light
10. Load indicator light
11. Play/stop button
WHA0203
4-16Heater, air conditioner and audio systems
ZREVIEW COPY:Ð2003 Sentra(b15)
Owners Manual(owners)ÐUSA English(nna)
12/10/02Ðdebbie
X
Page 105 of 224
COMPACT DISC (CD) CHANGER (if
so equipped)
To use the CD changer, turn the ignition key to
the ACC or ON position.
Disc loading — single
CAUTION
Trying to load a CD with the CD door
closed could damage the CD and/or CD
changer.
When a disc selection button is pressed for less
than 1.5 seconds, the CD changer enters the
One Disc Loading Mode. The disc selection but-
ton starts flashing green and both WAIT and the
disc selection button number flash in the display
until the door is opened. When the door has
opened, the display changes from WAIT to LOAD
and the load indicator lights flash green. Load
only one CD at a time. After the CD is loaded, the
door closes, the load indicator lights turn off and
the disc selection button turns a solid green. The
CD that was loaded starts to play automatically.
Disc loading — all
When a disc selection button is pressed for
longer than 1.5 seconds, the CD changer auto-
matically changes to All Disc Loading Mode. All
disc selection buttons start flashing orange, ex-cept the disc selection button that was pushed
initially. This button flashes green and both WAIT
and the disc selection button number flash in the
display until the door is opened. When the door
opens, the display changes from WAIT to LOAD
and the load indicator lights flash green. Load
only one CD at a time. After the CD is loaded, the
door closes, the load indicator lights turn off and
the disc selection button turns a solid green.
After all the CDs have been loaded, the CD that
was loaded first starts to play.
Play/Stop button
Press the
button while a CD is playing, the
CD stops playing and the CD changer turns off.
Press the
button while the CD changer is
off, the last CD that was loaded starts to play.
Press the
button with no CDs loaded, the
CD changer enters the One Disc Loading Mode.
FF (fast forward) REV (re-
verse) buttons
When the
orbutton is pushed while
the CD is playing, the CD plays at an increased
speed while fast forwarding or reversing. When
the button is released, the CD returns to normal
play speed.
APS (Automatic Program
Search) , FF, APS REV
When the
button is pushed while the CD
is playing, the selection following the current one
starts to play from the beginning. Push the
button several times to skip several selections.
Each time the button is pushed, the CD advances
one selection. When the last selection on the CD
is skipped, the first selection is played.
When the
button is pushed, the current
selection returns to the beginning. Push
the
button several times to skip back sev-
eral selections. Each time the button is pushed,
the CD moves back one selection. Went the first
selection on the CD is skipped, the last selection
is played.
Repeat Button
When the
button is pushed while a CD is
playing, the play pattern will change as follows.
ALL — All disc repeat:All CDs are played
repeatedly in sequence.
BLANK (no symbol) — One disc repeat:The
current CD is repeated.
1 — One track repeat:The current selection is
repeated.
Heater, air conditioner and audio systems4-17
ZREVIEW COPY:Ð2003 Sentra(b15)
Owners Manual(owners)ÐUSA English(nna)
12/10/02Ðdebbie
X
Page 106 of 224

ALL RANDOM — All disc random:Selections
from all the CDs that are stored are played at
random. The same program may be repeated
twice. Pressing the
button will select the
next random selection.
RANDOM — One disc random:Selections
from the current CD are played at random. The
same program may be repeated twice. Pressing
the
button will select the next random se-
lection.
When a new CD is inserted, the play pattern
automatically changes to the “ALL” play
pattern.
CD Eject — Single
When the
button is pressed for less than
1.5 seconds, then the current CD that is playing
(or if the CD changer is off, the last CD that was
played) ejects. The disc indicator light starts
flashing orange and both WAIT and the disc
selection button number flash in the display until
the CD is ejected. When the CD is ejected, the
disc indicator light turns off and the display turns
from WAIT to EJECT. When the CD is removed
from the unit, the CD changer automatically
changes to One Disc Loading Mode so a new
CD can be loaded into the empty holder. The disc
indicator light starts flashing green and both
LOAD and the disc selection button number ap-pear in the display until a CD is loaded. One Disc
Loading Mode cancels if another disc selection
button is pushed or by waiting longer than 15
seconds to load a CD.
CD Eject — ALL
When the
button is pressed for longer than
1.5 seconds, the CD changer automatically
changes to All Disc Eject Mode. The disc indica-
tor light for the current CD (or the last CD that
was played) starts flashing orange and both
WAIT and the disc selection button number flash
in the display until the CD ejects. When the CD
ejects, the disc indicator light turns off and the
display turns from WAIT to EJECT. When the CD
is removed from the unit, the next CD starts to
eject. After all the CDs are ejected, the CD
changer turns off.
If a CD is ejected and is not removed within
10 seconds, it will be pulled back into the
slot.
CD CARE AND CLEANING
cHandle a CD by its edges. Do not bend the
disc. Never touch the surface of the disc.
cAlways place the discs in the storage case
when they are not being used.
cTo clean a disc, wipe the surface from the
center to the outer edge using a clean, soft
cloth. Do not wipe the disc using a circular
motion.
cDo not use a conventional record cleaner or
alcohol intended for industrial use.
LHA0049
4-18Heater, air conditioner and audio systems
ZREVIEW COPY:Ð2003 Sentra(b15)
Owners Manual(owners)ÐUSA English(nna)
12/10/02Ðdebbie
X
Page 107 of 224
cA new disc may be rough on the inner and
outer edges. Remove the rough edges by rub-
bing the inner and outer edges with the side of
a pen or pencil as illustrated.
ANTENNA
The antenna cannot be shortened, but can be
removed. When you need to remove the antenna,
turn the antenna rod counterclockwise.
To install the antenna rod, turn the antenna clock-
wise. Tighten the antenna rod to specification
using a suitable tool such as an open-end
wrench. The antenna rod tightening specification
is 3.4 - 3.6 N·m (30 - 32 in-lb) . Do not use pliers
to tighten the antenna as they can leave marks on
the antenna surface. The antenna rod cannot be
hand tightened to the proper specification.
CAUTION
Always properly tighten the antenna rod
during installation or the antenna rod may
break during vehicle operation.When installing a CB, ham radio or car phone in
your NISSAN, be sure to observe the following
cautions, otherwise the new equipment may ad-
versely affect the MFI (Multiport Fuel Injection)
system and other electronic parts.
WARNING
cA cellular telephone should not be used
while driving so full attention may be
given to vehicle operation. Some juris-
dictions prohibit the use of cellular tele-
phones while driving.
cIf you must make a call while your ve-
hicle is in motion, the hands free cellu-
lar phone operational mode (if so
equipped) is highly recommended. Ex-
ercise extreme caution at all times so
full attention may be given to vehicle
operation.
cIf a conversation in a moving vehicle
requires you to take notes, pull off the
road to a safe location and stop your
vehicle before doing so.
CAUTION
cKeep the antenna as far away as pos-
sible from the Engine Control Module
(ECM) .
cKeep the antenna wire more than 8 in
(20 cm) away from the Multiport Fuel
Injection harness. Do not route the an-
tenna wire next to any harness.
cAdjust the antenna standing-wave ratio
as recommended by the manufacturer.
cConnect the ground wire from the CB
radio chassis to the body.
cFor details, consult a NISSAN dealer.
CAR PHONE OR CB RADIO
Heater, air conditioner and audio systems4-19
ZREVIEW COPY:Ð2003 Sentra(b15)
Owners Manual(owners)ÐUSA English(nna)
12/10/02Ðdebbie
X
Page 108 of 224

4-20Heater, air conditioner and audio systems
MEMO
Page 111 of 224
CAUTION
cDo not use leaded gasoline. Deposits
from leaded gasoline will seriously re-
duce the three-way catalyst’s ability to
help reduce exhaust pollutants.
cKeep your engine tuned up. Malfunc-
tions in the ignition, fuel injection, or
electrical systems can cause overrich
fuel flow into the three-way catalyst,
causing it to overheat. Do not keep driv-
ing if the engine misfires, or if notice-
able loss of performance or other un-
usual operating conditions are
detected. Have the vehicle inspected
promptly by a NISSAN dealer.
cAvoid driving with an extremely low fuel
level. Running out of fuel could cause
the engine to misfire, damaging the
three-way catalyst.
cDo not race the engine while warming it
up.
cDo not push or tow your vehicle to start
the engine.
AVOIDING COLLISION AND
ROLLOVER
WARNING
Failure to operate this vehicle in a safe
and prudent manner may result in loss of
control or an accident.
Be alert and drive defensively at all times. Obey
all traffic regulations. Avoid excessive speed,
high speed cornering, or sudden steering ma-
neuvers, because these driving practices could
cause you to lose control of your vehicle.As with
any vehicle, loss of control could result in a
collision with other vehicles or objects, or
cause the vehicle to roll over, particularly if
the loss of control causes the vehicle to
slide sideways.Be attentive at all times, and
avoid driving when tired. Never drive when under
the influence of alcohol or drugs (including pre-
scription or over-the-counter drugs which may
cause drowsiness) . Always wear your seat belt
as outlined in the “Seats, restraints and supple-
mental air bag systems” section of this manual,
and also instruct your passengers to do so.
Seat belts help reduce the risk of injury in colli-
sions and rollovers.In a rollover crash, an
unbelted person is significantly more likely
to die than a person wearing a seat belt.
DRINKING ALCOHOL/DRUGS AND
DRIVING
WARNING
Never drive under the influence of alcohol
or drugs. Alcohol in the bloodstream re-
duces coordination, delays reaction time
and impairs judgement. Driving after
drinking alcohol increases the likelihood
of being involved in an accident injuring
yourself and others. Additionally, if you
are injured in an accident, alcohol can
increase the severity of the injury.
NISSAN is committed to safe driving. However,
you must choose not to drive under the influence
of alcohol. Every year thousands of people are
injured or killed in alcohol-related accidents. Al-
though the local laws vary on what is considered
to be legally intoxicated, the fact is that alcohol
affects all people differently and most people
underestimate the effects of alcohol.
Remember, drinking and driving don’t mix! And
that is true for drugs, too (over-the-counter, pre-
scription, and illegal drugs) . Don’t drive if your
ability to operate your vehicle is impaired by alco-
hol, drugs, or some other physical condition.
Starting and driving5-3
ZREVIEW COPY:Ð2003 Sentra(b15)
Owners Manual(owners)ÐUSA English(nna)
12/10/02Ðdebbie
X