seat adjustment NISSAN TIIDA 2007 Service Owner's Manual
[x] Cancel search | Manufacturer: NISSAN, Model Year: 2007, Model line: TIIDA, Model: NISSAN TIIDA 2007Pages: 5883, PDF Size: 78.95 MB
Page 3336 of 5883
HAC-3
C
D
E
F
G
H
J
K
L
MA
B
HAC
N
O
P PTC HEATER (300 WATT) .....................................
142
PTC HEATER (300 WATT) : PTC Heater System
Description ............................................................
142
PTC HEATER (300 WATT) : PTC Heater Compo-
nent Description ....................................................
143
PTC HEATER (300 WATT) : PTC Heater (300
Watt) Diagnosis Procedure ...................................
144
PTC HEATER (300 WATT) : PTC Heater (300
Watt) Component Inspection .................................
151
PTC HEATER (1500 WATT) ...................................153
PTC HEATER (1500 WATT) : System Description ..153
PTC HEATER (1500 WATT) : Component De-
scription .................................................................
154
PTC HEATER (1500 WATT) : PTC Heater (1500
Watt) Diagnosis Procedure ...................................
155
PTC HEATER (1500 WATT) : PTC Heater (1500
Watt) Component Inspection .................................
160
POWER SUPPLY AND GROUND CIRCUIT
FOR CONTROLLER ........................................
163
Component Description .........................................163
Front Air Control Component Function Check ......163
Front Air Control Power and Ground Diagnosis
Procedure ..............................................................
163
ECU DIAGNOSIS .......................................165
AIR CONDITIONER CONTROL .......................165
Front Air Control Terminals Reference Values .....165
Wiring Diagram - Air Conditioner Control - ............167
PTC HEATER CONTROL SYSTEM ................175
PTC HEATER (300 WATT) .....................................175
PTC HEATER (300 WATT) : Wiring Diagram -
PTC Heater (300 Watt) - .......................................
175
PTC HEATER (1500 WATT) ...................................179
PTC HEATER (1500 WATT) : Wiring Diagram -
PTC Heater (1500 Watt) - .....................................
180
SYMPTOM DIAGNOSIS ............................184
AIR CONDITIONER CONTROL .......................184
Symptom Matrix Chart .........................................184
INSUFFICIENT COOLING ...............................185
Component Function Check ..................................185
Performance Test Diagnoses ................................186
Performance Chart ................................................188
Test Reading .........................................................189
Trouble Diagnoses for Unusual Pressure .............189
INSUFFICIENT HEATING ................................193
Component Function Check ..................................193
NOISE ...............................................................195
Component Function Check ..................................195
SELF-DIAGNOSIS CANNOT BE PER-
FORMED ..........................................................
197
Self-Diagnosis .......................................................197
MEMORY FUNCTION DOES NOT OPERATE .198
Memory Function Check ........................................198
PRECAUTION ............................................199
PRECAUTIONS ...............................................199
Precaution for Supplemental Restraint System
(SRS) "AIR BAG" and "SEAT BELT PRE-TEN-
SIONER" ...............................................................
199
Precaution for Procedures Without Cowl Top Cov-
er ...........................................................................
199
Working with HFC-134a (R-134a) .........................199
Precaution for Service Equipment .........................200
AUTO AIR CONDITIONER (W/NAVI)
BASIC INSPECTION .................................
201
DIAGNOSIS AND REPAIR WORKFLOW ......201
How to Perform Trouble Diagnosis For Quick And
Accurate Repair .....................................................
201
INSPECTION AND ADJUSTMENT ................202
Operational Check .................................................202
FUNCTION DIAGNOSIS ............................204
FUNCTION INFORMATION ............................204
Component Part Location ......................................204
REFRIGERATION SYSTEM ...........................206
Refrigerant Cycle ...................................................206
Refrigerant System Protection ...............................206
AUTOMATIC AIR CONDITIONER SYSTEM ..207
Control System Diagram .......................................207
Control System Description ...................................207
Discharge Air Flow ................................................208
Switches And Their Control Function ....................209
CAN COMMUNICATION SYSTEM .................211
System Description ................................................211
DIAGNOSIS SYSTEM (BCM) .........................212
CONSULT-III Function (BCM) ...............................212
SELF-DIAGNOSIS FUNCTION .......................213
Front Air Control Self-Diagnosis ............................213
Front Air Control Self-Diagnosis Code Chart .........218
COMPONENT DIAGNOSIS .......................219
MODE DOOR MOTOR ....................................219
System Description ................................................219
Mode Door Motor Component Function Check .....220
Mode Door Motor Diagnosis Procedure ................222
AIR MIX DOOR MOTOR .................................224
System Description ................................................224
Air Mix Door Motor Component Function Check ...225
Air Mix Door Motor Diagnosis Procedure ..............226
Page 3689 of 5883

INT-10
< PREPARATION >
SQUEAK AND RATTLE TROUBLE DIAGNOSIS
Most of these incidents can be repaired by adjusting, securing or insulating the item(s) or component(s) caus-
ing the noise.
SUNROOF/HEADLINING
Noises in the sunroof/headlining area can often be traced to one of the following:
1. Sunroof lid, rail, linkage or seals making a rattle or light knocking noise
2. Sun visor shaft shaking in the holder
3. Front or rear windshield touching headliner and squeaking
Again, pressing on the components to stop the noise while duplicating the conditions can isolate most of these
incidents. Repairs usually consist of insulating with felt cloth tape.
OVERHEAD CONSOLE (FRONT AND REAR)
Overhead console noises are often caused by the console panel clips not being engaged correctly. Most of
these incidents are repaired by pushing up on the console at the clip locations until the clips engage.
In addition look for:
1. Loose harness or harness connectors.
2. Front console map/reading lamp lens loose.
3. Loose screws at console attachment points.
SEATS
When isolating seat noise it's important to note the position the seat is in and the load placed on the seat when
the noise is present. These conditions should be duplicated when verifying and isolating the cause of the
noise.
Cause of seat noise include:
1. Headrest rods and holder
2. A squeak between the seat pad cushion and frame
3. The rear seatback lock and bracket
These noises can be isolated by moving or pressing on the suspected components while duplicating the con-
ditions under which the noise occurs. Most of these incidents can be repaired by repositioning the component
or applying urethane tape to the contact area.
UNDERHOOD
Some interior noise may be caused by components under the hood or on the engine wall. The noise is then
transmitted into the passenger compartment.
Causes of transmitted underhood noise include:
1. Any component installed on the engine wall
2. Components that pass through the engine wall
3. Engine wall mounts and connectors
4. Loose radiator pins
5. Hood bumpers out of adjustment
6. Hood striker out of adjustment
These noises can be difficult to isolate since they cannot be reached from the interior of the vehicle. The best
method is to secure, move or insulate one component at a time and test drive the vehicle. Also, engine RPM
or load can be changed to isolate the noise. Repairs can usually be made by moving, adjusting, securing, or
insulating the component causing the noise.
Page 3722 of 5883
SQUEAK AND RATTLE TROUBLE DIAGNOSES
IP-7
< SERVICE INFORMATION >
C
D
E
F
G
H
I
K
L
MA
B
IP
N
O
P
Most of these incidents can be repaired by adjusting, securing or insulating the item(s) or component(s) caus-
ing the noise.
SUNROOF/HEADLINING
Noises in the sunroof/headlining area can often be traced to one of the following:
1. Sunroof lid, rail, linkage or seals making a rattle or light knocking noise
2. Sun visor shaft shaking in the holder
3. Front or rear windshield touching headliner and squeaking
Again, pressing on the components to stop the noise while duplicating the conditions can isolate most of these
incidents. Repairs usually consist of insulating with felt cloth tape.
OVERHEAD CONSOLE (FRONT AND REAR)
Overhead console noises are often caused by the console panel clips not being engaged correctly. Most of
these incidents are repaired by pushing up on the console at the clip locations until the clips engage.
In addition look for:
1. Loose harness or harness connectors.
2. Front console map/reading lamp lens loose.
3. Loose screws at console attachment points.
SEATS
When isolating seat noise it's important to note the position the seat is in and the load placed on the seat when
the noise is present. These conditions should be duplicated when verifying and isolating the cause of the
noise.
Cause of seat noise include:
1. Headrest rods and holder
2. A squeak between the seat pad cushion and frame
3. The rear seatback lock and bracket
These noises can be isolated by moving or pressing on the suspected components while duplicating the con-
ditions under which the noise occurs. Most of these incidents can be repaired by repositioning the component
or applying urethane tape to the contact area.
UNDERHOOD
Some interior noise may be caused by components under the hood or on the engine wall. The noise is then
transmitted into the passenger compartment.
Causes of transmitted underhood noise include:
1. Any component mounted to the engine wall
2. Components that pass through the engine wall
3. Engine wall mounts and connectors
4. Loose radiator mounting pins
5. Hood bumpers out of adjustment
6. Hood striker out of adjustment
These noises can be difficult to isolate since they cannot be reached from the interior of the vehicle. The best
method is to secure, move or insulate one component at a time and test drive the vehicle. Also, engine RPM
or load can be changed to isolate the noise. Repairs can usually be made by moving, adjusting, securing, or
insulating the component causing the noise.
Page 4241 of 5883
MA-1
MAINTENANCE
C
D
E
F
G
H
I
J
K
L
MB
MA
SECTION MA
N
OA
CONTENTS
MAINTENANCE
PRECAUTION ...............................................3
PRECAUTIONS ...................................................3
Precaution for Supplemental Restraint System
(SRS) "AIR BAG" and "SEAT BELT PRE-TEN-
SIONER" ...................................................................
3
PREPARATION ............................................4
PREPARATION ...................................................4
Special Service Tool .................................................4
Commercial Service Tool ..........................................4
Pre-Delivery Inspection Item .....................................5
ON-VEHICLE MAINTENANCE .....................6
GENERAL MAINTENANCE ................................6
General Maintenance ................................................6
PERIODIC MAINTENANCE ................................7
Periodic Maintenance ................................................7
RECOMMENDED FLUIDS AND LUBRI-
CANTS ................................................................
19
Fluids and Lubricants ..............................................19
SAE Viscosity Number ............................................20
Engine Coolant Mixture Ratio .................................21
ENGINE MAINTENANCE (HR16DE) .................22
DRIVE BELTS ...........................................................22
DRIVE BELTS : Checking .......................................22
DRIVE BELTS : Tension Adjustment ......................22
ENGINE COOLANT ...................................................23
ENGINE COOLANT : Inspection .............................23
ENGINE COOLANT : Changing Engine Coolant ....23
RADIATOR ................................................................25
RADIATOR : Checking Radiator .............................25
FUEL LINES ..............................................................25
FUEL LINES : Inspection ........................................25
AIR CLEANER FILTER .............................................25
AIR CLEANER FILTER : Removal and Installation
....
26
ENGINE OIL ...............................................................26
ENGINE OIL : Draining ............................................27
ENGINE OIL : Refilling ............................................27
OIL FILTER ................................................................27
OIL FILTER : Removal and Installation ...................27
OIL FILTER : Inspection ..........................................28
SPARK PLUG ............................................................28
SPARK PLUG : Removal and Installation ...............28
SPARK PLUG : Inspection ......................................29
EVAP VAPOR LINES ................................................30
EVAP VAPOR LINES : Inspection ...........................30
ENGINE MAINTENANCE (MR18DE) ...............31
DRIVE BELTS ............................................................31
DRIVE BELTS : Component ....................................31
DRIVE BELTS : Checking Drive Belts .....................31
DRIVE BELTS : Tension Adjustment ......................31
ENGINE COOLANT ...................................................31
ENGINE COOLANT : Inspection .............................31
ENGINE COOLANT : Changing Engine Coolant ....32
RADIATOR .................................................................33
RADIATOR : Checking Radiator Cap ......................34
RADIATOR : Checking Radiator .............................34
FUEL LINES ...............................................................34
FUEL LINES : Inspection .........................................35
AIR CLEANER FILTER .............................................35
AIR CLEANER FILTER : Removal and Installation
....
35
ENGINE OIL ...............................................................36
ENGINE OIL : Inspection .........................................36
ENGINE OIL : Changing Engine Oil ........................37
Page 4242 of 5883

MA-2
OIL FILTER ...............................................................38
OIL FILTER : Removal and Installation ..................38
OIL FILTER : Inspection .........................................39
SPARK PLUG ...........................................................39
SPARK PLUG : Component ...................................40
SPARK PLUG : Removal and Installation ..............40
EVAP VAPOR LINES ................................................41
EVAP VAPOR LINES : Inspection ..........................41
ENGINE MAINTENANCE (K9K) .......................42
DRIVE BELTS ...........................................................42
DRIVE BELTS : Exploded View .............................42
DRIVE BELTS : Inspection and Adjustment ...........42
ENGINE COOLANT ..................................................42
ENGINE COOLANT : Inspection ............................42
ENGINE COOLANT : Draining ...............................43
ENGINE COOLANT : Refilling ................................43
ENGINE COOLANT : Flushing ...............................44
RADIATOR ................................................................44
RADIATOR : Checking Radiator Cap .....................44
RADIATOR : Checking Radiator ............................45
FUEL LINES ..............................................................45
FUEL LINES : Inspection ........................................45
AIR CLEANER FILTER .............................................46
AIR CLEANER FILTER : Removal and Installation
...
46
ENGINE OIL ..............................................................46
ENGINE OIL : Inspection ........................................47
ENGINE OIL : Draining ...........................................47
ENGINE OIL : Refilling ............................................48
OIL FILTER ...............................................................48
OIL FILTER : Replacement .....................................48
CHASSIS AND BODY MAINTENANCE ...........50
Air Conditioner Filter ...............................................50
Checking Exhaust System ......................................50
Checking Clutch Fluid Level and Leaks ..................50
Checking Clutch System .........................................50
Checking M/T Oil ....................................................50
Changing M/T Oil ....................................................51
Checking A/T Fluid: RE4F03B ................................51
Changing A/T Fluid: RE4F03B ................................52
Checking A/T Fluid: RSF91R ..................................52
Changing A/T Fluid: RS9F94R ...............................52
Balancing Wheels ...................................................53
Rotation ...................................................................53
Checking Brake Fluid Level and Leaks ...................54
Checking Brake Line and Cables ............................54
Changing Brake Fluid .............................................54
Drain and Refill .......................................................54
Checking Disc Brake ...............................................55
Axle and Suspension Parts .....................................56
Drive Shaft ..............................................................56
Lubricating Locks, Hinges and Hood Latch ............57
Checking Seat Belts, Buckles, Retractors, An-
chors and Adjusters ................................................
57
Page 4262 of 5883
MA-22
< ON-VEHICLE MAINTENANCE >
ENGINE MAINTENANCE (HR16DE)
ENGINE MAINTENANCE (HR16DE)
DRIVE BELTS
DRIVE BELTS : CheckingINFOID:0000000001730848
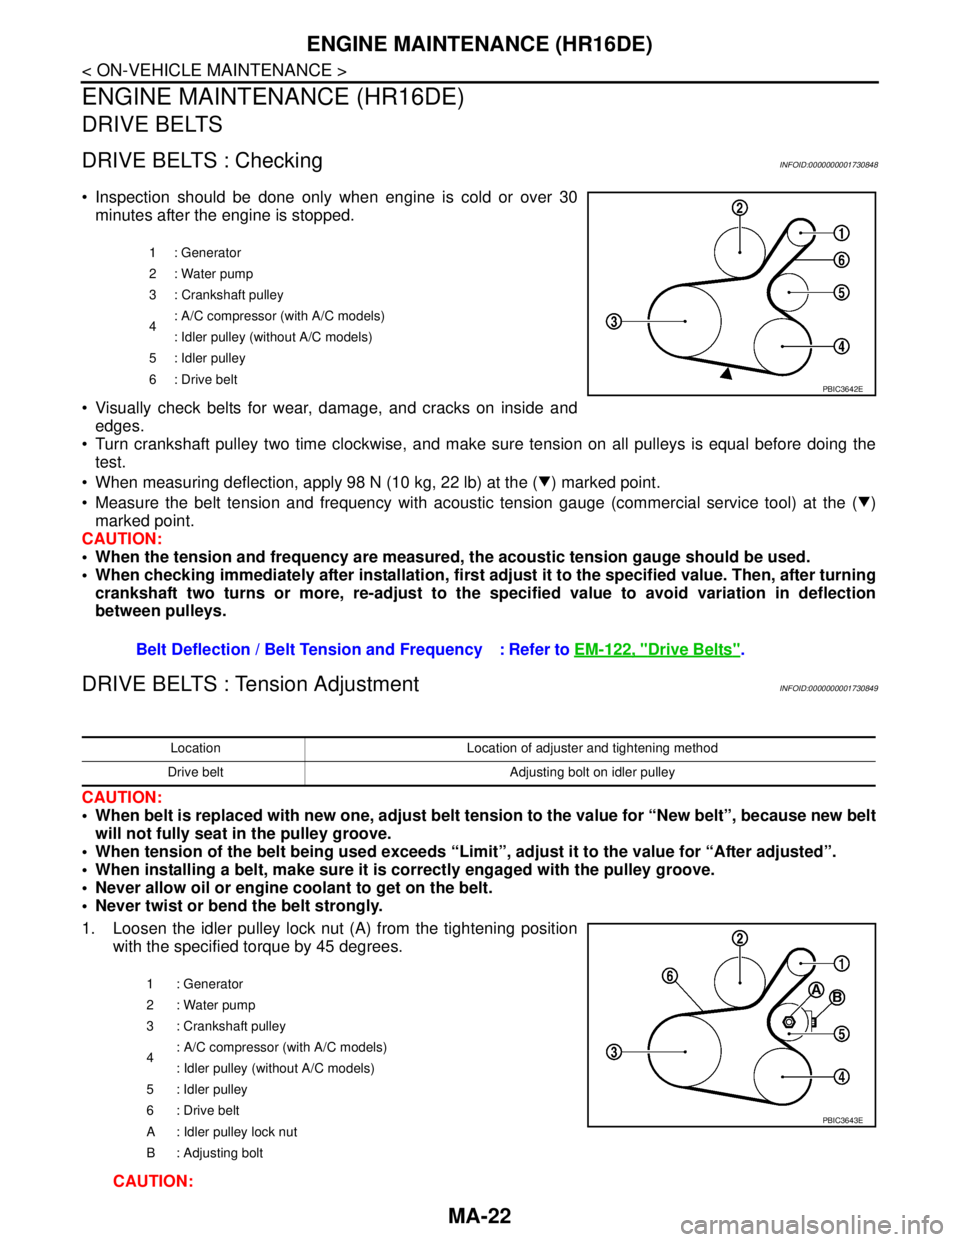
Inspection should be done only when engine is cold or over 30
minutes after the engine is stopped.
Visually check belts for wear, damage, and cracks on inside and
edges.
Turn crankshaft pulley two time clockwise, and make sure tension on all pulleys is equal before doing the
test.
When measuring deflection, apply 98 N (10 kg, 22 lb) at the ( ) marked point.
Measure the belt tension and frequency with acoustic tension gauge (commercial service tool) at the ( )
marked point.
CAUTION:
When the tension and frequency are measured, the acoustic tension gauge should be used.
When checking immediately after installation, first adjust it to the specified value. Then, after turning
crankshaft two turns or more, re-adjust to the specified value to avoid variation in deflection
between pulleys.
DRIVE BELTS : Tension AdjustmentINFOID:0000000001730849
CAUTION:
When belt is replaced with new one, adjust belt tension to the value for “New belt”, because new belt
will not fully seat in the pulley groove.
When tension of the belt being used exceeds “Limit”, adjust it to the value for “After adjusted”.
When installing a belt, make sure it is correctly engaged with the pulley groove.
Never allow oil or engine coolant to get on the belt.
Never twist or bend the belt strongly.
1. Loosen the idler pulley lock nut (A) from the tightening position
with the specified torque by 45 degrees.
CAUTION:
1 : Generator
2: Water pump
3 : Crankshaft pulley
4: A/C compressor (with A/C models)
: Idler pulley (without A/C models)
5 : Idler pulley
6: Drive belt
Belt Deflection / Belt Tension and Frequency : Refer to EM-122, "Drive Belts".
PBIC3642E
Location Location of adjuster and tightening method
Drive belt Adjusting bolt on idler pulley
1 : Generator
2: Water pump
3 : Crankshaft pulley
4: A/C compressor (with A/C models)
: Idler pulley (without A/C models)
5 : Idler pulley
6 : Drive belt
A : Idler pulley lock nut
B : Adjusting bolt
PBIC3643E
Page 4299 of 5883
MIR-1
DRIVER CONTROLS
C
D
E
F
G
H
I
J
K
M
SECTION MIR
A
B
MIR
N
O
P
CONTENTS
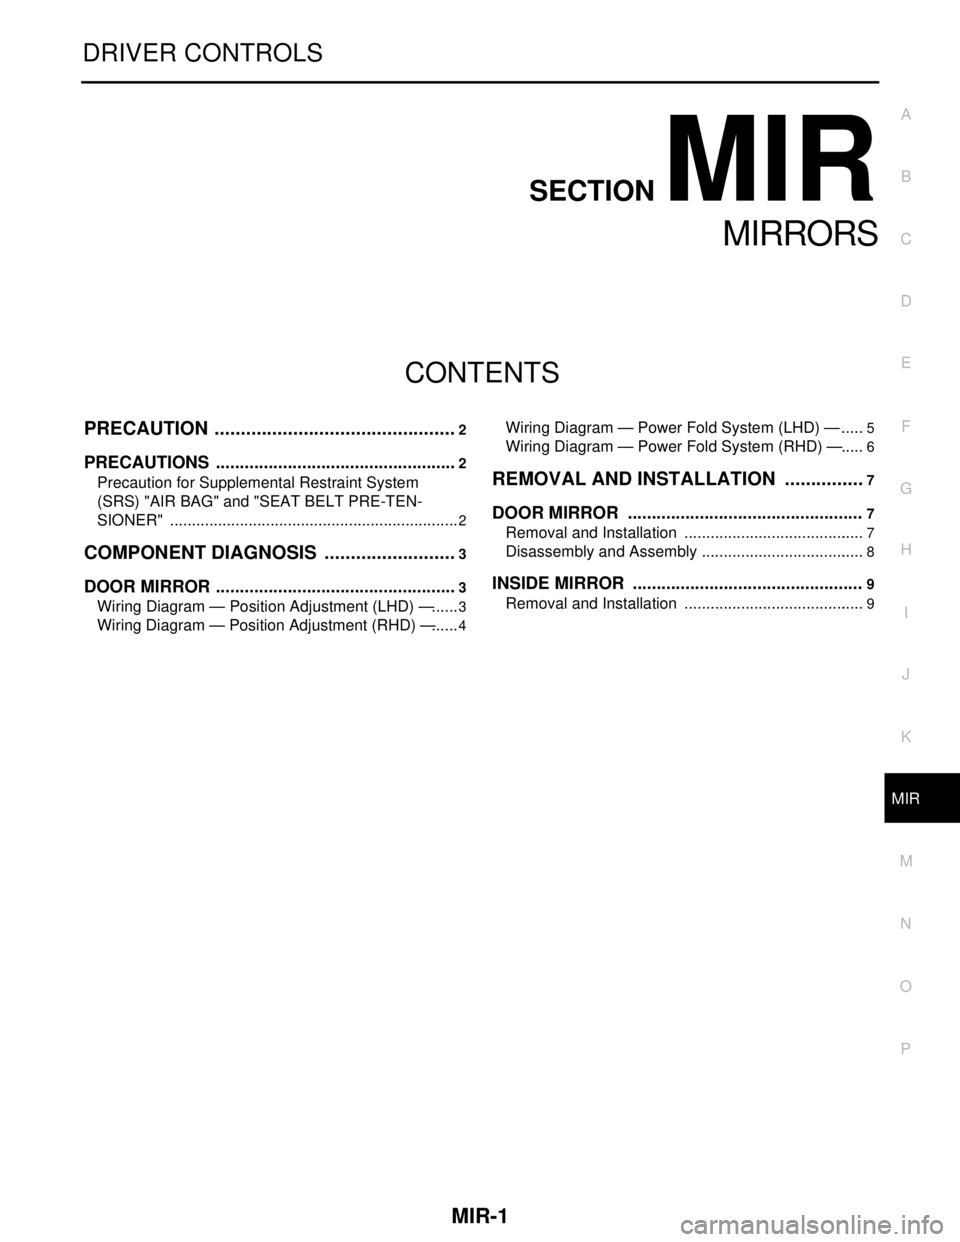
MIRRORS
PRECAUTION ...............................................2
PRECAUTIONS ...................................................2
Precaution for Supplemental Restraint System
(SRS) "AIR BAG" and "SEAT BELT PRE-TEN-
SIONER" ...................................................................
2
COMPONENT DIAGNOSIS ..........................3
DOOR MIRROR ...................................................3
Wiring Diagram — Position Adjustment (LHD) — ......3
Wiring Diagram — Position Adjustment (RHD) — ......4
Wiring Diagram — Power Fold System (LHD) — .....5
Wiring Diagram — Power Fold System (RHD) — .....6
REMOVAL AND INSTALLATION ................7
DOOR MIRROR .................................................7
Removal and Installation ..........................................7
Disassembly and Assembly ......................................8
INSIDE MIRROR ................................................9
Removal and Installation ..........................................9
Page 4535 of 5883
RF-1
BODY EXTERIOR, DOORS, ROOF & VEHICLE SECURITY
C
D
E
F
G
H
I
J
L
M
SECTION RF
A
B
RF
N
O
P
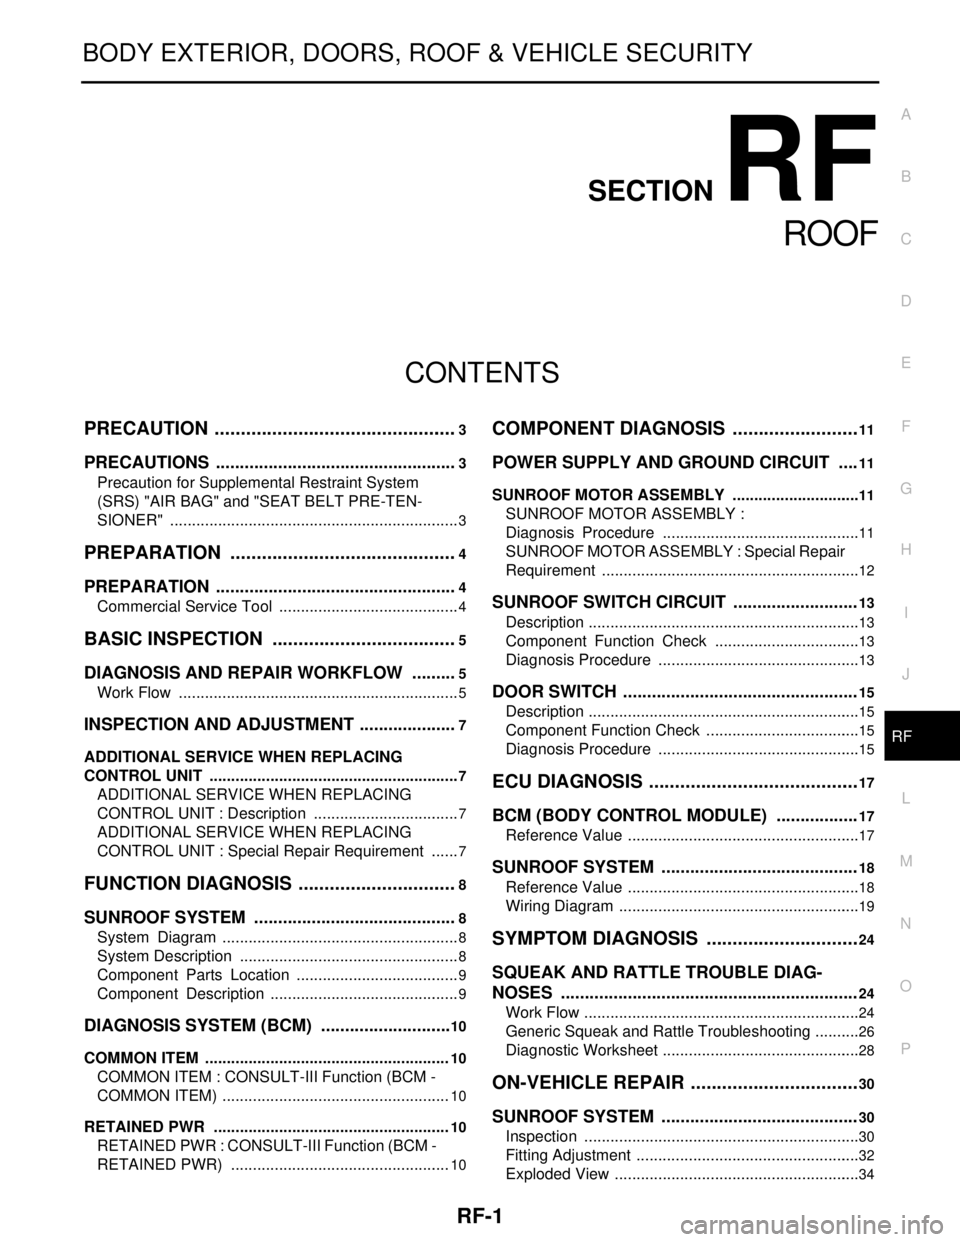
CONTENTS
ROOF
PRECAUTION ...............................................3
PRECAUTIONS ...................................................3
Precaution for Supplemental Restraint System
(SRS) "AIR BAG" and "SEAT BELT PRE-TEN-
SIONER" ...................................................................
3
PREPARATION ............................................4
PREPARATION ...................................................4
Commercial Service Tool ..........................................4
BASIC INSPECTION ....................................5
DIAGNOSIS AND REPAIR WORKFLOW ..........5
Work Flow .................................................................5
INSPECTION AND ADJUSTMENT .....................7
ADDITIONAL SERVICE WHEN REPLACING
CONTROL UNIT ..........................................................
7
ADDITIONAL SERVICE WHEN REPLACING
CONTROL UNIT : Description ..................................
7
ADDITIONAL SERVICE WHEN REPLACING
CONTROL UNIT : Special Repair Requirement .......
7
FUNCTION DIAGNOSIS ...............................8
SUNROOF SYSTEM ...........................................8
System Diagram .......................................................8
System Description ...................................................8
Component Parts Location ......................................9
Component Description ............................................9
DIAGNOSIS SYSTEM (BCM) ............................10
COMMON ITEM .........................................................10
COMMON ITEM : CONSULT-III Function (BCM -
COMMON ITEM) .....................................................
10
RETAINED PWR .......................................................10
RETAINED PWR : CONSULT-III Function (BCM -
RETAINED PWR) ...................................................
10
COMPONENT DIAGNOSIS .........................11
POWER SUPPLY AND GROUND CIRCUIT ....11
SUNROOF MOTOR ASSEMBLY ..............................11
SUNROOF MOTOR ASSEMBLY :
Diagnosis Procedure ..............................................
11
SUNROOF MOTOR ASSEMBLY : Special Repair
Requirement ............................................................
12
SUNROOF SWITCH CIRCUIT ..........................13
Description ...............................................................13
Component Function Check ..................................13
Diagnosis Procedure ...............................................13
DOOR SWITCH .................................................15
Description ...............................................................15
Component Function Check ....................................15
Diagnosis Procedure ...............................................15
ECU DIAGNOSIS .........................................17
BCM (BODY CONTROL MODULE) .................17
Reference Value ......................................................17
SUNROOF SYSTEM .........................................18
Reference Value ......................................................18
Wiring Diagram ........................................................19
SYMPTOM DIAGNOSIS ..............................24
SQUEAK AND RATTLE TROUBLE DIAG-
NOSES ..............................................................
24
Work Flow ................................................................24
Generic Squeak and Rattle Troubleshooting ...........26
Diagnostic Worksheet ..............................................28
ON-VEHICLE REPAIR .................................30
SUNROOF SYSTEM .........................................30
Inspection ................................................................30
Fitting Adjustment ....................................................32
Exploded View .........................................................34
Page 4561 of 5883
SQUEAK AND RATTLE TROUBLE DIAGNOSES
RF-27
< SYMPTOM DIAGNOSIS >
C
D
E
F
G
H
I
J
L
MA
B
RF
N
O
P
2. Trunk lid striker out of adjustment
3. The trunk lid torsion bars knocking together
4. A loose license plate or bracket
Most of these incidents can be repaired by adjusting, securing or insulating the item(s) or component(s) caus-
ing the noise.
SUNROOF/HEADLINING
Noises in the sunroof/headlining area can often be traced to one of the following:
1. Sunroof lid, rail, linkage or seals making a rattle or light knocking noise
2. Sun visor shaft shaking in the holder
3. Front or rear windshield touching headliner and squeaking
Again, pressing on the components to stop the noise while duplicating the conditions can isolate most of these
incidents. Repairs usually consist of insulating with felt cloth tape.
OVERHEAD CONSOLE (FRONT AND REAR)
Overhead console noises are often caused by the console panel clips not being engaged correctly. Most of
these incidents are repaired by pushing up on the console at the clip locations until the clips engage.
In addition look for:
1. Loose harness or harness connectors.
2. Front console map/reading lamp lens loose.
3. Loose screws at console attachment points.
SEATS
When isolating seat noise it's important to note the position the seat is in and the load placed on the seat when
the noise is present. These conditions should be duplicated when verifying and isolating the cause of the
noise.
Cause of seat noise include:
1. Headrest rods and holder
2. A squeak between the seat pad cushion and frame
3. The rear seatback lock and bracket
These noises can be isolated by moving or pressing on the suspected components while duplicating the con-
ditions under which the noise occurs. Most of these incidents can be repaired by repositioning the component
or applying urethane tape to the contact area.
UNDERHOOD
Some interior noise may be caused by components under the hood or on the engine wall. The noise is then
transmitted into the passenger compartment.
Causes of transmitted underhood noise include:
1. Any component installed on the engine wall
2. Components that pass through the engine wall
3. Engine wall mounts and connectors
4. Loose radiator pins
5. Hood bumpers out of adjustment
6. Hood striker out of adjustment
These noises can be difficult to isolate since they cannot be reached from the interior of the vehicle. The best
method is to secure, move or insulate one component at a time and test drive the vehicle. Also, engine RPM
or load can be changed to isolate the noise. Repairs can usually be made by moving, adjusting, securing, or
insulating the component causing the noise.
Page 4569 of 5883
SUNROOF SYSTEM
RF-35
< ON-VEHICLE REPAIR >
C
D
E
F
G
H
I
J
L
MA
B
RF
N
O
P
Removal and InstallationINFOID:0000000001724429
CAUTION:
After installation or any adjustment, check clearances for sunroof operation and glass lid alignment.
Handle glass lid with care to prevent damage.
Fully close the glass lid before removal, then do not operate sunroof motor assembly after removal.
When removing sunroof unit assembly, use shop cloths to protect the seats and trim from damage.
Always work with a helper.
NOTE:
For easy installation, mark each point before removal.
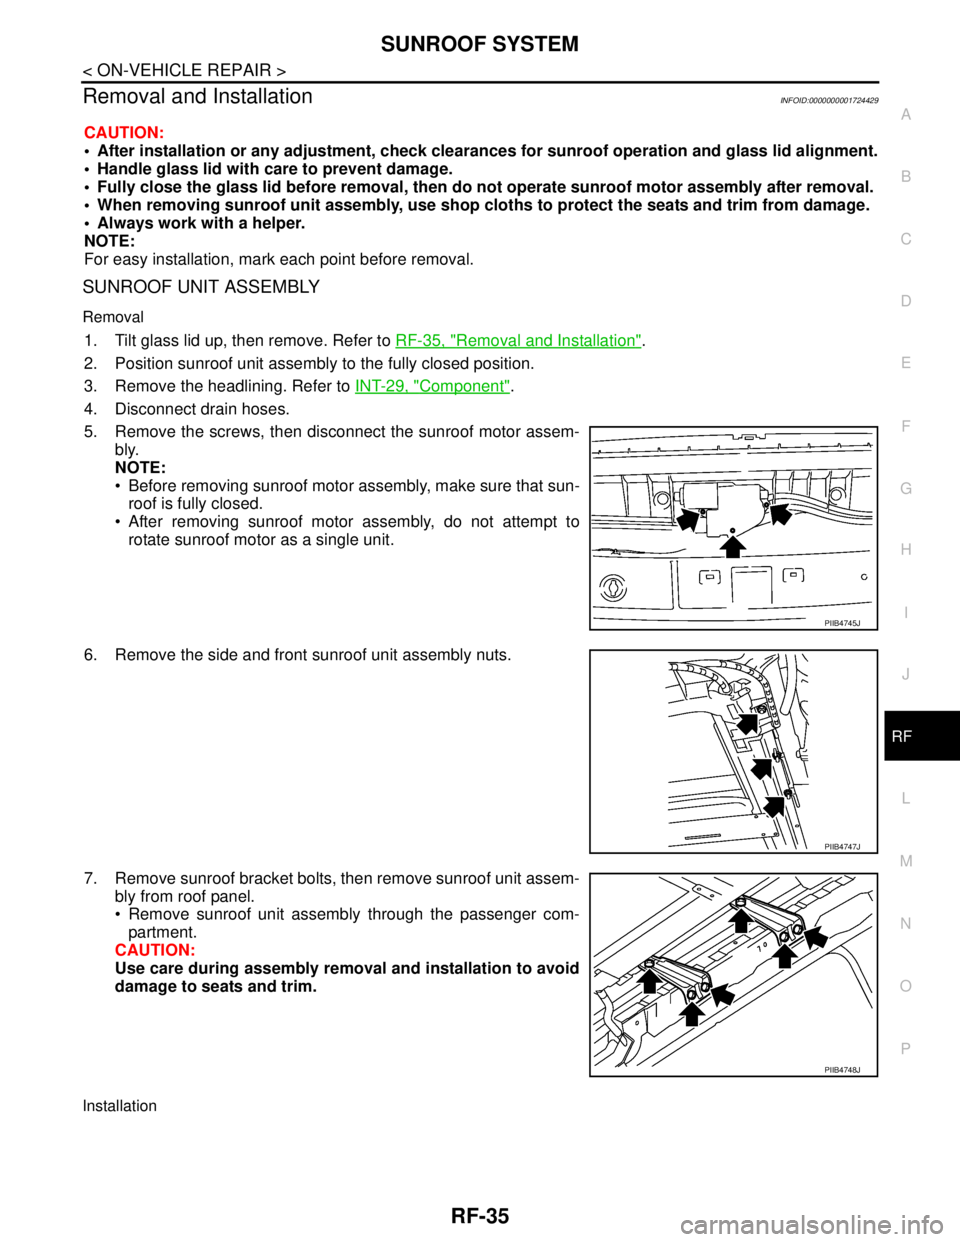
SUNROOF UNIT ASSEMBLY
Removal
1. Tilt glass lid up, then remove. Refer to RF-35, "Removal and Installation".
2. Position sunroof unit assembly to the fully closed position.
3. Remove the headlining. Refer to INT-29, "
Component".
4. Disconnect drain hoses.
5. Remove the screws, then disconnect the sunroof motor assem-
bly.
NOTE:
Before removing sunroof motor assembly, make sure that sun-
roof is fully closed.
After removing sunroof motor assembly, do not attempt to
rotate sunroof motor as a single unit.
6. Remove the side and front sunroof unit assembly nuts.
7. Remove sunroof bracket bolts, then remove sunroof unit assem-
bly from roof panel.
Remove sunroof unit assembly through the passenger com-
partment.
CAUTION:
Use care during assembly removal and installation to avoid
damage to seats and trim.
Installation
PIIB4745J
PIIB4747J
PIIB4748J