horn NISSAN TIIDA 2007 Service Repair Manual
[x] Cancel search | Manufacturer: NISSAN, Model Year: 2007, Model line: TIIDA, Model: NISSAN TIIDA 2007Pages: 5883, PDF Size: 78.95 MB
Page 1 of 5883
MODEL C11 SERIES
2007 NISSAN EUROPE S.A.S.
All rights reserved. No part of this Electronic Service Manual may be reproduced or stored in a retrieval system, or transmitted in any form,
or by any means, electronic, mechanical, photocopying, recording or otherwise, without the prior written permission of Nissan Europe
S.A.S., Paris, France.
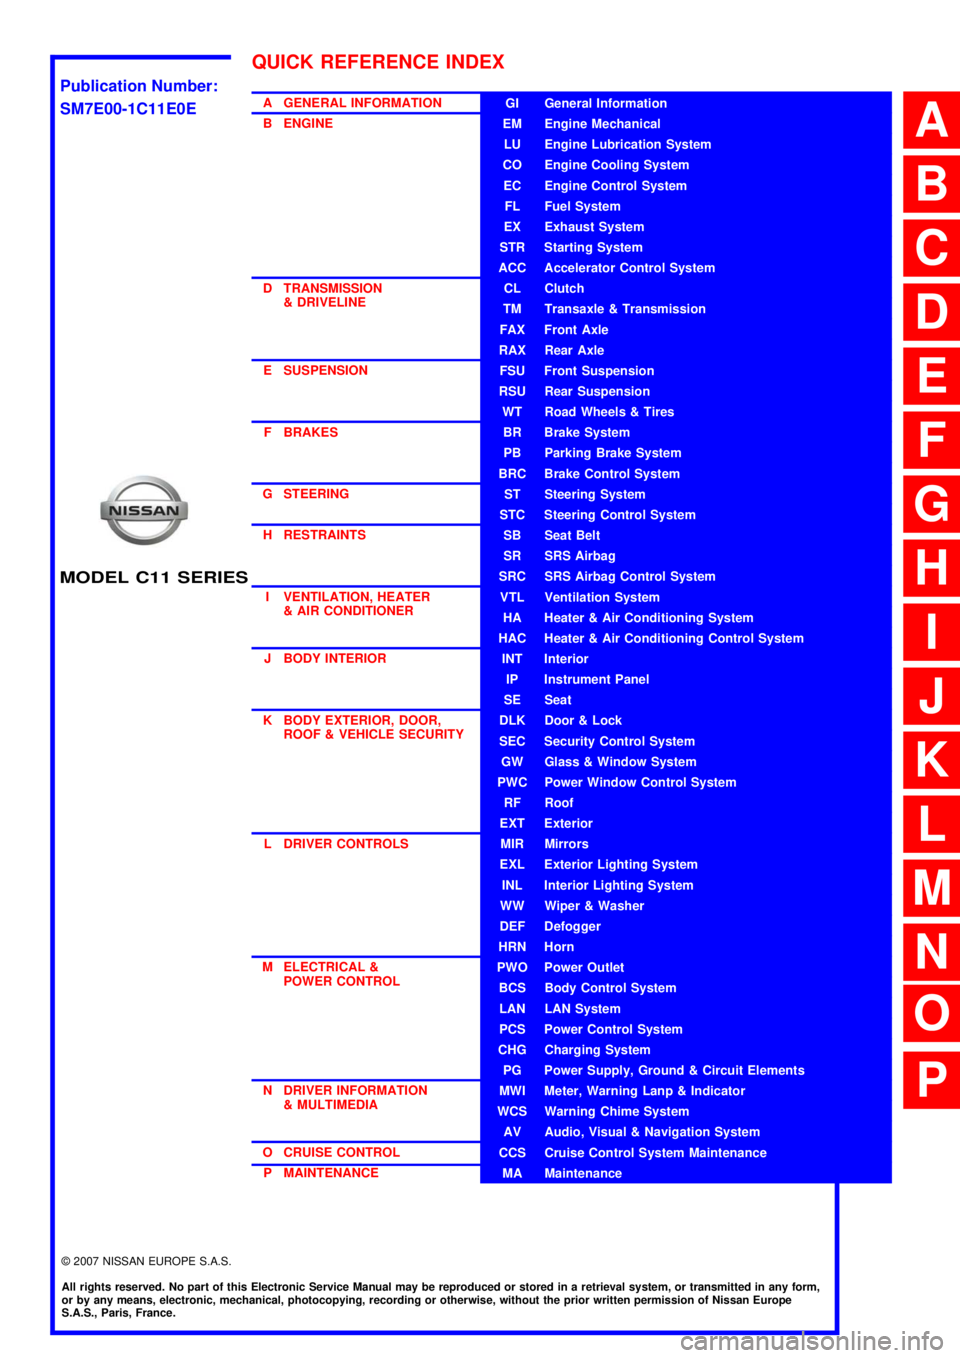
A GENERAL INFORMATION
B ENGINE
D TRANSMISSION& DRIVELINE
E SUSPENSION F BRAKES
G STEERING H RESTRAINTS
I VENTILATION, HEATER & AIR CONDITIONER
J BODY INTERIOR
K BODY EXTERIOR, DOOR, ROOF & VEHICLE SECURITY
L DRIVER CONTROLS
M ELECTRICAL & POWER CONTROL
N DRIVER INFORMATION & MULTIMEDIA
O CRUISE CONTROL P MAINTENANCEGI General Information
EM Engine Mechanical
LU Engine Lubrication System
CO Engine Cooling System
EC Engine Control System
FL Fuel System
EX Exhaust System
STR Starting System
ACC Accelerator Control System
CL Clutch
TM Transaxle & Transmission
FAX Front Axle
RAX Rear Axle
FSU Front Suspension
RSU Rear Suspension
WT Road Wheels & Tires
BR Brake System
PB Parking Brake System
BRC Brake Control System
ST Steering System
STC Steering Control System
SB Seat Belt
SR SRS Airbag
SRC SRS Airbag Control System
VTL Ventilation System
HA Heater & Air Conditioning System
HAC Heater & Air Conditioning Control System
INT Interior
IP Instrument Panel
SE Seat
DLK Door & Lock
SEC Security Control System
GW Glass & Window System
PWC Power Window Control System
RF Roof
EXT Exterior
MIR Mirrors
EXL Exterior Lighting System
INL Interior Lighting System
WW Wiper & Washer
DEF Defogger
HRN Horn
PWO Power Outlet
BCS Body Control System
LAN LAN System
PCS Power Control System
CHG Charging System
PG Power Supply, Ground & Circuit Elements
MWI Meter, Warning Lanp & Indicator
WCS Warning Chime System
AV Audio, Visual & Navigation System
CCS Cruise Control System Maintenance
MA Maintenance
QUICK REFERENCE INDEX
A
B
C
D
E
F
G
H
I
J
K
L
M
N
O
P
M
Publication Number:
SM7E00-1C11E0E
Page 495 of 5883
![NISSAN TIIDA 2007 Service Repair Manual CO-14
< ON-VEHICLE MAINTENANCE >[HR16DE]
RADIATOR
RADIATOR
Checking Radiator CapINFOID:0000000001534602
Check valve seat of radiator cap.
- Check if valve seat is swollen to the extent that the edg NISSAN TIIDA 2007 Service Repair Manual CO-14
< ON-VEHICLE MAINTENANCE >[HR16DE]
RADIATOR
RADIATOR
Checking Radiator CapINFOID:0000000001534602
Check valve seat of radiator cap.
- Check if valve seat is swollen to the extent that the edg](/img/5/57395/w960_57395-494.png)
CO-14
< ON-VEHICLE MAINTENANCE >[HR16DE]
RADIATOR
RADIATOR
Checking Radiator CapINFOID:0000000001534602
Check valve seat of radiator cap.
- Check if valve seat is swollen to the extent that the edge of the
plunger cannot be seen when watching it vertically from the top.
- Check if valve seat has no soil and damage.
Pull negative-pressure valve to open it, and make sure that it is
completely closed when released.
- Make sure that there is no dirt or damage on the valve seat of radi-
ator cap negative-pressure valve.
- Make sure that the valve operates properly in the opening and
closing conditions.
Check radiator cap relief pressure using suitable tool.
- When connecting the radiator cap to the tester, apply water or
coolant to the cap seal surface.
- Replace the radiator cap if there is an abnormality in the negative-
pressure valve, or if the open-valve pressure is outside of the stan-
dard values.
Replace radiator cap if there it does not comply to specifications to the above three checks.
CAUTION:
When installing radiator cap, thoroughly wipe out the radiator filler neck to remove any waxy residue
or foreign material.
Checking RadiatorINFOID:0000000001534603
Check radiator for mud or clogging. If necessary, clean radiator as follows.
Be careful not to bend or damage radiator fins.
When radiator is cleaned without removal, remove all surrounding parts such as cooling fan, radiator shroud
and horns. Then tape harness and connectors to prevent water from entering.
1. Apply water by hose to the back side of the radiator core vertically downward.
2. Apply water again to all radiator core surface once per minute.
3. Stop washing if any stains no longer flow out from radiator.
4. Blow air into the back side of radiator core vertically downward.
Use compressed air lower than 490 kPa (4.9 bar, 5 kg/cm
2, 71 psi) and keep distance more than 30 cm
(11.8 in).
PBIC2816E
SMA967B
Standard: 78 – 98 kPa (0.78 - 0.98 bar, 0.8 – 1.0 kg/cm2, 11
– 14 psi)
Limit: 59 kPa (0.59 bar, 0.6 kg/cm
2, 9 psi)
WBIA0570E
Page 519 of 5883
![NISSAN TIIDA 2007 Service Repair Manual CO-38
< ON-VEHICLE MAINTENANCE >[MR18DE]
RADIATOR
RADIATOR
Checking Radiator CapINFOID:0000000001337842
Check valve seat of radiator cap.
- Check if valve seat is swollen to the extent that the edg NISSAN TIIDA 2007 Service Repair Manual CO-38
< ON-VEHICLE MAINTENANCE >[MR18DE]
RADIATOR
RADIATOR
Checking Radiator CapINFOID:0000000001337842
Check valve seat of radiator cap.
- Check if valve seat is swollen to the extent that the edg](/img/5/57395/w960_57395-518.png)
CO-38
< ON-VEHICLE MAINTENANCE >[MR18DE]
RADIATOR
RADIATOR
Checking Radiator CapINFOID:0000000001337842
Check valve seat of radiator cap.
- Check if valve seat is swollen to the extent that the edge of the
plunger cannot be seen when watching it vertically from the top.
- Check if valve seat has no soil and damage.
Pull negative-pressure valve to open it, and make sure that it is
completely closed when released.
- Make sure that there is no dirt or damage on the valve seat of radi-
ator cap negative-pressure valve.
- Make sure that the valve operates properly in the opening and
closing conditions.
Check radiator cap relief pressure using suitable tool.
- When connecting the radiator cap to the tester, apply water or
coolant to the cap seal surface.
- Replace the radiator cap if there is an abnormality in the negative-
pressure valve, or if the open-valve pressure is outside of the stan-
dard values.
Replace radiator cap if there it does not comply to specifications to the above three checks.
CAUTION:
When installing radiator cap, thoroughly wipe out the radiator filler neck to remove any waxy residue
or foreign material.
Checking RadiatorINFOID:0000000001337843
Check radiator for mud or clogging. If necessary, clean radiator as follows.
Be careful not to bend or damage radiator fins.
When radiator is cleaned without removal, remove all surrounding parts such as cooling fan, radiator shroud
and horns. Then tape harness and connectors to prevent water from entering.
1. Apply water by hose to the back side of the radiator core vertically downward.
2. Apply water again to all radiator core surface once per minute.
3. Stop washing if any stains no longer flow out from radiator.
4. Blow air into the back side of radiator core vertically downward.
Use compressed air lower than 490 kPa (4.9 bar, 5 kg/cm
2, 71 psi) and keep distance more than 30 cm
(11.8 in).
PBIC2816E
SMA967B
Standard: 78 – 98 kPa (0.78 - 0.98 bar, 0.8 – 1.0 kg/cm2, 11
– 14 psi)
Limit: 59 kPa (0.59 bar, 0.6 kg/cm
2, 9 psi)
WBIA0570E
Page 541 of 5883
![NISSAN TIIDA 2007 Service Repair Manual CO-60
< ON-VEHICLE MAINTENANCE >[K9K]
RADIATOR
RADIATOR
Checking Radiator CapINFOID:0000000001538671
Check valve seat of radiator cap.
- Check if valve seat is swollen to the extent that the edge o NISSAN TIIDA 2007 Service Repair Manual CO-60
< ON-VEHICLE MAINTENANCE >[K9K]
RADIATOR
RADIATOR
Checking Radiator CapINFOID:0000000001538671
Check valve seat of radiator cap.
- Check if valve seat is swollen to the extent that the edge o](/img/5/57395/w960_57395-540.png)
CO-60
< ON-VEHICLE MAINTENANCE >[K9K]
RADIATOR
RADIATOR
Checking Radiator CapINFOID:0000000001538671
Check valve seat of radiator cap.
- Check if valve seat is swollen to the extent that the edge of the
plunger cannot be seen when watching it vertically from the top.
- Check if valve seat has no soil and damage.
Pull negative-pressure valve to open it, and make sure that it is
completely closed when released.
- Make sure that there is no dirt or damage on the valve seat of radi-
ator cap negative-pressure valve.
- Make sure that the valve operates properly in the opening and
closing conditions.
Check radiator cap relief pressure using suitable tool.
- When connecting the radiator cap to the tester, apply water or
coolant to the cap seal surface.
- Replace the radiator cap if there is an abnormality in the negative-
pressure valve, or if the open-valve pressure is outside of the stan-
dard values.
Replace radiator cap if there it does not comply to specifications to the above three checks.
CAUTION:
When installing radiator cap, thoroughly wipe out the radiator filler neck to remove any waxy residue
or foreign material.
Checking RadiatorINFOID:0000000001538672
Check radiator for mud or clogging. If necessary, clean radiator as follows.
Be careful not to bend or damage radiator fins.
When radiator is cleaned without removal, remove all surrounding parts such as cooling fan, radiator shroud
and horns. Then tape harness and connectors to prevent water from entering.
1. Apply water by hose to the back side of the radiator core vertically downward.
2. Apply water again to all radiator core surface once per minute.
3. Stop washing if any stains no longer flow out from radiator.
4. Blow air into the back side of radiator core vertically downward.
Use compressed air lower than 490 kPa (4.9 bar, 5 kg/cm
2, 71 psi) and keep distance more than 30 cm
(11.8 in).
PBIC2816E
SMA967B
Standard: 78 – 98 kPa (0.78 - 0.98 bar, 0.8 – 1.0 kg/cm2, 11
– 14 psi)
Limit: 59 kPa (0.59 bar, 0.6 kg/cm
2, 9 psi)
WBIA0570E
Page 544 of 5883
![NISSAN TIIDA 2007 Service Repair Manual RADIATOR
CO-63
< ON-VEHICLE REPAIR >[K9K]
C
D
E
F
G
H
I
J
K
L
MA
CO
N
P O
6. Disconnect radiator upper hose, reservoir tank hose and mounting bracket.
7. Disconnect radiator fan motor harness connecto NISSAN TIIDA 2007 Service Repair Manual RADIATOR
CO-63
< ON-VEHICLE REPAIR >[K9K]
C
D
E
F
G
H
I
J
K
L
MA
CO
N
P O
6. Disconnect radiator upper hose, reservoir tank hose and mounting bracket.
7. Disconnect radiator fan motor harness connecto](/img/5/57395/w960_57395-543.png)
RADIATOR
CO-63
< ON-VEHICLE REPAIR >[K9K]
C
D
E
F
G
H
I
J
K
L
MA
CO
N
P O
6. Disconnect radiator upper hose, reservoir tank hose and mounting bracket.
7. Disconnect radiator fan motor harness connectors.
8. Remove radiator core support cover.
9. Remove hood latch.
10. Disconnect horn and ambient temperature sensor harness connectors.
11. Remove radiator core support (upper).
12. Remove cooling fan and shroud assembly.
13. Release charge air cooler from the radiator. Refer to EM-270, "
Exploded View".
14. Remove A/C condenser to radiator bolts.
15. Remove radiator.
CAUTION:
Do not damage or scratch radiator core when removing.
INSTALLATION
Installation is in the reverse order of removal.
Check for engine coolant leaks. Refer to CO-58, "
Inspection".
InspectionINFOID:0000000001381593
INSPECTION AFTER INSTALLATION
Check for engine coolant leaks using rsuitable tools. Refer to CO-58, "Inspection".
Page 3648 of 5883

HRN-1
DRIVER CONTROLS
C
D
E
F
G
H
I
J
K
M
SECTION HRN
A
B
HRN
N
O
P
CONTENTS
HORN
PRECAUTION ...............................................2
PRECAUTION .....................................................2
Precaution for Supplemental Restraint System
(SRS) "AIR BAG" and "SEAT BELT PRE-TEN-
SIONER" ...................................................................
2
COMPONENT DIAGNOSIS ..........................3
HORN .................................................................3
Wiring Diagram .........................................................3
ON-VEHICLE REPAIR ..................................4
HORN .................................................................4
Removal and Installation ..........................................4
Page 3650 of 5883
HORN
HRN-3
< COMPONENT DIAGNOSIS >
C
D
E
F
G
H
I
J
K
MA
B
HRN
N
O
P
COMPONENT DIAGNOSIS
HORN
Wiring DiagramINFOID:0000000001702207
AWMWA0025GB
Page 3651 of 5883
HRN-4
< ON-VEHICLE REPAIR >
HORN
ON-VEHICLE REPAIR
HORN
Removal and InstallationINFOID:0000000001728320
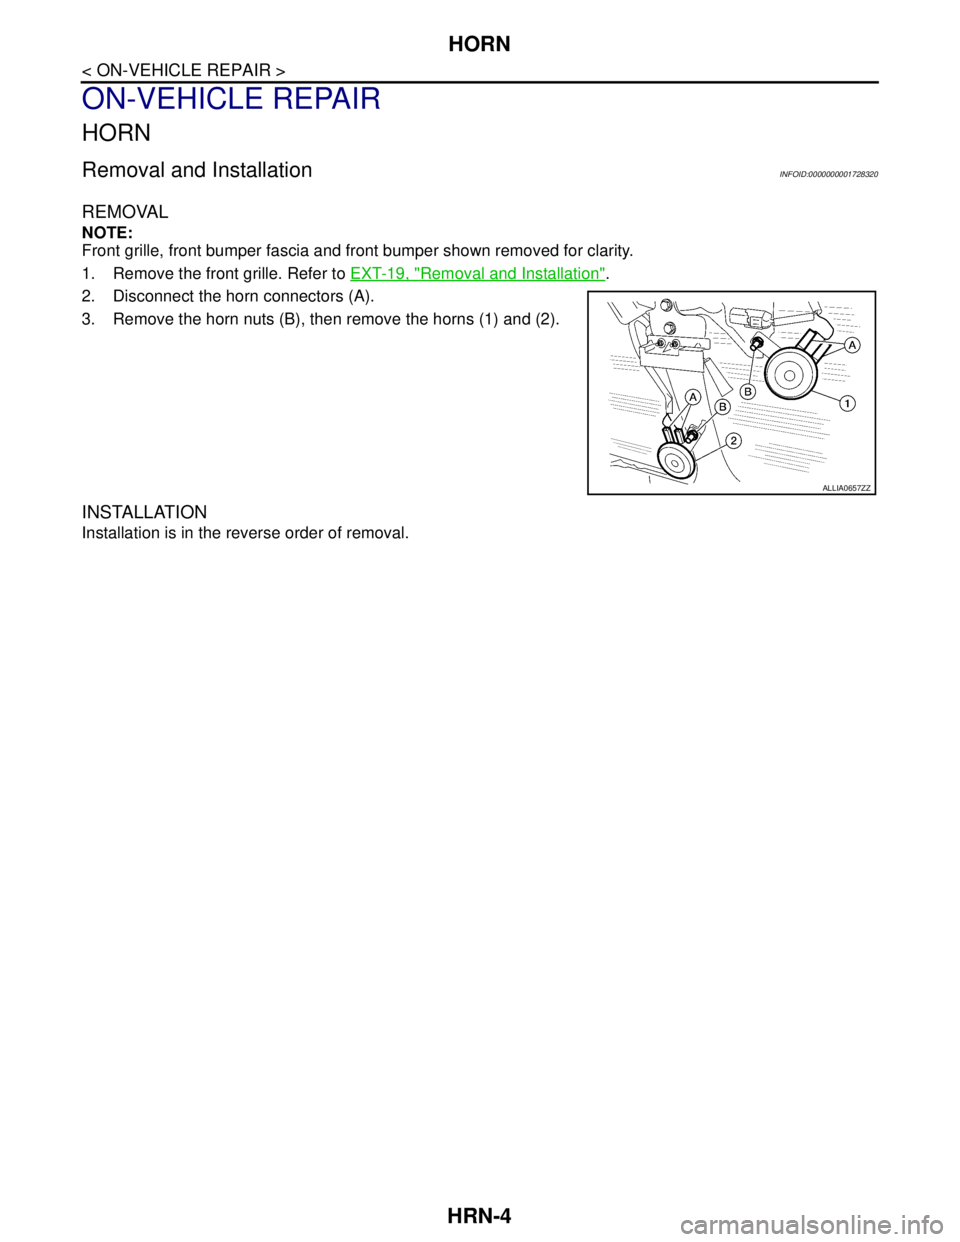
REMOVAL
NOTE:
Front grille, front bumper fascia and front bumper shown removed for clarity.
1. Remove the front grille. Refer to EXT-19, "
Removal and Installation".
2. Disconnect the horn connectors (A).
3. Remove the horn nuts (B), then remove the horns (1) and (2).
INSTALLATION
Installation is in the reverse order of removal.
ALLIA0657ZZ
Page 4265 of 5883
ENGINE MAINTENANCE (HR16DE)
MA-25
< ON-VEHICLE MAINTENANCE >
C
D
E
F
G
H
I
J
K
L
MB
MAN
OA
11. Refill reservoir tank to “MAX” level line with engine coolant.
12. Repeat steps 6 through 11 two or more times with radiator cap installed until engine coolant level no
longer drops.
13. Check cooling system for leaks with engine running.
14. Warm up engine, and check for sound of engine coolant flow while running engine from idle up to 3,000
rpm with heater temperature controller set at several position between “COOL” and “WARM”.
Sound may be noticeable at heater unit.
15. Repeat step 14 three times.
16. If sound is heard, bleed air from cooling system by repeating steps 6 through 11 until engine coolant level
no longer drops.
FLUSHING COOLING SYSTEM
1. Install reservoir tank if removed.
2. Install radiator drain plug.
If water drain plug on cylinder block is removed, close and tighten it. Refer to EM-100, "
Exploded
View".
CAUTION:
Be sure to clean radiator drain plug and install with new O-ring. Refer to CO-16, "
Component".
3. Fill radiator and reservoir tank with water and reinstall radiator cap.
4. Run engine and warm it up to normal operating temperature.
5. Rev engine two or three times under no-load.
6. Stop engine and wait until it cools down.
7. Drain water from the cooling system. Refer to CO-11, "
Changing Engine Coolant".
8. Repeat steps 1 through 7 until clear water begins to drain from radiator.
RADIATOR
RADIATOR : Checking RadiatorINFOID:0000000001730858
Check radiator for mud or clogging. If necessary, clean radiator as follows.
Be careful not to bend or damage radiator fins.
When radiator is cleaned without removal, remove all surrounding parts such as cooling fan, radiator shroud
and horns. Then tape harness and connectors to prevent water from entering.
1. Apply water by hose to the back side of the radiator core vertically downward.
2. Apply water again to all radiator core surface once per minute.
3. Stop washing if any stains no longer flow out from radiator.
4. Blow air into the back side of radiator core vertically downward.
Use compressed air lower than 490 kPa (4.9 bar, 5 kg/cm
2, 71 psi) and keep distance more than 30 cm
(11.8 in).
5. Blow air again into all the radiator core surfaces once per minute until no water sprays out.
FUEL LINES
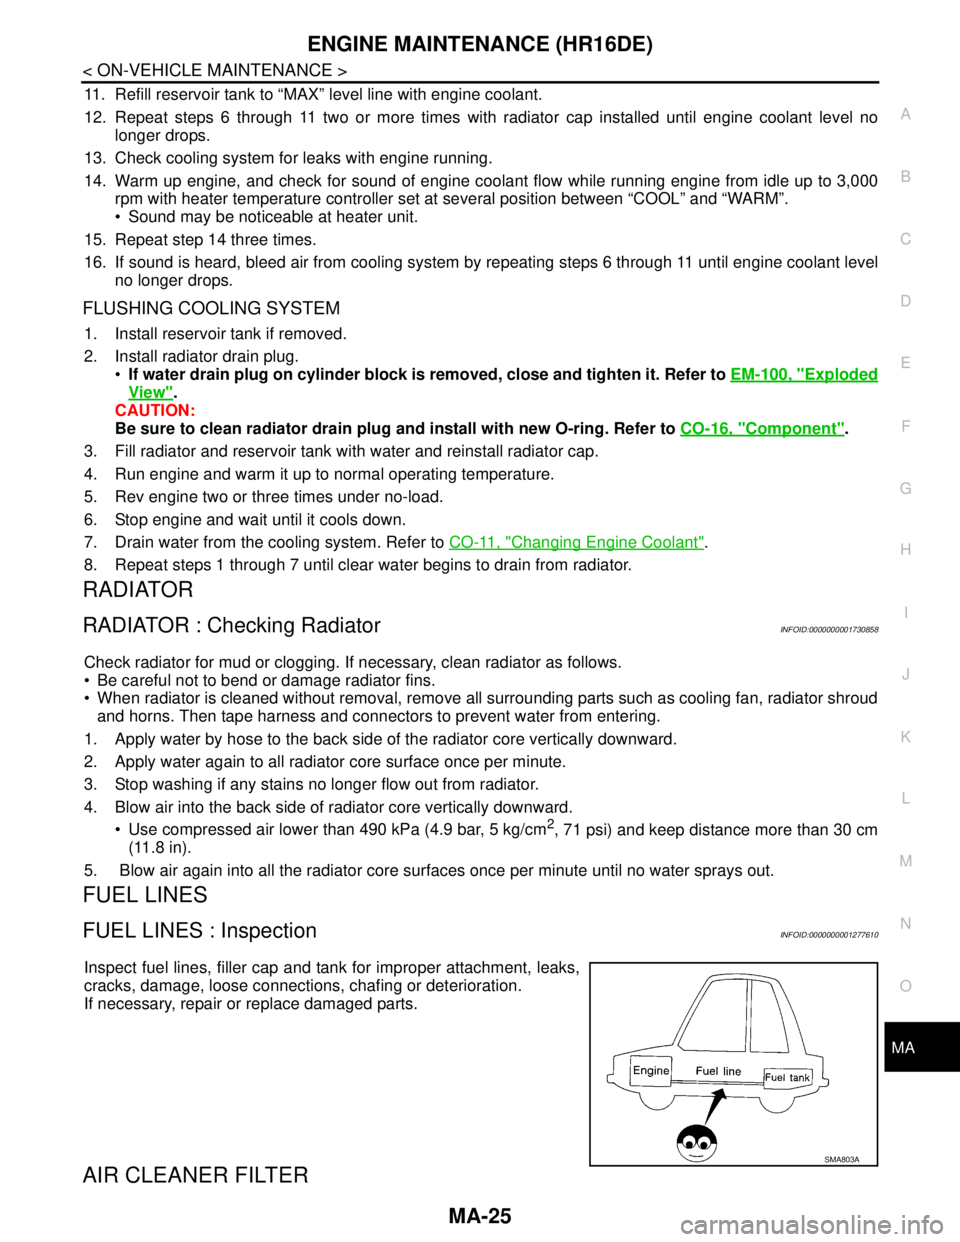
FUEL LINES : InspectionINFOID:0000000001277610
Inspect fuel lines, filler cap and tank for improper attachment, leaks,
cracks, damage, loose connections, chafing or deterioration.
If necessary, repair or replace damaged parts.
AIR CLEANER FILTER
SMA803A
Page 4274 of 5883
MA-34
< ON-VEHICLE MAINTENANCE >
ENGINE MAINTENANCE (MR18DE)
RADIATOR : Checking Radiator Cap
INFOID:0000000001730871
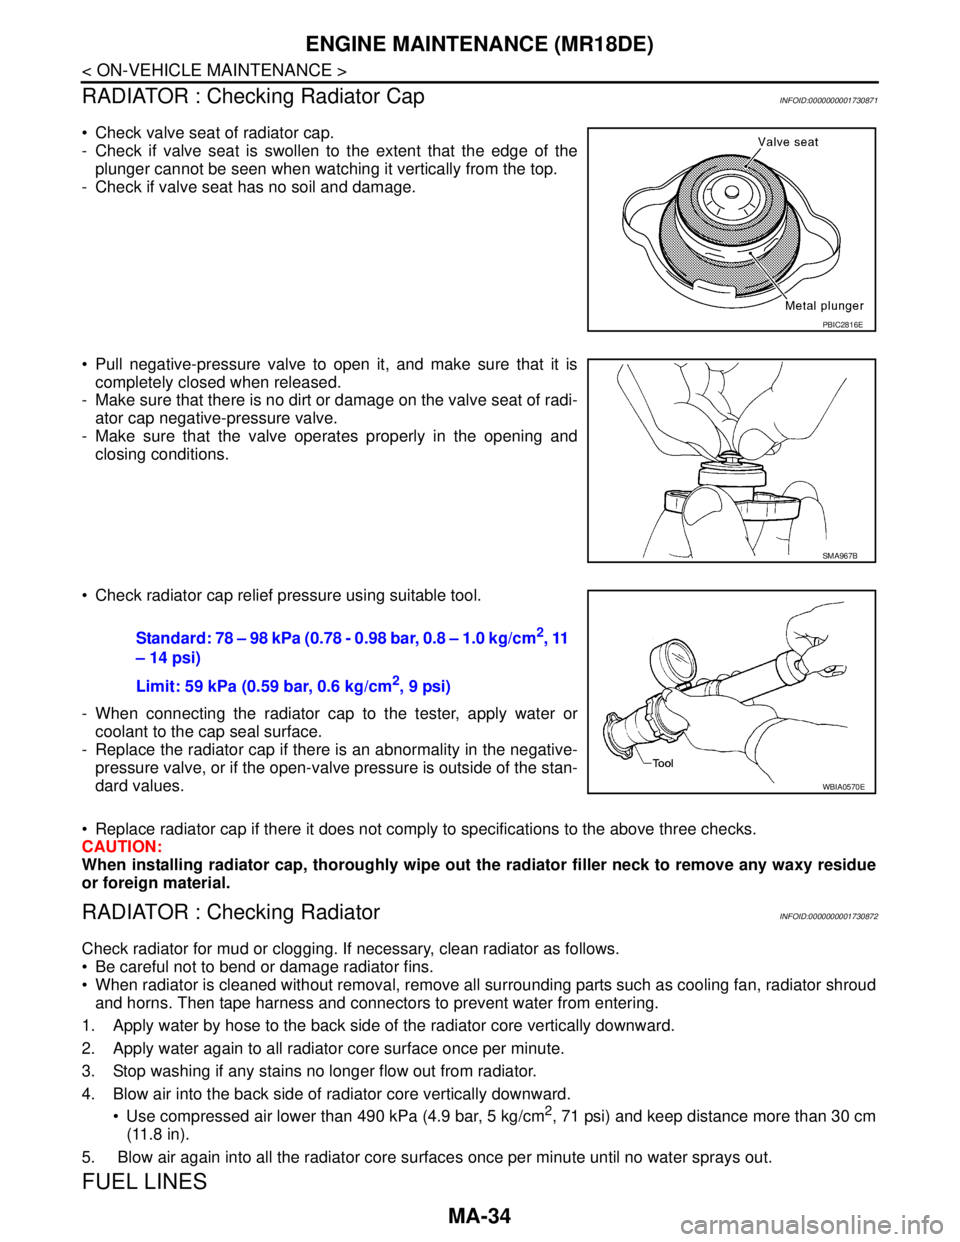
Check valve seat of radiator cap.
- Check if valve seat is swollen to the extent that the edge of the
plunger cannot be seen when watching it vertically from the top.
- Check if valve seat has no soil and damage.
Pull negative-pressure valve to open it, and make sure that it is
completely closed when released.
- Make sure that there is no dirt or damage on the valve seat of radi-
ator cap negative-pressure valve.
- Make sure that the valve operates properly in the opening and
closing conditions.
Check radiator cap relief pressure using suitable tool.
- When connecting the radiator cap to the tester, apply water or
coolant to the cap seal surface.
- Replace the radiator cap if there is an abnormality in the negative-
pressure valve, or if the open-valve pressure is outside of the stan-
dard values.
Replace radiator cap if there it does not comply to specifications to the above three checks.
CAUTION:
When installing radiator cap, thoroughly wipe out the radiator filler neck to remove any waxy residue
or foreign material.
RADIATOR : Checking RadiatorINFOID:0000000001730872
Check radiator for mud or clogging. If necessary, clean radiator as follows.
Be careful not to bend or damage radiator fins.
When radiator is cleaned without removal, remove all surrounding parts such as cooling fan, radiator shroud
and horns. Then tape harness and connectors to prevent water from entering.
1. Apply water by hose to the back side of the radiator core vertically downward.
2. Apply water again to all radiator core surface once per minute.
3. Stop washing if any stains no longer flow out from radiator.
4. Blow air into the back side of radiator core vertically downward.
Use compressed air lower than 490 kPa (4.9 bar, 5 kg/cm
2, 71 psi) and keep distance more than 30 cm
(11.8 in).
5. Blow air again into all the radiator core surfaces once per minute until no water sprays out.
FUEL LINES
PBIC2816E
SMA967B
Standard: 78 – 98 kPa (0.78 - 0.98 bar, 0.8 – 1.0 kg/cm2, 11
– 14 psi)
Limit: 59 kPa (0.59 bar, 0.6 kg/cm
2, 9 psi)
WBIA0570E