change time Oldsmobile Bravada 2003 s User Guide
[x] Cancel search | Manufacturer: OLDSMOBILE, Model Year: 2003, Model line: Bravada, Model: Oldsmobile Bravada 2003Pages: 410, PDF Size: 20.1 MB
Page 165 of 410
Display Language
To select your personalization for display language, press the select button while DISPLAY LANGUAGE is
displayed on the DIC. Pressing the select button
will scroll through the available languages:
Choosing a language will display all of the information
on the DIC in the desired language.
If you accidentally choose a language that you don’t
want or understand, press and hold the personalization
button and the trip information button at the same
time. The DIC will begin scrolling through the languages
in their particular language. English will be in English,
French will be in French and
so on. When you see
the language that you would like, release both buttons.
The DIC will then display the information in the language you chose.
Choose one of the options and press the personalization
button while it is displayed on the DIC to select it.
Select
The select button is used to reset certain functions and
turn
off or acknowledge messages on the DIC display.
The select button also toggles through the options
available in each personalization menu. For example, this
button will reset the trip odometers, turn
off the FUEL
LEVEL LOW message, and toggle through the languages
you can select the DIC to display information in.
DIC Warnings and Messages
Warning messages are displayed on the DIC to notify
the driver that the status of the vehicle has changed and
that some action may be needed by the driver to
correct the condition. More than one message may
appear at one time. They will appear one behind
the other. Some messages may not require immediate
action but you should press the select button to
acknowledge that you received the message and clear it
from the display. Some messages cannot be cleared
from the display because they are more urgent. These
messages require action before they can be removed
from the DIC display. The following are the possible
messages that can be displayed and some information
about them.
ENGINE COOLANT HOThDLE ENGINE
If the cooling system temperature gets hot, this
message will appear in the DIC and you will hear a
chime. Stop the vehicle and let the engine idle in
PARK (P) to allow the coolant to reach a safe
temperature. This message will clear when the coolant
temperature drops to a safe operating temperature.
3-52
Page 170 of 410
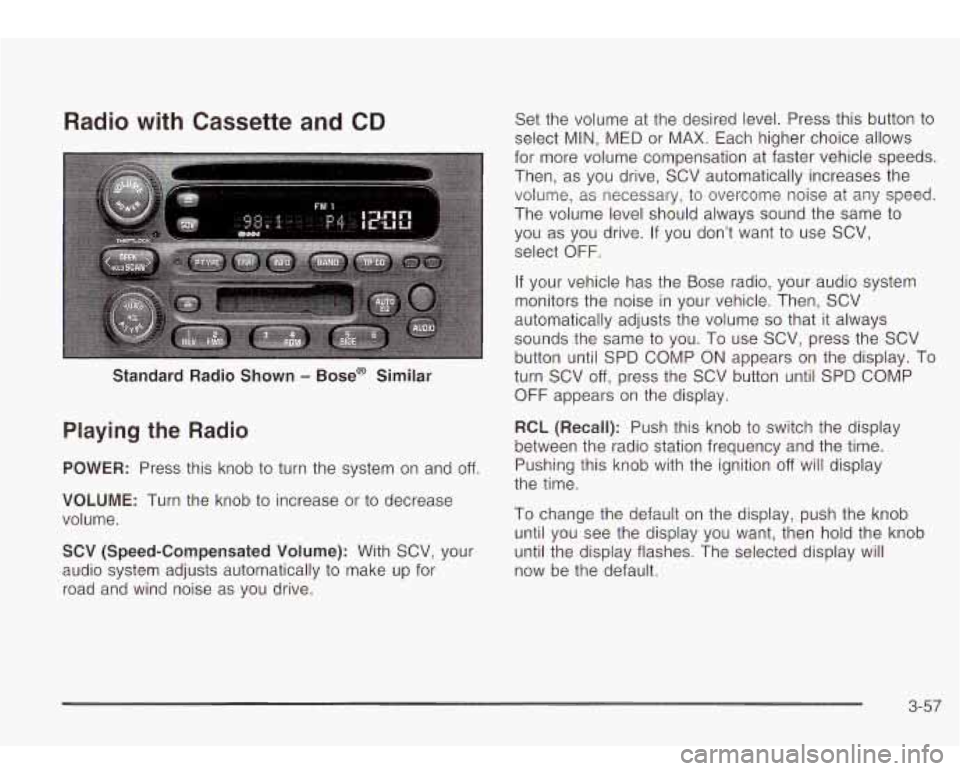
Radio with Cassette and CD
Standard Radio Shown - Bose@ Similar
Playing the Radio
POWER: Press this knob to turn the system on and off.
VOLUME: Turn the knob to increase or to decrease
volume.
SCV (Speed-Compensated Volume): With SCV, your
audio system adjusts automatically
to make up for
road and wind noise as you drive. Set
the volume at the desired level. Press this button to
select MIN, MED or MAX. Each higher choice allows
for more volume compensation at faster vehicle speeds.
Then, as you drive, SCV automatically increases the
volume, as necessary,
to overcome noise at any speed.
The volume level should always sound the same
to
you as you drive. If you don’t want to use SCV,
select
OFF.
If your vehicle has the Bose radio, your audio system
monitors the noise in your vehicle. Then, SCV
automatically adjusts the volume
so that it always
sounds the same to you. To use SCV, press the SCV
button until SPD COMP ON appears on the display.
To
turn SCV off, press the SCV button until SPD COMP
OFF appears on the display.
RCL (Recall): Push this knob to switch the display
between the radio station frequency and the time.
Pushing this knob with the ignition
off will display
the time.
To change the default on the display, push the knob
until you see the display you want, then hold the knob
until the display flashes. The selected display will
now be the default.
3-57
Page 178 of 410
AUTO EQ (Automatic Equalizer): Press this button to
select the desired equalization setting while playing a
compact disc. The equalization will be automatically set
whenever you play a compact disc. See “AUTO EQ”
listed previously for more information.
< SEEK > : Press the left arrow to go to the start of
the current track
if more than eight seconds have
played. Press the right arrow
to go to the next track. If
you hold this button or press it more than once, the
player will continue moving backward or forward through
the disc.
< SCAN > : Press and hold either arrow for more
than two seconds until you hear a beep and SCAN
appears on the display. The disc will go
to the next
track, play for a few seconds, then go on
to the
next track. SCAN and the track number will appear on
the display. Press this button again
to stop scanning.
RCL (Recall): Press this knob to see how long the
current track has been playing. To change the default
on the display (track or elapsed time), push the
knob until you see the display you want, then hold the
knob until the display flashes. The selected display
will now be the default. While elapsed time is showing,
EL TM will appear on the display.
BAND: Press this button to listen to the radio when a
CD is playing.
TP CD (Tape): Press this button to play a cassette
tape or a CD when listening
to the radio. Press TP CD
to switch between the tape and compact disc
if both
are loaded. The inactive tape or CD will remain safely
inside the radio for future listening. The display will
show the TAPE and CD symbols.
A (Eject): Press this button to eject a CD. Eject may
be activated with either the ignition or radio
off. CDs
may be loaded with the radio and ignition
off if this
button is pressed first.
Compact Disc Messages
CHECK CD: If this message appears on the radio
display and the disc comes out, it could be for one of
the following reasons:
You’re driving on a very rough road. When the road
becomes smoother, the disc should play.
0 The disc is dirty, scratched, wet or upside down.
The air is very humid. If so, wait about an hour and
try again.
If the CD is not playing correctly, for any other reason,
try a known good CD.
If any error occurs repeatedly or
if an error can’t be
corrected, contact your dealer. If your radio displays an
error message, write it down and provide it to your
dealer when reporting the problem.
3-65
Page 179 of 410

Radio with Six-Disc CD Set the volume at the desired level. Press this button to
select MIN, MED or MAX. Each higher setting will
allow for more volume compensation at faster vehicle
speeds. Then, as you drive, automatic volume increases
the volume, as necessary,
to overcome noise at any
speed. The volume level should always sound the same
to you as you drive. If you don’t want to use automatic
volume, select OFF.
RCL (Recall): Push this knob to switch the display
between the time and the radio station frequency. Push
this knob with the ignition
off to display the time.
To change the default on the display, push the knob
until you see the display you want, then hold the knob
for two seconds. The radio will produce one beep
Playing the Radio and selected display will now be the default.
PWR (Power): Push this knob to turn the system on
and
off.
VOL (Volume): Turn the knob to increase or to
decrease volume.
AUTO VOL (Automatic Volume): Your system has a
feature called automatic volume. With
this feature,
your audio system adjusts automatically
to make up for
road and wind noise as you drive.
Finding a Station
AM FM: Press this button to switch between AM, FM1
and
FM2. The display will show your selection.
TUNE: Turn this knob to select radio stations.
k SEEK >i : Press the right or the left arrow to go to
the next or to the previous station and stay there.
The radio will seek only
to stations that are in the
selected band and only
to those with a strong signal.
3-66
Page 187 of 410
RDM (Random): With random, you can listen to the
tracks
in random, rather than sequential, order, on one
disc or on all of the discs. To use random, do one
of the following:
To play the tracks on the disc you are listening to in
random order, press and hold RDM for more than
two seconds. You will hear a beep and RANDOM
ONE will appear on the display. Press RDM again to
turn it
off.
0 To play the tracks on all of the discs that are
loaded in random order, press and release the RDM
button. RANDOM ALL will appear on the display.
Press RDM again
to turn it off.
AUTO EQ (Automatic Equalization): Press AUTO EQ
to select the desired equalization setting while playing
a compact disc. The equalization will be automatically
set whenever you play a compact disc. For more
information on AUTO
EQ, see “AUTO EQ” listed
previously in this section.
k SEEK >I : Press the left arrow to go to the start of
the current track,
if more than ten seconds have passed.
Press the right arrow
to go to the next track. If you
press the button more than once, the player will continue
moving backward or forward through the disc.
I< SCAN >I : To scan one disc, press and hold either
SCAN arrow for more than two seconds until SCAN
appears on the display and you hear a beep. Use this
feature
to listen to 10 seconds of each track of the
currently selected disc. SCAN will appear on the display.
Press either SCAN arrow again, to stop scanning.
To scan all loaded discs, press and hold either SCAN
arrow for more than four seconds until DISC SCAN
appears on the display and you hear a beep. Use this
feature
to listen to 10 seconds of the first tracks of each
disc loaded. Press either SCAN arrow again, to stop
scanning.
RCL (Recall): Push this knob to see how long the
current track has been playing. To change the default
on the display (track and elapsed time), push the
knob until you see the display you want, then hold the
knob until the display flashes. The selected display
will now be the default.
AM FM: Press this button to play the radio when a
disc(s) is in the player.
3-74
Page 190 of 410
Headphones Battery Replacement
The entertainment system includes two IR wireless
headphones.
Mini-headphone jacks are also provided for use with
customer provided headphones.
The wireless headphones have an ON/OFF switch and
a volume control. To use the headphones turn the
switch to ON. An indicator light will illuminate.
If the light
does not illuminate, the batteries may need
to be
replaced. See
Battery Replacement later in this section
for more information. Switch the headphones
to OFF
when not in use.
If the system is shut
off, or if the headphones are out of
range of the IR transmitters below the overhead RSE
control panel for more than three minutes, the
headphones will shut
off automatically to save the
batteries.
If you move too far forward or step out of the
vehicle, the headphones will cut
out.
To adjust the volume on the headphones, use the
volume control.
Notice: Do not store the headphones in heat or
direct sunlight. This could damage the headphones
and would not be covered by your warranty.
Keep the headphones stored in a cool place.
To change the batteries, do the following:
1. Loosen the screw on the battery compartment door
located on the left side of the headphones.
2. Replace the two AAA batteries in the compartment.
3. Tighten the screws to close the compartment door
If the headphones are to be stored for a long period
of time, remove the batteries and keep them in a cool,
dry place. Make sure that they are installed correctly.
Stereo RCA Jacks
The
RCA jacks and the mini-headphone jacks are
located behind the video screen on the overhead
console. The RCA jacks allow you to hook up an
auxiliary device such as a camcorder or a video game
unit. The yellow RCA jack is used for video and the
red and white RCA jacks are used for audio.
You may
require adapter connectors or cables
to connect
your auxiliary device
to the RCA jacks. Refer to the
manufacturer’s instructions for proper usage. The
mini-headphone jacks allow you to hook up two
customer provided wired headphones.
3-77
Page 195 of 410
STOP: Press this button to stop playing, reversing
or fast forwarding the DVD.
A EJECT/LOAD: Press this button to eject a DVD
while it is playing. If the disc has been ejected and not
removed from the player, pressing this button will
load the disc. The stop/eject button on the DVD player
will also load the disc
if the disc is ejected and not
removed.
a REW (Rewind): Press this button to reverse the
DVD at
5x speed. To stop reversing, press this
button again. This button may not work when the DVD
is playing the copyright or the previews.
FWD (Fast Forward): Press this button to fast
forward the DVD at
5x speed. To stop fast forwarding,
press this button again. This button may not work
when the DVD is playing the copyright
or the previews.
PREV (Previous): Press this button to return to
the start of the current chapter. Press this button again
to return to the previous chapter. This button may
not work when the DVD is playing the copyright or the
previews.
bb! NEXT: Press this button to jump to the beginning
of the next chapter. This button may not work when
the DVD is playing the copyright or the previews.
MENU: Press this button to view the media menu. The
media menu is different on every disc. Use the up
and down and the right and the left arrow buttons
to
move the cursor around the media menu. After making
your selection, press the ENTER button. Some discs
may contain a short skit leading up
to the media menu.
+cI WIRED VOLUME: Press the plus or the minus
symbol
to increase or to decrease the volume of
the wired headphones.
You can press repeatedly or
press and hold the plus or the minus symbol
to increase
or
to decrease the volume in large amounts.
a SIZE/ANGLE: This button controls the screen
ratio of the video display. Press and release this button
to stretch a 4:3 picture to fit the wide aspect ratio 16.9
screen.
Press and release this button
to choose different angles
of the same scene. Press and hold this button again
to change angles. This feature is not available on
all DVD discs.
DISP/S-TITLE (Display Subtitle) CHAP TRK (Chapter
Track):
Press and release this button to display the
title, chapter and elapsed time of the current video
segment or the track and time
if a CD is being played.
Press and hold this button
to see the DVDs subtitle
language. Press and release this button again
to change
it. This feature is not available on all DVD discs.
3-82
Page 196 of 410
CQMP/AUDIO (Compression) CQMP: Press and
release this button
to display the current compression
displayed on the screen. Press this button again
to
select the next compression state. Three compression
states are available inciuding minimum, standard
and
off. The compression feature only functions on AC3
(Dolby@ Digital Surround) encoded DVD video discs.
Press and hold this button
to see if the DVD playing has
optional audio tracks, such as different languages or
commentaries. Press and release to change selections.
INPUT/TITLE DVD AUX (Auxiliary): Press and
release this button to switch between the auxiliary input
device and the DVD player.
Press and hold this button to see a display of the DVD’s
titles. Press and release
to change the titles available.
6-h RTN (Return): When a DVD menu is active
and this button is pressed, the selected option will be
disabled. This button could have different functions with
different discs.
SCREEN BRIGHTNESS: Press the plus or the
minus symbol
to increase or to decrease the brightness
of the screen. This button can also be found on the
video screen.
-:q- LIGHT: Press this button to illuminate the keypad
for about eight seconds.
Setup Menu
To access the setup menu, ensure a DVD is in the
player and the video is in stop mode. Press the menu
key. Once the menu is activated, use the UP, DOWN, RIGHT,
LEFT, and Enter buttons to navigate the screen.
The setup menu allows the use
to select default
preferences for Menu Language, Subtitle Language,
Audio Language, TV Aspect, TV Mode, and Dynamic
Range Compression.
Not all DVDs support all the feature defaults in the
setup menus. In the event a particular feature is
not supported, defaults will be provided by the DVD
media.
Exit the setup menu by pressing the RETURN button on
the remote control. If you make changes
to the system
setup defaults, the disc will resume play from the
beginning and not where it previously left off.
Battery Replacement
To change the batteries, do the following:
1. Unclip the battery door located on the back of the
2. Replace the two AAA batteries in the compartment.
3. Close the battery door securely.
remote control.
Make sure that they are installed correctly.
If the remote control is to be stored for a long period of
time, remove the batteries and keep them in a cool,
dry place.
3-83
Page 199 of 410
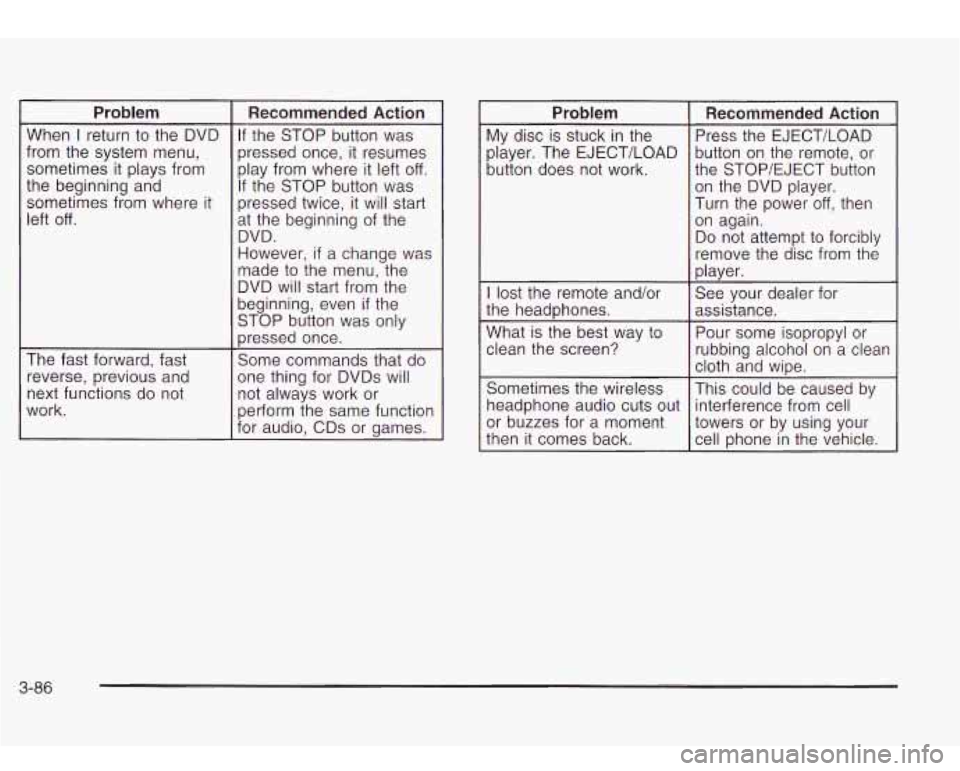
Problem
When I return to the DVD
from the system menu,
sometimes it plays from
the beginning and
sometimes from where it
left
off.
The fast forward, fast reverse, previous and
next functions do not
work.
Recommended Action
If the STOP button was
pressed once, it resumes
play from where it left
off.
If the STOP button was
pressed twice, it will start
at the beginning of the
DVD.
However,
if a change was
made to the menu, the
DVD will start from the
beginning, even
if the
STOP button was only
pressed once.
Some commands that do
one thing for DVDs will
not always work or
perform the same function
for audio, CDs or games.
- Problem
My disc is stuck in the
player. The EJECT/LOAD
button does not work.
Recommended Action
Press the EJECT/LOAD
button on the remote, or
the STOP/EJECT button
on the DVD player.
Turn the power
off, then
on again.
Do not attempt
to forcibly
remove the disc from the
player.
I lost the remote and/or
Pour some isopropyl or
What
is the best way
to
assistance.
the
headphones. See
your dealer for
clean the screen?
rubbing alcohol on
a clean
Sometimes the wireless
This could be caused by
headphone audio cuts out interference from cell
or buzzes for a moment
towers or by using your
then it comes back.
cell Dhone in the vehicle.
cloth and
wipe.
3-86
Page 213 of 410
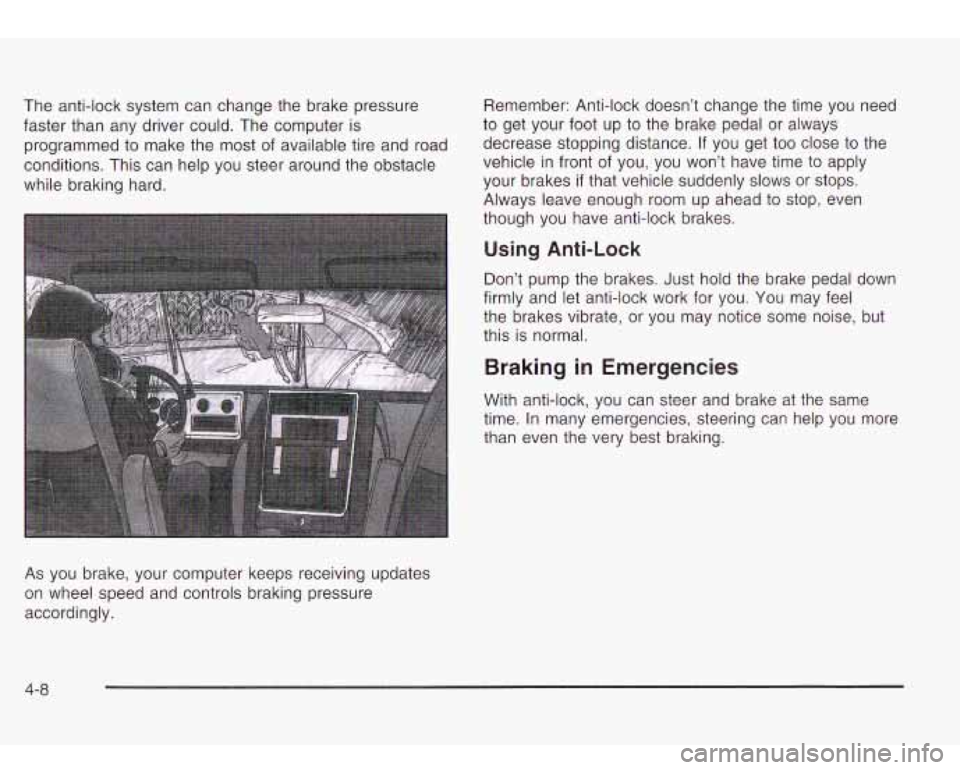
The anti-lock system can change the brake pressure
faster than any driver could. The computer is
programmed to make the
most of available tire and road
conditions. This can help you steer around the obstacle
while braking hard.
As you brake, your computer keeps receiving updates
on wheel speed and controls braking pressure
accordingly. Remember:
Anti-lock doesn’t change the time you need
to get your foot up to the brake pedal or always
decrease stopping distance. If you get too close to the
vehicle in front of you, you won’t have time to apply
your brakes
if that vehicle suddenly slows or stops.
Always leave enough room up ahead
to stop, even
though you have anti-lock brakes.
Using Anti-Lock
Don’t pump the brakes. Just hold the brake pedal down
firmly and let anti-lock work for you. You may feel
the brakes vibrate, or you may notice some noise, but
this is normal.
Braking in Emergencies
With anti-lock, you can steer and brake at the same
time. In many emergencies, steering can help you more
than even the very best braking.
4-8