radio OLDSMOBILE SILHOUETTE 1997 Owners Manual
[x] Cancel search | Manufacturer: OLDSMOBILE, Model Year: 1997, Model line: SILHOUETTE, Model: OLDSMOBILE SILHOUETTE 1997Pages: 436, PDF Size: 21.87 MB
Page 95 of 436

Lockout Deterrent
The Lockout Deterrent feature makes it difficult for you
to lock your keys in your vehicle. If the driver’s door is
open while the keys are in the ignition, you will not be
able to use your power door lock to lock the vehicle.
If you don’t leave the keys
in the ignition or if you
use the manual door lock, you could still lock your
keys in your vehicle. Always remember to take your
keys with
you.
To turn this feature off or on, see “Locks and Lighting
Choices” in the Index.
Leaving Your Vehicle
If you are leaving the vehicle, take your keys, open your
door and set the locks from the inside. Then get out and
close the door.
Remote Lock Control (Option)
If your Oldsmobile has this option, you can lock and
unlock your doors and the liftgate using the key chain
transmitter supplied with your vehicle.
LOCK
Your Remote Lock Control operates on a radio frequency
subject
to Federal Communications Commission (FCC)
Rules and with Industry and Science Canada Rules.
This device complies with Part
15 of the FCC Rules.
Operation is subject to the following
two conditions:
( 1 ) this device may not cause harmful interference,
and
(2) this device must accept any interference
received, including interference that may cause
undesired operation.
2-7
ProCarManuals.com
Page 107 of 436

Resetting the Power Sliding Door
The power sliding door may operate incorrectly or not
all because of the following conditions:
0 A low voltage or dead battery,
Disconnecting the battery or
If the IGN 1, B/U LAMP, RADIO or PWR
SEAT/PSD fuse is removed or blown.
See “Fuse Panel”
in the Index for more information
about your fuse panel.
If any
of these conditions occur, the power sliding door
will need to be reset.
To do this, follow the directions
listed here.
It will be easier if you read through them
once before beginning this procedure.
1.
2.
3.
4.
5.
6.
Check to be sure the power sliding door is unlocked
and securely closed.
Turn the ignition switch to
the OFF position.
Enable the power sliding door override feature.
Remove the RADIO fuse from the underhood fuse
and relay center. Leave
it out for 30 seconds.
Reinstall the fuse and wait
10 seconds.
Disable
the power sliding door override feature.
7. Push either of the power door buttons to open the
power sliding door.
8. Wait five seconds and close the door by pushing
either power door button.
9. Wait five seconds and repeat Steps 7 and 8.
If the door does not rest in the fully open position
after repeating Step
7, repeat Steps 7 and 8 again. If
the door still does not operate correctly, see your
retailer for service.
Sliding Door Security Lock
Your Oldsmobile is equipped with a sliding door
security lock that helps prevent young children or other
passengers from opening the sliding door from the
inside. This lock is on both doors if your vehicle has the
dual sliding doors.
If you have the optional power sliding door, you can
override the security lock by pressing either power
door switch when the power sliding door override
feature is disabled. See “Power Sliding Door” earlier
in the section.
The security lock lever
is located on the inside of the
sliding door, on the front edge of the door.
To access the
lever, open the sliding door. Use the security lock label
on the edge of the door
as a guide.
ProCarManuals.com
Page 115 of 436
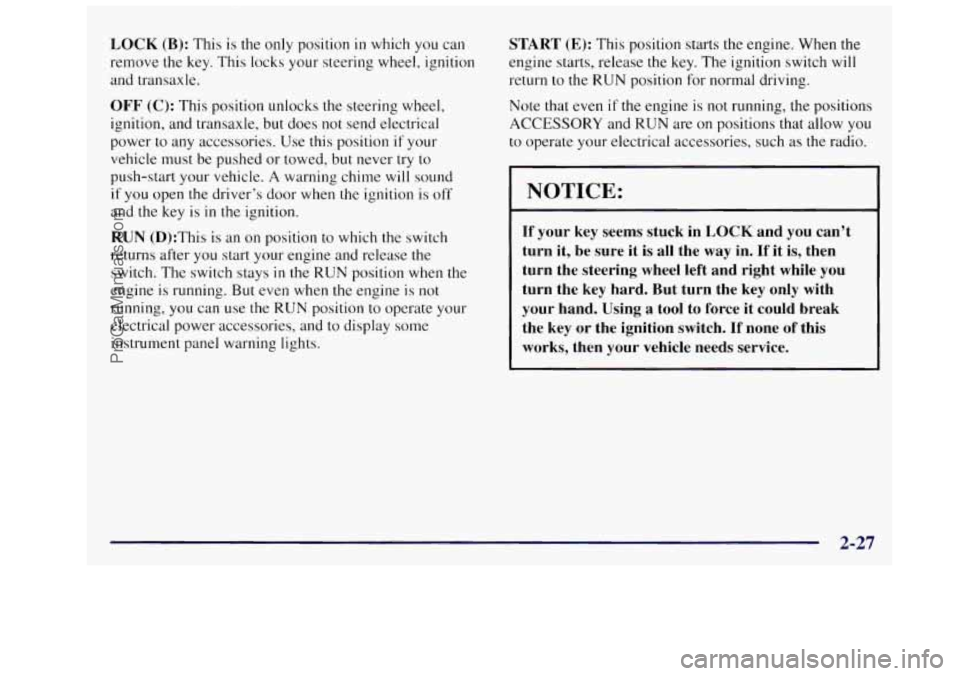
LOCK (B): This is the only position in which you can
remove
the key, This locks your steering wheel, ignition
and transaxle.
OFF (C): This position unlocks the steering wheel,
ignition, and transaxle, but does not send electrical
power to any accessories. Use this position if your
vehicle must be pushed or towed, but never try to
push-start your vehicle.
A warning chime will sound
if you open the driver’s door when the ignition is off
and the key is in the ignition.
RUN (D):This is an on position to which the switch
returns after
you start your engine and release the
switch. The switch stays
in the RUN position when the
engine is running. But even when
the engine is not
running, you can use the
RUN position to operate your
electrical power accessories, and to display some
instrument panel warning lights.
START (E): This position starts the engine. When the
engine starts, release the key. The ignition switch will
return to the
RUN position for normal driving.
Note that
even if the engine is not running, the positions
ACCESSORY and RUN are on positions that allow you
to operate your electrical accessories, such as the radio.
NOTICE:
If your key seems stuck in LOCK and you can’t
turn it, be sure it is all the
way in. If it is, then
turn the steering wheel left and right while
you
turn the key hard. But turn the key only with
your hand. Using
a tool to force it could break
the key
or the ignition switch. If none of this
works, then your vehicle needs service.
2-27
ProCarManuals.com
Page 130 of 436
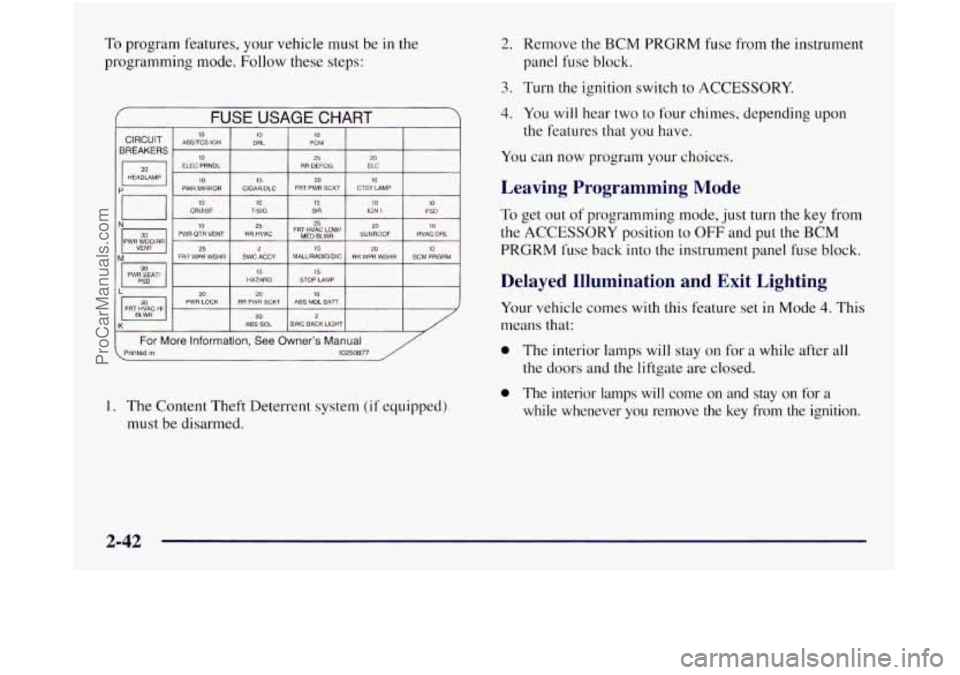
To program features, your vehicle must be in the
programming mode. Follow these steps:
f FUSE USAGE CHART
10 TISIG 15 SIR io IGN 1 10 PSD
I N- I PWH WTJOmR 30 111 PWR QTR VENT RR HVAC FRT MED HVAC BLWR Low’ SUNROOF HVACIDRL
VENT
25 20 M FRT WPR WSHR SWC ACCY MALLIRADIOIDIC RH WPR WSHR BCM PRGRM
PWR SEAT/ HAZARD
15 STOP LAMP
20 10 2u PWR LOCK ABS MDL BAi7 RR PWR SCKT FRT HVAC HI 20 2 ABS SOL SWC BACK LIGHT
( For More information, See Owner’s Manual Printed in 10250877
1. The Content Theft Deterrent system (if equipped)
must be disarmed.
2. Remove the BCM PRGRM fuse from the instrument
panel fuse block.
3. Turn the ignition switch to ACCESSORY.
4. You will hear two to four chimes, depending upon
the features that you have.
You can now program your choices.
Leaving Programming Mode
To get out of programming mode, just turn the key from
the ACCESSORY position to OFF and put the BCM
PRGRM fuse back into the instrument panel fuse block.
Delayed Illumination and Exit Lighting
Your vehicle comes with this feature set in Mode 4. This
means that:
0 The interior lamps will stay on for a while after all
the doors and the liftgate are closed.
0 The interior lamps will come on and stay on for a
while whenever you remove the key from the ignition.
2-42
ProCarManuals.com
Page 172 of 436
Accessory Power Outlet
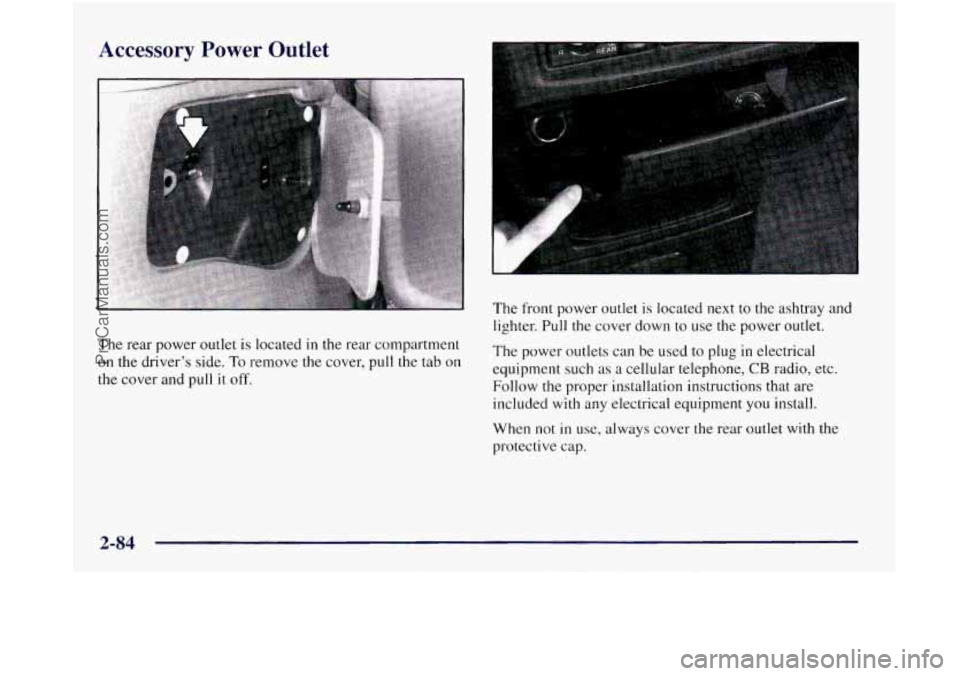
The rear power outlet is located in the rear compartment
on the driver’s side. To remove the cover, pull the tab on
the cover and pull it off.
The front power outlet is located next to the ashtray and
lighter. Pull the cover down to use the power outlet.
The power outlets can be used to plug in electrical
equipment such as
a cellular telephone, CB radio, etc.
Follow the proper installation instructions that are
included with any electrical equipment you install.
When not
in use, always cover the rear outlet with the
protective cap.
2-84
ProCarManuals.com
Page 182 of 436
Air Bag Readiness Light
There is an air bag readiness light on the instrument
panel, which shows a deployed air bag. The system
checks the air bag’s electrical system for malfunctions.
The light tells you if there is an electrical problem. The
system check includes
the air bag sensors, the air bag
module, the wiring and the diagnostic module. For
more information on the air bag system, see “Air Bag”
in the Index.
This light will come on
when you start your engine,
and it will tlash for a few
seconds. Then the light
should
go out. This means
the system
is ready.
If
the air bag readiness light stays on after you start the
engine or comes
on when you are driving, your air bag
system may not work properly. Have your vehicle
serviced right away. The air
bag readiness light should flash for a few
seconds when you turn the key to
RUN. If the light
doesn’t come on then, have
it fixed so it will be ready to
warn you if there is a problem.
Charging System Indicator Light
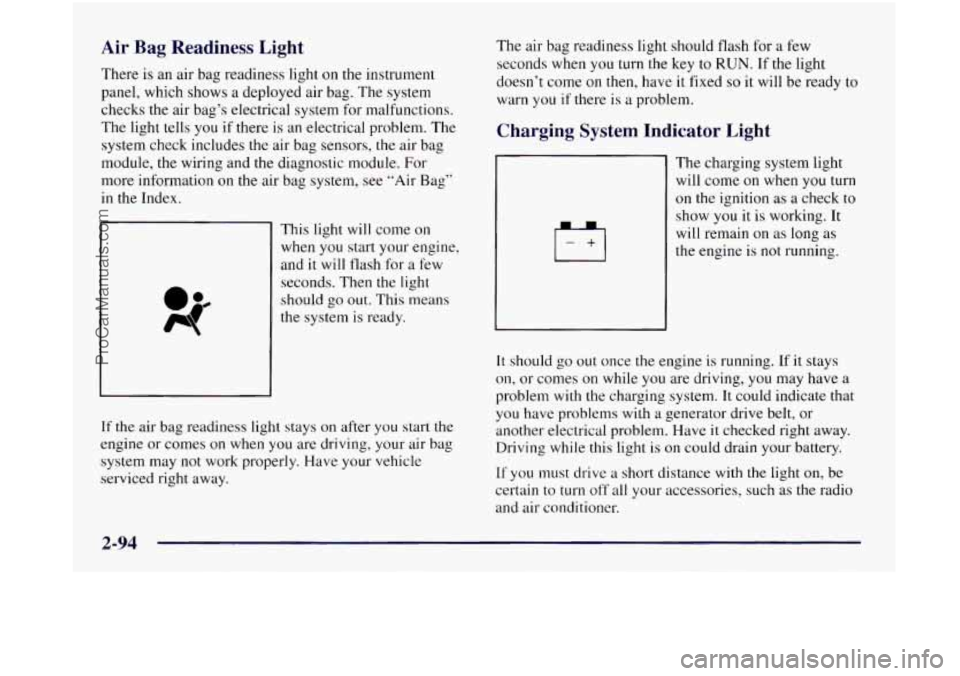
1+1
The charging system light
will come on when you turn
on the ignition as a check to
show you it is working. It
will remain on as long as
the engine is
not running.
It should go out once the engine is running. If it stays
on, or comes on while you are driving, you may have a
problem with the charging system. It could indicate that
you have problems with a generator drive belt, or
another electrical problem. Have
it checked right away.
Driving while this light is on could drain your battery.
If you must drive a short distance with the light on, be
certain to turn
off all your accessories, such as the radio
and air conditioner.
ProCarManuals.com
Page 195 of 436

Section 3 Comfort Controls and Audio Syster1.-
In this section, you’ll find out how to operate the comfort control and audio systems offered with your Oldsmobile.
Be sure
to read about the particular systems supplied with your vehicle.
3-2 3-3
3-4
3-4
3-5
3-8
3-8
3-9
3-9
3-15 Comfort Controls
Air Conditioning
Heating Ventilation System and Tips
Rear Climate Control
Tips for Defogging and Defrosting
Rear Window Defogger
Setting the Clock
Radios
Rear Seat Audio
3- 17
3 -24
3-26
3-27
3-27
3-28
3-28
3-30
3-30 Remote Compact
Disc Player
Theft-Deterrent Feature
Steering Wheel Controls
Understanding Radio Reception
Tips About Your Audio System
Adding Sound Equipment to Your Vehicle
Care
of Your Cassette Tape Player
Care
of Your Compact Discs
Antenna
ProCarManuals.com
Page 203 of 436

Setting the Clock for Systems with
NOTICE: Automatic Tone Control
Press and hold HR until the correct hour appears. Press
and hold
MN until the correct minute appears. Don’t use a razor blade or something else sharp
on the inside of the rear window. If you do, you
could cut or damage the warming grid, and the
AM-FM Stereo
I repairs wouldn’t be covered by your warranty.
I
Audio Systems
Your Deb@ audio system has been designed to operate
easily and give years
of listening pleasure. You will get
the most enjoyment out of it if you acquaint yourself
with it first. Find out what your Delco system can do
and how to operate all its controls, to be sure you’re
getting the most out of the advanced engineering that
went into
it.
Setting the Clock for Systems without
Automatic Tone Control
Press SET. Set will appear on the display for five
seconds. Within five seconds, press and hold
the right
arrow on the
SEEK button until the correct minute
appears. Press and hold the left arrow on
the SEEK
button until the correct hour appears.
Playing the Radio
VOLUME: This knob turns the system on and off and
controls the volume.
To increase volume and turn the
radio on, turn the knob clockwise. Turn it
counterclockwise to decrease volume.
3-9
ProCarManuals.com
Page 204 of 436
RECALL: Display the time with the ignition off by
pressing the RECALL knob. When
the radio is playing,
press this button to recall
the station frequency.
Finding a Station
AM-FM: Press the lower knob to switch between AM
and FM. The display shows your selection.
TUNE: Turn the lower knob to choose radio stations.
SEEK: Press the right or left arrow to go to the next
higher or lower station and stay there.
SCAN: Press and hold one of the SEEK arrows, then
press the other SEEK arrow;
SCAN will appear on the
display. Use
SCAN to listen to stations for a few
seconds. The radio will
go to a station, stop for a few
seconds,
then go on to the next station. The radio will
scan up or down the radio band, depending on the arrow
you pressed first. Press both
SEEK arrows or the upper
knob to stop scanning.
PUSHBUTTONS: The four numbered pushbuttons let
you return to your favorite stations. You can set up to
14 stations (seven AM and seven FM). Just:
1. Press AM-FM to select the band.
2. Tune in the desired station.
3. Press SET. (SET will appear on the display.)
4. Press and hold one of the four numbered buttons,
within five seconds. The sound will mute. When
it
returns, release the button. Whenever you press that
numbered button, the station you set will return.
5. Repeat the steps for each pushbutton.
In addition to the four stations already set, up to three
more stations may be preset on each band by pressing
two adjoining buttons at the same time. Just:
1. Tune in the desired station.
2. Press SET. (SET will appear on the display.)
3. Press any two adjoining pushbuttons at the same time,
within five seconds.
The sound will mute. When it
returns, release the buttons. Whenever you press the
same buttons,
the station you set will return.
4. Repeat the steps for each pair of pushbuttons.
3-10
ProCarManuals.com
Page 205 of 436

Setting the Tone
BASS:
Slide the lever up or down to increase or
decrease bass.
TREB: Slide the lever up or down to increase or
decrease treble.
If a station is weak or noisy, you may
want to decrease the treble.
Adjusting the Speakers
BAL:
Turn the control behind the upper knob to move
the sound to
the left or right speakers. The middle
position balances the sound between the speakers.
FADE: Turn the control behind the lower knob to move
the sound to the front or rear speakers. The middle
position balances the sound between the speakers.
AM-FM Stereo with Cassette Tape Player
and Automatic Tone Control
(If Equipped)
Playing the Radio
PWR-VOL:
Press this knob to turn the system on and
off. To increase volume, turn this knob clockwise. Turn
it counterclockwise to decrease volume. The knob is
capable of rotating continuously.
RECALL: Press this button to recall the station being
played.
If you press the button when the ignition is off,
the clock will show for a few seconds.
3-11
ProCarManuals.com