spare wheel OLDSMOBILE SILHOUETTE 2003 Owners Manual
[x] Cancel search | Manufacturer: OLDSMOBILE, Model Year: 2003, Model line: SILHOUETTE, Model: OLDSMOBILE SILHOUETTE 2003Pages: 466, PDF Size: 21.55 MB
Page 216 of 466
All-Wheel Drive Disable Warning
Message
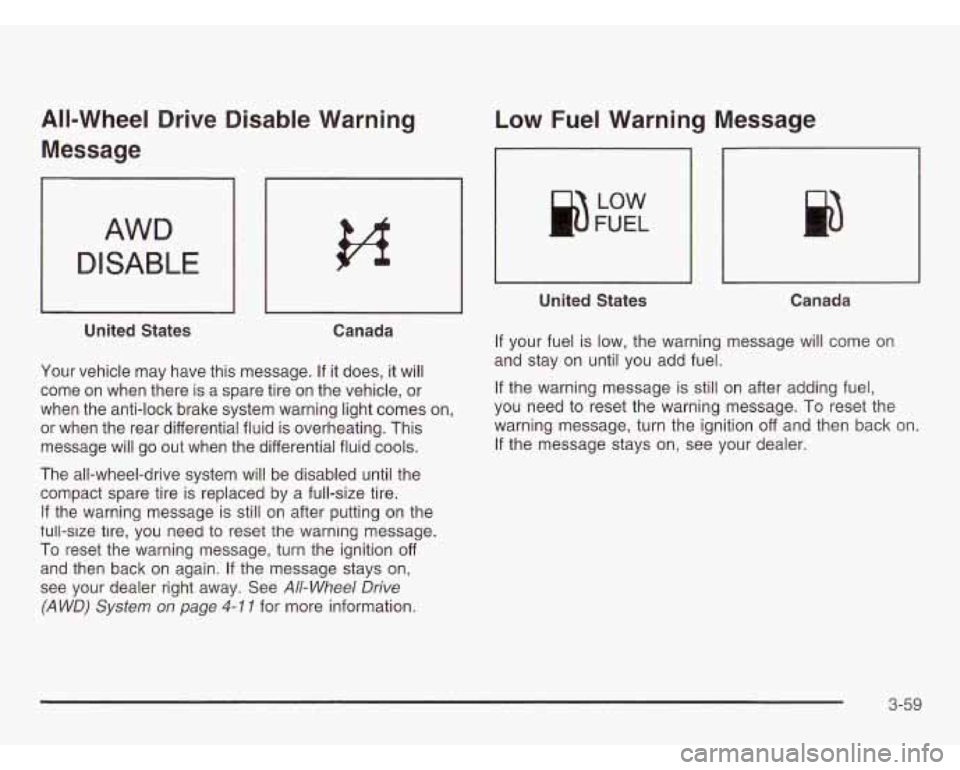
AWD
DISABLE
I I I I
United States Canada
Your vehicle may have this message. If
it does, it will
come on when there is a spare tire on the vehicle, or
when the anti-lock brake system warning light comes on,
or when the rear differential fluid is overheating. This
message will go out when the differential fluid cools.
The all-wheel-drive system will be disabled until the
compact spare tire is replaced by a full-size tire.
If the warning message is still on after putting on the
tull-slze tire, you need to reset the warning message.
To reset the warning message, turn the ignition
off
and then back on again. If the message stays on,
see your dealer right away. See
All-Wheel Drive
(A WD)
System on page 4-1 I for more information.
Low Fuel Warning Message
I
United States Canada
If your fuel is low, the warning message will come on
and stay on until you add fuel.
If the warning message is still on after adding fuel,
you need to reset the warning message. To reset the
warning message, turn the ignition off and then back on.
If the message stays on, see your dealer.
3-59
Page 308 of 466
Section 5 Service and Appearance Care
Service ............................................................ 5.3
Doing Your Own Service Work
......................... 5.3
Adding Equipment to the Outside
of
Your Vehicle .............................................. 5-4
Fuel
.............................................................. -5-5
Gasoline Octane
............................................ 5-5
Gasoline Specifications
................................... 5-5
California Fuel
............................................... 5-6
Additives
....................... .... ......... 5-6
Fuels in Foreign Countries
........... ..... 5-7
Filling Your Tank
............................ ..... 5-7
Filling a Portable Fuel Container
.................... 5-9
Checking Things Under the
Hood .................. -5-1 0
Hood Release .............................................. 5-10
Engine Compartment Overview ....................... 5-12
Engine Oil
................................................... 5-14
Engine Air CleanedFilter
................................ 5-19
Automatic Transaxle Fluid
.............................. 5-20
Radiator Pressure Cap
............................... 5-26
Engine Overheating
.................................... 5-26
Cooling System
............................. , ....... 5-29
Power Steering Fluid .................. , ....... 5-37
Windshield Washer Fluid
................. , ....... 5-38
Brakes
.......................... .... ........ 5-39
r.--.:.-- ---I-.- b CI lyll IC uuvlal I1 4-LU c r)r) .............................................
Battery ........................................................ 5.43
Jump Starting
............................................... 5-44
All-Wheel Drive
.............................................. 5-50
Bulb Replacement .......................................... 5-52
Halogen Bulbs
.............................. ......... 5-52
Front Turn Signal, Sidemarker and
Taillamps, Turn Signal, Stoplamps and
Headlamps
...................................... ..... 5-52
Parking Lamps
.............................. ..... 5-54
Replacement Bulbs
....................................... 5-57
Back-up Lamps
......................................... 5-56
Windshield Wiper Blade Replacement
.............. 5-58
Tires
.............................................................. 5-60
Inflation
- Tire Pressure ................................ 5-61
Tire Inspection and Rotation
........................... 5-62
When It
Is Time for New Tires ....................... 5-63
Buying New Tires
......................................... 5-64
Uniform Tire Quality Grading
.......................... 5-65
Wheel Alignment and Tire Balance
.................. 5-66
Wheel Replacement
...................................... 5-66
Tire Chains
.................................................. 5-67
Accessory Inflator
......................................... 5-68
If a Tire Goes Flat ........................................ 5-69
Changing a Flat Tire ..................................... 5-70
Compact Spare Tire ...................................... 5-86
5- 1
Page 369 of 466
Tire Inspection and Rotation
Tires should be rotated every 7,500 miles (12 500 km).
Any time you notice unusual wear, rotate your tires
as soon as possible and check wheel alignment. Also
check for damaged tires or wheels. See
When It Is Time
for New Tires on page
5-63 and Wheel Replacement
on page
5-66 for more information.
Make sure the spare tire is stored securely. Push, pull,
and then try to rotate or turn the tire,
If it moves, use the
folding wrench to tighten the cable. See
Changing a Flat
Tire on page
5-70.
The purpose of regular rotation is to achieve more
uniform wear for all tires on the vehicle. The first rotation
is the most important. See “Part A: Scheduled
Maintenance Services,” in Section
6, for scheduled
rotation intervals.
I,‘
/I
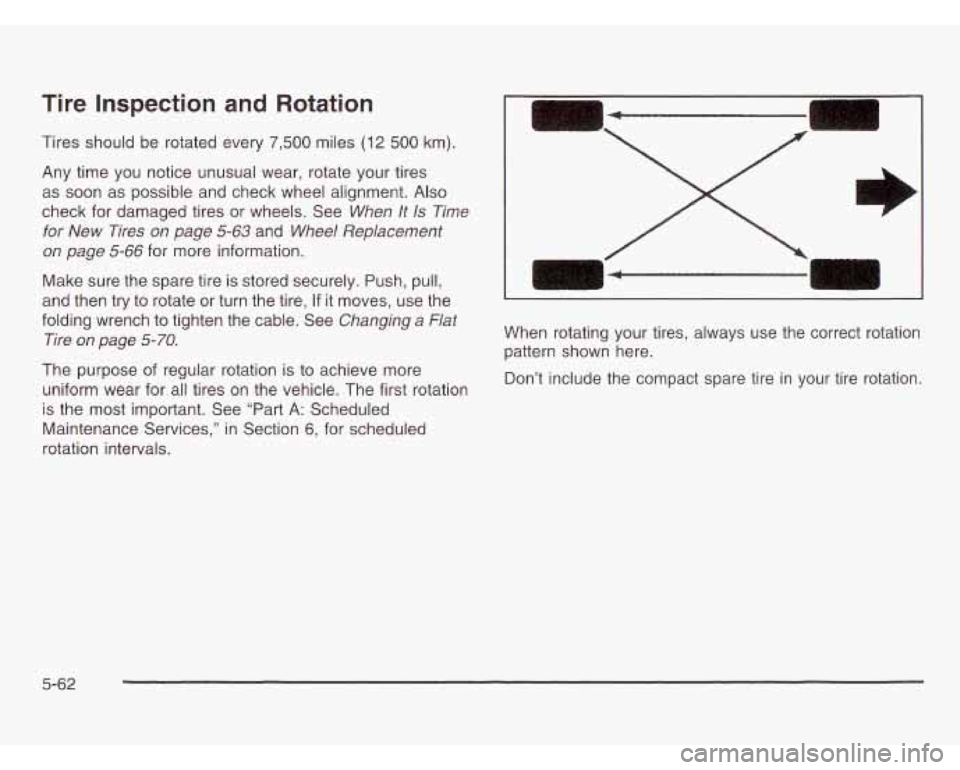
When rotating your tires, always use the correct rotation
pattern shown here.
Don’t include the compact spare tire in your tire rotation.
5-62
Page 371 of 466
Buying New Tires
To find out what kind and size of tires you need, look at
the Certificationflire label.
The tires installed on your vehicle when it was new had a
Tire Petformance Criteria Specification (TPC Spec)
number on each tire’s sidewall. When you get new tires,
get ones with that same TPC Spec number. That way
your vehicle will continue to have tires that are designed
to give proper endurance, handling, speed rating,
traction, ride and other things during normal service on
your vehicle. If your tires have an all-season tread design,
the TPC number will be followed by an
“MS” (for mud
and snow).
If you ever replace your tires with those not having a
TPC Spec number, make sure they are the same
size, load range, speed rating and construction type
(bias, bias-belted or radial) as your original tires. Mixing tires coul-.
Lause you to lose control
while driving. If you mix tires of different sizes
or types (radial and bias-belted tires), the
vehicle may not handle properly, and you
could have a crash. Using tires
of different
sizes may also cause damage to your vehicle.
Be sure to use the same size and type tires on
all wheels. It’s
all right to drive with your
compact spare temporarily,
it was developed
for use on your vehicle. See “Compact Spare
Tire”
in the index.
If you use bias-ply
1 1s on your vehicle, the
wheel rim flanges could develop cracks after
many miles
of driving. A tire and/or wheel
could fail suddenly, causing
a crash. Use only
radial-ply tires with the wheels on your vehicle.
5-64
Page 380 of 466
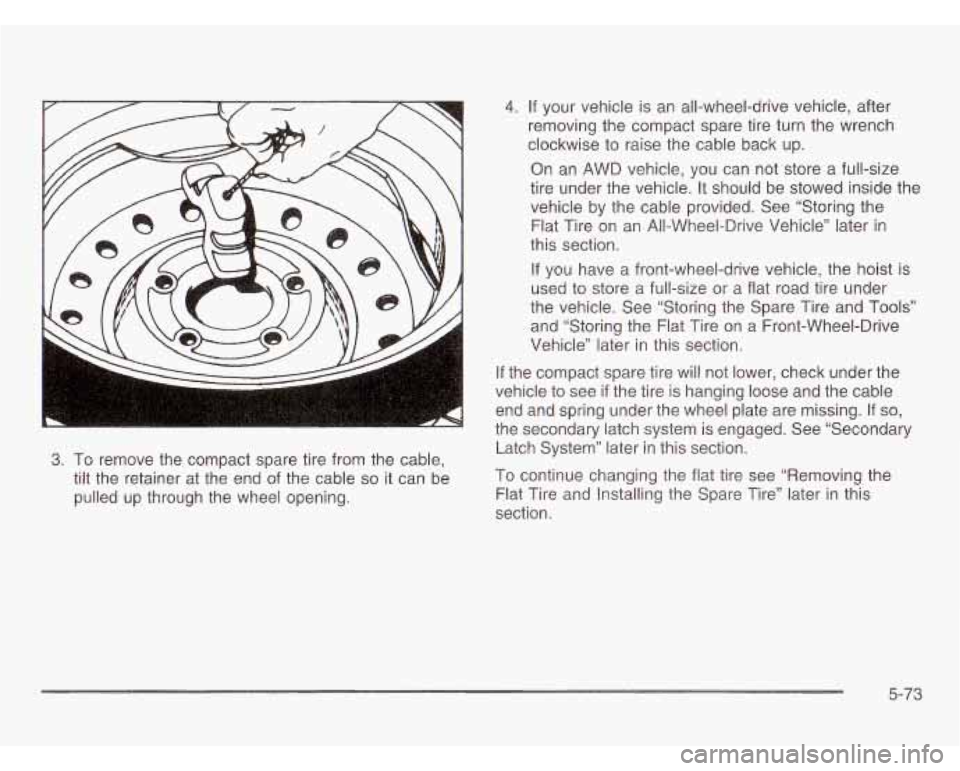
3. To remove the compact spare tire from the cable,
tilt the retainer at the end
of the cable so it can be
pulled up through the wheel opening.
-. If your vehicle is an all-wheel-drive vehicle, after
removing the compact spare tire turn the wrench
clockwise to raise the cable back up.
On an AWD vehicle, you can not store
a full-size
tire under the vehicle. It should be stowed inside the
vehicle by the cable provided. See “Storing the
Flat Tire on an All-Wheel-Drive Vehicle” later
in
this section.
If you have a front-wheel-drive vehicle, the hoist is
used to store a full-size or a flat road tire under
the vehicle. See “Storing the Spare Tire and
Tools”
and “Storing the Flat Tire on a Front-Wheel-Drive
Vehicle” later
in this section.
If the compact spare tire will not lower, check under the
vehicle to see
if the tire is hanging loose and the cable
end and spring under the wheel plate are missing. If
so,
the secondary latch system is engaged. See “Secondary
Latch System” later
in this section.
To continue changing the flat tire see “Removing the
Flat Tire and Installing the Spare Tire” later in this
section.
5-73
Page 381 of 466
Secondary Latch System
Your vehicle may have an underbody mounted tire hoist
assembly equipped with a secondary latch system.
It‘s designed to stop a tire from suddenly falling off your
vehicle
if the cable holding the spare tire is damaged.
For the secondary latch to work, the tire must be stowed
with the valve stem pointing down.
Front-wheel-drive vehicles use the underbody tire hoist
assembly to store either the compact spare or a flat
road tire. See “Storing a Flat or Spare Tire and
Tools”
in the Index for instructions on storing the spare or
flat tire correctly.
If your vehicle is equipped with all-wheel-drive, the
underbody tire hoist assembly stores only the compact
spare tire. See “Storing the Spare Tire and Tools”
later in this section for instructions. To store a flat
full-size tire correctly, see “Storing the Flat Tire
on
an All-Wheel-Drive Vehicle” later in this section. Before beginning this procedure read all the
instructions. Failure to read and follow the
instructions could damage the hoist assembly
and you and others could get hurt. Read and
follow the instructions listed below.
To release the spare tire from the secondary latch,
do the
f .. )wing:
Someone standing too close during the procedure could be injured by the jack.
If the
spare tire does not slide
off the jack completely,
make sure no one is behind you or on either
side of you as you pull the jack out from
the spare.
5-74
Page 382 of 466
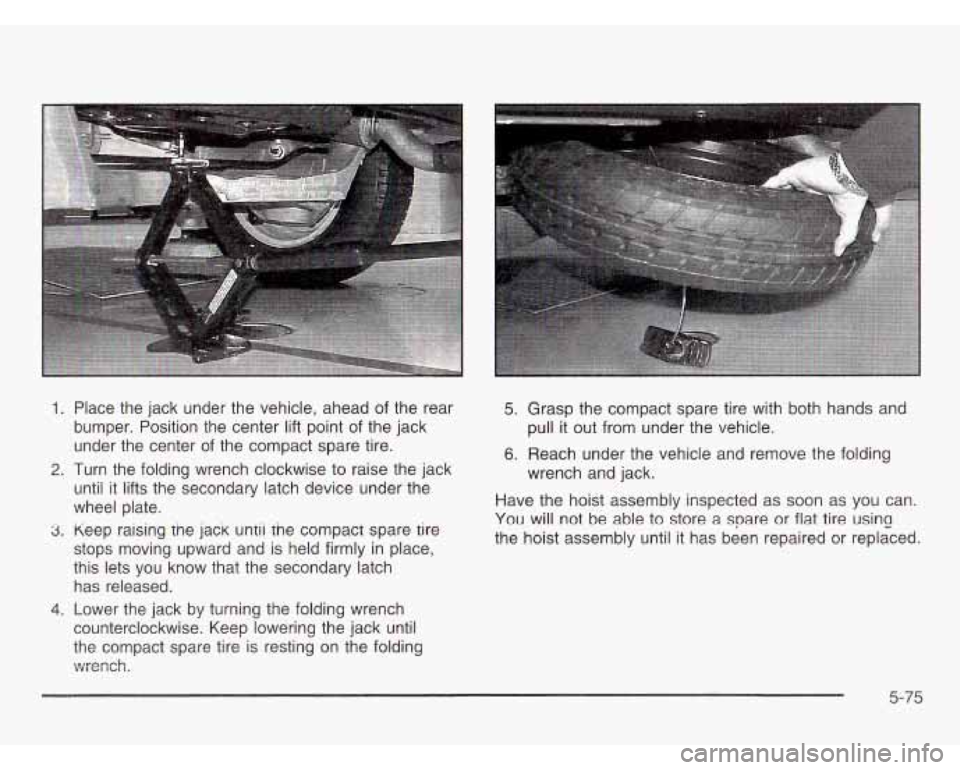
1. Place the jack under the vehicle, ahead of the rear
bumper. Position the center
lift point of the jack
under the center of the compact spare tire.
2. Turn the folding wrench clockwise to raise the jack
until it lifts the secondary latch device under the
wheel plate.
5. Grasp the compact spare tire with both hands and
6. Reach under the vehicle and remove the folding
pull
it out
from under the vehicle.
wrench and jack.
Have the hoist assembly inspected as soon as you can.
You will not be able to store a spare or flat tire usinG
the hoist assembly until it has been repaired or replaced. 3. Keep raising tne jack untii rne compact spare tire
stops moving upward and is held firmly in place,
this lets you know that the secondary latch
has released.
4. Lower the jack by turning the folding wrench
counterclockwise. Keep lowering the jack until
the compact spare tire is resting on the folding
wrench. ~- -~
5-75
Page 383 of 466
Removing the Wheel Covers
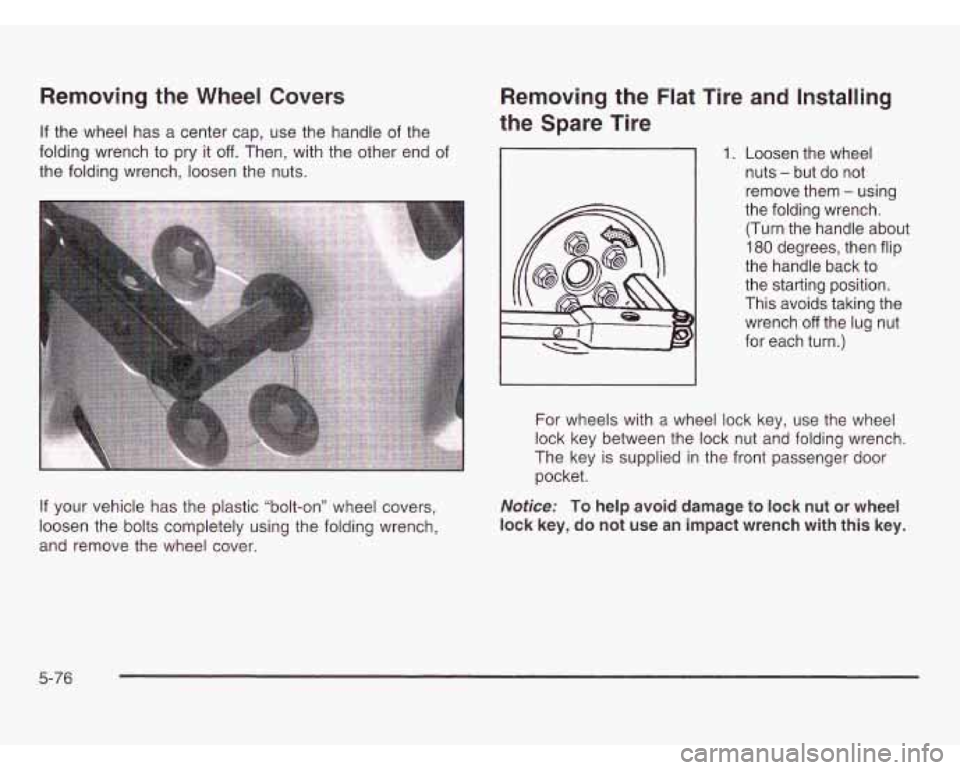
If the wheel has a center cap, use the handle of the
folding wrench to pry
it off. Then, with the other end of
the folding wrench, loosen the nuts.
If your vehicle has the plastic “bolt-on” wheel covers,
loosen the bolts completely using the folding wrench,
and remove the wheel cover.
Removing the Flat Tire and Installing
the Spare Tire
1. Loosen the wheel
nuts
- but do not
remove them
- using
the folding wrench.
(Turn the handle about
180 degrees, then flip
the handle back to
the starting position.
This avoids taking the
wrench
off the lug nut
for each turn.)
For wheels with
a wheel lock key, use the wheel
lock key between the lock nut and folding wrench.
The key is supplied
in the front passenger door
pocket.
Notice: To help avoid damage to lock nut or wheel
lock key, do not
use an impact wrench with this key.
5-76
Page 384 of 466
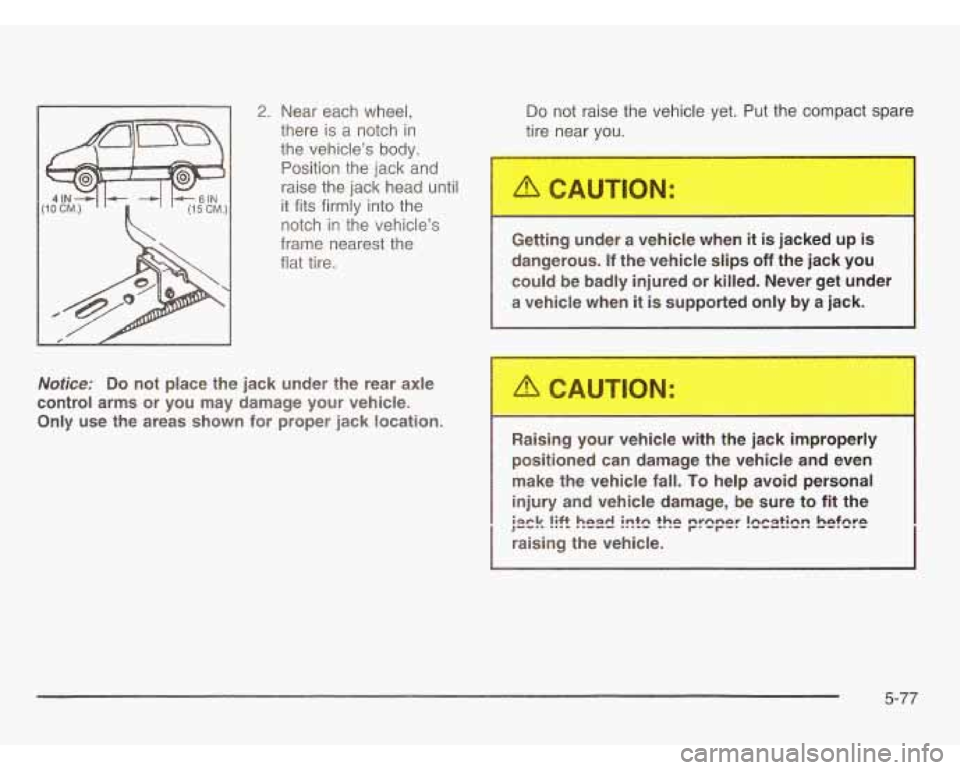
2. Near each wheel,
there is
a notch in
the vehicle's body.
Position the jack and
raise the jack head until
it fits firmly into the
notch
in the vehicle's
frame nearest the
flat tire.
Notice: Do not place the jack under the rear axle
control arms or you may damage your vehicle.
Only use the areas shown for proper jack location.
Do not raise the vehicle yet. Put the compact spare
tire near
you.
Getting under a vehicle when it is jacked up is
dangerous. If the vehicle slips off the jack you
could be badly injured or killed. Never get under
a vehicle when
it is supported only by a jack.
Raising your vehicle with the jack improperly
positioned
can damage the vehicle and even
make the vehicle fall.
To help avoid personal
injury and vehicle damage, be sure to fit the
raising the vehicle.
)'""' iaek lie ...- hnad ..--- intn ...- - thn -..- pmper h~~~~c~ befcre
5-77
Page 385 of 466
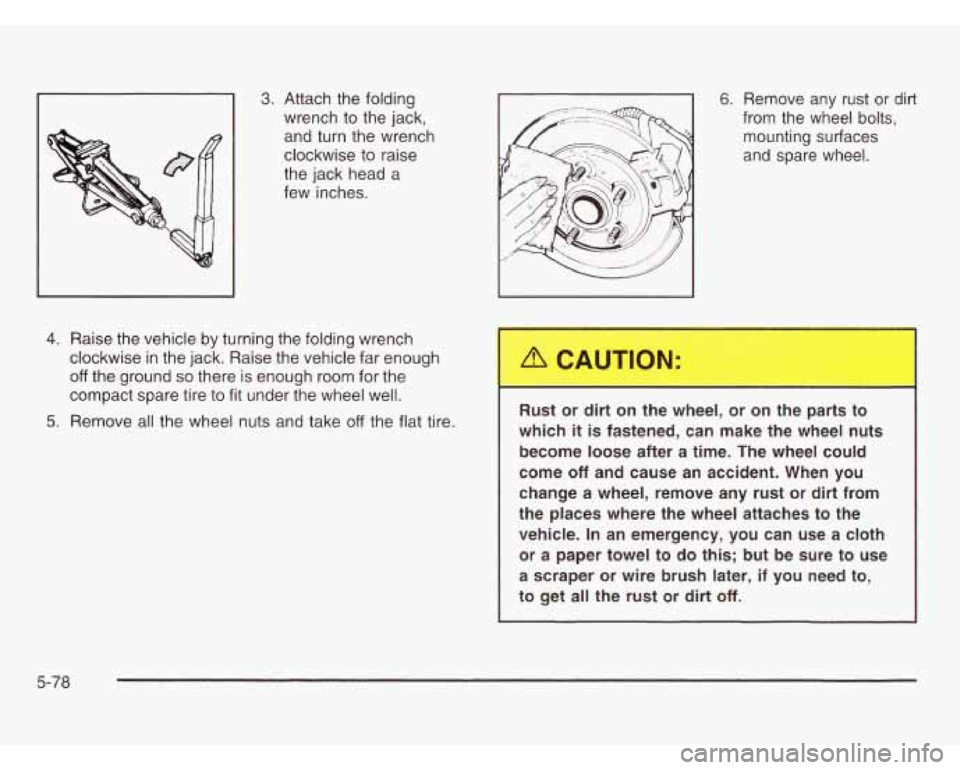
3. Attach the folding
wrench to the jack,
and turn the wrench
clockwise to raise
the jack head a
few inches.
4. Raise the vehicle by turning the folding wrench
clockwise in the jack. Raise the vehicle far enough
off the ground so there is enough room for the
compact spare tire to
fit under the wheel well.
5. Remove all the wheel nuts and take off the flat tire.
6. Remove any rust or dirt
from the wheel bolts, mounting surfaces
and spare wheel.
Rust or dirt on the wheel, or on the parts to
which
it is fastened, can make the wheel nuts
become loose after a time. The wheel could
come
off and cause an accident. When you
change a wheel, remove any rust or dirt from
the places where the wheel attaches
to the
vehicle.
In an emergency, you can use a cloth
or a paper towel to do this;
but be sure to use
a scraper or wire brush later, if you need to,
to get all the
rust or dirt off.
5-78