display OPEL COMBO 2010 Owner's Manual
[x] Cancel search | Manufacturer: OPEL, Model Year: 2010, Model line: COMBO, Model: OPEL COMBO 2010Pages: 212, PDF Size: 2.49 MB
Page 93 of 212
87
Lighting
Picture no: 13719s.tif
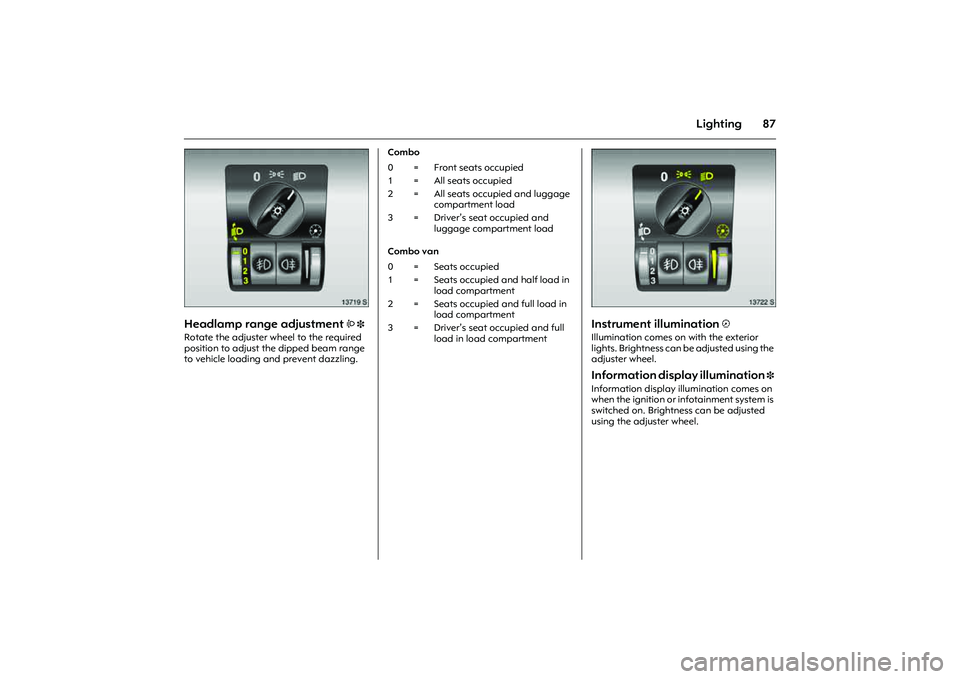
Headlamp range adjustment
? 3
Rotate the adjuster wheel to the required
position to adjust the dipped beam range
to vehicle loading and prevent dazzling. Combo
Combo van
Picture no: 13722s.tif
Instrument illumination
k
Illumination comes on with the exterior
lights. Brightness can be adjusted using the
adjuster wheel.
Information display illumination
3
Information display illumination comes on
when the ignition or infotainment system is
switched on. Brightness can be adjusted
using the adjuster wheel.
0 = Front seats occupied
1 = All seats occupied
2 = All seats occupied and luggage
compartment load
3 = Driver’s seat occupied and
luggage compartment load
0 = Seats occupied
1 = Seats occupied and half load in
load compartment
2 = Seats occupied and full load in
load compartment
3 = Driver’s seat occupied and full
load in load compartment
Page 96 of 212
90 Infotainment systemInfotainment system
Radio reception
3
Radio reception may be disrupted by
static, noise, distortion or loss of reception
due to
zChanges in distance from the
transmitter,
zmulti-path reception due to reflection
and
zshadowing. Infotainment system
3
The infotainment system is operated as
described in the operating instructions.
Picture no: 14034s.tif
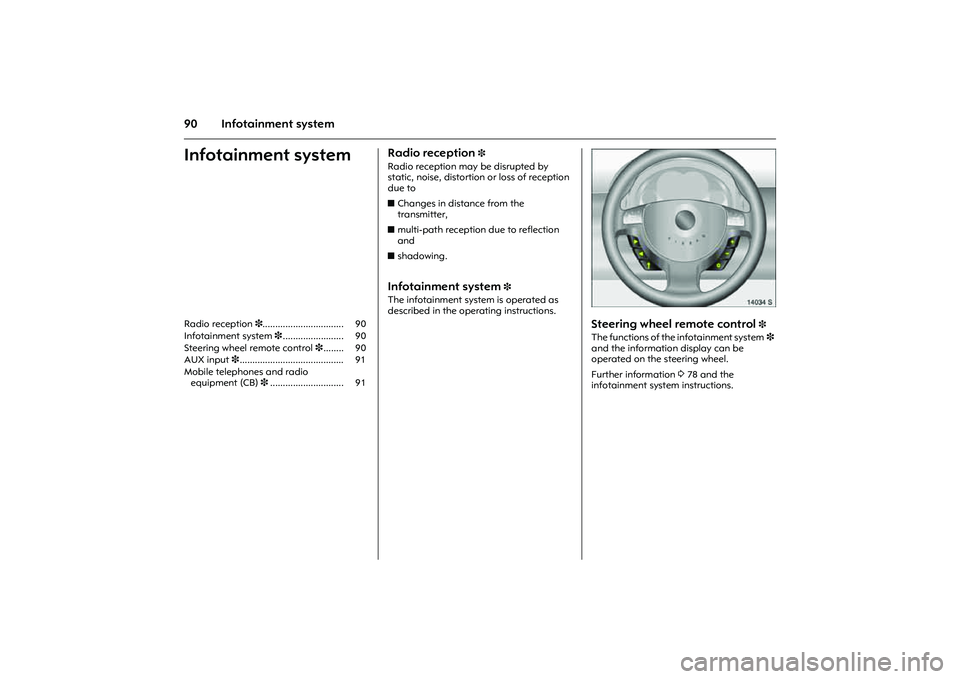
Steering wheel remote control
3
The functions of the infotainment system3
and the information display can be
operated on the steering wheel.
Further information 378 and the
infotainment system instructions. Radio reception 3................................ 90
Infotainment system 3........................ 90
Steering wheel remote control 3........ 90
AUX input 3......................................... 91
Mobile telephones and radio
equipment (CB) 3............................. 91
Page 106 of 212
100 Driving and operationDriving and operation
Manual transmission
automated
3
The Easytronic transmission permits
manual (manual mode) or automatic gear
shifting (automatic mode), both with
automatic clutch control.
Picture no: 12478s.tif
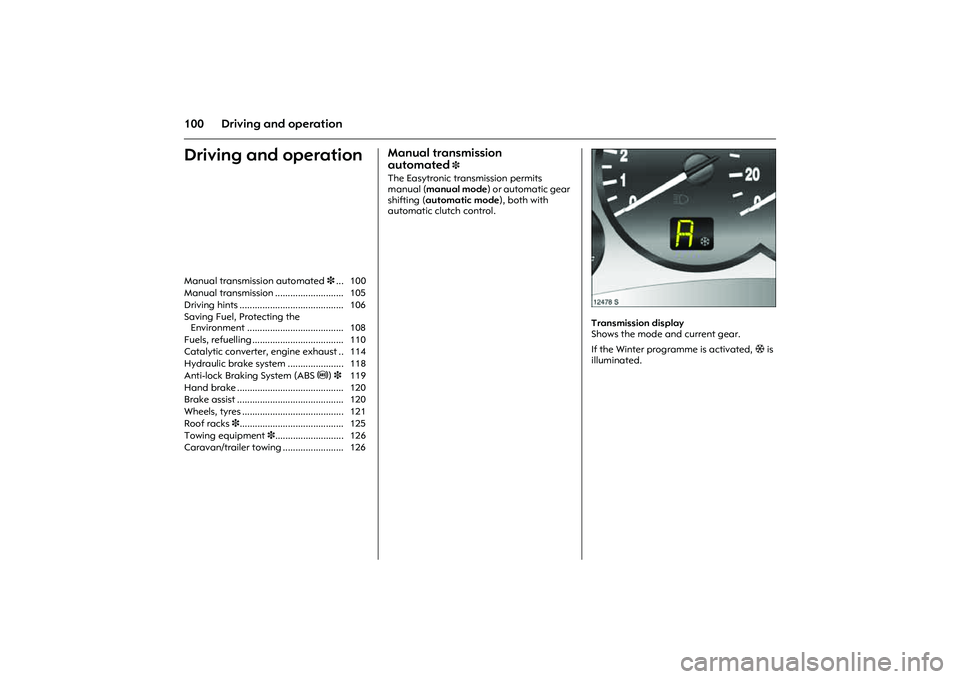
Transmission display
Shows the mode and current gear.
If the Winter programme is activated, T is
illuminated. Manual transmission automated3... 100
Manual transmission ........................... 105
Driving hints ......................................... 106
Saving Fuel, Protecting the
Environment ...................................... 108
Fuels, refuelling .................................... 110
Catalytic converter, engine exhaust .. 114
Hydraulic brake system ...................... 118
Anti-lock Braking System (ABSu)3 119
Hand brake .......................................... 120
Brake assist .......................................... 120
Wheels, tyres ........................................ 121
Roof racks 3......................................... 125
Towing equipment 3........................... 126
Caravan/trailer towing ........................ 126
Page 107 of 212
101
Driving and operation
Starting the engine
Briefly operate foot brake when starting
the engine. The engine can now be started
in position N and with the foot brake
operated. N appears in the gear display. If
the foot brake is not operated, "N" flashes
in the gear display and the engine cannot
be started.
If no brake lights are operational, the
engine will not start.
Picture no: 12466s.tif
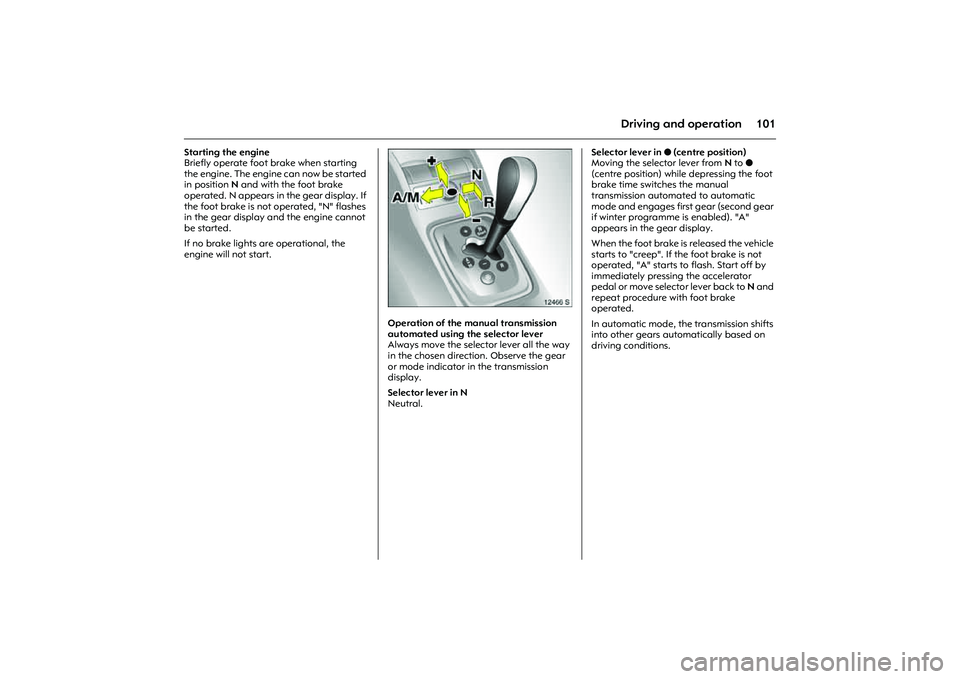
Operation of the manual transmission
automated using the selector lever
Always move the selector lever all the way
in the chosen direction. Observe the gear
or mode indicator in the transmission
display.
Selector lever in N
Neutral. Selector lever in o (centre position)
Moving the selector lever from N to o
(centre position) while depressing the foot
brake time switches the manual
transmission automated to automatic
mode and engages first gear (second gear
if winter programme is enabled). "A"
appears in the gear display.
When the foot brake is released the vehicle
starts to "creep". If the foot brake is not
operated, "A" starts to flash. Start off by
immediately pressing the accelerator
pedal or move selector lever back to N and
repeat procedure with foot brake
operated.
In automatic mode, the transmission shifts
into other gears automatically based on
driving conditions.
Page 108 of 212
102 Driving and operation
Picture no: 12466s.tif
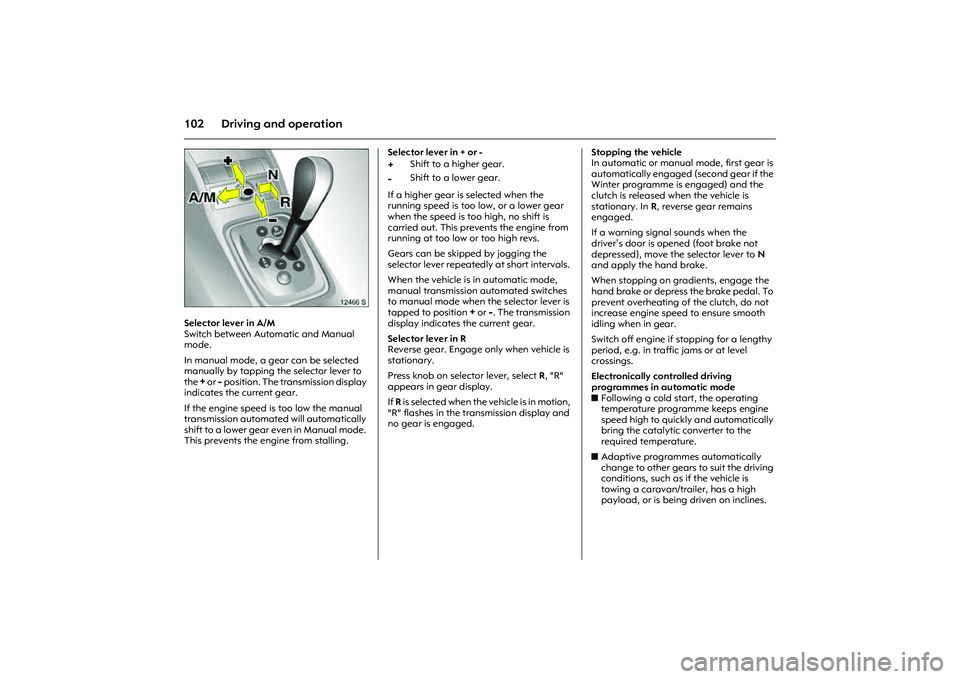
Selector lever in A/M
Switch between Automatic and Manual
mode.
In manual mode, a gear can be selected
manually by tapping the selector lever to
the
+ or
- position. The transmission display
indicates the current gear.
If the engine speed is too low the manual
transmission automated will automatically
shift to a lower gear even in Manual mode.
This prevents the engine from stalling. Selector lever in + or -
If a higher gear is selected when the
running speed is too low, or a lower gear
when the speed is too high, no shift is
carried out. This prevents the engine from
running at too low or too high revs.
Gears can be skipped by jogging the
selector lever repeatedly at short intervals.
When the vehicle is in automatic mode,
manual transmission automated switches
to manual mode when the selector lever is
tapped to position
+ or
-. The transmission
display indicates the current gear.
Selector lever in R
Reverse gear. Engage only when vehicle is
stationary.
Press knob on selector lever, select R, "R"
appears in gear display.
If R is selected when the vehicle is in motion,
"R" flashes in the transmission display and
no gear is engaged. Stopping the vehicle
In automatic or manual mode, first gear is
automatically engaged (second gear if the
Winter programme is engaged) and the
clutch is released when the vehicle is
stationary. In R, reverse gear remains
engaged.
If a warning signal sounds when the
driver’s door is opened (foot brake not
depressed), move the selector lever to N
and apply the hand brake.
When stopping on gradients, engage the
hand brake or depress the brake pedal. To
prevent overheating of the clutch, do not
increase engine speed to ensure smooth
idling when in gear.
Switch off engine if stopping for a lengthy
period, e.g. in traffic jams or at level
crossings.
Electronically controlled driving
programmes in automatic mode
zFollowing a cold start, the operating
temperature programme keeps engine
speed high to quickly and automatically
bring the catalytic converter to the
required temperature.
zAdaptive programmes automatically
change to other gears to suit the driving
conditions, such as if the vehicle is
towing a caravan/trailer, has a high
payload, or is being driven on inclines.
+
Shift to a higher gear.
-
Shift to a lower gear.
Page 109 of 212
103
Driving and operation
Picture no: 12479S.tif
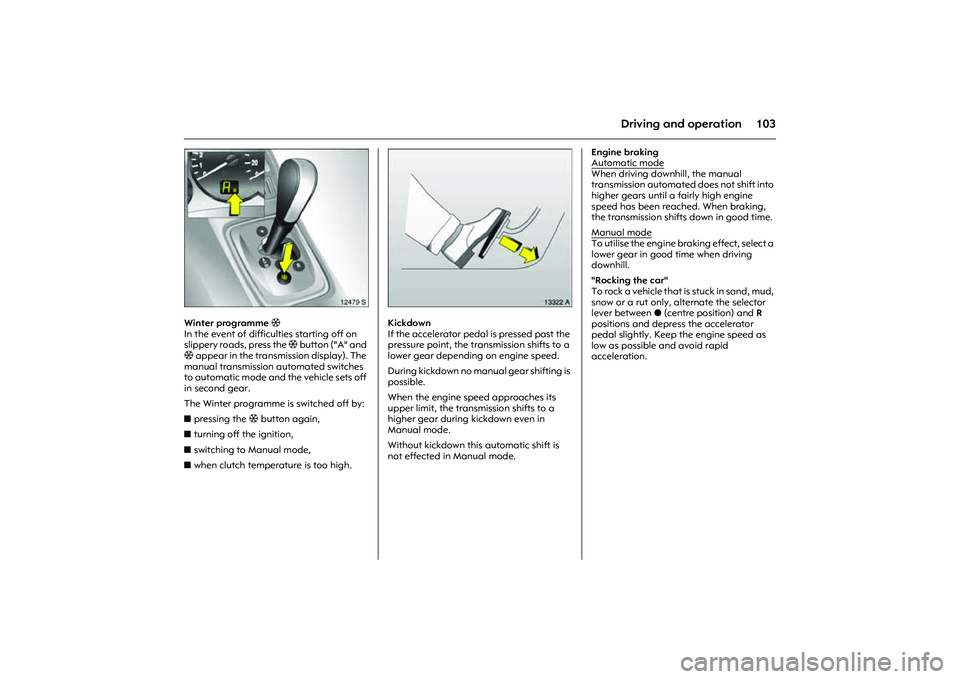
Winter programme T
In the event of difficulties starting off on
slippery roads, press the T b u t t o n ( " A " a n d
T appear in the transmission display). The
manual transmission automated switches
to automatic mode and the vehicle sets off
in second gear.
The Winter programme is switched off by:
zpressing the T button again,
zturning off the ignition,
zswitching to Manual mode,
zwhen clutch temperature is too high.
Picture no: 13322a.tif
Kickdown
If the accelerator pedal is pressed past the
pressure point, the transmission shifts to a
lower gear depending on engine speed.
During kickdown no manual gear shifting is
possible.
When the engine speed approaches its
upper limit, the transmission shifts to a
higher gear during kickdown even in
Manual mode.
Without kickdown this automatic shift is
not effected in Manual mode. Engine braking
Automatic mode
When driving downhill, the manual
transmission automated does not shift into
higher gears until a fairly high engine
speed has been reached. When braking,
the transmission shifts down in good time.
Manual modeTo utilise the engine braking effect, select a
lower gear in good time when driving
downhill.
"Rocking the car"
T o r o c k a v e h i c l e t h a t i s s t u c k i n s a n d , m u d ,
snow or a rut only, alternate the selector
lever between o (centre position) and R
positions and depress the accelerator
pedal slightly. Keep the engine speed as
low as possible and avoid rapid
acceleration.
Page 110 of 212
104 Driving and operation
Picture no: 14083j.tif
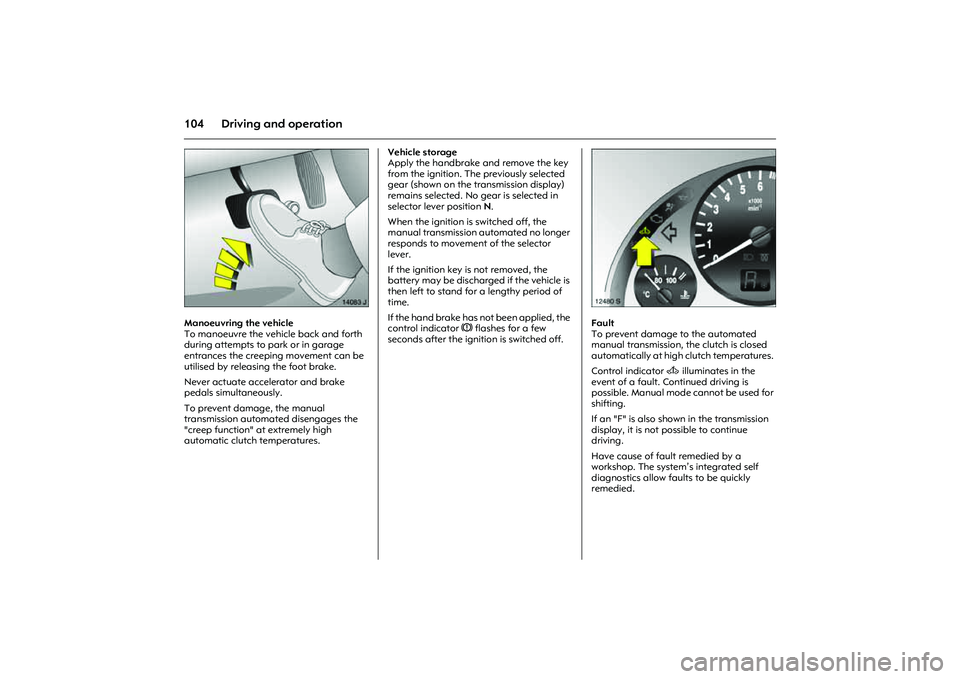
Manoeuvring the vehicle
To manoeuvre the vehicle back and forth
during attempts to park or in garage
entrances the creeping movement can be
utilised by releasing the foot brake.
Never actuate accelerator and brake
pedals simultaneously.
To prevent damage, the manual
transmission automated disengages the
"creep function" at extremely high
automatic clutch temperatures. Vehicle storage
Apply the handbrake and remove the key
from the ignition. The previously selected
gear (shown on the transmission display)
remains selected. No gear is selected in
selector lever position N.
When the ignition is switched off, the
manual transmission automated no longer
responds to movement of the selector
lever.
If the ignition key is not removed, the
battery may be discharged if the vehicle is
then left to stand for a lengthy period of
time.
If the hand brake has not been applied, the
control indicator R flashes for a few
seconds after the ignition is switched off.
Picture no: 12480s.tif
Fault
To prevent damage to the automated
manual transmission, the clutch is closed
automatically at high clutch temperatures.
Control indicator A illuminates in the
event of a fault. Continued driving is
possible. Manual mode cannot be used for
shifting.
If an "F" is also shown in the transmission
display, it is not possible to continue
driving.
Have cause of fault remedied by a
workshop. The system’s integrated self
diagnostics allow faults to be quickly
remedied.
Page 153 of 212
147
Self-help, vehicle care
Picture no: 15543s.tif
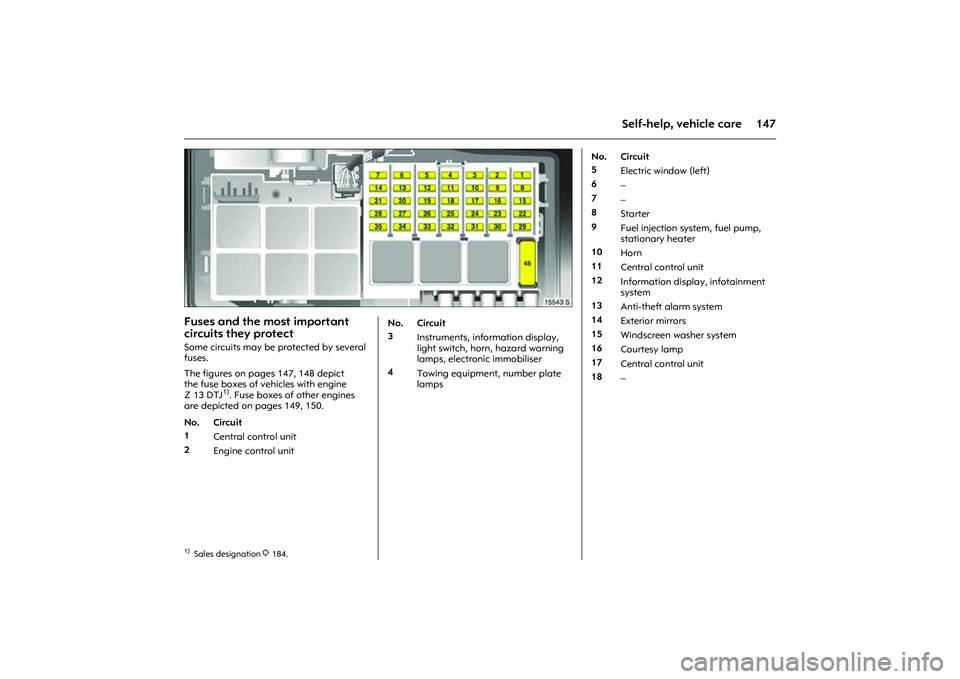
Fuses and the most important
circuits they protectSome circuits may be protected by several
fuses.
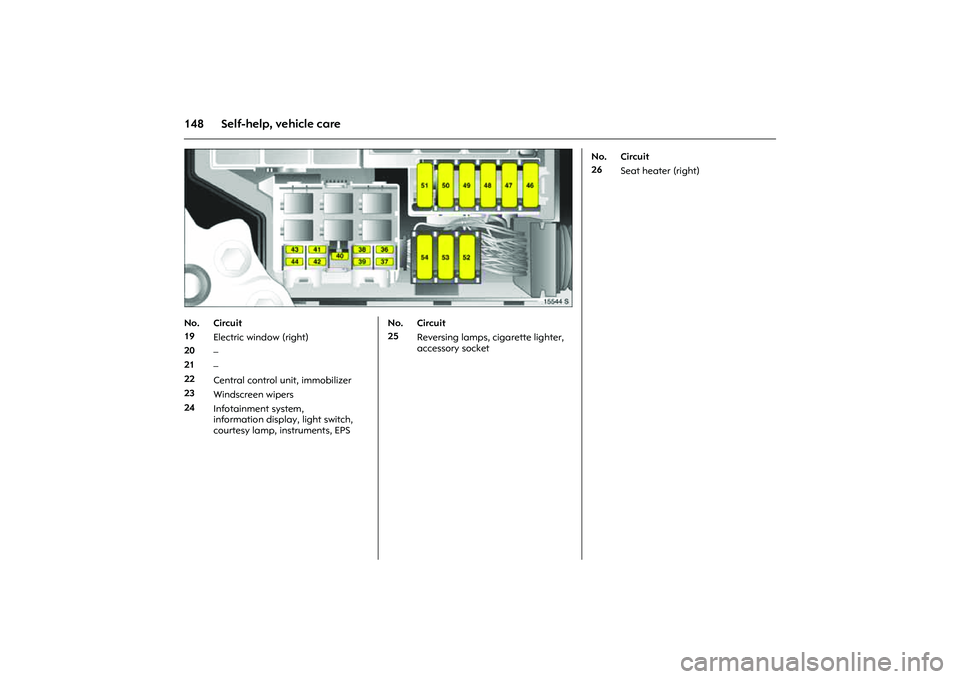
The figures on pages 147, 148 depict
the fuse boxes of vehicles with engine
Z13DTJ
1). Fuse boxes of other engines
are depicted on pages 149, 150.
Picture no:
1)Sales designation
3184.
No. Circuit
1
Central control unit
2
Engine control unit
No. Circuit
3
Instruments, information display,
light switch, horn, hazard warning
lamps, electronic immobiliser
4
Towing equipment, number plate
lampsNo. Circuit
5
Electric window (left)
6
–
7
–
8
Starter
9
Fuel injection system, fuel pump,
stationary heater
10
Horn
11
Central control unit
12
Information display, infotainment
system
13
Anti-theft alarm system
14
Exterior mirrors
15
Windscreen washer system
16
Courtesy lamp
17
Central control unit
18
–
Page 154 of 212
148 Self-help, vehicle care
Picture no: 15544s.tif Picture no:
No. Circuit
19
Electric window (right)
20
–
21
–
22
Central control unit, immobilizer
23
Windscreen wipers
24
Infotainment system,
information display, light switch,
courtesy lamp, instruments, EPS
No. Circuit
25
Reversing lamps, cigarette lighter,
accessory socket No. Circuit
26
Seat heater (right)
Page 166 of 212
160 Self-help, vehicle care
Picture no: 18112s.tif
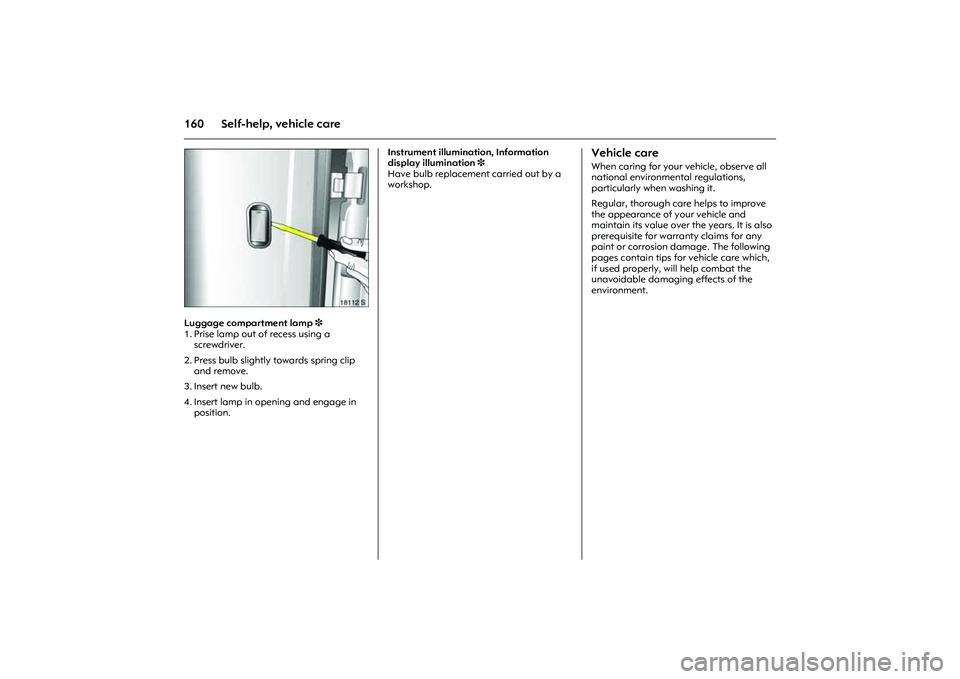
Luggage compartment lamp3
1. Prise lamp out of recess using a
screwdriver.
2. Press bulb slightly towards spring clip
and remove.
3. Insert new bulb.
4. Insert lamp in opening and engage in
position. Instrument illumination, Information
display illumination3
Have bulb replacement carried out by a
workshop.
Vehicle careWhen caring for your vehicle, observe all
national environmental regulations,
particularly when washing it.
Regular, thorough care helps to improve
the appearance of your vehicle and
maintain its value over the years. It is also
prerequisite for warranty claims for any
paint or corrosion damage. The following
pages contain tips for vehicle care which,
if used properly, will help combat the
unavoidable damaging effects of the
environment.