bonnet PEUGEOT 108 2015 Owners Manual
[x] Cancel search | Manufacturer: PEUGEOT, Model Year: 2015, Model line: 108, Model: PEUGEOT 108 2015Pages: 271, PDF Size: 7.42 MB
Page 80 of 271
78
108_en_Chap05_conduite_ed01-2015
to engage reverse, the vehicle must be
stationary with your foot on the brake pedal.
F
Sel
ect position R .
Reverse
there is an audible signal on engaging reverse.
th
e vehicle can be stopped whatever the
position of the gear selector ( N, E or R ).
However, there is an audible signal on opening
the driver's door if the gear selector is not at
position N .
Switching off
When the vehicle is stopped with the
engine running, always put the gear
selector to neutral N .
th
ere is a continuous audible signal
if you turn the ignition switch to " OFF"
with the vehicle in 2
nd, 3rd, 4th or 5th g e a r.
In this case return the ignition switch
to " ON ", move the gear selector to
position
N , then to position E , M or R,
then turn the ignition switch to " OFF". On a slope, use the brakes to
immobilise the vehicle and place the
gear selector in position N
, E or R.
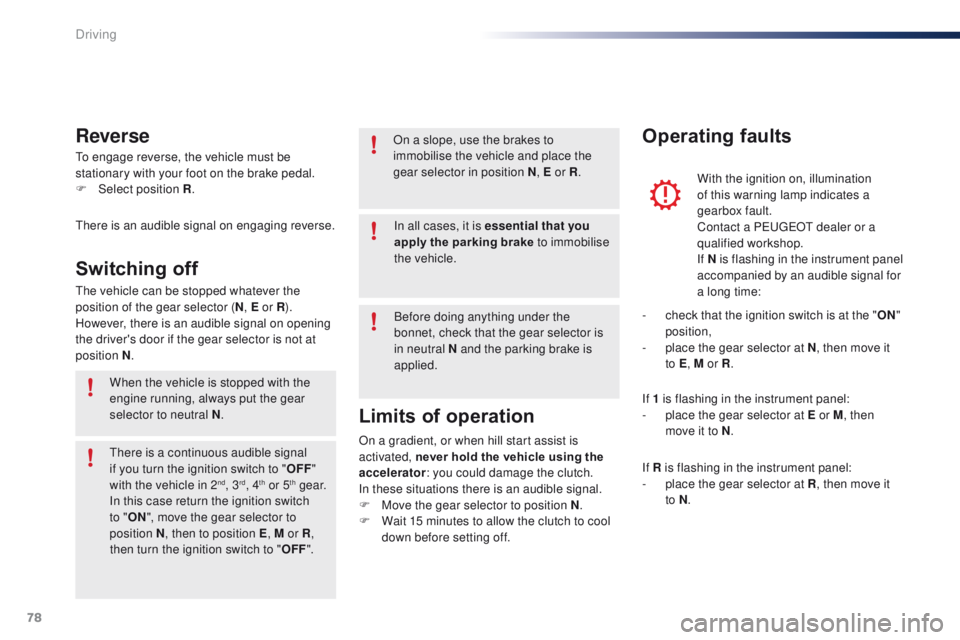
With the ignition on, illumination
of this warning lamp indicates a
gearbox fault.
Contact a P
e
uge
Ot
dealer or a
qualified workshop.
If N
i
s flashing in the instrument panel
accompanied by an audible signal for
a long time:
Operating faults
In all cases, it is essential that you
apply the parking brake to immobilise
the vehicle.
Before doing anything under the
bonnet, check that the gear selector is
in neutral N and the parking brake is
applied.
Limits of operation
On a gradient, or when hill start assist is
activated, never hold the vehicle using the
accelerator : you could damage the clutch.
In these situations there is an audible signal.
F
M
ove the gear selector to position N .
F
W
ait 15 minutes to allow the clutch to cool
down before setting off. -
c
heck that the ignition switch is at the "
ON"
position,
-
p
lace the gear selector at N
, then move it
to E , M or R .
If 1 is flashing in the instrument panel:
-
p
lace the gear selector at E or M
, then
move it to N .
If R is flashing in the instrument panel:
-
p
lace the gear selector at R, then move it
to N .
Driving
Page 84 of 271
82
108_en_Chap05_conduite_ed01-2015
Going into engine START mode
this indicator lamp goes off and the
engine starts automatically:
-
w
hen you fully depress the clutch pedal. StA
Rt mode is invoked automatically when:
- y ou open the driver's door,
-
y
ou open the bonnet,
-
y
ou unfasten the driver's seat belt,
-
s
ome special conditions (battery charge,
engine temperature, braking assistance,
descending a steep gradient, adjustment of
the air conditioning...) where the engine is
needed for control of a system.
Special cases: START invoked
automaticallyIn the event of a fault with the system,
this warning lamp flashes in the
instrument panel.
Operating fault
Have it checked by a Pe ugeOt dealer or a
qualified workshop.
Driving
Page 85 of 271
83
108_en_Chap05_conduite_ed01-2015
Before doing anything under the
bonnet, deactivate the Stop & Start
system to avoid any risk of injury
resulting from automatic operation of
S
t
A R
t m
o d e .
Maintenance
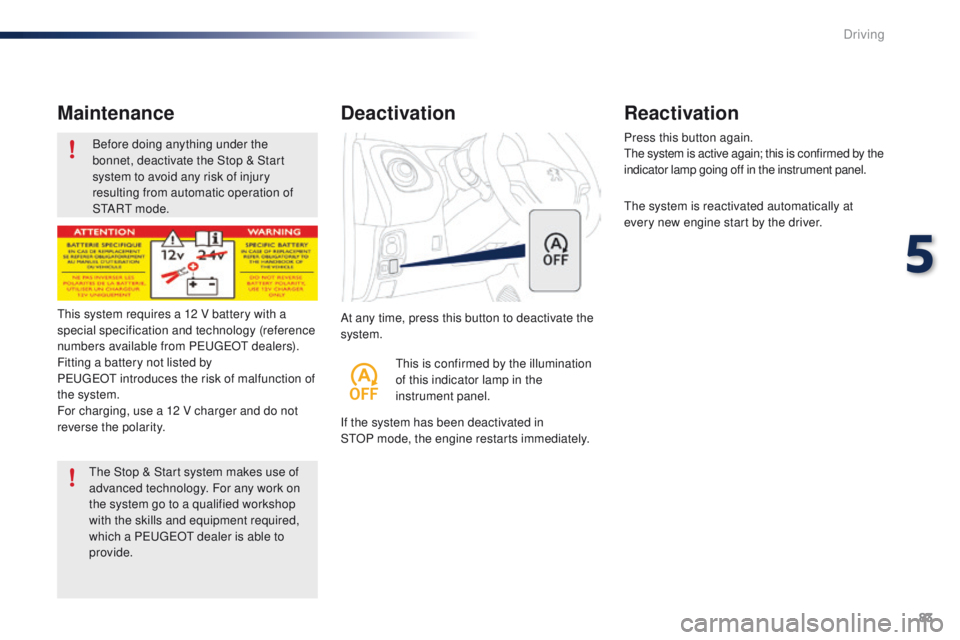
At any time, press this button to deactivate the
system.
Deactivation
If the system has been deactivated in
StOP mode, the engine restarts immediately. Press this button again.
th
e system is active again; this is confirmed by the
indicator lamp going off in the instrument panel.
th
e system is reactivated automatically at
every new engine start by the driver.
Reactivation
this is confirmed by the illumination
of this indicator lamp in the
instrument panel.
th
is system requires a 12 V battery with a
special specification and technology (reference
numbers available from P
e
uge
Ot d
ealers).
Fitting a battery not listed by
Pe
ugeOt
introduces the risk of malfunction of
the system.
For charging, use a 12 V charger and do not
reverse the polarity.
th
e Stop & Start system makes use of
advanced technology. For any work on
the system go to a qualified workshop
with the skills and equipment required,
which a P
e
uge
Ot
dealer is able to
provide.
5
Driving
Page 113 of 271
111
108_en_Chap07_securite_ed01-2015
Unwanted triggering of the system
It is possible for the system to detect a risk of
imminent collision and start working, in the
following conditions in particular:
-
d
etection of an object located close to the
outer edge of a bend (safety barrier, lamp
post or road sign),
-
d
etection of an object located at the top or
bottom of a steep slope,
-
d
etection of reflective objects (central
reservation...) in the road,
-
d
etection of the upper bar of a bridge or a
traffic light gantry,
-
d
etection of a vehicle on a bend travelling
in the other direction,
-
d
etection of a vehicle traveling in the other
direction, at a crossroads, when your
vehicle is turning left or right,
-
i
f the vehicle ahead of you sends up water
or snow,
-
i
f your vehicle stops very close to a wall or
other vehicles,
-
w
hen your vehicle closes rapidly on the
vehicle ahead,
-
i
f the vehicle is raised or lowered,
-
i
f the vehicle passes through a plastic curtain,
-
i
f driving through mist or smoke,
-
i
f the sensor is misaligned (following
replacement after a collision).
Never leave accumulations of snow or
any object projecting above the bonnet
or in front of the roof: this might fall into
the field of vision of the sensor and
generate a detection.
Operating limits
the system only detects vehicles
(cars, lorries)
that are stationary or moving in the same
direction as your vehicle. In difficult weather conditions (very
heavy rain, snow, fog, hail...), braking
distances increase, which can reduce
the ability of the system to avoid a
collision.
the
driver must therefore remain
particularly vigilant.
th
e system is not triggered or is interrupted if
the driver:
-
a
ccelerates strongly (even if the speed
limiter is on),
-
o
r turns the steering wheel suddenly
(avoiding manoeuvre).
Detection capability is less effective if:
-
y
ou are driving on roads with pronounced
bends and/or on roads in poor condition,
-
y
our vehicle is excessively loaded, as
this changes the horizontal attitude of the
vehicle. It does not detect small vehicles
(bicycles, motorcycles), pedestrians or
animals, nor non-reflective stationary
objects.
7
Safety
Page 156 of 271
154
108_en_Chap09_info-pratiques_ed01-2015
Changing a fuse
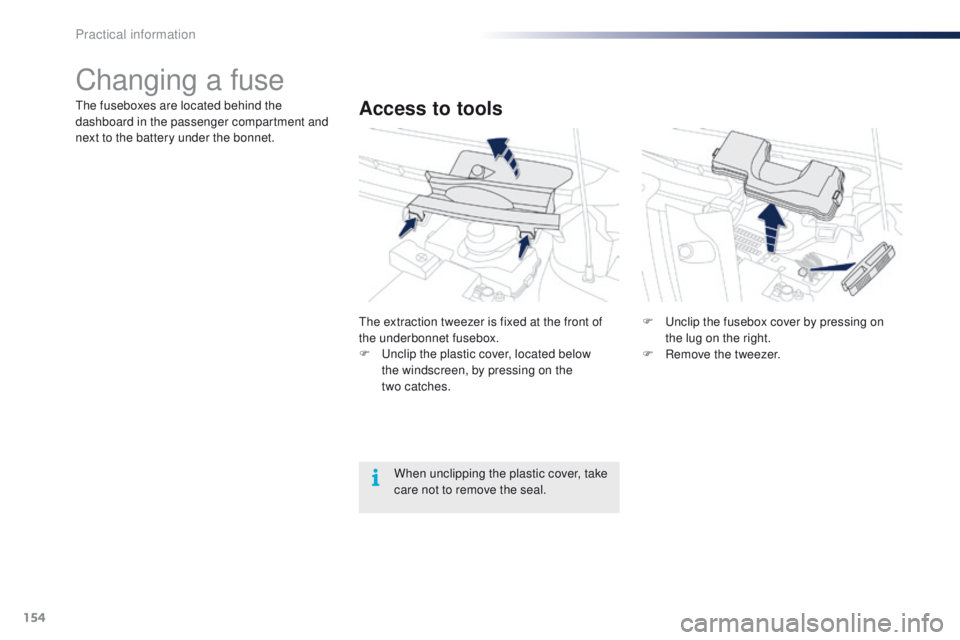
Access to toolsthe fuseboxes are located behind the
dashboard in the passenger compartment and
next to the battery under the bonnet.
th
e extraction tweezer is fixed at the front of
the underbonnet fusebox.
F
u
n
clip the plastic cover, located below
the windscreen, by pressing on the
two
catches.F
u
n
clip the fusebox cover by pressing on
the lug on the right.
F
R
emove the tweezer.
When unclipping the plastic cover, take
care not to remove the seal.
Practical information
Page 161 of 271
159
108_en_Chap09_info-pratiques_ed01-2015
Fuse
N° Rating
(A) Functions
1 10Right hand dipped beam
2 10Left hand dipped beam - Headlamp adjustment
3 7. 5Right hand main beam
4 7. 5Left hand main beam
5 * 15Fuel injection system
6 * 7. 5Fuel injection system
7 * 15Fuel injection system
8 * 7. 5Cooling fan
9 7. 5Air conditioning
10 ** 7. 5Fuel injection system - Brake lamps -
th
ird brake lamp
11 5Courtesy lamp - Boot lamp
12 10
Direction indicators - Hazard warning lamps - Instrument panel - Display screen
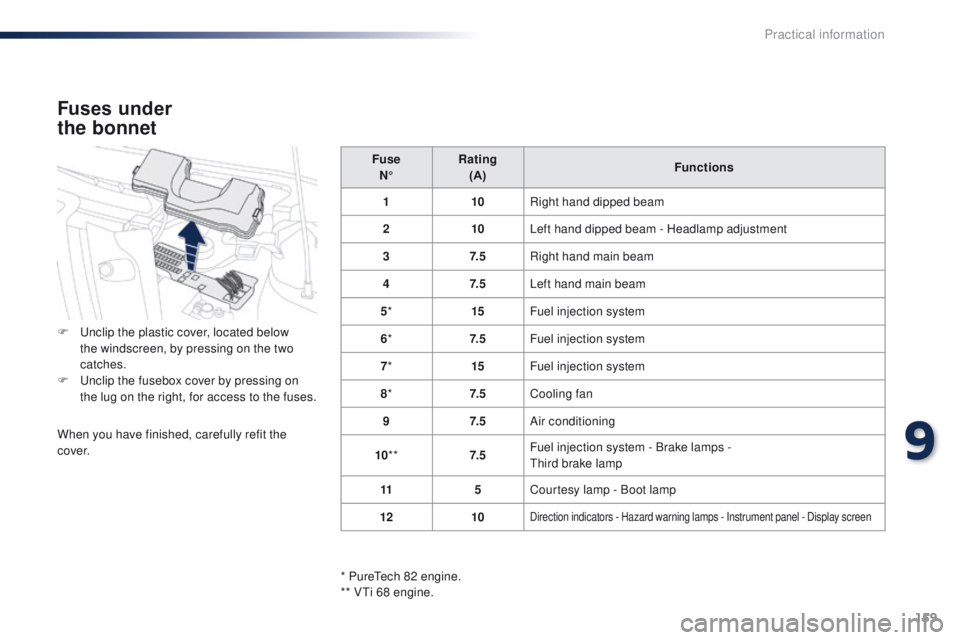
Fuses under
the bonnet
F unclip the plastic cover, located below
the windscreen, by pressing on the two
catches.
F
u
n
clip the fusebox cover by pressing on
the lug on the right, for access to the fuses.
When you have finished, carefully refit the
c ove r.
* Pure
te
ch 82 engine.
** V
ti 6
8 engine.
9
Practical information
Page 165 of 271
163
108_en_Chap09_info-pratiques_ed01-2015
12 V battery
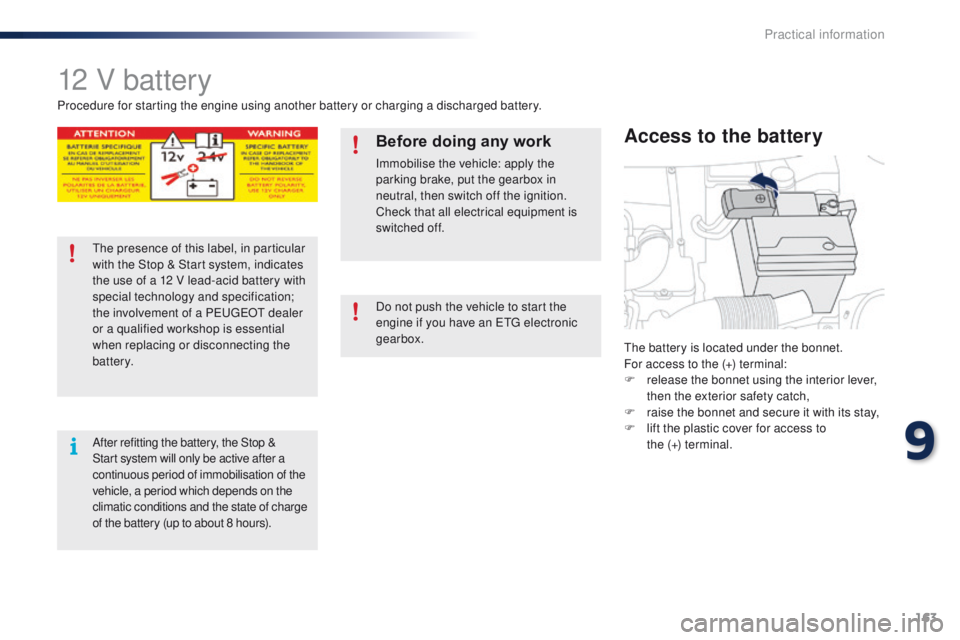
the battery is located under the bonnet.
For access to the (+) terminal:
F
r
elease the bonnet using the interior lever,
then the exterior safety catch,
F
r
aise the bonnet and secure it with its stay,
F
l
ift the plastic cover for access to
the (+)
terminal.
Access to the battery
Procedure for starting the engine using another battery or charging a discharged battery.
Before doing any work
Immobilise the vehicle: apply the
parking brake, put the gearbox in
neutral, then switch off the ignition.
Check that all electrical equipment is
switched off.
th
e presence of this label, in particular
with the Stop & Start system, indicates
the use of a 12 V lead-acid battery with
special technology and specification;
the involvement of a P
e
uge
Ot
dealer
or a qualified workshop is essential
when replacing or disconnecting the
battery.
After refitting the battery, the Stop &
Start system will only be active after a
continuous period of immobilisation of the
vehicle, a period which depends on the
climatic conditions and the state of charge
of the battery (up to about 8 hours). Do not push the vehicle to start the
engine if you have an
etg electronic
gearbox.
9
Practical information
Page 174 of 271
172
108_en_Chap10_verifications_ed01-2015
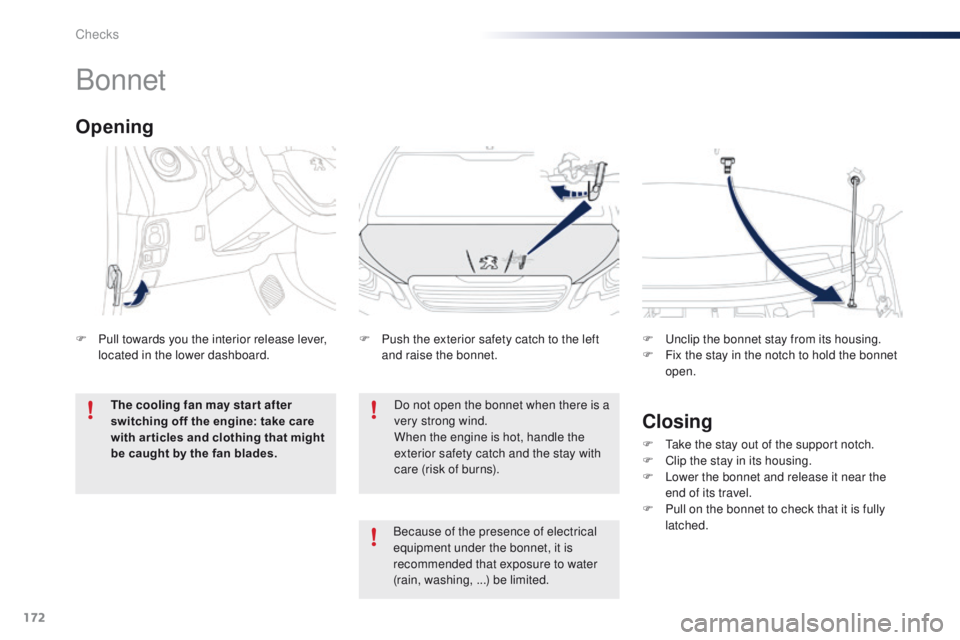
Bonnet
Do not open the bonnet when there is a
very strong wind.
When the engine is hot, handle the
exterior safety catch and the stay with
care (risk of burns).
F
P
ush the exterior safety catch to the left
and raise the bonnet. F u
n
clip the bonnet stay from its housing.
F
F
ix the stay in the notch to hold the bonnet
open.
Opening
F Pull towards you the interior release lever, located in the lower dashboard.
The cooling fan may star t after
switching off the engine: take care
with ar ticles and clothing that might
be caught by the fan blades.
Closing
F take the stay out of the support notch.
F C lip the stay in its housing.
F
L
ower the bonnet and release it near the
end of its travel.
F
P
ull on the bonnet to check that it is fully
latched.
Because of the presence of electrical
equipment under the bonnet, it is
recommended that exposure to water
(rain, washing, ...) be limited.
Checks
Page 176 of 271

174
108_en_Chap10_verifications_ed01-2015
Checking levels
take care when working under the
bonnet, as certain areas of the engine
may be extremely hot (risk of burns) and
the cooling fan could start at any time
(even with the ignition off).
Oil level
the check of the oil level is carried
out with the dipstick, located under
the bonnet. For the position of the
dipstick, refer to the under-bonnet
view on a previous page.
Checking with dipstick
Check all of these levels regularly, in line with the manufacturer's service schedule. top them up if necessary, unless other wise indicated.
If a level drops significantly, have the corresponding system checked by a Pe ugeOt dealer or a qualified workshop.
to e
nsure the accuracy of the reading,
your vehicle must be on a level
sur face, with the engine off for at least
30
minutes.
It is normal to top up the oil level between
two services (or oil changes). P
e
uge
Ot
recommends that you check the level, and top
up if necessary, every 3 000 miles (5 000 km). If you find that the oil level is above the A mark
or below the B mark, do not star t the engine
.
-
I
f the level is above the MAX mark (risk
of engine damage), contact a P
e
uge
Ot
dealer or a qualified workshop.
-
I
f the level is below the MIN mark, you
must top-up the engine oil.
Refer to the under-bonnet view for the location
of the dipstick on your vehicle.
F
t
a
ke the dipstick by its coloured grip and
pull it out completely.
F
W
ith the end of the dipstick with a clean
and non-fluffy cloth.
F
R
efit the dipstick and push it fully down,
then pull it out again for a visual check of
the oil level: the level must be between the
two marks A and B .
Checks
Page 177 of 271
175
108_en_Chap10_verifications_ed01-2015
the brake fluid level should be close
to the "MA X" mark. If it is not, check
the brake pad wear.
Brake fluid level
Changing the fluid
Refer to the manufacturer's service schedule
for details of the interval for this operation.
Fluid specification
the brake fluid must conform to the
manufacturer's recommendations.
Topping-up the engine oil
Oil gradethe oil must be the correct grade for your
engine and conform to the manufacturer's
recommendations.
Refer to the under-bonnet view for the location
of the oil filler cap on your vehicle.
F
u
n
screw the filler cap for access to the
filler orifice.
F
P
our in the oil in small quantities, avoiding
spills onto the engine (risk of fire).
F
W
ait a few minutes before checking the
level again using the dipstick.
F
t
o
p-up again if necessary.
F
A
fter checking and topping up, carefully
refit the oil filler cap and the dipstick to its
housing.
Engine oil change
Refer to the manufacturer's service schedule
for details of the interval for this operation.
In order to maintain the reliability of the engine
and emissions control system, never use
additives in the engine oil.
10
Checks