window Peugeot 508 RXH 2014 Owner's Guide
[x] Cancel search | Manufacturer: PEUGEOT, Model Year: 2014, Model line: 508 RXH, Model: Peugeot 508 RXH 2014Pages: 338, PDF Size: 10.81 MB
Page 116 of 338
114
508RXH_en_Chap03_confort_ed01-2014
F Switch off the demist /defrost of the rear screen and door mirrors as
soon as it is no longer needed as
lower current consumption results
in reduced fuel consumption.
Front demist - defrost Rear screen
demist
- defrost
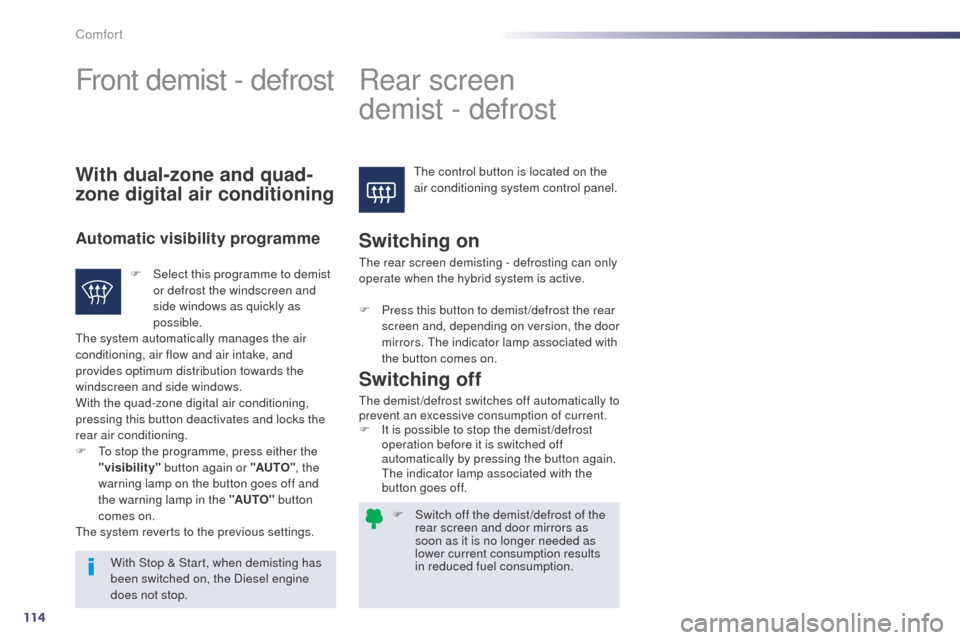
the control button is located on the
air conditioning system control panel.With dual-zone and quad-
zone digital air conditioning
Automatic visibility programmeSwitching on
With Stop & Start, when demisting has
been switched on, the Diesel engine
does not stop.
Switching off
the demist /defrost switches off automatically to
prevent an excessive consumption of current.
F
I
t is possible to stop the demist /defrost
operation before it is switched off
automatically by pressing the button again.
th
e indicator lamp associated with the
button goes off.
F
S
elect this programme to demist
or defrost the windscreen and
side windows as quickly as
possible.
th
e system automatically manages the air
conditioning, air flow and air intake, and
provides optimum distribution towards the
windscreen and side windows.
With the quad-zone digital air conditioning,
pressing this button deactivates and locks the
rear air conditioning.
F
t
o s
top the programme, press either the
"visibility" button again or "AUTO" , the
warning lamp on the button goes off and
the warning lamp in the "AUTO" button
comes on.
the
system reverts to the previous settings.
th
e rear screen demisting - defrosting can only
operate when the hybrid system is active.
F
P
ress this button to demist /defrost the rear
screen and, depending on version, the door
mirrors. t
h
e indicator lamp associated with
the button comes on.
Comfort
Page 172 of 338
170
508RXH_en_Chap06_securite-enfants_ed01-2014
Child seats
the incorrect installation of a child seat in a
vehicle compromises the child's protection in
the event of an accident.
Check that there is no seat belt or seat belt
buckle under the child seat as this could
destabilise it.
Remember to fasten the seat belts or the
child seat harnesses keeping the slack in
relation to the child's body to a minimum,
even for short journeys.
For the installation of a child seat using a
seat belt, ensure that this is well tensioned
on the child seat and that it is holding the
child seat firmly against the seat of your
vehicle. If your front passenger seat is
adjustable, move it forward if necessary.
At the rear seats, always leave sufficient
space between the front seat and:
-
a r
ear ward facing child seat,
-
t
he feet of a child seated in a for ward
facing child seat.
For this, move the front seat for ward and if
necessary straighten its backrest.
Recommendations
As a safety precaution, do not leave:
- o ne or more children alone and
unsupervised in a vehicle,
-
a c
hild or an animal in a vehicle which
is exposed to the sun, with the windows
closed,
-
t
he keys within reach of children inside
the vehicle.
to p
revent accidental opening of the doors,
use the "Child lock".
ta
ke care not to open the rear windows by
more than one third.
to p
rotect young children from the rays of
the sun, fit side blinds on the rear windows.
th
e chest part of the seat belt must be
positioned on the child's shoulder without
touching the neck.
en
sure that the lap part of the seat belt
passes correctly over the child's thighs.
P
e
uge
Ot
recommends the use of a booster
seat which has a back, fitted with a seat belt
guide at shoulder level.
For optimum installation of the "forward
facing" child seat, ensure that the back of
the child seat is as close as possible to the
backrest of the vehicle's seat, or in contact
if possible
th
e head restraint must be removed before
installing a child seat with a backrest on the
passenger seat.
en
sure that the head restraint is stowed or
attached securely so that it is not thrown
around the vehicle in the event of sharp
braking.
Refit the head restraint as soon as the child
seat is removed.Children at the front
the legislation on carrying a child on the
front passenger seat is specific to each
country. Refer to the legislation in force in
the country in which you are driving.
Deactivate the passenger's front airbag
when a "rear ward facing" child seat is
installed on the front passenger seat.
Otherwise, the child would risk being
seriously injured or killed if the airbag were
deployed.
Installing a booster
cushion
Child safety
Page 173 of 338
171
508RXH_en_Chap06_securite-enfants_ed01-2014
electric child lock
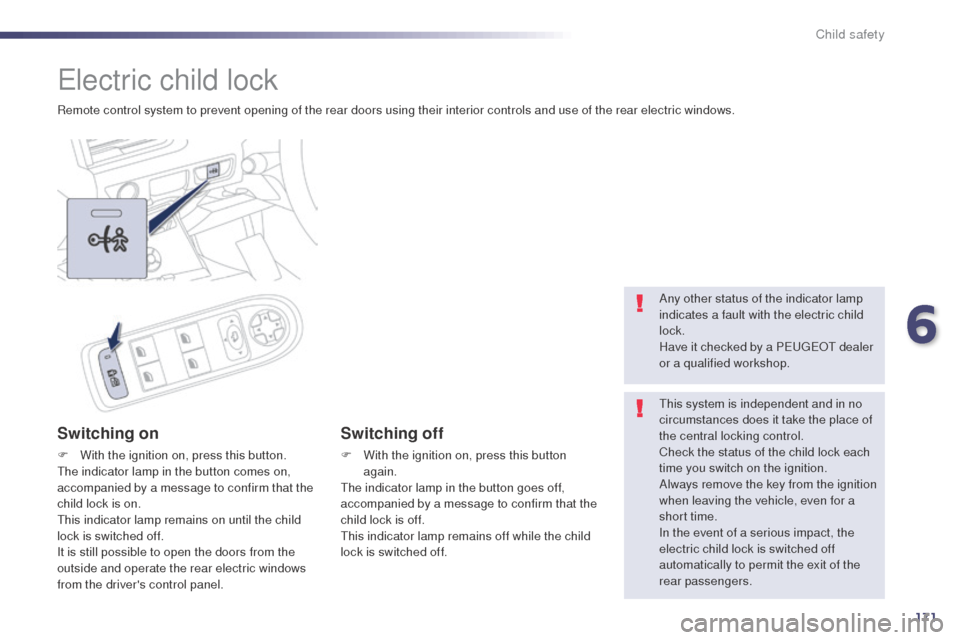
Remote control system to prevent opening of the rear doors using their interior controls and use of the rear electric windows.
Switching on
F With the ignition on, press this button.the indicator lamp in the button comes on,
accompanied by a message to confirm that the
child lock is on.
th
is indicator lamp remains on until the child
lock is switched off.
It is still possible to open the doors from the
outside and operate the rear electric windows
from the driver's control panel.
Switching off
F With the ignition on, press this button again.
th
e indicator lamp in the button goes off,
accompanied by a message to confirm that the
child lock is off.
th
is indicator lamp remains off while the child
lock is switched off. Any other status of the indicator lamp
indicates a fault with the electric child
lock.
Have it checked by a P
e
uge
Ot
dealer
or a qualified workshop.
th
is system is independent and in no
circumstances does it take the place of
the central locking control.
Check the status of the child lock each
time you switch on the ignition.
Always remove the key from the ignition
when leaving the vehicle, even for a
short time.
In the event of a serious impact, the
electric child lock is switched off
automatically to permit the exit of the
rear passengers.
6
Child safety
Page 187 of 338
185
508RXH_en_Chap07_securite_ed01-2014
Lateral airbags
Deployment
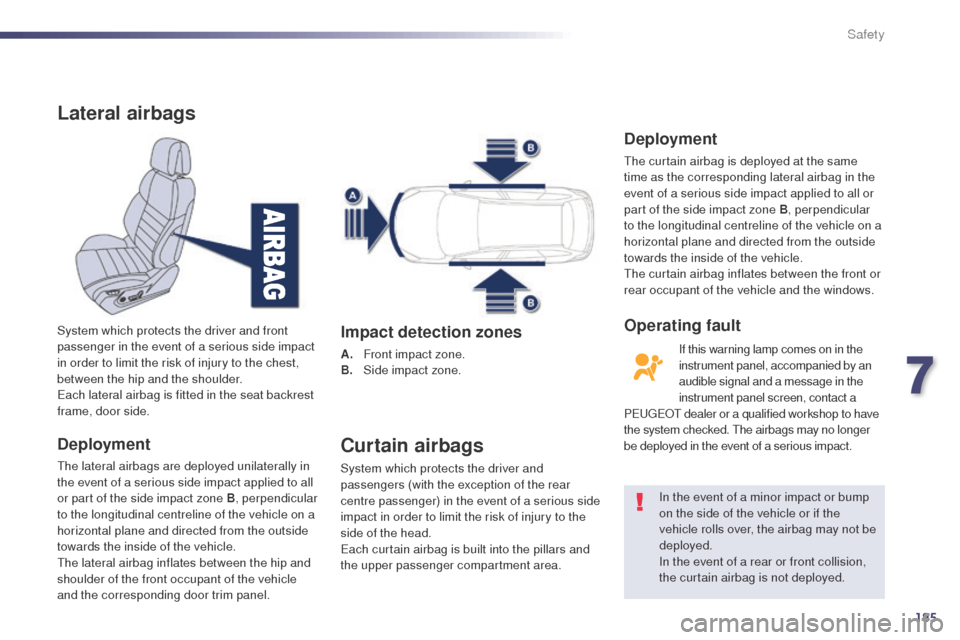
the lateral airbags are deployed unilaterally in
the event of a serious side impact applied to all
or part of the side impact zone B, perpendicular
to the longitudinal centreline of the vehicle on a
horizontal plane and directed from the outside
towards the inside of the vehicle.
th
e lateral airbag inflates between the hip and
shoulder of the front occupant of the vehicle
and the corresponding door trim panel. System which protects the driver and front
passenger in the event of a serious side impact
in order to limit the risk of injury to the chest,
between the hip and the shoulder.
ea
ch lateral airbag is fitted in the seat backrest
frame, door side.
Impact detection zones
A. Front impact zone.
B. S ide impact zone.
Curtain airbags
System which protects the driver and
passengers (with the exception of the rear
centre passenger) in the event of a serious side
impact in order to limit the risk of injury to the
side of the head.
ea
ch curtain airbag is built into the pillars and
the upper passenger compartment area. In the event of a minor impact or bump
on the side of the vehicle or if the
vehicle rolls over, the airbag may not be
deployed.
In the event of a rear or front collision,
the curtain airbag is not deployed.
Deployment
the curtain airbag is deployed at the same
time as the corresponding lateral airbag in the
event of a serious side impact applied to all or
part of the side impact zone B, perpendicular
to the longitudinal centreline of the vehicle on a
horizontal plane and directed from the outside
towards the inside of the vehicle.
th
e curtain airbag inflates between the front or
rear occupant of the vehicle and the windows.
If this warning lamp comes on in the
instrument panel, accompanied by an
audible signal and a message in the
instrument panel screen, contact a
P
e
uge
Ot
dealer or a qualified workshop to have
the system checked.
t
h
e airbags may no longer
be deployed in the event of a serious impact.
Operating fault
7
Safety
Page 209 of 338
207
508RXH_en_Chap08_info-pratiques_ed01-2014
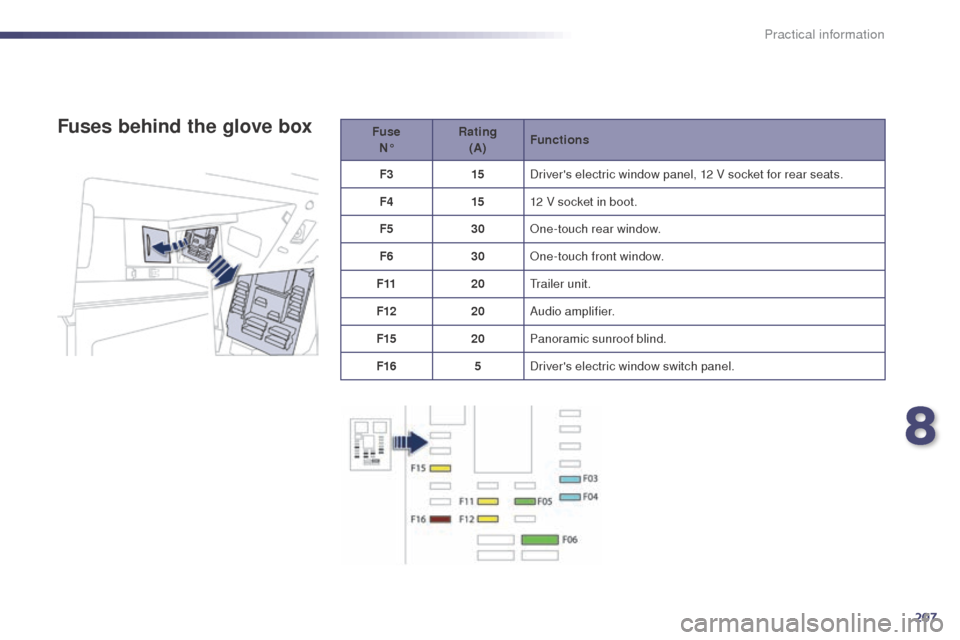
Fuse N° Rating
(A) Functions
F3 15Driver's electric window panel, 12 V socket for rear seats.
F4 1512 V socket in boot.
F5 30One-touch rear window.
F6 30One-touch front window.
F11 20
tr
ailer unit.
F12 20Audio amplifier.
F15 20Panoramic sunroof blind.
F16 5Driver's electric window switch panel.Fuses behind the glove box
8
Practical information
Page 213 of 338
211
508RXH_en_Chap08_info-pratiques_ed01-2014
Following reconnection of the battery
Following reconnection of the battery, switch on
the ignition and wait 1 minute before starting to
permit initialisation of the electronic systems.
However, if problems remain following this
operation, contact a P
e
uge
Ot
dealer or a
qualified workshop.
Referring to the corresponding section, you
must yourself reinitialise (depending on
version):
-
t
he remote control key,
-
t
he electric blind(s),
-
...
Before disconnecting the battery
Wait 2 minutes after switching off the ignition
before disconnecting the battery.
Close the windows and the doors before
disconnecting the battery.
Protect your eyes and face before
handling the battery.
All operations on the battery must be
carried out in a well ventilated area and
away from naked flames and sources
of sparks, so as to avoid the risk of
explosion or fire.
Do not try to charge a frozen battery;
the battery must first be thawed out to
avoid the risk of explosion. If the battery
has been frozen, before charging have
it checked by a P
e
uge
Ot
dealer or a
qualified workshop who will check that
the internal components have not been
damaged and the casing is not cracked,
which could cause a leak of toxic and
corrosive acid.
Do not push the vehicle to start the
engine. It is advisable to disconnect the battery
if the vehicle is to be left unused for
more than one month.
the batteries contain harmful substances
such as sulphuric acid and lead.
th ey
must be disposed of in accordance
with regulations and must not, in any
circumstances, be discarded with household
waste.
ta
ke used remote control batteries and
vehicle batteries to a special collection point.
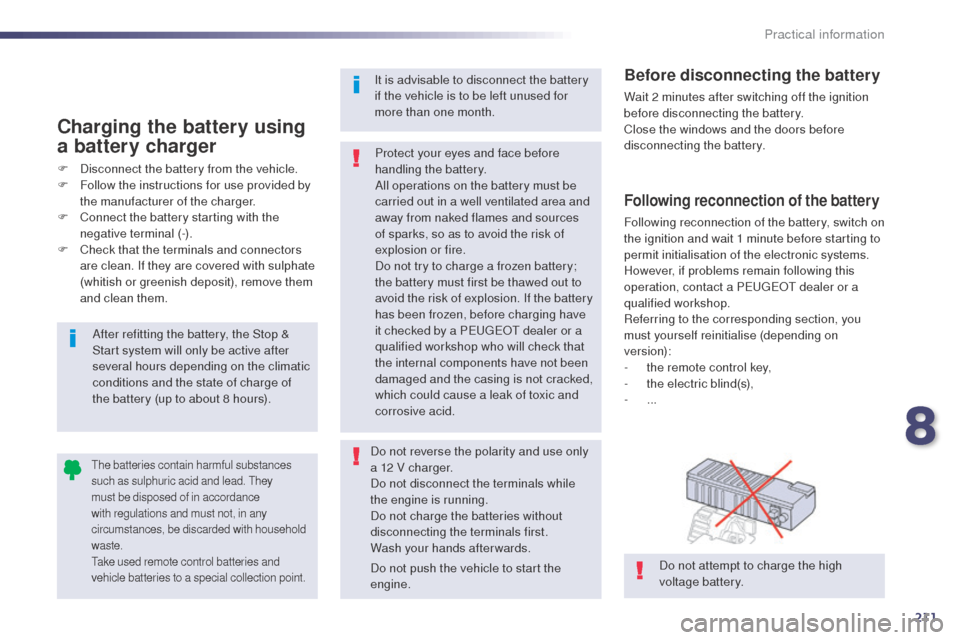
Do not attempt to charge the high
voltage battery.
After refitting the battery, the Stop &
Start system will only be active after
several hours depending on the climatic
conditions and the state of charge of
the battery (up to about 8 hours).
Charging the battery using
a battery charger
F Disconnect the battery from the vehicle.
F
F ollow the instructions for use provided by
the manufacturer of the charger.
F
C
onnect the battery starting with the
negative terminal (-).
F
C
heck that the terminals and connectors
are clean. If they are covered with sulphate
(whitish or greenish deposit), remove them
and clean them.
Do not reverse the polarity and use only
a 12 V charger.
Do not disconnect the terminals while
the engine is running.
Do not charge the batteries without
disconnecting the terminals first.
Wash your hands afterwards.
8
Practical information
Page 214 of 338
212
508RXH_en_Chap08_info-pratiques_ed01-2014
Removing - refitting the battery
this procedure allows you to safely remove the
battery, when needed to change a bulb.You can contact a P
e
uge
Ot
dealer or
a qualified workshop to have this done.Before removing
- If your vehicle has a motorised tailgate, it will not be possible to open it after
disconnecting the battery.
-
S
witch of the ignition and remove the key.
-
I
f your vehicle has Keyless e
n
try and
Starting, place the remote control at least
3 metres away.
-
W
ait around 6 minutes before
disconnecting the battery.
-
P
lace the vehicle in a ventilated area, with
free access and preferably on level ground.
-
A
pply the parking brake.
-
P
lace the gear selector in position N .
-
I
f the vehicle has an alarm, leave the
bonnet open to avoid triggering the alarm.
-
L
eave at least one window open if parking
in a secure area, other wise lock all doors
and the boot.
Practical information
Page 217 of 338
215
508RXH_en_Chap08_info-pratiques_ed01-2014
Refitting
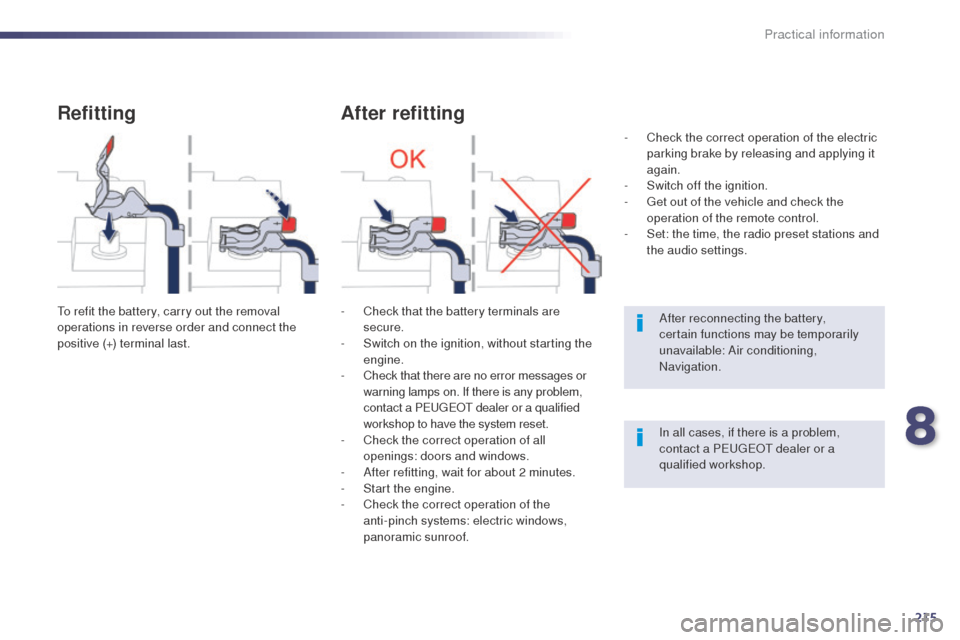
to refit the battery, carry out the removal
operations in reverse order and connect the
positive (+) terminal last.
After refitting
- Check that the battery terminals are secure.
-
S
witch on the ignition, without starting the
engine.
-
C
heck that there are no error messages or
warning lamps on. If there is any problem,
contact a P
e
uge
Ot
dealer or a qualified
workshop to have the system reset.
-
C
heck the correct operation of all
openings: doors and windows.
-
A
fter refitting, wait for about 2 minutes.
-
S
tart the engine.
-
C
heck the correct operation of the
anti-pinch systems: electric windows,
panoramic sunroof. After reconnecting the battery,
certain functions may be temporarily
unavailable: Air conditioning,
Navigation.
In all cases, if there is a problem,
contact a P
e
uge
Ot
dealer or a
qualified workshop.
-
C
heck the correct operation of the electric
parking brake by releasing and applying it
again.
-
S
witch off the ignition.
- g
e
t out of the vehicle and check the
operation of the remote control.
-
S
et: the time, the radio preset stations and
the audio settings.
8
Practical information
Page 226 of 338
224
508RXH_en_Chap08_info-pratiques_ed01-2014
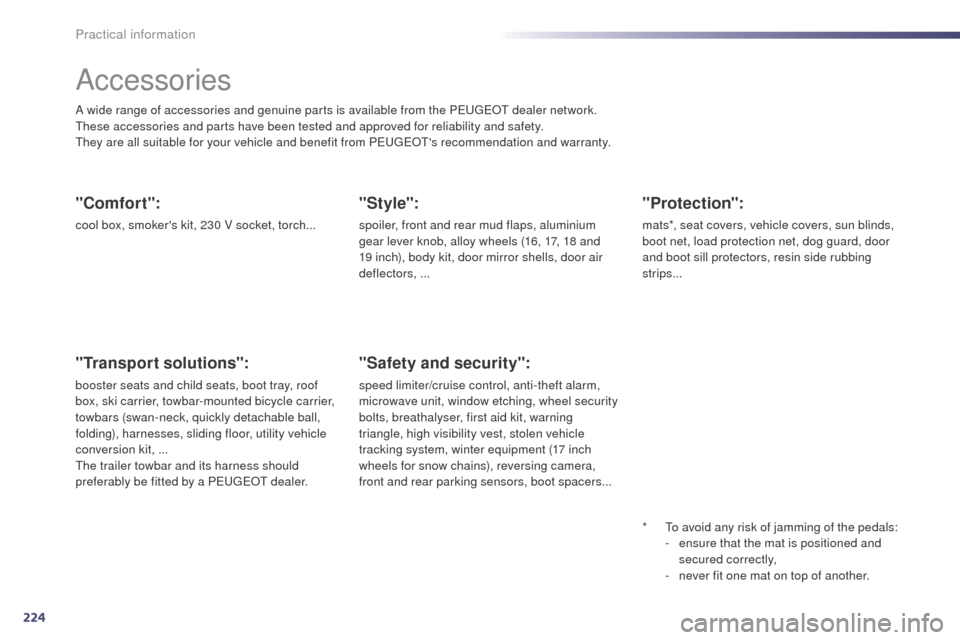
Accessories
A wide range of accessories and genuine parts is available from the PeugeOt dealer network.th
ese accessories and parts have been tested and approved for reliability and safety.
th
ey are all suitable for your vehicle and benefit from P
e
uge
Ot'
s recommendation and warranty.
"Comfort":
cool box, smoker's kit, 230 V socket, torch...
"Transport solutions":
booster seats and child seats, boot tray, roof
box, ski carrier, towbar-mounted bicycle carrier,
towbars (swan-neck, quickly detachable ball,
folding), harnesses, sliding floor, utility vehicle
conversion kit, ...
th
e trailer towbar and its harness should
preferably be fitted by a P
e
uge
Ot
dealer.
"Style":
spoiler, front and rear mud flaps, aluminium
gear lever knob, alloy wheels (16, 17, 18 and
19 inch), body kit, door mirror shells, door air
deflectors, ...
*
t
o a
void any risk of jamming of the pedals:
-
e
nsure that the mat is positioned and
secured correctly,
-
n
ever fit one mat on top of another.
"Safety and security":
speed limiter/cruise control, anti-theft alarm,
microwave unit, window etching, wheel security
bolts, breathalyser, first aid kit, warning
triangle, high visibility vest, stolen vehicle
tracking system, winter equipment (17 inch
wheels for snow chains), reversing camera,
front and rear parking sensors, boot spacers...
"Protection":
mats*, seat covers, vehicle covers, sun blinds,
boot net, load protection net, dog guard, door
and boot sill protectors, resin side rubbing
strips...
Practical information
Page 311 of 338
309
508RXH_en_Chap11c_SMegplus-i_ed01-2014
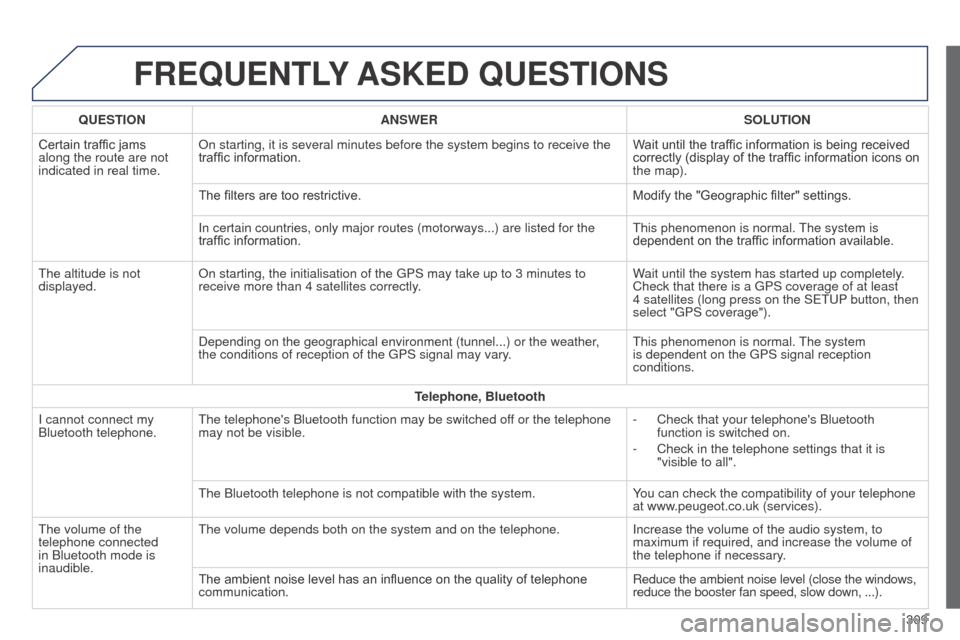
FREQUENTLY ASKED QUESTIONS
QUESTION ANSWER SOLUTION
Certain traffic jams
along the route are not
indicated in real time. On starting, it is several minutes before the system begins to receive t\
he
traffic information.
Wait until the traffic information is being received
correctly (display of the traffic information icons on
the map).
The filters are too restrictive. Modify the "Geographic filter" settings.
In certain countries, only major routes (motorways...) are listed for \
the
traffic information.
t
his phenomenon is normal.
t
he system is
dependent on the traffic information available.
t
he altitude is not
displayed. On starting, the initialisation of the
g PS may take up to 3 minutes to
receive more than 4 satellites correctly. Wait until the system has started up completely.
Check that there is a
g PS coverage of at least
4
satellites (long press on the S etu P button, then
select "
g PS coverage").
Depending on the geographical environment (tunnel...) or the weather,
the conditions of reception of the
g PS signal may vary.
t
his phenomenon is normal.
t
he system
is dependent on the
g PS signal reception
conditions.
Telephone, Bluetooth
I cannot connect my
Bluetooth telephone.
t
he telephone's Bluetooth function may be switched off or the telephone
may not be visible. -
Check that your telephone's Bluetooth
function is switched on.
-
Check in the telephone settings that it is
"visible to all".
t
he Bluetooth telephone is not compatible with the system. You can check the compatibility of your telephone
at www.peugeot.co.uk (services).
t
he volume of the
telephone connected
in Bluetooth mode is
inaudible.
t
he volume depends both on the system and on the telephone. Increase the volume of the audio system, to
maximum if required, and increase the volume of
the telephone if necessary.
The ambient noise level has an influence on the quality of telephone
communication. Reduce the ambient noise level (close the windows,
reduce the booster fan speed, slow down, ...).