ignition Peugeot 508 RXH 2014 Manual PDF
[x] Cancel search | Manufacturer: PEUGEOT, Model Year: 2014, Model line: 508 RXH, Model: Peugeot 508 RXH 2014Pages: 338, PDF Size: 10.81 MB
Page 229 of 338
227
508RXH_en_Chap09_verifications_ed01-2014
Opening the bonnet
Opening
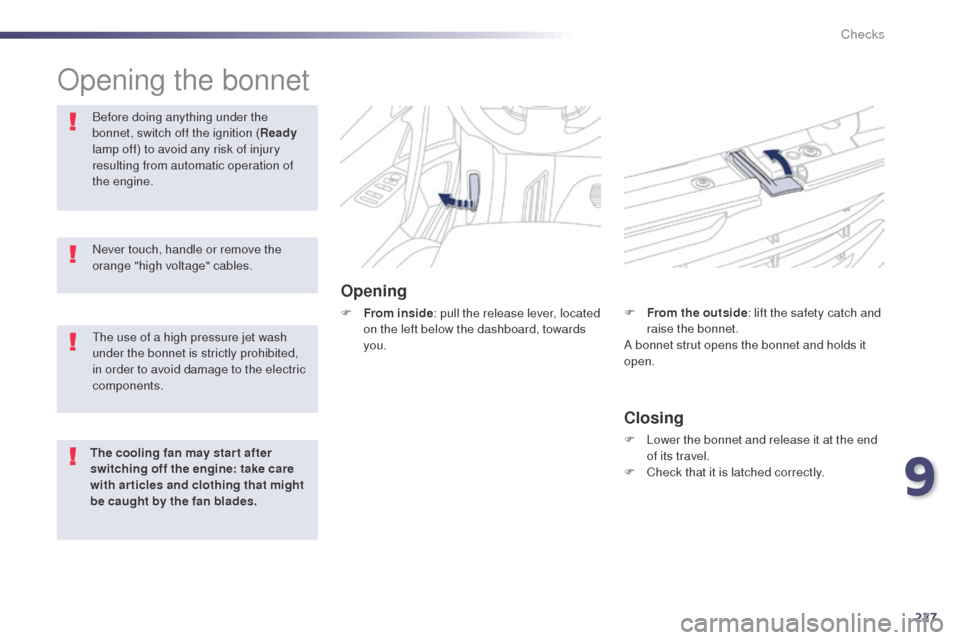
F From inside: pull the release lever, located
on the left below the dashboard, towards
you.
Before doing anything under the
bonnet, switch off the ignition (
Ready
lamp off) to avoid any risk of injury
resulting from automatic operation of
the engine.
Closing
F Lower the bonnet and release it at the end of its travel.
F
C
heck that it is latched correctly.
F
F
rom the outside
: lift the safety catch and
raise the bonnet.
A bonnet strut opens the bonnet and holds it
open.
Never touch, handle or remove the
orange "high voltage" cables.
th
e use of a high pressure jet wash
under the bonnet is strictly prohibited,
in order to avoid damage to the electric
components.
The cooling fan may star t after
switching off the engine: take care
with articles and clothing that might
be caught by the fan blades.
9
Checks
Page 230 of 338
228
508RXH_en_Chap09_verifications_ed01-2014
On vehicles fitted with HDi engines, the fuel
system must be primed if you run out of fuel;
refer to the corresponding engine compartment
view.
Running out of fuel (Diesel)
If the tank on your vehicle is fitted with
a misfuel prevention device, refer to the
"Misfuel prevention (Diesel)" section.F
F ill the fuel tank with at least five litres of
Diesel.
F
O
pen the bonnet.
F
I
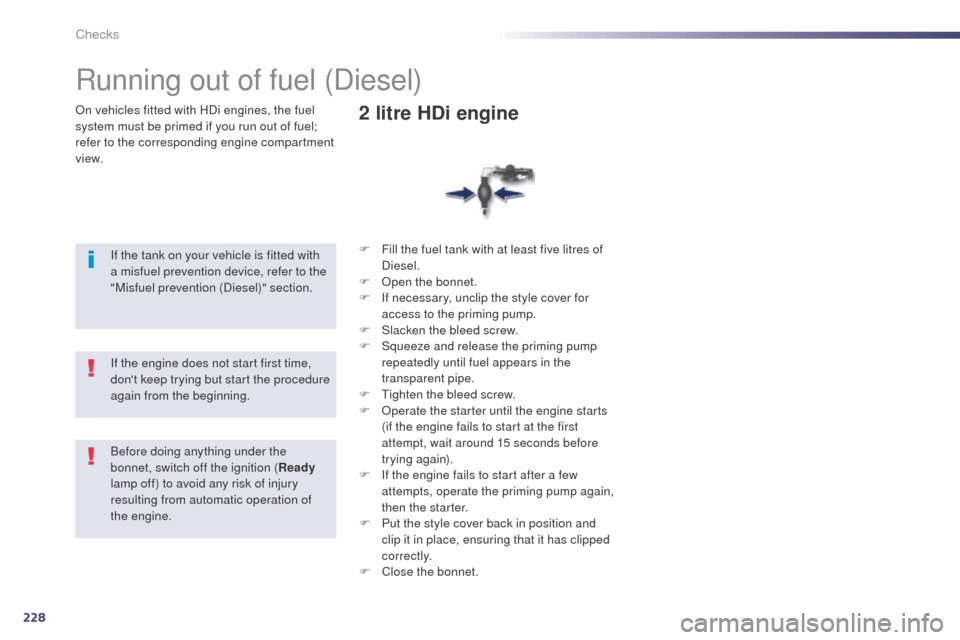
f necessary, unclip the style cover for
access to the priming pump.
F
S
lacken the bleed screw.
F
S
queeze and release the priming pump
repeatedly until fuel appears in the
transparent pipe.
F
t
i
ghten the bleed screw.
F
O
perate the starter until the engine starts
(if the engine fails to start at the first
attempt, wait around 15 seconds before
trying again).
F
I
f the engine fails to start after a few
attempts, operate the priming pump again,
then the starter.
F
P
ut the style cover back in position and
clip it in place, ensuring that it has clipped
c o r r e c t l y.
F
C
lose the bonnet.
2 litre HDi engine
If the engine does not start first time,
don't keep trying but start the procedure
again from the beginning.
Before doing anything under the
bonnet, switch off the ignition (Ready
lamp off) to avoid any risk of injury
resulting from automatic operation of
the engine.
Checks
Page 231 of 338
229
508RXH_en_Chap09_verifications_ed01-2014
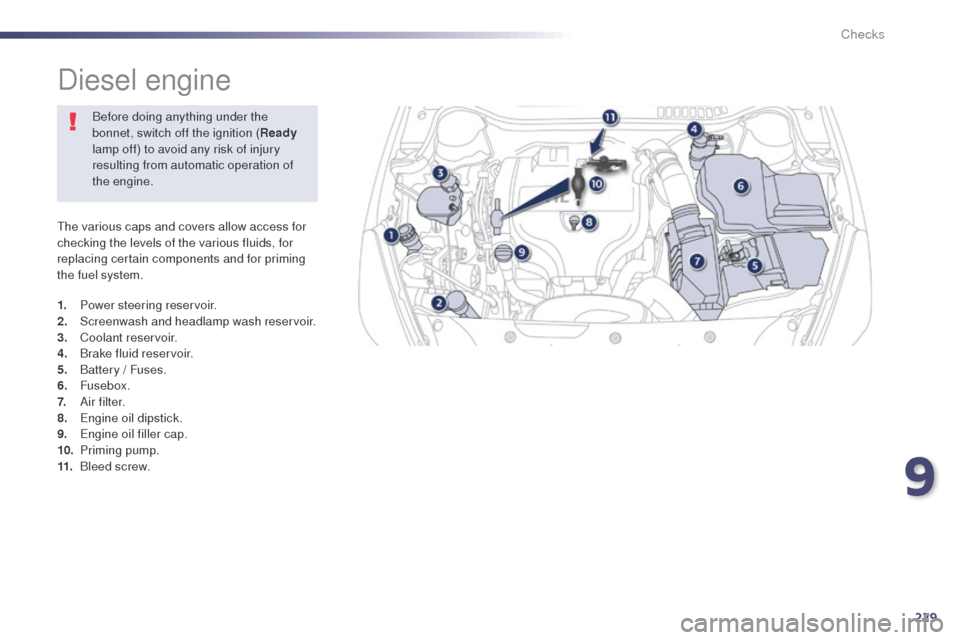
the various caps and covers allow access for
checking the levels of the various fluids, for
replacing certain components and for priming
the fuel system.
Diesel engine
1. Power steering reservoir.
2. Screenwash and headlamp wash reservoir.
3.
C
oolant reservoir.
4.
B
rake fluid reservoir.
5.
B
attery / Fuses.
6.
Fusebox.
7.
A
i r f i l t e r.
8.
e
n
gine oil dipstick.
9.
e
n
gine oil filler cap.
10.
P
riming pump.
11.
B
leed screw.Before doing anything under the
bonnet, switch off the ignition (
Ready
lamp off) to avoid any risk of injury
resulting from automatic operation of
the engine.
9
Checks
Page 232 of 338
230
508RXH_en_Chap09_verifications_ed01-2014
Checking levels
Before doing anything under the
bonnet, switch off the ignition (Ready
lamp off) to avoid any risk of injury
resulting from automatic operation of
the engine.
Engine oil level
the check is carried out either when
the ignition is switched on using the
oil level indicator in the instrument
panel for vehicles with and electric oil
level gauge, or using the dipstick.
to e
nsure that the reading is correct,
your vehicle must be parked on a level
sur face and the engine having been off
for more than 30 minutes.
It is normal to top up the oil level between
two services (or oil changes). P
e
uge
Ot
recommends that you check the level, and top
up if necessary, every 3 000 miles (5 000 kms). Check all of these levels regularly, in line with the warranty and maintenance record. t
o
p them up if necessary, unless other wise indicated.
If a level drops significantly, have the corresponding system checked by a P
e
uge
Ot
dealer or a qualified workshop.
ta
ke care when working under the bonnet, as certain areas of the engine may be extremely hot (risk of burns) and the cooling fan could start at
any time (even with the ignition off).
Checking using the dipstick
Refer to the "Diesel engine" section for
the location of the dipstick in the engine
compartment of your vehicle.
F
t
a
ke the dipstick by its coloured grip and
remove it completely.
F
W
ipe the end of the dipstick using a clean
non-fluffy cloth.
F
R
efit the dipstick and push fully down, then
pull it out again to make the visual check:
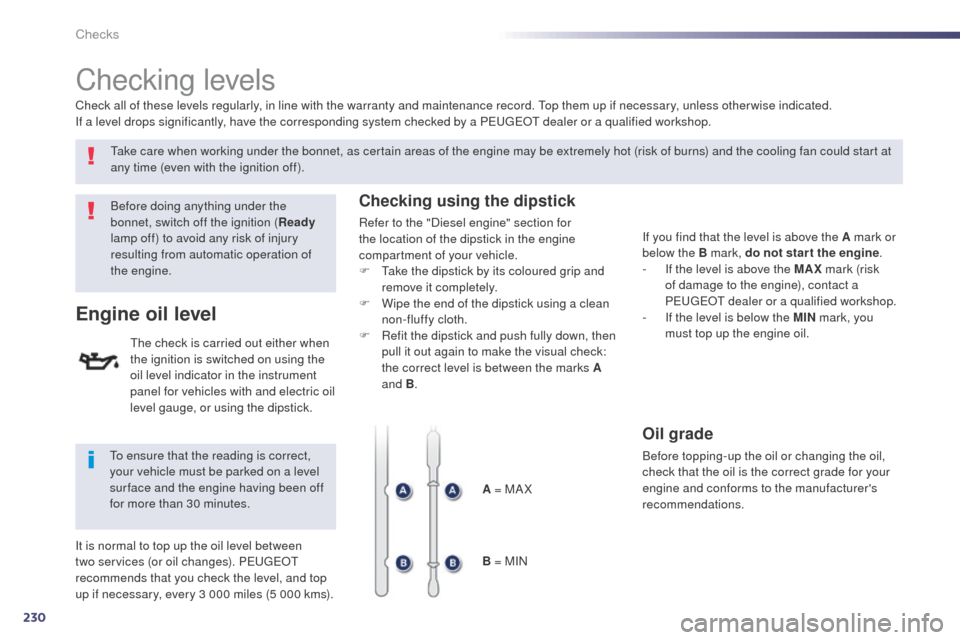
the correct level is between the marks A
and B .
A = MA X
B = MIN If you find that the level is above the A mark or
below the B mark, do not star t the engine
.
-
I
f the level is above the MAX mark (risk
of damage to the engine), contact a
P
e
uge
Ot
dealer or a qualified workshop.
-
I
f the level is below the MIN mark, you
must top up the engine oil.
Oil grade
Before topping-up the oil or changing the oil,
check that the oil is the correct grade for your
engine and conforms to the manufacturer's
recommendations.
Checks
Page 233 of 338
231
508RXH_en_Chap09_verifications_ed01-2014
the brake fluid level should be close
to the "MA X" mark. If it is not, check
the brake pad wear.
Brake fluid level
Changing the fluid
Refer to the warranty and maintenance record
for details of the interval for this operation.
Fluid specification
the brake fluid must conform to the
manufacturer's recommendations.
Power steering fluid level
the power steering fluid level should
be close to the "MA X" mark. With
the engine cold, unscrew the cap to
check the level.
Topping up the engine oil level
Refer to the "Diesel engine" section for the
location of the oil filler cap in the engine
compartment of your vehicle.
F u
n
screw the oil filler cap to reveal the filler
aperture.
F
A
dd oil in small quantities, avoiding any
spills on engine components (risk of fire).
F
W
ait a few minutes before checking the
level again using the dipstick.
F
A
dd more oil if necessary.
F
A
fter checking the level, carefully refit the
oil filler cap and the dipstick in its tube.
After topping up the oil, the check when
switching on the ignition with the oil level
indicator in the instrument panel is not valid
during the 30 minutes after topping up.
Engine oil change
Refer to the warranty and maintenance record
for the interval for this operation.
In order to maintain the reliability of the engine
and emission control system, the use of
additives in the engine oil is prohibited.
9
Checks
Page 235 of 338
233
508RXH_en_Chap09_verifications_ed01-2014
Checks
12 V battery
the battery does not require any
maintenance.
However, check that the terminals
are clean and correctly tightened, Refer to the warranty and
maintenance record for details of
the replacement intervals for these
components.
Air filter and passenger compartment filter
Replace the oil filter each time the
engine oil is changed.
Refer to the warranty and
maintenance record for details of
the replacement interval for this
component.
Oil filter
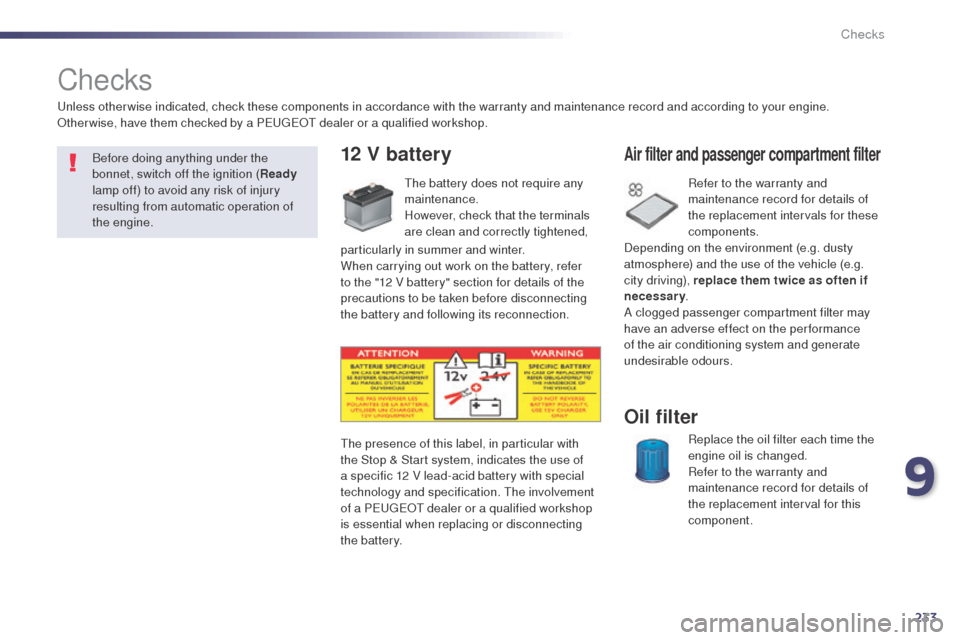
the presence of this label, in particular with
the Stop & Start system, indicates the use of
a specific 12 V lead-acid battery with special
technology and specification.
t
h
e involvement
of a P
e
uge
Ot
dealer or a qualified workshop
is essential when replacing or disconnecting
the battery.
un
less other wise indicated, check these components in accordance with the warranty and maintenance record and according to your engine.
Other wise, have them checked by a P
e
uge
Ot
dealer or a qualified workshop.
Before doing anything under the
bonnet, switch off the ignition ( Ready
lamp off) to avoid any risk of injury
resulting from automatic operation of
the engine.
particularly in summer and winter.
When carrying out work on the battery, refer
to the "12 V battery" section for details of the
precautions to be taken before disconnecting
the battery and following its reconnection. Depending on the environment (e.g. dusty
atmosphere) and the use of the vehicle (e.g.
city driving), replace them twice as often if
necessary
.
A clogged passenger compartment filter may
have an adverse effect on the per formance
of the air conditioning system and generate
undesirable odours.
9
Checks
Page 244 of 338
242
508RXH_en_Chap11a_BtA_ed01-2014
EMERGENCY OR ASSIST ANCE CALL
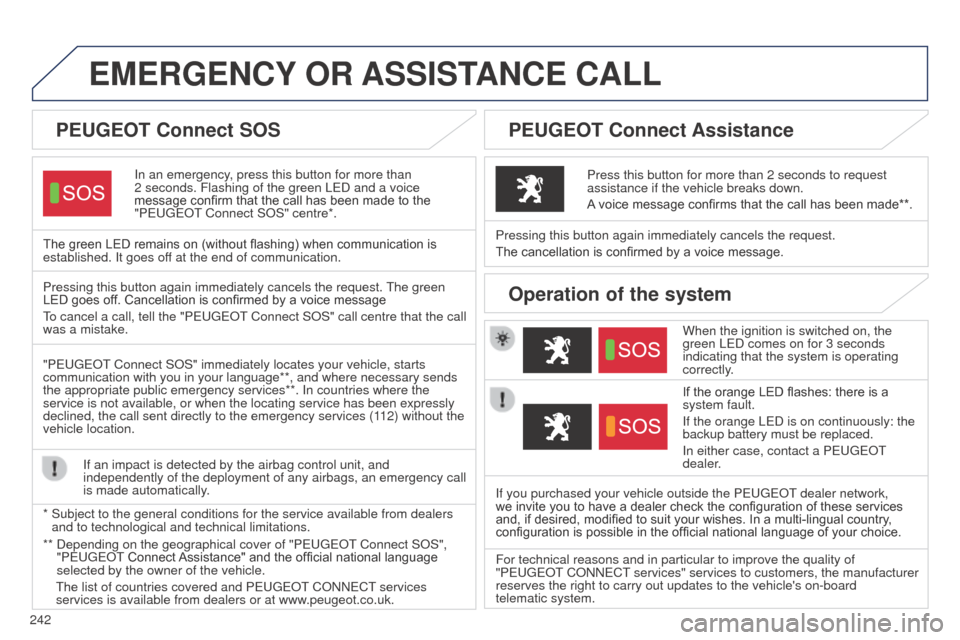
In an emergency, press this button for more than
2
seconds. Flashing of the green L e D and a voice
message confirm that the call has been made to the
"Peuge
O t Connect SOS" centre*.
The green LED remains on (without flashing) when communication is
established. It goes off at the end of communication.
When the ignition is switched on, the
green L
e D comes on for 3 seconds
indicating that the system is operating
correctly.
Pressing this button again immediately cancels the request.
The cancellation is confirmed by a voice message.
Press this button for more than 2 seconds to request
assistance if the vehicle breaks down.
A voice message confirms that the call has been made**.
Operation of the systemPressing this button again immediately cancels the request. t
he green
LED goes off. Cancellation is confirmed by a voice message
to cancel a call, tell the "Peuge
O t Connect SOS" call centre that the call
was a mistake.
"Peuge
O t Connect SOS" immediately locates your vehicle, starts
communication with you in your language**, and where necessary sends
the appropriate public emergency services**. In countries where the
service is not available, or when the locating service has been expressl\
y
declined, the call sent directly to the emergency services (112) without the
vehicle location.
If an impact is detected by the airbag control unit, and
independently of the deployment of any airbags, an emergency call
is made automatically.
*
Subject to the general conditions for the service available from dealers\
and to technological and technical limitations.
**
Depending on the geographical cover of "Peuge
O t Connect SOS",
"Peuge
O t Connect Assistance" and the official national language
selected by the owner of the vehicle.
t
he list of countries covered and P euge O t
CONN
e C t
services
services is available from dealers or at www
.peugeot.co.uk. If the orange LED flashes: there is a
system fault.
If the orange L
e D is on continuously: the
backup battery must be replaced.
In either case, contact a P
euge O t
dealer
.
If you purchased your vehicle outside the P
euge O t
dealer network,
we invite you to have a dealer check the configuration of these services
and, if desired, modified to suit your wishes. In a multi-lingual country ,
configuration is possible in the official national language of your choice.
For technical reasons and in particular to improve the quality of
"P
euge O t
CONN
e C t
services" services to customers, the manufacturer
reserves the right to carry out updates to the vehicle's on-board
telematic
system.
PEUGEOT Connect SOSP EUGEOT Connect Assistance
Page 250 of 338
248
02
508RXH_en_Chap11c_SMegplus-i_ed01-2014
With the engine running, press to
mute the sound.
With the ignition off, press to switch
the system off.
Volume (each source is
independent, including "Traffic
announcements (t
A)" and
navigation instructions).
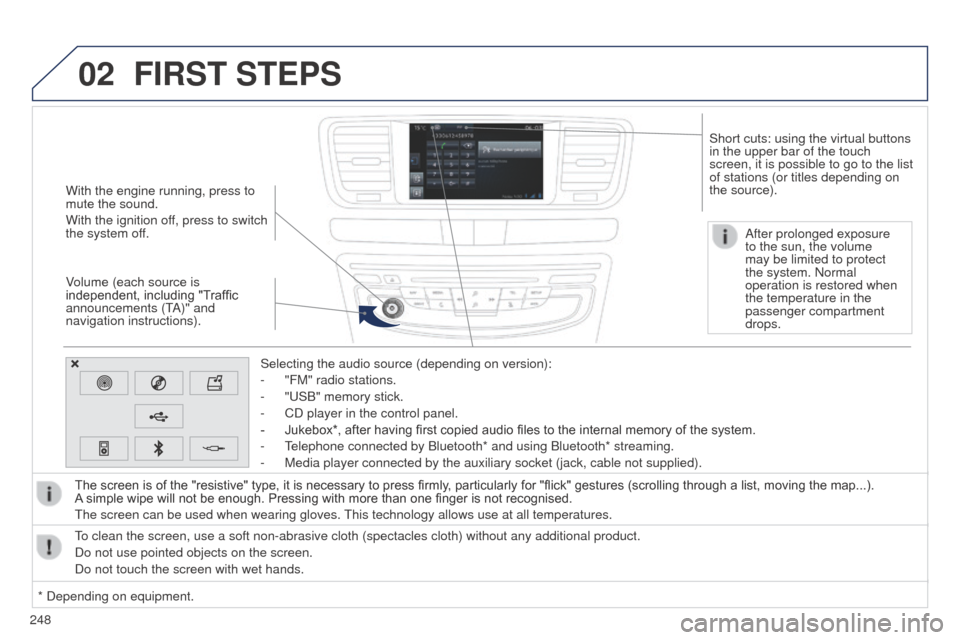
Selecting the audio source (depending on version):
-
"FM" radio stations.
-
"
u SB" memory stick.
-
CD player in the control panel.
-
Jukebox*, after having first copied audio files to the internal memory of the system.
-
t
elephone connected by Bluetooth* and using Bluetooth* streaming.
-
Media player connected by the auxiliary socket (jack, cable not supplie\
d).
The screen is of the "resistive" type, it is necessary to press firmly , particularly for "flick" gestures (scrolling through a list, moving the map...).
A
simple wipe will not be enough. Pressing with more than one finger is not recognised.
t
he screen can be used when wearing gloves.
t
his technology allows use at all temperatures.
FIRST STEPS
* Depending on equipment.
to clean the screen, use a soft non-abrasive cloth (spectacles cloth) w\
ithout any additional product.
Do not use pointed objects on the screen.
Do not touch the screen with wet hands. After prolonged exposure
to the sun, the volume
may be limited to protect
the system. Normal
operation is restored when
the temperature in the
passenger compartment
drops.
Short cuts: using the virtual buttons
in the upper bar of the touch
screen, it is possible to go to the list
of stations (or titles depending on
the source).
Page 262 of 338
260
04
508RXH_en_Chap11c_SMegplus-i_ed01-2014
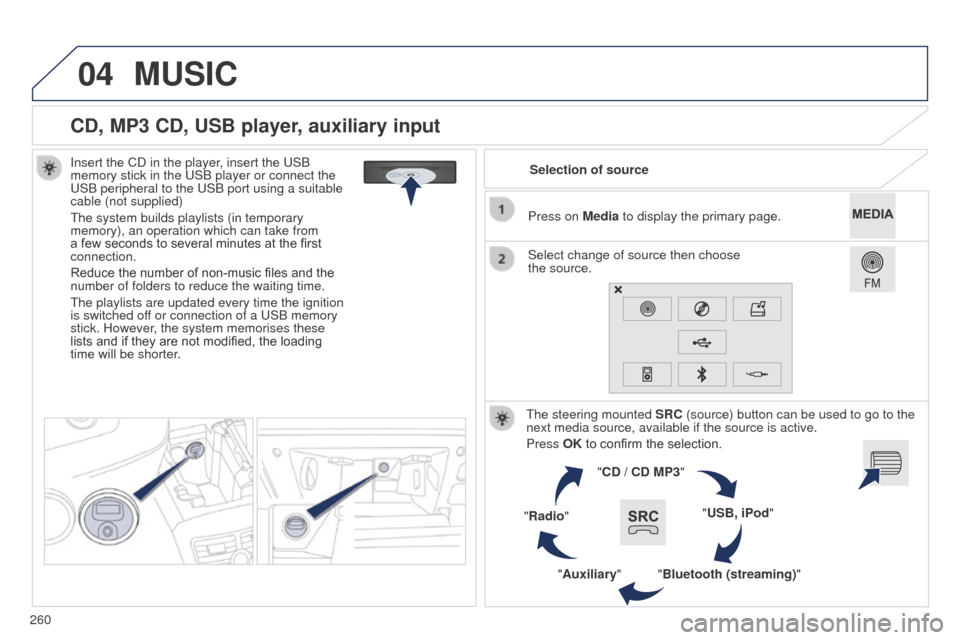
CD, MP3 CD, USB player, auxiliary input
Insert the CD in the player, insert the uSB
memory stick in the u SB player or connect the
u
SB peripheral to the u SB port using a suitable
cable (not supplied)
t
he system builds playlists (in temporary
memory), an operation which can take from
a few seconds to several minutes at the first
connection.
Reduce the number of non-music files and the
number of folders to reduce the waiting time.
t
he playlists are updated every time the ignition
is switched off or connection of a
u SB memory
stick. However, the system memorises these
lists and if they are not modified, the loading
time will be shorter. Selection of source
t
he steering mounted SRC (source) button can be used to go to the
next media source, available if the source is active.
Press OK to confirm the selection.
"CD / CD MP3"
"USB, iPod"
"Bluetooth (streaming)"
"Auxiliary"
"Radio" Select change of source then choose
the
source.
Press on Media to display the primary page.
MUSIC
Page 305 of 338
303
08
508RXH_en_Chap11c_SMegplus-i_ed01-2014
Depending on your telephone, you may be asked to accept
automatic connection every time the ignition is switched on.
Depending on the type of telephone, the system
will ask you to accept or not the transfer of your
contacts.
t
he services available depend on the network, the SIM card and the
compatibility of the Bluetooth telephone used. Check the telephone
manual and with your network provider for details of the services
available to you.
On return to the vehicle, the last telephone connected automatically
reconnects, within around 30 seconds after switching on the ignition
(Bluetooth activated).
to modify the automatic connection mode, select the telephone in
the list then select the desired profile.
t
he telephone is added to the list.
BLUETOOTH
If not, select "
Update".
The ability of the system to connect with only one profile depends on
the telephone. The two profiles may both connect by default.
Visit www.peugeot.co.uk for more information (compatibility,
additional help, ...).
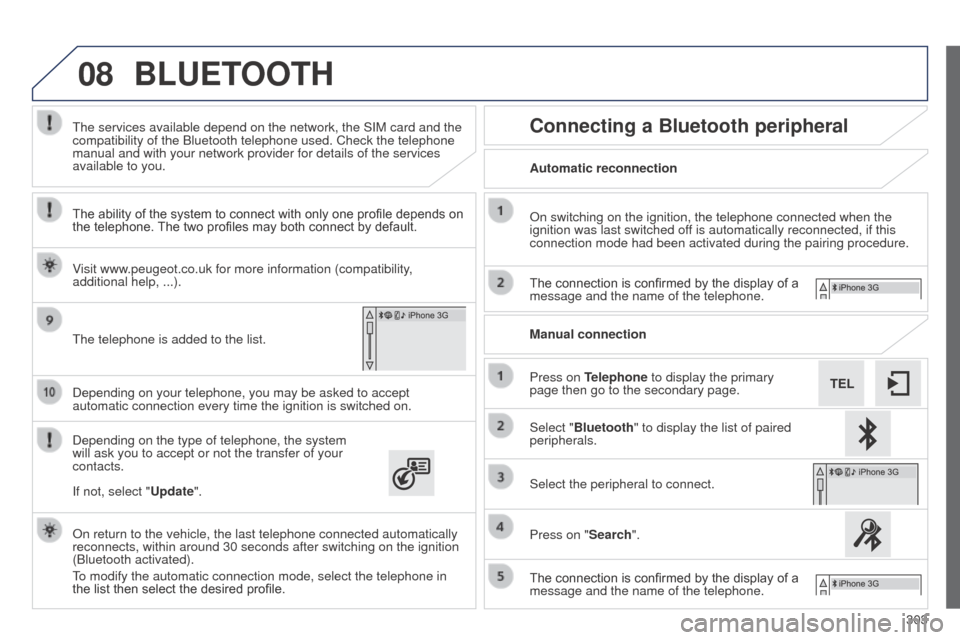
Automatic reconnection
Connecting a Bluetooth peripheral
On switching on the ignition, the telephone connected when the
ignition was last switched off is automatically reconnected, if this
connection mode had been activated during the pairing procedure.
The connection is confirmed by the display of a
message and the name of the telephone.
Press on Telephone to display the primary
page then go to the secondary page. Manual connection
Select "Bluetooth" to display the list of paired
peripherals.
Select the peripheral to connect.
Press on "Search".
The connection is confirmed by the display of a
message and the name of the telephone.