Engine oil change Peugeot Boxer 2020 Owner's Manual
[x] Cancel search | Manufacturer: PEUGEOT, Model Year: 2020, Model line: Boxer, Model: Peugeot Boxer 2020Pages: 196, PDF Size: 5.1 MB
Page 7 of 196
5
Eco-driving
Eco-driving
Eco-driving refers to a range of everyday
practices that allow the motorist to optimise their
fuel consumption and CO
2emissions.
Optimise your use of the gearbox
With a manual gearbox, move off gently and
change up promptly. While accelerating, change
up early.
The gear efficiency indicator prompts you to
engage the most suitable gear: whenever this
indication is displayed on the instrument panel,
follow it straight away.
Drive smoothly
Maintain a safe distance between vehicles, use
engine braking rather than the brake pedal and
press the accelerator gradually. These attitudes
help to save fuel, reduce CO
2 emissions and
decrease general traffic noise.
If the vehicle has the steering-mounted
"CRUISE" control, use cruise control at speeds
above 19 mph (30 km/h) when traffic is flowing
smoothly.
Use electrical equipment wisely
Before moving off, if the passenger compartment
is too warm, ventilate it by opening the windows
and air vents before using the air conditioning.
At speeds above 31 mph (50 km/h), close the windows and leave the air vents open. Consider using equipment that can help keep
the temperature in the passenger compartment
down.
Unless automatically regulated, switch off the air
conditioning as soon as the desired temperature
has been reached.
Switch off the demisting and defrosting functions,
if they are not managed automatically.
Switch off the heated seat as soon as possible.
Switch off the headlamps and foglamps when
the visibility conditions do not require their use.
Avoid running the engine before moving off,
particularly in winter; your vehicle will warm up
much faster while driving.
As a passenger, avoid connecting your
multimedia devices (film, music, video game,
etc.) to help reduce consumption of electrical
energy, and hence fuel.
Disconnect all portable devices before leaving
the vehicle.
Limit the causes of excess consumption
Spread loads throughout the vehicle.
Limit the loads carried in the vehicle and
minimise wind resistance (roof bars, roof rack,
bicycle carrier, trailer, etc.). Preferably, use a
roof box.
Remove roof bars and roof racks after use.
At the end of winter, remove snow tyres and refit
summer tyres.
Comply with servicing instructions
Check tyre pressures regularly, with the tyres
cold, referring to the label in the door aperture on
the driver's side.
Carry out this check in particular:
– before a long journey
.– at each change of season.– after a long period out of use.Do not overlook the spare wheel and, where
applicable, the tyres on your trailer or caravan.
Have your vehicle serviced regularly (engine oil,
oil filter, air filter, passenger compartment filter,
etc.) and observe the schedule of operations in
the manufacturer's service schedule.
With a BlueHDi Diesel engine, if the SCR system
is faulty, your vehicle will emit pollution. Visit
a PEUGEOT dealer or a qualified workshop
as soon as possible to restore your vehicle’s
nitrogen oxide emissions to regulatory
compliance.
When filling the fuel tank, do not continue after
the third nozzle cut-out, to avoid overflow.
You will only see the fuel consumption of your
new vehicle settle down to a consistent average
after the first 1,900 miles (3,000 kilometres).
Page 9 of 196
7
Instruments
1For more information on a system or a function,
refer to the corresponding section.
Warning lamp continuously
lit
The illumination of a red or orange warning lamp
indicates the occurrence of a fault that needs
further investigation.
If a warning lamp remains lit
The references (1), (2) and (3) in the warning
and indicator lamp description indicate whether
you should contact a qualified professional in
addition to the immediate recommended actions.
(1): You must stop the vehicle.
Stop as soon as it is safe to do so and switch off
the ignition.
(2): Contact a PEUGEOT dealer or a qualified
workshop.
(3): Visit a PEUGEOT dealer or a qualified
workshop.
List of warning and
indicator lamps
Red warning/indicator lamps
Coolant temperature
On H in the red zone or fixed with the
needle in the red zone.
The coolant temperature is too high and/or has
abnormally increased. Carry out (1), then wait until the engine has
cooled down before topping up the level, if
necessary. If the problem persists, carry out (2).
Engine oil pressureFlashing, for a few seconds, accompanied
by a message in the display.
The engine oil quality is deteriorated.
Change the engine oil as soon as possible.
After a second alert level, engine performance
will be limited.
Temporarily or permanently on, with the engine running.
A lack of oil or a major malfunction is detected.
Carry out (1) then manually check the level.
If necessary, top up.
If the level is correct, carry out (2).
Battery chargeFixed.
A malfunction in the charging circuit or the
battery is detected.
Check the battery terminals.
Fixed or flashing, despite the checks.
An ignition or injection malfunction is
detected.
Carry out (2).
Opening detectionFixed.
One of the vehicle access openings is not
properly closed.
Check that the cab doors, the rear and side
doors and the bonnet are closed.
Power steeringFixed, accompanied by an audible signal
and a message on the screen.
The power steering has a fault.
Drive carefully at moderate speed, then carry
out (3).
AirbagsFixed or flashing.
One of the airbags or seat belt
pyrotechnic pretensioners is faulty.
Carry out (3).
Seat belt not fastenedFixed, then flashing.
The driver has not fastened his seat belt.
Pull the strap then insert the tongue in the
buckle.
Accompanied by an audible signal, then fixed.
The vehicle is moving with the driver's seat belt
unfastened.
Check that the seat belt is fastened correctly by
pulling the strap.
Pneumatic suspensionFixed.
The system has a fault.
Carry out (3).
Parking brakeFixed.
The parking brake is applied or not
properly released.
Page 12 of 196
10
Instruments
Be extra vigilant and avoid sudden braking.
Date / TimeFixed.
It is set via the “MODE” menu.
Beam heightFixed.
The headlamps are adjusted from position
0 to 3 depending on the load transported.
Adjust with the buttons on the MODE control
module.
Service spannerFixed.
Service is due.
Refer to the list of checks in the manufacturer's
service schedule then have the service carried
out.
Stop & StartFixed.
With the vehicle stationary (traffic lights,
stop sign, congestion, etc.), the Stop & Start
system puts the engine in STOP mode.
The indicator lamp goes off and the engine
restarts automatically in START mode, as soon
as you move off.
Flashing for a few seconds, then goes off.
STOP mode is temporarily unavailable.
Gear shift indicatorFixed.
The next higher gear may be engaged.
Speed limiterFixed.
The limiter is activated.
Fixed with "OFF".
The limiter is selected and not active.
Indicators
Service information
For a few seconds after the ignition is switched
on, the spanner symbolising service information
comes on: the screen informs you when the next
service is due, in accordance with the servicing
schedule indicated in the manufacturer's service
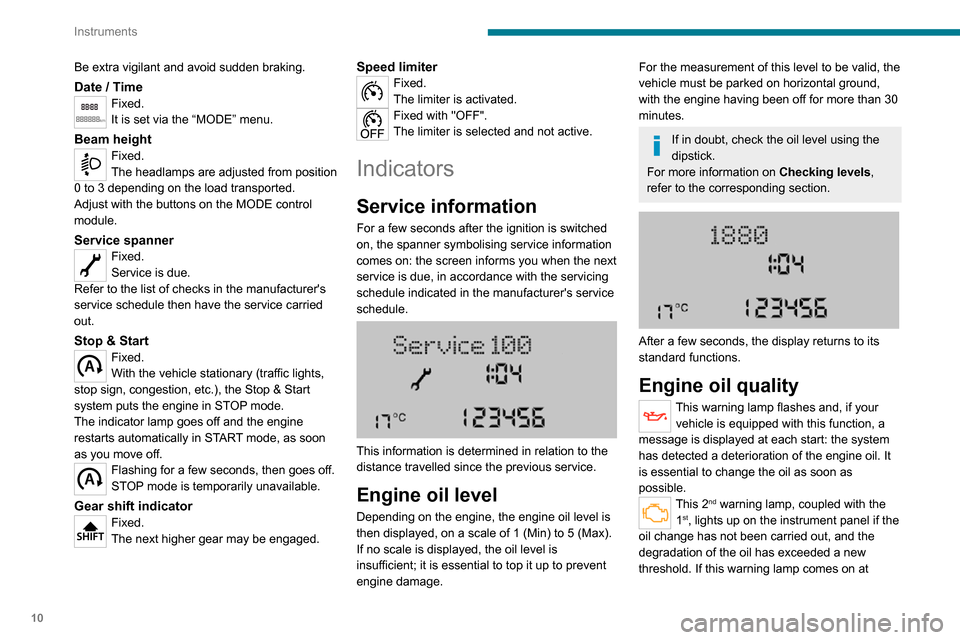
schedule.
This information is determined in relation to the
distance travelled since the previous service.
Engine oil level
Depending on the engine, the engine oil level is
then displayed, on a scale of 1 (Min) to 5 (Max).
If no scale is displayed, the oil level is
insufficient; it is essential to top it up to prevent
engine damage.
For the measurement of this level to be valid, the
vehicle must be parked on horizontal ground,
with the engine having been off for more than 30
minutes.
If in doubt, check the oil level using the
dipstick.
For more information on Checking levels,
refer to the corresponding section.
After a few seconds, the display returns to its
standard functions.
Engine oil quality
This warning lamp flashes and, if your vehicle is equipped with this function, a
message is displayed at each start: the system
has detected a deterioration of the engine oil. It
is essential to change the oil as soon as
possible.
This 2nd warning lamp, coupled with the
1st, lights up on the instrument panel if the
oil change has not been carried out, and the
degradation of the oil has exceeded a new
threshold. If this warning lamp comes on at
Page 13 of 196
11
Instruments
1regular intervals, the oil has to be changed as
soon as possible.
For 3.0 L HDi engines, the engine speed
is then limited to 3,000 rpm, then 1,500
rpm until the oil is changed. Change the
engine oil to prevent damage.
Resetting the service
indicator
A qualified workshop, equipped with the
diagnostic tool, will stop the permanent flashing
of the warning lamp after each service.
If you have serviced the vehicle yourself, reset
the service indicator as follows:
► Insert the key into the ignition switch.► Turn it to the MAR - ON position.► Simultaneously depress the brake and accelerator pedals for more than 15 seconds.
Refer to the checklist in the
manufacturer's service schedule
provided on delivery of the vehicle.
Reminder of the servicing
information
To access the service indications at any time, briefly press the MODE button.
Use the up/down arrows to view service intervals
and engine oil quality.
Pressing the MODE button again allows you to return to the various display menus.
A long press allows you to return to the home
screen.
Menu... Select... Allows you
to...
Service Service
(miles/
km before
service) Display the
remaining
miles/
kilometres to
be travelled
before the
next service.
Oil change
(miles/km
before oil
change) Display the
remaining
miles/
kilometres to
be travelled
before the
next oil
change.
For more information on
Vehicle
configuration (MODE) , refer to the
corresponding section.
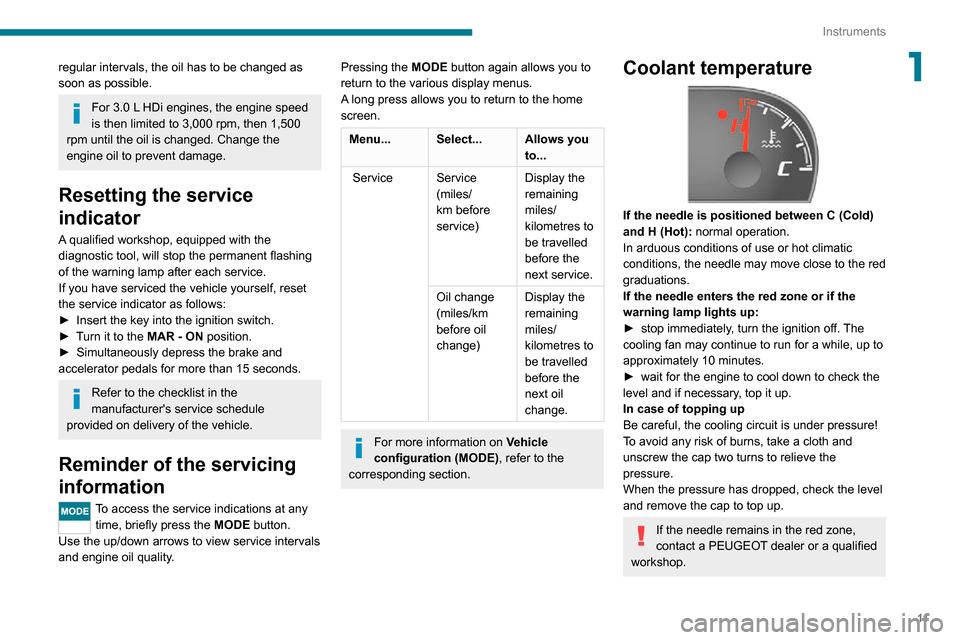
Coolant temperature
If the needle is positioned between C (Cold)
and H (Hot): normal operation.In arduous conditions of use or hot climatic
conditions, the needle may move close to the red
graduations.
If the needle enters the red zone or if the
warning lamp lights up:
► stop immediately , turn the ignition off. The cooling fan may continue to run for a while, up to
approximately 10 minutes.
► wait for the engine to cool down to check the level and if necessary, top it up.
In case of topping up
Be careful, the cooling circuit is under pressure!
To avoid any risk of burns, take a cloth and
unscrew the cap two turns to relieve the
pressure.
When the pressure has dropped, check the level
and remove the cap to top up.
If the needle remains in the red zone,
contact a PEUGEOT dealer or a qualified
workshop.
Page 98 of 196
96
Practical information
Topping up the engine oil level
► Remove the dipstick before topping up.► Recover the oil filler neck.► Unscrew the filler cap.► Install the oil filler neck in the filler hole.► Top up with oil.► Remove the oil filler neck from the filler hole.► Replace the filler cap.► Replace the dipstick.
Brake fluid
The level of this fluid should be close to
the "MAX" mark. If not, check the brake
pad wear.
The Diesel circuit is under very high
pressure.
All work on this circuit must be carried out
only by a PEUGEOT dealer or a qualified
workshop.
Checking levels
Check all of the following levels regularly in
accordance with the manufacturer's service
schedule. Top them up if required, unless
otherwise indicated.
If a level drops significantly, have the
corresponding system checked by a PEUGEOT
dealer or a qualified workshop.
The fluids must comply with the manufacturer's requirements and with
the vehicle's engine.
Take care when working under the bonnet, as certain areas of the engine
may be extremely hot (risk of burns) and the
cooling fan could start at any time (even with
the ignition off).
If the engine cover is to be removed /
refitted, handle it with care to avoid
damaging the mounting clips.
Used products
Avoid prolonged contact of used oil or fluids with the skin.
Most of these fluids are harmful to health and
very corrosive.
Do not discard used oil or fluids into sewers or onto the ground.
Empty used oil into the containers reserved
for this purpose at a PEUGEOT dealer or a
qualified workshop.
Engine oil
The level is checked, with the engine having been switched off for at least 30
minutes and on level ground, using the dipstick.
It is normal to top up the oil level between two
services (or oil changes). It is recommended
that you check the level, and top up if necessary,
every 3,000 miles (5,000 km).
In order to maintain the reliability of the
engine and emissions control system,
never use additives in the engine oil.
Checking using the dipstick
For the location of the dipstick, please refer
to the illustration of the corresponding engine
compartment.
► Grasp the dipstick by its coloured grip and pull it out completely.
► Wipe the end of the dipstick using a clean, lint-free cloth.
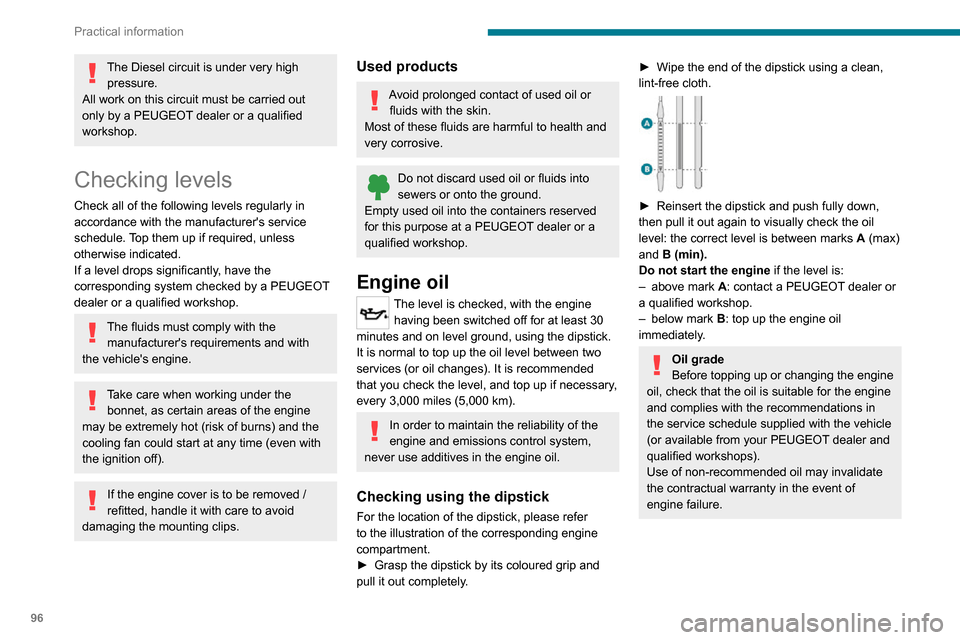
► Reinsert the dipstick and push fully down, then pull it out again to visually check the oil
level: the correct level is between marks A (max) and B (min).
Do not start the engine if the level is:
– above mark A: contact a PEUGEOT dealer or
a qualified workshop.
– below mark B: top up the engine oil
immediately.
Oil grade
Before topping up or changing the engine
oil, check that the oil is suitable for the engine
and complies with the recommendations in
the service schedule supplied with the vehicle
(or available from your PEUGEOT dealer and
qualified workshops).
Use of non-recommended oil may invalidate
the contractual warranty in the event of
engine failure.
Page 100 of 196
98
Practical information
A clogged passenger compartment filter can adversely affect air conditioning
system performance and generate
undesirable odours.
Oil filter
Change the oil filter each time the engine oil is changed.
Particle filter (Diesel)
In addition to the catalytic converter, this filter
actively contributes to the preservation of
air quality by trapping the unburnt pollutant
particles. Black exhaust fumes are therefore not
emitted.
Operation
This filter, inserted into the exhaust system,
accumulates the carbonaceous particles. The
engine management computer automatically
and periodically manages the removal of
carbonaceous particles (regeneration).
The regeneration procedure is triggered
according to the amount of accumulated
particles and the conditions of use of the vehicle.
During this phase, you may notice certain
phenomena - accelerated idling, triggering of
the cooling fan, increased smoke and increased
temperature at the exhaust - which have no
impact on the operation of the vehicle and the
environment.
Screenwash and headlamp
washer fluid
To check the level or top up this fluid on vehicles fitted with headlamp washers,
immobilise the vehicle and switch off the engine.
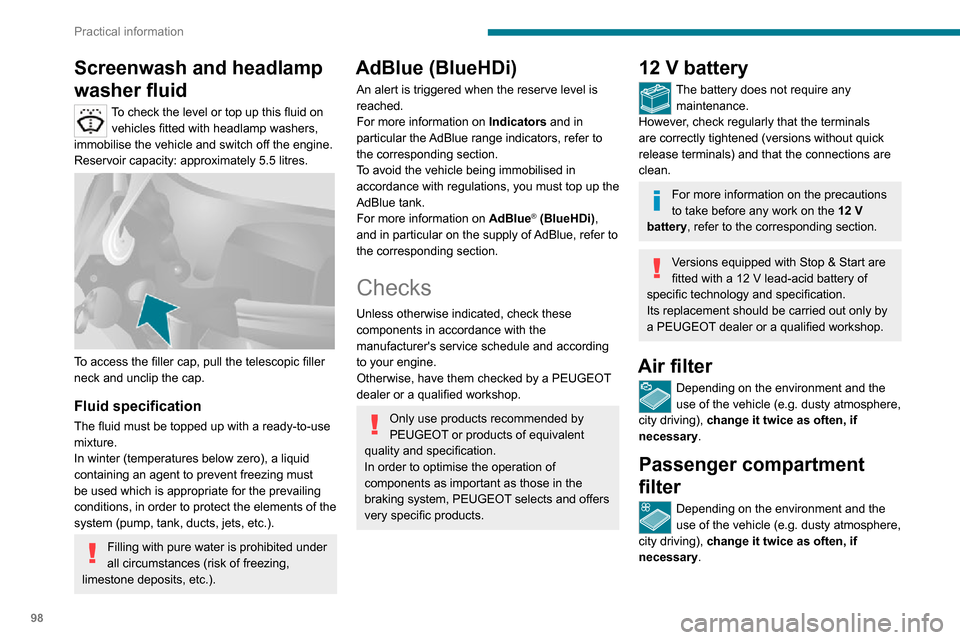
Reservoir capacity: approximately 5.5 litres.
To access the filler cap, pull the telescopic filler
neck and unclip the cap.
Fluid specification
The fluid must be topped up with a ready-to-use
mixture.
In winter (temperatures below zero), a liquid
containing an agent to prevent freezing must
be used which is appropriate for the prevailing
conditions, in order to protect the elements of the
system (pump, tank, ducts, jets, etc.).
Filling with pure water is prohibited under
all circumstances (risk of freezing,
limestone deposits, etc.).
AdBlue (BlueHDi)
An alert is triggered when the reserve level is
reached.
For more information on Indicators and in
particular the AdBlue range indicators, refer to
the corresponding section.
To avoid the vehicle being immobilised in
accordance with regulations, you must top up the
AdBlue tank.
For more information on AdBlue
® (BlueHDi),
and in particular on the supply of AdBlue, refer to
the corresponding section.
Checks
Unless otherwise indicated, check these
components in accordance with the
manufacturer's service schedule and according
to your engine.
Otherwise, have them checked by a PEUGEOT
dealer or a qualified workshop.
Only use products recommended by
PEUGEOT or products of equivalent
quality and specification.
In order to optimise the operation of
components as important as those in the
braking system, PEUGEOT selects and offers
very specific products.
12 V battery
The battery does not require any maintenance.
However, check regularly that the terminals
are correctly tightened (versions without quick
release terminals) and that the connections are
clean.
For more information on the precautions
to take before any work on the 12 V battery, refer to the corresponding section.
Versions equipped with Stop & Start are fitted with a 12 V lead-acid battery of specific technology and specification.
Its replacement should be carried out only by
a PEUGEOT dealer or a qualified workshop.
Air filter
Depending on the environment and the
use of the vehicle (e.g. dusty atmosphere,
city driving), change it twice as often, if
necessary .
Passenger compartment
filter
Depending on the environment and the
use of the vehicle (e.g. dusty atmosphere,
city driving), change it twice as often, if
necessary .
Page 101 of 196
99
Practical information
7A clogged passenger compartment filter can adversely affect air conditioning
system performance and generate
undesirable odours.
Oil filter
Change the oil filter each time the engine
oil is changed.
Particle filter (Diesel)
In addition to the catalytic converter, this filter
actively contributes to the preservation of
air quality by trapping the unburnt pollutant
particles. Black exhaust fumes are therefore not
emitted.
Operation
This filter, inserted into the exhaust system,
accumulates the carbonaceous particles. The
engine management computer automatically
and periodically manages the removal of
carbonaceous particles (regeneration).
The regeneration procedure is triggered
according to the amount of accumulated
particles and the conditions of use of the vehicle.
During this phase, you may notice certain
phenomena - accelerated idling, triggering of
the cooling fan, increased smoke and increased
temperature at the exhaust - which have no
impact on the operation of the vehicle and the
environment.
Following prolonged operation of the
vehicle at very low speed or at idle, you
may, in exceptional circumstances, notice the
emission of water vapour at the exhaust while
accelerating. This has no impact on the
vehicle’s behaviour and the environment.
Due to the high exhaust temperatures
caused by the normal operation of the
particle filter, it is recommended not to park
the vehicle on flammable materials (grass, dry
leaves, pine needles, etc.) to avoid any risk of
fire.
Saturation/Regeneration
If there is a risk of clogging, this warning
lamp comes on, accompanied by a
message on the instrument panel display.
This warning is due to the start of saturation of
the particle filter (exceptionally long urban driving
conditions: reduced speed, traffic jams, etc.).
In order to regenerate the filter, it is
recommended to drive as soon as possible -
when traffic conditions and regulations permit
- at a speed of at least 37 mph (60 km/h), with
an engine speed above 2,000 rpm for about
15 minutes (until the warning lamp and/or the
message disappear).
If possible, avoid switching off the engine
before the end of filter regeneration; repeated
interruptions can lead to early deterioration of the
engine oil. It is not recommended to terminate
the filter regeneration with the vehicle stationary.
Malfunction
If this alert persists, do not ignore this warning;
this indicates that a malfunction has occurred in
the exhaust system/particle filter assembly.
Have the assembly checked by a PEUGEOT
dealer or a qualified workshop.
Manual gearbox
The gearbox does not require any maintenance (no oil change).
Brake pads
Brake wear depends on the style of
driving, particularly in the case of vehicles
used in town, over short distances. It may be
necessary to have the condition of the brakes
checked, even between vehicle services.
Unless there is a leak in the circuit, a drop in the
brake fluid level indicates that the brake pads
are worn.
If this warning lamp comes on, have the
brake pads checked by a PEUGEOT
dealer or a qualified workshop.
After washing the vehicle, moisture, or in wintry conditions, ice can form on the
brake discs and pads: braking efficiency may
be reduced. Gently dab the brakes to dry and
defrost them.
Page 102 of 196
100
Practical information
reading and have an adverse effect on road holding.
Fitting different tyres on the front and rear axles
can cause the ESC to mistime.
AdBlue® (BlueHDi
engines)
To respect the environment and ensure
compliance with the Euro 6 standard, without
adversely affecting the performance or fuel
consumption of its Diesel engines, PEUGEOT
has taken the decision to equip its vehicles
with a system that associates SCR (Selective
Catalytic Reduction) with a Diesel Particle Filter
(DPF) for the treatment of exhaust gases.
SCR system
Using a liquid called AdBlue® that contains
urea, a catalytic converter turns up to 85% of
the nitrogen oxides (NOx) into nitrogen and
Brake disc wear
For information on checking brake disc
wear, contact a PEUGEOT dealer or a
qualified workshop.
Manual parking brake
If you notice excessive brake lever travel
or decreased effectiveness, the parking
brake must be adjusted, even between two
services.
This system must be checked by a PEUGEOT
dealer or a qualified workshop.
Diesel fuel filter
The Diesel fuel filter is located under the bonnet,
close to the brake fluid reservoir.
If this warning lamp comes on, the filter
must be purged to remove water.
You can also purge the fuel filter regularly, every
time the engine oil is changed.
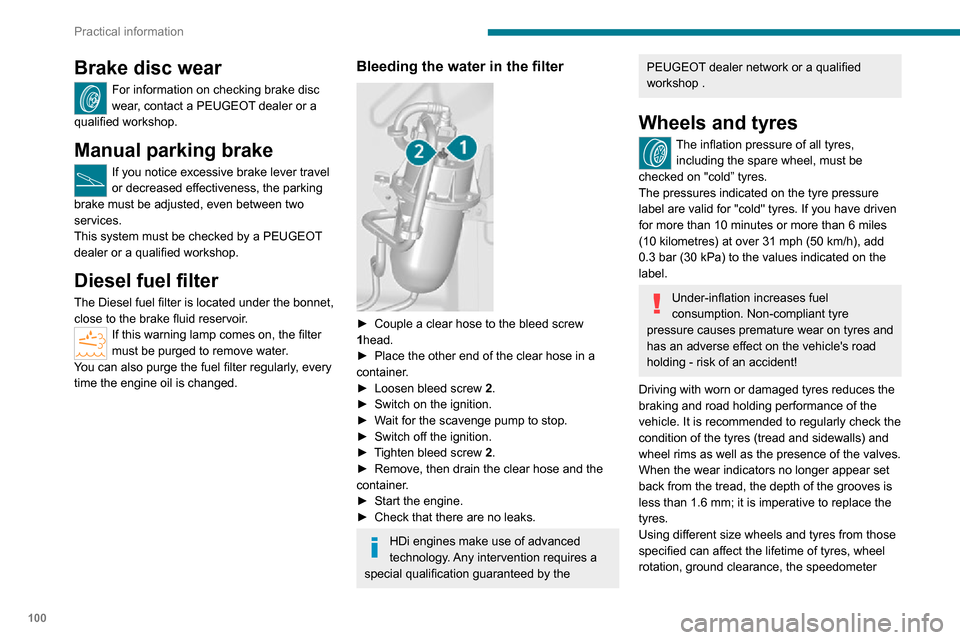
Bleeding the water in the filter
► Couple a clear hose to the bleed screw 1head.► Place the other end of the clear hose in a container.► Loosen bleed screw 2.► Switch on the ignition.► Wait for the scavenge pump to stop.► Switch off the ignition.► Tighten bleed screw 2.► Remove, then drain the clear hose and the container.► Start the engine.► Check that there are no leaks.
HDi engines make use of advanced
technology. Any intervention requires a
special qualification guaranteed by the
PEUGEOT dealer network or a qualified workshop .
Wheels and tyres
The inflation pressure of all tyres,
including the spare wheel, must be
checked on "cold” tyres.
The pressures indicated on the tyre pressure
label are valid for "cold" tyres. If you have driven
for more than 10 minutes or more than 6 miles
(10 kilometres) at over 31 mph (50 km/h), add 0.3 bar (30 kPa) to the values indicated on the
label.
Under-inflation increases fuel
consumption. Non-compliant tyre
pressure causes premature wear on tyres and
has an adverse effect on the vehicle's road
holding - risk of an accident!
Driving with worn or damaged tyres reduces the
braking and road holding performance of the
vehicle. It is recommended to regularly check the
condition of the tyres (tread and sidewalls) and
wheel rims as well as the presence of the valves.
When the wear indicators no longer appear set
back from the tread, the depth of the grooves is
less than 1.6 mm; it is imperative to replace the
tyres.
Using different size wheels and tyres from those
specified can affect the lifetime of tyres, wheel
rotation, ground clearance, the speedometer
Page 150 of 196
148
Special features
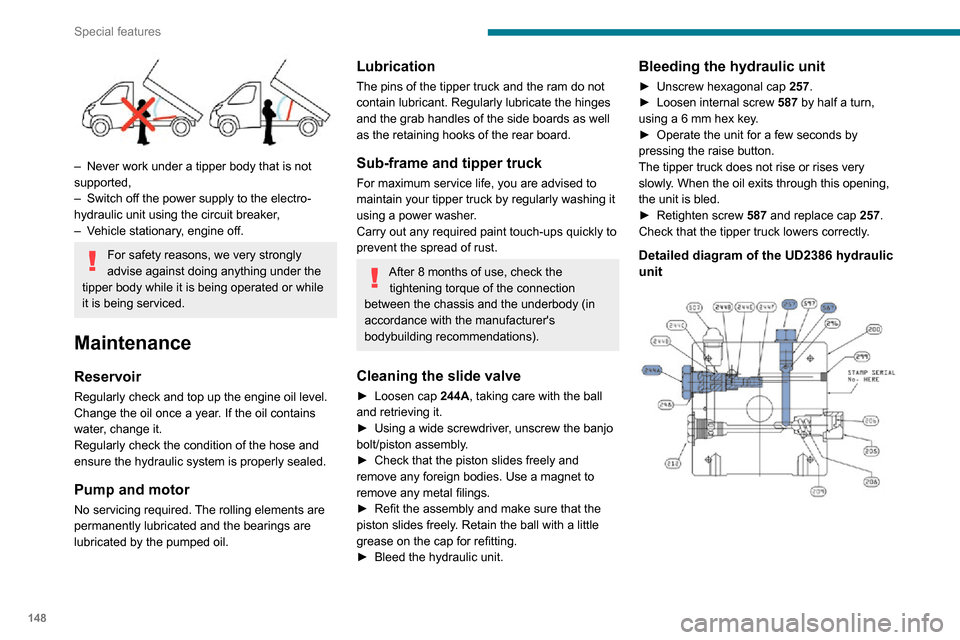
– Never work under a tipper body that is not supported,– Switch off the power supply to the electro-hydraulic unit using the circuit breaker,– Vehicle stationary, engine off.
For safety reasons, we very strongly
advise against doing anything under the
tipper body while it is being operated or while
it is being serviced.
Maintenance
Reservoir
Regularly check and top up the engine oil level.
Change the oil once a year. If the oil contains
water, change it.
Regularly check the condition of the hose and
ensure the hydraulic system is properly sealed.
Pump and motor
No servicing required. The rolling elements are
permanently lubricated and the bearings are
lubricated by the pumped oil.
Lubrication
The pins of the tipper truck and the ram do not
contain lubricant. Regularly lubricate the hinges
and the grab handles of the side boards as well
as the retaining hooks of the rear board.
Sub-frame and tipper truck
For maximum service life, you are advised to
maintain your tipper truck by regularly washing it
using a power washer.
Carry out any required paint touch-ups quickly to
prevent the spread of rust.
After 8 months of use, check the tightening torque of the connection
between the chassis and the underbody (in
accordance with the manufacturer's
bodybuilding recommendations).
Cleaning the slide valve
► Loosen cap 244A , taking care with the ball
and retrieving it.
► Using a wide screwdriver , unscrew the banjo
bolt/piston assembly.► Check that the piston slides freely and remove any foreign bodies. Use a magnet to
remove any metal filings.
► Refit the assembly and make sure that the piston slides freely. Retain the ball with a little
grease on the cap for refitting.
► Bleed the hydraulic unit.
Bleeding the hydraulic unit
► Unscrew hexagonal cap 257.► Loosen internal screw 587 by half a turn,
using a 6 mm hex key.
► Operate the unit for a few seconds by pressing the raise button.
The tipper truck does not rise or rises very
slowly. When the oil exits through this opening,
the unit is bled.
► Retighten screw 587 and replace cap 257.
Check that the tipper truck lowers correctly.
Detailed diagram of the UD2386 hydraulic unit
Diagnostics
Symptoms ElectricHydraulic Verification/Check
The hydraulic unit does not work. XPower harness and unit relay.
X Control harness (control unit).
X Circuit-breaker.
Very noisy unit, rises slowly. XSuction strainer clogged or crushed at the bottom of the tank.
Very noisy new unit, rises quickly. XPump alignment, change the unit.
The ram lowers by itself. XLowering valve crushed or blocked.
The ram does not lower. XYes, check the slide valve and bleed.
Refer to the "Maintenance" section.
X No, check the coil and the electrical connections of the valve.
X No, replace the solenoid valve.
X No, check the alignment of the ram.
The unit works but its pressure does not increase. XSlide valve jammed if no solenoid valve on the unit.
Refer to the "Maintenance" section.
X Pressure relief device, setting, dirt.
X Pump seal out of service.
X Motor/pump coupling.
X Pump loose from its support.
The hydraulic unit does not work. XSolenoid valve blocked, replace it or retighten the nut behind the
strainer.
The control unit does not work. XCheck connection and contacts.
Emulsion in the tank. XIncorrectly positioned return pipe.
X Insufficient oil level.
Page 180 of 196
178
Alphabetical index
Low fuel level 90Lumbar 27
M
Maintenance, routine 74, 98Manoeuvring aids (recommendations) 73Mat 74
Menu 13, 160–161, 163, 166, 168Menus (audio) 160–161Mirrors, door 31, 83
O
Oil change 96Oil consumption 96OIl, engine 96–98On-board tools 105–110Opening the bonnet 94Overhead storage 38–41
P
Pads, brake 99Parking brake 68, 100Player, USB 152–153, 161–162Port, USB 152–153, 161–162Pressures, tyres 100Pre-tensioning seat belts 56
Protecting children 57–59
R
Radar (warnings) 74Radio 152, 160, 162Radio, digital (Digital Audio Broadcasting - DAB) 161
Range, AdBlue® 12, 98Recovery 122Regeneration of the particle filter 99Remote control 20, 66Replacing bulbs 111Replacing the air filter 98Replacing the oil filter 99Replacing the passenger compartment filter 98Resetting the service indicator 10–11Reversing camera 74
S
Safety, children 57–59Screen, colour 160Screen menu map 160–161, 163, 166, 168Screenwash fluid 97–98SCR (Selective Catalytic Reduction) 101Seat belts 55–56Seat belts, rear 56Seats, heated 28
Seats, rear 59Sensors (warnings) 74Service indicator 10–11Servicing 10–11, 98Settings, equipment 13, 18Sidelamps 46Snow chains 91Socket, auxiliary 153, 162Socket, Jack 153, 162
Sockets, auxiliary 38–41Speed limiter 76–77Speed limit recognition 75–76Speedometer 74Stability control (ESC) 52Stability control (ESP) 53Starting a Diesel engine 91Station, radio 152, 160Steering mounted controls, audio 151, 159Steering wheel adjustment 30Stop & Start 32, 38, 49, 56,
69–70, 94, 98, 122
Storage 38–41Sunshine sensor 31
T
Tables of engines 125Table, writing 38–40Tank, fuel 90Technical data 125Telephone 154, 166–168