brake PEUGEOT BOXER 2021 Owner's Manual
[x] Cancel search | Manufacturer: PEUGEOT, Model Year: 2021, Model line: BOXER, Model: PEUGEOT BOXER 2021Pages: 212, PDF Size: 6.37 MB
Page 92 of 212
90
Driving
The trailer detection mode is set via the
MODE button.
For more information on Vehicle configuration
(MODE), refer to the corresponding section.
Two modes are available:
–
Max
: for a trailer length greater than 9 metres.
–
Auto
: for an automatic detection of the trailer
length (3 m, 6 m or 9 m).
In Auto mode, an icon appears in the instrument
panel indicating the length detected by the
system.
It may be necessary to make a 90° turn
to allow the system to detect the length
of the trailer.
When a trailer is detected, vehicle detection
when reversing is deactivated.
Operating conditions
– All vehicles are moving in the same direction
and in adjacent lanes.
–
The speed of your vehicle is 6 mph (10 km/h)
minimum.
–
When you overtake a vehicle, the speed
difference is less than 16
mph (25 km/h).
–
When another vehicle overtakes you, the
speed difference is less than 31
mph (50 km/h).
Active Safety Brake with Collision Risk Alert and
Intelligent emergency
braking assistance
For more information, refer to the
General recommendations on the use
of driving and manoeuvring aids .
This system:
–
warns the driver that their vehicle is at risk of
collision with the vehicle in front.
–
reduces the vehicle's speed to avoid a
collision or limit its severity
.
This system is comprised of three functions:
–
Collision
Risk Alert.
–
Intelligent emergency braking assistance
(iEBA).
–
Active Safety Brake (automatic emergency
braking).
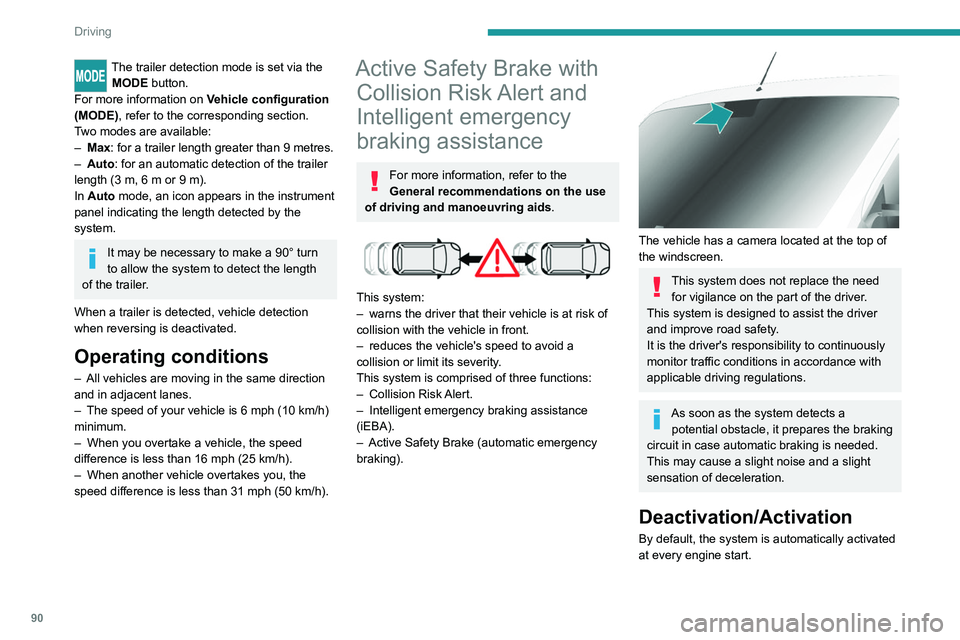
The vehicle has a camera located at the top of
the windscreen.
This system does not replace the need for vigilance on the part of the driver.
This system is designed to assist the driver
and improve road safety.
It is the driver's responsibility to continuously
monitor traffic conditions in accordance with
applicable driving regulations.
As soon as the system detects a potential obstacle, it prepares the braking
circuit in case automatic braking is needed.
This may cause a slight noise and a slight
sensation of deceleration.
Deactivation/Activation
By default, the system is automatically activated
at every engine start.
Page 93 of 212
91
Driving
6This function can be set using the MODE button; in the "Active Safety Brake" menu,
select "ON" or "OFF".
For more information on Vehicle
configuration (MODE) , refer to the
corresponding section.
Deactivation of the system is signalled by
the illumination of this warning lamp,
accompanied by the display of a message.
Operating conditions and
limits
Vehicle moving forward.
ESC system operational.
DSC/ASR systems activated.
Seat belts fastened for all passengers.
Stabilised speed on roads with few bends.
In the following cases, deactivating the system
via the vehicle's configuration menu is advised:
–
T
owing a trailer.
–
Carrying long objects on roof bars or roof rack.
–
V
ehicle with snow chains fitted.
–
Before using an automatic car wash, with the
engine running.
–
When changing
a wheel, working near a wheel
or inside the engine compartment.
–
Before placing the vehicle on a rolling road in
a workshop.
–
T
owed vehicle, engine running.
–
Following
an impact to the windscreen close to
the detection camera.
The system is automatically deactivated when a fault with the brake pedal switch
or at least two brake lamps is detected.
It can be dangerous to drive if the brake
lamps are not in perfect working order.
The driver must not overload the vehicle (keep within the GVW limit and load
height limits for roof bars).
Following an impact, the system is
automatically deactivated.
Have it checked by a PEUGEOT dealer or a
qualified workshop.
It is possible that warnings are not given,
are given too late or seem unjustified.
The driver must always stay in control of their
vehicle and be prepared to react at any time
to avoid an accident.
Cases of non-detection by the system:
–
Pedestrians, cyclists, animals, objects on the
road.
–
V
ehicles crossing your lane.
–
V
ehicles driving in the opposite direction.
Pay particular attention:
– When narrow vehicles (motorcycles)
are present and/or there are vehicles
staggered across the traffic lane.
–
When entering a tunnel or crossing a
bridge.
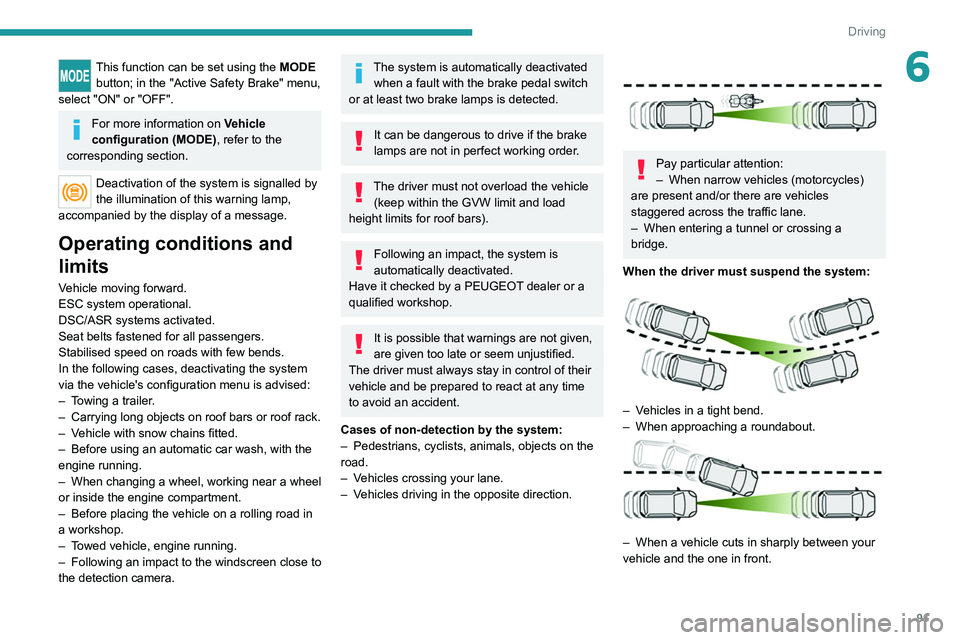
When the driver must suspend the system:
– Vehicles in a tight bend.
– When approaching a roundabout.
– When a vehicle cuts in sharply between your
vehicle and the one in front.
Page 94 of 212
92
Driving
Collision Risk Alert
It warns the driver that their vehicle is at risk of
collision with the vehicle in front.
Modifying the alert trigger threshold
This trigger threshold determines the sensitivity
with which the function warns of the risk of
collision.
The threshold is set via the vehicle configuration menu.
►
Select one of the three pre-defined
thresholds: "Near", "Normal" or "Far".
The last threshold selected is memorised when
the ignition is switched off.
Operation
Depending on the degree of risk of collision
detected by the system and the alert threshold
chosen by the driver, several different levels
of alert may be triggered and displayed in the
instrument panel.
They take account of the vehicle dynamics, the
speed of your vehicle and the one in front, the
environmental conditions and the operation of
the vehicle (cornering, actions on the pedals,
etc.) to trigger the alert at the best moment.
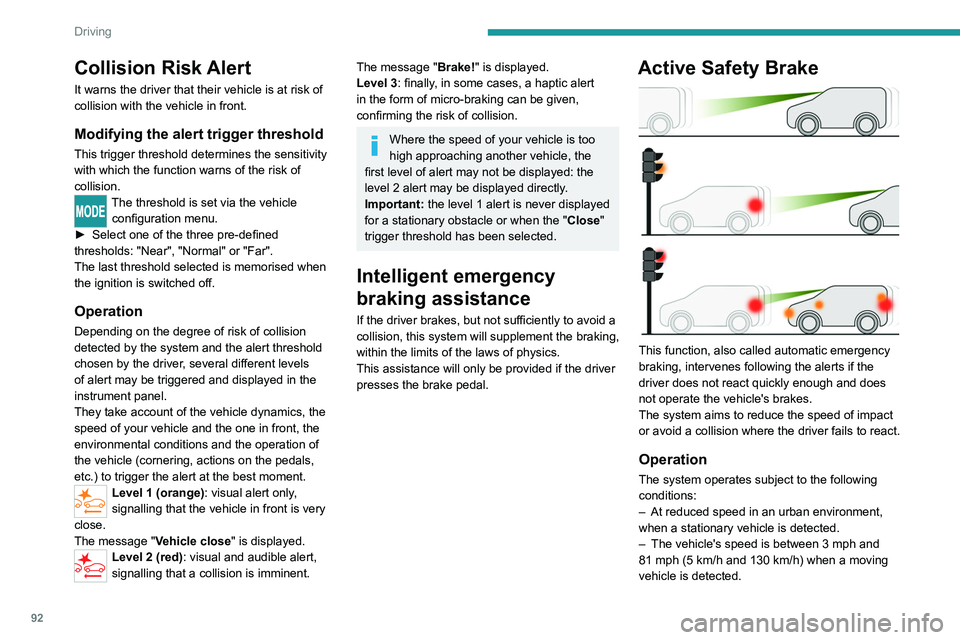
Level 1 (orange): visual alert only,
signalling that the vehicle in front is very
close.
The message "
Vehicle close" is displayed.
Level 2 (red): visual and audible alert,
signalling that a collision is imminent.
The message "Brake! " is displayed.
Level 3: finally, in some cases, a haptic alert
in the form of micro-braking can be given,
confirming the risk of collision.
Where the speed of your vehicle is too
high approaching another vehicle, the
first level of alert may not be displayed: the
level 2 alert may be displayed directly.
Important: the level
1 alert is never displayed
for a stationary obstacle or when the " Close"
trigger threshold has been selected.
Intelligent emergency
braking assistance
If the driver brakes, but not sufficiently to avoid a
collision, this system will supplement the braking,
within the limits of the laws of physics.
This assistance will only be provided if the driver
presses the brake pedal.
Active Safety Brake
This function, also called automatic emergency
braking, intervenes following the alerts if the
driver does not react quickly enough and does
not operate the vehicle's brakes.
The system aims to reduce the speed of impact
or avoid a collision where the driver fails to react.
Operation
The system operates subject to the following
conditions:
–
At reduced speed in an urban environment,
when a stationary vehicle is detected.
–
The vehicle's speed is between 3 mph and
81 mph (5
km/h and 130 km/h) when a moving
vehicle is detected.
Page 95 of 212
93
Driving
6This warning lamp flashes (for approximately 10 seconds) as soon as
the function applies the vehicle’s brakes.
With a manual gearbox, in the event of automatic
emergency braking bringing the vehicle to a
complete stop, the engine may stall.
The driver can maintain control of the vehicle at any time by firmly turning the
steering wheel and/or firmly depressing the
accelerator pedal.
The brake pedal may vibrate slightly while the function is operating.
If the vehicle comes to a complete stop,
automatic braking is maintained for 1 to 2
seconds.
Malfunction
In the event of a system malfunction, this
warning lamp comes on on the instrument
panel, accompanied by an onscreen message
and an audible signal.
Contact a PEUGEOT dealer or a qualified
workshop to have the system checked.
If these warning lamps come on
after the engine has been switched
off and then restarted, contact a PEUGEOT
dealer or a qualified workshop to have the
system checked.
Audible rear parking sensors
For more information, refer to the
General recommendations on the use
of driving and manoeuvring aids .
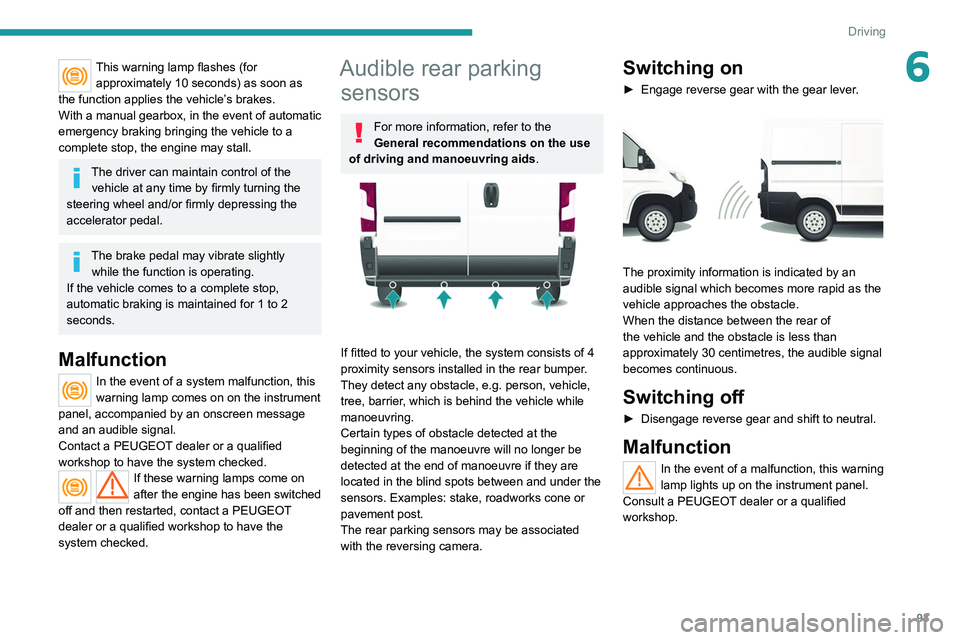
If fitted to your vehicle, the system consists of 4
proximity sensors installed in the rear bumper.
They detect any obstacle, e.g. person, vehicle,
tree, barrier, which is behind the vehicle while
manoeuvring.
Certain types of obstacle detected at the
beginning of the manoeuvre will no longer be
detected at the end of manoeuvre if they are
located in the blind spots between and under the
sensors. Examples: stake, roadworks cone or
pavement post.
The rear parking sensors may be associated
with the reversing camera.
Switching on
► Engage reverse gear with the gear lever .
The proximity information is indicated by an
audible signal which becomes more rapid as the
vehicle approaches the obstacle.
When the distance between the rear of
the vehicle and the obstacle is less than
approximately 30 centimetres, the audible signal
becomes continuous.
Switching off
► Disengage reverse gear and shift to neutral.
Malfunction
In the event of a malfunction, this warning
lamp lights up on the instrument panel.
Consult a PEUGEOT dealer or a qualified
workshop.
Page 96 of 212
94
Driving
Reversing camera
For more information, refer to the
General recommendations on the use
of driving and manoeuvring aids .
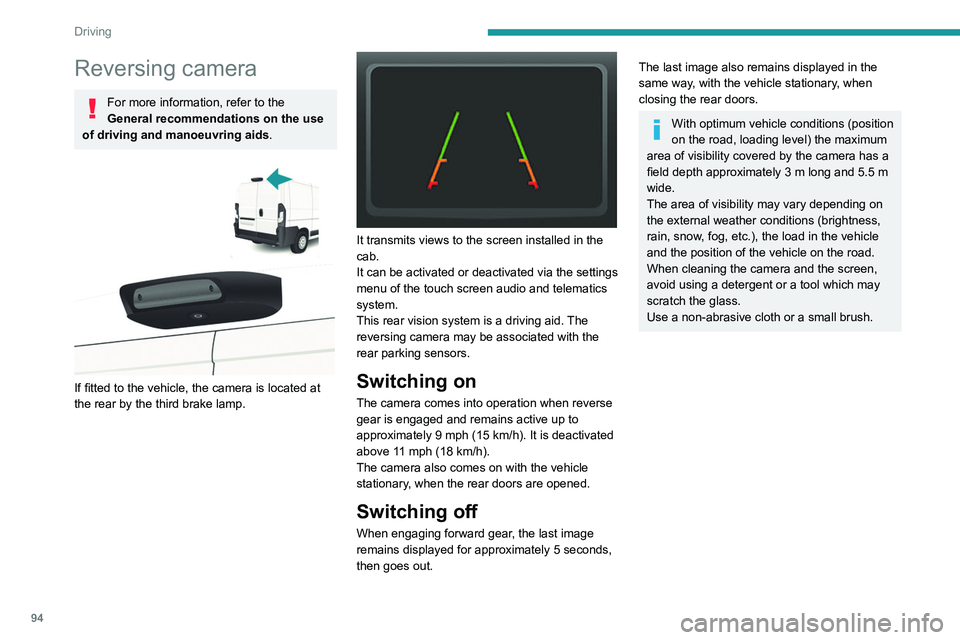
If fitted to the vehicle, the camera is located at
the rear by the third brake lamp.
It transmits views to the screen installed in the
cab.
It can be activated or deactivated via the settings
menu of the touch screen audio and telematics
system.
This rear vision system is a driving aid. The
reversing camera may be associated with the
rear parking sensors.
Switching on
The camera comes into operation when reverse
gear is engaged and remains active up to
approximately 9 mph (15 km/h). It is deactivated
above 11 mph (18 km/h).
The camera also comes on with the vehicle
stationary, when the rear doors are opened.
Switching off
When engaging forward gear, the last image
remains displayed for approximately 5 seconds,
then goes out.
The last image also remains displayed in the
same way, with the vehicle stationary, when
closing the rear doors.
With optimum vehicle conditions (position
on the road, loading level) the maximum
area of visibility covered by the camera has a
field depth approximately 3 m long and 5.5 m
wide.
The area of visibility may vary depending on
the external weather conditions (brightness,
rain, snow, fog, etc.), the load in the vehicle
and the position of the vehicle on the road.
When cleaning the camera and the screen,
avoid using a detergent or a tool which may
scratch the glass.
Use a non-abrasive cloth or a small brush.
Page 106 of 212
104
Practical information
Installation tips
► To fit the snow chains during a journey, stop
the vehicle on a flat surface at the side of the
road.
►
Apply the parking brake and position any
wheel chocks under the wheels to prevent
movement of the vehicle.
►
Fit the snow chains following the instructions
provided by the manufacturer
.
►
Move off gently and drive for a few moments,
without exceeding 31
mph (50 km/h).
►
Stop the vehicle and check that the snow
chains are correctly tightened.
It is strongly recommended that you
practise fitting the snow chains on a level
and dry surface before setting off.
Avoid driving with snow chains on roads that have been cleared of snow to avoid
damaging the vehicle's tyres and the road
surface. If the vehicle is fitted with alloy
wheels, check that no part of the chain or its
fixings is in contact with the wheel rim.
Towing a trailer
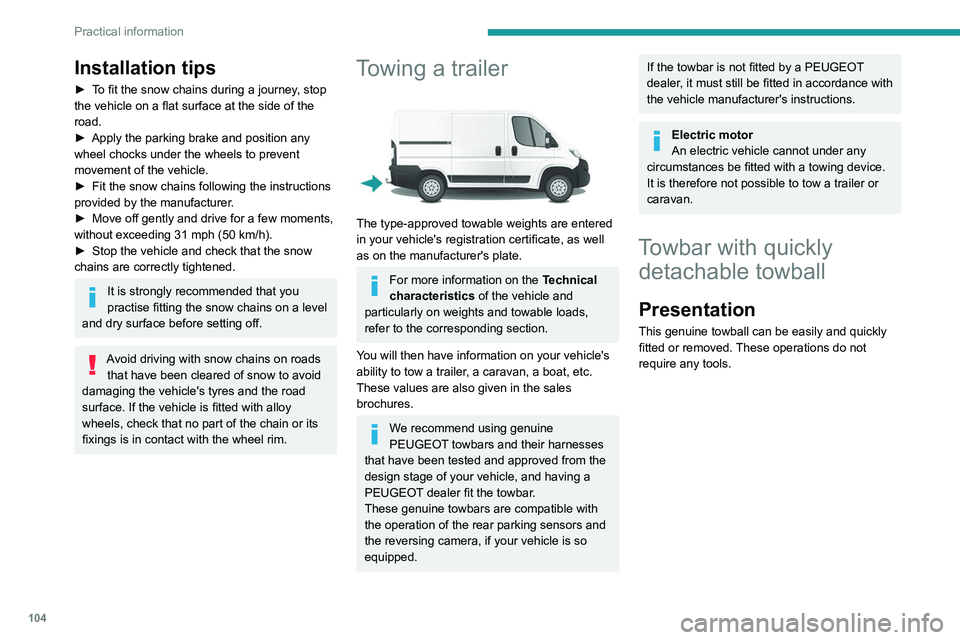
The type-approved towable weights are entered
in your vehicle's registration certificate, as well
as on the manufacturer's plate.
For more information on the Technical
characteristics of the vehicle and
particularly on weights and towable loads,
refer to the corresponding section.
You will then have information on your vehicle's
ability to tow a trailer, a caravan, a boat, etc.
These values are also given in the sales
brochures.
We recommend using genuine
PEUGEOT towbars and their harnesses
that have been tested and approved from the
design stage of your vehicle, and having a
PEUGEOT dealer fit the towbar.
These genuine towbars are compatible with
the operation of the rear parking sensors and
the reversing camera, if your vehicle is so
equipped.
If the towbar is not fitted by a PEUGEOT
dealer, it must still be fitted in accordance with
the vehicle manufacturer's instructions.
Electric motor
An electric vehicle cannot under any
circumstances be fitted with a towing device.
It is therefore not possible to tow a trailer or
caravan.
Towbar with quickly detachable towball
Presentation
This genuine towball can be easily and quickly
fitted or removed. These operations do not
require any tools.
Page 110 of 212
108
Practical information
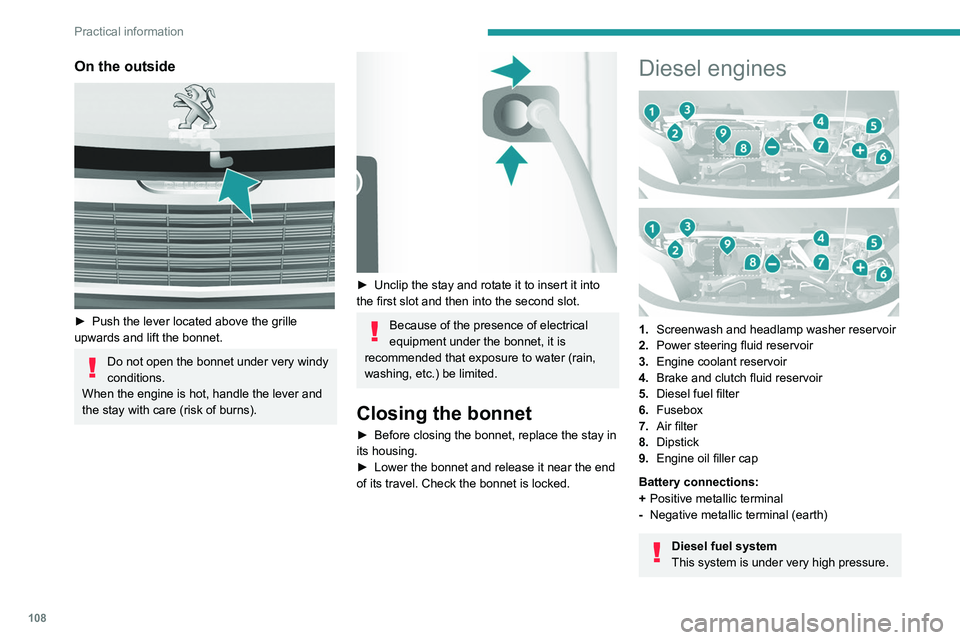
On the outside
► Push the lever located above the grille
upwards and lift the bonnet.
Do not open the bonnet under very windy
conditions.
When the engine is hot, handle the lever and
the stay with care (risk of burns).
► Unclip the stay and rotate it to insert it into
the first slot and then into the second slot.
Because of the presence of electrical
equipment under the bonnet, it is
recommended that exposure to water (rain,
washing, etc.) be limited.
Closing the bonnet
► Before closing the bonnet, replace the stay in
its housing.
►
Lower the bonnet and release it near the end
of its travel. Check the bonnet is locked.
Diesel engines
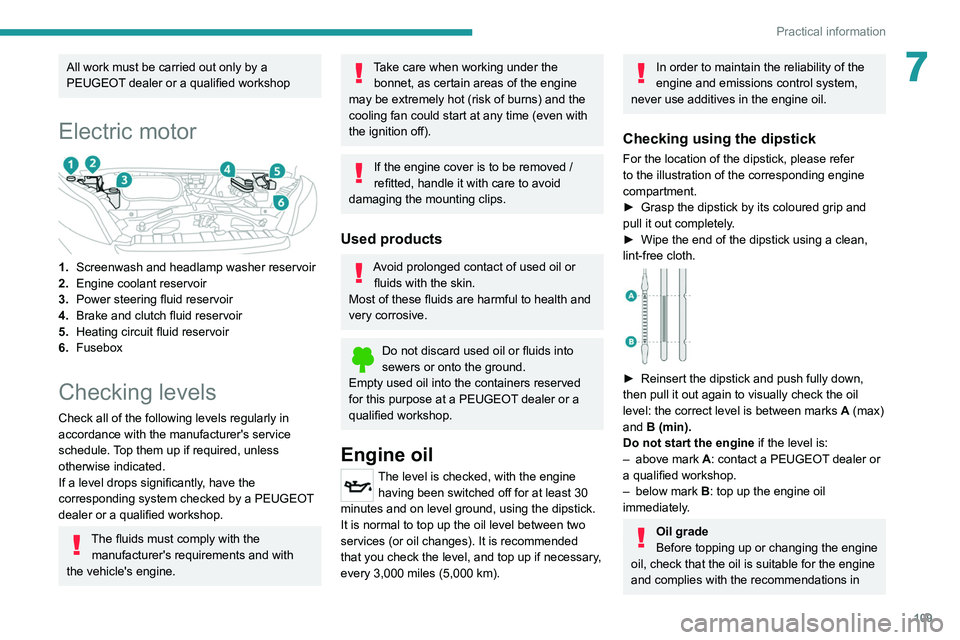
1. Screenwash and headlamp washer reservoir
2. Power steering fluid reservoir
3. Engine coolant reservoir
4. Brake and clutch fluid reservoir
5. Diesel fuel filter
6. Fusebox
7. Air filter
8. Dipstick
9. Engine oil filler cap
Battery connections:
+ Positive metallic terminal
- Negative metallic terminal (earth)
Diesel fuel system
This system is under very high pressure.
Page 111 of 212
109
Practical information
7All work must be carried out only by a
PEUGEOT dealer or a qualified workshop
Electric motor
1.Screenwash and headlamp washer reservoir
2. Engine coolant reservoir
3. Power steering fluid reservoir
4. Brake and clutch fluid reservoir
5. Heating
circuit fluid reservoir
6. Fusebox
Checking levels
Check all of the following levels regularly in
accordance with the manufacturer's service
schedule. Top them up if required, unless
otherwise indicated.
If a level drops significantly, have the
corresponding system checked by a PEUGEOT
dealer or a qualified workshop.
The fluids must comply with the
manufacturer's requirements and with
the vehicle's engine.
Take care when working under the bonnet, as certain areas of the engine
may be extremely hot (risk of burns) and the
cooling fan could start at any time (even with
the ignition off).
If the engine cover is to be removed /
refitted, handle it with care to avoid
damaging the mounting clips.
Used products
Avoid prolonged contact of used oil or fluids with the skin.
Most of these fluids are harmful to health and
very corrosive.
Do not discard used oil or fluids into
sewers or onto the ground.
Empty used oil into the containers reserved
for this purpose at a PEUGEOT dealer or a
qualified workshop.
Engine oil
The level is checked, with the engine having been switched off for at least 30
minutes and on level ground, using the dipstick.
It is normal to top up the oil level between two
services (or oil changes). It is recommended
that you check the level, and top up if necessary,
every 3,000 miles (5,000 km).
In order to maintain the reliability of the
engine and emissions control system,
never use additives in the engine oil.
Checking using the dipstick
For the location of the dipstick, please refer
to the illustration of the corresponding engine
compartment.
►
Grasp the dipstick by its coloured grip and
pull it out completely
.
►
Wipe the end of the dipstick using a clean,
lint-free cloth.
► Reinsert the dipstick and push fully down,
then pull it out again to visually check the oil
level: the correct level is between marks A
(max)
and B (min).
Do not start the engine if the level is:
–
above mark
A: contact a PEUGEOT dealer or
a qualified workshop.
–
below mark B
: top up the engine oil
immediately.
Oil grade
Before topping up or changing the engine
oil, check that the oil is suitable for the engine
and complies with the recommendations in
Page 112 of 212
11 0
Practical information
the service schedule supplied with the vehicle
(or available from your PEUGEOT dealer and
qualified workshops).
Use of non-recommended oil may invalidate
the contractual warranty in the event of
engine failure.
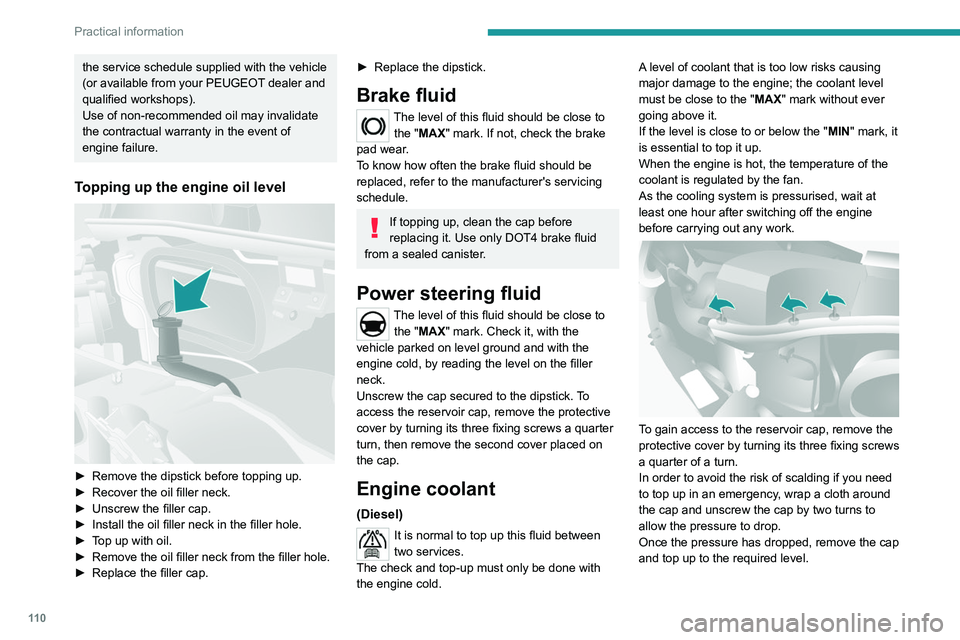
Topping up the engine oil level
► Remove the dipstick before topping up.
► Recover the oil filler neck.
►
Unscrew the filler cap.
►
Install the oil filler neck in the filler hole.
►
T
op up with oil.
►
Remove the oil filler neck from the filler hole.
►
Replace the filler cap.
► Replace the dipstick.
Brake fluid
The level of this fluid should be close to the "MAX" mark. If not, check the brake
pad wear.
To know how often the brake fluid should be
replaced, refer to the manufacturer's servicing
schedule.
If topping up, clean the cap before
replacing it. Use only DOT4 brake fluid
from a sealed canister.
Power steering fluid
The level of this fluid should be close to the "MAX" mark. Check it, with the
vehicle parked on level ground and with the
engine cold, by reading the level on the filler
neck.
Unscrew the cap secured to the dipstick. To
access the reservoir cap, remove the protective
cover by turning its three fixing screws a quarter
turn, then remove the second cover placed on
the cap.
Engine coolant
(Diesel)
It is normal to top up this fluid between
two services.
The check and top-up must only be done with
the engine cold. A level of coolant that is too low risks causing
major damage to the engine; the coolant level
must be close to the "MAX" mark without ever
going above it.
If the level is close to or below the "
MIN" mark, it
is essential to top it up.
When the engine is hot, the temperature of the
coolant is regulated by the fan.
As the cooling system is pressurised, wait at
least one hour after switching off the engine
before carrying out any work.
To gain access to the reservoir cap, remove the
protective cover by turning its three fixing screws
a quarter of a turn.
In order to avoid the risk of scalding if you need
to top up in an emergency, wrap a cloth around
the cap and unscrew the cap by two turns to
allow the pressure to drop.
Once the pressure has dropped, remove the cap
and top up to the required level.
Page 115 of 212
11 3
Practical information
7Manual gearbox
The gearbox does not require any maintenance (no oil change).
Brake pads
Brake wear depends on the style of
driving, particularly in the case of vehicles
used in town, over short distances. It may be
necessary to have the condition of the brakes
checked, even between vehicle services.
Unless there is a leak in the circuit, a drop in the
brake fluid level indicates that the brake pads
are worn.
If this warning lamp comes on, have the
brake pads checked by a PEUGEOT
dealer or a qualified workshop.
After washing the vehicle, moisture, or in wintry conditions, ice can form on the
brake discs and pads: braking efficiency may
be reduced. Gently dab the brakes to dry and
defrost them.
Brake disc wear
For information on checking brake disc
wear, contact a PEUGEOT dealer or a
qualified workshop.
Manual parking brake
If you notice excessive brake lever travel
or decreased effectiveness, the parking brake must be adjusted, even between two
services.
This system must be checked by a PEUGEOT
dealer or a qualified workshop.
Diesel fuel filter
The Diesel fuel filter is located in the engine
compartment near the brake fluid reservoir.
If this warning lamp comes on, bleed the
filter.
You can also bleed it regularly at each engine oil
change.
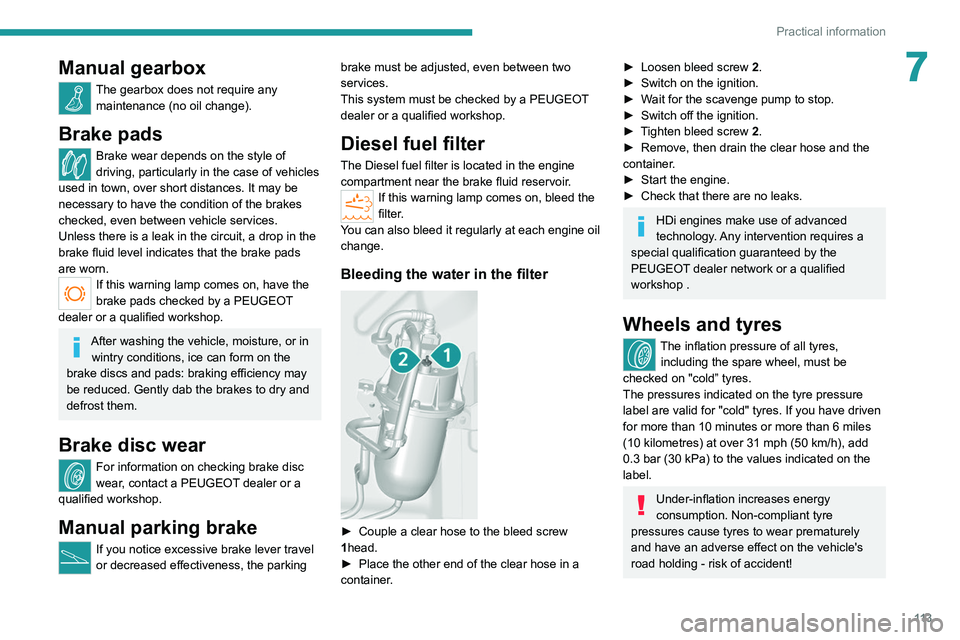
Bleeding the water in the filter
► Couple a clear hose to the bleed screw
1 head.
►
Place the other end of the clear hose in a
container
.
► Loosen bleed screw 2 .
► Switch on the ignition.
►
W
ait for the scavenge pump to stop.
►
Switch off the ignition.
►
T
ighten bleed screw 2.
►
Remove, then drain the clear hose and the
container
.
►
Start the engine.
►
Check that there are no leaks.
HDi engines make use of advanced
technology. Any intervention requires a
special qualification guaranteed by the
PEUGEOT
dealer network or a qualified
workshop .
Wheels and tyres
The inflation pressure of all tyres, including the spare wheel, must be
checked on "cold” tyres.
The pressures indicated on the tyre pressure
label are valid for "cold" tyres. If you have driven
for more than 10 minutes or more than 6 miles
(10 kilometres) at over 31 mph (50
km/h), add
0.3 bar (30 kPa) to the values indicated on the
label.
Under-inflation increases energy
consumption. Non-compliant tyre
pressures cause tyres to wear prematurely
and have an adverse effect on the vehicle's
road holding - risk of accident!