lock PEUGEOT BOXER 2021 Owner's Manual
[x] Cancel search | Manufacturer: PEUGEOT, Model Year: 2021, Model line: BOXER, Model: PEUGEOT BOXER 2021Pages: 212, PDF Size: 6.37 MB
Page 59 of 212

57
Safety
5Pedestrian horn (Electric)
This system alerts pedestrians that the vehicle is approaching.
The pedestrian horn operates once the vehicle
is moving and at speeds of up to 25 mph
(40
km/h), in forward or reverse gear.
This function cannot be deactivated.
Electronic stability control
(ESC)
Electronic stability control (ESC: Electronic
Stability Control) integrating the following
systems:
–
anti-lock braking system (ABS) and electronic
brake force distribution (EBFD),
–
emergency braking assistance (EBA),
–
wheel anti-slip regulation (ASR) or traction
control,
–
dynamic stability control (DSC).
Definitions
Anti-lock braking system (ABS) and Electronic brake force distribution
(EBFD)
This system improves the stability and handling
of your vehicle when braking and contributes
towards improved control on bends, in particular
on poor or slippery road surfaces. ABS prevents wheel locking in the event of
emergency braking.
EBFD manages the braking pressure wheel by
wheel.
Emergency braking assistance (EBA)
In an emergency, this system enables you
to reach the optimum braking pressure more
quickly and therefore reduce the stopping
distance.
It is triggered in relation to the speed at which
the brake pedal is depressed. The effect of this
is a reduction in the resistance of the pedal and
an increase in braking efficiency.
Anti-slip regulation (ASR)
The ASR system (also known as Traction
Control) optimises traction in order to limit
wheel slip, by acting on the brakes of the driving
wheels and on the engine. It also improves the
directional stability of the vehicle on acceleration.
Dynamic stability control (DSC)
If there is a difference between the path followed
by the vehicle and that required by the driver, the
DSC monitors each wheel and automatically acts
on the brake of one or more wheels and on the
engine to return the vehicle to the required path,
within the limits of the laws of physics.
Anti-lock braking system
(ABS) and electronic brake
force distribution (EBFD)
When this warning lamp comes on,
accompanied by a message on the
instrument panel display screen, it indicates that
there is a fault with the ABS, which could cause
loss of control of the vehicle when braking.
When these warning lamps come
on, accompanied by a message on
the instrument panel display screen, they
indicate that there is a fault with the electronic
brake force distribution (EBFD), which could
cause loss of control of the vehicle when
braking.
You must stop as soon as it is safe to do so.
Contact a PEUGEOT dealer or a qualified
workshop.
For maximum efficiency of the braking
system, a period of adjustment of
approximately 310 miles (500 km) is
necessary. During this period, it is advisable
to avoid abrupt, repeated and prolonged
braking.
The anti-lock device does not allow for shorter braking. On a very slippery road
Page 62 of 212
60
Safety
If the speed exceeds 19 mph (30 km/h), the
system is automatically deactivated but the
button indicator lamp remains on.
The system is automatically reactivated as soon
as the speed returns below 19 mph (30 km/h).
You can depress the accelerator or brake pedal again at any time.
For the system to activate, the slope
must be greater than 8%.
Do not use the system with the gearbox in
neutral.
Engage a gear corresponding to the speed to
prevent the engine stalling.
►
T
o manually deactivate the system, press the
button; the indicator lamp goes out.
The function may be unavailable if the brakes overheat. Wait a few minutes for
them to cool down before trying again.
Malfunction
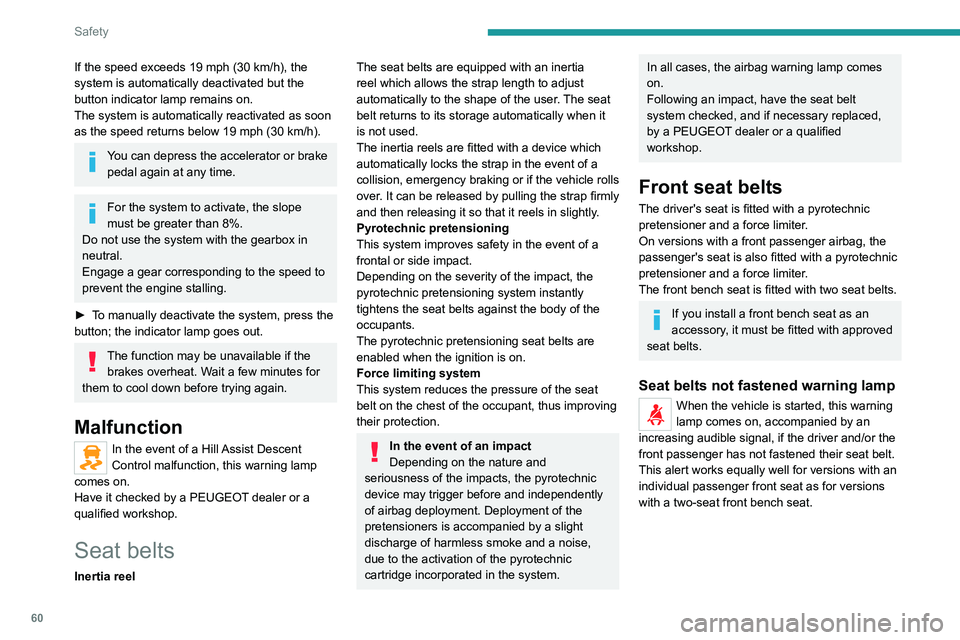
In the event of a Hill Assist Descent
Control malfunction, this warning lamp
comes on.
Have it checked by a PEUGEOT dealer or a
qualified workshop.
Seat belts
Inertia reel
The seat belts are equipped with an inertia
reel which allows the strap length to adjust
automatically to the shape of the user. The seat
belt returns to its storage automatically when it
is not used.
The inertia reels are fitted with a device which
automatically locks the strap in the event of a
collision, emergency braking or if the vehicle rolls
over. It can be released by pulling the strap firmly
and then releasing it so that it reels in slightly.
Pyrotechnic pretensioning
This system improves safety in the event of a
frontal or side impact.
Depending on the severity of the impact, the
pyrotechnic pretensioning system instantly
tightens the seat belts against the body of the
occupants.
The pyrotechnic pretensioning seat belts are
enabled when the ignition is on.
Force limiting system
This system reduces the pressure of the seat
belt on the chest of the occupant, thus improving
their protection.
In the event of an impact
Depending on the nature and
seriousness of the impacts, the pyrotechnic
device may trigger before and independently
of airbag deployment. Deployment of the
pretensioners is accompanied by a slight
discharge of harmless smoke and a noise,
due to the activation of the pyrotechnic
cartridge incorporated in the system.
In all cases, the airbag warning lamp comes
on.
Following an impact, have the seat belt
system checked, and if necessary replaced,
by a PEUGEOT dealer or a qualified
workshop.
Front seat belts
The driver's seat is fitted with a pyrotechnic
pretensioner and a force limiter.
On versions with a front passenger airbag, the
passenger's seat is also fitted with a pyrotechnic
pretensioner and a force limiter.
The front bench seat is fitted with two seat belts.
If you install a front bench seat as an
accessory, it must be fitted with approved
seat belts.
Seat belts not fastened warning lamp
When the vehicle is started, this warning
lamp comes on, accompanied by an
increasing audible signal, if the driver and/or the
front passenger has not fastened their seat belt.
This alert works equally well for versions with an
individual passenger front seat as for versions
with a two-seat front bench seat.
Page 63 of 212
61
Safety
5Height adjustment
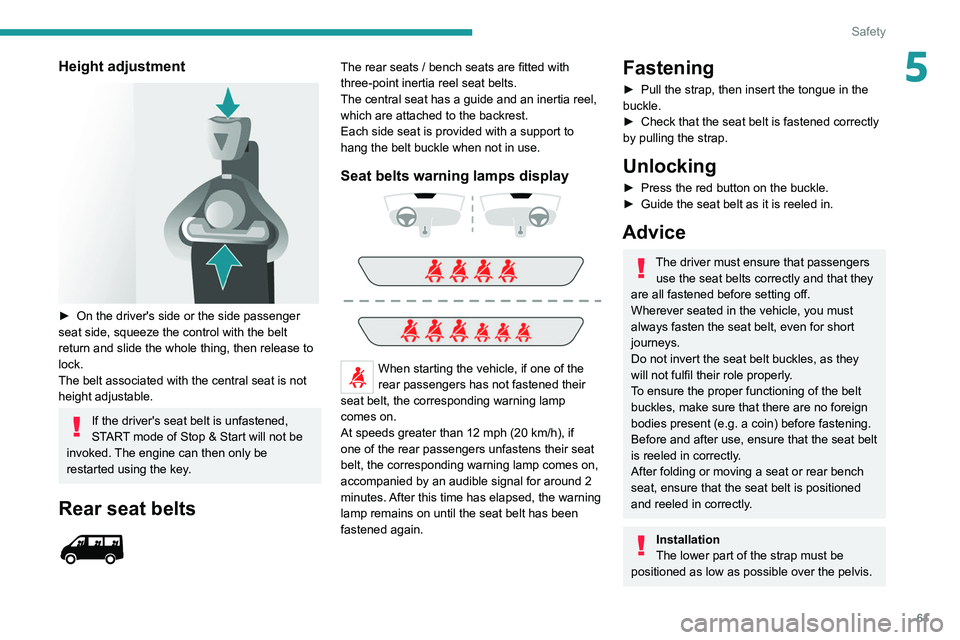
► On the driver's side or the side passenger
seat side, squeeze the control with the belt
return and slide the whole thing, then release to
lock.
The belt associated with the central seat is not
height adjustable.
If the driver's seat belt is unfastened,
START mode of Stop & Start will not be
invoked. The engine can then only be
restarted using the key.
Rear seat belts
The rear seats / bench seats are fitted with
three-point inertia reel seat belts.
The central seat has a guide and an inertia reel,
which are attached to the backrest.
Each side seat is provided with a support to
hang the belt buckle when not in use.
Seat belts warning lamps display
When starting the vehicle, if one of the
rear passengers has not fastened their
seat belt, the corresponding warning lamp
comes on.
At speeds greater than 12 mph (20
km/h), if
one of the rear passengers unfastens their seat
belt, the corresponding warning lamp comes on,
accompanied by an audible signal for around 2
minutes. After this time has elapsed, the warning
lamp remains on until the seat belt has been
fastened again.
Fastening
► Pull the strap, then insert the tongue in the
buckle.
►
Check that the seat belt is fastened correctly
by pulling the strap.
Unlocking
► Press the red button on the buckle.
► Guide the seat belt as it is reeled in.
Advice
The driver must ensure that passengers use the seat belts correctly and that they
are all fastened before setting off.
Wherever seated in the vehicle, you must
always fasten the seat belt, even for short
journeys.
Do not invert the seat belt buckles, as they
will not fulfil their role properly.
To ensure the proper functioning of the belt
buckles, make sure that there are no foreign
bodies present (e.g.
a coin) before fastening.
Before and after use, ensure that the seat belt
is reeled in correctly.
After folding or moving a seat or rear bench
seat, ensure that the seat belt is positioned
and reeled in correctly.
Installation
The lower part of the strap must be
positioned as low as possible over the pelvis.
Page 66 of 212
64
Safety
seats suited to their weight, on seats fitted with
a seat belt or ISOFIX mountings.
–
Statistically
, the safest seats in your
vehicle for carrying children are the rear
seats.
–
Children weighing less than 9 kg must
travel in the "rearward facing" position,
whether in the front or rear of the vehicle.
It is recommended that children travel
on the rear seats of the vehicle:
–
"rearward facing" up to the age of 3,
–
"forward facing" over the age of 3.
Make sure that the seat belt is correctly
positioned and tightened.
For child seats with a support leg, ensure that
the support leg is in firm and steady contact
with the floor.
An incorrectly installed child seat in a vehicle compromises the child's safety in
the event of an accident.
Ensure that there is no seat belt or seat belt
buckle under the child seat, as this could
destabilise it.
Remember to fasten the seat belts or the
child seat harness keeping the slack relative
to the child's body to a minimum, even for
short journeys.
When installing a child seat using the seat
belt, ensure that the seat belt is tightened
correctly on the child seat and that it secures
the child seat firmly on the vehicle seat. If
the passenger seat is adjustable, move it
forwards if necessary.
Remove the head restraint before
installing a child seat with a backrest on a
passenger seat.
Ensure that the head restraint is stored or
attached securely to prevent it from being
thrown around the vehicle in the event of
sharp braking. Refit the head restraint once
the child seat has been removed.
Installing a booster seat
The chest part of the seat belt must be
positioned on the child's shoulder without
touching the neck.
Ensure that the lap part of the seat belt
passes correctly over the child's thighs.
Use a booster seat with a backrest, equipped
with a belt guide at shoulder level.
Additional protections
To prevent accidental opening of the
doors and rear windows, use the "Child lock".
Take care not to open the rear windows by
more than one third.
To protect young children from the sun's rays,
fit side blinds on the rear windows.
As a safety measure, do not leave:
–
A
child alone and unsupervised inside a
vehicle.
– A child or an animal in a vehicle which is
exposed to the sun, with the windows closed.
–
The keys within reach of children inside the
vehicle.
Child seat at the rear
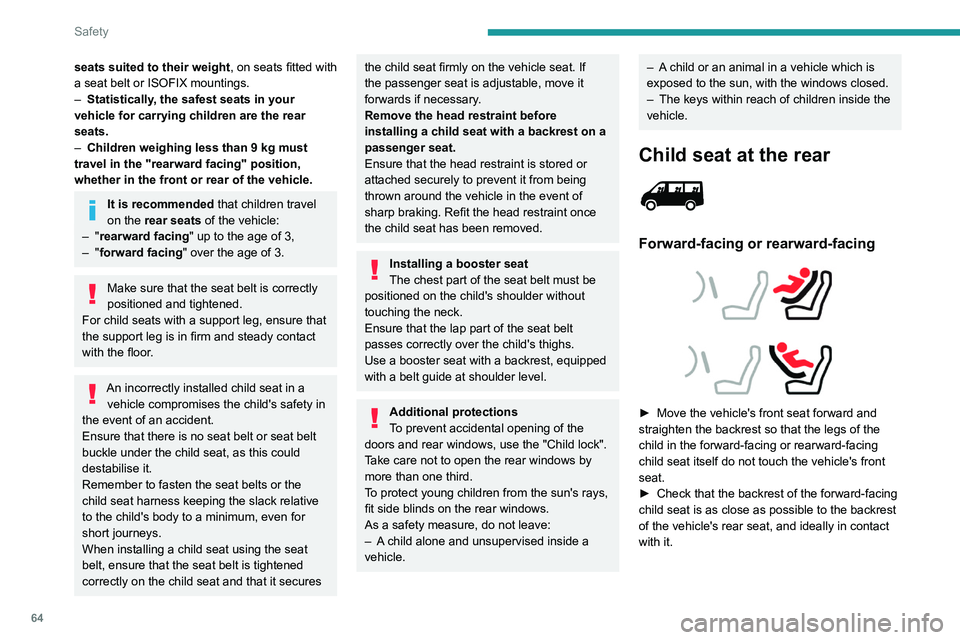
Forward-facing or rearward-facing
► Move the vehicle's front seat forward and
straighten the backrest so that the legs of the
child in the forward-facing or rearward-facing
child seat itself do not touch the vehicle's front
seat.
►
Check that the backrest of the forward-facing
child seat is as close as possible to the backrest
of the vehicle's rear seat, and ideally in contact
with it.
Page 70 of 212
68
Safety
Under 10 kg(group 0)
Up to about 6 months old Under 10 kg
(group 0)
Under 13 kg (group 0+)
Up to about 1 year old From 9 to 18 kg
(group 1)
From about 1 to 3 years old
Row 2 rear side seats with
2-seat bench seat in Row 1
IUF XIUF X IUF
IUF Seat suitable for the installation of a universal ISOFIX child seat. “Forward facing” ISOFIX child seats equipped with an upper strap attached to the
upper ring of the vehicle’s ISOFIX seats.
X Seat which is not suitable for the installation of an ISOFIX child seat of the size category indicated.
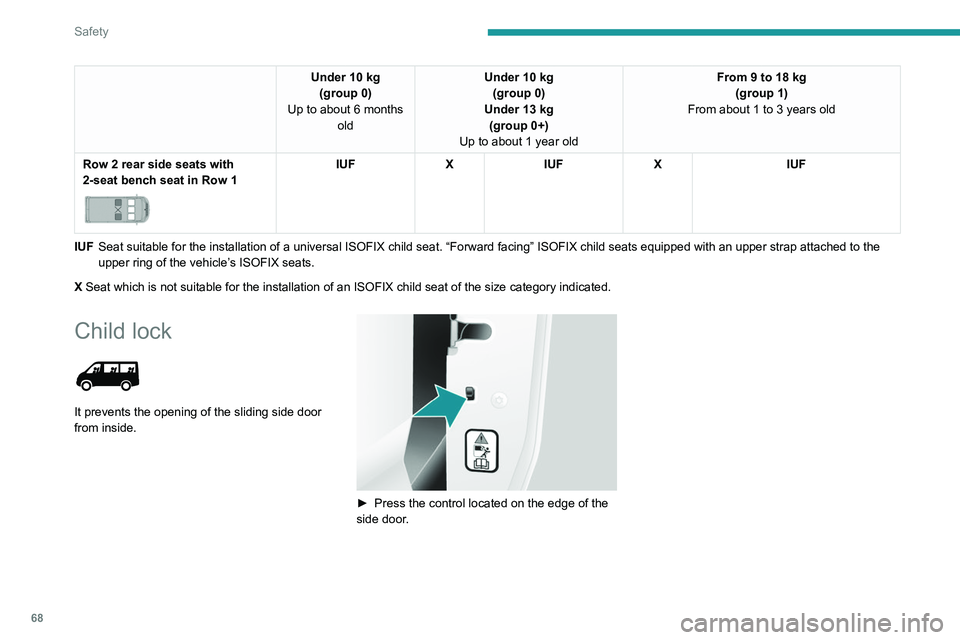
Child lock
It prevents the opening of the sliding side door
from inside.
► Press the control located on the edge of the
side door .
Page 73 of 212
71
Driving
6If the outside temperature is high, let the
engine idle for 1 to 2 minutes after the
vehicle comes to a stop, to help it to cool.
Before setting off
Nose weight
► Distribute the load in the trailer so that the
heaviest items are located as close as possible
to the axle, and the nose weight (at the point
where it joins your vehicle) approaches the
maximum permitted, without exceeding it.
Tyres
► Check the tyre pressures of the towing
vehicle and of the trailer , observing the
recommended pressures.
Lighting
► Check the electrical signalling on the trailer
and the headlamp beam height of your vehicle.
If a genuine PEUGEOT towing device is
used, the rear parking sensors will be
deactivated automatically to avoid activating
the audible signal.
When driving
Cooling
Towing a trailer uphill causes the coolant
temperature to increase. The maximum towable
load depends on the gradient and the exterior temperature. The fan’s cooling capacity does not
increase with engine speed.
►
Reduce speed and lower the engine speed to
limit the amount of heating produced.
►
Pay constant attention to the coolant
temperature.
If this warning lamp and the STOP
warning lamp come on, stop the vehicle
and switch off the engine as soon as possible.
Brakes
Using the engine brake is recommended to limit
the overheating of the brakes. Braking distances
are increased when towing a trailer.
Side wind
Bear in mind that the vehicle will be more
susceptible to wind when towing.
Anti-theft protection
Electronic immobiliser
The keys contain an electronic immobiliser
device.
This device locks the engine supply system. It
activates automatically when the key is removed
from the ignition.
When the ignition switch is turned on, a dialogue
is set up between the key and the electronic
immobiliser.
This warning lamp goes off after the key has been recognised, the ignition is
switched on and the engine can be started.
If the key is not recognised, the engine
cannot be started. Use another key and
have the faulty key checked by a PEUGEOT
dealer.
Carefully note the key number. In case of
loss, the intervention of a PEUGEOT
dealer will be faster and more efficient if you
provide this number and the confidential card.
Do not make any modifications to the
electronic immobiliser system.
Operating the remote control, even in your
pocket, may cause the doors to be unlocked
accidentally.
The simultaneous use of other high-frequency
devices (mobile phones, home alarms, etc.),
may temporarily disturb the operation of the
remote control.
Except for reinitialisation, the remote control
cannot operate while the key is in the ignition
switch, even when the ignition is off.
Driving with the doors locked could make
it more difficult for the emergency
services to enter the vehicle in an emergency.
As a safety precaution (with children on
board), remove the key from the ignition when
leaving the vehicle, even for a short time.
Page 75 of 212
73
Driving
6Starting/Switching off the
motor (Electric)
Starting
► With the parking brake applied, turn the key
to the AV V position and then release it so it
returns to the MAR position.
The message "Go green" appears in the display
integrated into the rear view mirror.
►
Depress the brake pedal fully
, then press
button D (Drive) or R (Reverse) on the drive
selector.
The pedestrian horn comes on.
►
Release the parking brake.
If the electric motor does not start first time, turn
the key to the
STOP position and repeat the
procedure.
Do not depress the accelerator pedal
when switching on the ignition.
Switching off
► Press button N (Neutral) on the drive selector
and then apply the parking brake.
►
Move the key back to the
STOP position.
The parking brake must be applied each time the ignition is switched off.
If the parking brake is not applied, the
message "ENGAGE HANDBRAKE " appears
in the rear view mirror accompanied by an
audible signal lasting 10 seconds.
If the driver's door is opened with mode
D or R selected, the drive selector
automatically switches to mode N. The
message "DRIVE ACTIVE" is displayed in the
rear view mirror accompanied by an audible
signal.
Always remove the key from the ignition switch when the vehicle is parked in
order to avoid discharging the 12
V accessory
battery.
Battery standby system
If your vehicle is to be out of use for an extended
period of time, such as during winter storage for
example, it is strongly recommended to put the
battery in standby mode in order to protect it and
optimise its life.
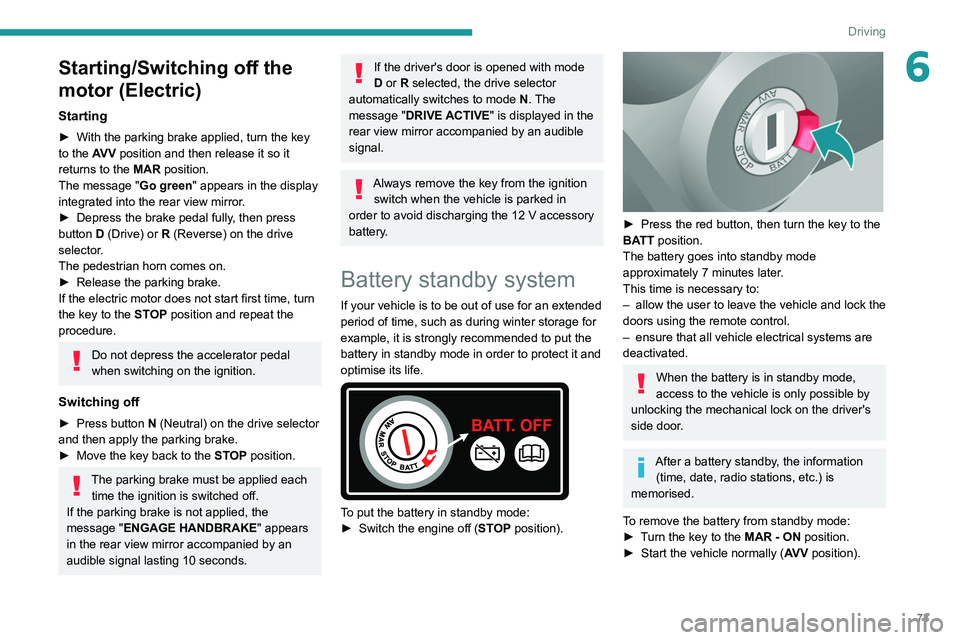
To put the battery in standby mode:
► Switch the engine off ( ST
OP position).
► Press the red button, then turn the key to the
BA TT position.
The battery goes into standby mode
approximately 7 minutes later.
This time is necessary to:
–
allow the user to leave the vehicle and lock the
doors using the remote control.
–
ensure that all vehicle electrical systems are
deactivated.
When the battery is in standby mode,
access to the vehicle is only possible by
unlocking the mechanical lock on the driver's
side door.
After a battery standby, the information (time, date, radio stations, etc.) is
memorised.
To remove the battery from standby mode:
►
T
urn the key to the MAR - ON position.
►
Start the vehicle normally ( AV
V position).
Page 76 of 212
74
Driving
Parking brake
Application
► Apply the parking brake to immobilise the
vehicle.
►
Check that the parking brake is correctly
applied before leaving the vehicle.
Apply the parking brake only when the
vehicle is stationary.
When parking on a slope, turn your
wheels towards the kerb and pull the
parking brake lever up.
There is no advantage in engaging a gear
after parking the vehicle, particularly if the
vehicle is loaded.
In the event of a failure of the
hydraulic braking system
While driving , to avoid any accidental
movement of the vehicle, use the parking
brake while depressing the brake pedal.
In this exceptional circumstance, it is
advisable to pull the parking brake up gently
so as not to block the rear wheels - risk of
skidding!
Release
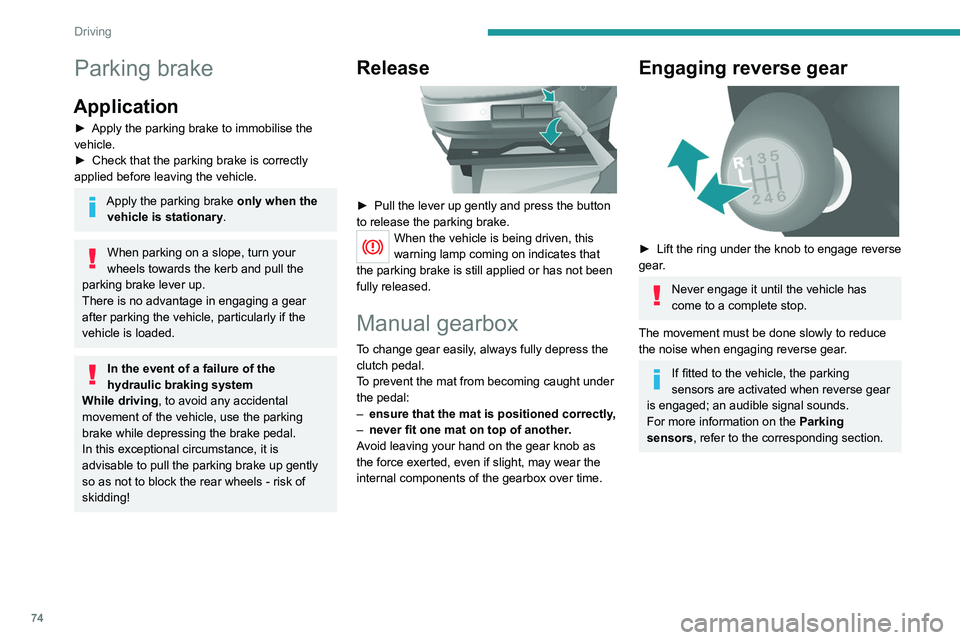
► Pull the lever up gently and press the button
to release the parking brake.
When the vehicle is being driven, this
warning lamp coming on indicates that
the parking brake is still applied or has not been
fully released.
Manual gearbox
To change gear easily, always fully depress the
clutch pedal.
To prevent the mat from becoming caught under
the pedal:
–
ensure that the mat is positioned correctly
,
–
never fit one mat on top of another
.
Avoid leaving your hand on the gear knob as
the force exerted, even if slight, may wear the
internal components of the gearbox over time.
Engaging reverse gear
► Lift the ring under the knob to engage reverse
gear .
Never engage it until the vehicle has
come to a complete stop.
The movement must be done slowly to reduce
the noise when engaging reverse gear.
If fitted to the vehicle, the parking
sensors are activated when reverse gear
is engaged; an audible signal sounds.
For more information on the Parking
sensors, refer to the corresponding section.
Page 98 of 212
96
Practical information
Fuel
The capacity of the tank is about 90 litres.
Fuel tanks of different capacities may be fitted,
60 and 120 litres, depending on the engine.
Low fuel level
When the low fuel tank level E (Empty) is
reached, this warning lamp comes on.
At this moment, you have approximately 10 or
12 litres left in the reserve, depending on the
capacity of your tank and the engine.
You must refuel as soon as possible to avoid
running out of fuel.
Refuelling
The fuel tank must be filled with the engine off.
► Open the fuel filler flap.
►
Hold the black filler cap with one hand.
►
With the other hand, insert the key and turn it
anti-clockwise.
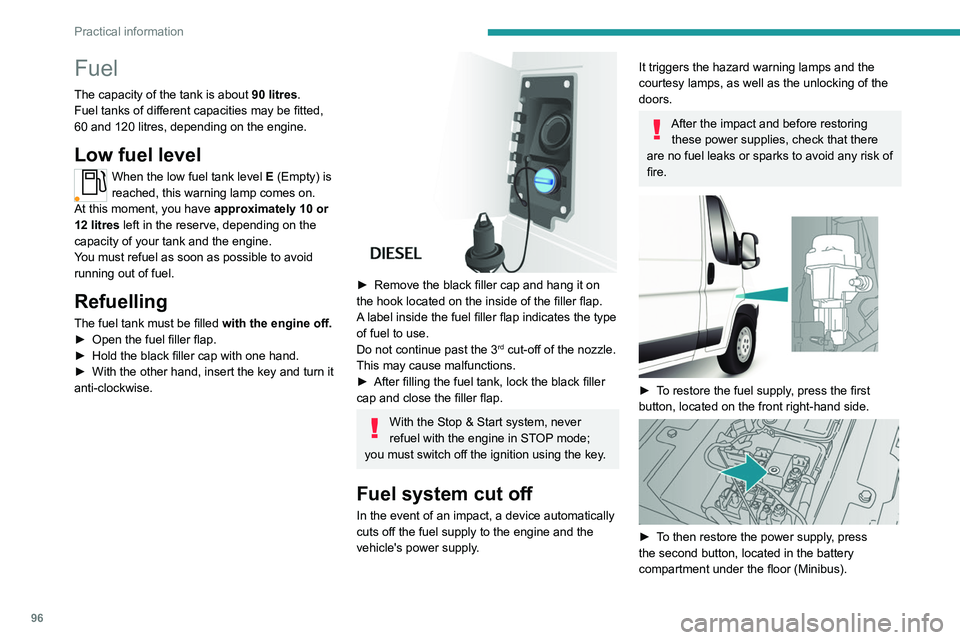
► Remove the black filler cap and hang it on
the hook located on the inside of the filler flap.
A
label inside the fuel filler flap indicates the type
of fuel to use.
Do not continue past the 3
rd cut-off of the nozzle.
This may cause malfunctions.
►
After filling the fuel tank, lock the black filler
cap and close the filler flap.
With the Stop & Start system, never
refuel with the engine in STOP mode;
you must switch off the ignition using the key.
Fuel system cut off
In the event of an impact, a device automatically
cuts off the fuel supply to the engine and the
vehicle's power supply.
It triggers the hazard warning lamps and the
courtesy lamps, as well as the unlocking of the
doors.
After the impact and before restoring these power supplies, check that there
are no fuel leaks or sparks to avoid any risk of
fire.
► To restore the fuel supply, press the first
button, located on the front right-hand side.
► To then restore the power supply, press
the second button, located in the battery
compartment under the floor (Minibus).
Page 100 of 212
98
Practical information
When washing
Before washing the vehicle, always
check that the charging flap is closed
correctly.
Never wash the vehicle while the battery is
on charge.
High-pressure washing
To avoid damaging the electrical
components, it is expressly prohibited to
use high-pressure washing in the engine
compartment or under the body.
Do not use a pressure greater than 80 bar
when washing the bodywork.
Never allow water or dust to enter the
connector or charging nozzle - risk of
electrocution or fire!
Never connect / disconnect the charging
nozzle or cable with wet hands - risk of
electrocution!
Traction battery
This battery stores the energy that powers
the electric motor and the thermal comfort
equipment in the passenger compartment. It is
discharged during use and must be recharged as
often as possible, even partially.
The range of the battery may vary according
to the type of driving, the route, the use of
thermal comfort equipment and the ageing of its
components.
The lifespan of the traction battery depends on multiple factors, such as
climatic conditions, distance travelled and
how often it has been fast-charged.
To conserve the traction battery's capacity
and range:
–
A
void driving too often with a battery
charge level below 15%.
–
Carry out a full charge (100%) at least once
per week and then do not use the vehicle for
about 4 hours to allow the traction battery to
level out the charge across the cells (thus
ensuring a balanced voltage across the cells).
–
In summer
, park the vehicle in the shade
and away from any source of heat.
In the event of damage to the traction
battery
It is strictly prohibited to work on the vehicle
yourself.
Do not touch liquids coming from the battery,
and in the event of skin contact with these
products, wash abundantly with water and
contact a doctor as soon as possible.
Contact a PEUGEOT dealer or a qualified
workshop to have the system checked.
Charging flap and charging
connector
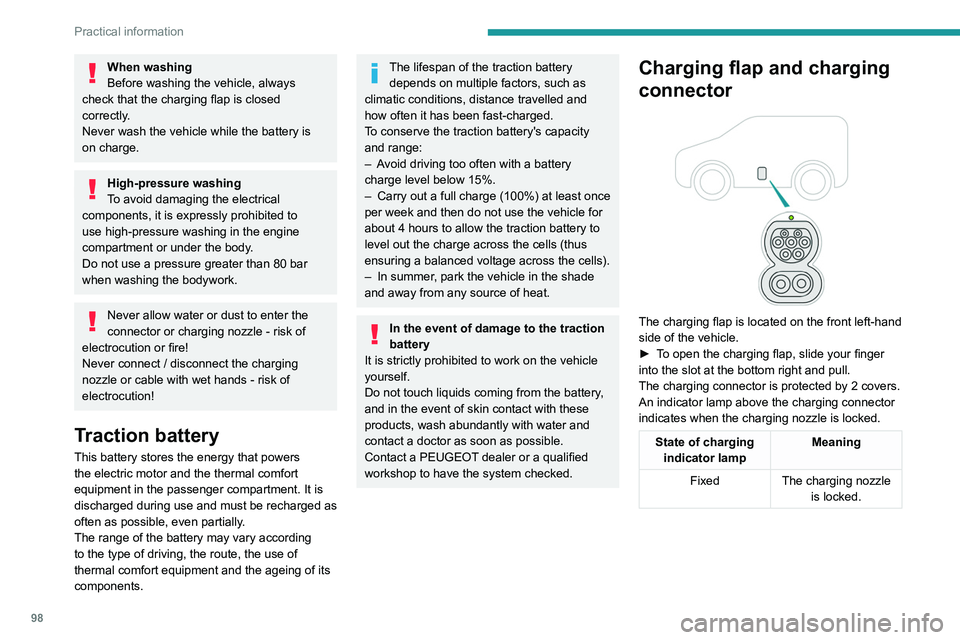
The charging flap is located on the front left-hand
side of the vehicle.
►
T
o open the charging flap, slide your finger
into the slot at the bottom right and pull.
The charging connector is protected by 2 covers.
An indicator lamp above the charging connector
indicates when the charging nozzle is locked.
State of charging indicator lamp Meaning
Fixed The charging nozzle
is locked.