Ignition Peugeot Partner 2020 Owner's Guide
[x] Cancel search | Manufacturer: PEUGEOT, Model Year: 2020, Model line: Partner, Model: Peugeot Partner 2020Pages: 260, PDF Size: 7.76 MB
Page 45 of 260
43
Ease of use and comfort
3► Adjust the height and reach.
► Lower the control lever to lock the steering
wheel.
As a safety precaution, these operations must only be carried out while the vehicle
is stationary.
Mirrors
Door mirrors
Adjustment
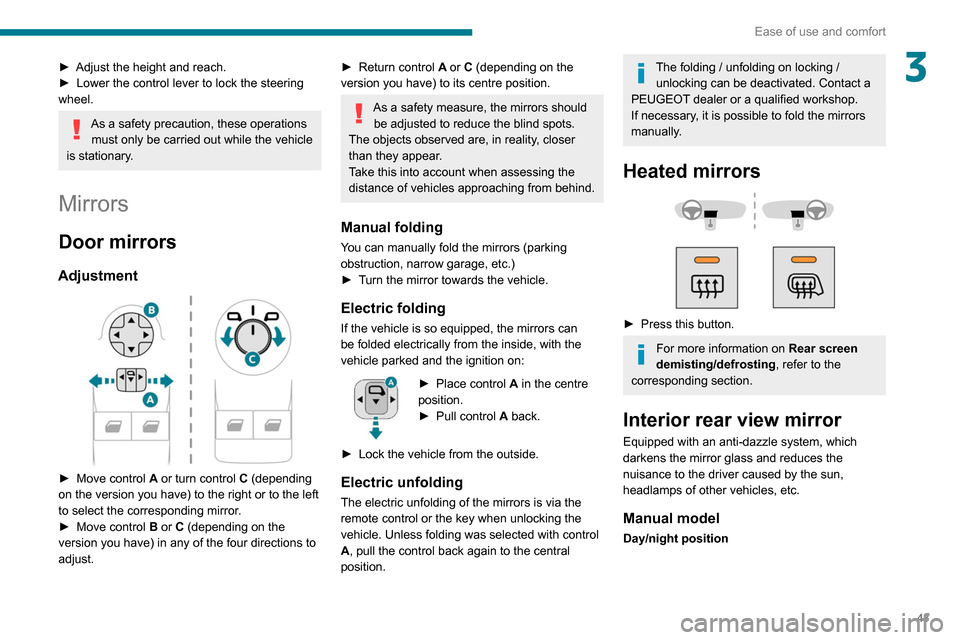
► Move control A or turn control C (depending
on the version you have) to the right or to the left
to select the corresponding mirror.
►
Move control
B or C (depending on the
version you have) in any of the four directions to
adjust.
► Return control A or C (depending on the
version you have) to its centre position.
As a safety measure, the mirrors should be adjusted to reduce the blind spots.
The objects observed are, in reality, closer
than they appear.
Take this into account when assessing the
distance of vehicles approaching from behind.
Manual folding
You can manually fold the mirrors (parking
obstruction, narrow garage, etc.)
►
T
urn the mirror towards the vehicle.
Electric folding
If the vehicle is so equipped, the mirrors can
be folded electrically from the inside, with the
vehicle parked and the ignition on:
► Place control A in the centre
position.
►
Pull control A
back.
►
Lock the vehicle from the outside.
Electric unfolding
The electric unfolding of the mirrors is via the
remote control or the key when unlocking the
vehicle. Unless folding was selected with control
A, pull the control back again to the central
position.
The folding / unfolding on locking / unlocking can be deactivated. Contact a
PEUGEOT dealer or a qualified workshop.
If necessary, it is possible to fold the mirrors
manually.
Heated mirrors
► Press this button.
For more information on Rear screen
demisting/defrosting , refer to the
corresponding section.
Interior rear view mirror
Equipped with an anti-dazzle system, which
darkens the mirror glass and reduces the
nuisance to the driver caused by the sun,
headlamps of other vehicles, etc.
Manual model
Day/night position
Page 50 of 260
48
Ease of use and comfort
USB port
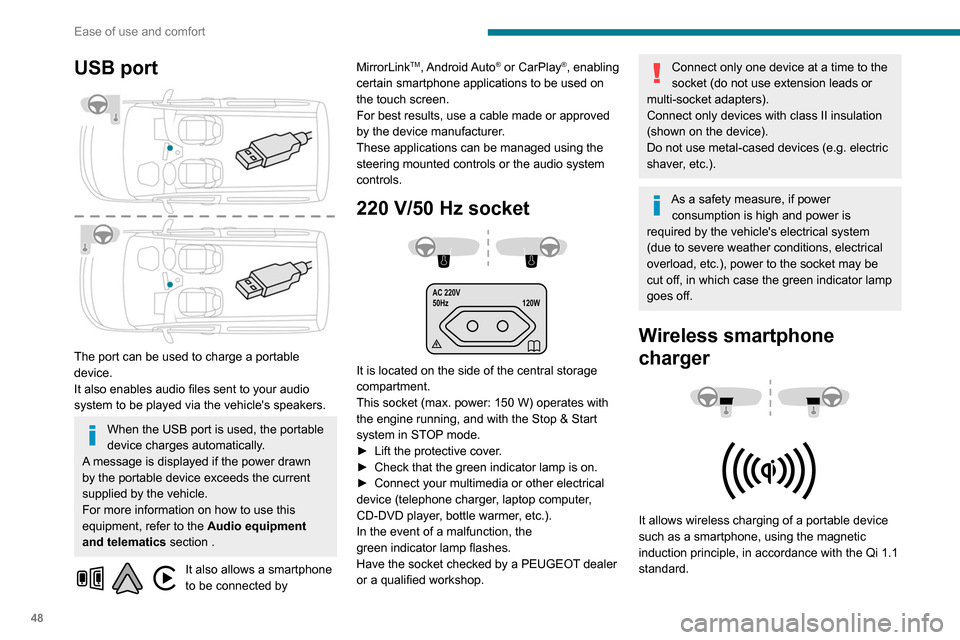
The port can be used to charge a portable
device.
It also enables audio files sent to your audio
system to be played via the vehicle's speakers.
When the USB port is used, the portable
device charges automatically.
A message is displayed if the power drawn
by the portable device exceeds the current
supplied by the vehicle.
For more information on how to use this
equipment, refer to the Audio equipment
and telematics section .
It also allows a smartphone
to be connected by MirrorLink
TM, Android Auto® or CarPlay®, enabling
certain smartphone applications to be used on
the touch screen.
For best results, use a cable made or approved
by the device manufacturer.
These applications can be managed using the
steering mounted controls or the audio system
controls.
220 V/50 Hz socket
AC 220V
50Hz 120W
It is located on the side of the central storage
compartment.
This socket (max. power: 150
W) operates with
the engine running, and with the Stop & Start
system in STOP mode.
►
Lift the protective cover
.
►
Check that the green indicator lamp is on.
►
Connect your multimedia or other electrical
device (telephone charger
, laptop computer,
CD-DVD player, bottle warmer, etc.).
In the event of a malfunction, the
green
indicator lamp flashes.
Have the socket checked by a PEUGEOT dealer
or a qualified workshop.
Connect only one device at a time to the
socket (do not use extension leads or
multi-socket adapters).
Connect only devices with class II insulation
(shown on the device).
Do not use metal-cased devices (e.g. electric
shaver, etc.).
As a safety measure, if power consumption is high and power is
required by the vehicle's electrical system
(due to severe weather conditions, electrical
overload, etc.), power to the socket may be
cut off, in which case the green indicator lamp
goes off.
Wireless smartphone
charger
It allows wireless charging of a portable device
such as a smartphone, using the magnetic
induction principle, in accordance with the Qi 1.1
standard.
The portable device to be charged must be
compatible with the Qi standard, either by design
or by using a compatible holder or shell.
The charging area is identified by the Qi symbol.
The charger works with the engine running and
with the Stop & Start system in STOP mode.
Charging is managed by the smartphone.
With Keyless Entry and Starting, the charger’s
operation may be briefly disrupted when a door
is opened or the ignition is switched off.
Charging
► With the charging area clear, place a device
in its centre.
When the portable device is detected, the
charger’s indicator lamp lights up green. It
remains lit for the whole time that the battery is
being charged.
The system is not designed to charge multiple devices simultaneously.
Do not leave any metal objects (coins,
keys, vehicle remote control, etc.) in the
charging area while a device is being
charged, due to the risk of overheating or
interrupting the charging process.
Page 51 of 260
49
Ease of use and comfort
3The portable device to be charged must be
compatible with the Qi standard, either by design
or by using a compatible holder or shell.
The charging area is identified by the Qi symbol.
The charger works with the engine running and
with the Stop & Start system in STOP mode.
Charging is managed by the smartphone.
With Keyless Entry and Starting, the charger’s
operation may be briefly disrupted when a door
is opened or the ignition is switched off.
Charging
► With the charging area clear, place a device
in its centre.
When the portable device is detected, the
charger’s indicator lamp lights up green. It
remains lit for the whole time that the battery is
being charged.
The system is not designed to charge multiple devices simultaneously.
Do not leave any metal objects (coins,
keys, vehicle remote control, etc.) in the
charging area while a device is being
charged, due to the risk of overheating or
interrupting the charging process.
Operating check
The state of the indicator lamp allows the
operation of the charger to be monitored.
State of the
indicator lamp Meaning
Off Engine switched off.
No compatible devices
detected.
Charging finished.
Fixed green Compatible device detected.
Charging.
Flashing orange Foreign object detected in the charging zone.
Device not well centred in
the charging zone.
Fixed orange Fault with the device's battery meter.
Device battery
temperature too high.
Charger malfunction.
If the indicator lamp is lit orange:
– remove the device, then place it back in the
centre of the charging zone.
or
–
remove the device and try again in a quarter
of an hour
.
If the problem persists, have the system checked
by a PEUGEOT dealer or a qualified workshop.
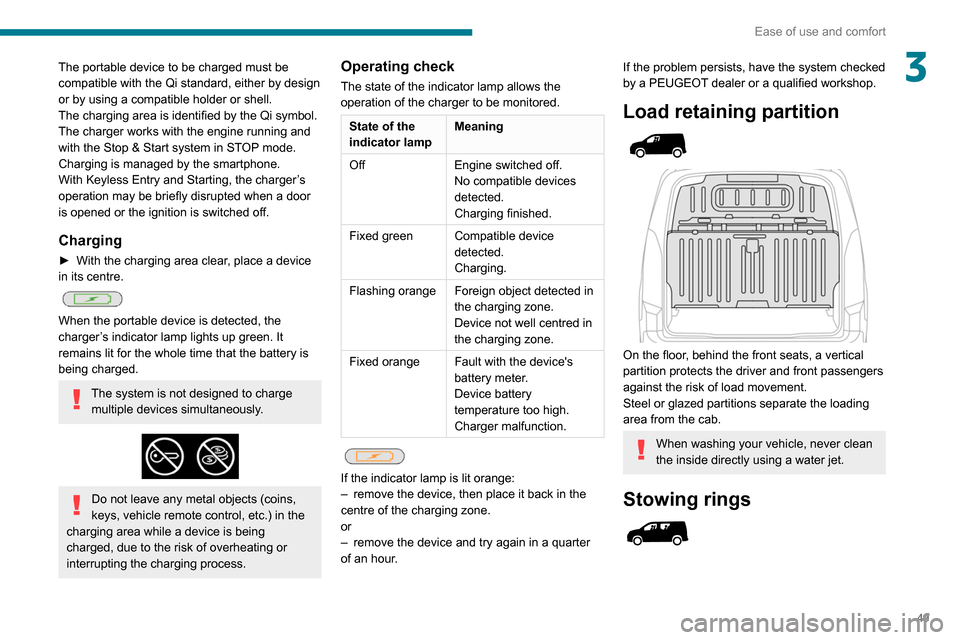
Load retaining partition
On the floor, behind the front seats, a vertical
partition protects the driver and front passengers
against the risk of load movement.
Steel or glazed partitions separate the loading
area from the cab.
When washing your vehicle, never clean
the inside directly using a water jet.
Stowing rings
Page 64 of 260
62
Ease of use and comfort
closed environment such as a garage or
workshop which is not equipped with an
exhaust gas extraction system.
Do not park the vehicle on a flammable
surface (dry grass, dead leaves, paper, etc.)
- Risk of fire!
Glazed surfaces such as the rear screen
or windscreen can become very hot in
places.
Never put objects on these surfaces; never
touch these surfaces - Risk of burns!
Do not throw remote control batteries
away, as they contain metals that are
harmful to the environment. Take them to an
approved disposal point.
Courtesy lamp
Automatic switching on/off
The front courtesy lamp comes on when the key
is removed from the ignition switch.
All courtesy lamps come on when the vehicle is
unlocked, when one of the corresponding doors
is opened and when locating the vehicle using
the remote control.
They fade to off after the ignition is switched on
and when the vehicle is locked.
Take care not to allow objects to come into contact with the courtesy lamp.
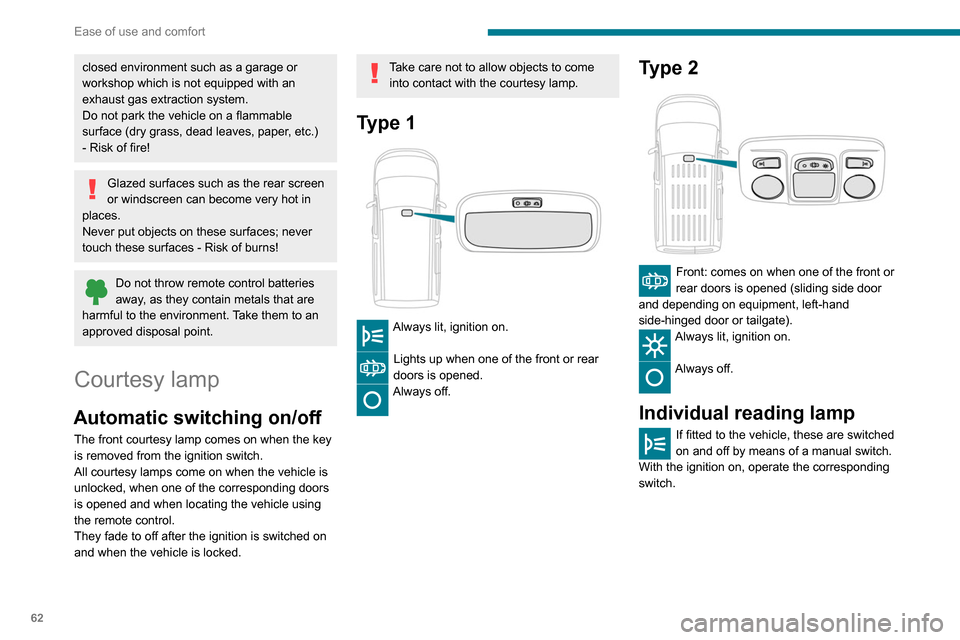
Type 1
Always lit, ignition on.
Lights up when one of the front or rear
doors is opened.
Always off.
Type 2
Front: comes on when one of the front or
rear doors is opened (sliding side door
and depending on equipment, left-hand
side-hinged door or tailgate).
Always lit, ignition on.
Always off.
Individual reading lamp
If fitted to the vehicle, these are switched
on and off by means of a manual switch.
With the ignition on, operate the corresponding
switch.
Page 65 of 260
63
Lighting and visibility
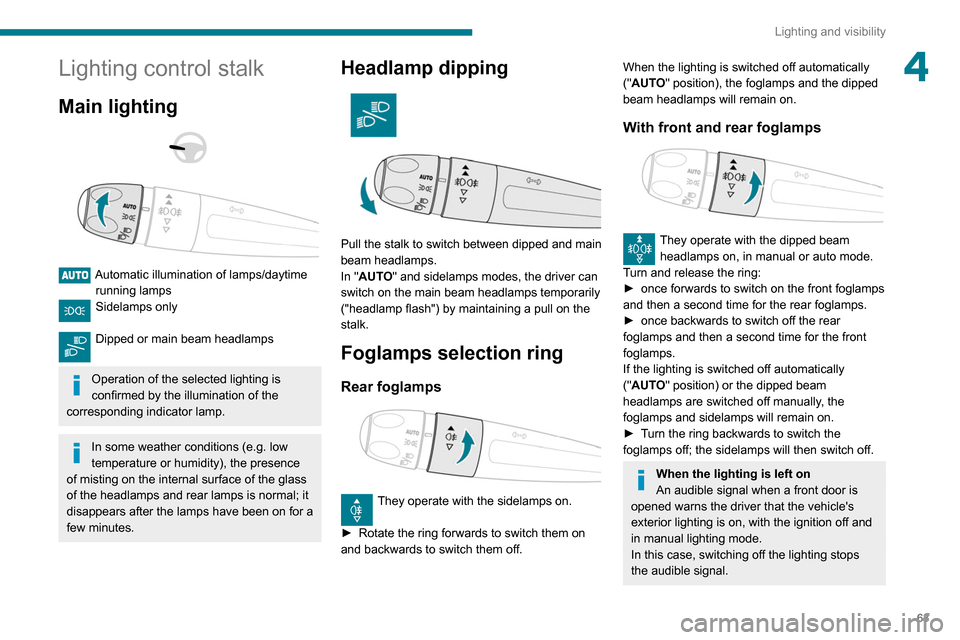
4Lighting control stalk
Main lighting
Automatic illumination of lamps/daytime running lamps
Sidelamps only
Dipped or main beam headlamps
Operation of the selected lighting is
confirmed by the illumination of the
corresponding indicator lamp.
In some weather conditions (e.g. low
temperature or humidity), the presence
of misting on the internal surface of the glass
of the headlamps and rear lamps is normal; it
disappears after the lamps have been on for a
few minutes.
Headlamp dipping
Pull the stalk to switch between dipped and main
beam headlamps.
In "AUTO" and sidelamps modes, the driver can
switch on the main beam headlamps temporarily
("headlamp flash") by maintaining a pull on the
stalk.
Foglamps selection ring
Rear foglamps
They operate with the sidelamps on.
►
Rotate the ring forwards to switch them on
and backwards to switch them off.
When the lighting is switched off automatically
("AUTO" position), the foglamps and the dipped
beam headlamps will remain on.
With front and rear foglamps
They operate with the dipped beam headlamps on, in manual or auto mode.
Turn and release the ring:
►
once forwards to switch on the front foglamps
and then a second time for the rear foglamps.
►
once backwards to switch off the rear
foglamps and then a second time for the front
foglamps.
If the lighting is switched off automatically
("
AUTO" position) or the dipped beam
headlamps are switched off manually, the
foglamps and sidelamps will remain on.
►
T
urn the ring backwards to switch the
foglamps off; the sidelamps will then switch off.
When the lighting is left on
An audible signal when a front door is
opened warns the driver that the vehicle's
exterior lighting is on, with the ignition off and
in manual lighting mode.
In this case, switching off the lighting stops
the audible signal.
Page 66 of 260
64
Lighting and visibility
Daytime running lamps /
Sidelamps
The front lamps light up automatically when the
engine starts.
They provide the following functions:
– Daytime running lamps (lighting control stalk in
the "AUTO" position with adequate light level).
– Sidelamps (lighting control stalk in the " AUTO"
position with low light levels or "Sidelamps only”
or "Dipped/main beam headlamps").
The LEDs are brighter when operating as daytime running lamps.
Parking lamps
Side markers for the vehicle by illumination of
the sidelamps on the traffic side only.
► Depending on version, within one minute of
switching off the ignition, operate the lighting
control stalk up or down depending on the traffic
side (for example: when parking on the left;
The lighting goes off when you switch off the
ignition, but you can always switch it on again
using the lighting control stalk.
Travelling abroad
If using your vehicle in a country that
drives on the other side of the road, the
headlamps must be adjusted to avoid
dazzling on-coming drivers.
Contact a PEUGEOT dealer or a qualified
workshop.
In good or rainy weather, by both day
and night, use of the front foglamps and
the rear foglamps are prohibited. In these
situations, the power of their beams may
dazzle other drivers. They should only be
used in fog or falling snow.
In these weather conditions, it is your
responsibility to switch on the foglamps and
dipped headlamps manually as the sunshine
sensor may detect sufficient light.
Switch off the front and rear foglamps when
they are no longer necessary.
Never look too closely at the luminous
beam of LED headlamps: risk of serious
eye injury.
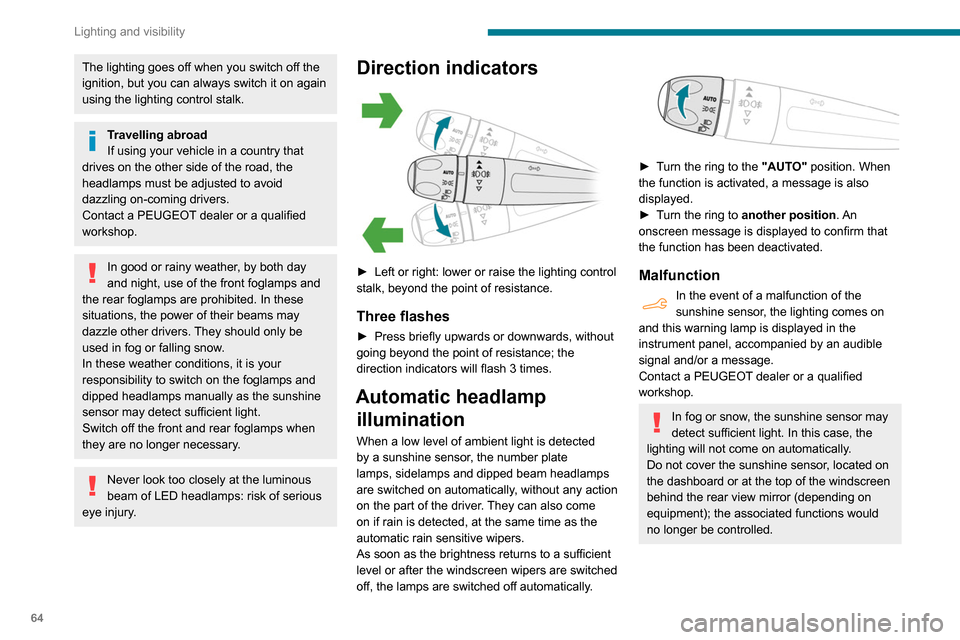
Direction indicators
► Left or right: lower or raise the lighting control
stalk, beyond the point of resistance.
Three flashes
► Press briefly upwards or downwards, without
going beyond the point of resistance; the
direction indicators will flash 3 times.
Automatic headlamp illumination
When a low level of ambient light is detected
by a sunshine sensor, the number plate
lamps,
sidelamps and dipped beam headlamps
are switched on automatically, without any action
on the part of the driver. They can also come
on if rain is detected, at the same time as the
automatic rain sensitive wipers.
As soon as the brightness returns to a sufficient
level or after the windscreen wipers are switched
off, the lamps are switched off automatically.
► Turn the ring to the "AUTO" position. When
the function is activated, a message is also
displayed.
►
T
urn the ring to another position . An
onscreen message is displayed to confirm that
the function has been deactivated.
Malfunction
In the event of a malfunction of the
sunshine sensor, the lighting comes on
and this warning lamp is displayed in the
instrument panel, accompanied by an audible
signal and/or a message.
Contact a PEUGEOT dealer or a qualified
workshop.
In fog or snow, the sunshine sensor may
detect sufficient light. In this case, the
lighting will not come on automatically.
Do not cover the sunshine sensor, located on
the dashboard or at the top of the windscreen
behind the rear view mirror (depending on
equipment); the associated functions would
no longer be controlled.
Page 67 of 260
65
Lighting and visibility
4Daytime running lamps /
Sidelamps
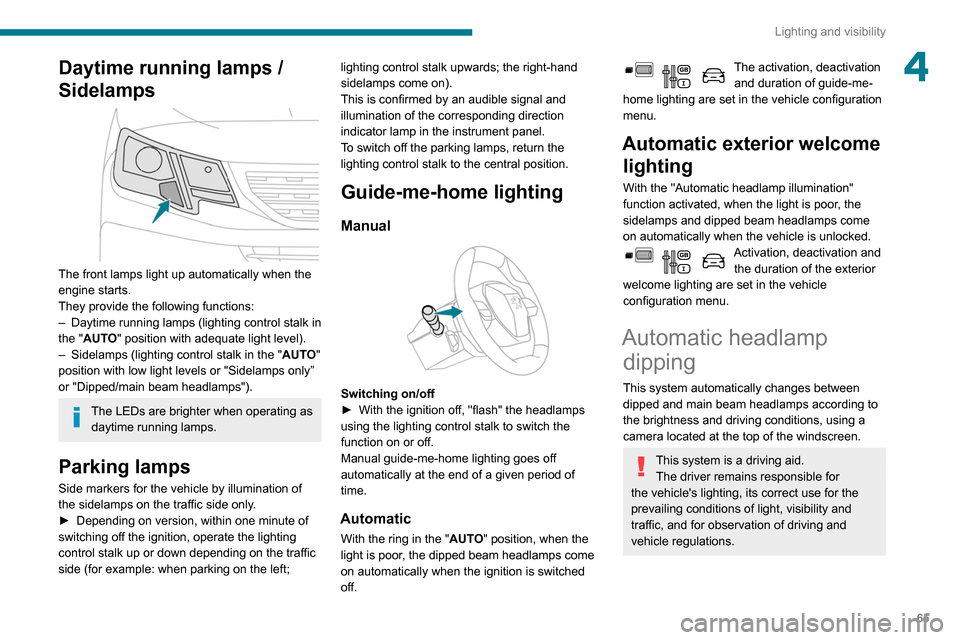
The front lamps light up automatically when the
engine starts.
They provide the following functions:
–
Daytime running lamps (lighting control stalk in
the "
AUTO" position with adequate light level).
–
Sidelamps (lighting control stalk in the " AUT
O"
position with low light levels or "Sidelamps only”
or "Dipped/main beam headlamps").
The LEDs are brighter when operating as daytime running lamps.
Parking lamps
Side markers for the vehicle by illumination of
the sidelamps on the traffic side only.
►
Depending on version, within one minute of
switching off the ignition, operate the lighting
control stalk up or down depending on the traffic
side (for example: when parking on the left; lighting control stalk upwards; the right-hand
sidelamps come on).
This is confirmed by an audible signal and
illumination of the corresponding direction
indicator lamp in the instrument panel.
T
o switch off the parking lamps, return the
lighting control stalk to the central position.
Guide-me-home lighting
Manual
Switching on/off
► With the ignition off, "flash" the headlamps
using the lighting control stalk to switch the
function on or off.
Manual guide-me-home lighting goes off
automatically at the end of a given period of
time.
Automatic
With the ring in the "AUTO" position, when the
light is poor, the dipped beam headlamps come
on automatically when the ignition is switched
off.
The activation, deactivation and duration of guide-me-
home lighting are set in the vehicle configuration
menu.
Automatic exterior welcome lighting
With the "Automatic headlamp illumination"
function activated, when the light is poor, the
sidelamps and dipped beam headlamps come
on automatically when the vehicle is unlocked.
Activation, deactivation and
the duration of the exterior
welcome lighting are set in the vehicle
configuration menu.
Automatic headlamp dipping
This system automatically changes between
dipped and main beam headlamps according to
the brightness and driving conditions, using a
camera located at the top of the windscreen.
This system is a driving aid.
The driver remains responsible for
the vehicle's lighting, its correct use for the
prevailing conditions of light, visibility and
traffic, and for observation of driving and
vehicle regulations.
Page 68 of 260
66
Lighting and visibility
Headlamp beam height
adjustment
To avoid inconvenience to other road users,
the height of the halogen headlamps should be
adjusted according to the load in the vehicle.
0Unladen.
1 Partial load.
2 Medium load.
3 Maximum authorised load.
4 5 6 Not used.
The initial setting is position 0.
Wiper control stalk
Programming
Your vehicle may also include some functions
that can be activated/deactivated:
– automatic windscreen wipers,
– rear wiping on engaging reverse gear.
The system will be operational as soon
as you exceed 16 mph (25 km/h).
If the speed drops below 9 mph (15
km/h), the
system no longer operates.
Activation/Deactivation
Activation and deactivation are done via the vehicle
configuration menu.
When deactivated, the lighting system changes
to "automatic illumination of headlamps" mode.
The state of the system stays in the memory
when switching off the ignition.
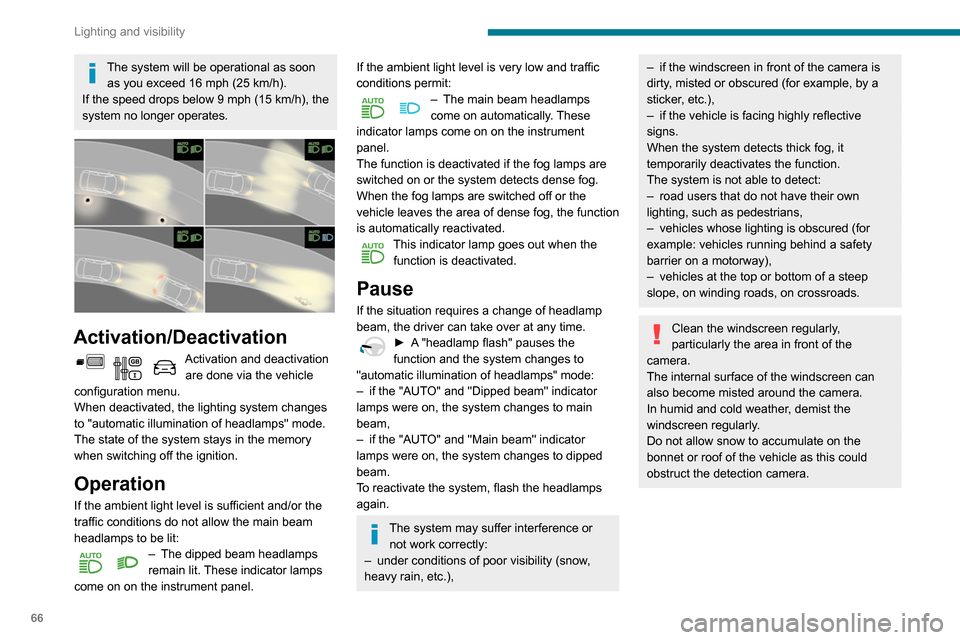
Operation
If the ambient light level is sufficient and/or the
traffic conditions do not allow the main beam
headlamps to be lit:
– The dipped beam headlamps
remain lit. These indicator lamps
come on on the instrument panel.
If the ambient light level is very low and traffic
conditions permit:
– The main beam headlamps
come on automatically . These
indicator lamps come on on the instrument
panel.
The function is deactivated if the fog lamps are
switched on or the system detects dense fog.
When the fog lamps are switched off or the
vehicle leaves the area of dense fog, the function
is automatically reactivated.
This indicator lamp goes out when the function is deactivated.
Pause
If the situation requires a change of headlamp
beam, the driver can take over at any time.
► A "headlamp flash" pauses the
function and the system changes to
"automatic illumination of headlamps" mode:
–
if the "AUT
O" and "Dipped beam" indicator
lamps were on, the system changes to main
beam,
–
if the "AUT
O" and "Main beam" indicator
lamps were on, the system changes to dipped
beam.
To reactivate the system, flash the headlamps
again.
The system may suffer interference or not work correctly:
–
under conditions of poor visibility (snow
,
heavy rain, etc.),
– if the windscreen in front of the camera is
dirty , misted or obscured (for example, by a
sticker, etc.),
–
if the vehicle is facing highly reflective
signs.
When the system detects thick fog, it
temporarily deactivates the function.
The system is not able to detect:
–
road users that do not have their own
lighting, such as pedestrians,
–
vehicles whose lighting is obscured (for
example: vehicles running behind a safety
barrier on a motorway),
–
vehicles at the top or bottom of a steep
slope, on winding roads, on crossroads.
Clean the windscreen regularly,
particularly the area in front of the
camera.
The internal surface of the windscreen can
also become misted around the camera.
In humid and cold weather, demist the
windscreen regularly.
Do not allow snow to accumulate on the
bonnet or roof of the vehicle as this could
obstruct the detection camera.
Page 70 of 260

68
Lighting and visibility
After refitting a windscreen wiper blade
► To return the wiper blades to their initial
position, switch on the ignition and operate the
wiper control stalk.
Changing a wiper blade
Removing/refitting at the front
► Carry out these wiper blade replacement
operations from the driver's side.
► Starting with the wiper blade farthest from
you, hold each arm by the rigid section and raise
it as far as possible.
Take care not to hold the arms at the jet locations.
Do not touch the wiper blades. Risk of
irreparable deformation.
Do not release them while moving them. Risk
of damaging the windscreen!
On vehicles fitted with automatic air
conditioning, any action on the
screenwash control temporarily closes the air
intake, to avoid odours inside the passenger
compartment.
The windscreen wash jets are incorporated into the tip of each wiper
arm.
Screenwash fluid is sprayed along the length
of the wiper blade. This improves visibility and
reduces screenwash fluid consumption.
In some cases, depending on the contents
or colour of the fluid and on the exterior
brightness, the liquid spray may be barely
noticeable.
To avoid damaging the wiper blades, do not operate the windscreen washer if the
windscreen washer reservoir is empty.
Only operate the windscreen washer if
there is no risk of the fluid freezing on the
windscreen and hindering visibility. Always
use windscreen washer fluid suitable for low
temperatures during the winter period.
Never top up with water.
Rear wiper
Rear wiper selection ring:Off.
Intermittent wiping (proportional to the
speed of the vehicle).
Wash-wipe (set duration).
Reverse gear
When reverse gear is engaged, the rear wiper
will come into operation automatically if the
windscreen wipers are operating.
Activation/Deactivation
Activation or deactivation is set via the vehicle
configuration menu.
This system is activated by default.
If a significant accumulation of snow or
ice is present, or when using a bicycle
carrier on the boot, deactivate the automatic
rear wiper.
Special position of the
windscreen wipers
This maintenance position is used while cleaning
or replacing the wiper blades. It can also be
useful, in winter (ice, snow), to release the wiper
blades from the windscreen.
To maintain the effectiveness of the flat wiper blades, it is advisable to:
–
handle them with care,
–
clean them regularly using soapy water
,
–
avoid using them to retain cardboard on the
windscreen,
–
replace them at the first signs of wear
.
Before removing a windscreen wiper blade
► Actuating the wiper control stalk within one
minute of switching off the ignition will position
the wiper blades vertically
.
►
Proceed with the desired operation or replace
the wiper blades.
Page 71 of 260

69
Lighting and visibility
4After refitting a windscreen wiper blade
► To return the wiper blades to their initial
position, switch on the ignition and operate the
wiper control stalk.
Changing a wiper blade
Removing/refitting at the front
► Carry out these wiper blade replacement
operations from the driver's side.
►
Starting with the wiper blade farthest from
you, hold each arm by the rigid section and raise
it as far as possible.
Take care not to hold the arms at the jet locations.
Do not touch the wiper blades. Risk of
irreparable deformation.
Do not release them while moving them. Risk
of damaging the windscreen!
► Clean the windscreen using screenwash
fluid.
Do not apply "Rain X" type water-
repellent products.
►
Unclip the worn wiper blade closest to you
and remove it.
►
Install the new wiper blade and clip it to the
arm.
►
Repeat the procedure for the other wiper
blade.
►
Starting with the wiper blade closest to you,
once again hold each arm by the rigid section,
then guide it carefully onto the windscreen.
Removing/refitting at the rear
► Hold the arm by the rigid section and raise it
as far as possible.
►
Clean the rear screen using screenwash
fluid.
►
Unclip the worn wiper blade and remove it.
►
Install the new wiper blade and clip it to the
arm.
►
Once again hold the arm by the rigid section,
then guide it carefully onto the rear screen.
Automatic windscreen wipers
The windscreen wipers operate automatically
once rain is detected (sensor behind the rear
view mirror), adapting their speed to the intensity
of the rain without any action on the part of the
driver.
Switching on
Briefly push the control stalk downwards.
A wiping cycle confirms that the instruction has
been accepted.
Depending on version, this symbol
appears in the display screen or
this indicator lamp comes on on the instrument
panel and a message is displayed.
Off
Give the control stalk another brief push
downwards or place the control stalk in
another position (Int, 1 or 2).
This indicator lamp goes off on the instrument
panel and a message is displayed.
If the ignition has been off for more than
one minute, the automatic wipers must