service PONTIAC VIBE 2010 Owner's Guide
[x] Cancel search | Manufacturer: PONTIAC, Model Year: 2010, Model line: VIBE, Model: PONTIAC VIBE 2010Pages: 318, PDF Size: 1.7 MB
Page 173 of 318

Recommended Fuel
Use regular unleaded gasoline with a
posted octane rating of 87 or higher.
If the octane rating is less than 87,
you might notice an audible knocking
noise when you drive, commonly
referred to as spark knock. If this
occurs, use a gasoline rated at
87 octane or higher as soon as
possible. If you are using gasoline
rated at 87 octane or higher and you
hear heavy knocking, the engine
needs service.
Gasoline Speci�cations
At a minimum, gasoline should
meet ASTM specification D 4814
in the United States or CAN/
CGSB-3.5 or 3.511 in Canada.
Some gasolines contain an
octane-enhancing additive called
methylcyclopentadienyl manganese
tricarbonyl (MMT). We recommend
against the use of gasolines
containing MMT. SeeFuel Additives
on page 8-40 for additional
information.
California Fuel
Requirements
If the vehicle is certified to meet
California Emissions Standards, it is
designed to operate on fuels that
meet California specifications.
See the underhood emission control
label. If this fuel is not available in
states adopting California emissions
standards, the vehicle will operate
satisfactorily on fuels meeting federal
specifications, but emission control
system performance might be
affected. The malfunction indicator
lamp could turn on and the vehicle
might fail a smog-check test.
See Malfunction Indicator Lamp on
page 4-14. If this occurs, return to
your authorized dealer/retailer for
diagnosis. If it is determined that the
condition is caused by the type of
fuel used, repairs might not be
covered by the vehicle warranty.
Driving and Operating 8-39
Page 175 of 318
Notice:This vehicle was not
designed for fuel that contains
methanol. Do not use fuel
containing methanol. It can
corrode metal parts in the fuel
system and also damage plastic
and rubber parts. That damage
would not be covered under the
vehicle warranty.
Some gasolines that are
not reformulated for low
emissions can contain an
octane-enhancing additive called
methylcyclopentadienyl manganese
tricarbonyl (MMT); ask the attendant
where you buy gasoline whether the
fuel contains MMT. We recommend
against the use of such gasolines.
Fuels containing MMT can reduce
the life of spark plugs and the
performance of the emission
control system could be affected.
The malfunction indicator lamp might
turn on. If this occurs, return to your
dealer/retailer for service.Filling the Tank
{CAUTION
Fuel vapor burns violently and a
fuel fire can cause bad injuries.
To help avoid injuries to you and
others, read and follow all the
instructions on the pump island.
Turn off the engine when you are
refueling. Do not smoke if you are
near fuel or refueling the vehicle.
Do not use cellular phones. Keep
sparks, flames, and smoking
materials away from fuel. Do not
leave the fuel pump unattended
when refueling the vehicle. This is
against the law in some places.
Do not re-enter the vehicle while
pumping fuel. Keep children away
from the fuel pump; never let
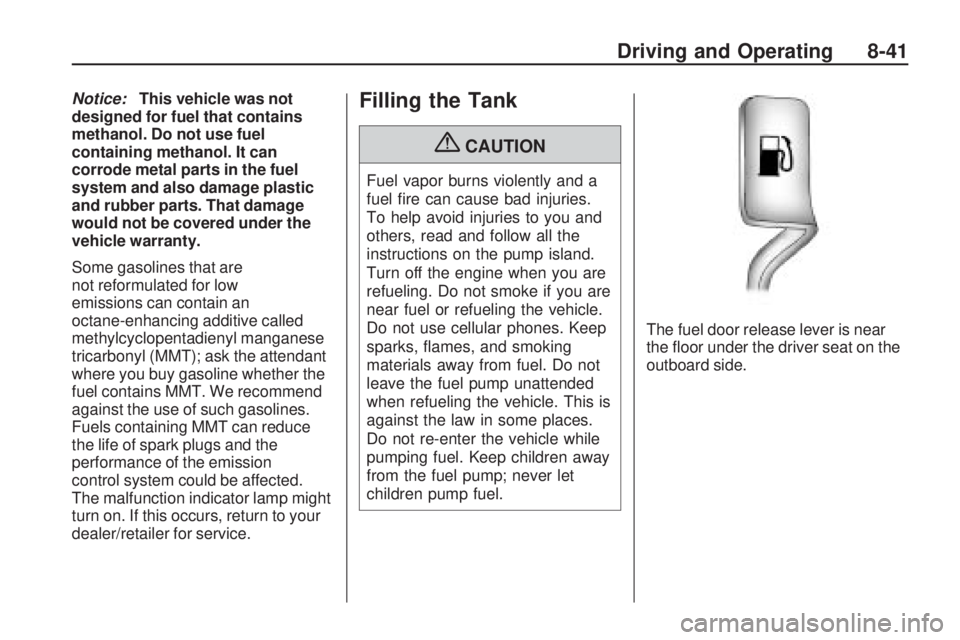
children pump fuel. The fuel door release lever is near
the floor under the driver seat on the
outboard side.
Driving and Operating 8-41
Page 181 of 318
Parking on Hills
{CAUTION
Parking the vehicle on a hill with
the trailer attached can be
dangerous. If something goes
wrong, the rig could start to move.
People can be injured, and both
the vehicle and the trailer can be
damaged. When possible, always
park the rig on a flat surface.
If parking the rig on a hill:
1. Press the brake pedal, but do not shift into P (Park) yet for vehicles
with an automatic transmission,
or into gear for vehicles with a
manual transmission. Turn the
wheels into the curb if facing
downhill or into traffic if facing
uphill.
2. Have someone place chocks under the trailer wheels. 3. When the wheel chocks are in
place, release the brake pedal
until the chocks absorb the load.
4. Reapply the brake pedal. Then apply the parking brake and
shift into P (Park) for vehicles
with an automatic transmission
or into gear for vehicles with
a manual transmission.
5. Release the brake pedal.
Leaving After Parking on
a Hill
1. Apply and hold the brake pedal while you:
•start the engine,
•shift into a gear, and
•release the parking brake.
2. Let up on the brake pedal.
3. Drive slowly until the trailer is clear of the chocks.
4. Stop and have someone pick up and store the chocks.
Maintenance When Trailer
Towing
The vehicle needs service more
often when pulling a trailer. See this
manual’s Maintenance Schedule or
Index for more information. Things
that are especially important in trailer
operation are automatic transmission
fluid, engine oil, axle lubricant, belts,
cooling system and brake system.
It is a good idea to inspect these
before and during the trip.
Check periodically to see that all
hitch nuts and bolts are tight.
Engine Cooling When Trailer
Towing
The cooling system may temporarily
overheat during severe operating
conditions. See Engine Overheating
on page 9-23.
Driving and Operating 8-47
Page 185 of 318
Vehicle Care
General InformationGeneral Information..............
.9-2
California Proposition 65 Warning ........................
.9-2
California Perchlorate Materials Requirements ........9-3
Accessories and Modifications ......................
.9-3
Vehicle ChecksDoing Your Own
Service Work .....................
.9-4
Hood ..................................
.9-5
Engine Compartment Overview ...........................
.9-6
Engine Oil ...........................
.9-9
Automatic Transmission Fluid ...............................
.9-12
Manual Transmission Fluid . . . .9-14
Hydraulic Clutch .................
.9-15
Engine Air Cleaner/Filter .......9-16
Cooling System ..................
.9-19
Engine Coolant ..................
.9-19Engine Overheating
.............9-23
Power Steering Fluid ............9-24
Washer Fluid .....................
.9-24
Brakes ..............................
.9-26
Brake Fluid ........................
.9-27
Battery ..............................
.9-28
All-Wheel Drive ..................
.9-29
Starter Switch Check ............9-30
Wiper Blade Replacement .....9-30
Headlamp AimingHeadlamp Aiming...............
.9-32
Bulb ReplacementBulb Replacement ..............
.9-33
Halogen Bulbs ...................
.9-33
Headlamps and Parking Lamps .............................
.9-33
Taillamps ...........................
.9-35
License Plate Lamp .............9-36
Replacement Bulbs .............
.9-37
Electrical SystemElectrical System Overload . . . .9-37
Fuses and Circuit Breakers . . .9-38
Engine Compartment Fuse Block ..............................
.9-38
Instrument Panel Fuse Block ..............................
.9-41
Wheels and TiresTires.................................
.9-43
Tire Sidewall Labeling ..........9-44
Tire Designations ................
.9-46
Tire Terminology and Definitions ........................
.9-46
Tire Pressure .....................
.9-49
Tire Pressure Monitor System ............................
.9-50
Tire Pressure Monitor Operation .........................
.9-52
Tire Inspection ...................
.9-54
Tire Rotation ......................
.9-55
When It Is Time for New Tires ...............................
.9-56
Buying New Tires ...............
.9-56
Different Size Tires and Wheels ............................
.9-58
Uniform Tire Quality Grading ...........................
.9-58
Wheel Alignment and Tire Balance ...........................
.9-60
Wheel Replacement .............9-60
Tire Chains ........................
.9-61
If a Tire Goes Flat ..............
.9-62
Tire Changing ....................
.9-63
Compact Spare Tire .............9-68
Vehicle Care 9-1
Page 186 of 318
Jump StartingJump Starting....................
.9-69
TowingTowing the Vehicle .............
.9-73
Recreational Vehicle Towing ............................
.9-73
Appearance CareExterior Care.....................
.9-75
Interior Care ......................
.9-80
Floor Mats .........................
.9-83
General Information
For service and parts needs, visit
your dealer/retailer. You will receive
genuine GM parts and GM-trained
and supported service people.
Genuine GM parts have one of
these marks:
California Proposition
65 Warning
Most motor vehicles, including this
one, contain and/or emit chemicals
known to the State of California to
cause cancer and birth defects
or other reproductive harm. Engine
exhaust, many parts and systems
(including some inside the vehicle),
many fluids, and some component
wear by-products contain and/or emit
these chemicals.
9-2 Vehicle Care
Page 188 of 318
When you go to your GM dealer/
retailer and ask for GM Accessories,
you will know that GM-trained and
supported service technicians will
perform the work using genuine GM
Accessories.
Also, seeAdding Equipment to
the Airbag-Equipped Vehicle
on page 2-35.Vehicle Checks
Doing Your Own
Service Work
{CAUTION
You can be injured and the
vehicle could be damaged if you
try to do service work on a vehicle
without knowing enough about it.
•Be sure you have sufficient
knowledge, experience, the
proper replacement parts, and
tools before attempting any
vehicle maintenance task.
(Continued)
CAUTION (Continued)
•Be sure to use the proper
nuts, bolts, and other
fasteners. English and
metric fasteners can be
easily confused. If the wrong
fasteners are used, parts
can later break or fall off.
You could be hurt.
If doing some of your own service
work, use the proper service
manual. It tells you much more
about how to service the vehicle
than this manual can. To order
the proper service manual,
see Service Publications Ordering
Information on page 12-12 .
9-4 Vehicle Care
Page 189 of 318
This vehicle has an airbag system.
Before attempting to do your
own service work, seeAirbag
System Check on page 2-36 .
Keep a record with all parts receipts
and list the mileage and the date
of any service work performed.
See Maintenance Records on
page 10-18.Hood
To open the hood:
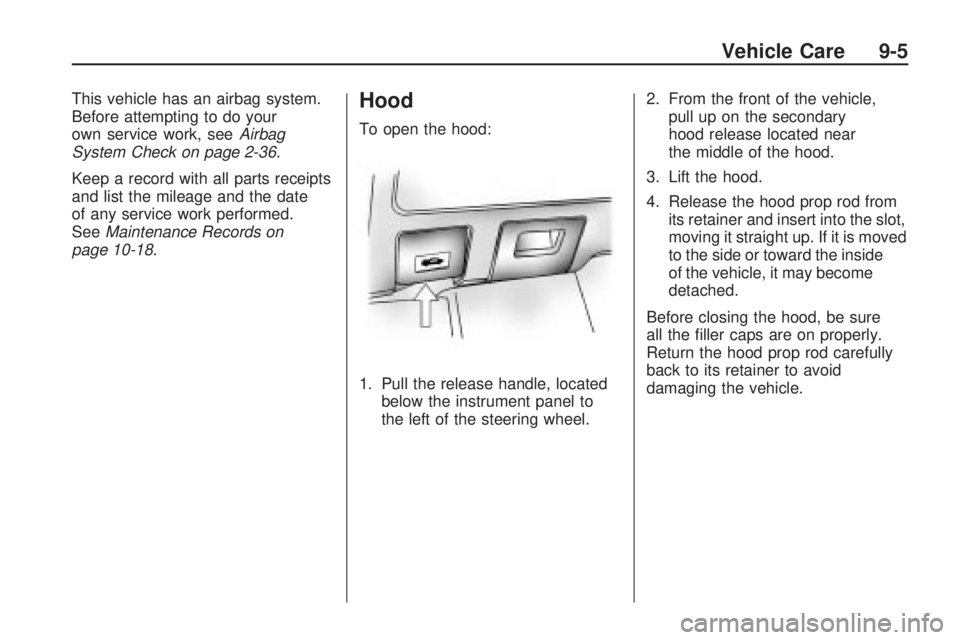
1. Pull the release handle, located below the instrument panel to
the left of the steering wheel. 2. From the front of the vehicle,
pull up on the secondary
hood release located near
the middle of the hood.
3. Lift the hood.
4. Release the hood prop rod from its retainer and insert into the slot,
moving it straight up. If it is moved
to the side or toward the inside
of the vehicle, it may become
detached.
Before closing the hood, be sure
all the filler caps are on properly.
Return the hood prop rod carefully
back to its retainer to avoid
damaging the vehicle.
Vehicle Care 9-5
Page 196 of 318
What to Do with Used Oil
Used engine oil contains certain
elements that can be unhealthy for
your skin and could even cause
cancer. Do not let used oil stay on
your skin for very long. Clean your
skin and nails with soap and water,
or a good hand cleaner. Wash or
properly dispose of clothing or rags
containing used engine oil. See the
manufacturer’s warnings about the
use and disposal of oil products.
Used oil can be a threat to the
environment. If you change your own
oil, be sure to drain all the oil from the
filter before disposal. Never dispose
of oil by putting it in the trash, pouring
it on the ground, into sewers, or into
streams or bodies of water. Recycle
it by taking it to a place that collects
used oil.
Automatic Transmission
Fluid
When to Check and Change
Automatic Transmission Fluid
Check the fluid in the transmission
and differential at the intervals listed
inScheduled Maintenance on
page 10-3, and be sure to use
the transmission fluid listed in
Recommended Fluids and
Lubricants on page 10-15 .
How to Check Automatic
Transmission Fluid
This operation can be difficult, you
may choose to have this done at the
dealer/retailer service department.
If you do it yourself, be sure to
follow all the instructions here,
or you could get a false reading
on the dipstick. Wait at least 30 minutes before
checking the transmission fluid level
if you have been driving:
•When outside temperatures are
above 90°F (32°C).
•At high speed for quite a while.
•In heavy traffic — especially
in hot weather.
•While pulling a trailer.
To get the right reading, the fluid
should be at normal operating
temperature, which is 158°F to
176°F (70°C to 80°C).
Get the vehicle warmed up by
driving about 15 miles (24 km)
when outside temperatures
are above 50°F (10°C). If it is
colder than 50°F (10°C), you
may have to drive longer.
9-12 Vehicle Care
Page 198 of 318
How to Add Automatic
Transmission Fluid
Refer to the Maintenance
Schedule to determine what
kind of transmission fluid to use.
Recommended Fluids and
Lubricants on page 10-15.
If the fluid level is low, add only
enough of the proper fluid to bring
the level into the area between
dimples on the dipstick.
1. Pull out the dipstick.
2. Using a long-neck funnel, add enough fluid at the dipstick
hole to bring it to the proper level.
It does not take much fluid,
generally less than one pint
(0.5 L). Do not overfill. Notice:
Too much or too
little �uid can damage your
transmission. Too much can mean
that some of the �uid could come
out and fall on hot engine parts or
exhaust system parts, starting a
�re. Too little �uid could cause the
transmission to overheat. Be sure
to get an accurate reading if you
check your transmission �uid.
3. After adding fluid, recheck the fluid level as described under
“How to Check Automatic
Transmission Fluid,” earlier
in this section.
4. When the correct fluid level is obtained, push the dipstick
back in all the way; then press
the tab down to lock the dipstick
in place.
Manual Transmission
Fluid
When to Check
A good time to have your manual
transmission fluid level checked
is when the engine oil is changed.
However, the fluid in your manual
transmission does not require
changing.
How to Check
This operation can be difficult, you
may choose to have this done
at your dealer/retailer service
department.
If you do it yourself, be sure to
follow all the instructions here, or
you could get a false reading.
9-14 Vehicle Care
Page 207 of 318
5. Put the cap back on the coolantrecovery tank, but leave the
pressure cap off.
6. Start the engine and let it run until you can feel the upper
radiator hose getting hot. Watch
out for the engine cooling fan.
7. By this time, the coolant level inside the radiator filler neck may
be lower. If the level is lower,
add more of the proper coolant
mixture through the filler neck
until the level reaches the base
of the filler neck.
8. Then replace the pressure cap. At any time during this procedure
if coolant begins to flow out of the
filler neck, reinstall the pressure
cap. Be sure the ears on the
pressure cap are in line with
the vent tube.Engine Overheating
A coolant temperature gage is
located on the vehicle’s instrument
panel. See Engine Coolant
Temperature Gage on page 4-11 .
Check to see if the electric engine
cooling fan is running. If the engine
is overheating, the fan should be
running. If it is not, the vehicle needs
service.
If no problem is apparent, but the
coolant level is not at or above the
FULL mark, add a 50/50 mixture
of clean, drinkable water and
DEX-COOL
®coolant at the coolant
recovery tank. See Engine Coolant
on page 9-19 for more information
about the proper coolant mixture.
If the coolant inside the coolant
recovery tank is boiling, do not do
anything else until it cools down.
The vehicle should be parked on
a level surface.
If Steam Is Coming From Your
Engine
{CAUTION
Steam from an overheated engine
can burn you badly, even if you
just open the hood. Stay away
from the engine if you see or hear
steam coming from it. Just turn it
off and get everyone away from
the vehicle until it cools down. Wait
until there is no sign of steam or
coolant before you open the hood.
If you keep driving when your
engine is overheated, the liquids
in it can catch fire. You or others
could be badly burned. Stop your
engine if it overheats, and get
out of the vehicle until the engine
is cool.
Notice: If the engine catches
�re because of being driven with
no coolant, your vehicle can be
badly damaged. The costly repairs
would not be covered by the
vehicle warranty.
Vehicle Care 9-23