display Ram 3500 2020 Owner's Manual
[x] Cancel search | Manufacturer: RAM, Model Year: 2020, Model line: 3500, Model: Ram 3500 2020Pages: 568
Page 322 of 568
320STARTING AND OPERATING
Tighten the gas cap until you hear a “clicking”
sound. This is an indication that the gas cap
is tightened properly. The MIL in the instru -
ment cluster may turn on if the gas cap is not
secured properly. Make sure that the gas cap
is tightened each time the vehicle is refueled.
LOOSE FUEL FILLER CAP MESSAGE
If the vehicle diagnostic system
determines that the fuel filler cap is
loose, improperly installed, or
damaged, a loose gASCAP indicator
will display in the instrument cluster telltale
display area. Refer to “Instrument Cluster Display” in “Getting To Know Your Instrument
Panel” for further information. Tighten the fuel
filler cap properly and push the RIGHT button to
turn off the message. If the problem continues,
the message will appear the next time the
vehicle is started.
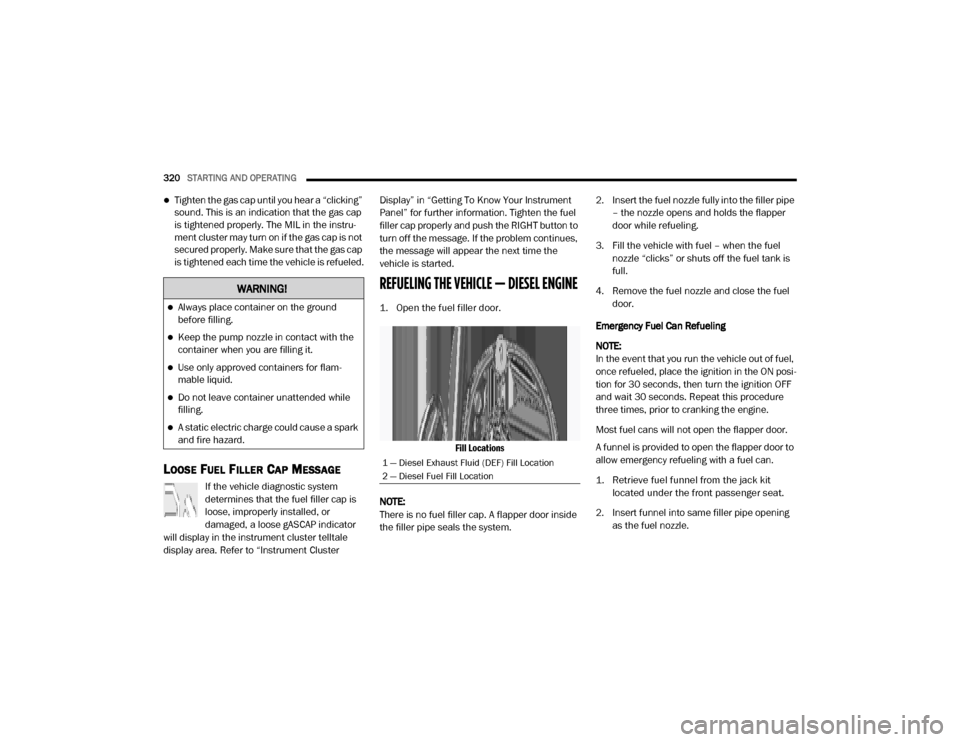
REFUELING THE VEHICLE — DIESEL ENGINE
1. Open the fuel filler door.
Fill Locations
NOTE:
There is no fuel filler cap. A flapper door inside
the filler pipe seals the system. 2. Insert the fuel nozzle fully into the filler pipe
– the nozzle opens and holds the flapper
door while refueling.
3. Fill the vehicle with fuel – when the fuel nozzle “clicks” or shuts off the fuel tank is
full.
4. Remove the fuel nozzle and close the fuel door.
Emergency Fuel Can Refueling
NOTE:
In the event that you run the vehicle out of fuel,
once refueled, place the ignition in the ON posi -
tion for 30 seconds, then turn the ignition OFF
and wait 30 seconds. Repeat this procedure
three times, prior to cranking the engine.
Most fuel cans will not open the flapper door.
A funnel is provided to open the flapper door to
allow emergency refueling with a fuel can.
1. Retrieve fuel funnel from the jack kit located under the front passenger seat.
2. Insert funnel into same filler pipe opening as the fuel nozzle.
WARNING!
Always place container on the ground
before filling.
Keep the pump nozzle in contact with the
container when you are filling it.
Use only approved containers for flam -
mable liquid.
Do not leave container unattended while
filling.
A static electric charge could cause a spark
and fire hazard.
1 — Diesel Exhaust Fluid (DEF) Fill Location
2 — Diesel Fuel Fill Location
20_DJD2_OM_EN_USC_t.book Page 320
Page 324 of 568

322STARTING AND OPERATING
Temperature sensors
SCR catalyst
UQS Sensor
Refer to “Instrument Cluster Display” in
“Getting To Know Your Instrument Panel” for
system messages and warnings.
NOTE:
Your vehicle is equipped with a DEF injection
system. You may occasionally hear an audible
clicking noise. This is normal operation.
The DEF pump will run for a period of time
after engine shutdown to purge the DEF
system. This is normal operation.
Diesel Exhaust Fluid Storage
Diesel Exhaust Fluid (DEF) is considered a very
stable product with a long shelf life. If DEF is
kept in temperatures between 10°F and 90°F
(-12°C and 32°C), it will last a minimum of one
year.
DEF is subject to freezing at the lowest
temperatures. For example, DEF may freeze at
temperatures at or below 12°F (-11°C). The
system has been designed to operate in this
environment. NOTE:
When working with DEF, it is important to know
that:
Any containers or parts that come into
contact with DEF must be DEF compatible
(plastic or stainless steel). Copper, brass,
aluminum, iron or non-stainless steel should
be avoided as they are subject to corrosion
by DEF.
If DEF is spilled, it should be wiped up
completely.
Adding Diesel Exhaust Fluid
The DEF gauge (located on the instrument
cluster) will display the level of DEF remaining in
the tank. Refer to “Instrument Cluster” and
“Instrument Cluster Descriptions” in “Getting To
Know Your Instrument Panel” for further
information.
NOTE:
Driving conditions (altitude, vehicle speed,
load, etc.) will affect the amount of DEF that
is used in your vehicle.
Another factor is that outside temperature
can affect DEF consumption. In cold condi
-
tions, 12°F (-11°C) and below, the DEF gauge needle can stay on a fixed position and
may not move for extended periods of time.
This is a normal function of the system.
There is an electric heater inside the DEF
tank that automatically works when neces
-
sary. And if the DEF supply does freeze, the
truck will operate normally until it thaws.
DEF Fill Procedure
NOTE:
Refer to “Fluids And Lubricants” in “Technical
Specifications” for the correct fluid type.
1. Remove cap from DEF tank (located on driver’s side of the vehicle or in fuel door).
Fill Locations
1 — Diesel Exhaust Fluid (DEF) Fill Location
2 — Diesel Fuel Fill Location
20_DJD2_OM_EN_USC_t.book Page 322
Page 334 of 568

332STARTING AND OPERATING
Integrated Trailer Brake Module — If
Equipped
Your vehicle may have an Integrated Trailer
Brake Module (ITBM) for Electric and Electric
Over Hydraulic (EOH) trailer brakes.
NOTE:
This module has been designed and verified
with electric trailer brakes and new electric over
hydraulic systems. Some previous EOH systems
may not be compatible with ITBM.
Integrated Trailer Brake Module (ITBM)
The user interface consists of the following:
Manual Brake Control Lever
Slide the manual brake control lever to the left
to activate power to the trailer's electric brakes
independent of the tow vehicle's brakes. If the
manual brake control lever is activated while
the brake is also applied, the greater of the two
inputs determines the power sent to the trailer
brakes.
The trailer and the vehicle’s stop lamps will
come on when braking normally with the vehicle
brake pedal. Only the trailer stop lamps will
come on when the manual brake control lever is
applied.
Trailer Brake Status Indicator Light
This light indicates the trailer electrical
connection status.
If no electrical connection is detected after the
ignition is turned on, pushing the GAIN
adjustment button or sliding the manual brake
control lever will display the GAIN setting for
10 seconds and the “Trailer Brake Status
Indicator Light” will not be displayed.
WARNING!
Do not connect trailer brakes to your
vehicle's hydraulic brake lines. It can over
-
load your brake system and cause it to fail.
You might not have brakes when you need
them and could have an accident.
Towing any trailer will increase your stop -
ping distance. When towing, you should
allow for additional space between your
vehicle and the vehicle in front of you.
Failure to do so could result in an accident.
CAUTION!
If the trailer weighs more than 1,000 lbs
(453 kg) loaded, it should have its own
brakes and they should be of adequate
capacity. Failure to do this could lead to
accelerated brake lining wear, higher brake
pedal effort, and longer stopping distances.
1 — GAIN Adjustment Button
2 — GAIN Adjustment Button
3 — Manual Brake Control Lever
20_DJD2_OM_EN_USC_t.book Page 332
Page 335 of 568
STARTING AND OPERATING333
If a fault is detected in the trailer wiring or the
Integrated Trailer Brake Module (ITBM), the
“Trailer Brake Status Indicator Light” will flash.
GAIN Adjustment Buttons (+/-)
Pushing these buttons will adjust the brake
control power output to the trailer brakes in
0.5 increments. The GAIN setting can be
increased to a maximum of 10 or decreased to
a minimum of 0 (no trailer braking).
GAIN
The GAIN setting is used to set the trailer brake
control for the specific towing condition and
should be changed as towing conditions
change. Changes to towing conditions include
trailer load, vehicle load, road conditions and
weather.
Adjusting GAIN
NOTE:
This should only be performed in a traffic free
environment at speeds of approximately
20–25 mph (30–40 km/h).
1. Make sure the trailer brakes are in good
working condition, functioning normally
and properly adjusted. See your trailer
dealer if necessary.
2. Hook up the trailer and make the electrical connections according to the trailer
manufacturer's instructions.
3. When a trailer with electric/EOH brakes is plugged in, the trailer connected message
should appear in the instrument cluster
display (if the connection is not recognized
by the ITBM, braking functions will not be
available), the GAIN setting will illuminate
and the correct type of trailer must be
selected from the instrument cluster display
options.
4. Push the UP or DOWN button on the steering wheel until “TRAILER TOW”
appears on the screen.
5. Push the RIGHT arrow on the steering wheel to enter “TRAILER TOW”. 6. Push the UP or DOWN buttons until the
Trailer Brake Type appears on the screen.
7. Push the RIGHT arrow and then push the UP or DOWN buttons until the proper Trailer
Brake Type appears on the screen.
8. In a traffic-free environment, tow the trailer on a dry, level surface at a speed of
20–25 mph (30–40 km/h) and squeeze
the manual brake control lever completely.
9. If the trailer wheels lockup (indicated by squealing tires), reduce the GAIN setting; if
the trailer wheels turn freely, increase the
GAIN setting.
Repeat steps 8 and 9 until the GAIN setting is at
a point just below trailer wheel lockup. If towing
a heavier trailer, trailer wheel lockup may not be
attainable even with the maximum GAIN setting
of 10.
5
20_DJD2_OM_EN_USC_t.book Page 333
Page 336 of 568

334STARTING AND OPERATING
* The suggested selection depends and may
change depending on the customer
preferences for braking performance. Condition
of the trailer brakes, driving and road state may
also affect the selection.
Display Messages
The trailer brake control interacts with the
instrument cluster display. Display messages,
along with a single chime, will be displayed
when a malfunction is determined in the trailer
connection, trailer brake control, or on the
trailer. Refer to “Instrument Cluster Display” in
“Getting To Know Your Instrument Panel” for
further information. NOTE:
An aftermarket controller may be available
for use with trailers with air or elec
-
tric-over-hydraulic trailer brake systems. To
determine the type of brakes on your trailer
and the availability of controllers, check with
your trailer manufacturer or dealer.
Removal of the ITBM will cause errors and it
may cause damage to the electrical system
and electronic modules of the vehicle. See an
authorized dealer if an aftermarket module is
to be installed.
Towing Requirements — Trailer Lights And
Wiring
Whenever you pull a trailer, regardless of the
trailer size, stoplights and turn signals on the
trailer are required for motoring safety.
Light Electric Heavy Electric Light EOHHeavy EOH
Type of Trailer Brakes Electric Trailer Brakes Electric Trailer Brakes Electric over Hydraulic
Trailer BrakesElectric over Hydraulic
Trailer Brakes
Load *Under 10,000 lbs *Above 10,000 lbs *Under 10,000 lbs *Above 10,000 lbs
WARNING!
Connecting a trailer that is not compatible
with the ITBM system may result in reduced
or complete loss of trailer braking. There may
be a increase in stopping distance or trailer
instability which could result in personal
injury.
CAUTION!
Connecting a trailer that is not compatible
with the ITBM system may result in reduced
or complete loss of trailer braking. There may
be a increase in stopping distance or trailer
instability which could result in damage to
your vehicle, trailer, or other property.
20_DJD2_OM_EN_USC_t.book Page 334
Page 348 of 568
346
IN CASE OF EMERGENCY
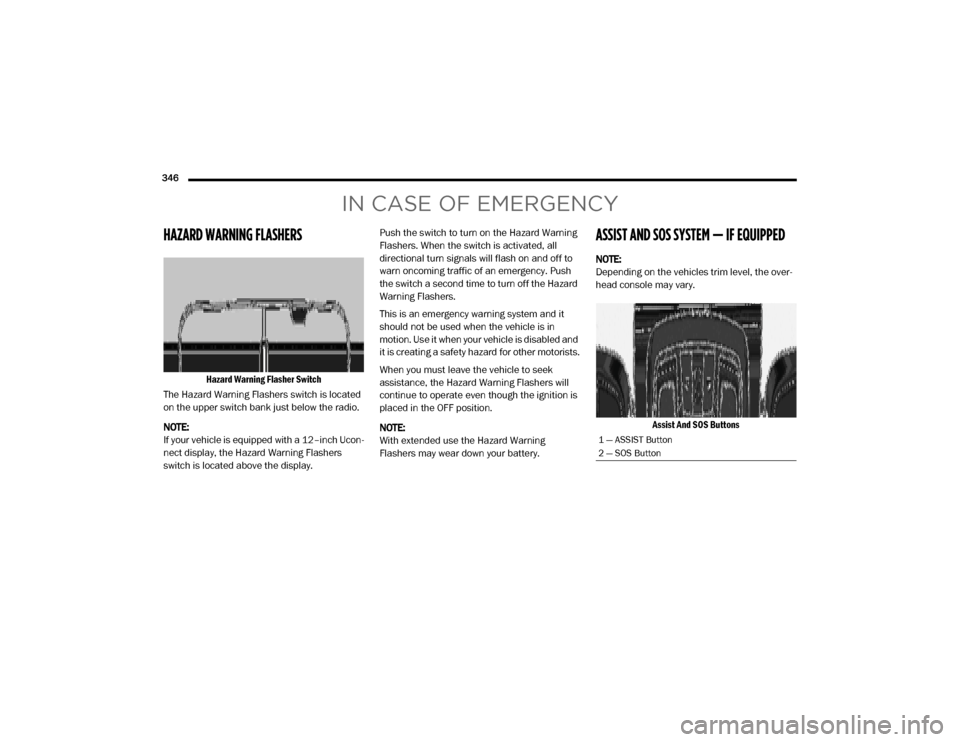
HAZARD WARNING FLASHERS
Hazard Warning Flasher Switch
The Hazard Warning Flashers switch is located
on the upper switch bank just below the radio.
NOTE:
If your vehicle is equipped with a 12–inch Ucon -
nect display, the Hazard Warning Flashers
switch is located above the display. Push the switch to turn on the Hazard Warning
Flashers. When the switch is activated, all
directional turn signals will flash on and off to
warn oncoming traffic of an emergency. Push
the switch a second time to turn off the Hazard
Warning Flashers.
This is an emergency warning system and it
should not be used when the vehicle is in
motion. Use it when your vehicle is disabled and
it is creating a safety hazard for other motorists.
When you must leave the vehicle to seek
assistance, the Hazard Warning Flashers will
continue to operate even though the ignition is
placed in the OFF position.
NOTE:
With extended use the Hazard Warning
Flashers may wear down your battery.
ASSIST AND SOS SYSTEM — IF EQUIPPED
NOTE:
Depending on the vehicles trim level, the over
-
head console may vary.
Assist And SOS Buttons
1 — ASSIST Button
2 — SOS Button
20_DJD2_OM_EN_USC_t.book Page 346
Page 351 of 568

IN CASE OF EMERGENCY349
(Continued)
SOS Call System Limitations
Vehicles sold in Mexico DO NOT have SOS Call
system capabilities. SOS or other emergency line operators in
Mexico may not answer or respond to SOS
system calls.
If the SOS Call system detects a malfunction,
any of the following may occur at the time the
malfunction is detected, and at the beginning of
each ignition cycle:
The overhead console light located between
the ASSIST and SOS buttons will continuously
be illuminated red.
The Device Screen will display the following
message: “Vehicle device requires service.
Please contact an authorized dealer.”
An In-Vehicle Audio message will state
“Vehicle device requires service. Please
contact an authorized dealer.”
Even if the SOS Call system is fully functional,
factors beyond FCA US LLC’s control may
prevent or stop the SOS Call system operation.
These include, but are not limited to, the
following factors:Delayed accessories mode is active.
The ignition is in the OFF position.
The vehicle’s electrical systems are not
intact.
The SOS Call system software and/or hard
-
ware are damaged during a crash.
The vehicle battery loses power or becomes
disconnected during a vehicle crash.
The SOS Call system is embedded into the
vehicle’s electrical system. Do not add
aftermarket electrical equipment to the
vehicle’s electrical system. This may
prevent your vehicle from sending a signal
to initiate an emergency call. To avoid inter -
ference that can cause the SOS Call system
to fail, never add aftermarket equipment
(e.g., two-way mobile radio, CB radio, data
recorder, etc.) to your vehicle’s electrical
system or modify the antennas on your
vehicle. IF YOUR VEHICLE LOSES BATTERY
POWER FOR ANY REASON (INCLUDING
DURING OR AFTER AN ACCIDENT), THE
UCONNECT FEATURES, APPS AND
SERVICES, AMONG OTHERS, WILL NOT
OPERATE.
Modifications to any part of the SOS Call
system could cause the air bag system to
fail when you need it. You could be injured
if the air bag system is not there to help
protect you.
WARNING! (Continued)
WARNING!
Ignoring the overhead console light could
mean you will not have SOS Call services. If
the overhead console light is illuminated,
have an authorized dealer service the SOS
Call system immediately.
The Occupant Restraint Control module
turns on the air bag Warning Light on the
instrument panel if a malfunction in any
part of the system is detected. If the Air Bag
Warning Light is illuminated, have an
authorized dealer service the Occupant
Restraint Control system immediately.
WARNING! (Continued)
6
20_DJD2_OM_EN_USC_t.book Page 349
Page 387 of 568
385
SERVICING AND MAINTENANCE
SCHEDULED SERVICING — GAS ENGINE
Your vehicle is equipped with an automatic oil
change indicator system. The oil change
indicator system will remind you that it is time to
take your vehicle in for scheduled maintenance.
Based on engine operation conditions, the oil
change indicator message will illuminate. This
means that service is required for your vehicle.
Operating conditions such as frequent
short-trips, trailer tow, extremely hot or cold
ambient temperatures, and E85 fuel usage will
influence when the “Oil Change Required”
message is displayed. Severe Operating
Conditions can cause the change oil message to
illuminate as early as 3,500 miles (5,600 km)
since last reset. Have your vehicle serviced as
soon as possible, within the next 500 miles
(805 km).
An authorized dealer will reset the oil change
indicator message after completing the
scheduled oil change.If a scheduled oil change is performed by
someone other than an authorized dealer, the
message can be reset by referring to the steps
described under “Instrument Cluster Display” in
“Getting To Know Your Instrument Panel”.
NOTE:
Under no circumstances should oil change
intervals exceed 8,000 miles (13,000 km),
12 months or 350 hours of engine run time,
whichever comes first. The 350 hours of engine
run or idle time is generally only a concern for
fleet customers.
Severe Duty All Models
NOTE:
Change Engine Oil at 4,000 miles (6,500 km) or
350 hours of engine run time if the vehicle is
operated in a dusty and off road environment or
is operated predominantly at idle, or only very
low engine RPM. This type of vehicle use is
considered Severe Duty.
Once A Month Or Before A Long Trip:Check engine oil level
Check windshield washer fluid level
Check tire pressure and look for unusual
wear or damage. Rotate tires at the first sign
of irregular wear, even if it occurs before the
oil indicator system turns on.
Check the fluid levels of the coolant reservoir,
brake master cylinder, power steering and
automatic transmission (six-speed only) and
fill as needed
Check function of all interior and exterior
lights7
20_DJD2_OM_EN_USC_t.book Page 385
Page 392 of 568
390SERVICING AND MAINTENANCE
Inspection and service should also be
performed anytime a malfunction is observed or
suspected. Retain all receipts.
NOTE:
Using white lithium grease, lubricate the door
hinge pivot joints twice a year to prevent prema-
ture wear.
OIL CHANGE INDICATOR SYSTEM —
C
UMMINS DIESEL
Your vehicle is equipped with an engine oil
change indicator system. This system will alert
you when it is time to change your engine oil by
displaying the words “Oil Change Due” in your
instrument cluster display. The oil change
reminder will remind the owner to change the
engine oil every 15,000 miles (24,000 km) or
500 hours, whichever comes first, except for the
Chassis Cab models configured with optional
B20 capability that are using greater than 5%
levels of biodiesel, which are 12,500 miles
(20,000 km) or 400 hours, whichever comes
first. Failure to change the engine oil per the
maintenance schedule can result in internal
engine damage.
An authorized dealer will reset the oil change
indicator message after completing the
scheduled oil change. If a scheduled oil change
is performed by someone other than an
authorized dealer, the message can be reset by
referring to the steps described under
“Instrument Cluster Display” in “Getting To
Know Your Instrument Panel” for further
information.
Replace the engine oil and oil filter every
15,000 miles (24,000 km) or 12 months, or
sooner if prompted by the oil change indicator
system. Under no circumstances should oil
change intervals exceed 15,000 miles
(24,000 km) or 12 months, whichever comes
first.
NOTE:
Under no circumstances should oil change
intervals exceed 15,000 miles (24,000 km)
or 12 months or 500 hours, whichever
comes first.
Replace the engine oil and oil filter every
12,500 miles (20,000 km) or 400 hours,
whichever comes first when running greater
than 5% levels of biodiesel (Chassis Cab
models configured with optional B20 capa -
bility). If Chassis Cab models configured with optional
B20 capability are operated with greater than
5% levels of biodiesel, the oil change interval
must not exceed 12,500 miles (20,000 km) or
400 hours, whichever comes first under any
circumstances. See the Fuel Requirements
section for more information regarding
operation with biodiesel blend (B6-B20) fuel
meeting ASTM specification D-7467.
PERFORM SERVICE INDICATOR —
C
UMMINS DIESEL
Your vehicle will require emissions
maintenance at a set interval. To help remind
you when this maintenance is due, the
instrument cluster will display “Perform
Service”. When the “Perform Service” message
is displayed on the instrument cluster it is
necessary to have the emissions maintenance
performed. Emissions maintenance may
include replacing the Closed Crankcase
Ventilation (CCV) filter element. The procedure
for clearing and resetting the “Perform Service”
indicator message is located in the appropriate
Service Information.
20_DJD2_OM_EN_USC_t.book Page 390
Page 416 of 568
414SERVICING AND MAINTENANCE
the Diesel Particulate Filter, the engine idle
speed will return to normal when the brake
pedal is applied. A small change in engine tone
or a slight change in engine performance while
accelerating may also be noticeable at speeds
below 20 mph (32 km/h). This operating mode
may last for up to an hour of idle time, or around
20 minutes of driving time.
Additionally, your vehicle has the ability to alert
you to additional maintenance required on your
truck or engine.
Refer to “Instrument Cluster Display” in
“Getting To Know Your Instrument Panel” for
further information.DIESEL EXHAUST FLUID
Diesel Exhaust Fluid (DEF) sometimes known
simply by the name of its active component,
UREA—is a key component of selective catalytic
reduction (SCR) systems, which help diesel
vehicles meet stringent emission regulations.
DEF is a liquid reducing agent that reacts with
engine exhaust in the presence of a catalyst to
convert smog-forming nitrogen oxides (NOx)
into harmless nitrogen and water vapor.
Refer to “Fluids And Lubricants” in “Technical
Specification” for further information.
You can receive assistance in locating DEF in
the United States by calling 866-RAM-INFO
(866-726-4636). In Canada call
1–800–465–2001 (English) or
1–800–387–9983 (French)
You can receive assistance in locating DEF by
contacting an authorized dealer.
BODY LUBRICATION
Locks and all body pivot points, including such
items as seat tracks, door hinge pivot points
and rollers, liftgate, tailgate, decklid, sliding
doors and hood hinges, should be lubricated
periodically with a lithium based grease, such as Mopar Spray White Lube to ensure quiet,
easy operation and to protect against rust and
wear. Prior to the application of any lubricant,
the parts concerned should be wiped clean to
remove dust and grit; after lubricating, excess
oil and grease should be removed. Particular
attention should also be given to hood latching
components to ensure proper function. When
performing other underhood services, the hood
latch, release mechanism and safety catch
should be cleaned and lubricated.
The external lock cylinders should be lubricated
twice a year, preferably in the Autumn and
Spring. Apply a small amount of a high quality
lubricant, such as Mopar Lock Cylinder
Lubricant directly into the lock cylinder.
WINDSHIELD WIPER BLADES
Clean the rubber edges of the wiper blades and
the windshield periodically with a sponge or soft
cloth and a mild nonabrasive cleaner. This will
remove accumulations of salt or road film.
Operation of the wipers on dry glass for long
periods may cause deterioration of the wiper
blades. Always use washer fluid when using the
wipers to remove salt or dirt from a dry
windshield.
WARNING!
A hot exhaust system can start a fire if you
park over materials that can burn. Such
materials might be grass or leaves coming
into contact with your exhaust system. Do not
park or operate your vehicle in areas where
your exhaust system can contact anything
that can burn.
20_DJD2_OM_EN_USC_t.book Page 414