brake fluid Ram 4500 Chassis Cab 2018 User Guide
[x] Cancel search | Manufacturer: RAM, Model Year: 2018, Model line: 4500 Chassis Cab, Model: Ram 4500 Chassis Cab 2018Pages: 298, PDF Size: 5.88 MB
Page 63 of 298
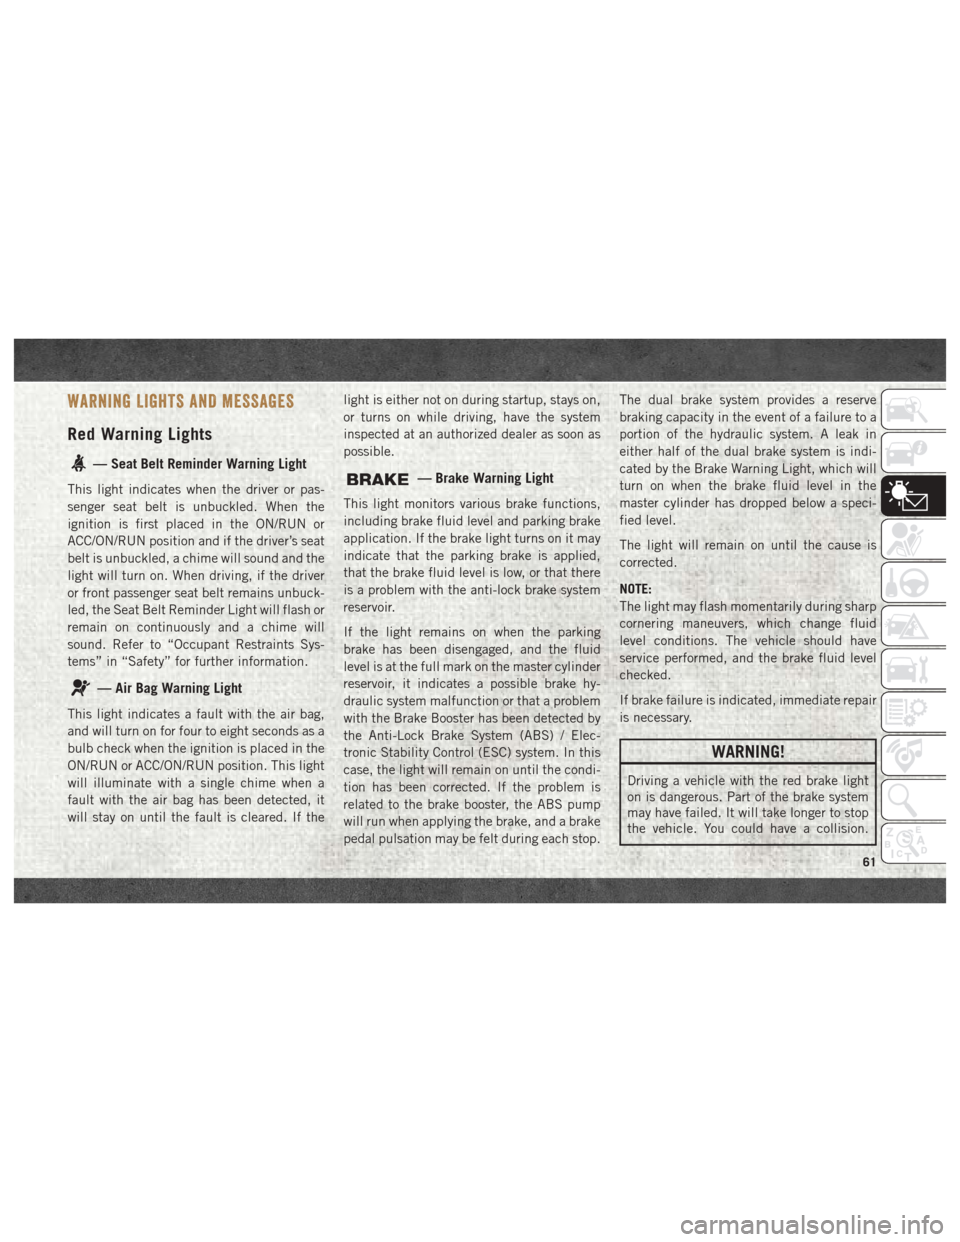
WARNING LIGHTS AND MESSAGES
Red Warning Lights
— Seat Belt Reminder Warning Light
This light indicates when the driver or pas-
senger seat belt is unbuckled. When the
ignition is first placed in the ON/RUN or
ACC/ON/RUN position and if the driver’s seat
belt is unbuckled, a chime will sound and the
light will turn on. When driving, if the driver
or front passenger seat belt remains unbuck-
led, the Seat Belt Reminder Light will flash or
remain on continuously and a chime will
sound. Refer to “Occupant Restraints Sys-
tems” in “Safety” for further information.
— Air Bag Warning Light
This light indicates a fault with the air bag,
and will turn on for four to eight seconds as a
bulb check when the ignition is placed in the
ON/RUN or ACC/ON/RUN position. This light
will illuminate with a single chime when a
fault with the air bag has been detected, it
will stay on until the fault is cleared. If thelight is either not on during startup, stays on,
or turns on while driving, have the system
inspected at an authorized dealer as soon as
possible.
— Brake Warning Light
This light monitors various brake functions,
including brake fluid level and parking brake
application. If the brake light turns on it may
indicate that the parking brake is applied,
that the brake fluid level is low, or that there
is a problem with the anti-lock brake system
reservoir.
If the light remains on when the parking
brake has been disengaged, and the fluid
level is at the full mark on the master cylinder
reservoir, it indicates a possible brake hy-
draulic system malfunction or that a problem
with the Brake Booster has been detected by
the Anti-Lock Brake System (ABS) / Elec-
tronic Stability Control (ESC) system. In this
case, the light will remain on until the condi-
tion has been corrected. If the problem is
related to the brake booster, the ABS pump
will run when applying the brake, and a brake
pedal pulsation may be felt during each stop.The dual brake system provides a reserve
braking capacity in the event of a failure to a
portion of the hydraulic system. A leak in
either half of the dual brake system is indi-
cated by the Brake Warning Light, which will
turn on when the brake fluid level in the
master cylinder has dropped below a speci-
fied level.
The light will remain on until the cause is
corrected.
NOTE:
The light may flash momentarily during sharp
cornering maneuvers, which change fluid
level conditions. The vehicle should have
service performed, and the brake fluid level
checked.
If brake failure is indicated, immediate repair
is necessary.
WARNING!
Driving a vehicle with the red brake light
on is dangerous. Part of the brake system
may have failed. It will take longer to stop
the vehicle. You could have a collision.
61
Page 68 of 298
CAUTION!
The TPMS has been optimized for the
original equipment tires and wheels.
TPMS pressures and warning have been
established for the tire size equipped on
your vehicle. Undesirable system opera-
tion or sensor damage may result when
using replacement equipment that is not
of the same size, type, and/or style. After-
market wheels can cause sensor damage.
Using aftermarket tire sealants may cause
the Tire Pressure Monitoring System
(TPMS) sensor to become inoperable. Af-
ter using an aftermarket tire sealant it is
recommended that you take your vehicle
to your authorized dealer to have your
sensor function checked.
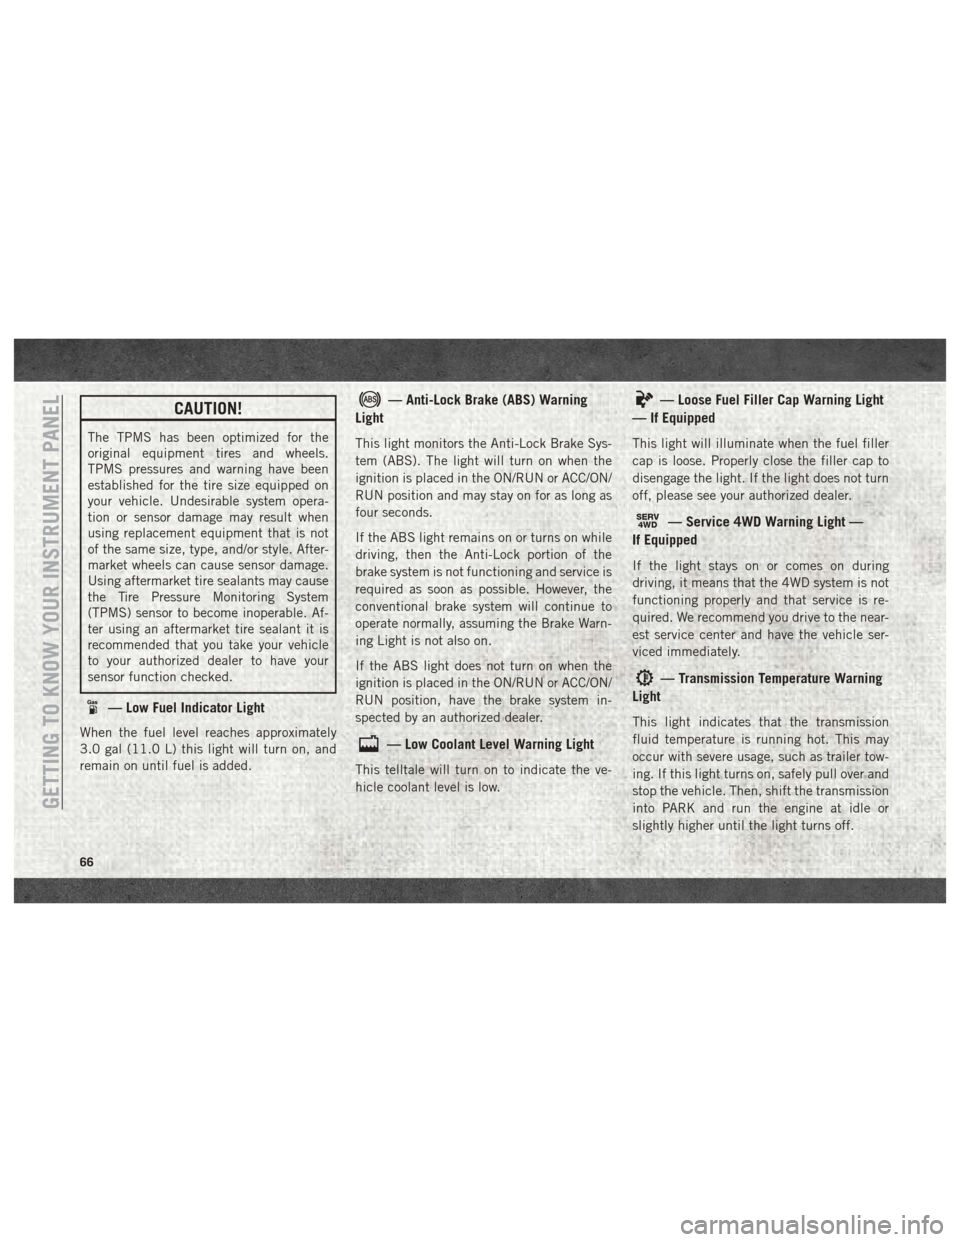
— Low Fuel Indicator Light
When the fuel level reaches approximately
3.0 gal (11.0 L) this light will turn on, and
remain on until fuel is added.
— Anti-Lock Brake (ABS) Warning
Light
This light monitors the Anti-Lock Brake Sys-
tem (ABS). The light will turn on when the
ignition is placed in the ON/RUN or ACC/ON/
RUN position and may stay on for as long as
four seconds.
If the ABS light remains on or turns on while
driving, then the Anti-Lock portion of the
brake system is not functioning and service is
required as soon as possible. However, the
conventional brake system will continue to
operate normally, assuming the Brake Warn-
ing Light is not also on.
If the ABS light does not turn on when the
ignition is placed in the ON/RUN or ACC/ON/
RUN position, have the brake system in-
spected by an authorized dealer.
— Low Coolant Level Warning Light
This telltale will turn on to indicate the ve-
hicle coolant level is low.
— Loose Fuel Filler Cap Warning Light
— If Equipped
This light will illuminate when the fuel filler
cap is loose. Properly close the filler cap to
disengage the light. If the light does not turn
off, please see your authorized dealer.
SERV4WD— Service 4WD Warning Light —
If Equipped
If the light stays on or comes on during
driving, it means that the 4WD system is not
functioning properly and that service is re-
quired. We recommend you drive to the near-
est service center and have the vehicle ser-
viced immediately.
— Transmission Temperature Warning
Light
This light indicates that the transmission
fluid temperature is running hot. This may
occur with severe usage, such as trailer tow-
ing. If this light turns on, safely pull over and
stop the vehicle. Then, shift the transmission
into PARK and run the engine at idle or
slightly higher until the light turns off.
GETTING TO KNOW YOUR INSTRUMENT PANEL
66
Page 120 of 298

Lights
Have someone observe the operation of brake
lights and exterior lights while you work the
controls. Check turn signal and high beam
indicator lights on the instrument panel.
Door Latches
Check for proper closing, latching, and lock-
ing.
Fluid Leaks
Check area under the vehicle after overnight
parking for fuel, coolant, oil, or other fluid
leaks. Also, if gasoline fumes are detected or
if fuel, or brake fluid leaks are suspected. The
cause should be located and corrected imme-
diately.
SAFETY
118
Page 121 of 298

STARTING AND OPERATING
STARTING THE ENGINE — GASOLINE
ENGINE................... .120
Normal Starting...............120
STARTING THE ENGINE — 6.7L DIESEL
ENGINE................... .121
Keyless Enter-N-Go — Ignition ......122
Extreme Cold Weather ...........124
NORMAL OPERATION — 6.7L DIESEL
ENGINE................... .125
Cold Weather Precautions.........125
Engine Idling ................125
Stopping The Engine ............126
ENGINE BREAK-IN RECOMMENDATIONS —
GASOLINE ENGINE.............127
ENGINE BREAK-IN RECOMMENDATIONS —
6.7L DIESEL ................ .127
AUTOMATIC TRANSMISSION ......128
Key Ignition Park Interlock........129Brake/Transmission Shift Interlock
System
....................129
Six–Speed Automatic Transmission —
If Equipped .................129
FOUR-WHEEL DRIVE OPERATION —
IF EQUIPPED ............... .131
Electronically Shifted Transfer Case
(Four-Position Switch) — If Equipped .132
SPEED CONTROL..............133
To Activate..................134
To Set A Desired Speed ..........134
To Vary The Speed Setting .........134
To Accelerate For Passing .........135
To Resume Speed .............135
To Deactivate ................135
PARKSENSE FRONT AND REAR PARK
ASSIST — IF EQUIPPED .........136
Cleaning The ParkSense System .....136
PARKVIEW REAR BACK UP CAMERA —
IF EQUIPPED............... .136REFUELING THE VEHICLE — GAS . . . .138
Materials Added To Fuel
..........139
REFUELING THE VEHICLE — DIESEL
CHASSIS CAB MODELS..........139
Diesel Exhaust Fluid............139
Diesel Exhaust Fluid Storage .......140
Adding Diesel Exhaust Fluid .......140
TRAILER TOWING.............142
Trailer Towing Weights (Maximum Trailer
Weight Ratings)...............142
Towing Requirements ...........142
RECREATIONAL TOWING (BEHIND
MOTORHOME, ETC.)............147
Towing This Vehicle Behind Another
Vehicle....................147
Recreational Towing — Two-Wheel Drive
Models .....................147
Recreational Towing — Four-Wheel Drive
Models ....................148
STARTING AND OPERATING
119
Page 150 of 298

CAUTION!
• Towing with the rear wheels on theground will cause severe transmission
damage. Damage from improper towing
is not covered under the New Vehicle
Limited Warranty.
• Do not disconnect the driveshaft be-
cause fluid may leak from the transmis-
sion, causing damage to internal parts.
Recreational Towing —
Four-Wheel Drive Models
NOTE:
Both the manual shift and electronic shift
transfer cases must be shifted into NEUTRAL
(N) for recreational towing. Automatic trans-
missions must be shifted into PARK for rec-
reational towing. Manual transmissions must
be placed in gear (NOT in NEUTRAL) for
recreational towing. Refer to the following for
the proper transfer case NEUTRAL (N) shift-
ing procedure for your vehicle.
CAUTION!
• DO NOT dolly tow any 4WD vehicle.Towing with only one set of wheels on
the ground (front or rear) will cause
severe transmission and/or transfer case
damage. Tow with all four wheels either
ON the ground, or OFF the ground (using
a vehicle trailer).
• Tow only in the forward direction. Towing
this vehicle backwards can cause severe
damage to the transfer case.
• Before recreational towing, the transfer
case must be in NEUTRAL. To be certain
the transfer case is fully in NEUTRAL,
perform the procedure outlined under
“Shifting Into NEUTRAL”. Internal
transmission damage will result, if the
transfer case is not in NEUTRAL during
towing.
• Automatic transmissions must be
placed in PARK, and manual transmis-
sions must be placed in gear (not in
Neutral) for recreational towing.
• Towing this vehicle in violation of the
above requirements can cause severe
CAUTION!
transmission and/or transfer case dam-
age. Damage from improper towing is
not covered under the New Vehicle Lim-
ited Warranty.
• Do not disconnect the rear driveshaft
because fluid will leak from the transfer
case, causing damage to internal parts.
• Do not use a bumper-mounted clamp-on
tow bar on your vehicle. The bumper
face bar will be damaged.
Shifting Into NEUTRAL (N)
Use the following procedure to prepare your
vehicle for recreational towing.
WARNING!
You or others could be injured or killed if
you leave the vehicle unattended with the
transfer case in the NEUTRAL (N) position
without first fully engaging the parking
brake. The transfer case NEUTRAL (N)
position disengages both the front and rear
driveshafts from the powertrain, and will
allow the vehicle to roll, even if the auto-
STARTING AND OPERATING
148
Page 176 of 298
SCHEDULED SERVICING — GASOLINE
ENGINE
Your vehicle is equipped with an automatic
oil change indicator system. The oil change
indicator system will remind you that it is
time to take your vehicle in for scheduled
maintenance.
Based on engine operation conditions, the oil
change indicator message will illuminate.
This means that service is required for your
vehicle. Operating conditions such as fre-
quent short-trips, trailer tow, extremely hot or
cold ambient temperatures, and E85 fuel
usage will influence when the “Oil Change
Required” message is displayed. Severe Op-
erating Conditions can cause the change oil
message to illuminate as early as
3,500 miles (5,600 km) since last reset.
Have your vehicle serviced as soon as pos-
sible, within the next 500 miles (805 km).
Your authorized dealer will reset the oil
change indicator message after completing
the scheduled oil change. If a scheduled oil
change is performed by someone other than
your authorized dealer, the message can bereset by referring to the steps described under
“Warning And Indicator Lights” or “Instru-
ment Cluster Display” in “Getting To Know
Your Instrument Panel” in your Owner’s
Manual at
www.mopar.com/en-us/care/
owner-manual.html (U.S. Residents) or
www.owners.mopar.ca (Canadian Residents)
for further information.
Gasoline Engines:
Under no circumstances should oil change
intervals exceed 8,000 miles (13,000 km),
twelve months or 350 hours of engine run
time, whichever comes first. The 350 hours
of engine run or idle time is generally only a
concern for fleet customers.
Severe Duty:
Change Engine Oil at 4,000 miles
(6,500 km) or 350 hours of engine run time
if the vehicle is operated in a dusty and off
road environment or is operated predomi-
nately at idle or very low engine RPM’s. This
type of vehicle use is considered Severe Duty. Once A Month Or Before A Long Trip:
• Check engine oil level
• Check windshield washer fluid level
• Check the tire inflation pressures and look
for unusual wear or damage
• Check the fluid levels of the coolant reser- voir, brake master cylinder, power steering
and automatic transmission, and fill as
needed
• Check function of all interior and exterior lights
SERVICING AND MAINTENANCE
174
Page 177 of 298
Maintenance Plan –
Gasoline Engine
Required Maintenance
Refer to the maintenance plan on the follow-
ing pages for required maintenance.
At Every Oil Change Interval As Indicated By OilChange Indicator System:
• Change oil and filter.
• Rotate the tires. Rotate at the first sign of
irregular wear, even if it occurs before the oil
indicator system turns on.
• Inspect engine cooling system protection and hoses.
• Inspect exhaust system.
• Inspect engine air cleaner if using in dusty or off-road conditions.
• Inspect battery and clean and tighten ter- minals as required.
• Inspect automatic transmission fluid if equipped with dipstick.
• Inspect brake pads, shoes, rotors, drums, hoses and park brake.
• Inspect front end, and lubricate — If equipped with serviceable fittings.
At Every Oil Change Interval As Indicated By Oil Change Indicator System:
• Lube the front drive shaft fitting (4X4 models only).
175
Page 178 of 298

Mileage or time passed (whichever comesfirst)
20,000
30,000
40,000
50,000
60,000
70,000
80,000
90,000
100,000
110,000
120,000
130,000
140,000
150,000
Or Years: 2 3 4 5 6 7 8 9 10 11 12 13 14 15
Or Kilometers:
32,000
48,000
64,000
80,000
96,000
112,000
128,000
144,000
160,000
176,000
192,000
208,000
224,000
240,000
Additional Inspections
Inspect the CV/Universal joints. X X X X X
Inspect front suspension, tie rod ends, and
replace if necessary. XXX X X X X
Inspect the front and rear axle surfaces. If
gear oil leakage is suspected, check the
fluid level. If using your vehicle for police,
taxi, fleet, off-road or frequent trailer tow-
ing, change axle fluid. XXX X X X X
Inspect the brake linings, parking brake
function. XXX X X X X
Additional Maintenance
Replace engine air filter. X X X X X
Replace spark plugs. ** X
Flush and replace the engine coolant at
10 years or 150,000 miles (240,000 km)
whichever comes first. XX
Change the automatic transmission fluid
(AS66RC Transmission Only). XX X
Change the automatic transmission fluid
and sump filter (AS66RC Transmission
Only). XX
SERVICING AND MAINTENANCE
176
Page 180 of 298
Heavy Duty Use Of The Vehicle
Change engine oil at 4,000 miles (6,500 km)
or 350 hours of engine run time if the vehicle
is operated in a dusty and off road environ-
ment or is operated predominately at idle or
only very low engine RPM’s. This type of
vehicle use is considered Severe Duty.
SCHEDULED MAINTENANCE — 6.7L
CUMMINS DIESEL ENGINE
CAUTION!
Failure to perform the required mainte-
nance items may result in damage to the
vehicle.
At Each Stop For Fuel
Check the engine oil level at least 30 minutes
after a fully warmed engine is shut off.
Checking the oil level while the vehicle is on
level ground will improve the accuracy of the
oil level reading. Add oil only when the level
is at or below the ADD or MIN mark. Once A Month
• Inspect the batteries, and clean and
tighten the terminals as required.
• Check the fluid levels of the coolant reser- voir, brake master cylinder, and automatic
transmission (if equipped), and add as
needed.
At Each Oil Change
• Change the engine oil filter.
• Inspect the exhaust system.
• Inspect engine air filter.
• Check the coolant level, hoses, and clamps.
• Inspect front end, and lubricate — If equipped with serviceable fittings.
• Lube the front drive shaft fitting (4X4 mod- els only).
Inspection and service should also be per-
formed anytime a malfunction is observed or
suspected. Retain all receipts.
Oil Change Indicator System —
Cummins Diesel
Your vehicle is equipped with an engine oil
change indicator system. This system will
alert you when it is time to change your
engine oil by displaying the words “Oil
Change Due” in your instrument cluster dis-
play. The oil change reminder will remind the
owner to change the engine oil every
15,000 miles or 500 hours, whichever
comes first, except for the Chassis Cab mod-
els and Pickup models configured with op-
tional B20 capability that are using B20 bio-
diesel, which are 12,500 miles or 400 hours,
whichever comes first. Failure to change the
engine oil per the maintenance schedule can
result in internal engine damage.
Replace the engine oil and oil filter every
15,000 miles (24,000 km) or six months, or
sooner if prompted by the oil change indicator
system. Under no circumstances should oil
change intervals exceed 15,000 miles
(24,000 km) or six months, whichever comes
first.
SERVICING AND MAINTENANCE
178
Page 182 of 298
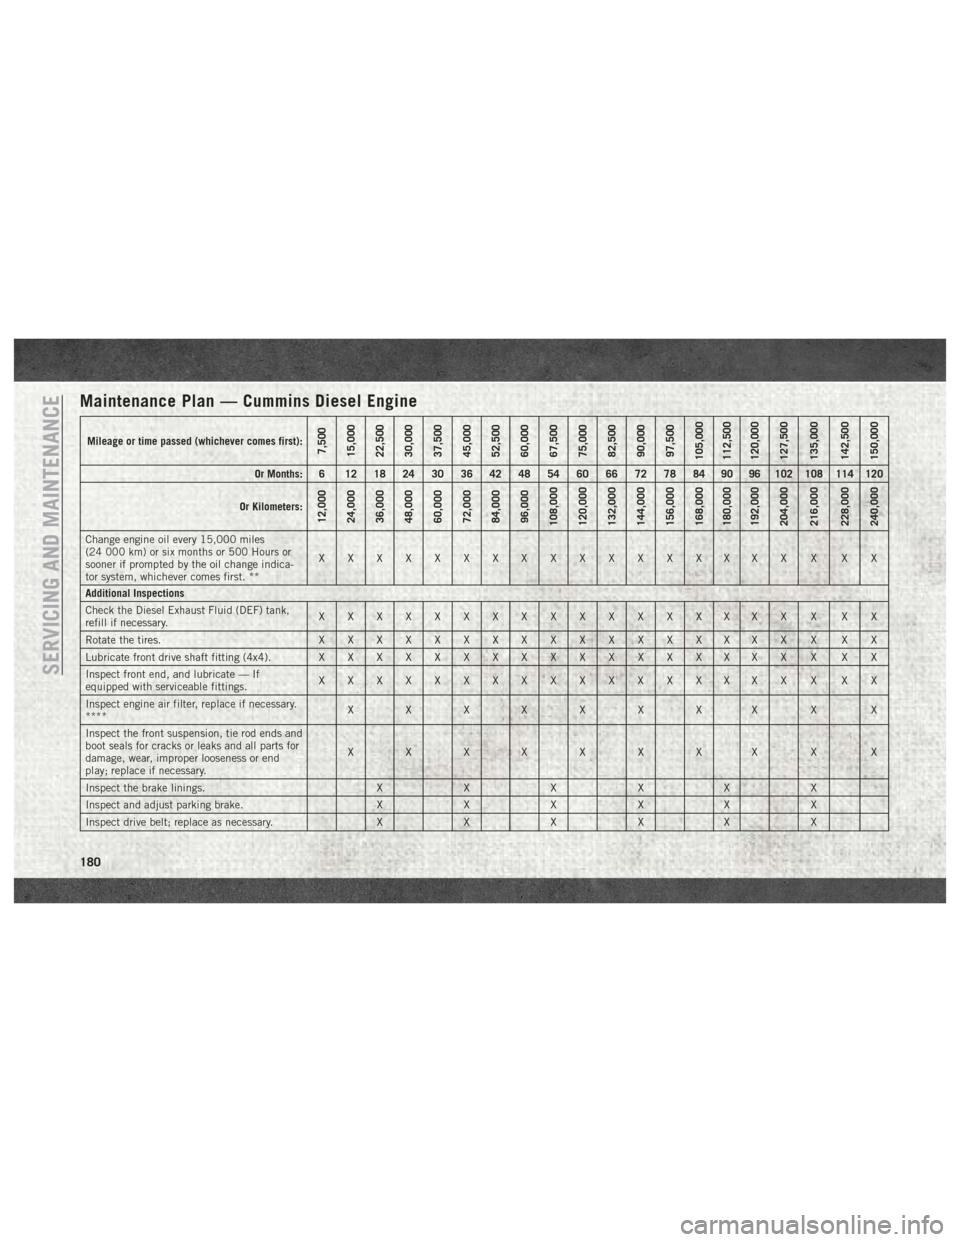
Maintenance Plan — Cummins Diesel Engine
Mileage or time passed (whichever comes first):7,500
15,000
22,500
30,000
37,500
45,000
52,500
60,000
67,500
75,000
82,500
90,000
97,500
105,000
112,500
120,000
127,500
135,000
142,500
150,000
Or Months: 6 12 18 24 30 36 42 48 54 60 66 72 78 84 90 96 102 108 114 120
Or Kilometers:
12,000
24,000
36,000
48,000
60,000
72,000
84,000
96,000
108,000
120,000
132,000
144,000
156,000
168,000
180,000
192,000
204,000
216,000
228,000
240,000
Change engine oil every 15,000 miles
(24 000 km) or six months or 500 Hours or
sooner if prompted by the oil change indica-
tor system, whichever comes first. ** XXXXXXXXXXXXXXXXX X XX
Additional Inspections
Check the Diesel Exhaust Fluid (DEF) tank,
refill if necessary. XXXXXXXXXXXXXXXXX X XX
Rotate the tires. X X X X X X X XXXXXXXXXX X XX
Lubricate front drive shaft fitting (4x4). X X X X X X X XXXXXXXXXX X XX
Inspect front end, and lubricate — If
equipped with serviceable fittings. XXXXXXXXXXXXXXXXX X XX
Inspect engine air filter, replace if necessary.
**** XX XX X X XX X X
Inspect the front suspension, tie rod ends and
boot seals for cracks or leaks and all parts for
damage, wear, improper looseness or end
play; replace if necessary. XX XX X X XX X X
Inspect the brake linings. XXX XX X
Inspect and adjust parking brake. XXX XX X
Inspect drive belt; replace as necessary. XXX XX X
SERVICING AND MAINTENANCE
180