audio RAM CHASSIS CAB 2021 Owners Manual
[x] Cancel search | Manufacturer: RAM, Model Year: 2021, Model line: CHASSIS CAB, Model: RAM CHASSIS CAB 2021Pages: 463, PDF Size: 21.5 MB
Page 7 of 463
5
LANESENSE — IF EQUIPPED ........................... 183 LaneSense Operation ................................183Turning LaneSense On Or Off ...................184LaneSense Warning Message ..................184
Changing LaneSense Status .....................186
PARKVIEW REAR BACK UP CAMERA ............ 186
AUX Camera — If Equipped .......................188
SURROUND VIEW CAMERA SYSTEM — IF
EQUIPPED ........................................................... 189
AUX Camera — If Equipped .......................194
ENGINE RUNAWAY ............................................ 195
REFUELING THE VEHICLE — GASOLINE
ENGINE ................................................................ 195
Loose Fuel Filler Cap Message ................196
REFUELING THE VEHICLE — DIESEL
ENGINE ............................................................... 196
Diesel Exhaust Fluid ..................................196
VEHICLE LOADING ............................................ 199
Gross Vehicle Weight Rating (GVWR) ......199Payload .......................................................199Gross Axle Weight Rating (GAWR) ............200
Tire Size ......................................................200
Rim Size......................................................200
Inflation Pressure ......................................200
Curb Weight................................................200
Loading .......................................................200 TRAILER TOWING ............................................... 200
Common Towing Definitions ..................... 201Trailer Hitch Type and Maximum Trailer
Weight ........................................................ 204 Trailer Towing Weights (Maximum Trailer
Weight Ratings) ......................................... 205 Trailer And Tongue Weight ....................... 205
Towing Requirements ............................... 205Towing Tips ................................................ 211
SNOWPLOW — IF EQUIPPED ............................ 212
Before Plowing ........................................... 212
Snowplow Prep Package Model
Availability .................................................. 212 Over The Road Operation With Snowplow
Attached ..................................................... 213 Operating Tips ............................................ 213General Maintenance................................ 213
RECREATIONAL TOWING (BEHIND
MOTORHOME) ...................................................214
Towing This Vehicle Behind Another
Vehicle ........................................................ 214 Recreational Towing — Two-Wheel Drive
Models ........................................................ 215 Recreational Towing — Four-Wheel Drive
Models ........................................................ 215
DRIVING TIPS ...................................................... 218
Driving On Slippery Surfaces ................... 218
Driving Through Water .............................. 218
MULTIMEDIA
UCONNECT SYSTEMS ....................................... 220
CYBERSECURITY ............................................... 220
UCONNECT 3.0 ................................................... 221 Introduction................................................ 221
Radio Mode ................................................ 222
Media Mode ............................................... 224
Phone Mode............................................... 225
UCONNECT SETTINGS ....................................... 228
Customer Programmable Features .......... 228
UCONNECT INTRODUCTION.............................. 244
System Overview ...................................... 244
Safety And General Information ............... 246
UCONNECT MODES ........................................... 247
Steering Wheel Audio Controls ................. 247
Radio Mode ............................................... 247
Media Mode .............................................. 255Phone Mode .............................................. 258
RADIO OPERATION AND MOBILE PHONES.... 269
Regulatory And Safety Information .......... 269
OFF-ROAD PAGES — IF EQUIPPED .................. 270
Off-Road Pages Status Bar ....................... 270Vehicle Dynamics ...................................... 271
Accessory Gauge ....................................... 271
Pitch & Roll................................................. 272Forward Facing Camera ............................ 272
21_DPF_OM_EN_USC_t.book Page 5
Page 93 of 463

GETTING TO KNOW YOUR INSTRUMENT PANEL91
Trailer Tow
Audio
Messages
Screen Set Up
Vehicle Settings — If Equipped
Commercial Settings — If Equipped
The system allows the driver to select
information by pushing the following instrument
cluster display control buttons located on the
left side of the steering wheel:
Instrument Cluster Display Control Buttons
Up Arrow Button
Push and release the up arrow button to
scroll upward through the main menu items,
submenu screen, and vehicle settings.
Down Arrow Button
Push and release the down arrow button
to scroll downward through the main menu
items, submenu screen, and vehicle settings.
Right Arrow Button
Push and release the right arrow button to
access/select the information screens or
submenu screens of a main menu item.
Push and hold the right arrow button for
two seconds to reset displayed/selected
features that can be reset.
Left Arrow Button
Push and release the left arrow button
to access/select the information screens,
submenu screens of a main menu item, or to
return to the main menu.
OIL LIFE RESET
Your vehicle is equipped with an engine oil
change indicator system. The “Oil Change
Required” message will display in the instrument
cluster display after a single chime has sounded,
to indicate the next scheduled oil change
interval. The engine oil change indicator system
is duty cycle based, which means the engine oil
change interval may fluctuate, dependent upon
your personal driving style.
NOTE:
Use the steering wheel instrument cluster
display controls for the following procedure.
Oil Life Reset Procedure
1. Without pushing the brake pedal, push the ENGINE START/STOP button and place the
ignition to the ON/RUN position (do not
start the engine).
2. Push and release the down arrow button
to scroll downward through the main menu
to “Vehicle Info.”
3. Push and release the right arrow button
to access the ”Vehicle Info” screen, then
scroll up or down to select “Oil Life.”
3
21_DPF_OM_EN_USC_t.book Page 91
Page 96 of 463

94GETTING TO KNOW YOUR INSTRUMENT PANEL
Fuel Economy
Push and release the up or down arrow
button until the Fuel Economy menu item is
highlighted in the instrument cluster display.
Push and Hold the right arrow button to reset
Average Fuel Economy.
Current Fuel Economy Gauge
Average Fuel Economy Value
Range To Empty
Fuel Tank Levels — If Equipped
Trip A/Trip B
Push and release the up or down arrow
button until the Trip menu item is highlighted
in the instrument cluster display. Push and
release the right arrow button to enter the
submenus of Trip A and Trip B. The Trip A or Trip
B information will display the following:
Distance
Average Fuel Economy
Elapsed Time
Push and hold right arrow button to reset all
information.
Trailer Tow
Push and release the up or down arrow
button until the Trailer Tow menu item is
highlighted in the instrument cluster display.
Push and release the right or left arrow
button to cycle through the following trailer tow
information:
Trip (trailer specific) Distance: Push and hold
the OK button to reset the distance.
Integrated Trailer Brake Module (ITBM):
Braking Output
Trailer Type
ITBM Gain
Trailer Light Check: Push and hold the
OK button to begin the Trailer Light Test
sequence Ú page 209.
Trailer Tire Pressure Monitoring: The Instru-
ment Cluster Display will display the Trailer
Tire Pressure for a connected trailer with
sensors that match the active trailer profile.
When a low tire is present, the low tire value
will be displayed in red, and the affected low tire will have a red glow. “Trailer Tire Low“ will
be displayed on the center bottom of the
Instrument Cluster Display screen.
Audio
Push and release the
up or down arrow
button until the Audio Menu icon/title is
highlighted in the instrument cluster display.
This menu will display the audio source
information, including the Song name, Artist
name, and audio source with an accompanying
graphic.
Phone Call Status
When a call is incoming, a Phone Call Status
pop-up will display on the screen. The pop-up
will remain until the phone is answered or
ignored.
NOTE:
The call status will temporarily replace the
previous media source information displayed
on the screen. When the pop-up is no longer
displayed, the display will return to the last used
screen.
21_DPF_OM_EN_USC_t.book Page 94
Page 97 of 463

GETTING TO KNOW YOUR INSTRUMENT PANEL95
Stored Messages
Push and release the up or down arrow
button until the Messages Menu item is
highlighted. This feature shows the number of
stored warning messages. Push and release the
right or left arrow button to cycle through
stored messages.
Screen Setup Menu Item
Push and release the up or down arrow
button until the Screen Setup menu item is
highlighted in the instrument cluster display.
Push and release the right arrow button to
enter the Screen Setup submenu. The Screen
Setup feature allows you to change what
information is displayed in the instrument
cluster as well as the location that information
is displayed.
Current Gear — If Equipped
Off
On
Odometer
Unit Without Decimal
Unit With Decimal Favorite Menu
Speedometer
Vehicle Info
Driver Assist (Show/Hide) — If Equipped
Fuel Economy (Show/Hide)
Trip Info (Show/Hide)
Trailer Tow (Show/Hide)
Audio (Show/Hide)
Messages
Screen Setup
Vehicle Settings — If Equipped
Commercial Settings — If Equipped
NOTE:
Menus with (Show/Hide) can push the right
arrow button to choose whether to show or hide
this menu in the instrument cluster display. Upper Left — If Equipped
None
Compass — If Equipped
Outside Temp — If Equipped
Time
Range To Empty
Average Econ
Current Econ
Trip A Distance
Trip B Distance
Trailer Trip — If Equipped
Trailer Brake — If Equipped
Oil Pressure — If Equipped
Coolant Temperature — If Equipped
Oil Temperature — If Equipped
Battery Voltage — If Equipped
Transmission Temperature — If Equipped
3
21_DPF_OM_EN_USC_t.book Page 95
Page 98 of 463

96GETTING TO KNOW YOUR INSTRUMENT PANEL
Oil Life — If Equipped
Exhaust Brake — If Equipped
Turbo Boost — If Equipped
Fuel Filter Life — If Equipped
Center
None
Compass
Outside Temp
Time
Range To Empty
Average Econ
Current Econ
Trip A Distance
Trip B Distance
Trailer Trip — If Equipped
Audio
Speedometer
Menu Title Upper Right
None
Compass — If Equipped
Outside Temp
Time
Range To Empty
Average Econ
Current Econ
Trip A Distance
Trip B Distance
Trailer Trip — If Equipped
Trailer Brake — If Equipped
Oil Pressure — If Equipped
Coolant Temperature — If Equipped
Oil Temperature — If Equipped
Battery Voltage — If Equipped
Transmission Temperature — If Equipped
Oil Life — If Equipped
Exhaust Brake — If Equipped
Turbo Boost — If Equipped
Fuel Filter Life — If Equipped
Left Side — If Equipped
None
Range
Average Econ
Menu Icon
Coolant Temperature
Oil Temperature
Transmission Temperature
Oil Life
Fuel Filter Life — If Equipped
21_DPF_OM_EN_USC_t.book Page 96
Page 108 of 463
106GETTING TO KNOW YOUR INSTRUMENT PANEL
NOTE:
The charging system is independent from
load reduction. The charging system
performs a diagnostic on the charging
system continuously.
If the Battery Charge Warning Light is on it
may indicate a problem with the charging
system Úpage 108.
The electrical loads that may be switched off
(if equipped), and vehicle functions which can
be affected by load reduction:
Heated Seats/Vented Seats/Heated Wheel
Rear Defroster And Heated Mirrors
HVAC System
115 Volt AC Power Inverter System
Audio and Telematics System
Loss of the battery charge may indicate one or
more of the following conditions:
The charging system cannot deliver enough
electrical power to the vehicle system because
the electrical loads are larger than the capa -
bility of charging system. The charging system
is still functioning properly.
Turning on all possible vehicle electrical
loads (e.g. HVAC to max settings, exterior
and interior lights, overloaded power outlets
+12 Volts, 115 Volt AC, USB ports) during
certain driving conditions (city driving,
towing, frequent stopping).
Installing options like additional lights,
upfitter electrical accessories, audio
systems, alarms and similar devices.
Unusual driving cycles (short trips separated
by long parking periods).
The vehicle was parked for an extended
period of time (weeks, months).
The battery was recently replaced and was
not charged completely.
The battery was discharged by an electrical
load left on when the vehicle was parked.
The battery was used for an extended period
with the engine not running to supply radio,
lights, chargers, +12 Volt portable appli -
ances like vacuum cleaners, game consoles
and similar devices. What to do when an electrical load reduction
action message is present (“Battery Saver On”
or “Battery Saver Mode”)
During a trip:
Reduce power to unnecessary loads if
possible:
Turn off redundant lights (interior or exterior).
Check what may be plugged in to power
outlets +12 Volts, 115 Volt AC, USB ports.
Check HVAC settings (blower, temperature).
Check the audio settings (volume).
After a trip:
Check if any aftermarket equipment was
installed (additional lights, upfitter electrical
accessories, audio systems, alarms) and
review specifications if any (load and Ignition
Off Draw currents).
Evaluate the latest driving cycles (distance,
driving time and parking time).
The vehicle should have service performed if the
message is still present during consecutive trips
and the evaluation of the vehicle and driving
pattern did not help to identify the cause.
21_DPF_OM_EN_USC_t.book Page 106
Page 183 of 463

STARTING AND OPERATING181
NOTE:
ParkSense will reduce the volume of the radio,
if on, when the system is sounding an audio
tone.
Front Park Assist Audible Alerts
ParkSense will turn off the Front Park Assist
audible alert (chime) after approximately three
seconds when an obstacle has been detected,
the vehicle is stationary, and brake pedal is
applied. Adjustable Chime Volume Settings
The Front and Rear chime volume settings are
programmable through the Uconnect system
Ú
page 228.
ENABLING AND DISABLING PARKSENSE
Front ParkSense can be enabled and
disabled with the Front ParkSense
switch.
Rear ParkSense can be enabled and disabled
with the Rear ParkSense switch.
When the gear selector is moved to REVERSE
and the Front or Rear system is disabled, the
instrument cluster display will show a vehicle graphic with an “Off” message overlay over the
system that is off (Front or Rear system). This
vehicle graphic will be displayed for as long as
the vehicle is in REVERSE.
The Front or Rear ParkSense switch LED will be
on when Front or Rear ParkSense is disabled or
requires service. The Front or Rear ParkSense
switch LED will be off when the Front or Rear
system is enabled. If the Front or Rear
ParkSense switch is pushed, and the system
requires service, the Front or Rear ParkSense
switch LED will blink momentarily, and then the
LED will be on.
WARNING ALERTS FOR FRONT
Front Distance
(inches/cm) Greater than 47 inches
(120 cm) 47-39 inches
(120-100 cm) 39-25 inches
(100-65 cm) 25-12 inches
(65-30 cm) Less than 12 inches
(30 cm)
Audible Alert Chime NoneNoneNone FastContinuous
Arcs-Left NoneNoneNone3rd Flashing 4th Flashing
Arcs-Center None1st Solid2nd Flashing 3rd Flashing4th Flashing
Arcs-Right NoneNoneNone3rd Flashing 4th Flashing
Radio Volume Reduced No
NoNo Yes Yes
4
21_DPF_OM_EN_USC_t.book Page 181
Page 224 of 463
222MULTIMEDIA
6 — ON/VOLUME
Push the ON/VOLUME control knob to turn on
the radio. Push the ON/VOLUME control knob a
second time to turn off the radio.
The volume control turns continuously
(360 degrees) in either direction without
stopping. Turning the ON/VOLUME control knob
to the right increases the volume and to the left
decreases it.
7 — AUDIO
Push the Audio button on the faceplate to
adjust the Bass, Mid Range, Treble, Balance or
Fade.
8 — MENU
Push the Menu button on the faceplate to scroll
between the setting submenus.
9 — Phone Pick Up
Push the Phone Pick Up button to initiate or
answer a phone call and send or receive a text.
10 — Phone Hang Up
Push the Phone Hang Up button to end a call. 11 — Seek Up
Push the SEEK UP button on the faceplate to
tune the radio to the next listenable station or
channel.
12 — ENTER/BROWSE & TUNE/SCROLL
Push the Enter/Browse button to accept a
highlighted selection on the screen. Rotate the
Tune/Scroll knob to scroll through a list or tune
a radio station.
13 — BACK
Push the Back button on the faceplate to return
to a previous menu or screen.
RADIO MODE
Operating Radio Mode
The radio is equipped with the following modes:
FM
AM
SXM SiriusXM® Satellite Radio (if equipped)
Push the Radio button on the faceplate to enter
the Radio Mode. The different tuner modes, AM,
FM, and SXM, can then be selected by pushing
the Radio button until the desired tuner mode is
displayed.
Switching The System ON/OFF
Push the On/Off Volume Control knob to turn on
the radio. Push the On/Off Volume Control knob
a second time to turn off the radio.
When the audio system is turned on, the sound
will be set at the same volume level as last
played.
Volume Control
The electronic volume control turns
continuously (360 degrees) in either direction
without stopping. Turning the On/Off & Volume
control knob to the right increases the volume
and to the left decreases it.
Enter/Browse And Tune/Scroll Control
Turn the rotary Tune/Scroll control knob
clockwise to increase or counterclockwise to
decrease the radio station frequency.
When scrolling through a list, push the
Enter/Browse button on the faceplate to
choose a selection.
21_DPF_OM_EN_USC_t.book Page 222
Page 226 of 463
224MULTIMEDIA
Audio
Push Audio button. Turning the Tune/Scroll
knob highlights the desired selection.
The Audio Menu shows the following options for
you to customize the audio settings:
Treble, Mid, Bass, Fade And Balance — Select
the desired setting to adjust, then push the
Enter/Browse button. Turn the Tune/Scroll
knob to adjust the setting + or – 9. Push the
BACK button on the faceplate when done.
Speed Adjusted Volume (if equipped) —
Select Speed Adjusted Volume and push the
Enter/Browse button. Turn the Tune/Scroll
knob to adjust the setting to Off, 1, 2, or 3.
Push the Back button on the faceplate when
done.
Loudness (if equipped) — Select Loudness
and push the Enter/Browse button to mark
the check box on or off. Push the Back button
on the faceplate when done.
AUX Volume Offset (if equipped) — Select AUX
Volume Offset and push the Enter/Browse
button. Turn the Tune/Scroll knob to adjust
the setting + or – 3. Push the Back button on
the faceplate when done.
Clock Setting
1. Push the Menu button at the bottom of the
radio, and push the Enter/Browse button
for System Settings. Next, select the Time
and Format setting and then select Set
Time by pushing the Enter/Browse button.
2. Adjust the hours or minutes by turning the Tune/Scroll knob, then pushing the
Enter/Browse button to move to the next
entry. You can also select 12 hr or 24 hr
format by turning the Tune/Scroll knob,
then pushing the Enter/Browse button on
the desired selection.
3. Once the time is set, press the Back button to exit the time screen.
MEDIA MODE
Operating Media Mode
Media Mode is entered by pushing the Media
button on the faceplate located to the left of the
display. Once in Media Mode, press the Media
button in order to select the desired media
source. Audio Source Selection
Push the Media button on the faceplate to
select the desired audio source, AUX, USB or
Bluetooth® audio device.
Seek Up/Seek Down
Push and release the Seek Up button on the
faceplate for the next selection.
Push and release the Seek Down button on
the faceplate to return to the beginning of the
current selection, or return to the beginning of
the previous selection if the Media is within the
first three seconds of the current selection.
Fast Seek Up
Push and hold the Seek Up button on the
faceplate and the desired mode will begin to
fast forward through the current track until the
button on the faceplate is released.
Fast Seek Down
Push and hold the Seek Down button on the
faceplate and the desired mode will begin to
rewind through the current track until the
button on the faceplate is released.
21_DPF_OM_EN_USC_t.book Page 224
Page 227 of 463
MULTIMEDIA225
USB Mode
USB Mode is entered by either inserting a USB
device into the USB port, or by pushing the
Media button. Once in Media Mode, push the
Media button and select USB. The display will
show the track number, and track time in
minutes and seconds. Play will begin at the start
of track one.
Bluetooth® Mode
Bluetooth® Streaming Audio (BTSA) or
Bluetooth® Mode is entered by pairing a
Bluetooth® device containing music to the
Uconnect system.
Before proceeding, the Bluetooth® device
must be paired with the Uconnect Phone to
communicate with the Uconnect system.
Once the Bluetooth® device is paired to the
Uconnect system, push the Media button
located on the faceplate. Once in Media Mode,
push the Media button and then select
Bluetooth®.
For mobile phone compatibility and pairing
instructions, please visit UconnectPhone.com.
AUX Mode
AUX Mode is entered by inserting an AUX device
using a cable with a 3.5 mm stereo audio jack
into the AUX port, or by pushing Media button.
Once in Media Mode, push the Media button
and select AUX.
If you insert an auxiliary device with the ignition
ON/RUN and the radio On, the unit will switch to
AUX Mode and begin to play when you insert the
device cable.
Controlling The Auxiliary Device
The control of the auxiliary device (e.g.,
selecting playlists, play, fast forward, etc.)
cannot be provided by the radio. Use the device
controls instead. Adjust the volume with the
On/Off Volume rotary knob or with the volume
of the attached device.
NOTE:
The vehicle radio unit is acting as the amplifier
for audio output from the auxiliary device.
Therefore, if the volume control on the auxiliary
device is set too low, there will be insufficient
audio signal for the radio unit to play music from
the device.
PHONE MODE
Operating Phone Mode
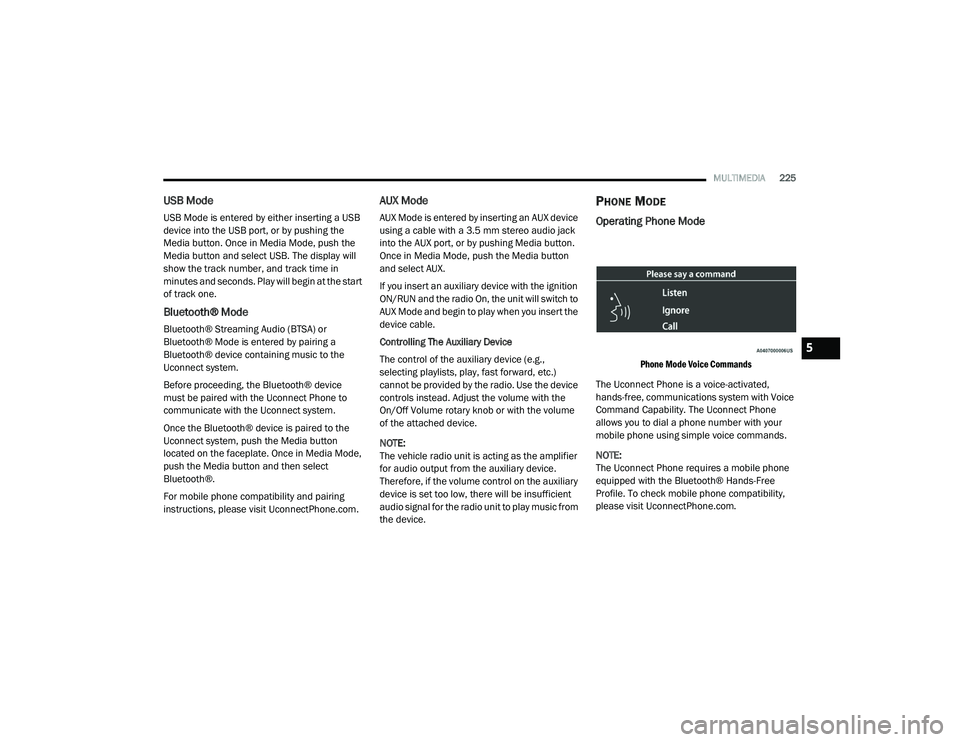
Phone Mode Voice Commands
The Uconnect Phone is a voice-activated,
hands-free, communications system with Voice
Command Capability. The Uconnect Phone
allows you to dial a phone number with your
mobile phone using simple voice commands.
NOTE:
The Uconnect Phone requires a mobile phone
equipped with the Bluetooth® Hands-Free
Profile. To check mobile phone compatibility,
please visit UconnectPhone.com.
5
21_DPF_OM_EN_USC_t.book Page 225