check engine RAM CHASSIS CAB 2021 Owners Manual
[x] Cancel search | Manufacturer: RAM, Model Year: 2021, Model line: CHASSIS CAB, Model: RAM CHASSIS CAB 2021Pages: 463, PDF Size: 21.5 MB
Page 8 of 463
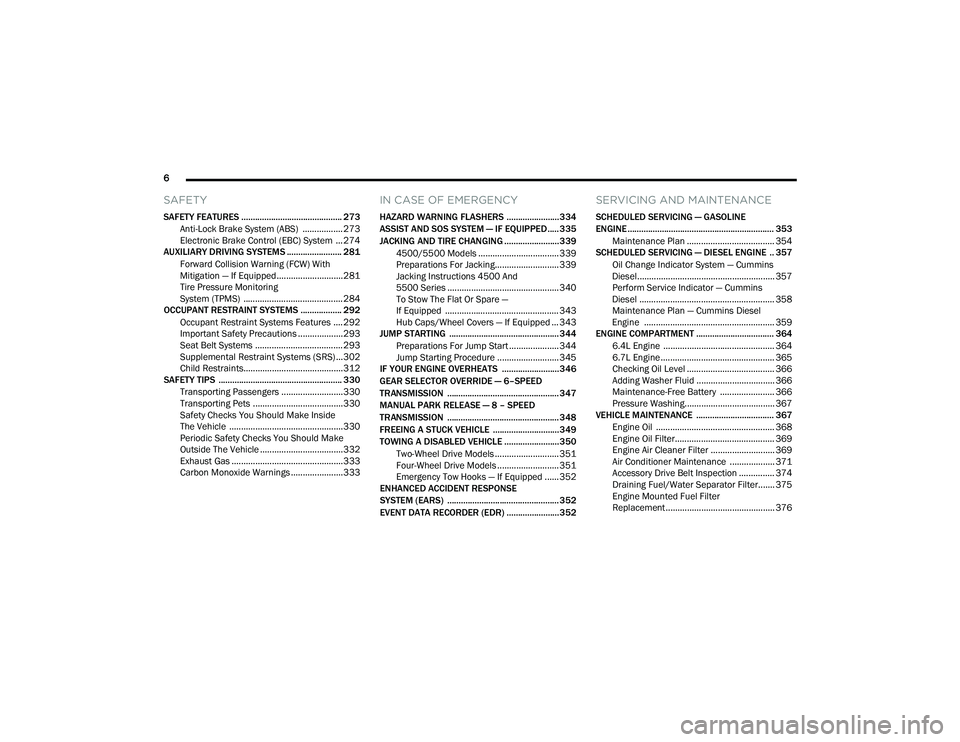
6
SAFETY
SAFETY FEATURES ............................................ 273
Anti-Lock Brake System (ABS) ................. 273
Electronic Brake Control (EBC) System ...274
AUXILIARY DRIVING SYSTEMS ........................ 281
Forward Collision Warning (FCW) With
Mitigation — If Equipped............................281 Tire Pressure Monitoring
System (TPMS) ..........................................284
OCCUPANT RESTRAINT SYSTEMS .................. 292
Occupant Restraint Systems Features ....292
Important Safety Precautions ...................293Seat Belt Systems ..................................... 293Supplemental Restraint Systems (SRS) ...302Child Restraints..........................................312
SAFETY TIPS ...................................................... 330
Transporting Passengers ..........................330
Transporting Pets ......................................330
Safety Checks You Should Make Inside
The Vehicle ................................................330 Periodic Safety Checks You Should Make
Outside The Vehicle ...................................332 Exhaust Gas ...............................................333Carbon Monoxide Warnings ......................333
IN CASE OF EMERGENCY
HAZARD WARNING FLASHERS .......................334
ASSIST AND SOS SYSTEM — IF EQUIPPED..... 335
JACKING AND TIRE CHANGING ........................339
4500/5500 Models .................................. 339Preparations For Jacking........................... 339
Jacking Instructions 4500 And
5500 Series ............................................... 340 To Stow The Flat Or Spare —
If Equipped ................................................ 343 Hub Caps/Wheel Covers — If Equipped ... 343
JUMP STARTING ................................................ 344
Preparations For Jump Start ..................... 344Jump Starting Procedure .......................... 345
IF YOUR ENGINE OVERHEATS .........................346
GEAR SELECTOR OVERRIDE — 6–SPEED
TRANSMISSION ................................................. 347
MANUAL PARK RELEASE — 8 – SPEED
TRANSMISSION ................................................. 348
FREEING A STUCK VEHICLE .............................349
TOWING A DISABLED VEHICLE ........................350 Two-Wheel Drive Models ........................... 351
Four-Wheel Drive Models .......................... 351Emergency Tow Hooks — If Equipped ...... 352
ENHANCED ACCIDENT RESPONSE
SYSTEM (EARS) ................................................. 352
EVENT DATA RECORDER (EDR) .......................352
SERVICING AND MAINTENANCE
SCHEDULED SERVICING — GASOLINE
ENGINE ................................................................ 353
Maintenance Plan ..................................... 354
SCHEDULED SERVICING — DIESEL ENGINE .. 357
Oil Change Indicator System — Cummins
Diesel.......................................................... 357 Perform Service Indicator — Cummins
Diesel ......................................................... 358 Maintenance Plan — Cummins Diesel
Engine ....................................................... 359
ENGINE COMPARTMENT .................................. 364
6.4L Engine ............................................... 364
6.7L Engine ................................................ 365
Checking Oil Level ..................................... 366
Adding Washer Fluid ................................. 366Maintenance-Free Battery ....................... 366Pressure Washing...................................... 367
VEHICLE MAINTENANCE .................................. 367
Engine Oil .................................................. 368
Engine Oil Filter.......................................... 369
Engine Air Cleaner Filter ........................... 369
Air Conditioner Maintenance ................... 371
Accessory Drive Belt Inspection ............... 374Draining Fuel/Water Separator Filter....... 375Engine Mounted Fuel Filter
Replacement.............................................. 376
21_DPF_OM_EN_USC_t.book Page 6
Page 14 of 463
12
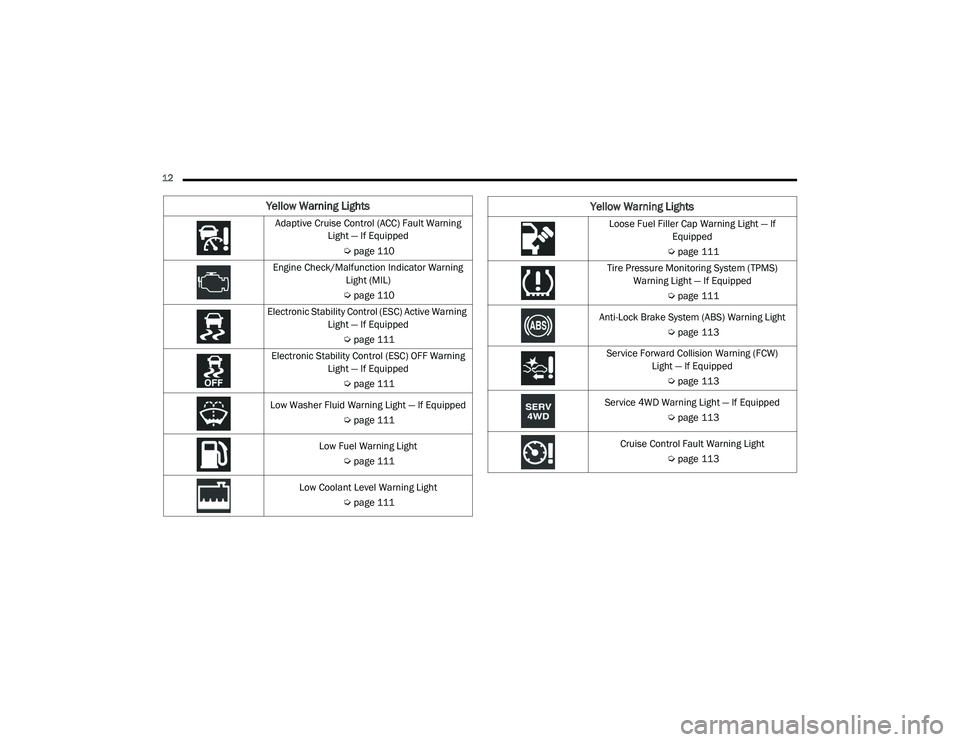
Yellow Warning Lights
Adaptive Cruise Control (ACC) Fault Warning Light — If Equipped
Úpage 110
Engine Check/Malfunction Indicator Warning Light (MIL)
Ú page 110
Electronic Stability Control (ESC) Active Warning Light — If Equipped
Úpage 111
Electronic Stability Control (ESC) OFF Warning Light — If Equipped
Úpage 111
Low Washer Fluid Warning Light — If Equipped Úpage 111
Low Fuel Warning Light Úpage 111
Low Coolant Level Warning Light Úpage 111Loose Fuel Filler Cap Warning Light — If
Equipped
Ú page 111
Tire Pressure Monitoring System (TPMS) Warning Light — If Equipped
Úpage 111
Anti-Lock Brake System (ABS) Warning Light Úpage 113
Service Forward Collision Warning (FCW) Light — If Equipped
Úpage 113
Service 4WD Warning Light — If Equipped Úpage 113
Cruise Control Fault Warning Light Úpage 113
Yellow Warning Lights
21_DPF_OM_EN_USC_t.book Page 12
Page 19 of 463
GETTING TO KNOW YOUR VEHICLE17
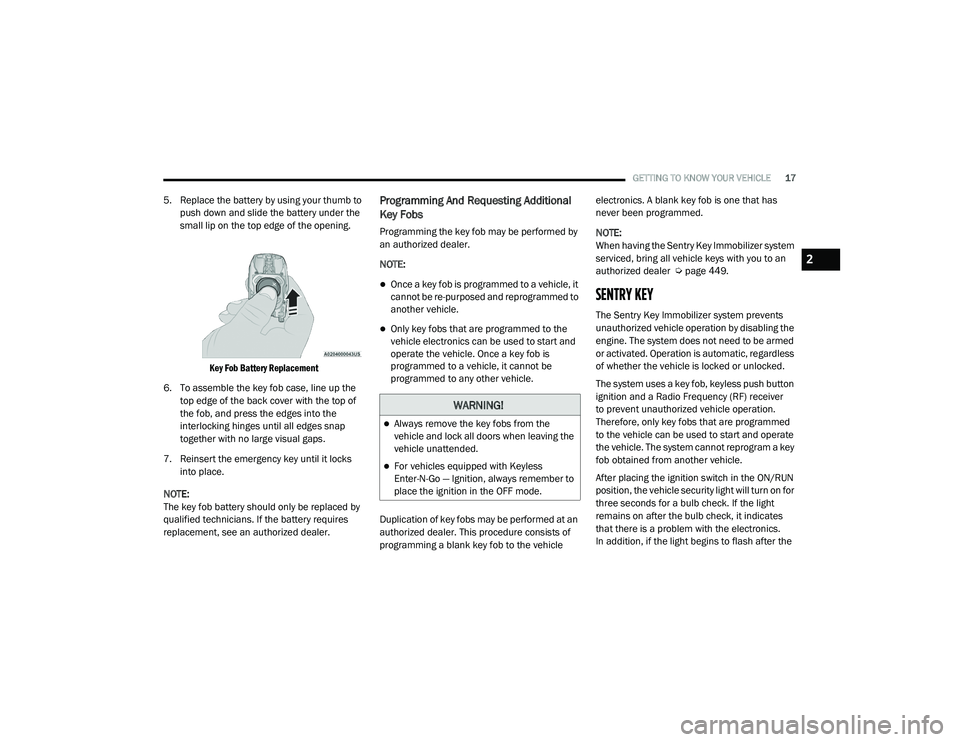
5. Replace the battery by using your thumb to
push down and slide the battery under the
small lip on the top edge of the opening.
Key Fob Battery Replacement
6. To assemble the key fob case, line up the top edge of the back cover with the top of
the fob, and press the edges into the
interlocking hinges until all edges snap
together with no large visual gaps.
7. Reinsert the emergency key until it locks into place.
NOTE:
The key fob battery should only be replaced by
qualified technicians. If the battery requires
replacement, see an authorized dealer.Programming And Requesting Additional
Key Fobs
Programming the key fob may be performed by
an authorized dealer.
NOTE:
Once a key fob is programmed to a vehicle, it
cannot be re-purposed and reprogrammed to
another vehicle.
Only key fobs that are programmed to the
vehicle electronics can be used to start and
operate the vehicle. Once a key fob is
programmed to a vehicle, it cannot be
programmed to any other vehicle.
Duplication of key fobs may be performed at an
authorized dealer. This procedure consists of
programming a blank key fob to the vehicle electronics. A blank key fob is one that has
never been programmed.
NOTE:
When having the Sentry Key Immobilizer system
serviced, bring all vehicle keys with you to an
authorized dealer Ú
page 449.
SENTRY KEY
The Sentry Key Immobilizer system prevents
unauthorized vehicle operation by disabling the
engine. The system does not need to be armed
or activated. Operation is automatic, regardless
of whether the vehicle is locked or unlocked.
The system uses a key fob, keyless push button
ignition and a Radio Frequency (RF) receiver
to prevent unauthorized vehicle operation.
Therefore, only key fobs that are programmed
to the vehicle can be used to start and operate
the vehicle. The system cannot reprogram a key
fob obtained from another vehicle.
After placing the ignition switch in the ON/RUN
position, the vehicle security light will turn on for
three seconds for a bulb check. If the light
remains on after the bulb check, it indicates
that there is a problem with the electronics.
In addition, if the light begins to flash after the
WARNING!
Always remove the key fobs from the
vehicle and lock all doors when leaving the
vehicle unattended.
For vehicles equipped with Keyless
Enter-N-Go — Ignition, always remember to
place the ignition in the OFF mode.
2
21_DPF_OM_EN_USC_t.book Page 17
Page 20 of 463
18GETTING TO KNOW YOUR VEHICLE
bulb check, it indicates that someone
attempted to start the engine with an invalid key
fob. In the event that a valid key fob is used to
start the engine but there is an issue with the
vehicle electronics, the engine will start and
shut off after two seconds.
If the vehicle security light turns on during
normal vehicle operation (vehicle running for
longer than 10 seconds), it indicates that there
is a fault in the electronics. Should this occur,
have the vehicle serviced as soon as possible by
an authorized dealer.
All of the key fobs provided with your new
vehicle have been programmed to the vehicle
electronics Úpage 449.IGNITION SWITCH
KEYLESS PUSH BUTTON IGNITION
This feature allows the driver to operate the
ignition switch with the push of a button as long
as the Remote Keyless Entry key fob is in the
passenger compartment.
The Keyless Push Button Ignition has four
operating positions; three of which are labeled
and will illuminate when in position. The three
positions are OFF, ACC, and ON/RUN. The fourth
position is START. During START, RUN will
illuminate.
NOTE:
In case the ignition switch does not change with
the push of a button, the key fob may have a low
or depleted battery. In this situation, a back up
method can be used to operate the ignition
switch. Put the nose side (side opposite of
the emergency key) of the key fob against the
START/STOP ignition button, with your foot
applied on the brake pedal, and push to
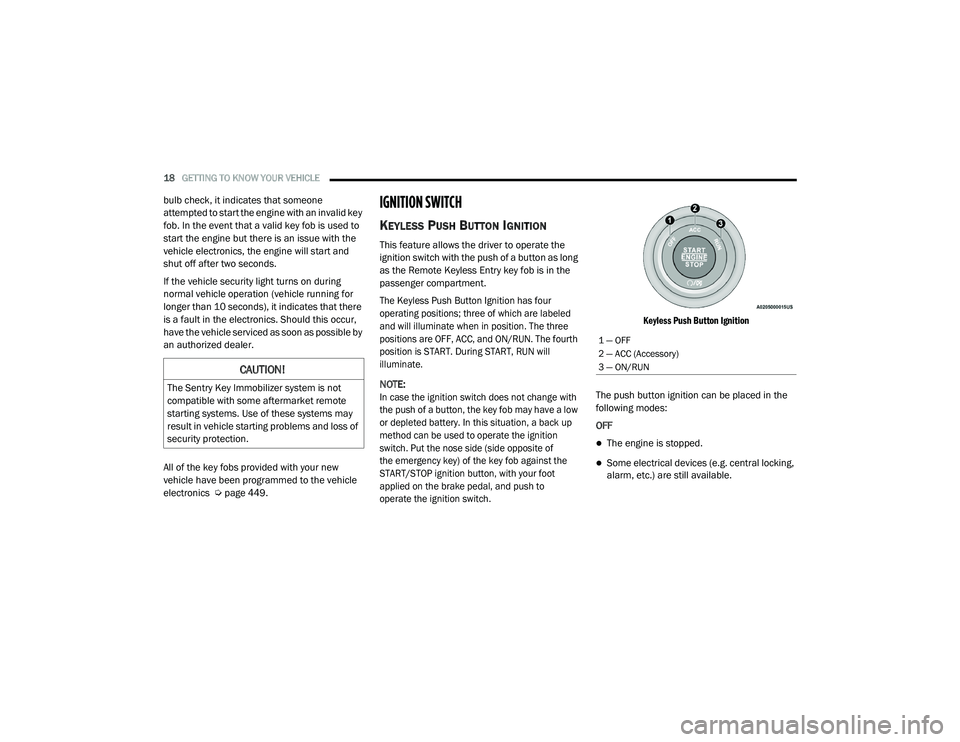
operate the ignition switch. Keyless Push Button Ignition
The push button ignition can be placed in the
following modes:
OFF
The engine is stopped.
Some electrical devices (e.g. central locking,
alarm, etc.) are still available.
CAUTION!
The Sentry Key Immobilizer system is not
compatible with some aftermarket remote
starting systems. Use of these systems may
result in vehicle starting problems and loss of
security protection.
1 — OFF
2 — ACC (Accessory)
3 — ON/RUN
21_DPF_OM_EN_USC_t.book Page 18
Page 108 of 463
106GETTING TO KNOW YOUR INSTRUMENT PANEL
NOTE:
The charging system is independent from
load reduction. The charging system
performs a diagnostic on the charging
system continuously.
If the Battery Charge Warning Light is on it
may indicate a problem with the charging
system Úpage 108.
The electrical loads that may be switched off
(if equipped), and vehicle functions which can
be affected by load reduction:
Heated Seats/Vented Seats/Heated Wheel
Rear Defroster And Heated Mirrors
HVAC System
115 Volt AC Power Inverter System
Audio and Telematics System
Loss of the battery charge may indicate one or
more of the following conditions:
The charging system cannot deliver enough
electrical power to the vehicle system because
the electrical loads are larger than the capa -
bility of charging system. The charging system
is still functioning properly.
Turning on all possible vehicle electrical
loads (e.g. HVAC to max settings, exterior
and interior lights, overloaded power outlets
+12 Volts, 115 Volt AC, USB ports) during
certain driving conditions (city driving,
towing, frequent stopping).
Installing options like additional lights,
upfitter electrical accessories, audio
systems, alarms and similar devices.
Unusual driving cycles (short trips separated
by long parking periods).
The vehicle was parked for an extended
period of time (weeks, months).
The battery was recently replaced and was
not charged completely.
The battery was discharged by an electrical
load left on when the vehicle was parked.
The battery was used for an extended period
with the engine not running to supply radio,
lights, chargers, +12 Volt portable appli -
ances like vacuum cleaners, game consoles
and similar devices. What to do when an electrical load reduction
action message is present (“Battery Saver On”
or “Battery Saver Mode”)
During a trip:
Reduce power to unnecessary loads if
possible:
Turn off redundant lights (interior or exterior).
Check what may be plugged in to power
outlets +12 Volts, 115 Volt AC, USB ports.
Check HVAC settings (blower, temperature).
Check the audio settings (volume).
After a trip:
Check if any aftermarket equipment was
installed (additional lights, upfitter electrical
accessories, audio systems, alarms) and
review specifications if any (load and Ignition
Off Draw currents).
Evaluate the latest driving cycles (distance,
driving time and parking time).
The vehicle should have service performed if the
message is still present during consecutive trips
and the evaluation of the vehicle and driving
pattern did not help to identify the cause.
21_DPF_OM_EN_USC_t.book Page 106
Page 110 of 463

108GETTING TO KNOW YOUR INSTRUMENT PANEL
Vehicles equipped with the Anti-Lock Brake
System (ABS) are also equipped with Electronic
Brake Force Distribution (EBD). In the event of
an EBD failure, the Brake Warning Light will turn
on along with the ABS Light. Immediate repair to
the ABS system is required.
Operation of the Brake Warning Light can be
checked by turning the ignition switch from the
OFF position to the ON/RUN position. The light
should illuminate for approximately two seconds.
The light should then turn off unless the parking
brake is applied or a brake fault is detected. If the
light does not illuminate, have the light inspected
by an authorized dealer.
The light also will turn on when the parking
brake is applied with the ignition switch in the
ON/RUN position. NOTE:
This light shows only that the parking brake is
applied. It does not show the degree of brake
application.
Hood Open Warning Light
This warning light will illuminate when
the hood is ajar/open and not fully
closed.
NOTE:
If the vehicle is moving, there will also be a
single chime.
Vehicle Security Warning Light — If
Equipped
This light will flash at a fast rate for
approximately 15 seconds when the
vehicle security alarm is arming, and
then will flash slowly until the vehicle
is disarmed.
Engine Coolant Temperature Warning
Light
This warning light warns of an
overheated engine condition. If the
engine coolant temperature is too
high, this indicator will illuminate and
a single chime will sound. If the temperature reaches the upper limit, a continuous chime will
sound for four minutes or until the engine is
able to cool, whichever comes first.
If the light turns on while driving, safely pull over
and stop the vehicle. If the Air Conditioning
(A/C) system is on, turn it off. Also, shift the
transmission into NEUTRAL and idle the vehicle.
If the temperature reading does not return to
normal, turn the engine off immediately and call
for service Ú
page 346.
Battery Charge Warning Light
This warning light will illuminate when
the battery is not charging properly.
If it stays on while the engine is
running, there may be a malfunction
with the charging system. Contact an
authorized dealer as soon as possible.
This indicates a possible problem with the
electrical system or a related component.
Oil Pressure Warning Light
This warning light will illuminate to
indicate low engine oil pressure. If the
light turns on while driving, stop the
vehicle, shut off the engine as soon as
possible, and contact an authorized dealer.
A chime will sound when this light turns on.
WARNING!
Driving a vehicle with the red brake light on is
dangerous. Part of the brake system may
have failed. It will take longer to stop the
vehicle. You could have a collision. Have the
vehicle checked immediately.
21_DPF_OM_EN_USC_t.book Page 108
Page 111 of 463

GETTING TO KNOW YOUR INSTRUMENT PANEL109
Do not operate the vehicle until the cause is
corrected. This light does not indicate how
much oil is in the engine. The engine oil level
must be checked under the hood.
Oil Temperature Warning Light
This warning light will illuminate to
indicate the engine oil temperature is
high. If the light turns on while driving,
stop the vehicle and shut off the
engine as soon as possible. Wait for oil
temperature to return to normal levels.
Electronic Throttle Control (ETC) Warning
Light
This warning light will illuminate to
indicate a problem with the ETC
system. If a problem is detected while
the vehicle is running, the light will
either stay on or flash depending on the nature
of the problem. Cycle the ignition when the
vehicle is safely and completely stopped and
the transmission is placed in the PARK position.
The light should turn off. If the light remains
on with the vehicle running, your vehicle will
usually be drivable; however, see an authorized
dealer for service as soon as possible. NOTE:
This light may turn on if the accelerator and
brake pedals are pressed at the same time.
If the light continues to flash when the vehicle is
running, immediate service is required and you
may experience reduced performance, an
elevated/rough idle, or engine stall and your
vehicle may require towing. The light will come
on when the ignition is placed in the ON/RUN or
ACC/ON/RUN position and remain on briefly as
a bulb check. If the light does not come on
during starting, have the system checked by an
authorized dealer.Electric Power Steering (EPS) Fault
Warning Light
This warning light will turn on when
there's a fault with the EPS system
Ú
page 163.
Trailer Brake Disconnected Warning Light
This warning light will illuminate when
the Trailer Brake has been
disconnected Ú page 200.
Transmission Temperature Warning
Light — If Equipped
This warning light will illuminate to
warn of a high transmission fluid
temperature. This may occur with
strenuous usage such as trailer
towing. If this light turns on, stop the vehicle and
run the engine at idle or slightly faster, with the
transmission in PARK or NEUTRAL, until the
light turns off. Once the light turns off, you may
continue to drive normally.
WARNING!
Continued operation with reduced assist
could pose a safety risk to yourself and
others. Service should be obtained as soon
as possible.
WARNING!
If you continue operating the vehicle when
the Transmission Temperature Warning Light
is illuminated you could cause the fluid to boil
over, come in contact with hot engine or
exhaust components and cause a fire.
3
21_DPF_OM_EN_USC_t.book Page 109
Page 112 of 463

110GETTING TO KNOW YOUR INSTRUMENT PANEL
Door Open Warning Light
This indicator will illuminate when a
door is ajar/open and not fully closed.
NOTE:
If the vehicle is moving there will also be a single
chime.
YELLOW WARNING LIGHTS
Adaptive Cruise Control (ACC) Fault
Warning Light — If Equipped
This warning light will illuminate to
indicate a fault in the ACC system.
Contact a local authorized dealer for
service Ú page 166.
Engine Check/Malfunction Indicator
Warning Light (MIL)
The Engine Check/Malfunction
Indicator Light (MIL) is a part of an
Onboard Diagnostic System called
OBD II that monitors engine and
automatic transmission control systems. This
warning light will illuminate when the ignition
is in the ON/RUN position before engine start.
If the bulb does not come on when turning the
ignition switch from OFF to ON/RUN, have the
condition checked promptly.
Certain conditions, such as a loose or missing
gas cap, poor quality fuel, etc., may illuminate
the light after engine start. The vehicle should
be serviced if the light stays on through several
typical driving styles. In most situations, the
vehicle will drive normally and will not require
towing.
When the engine is running, the MIL may flash
to alert serious conditions that could lead to
immediate loss of power or severe catalytic
converter damage. The vehicle should be
serviced by an authorized dealer as soon as
possible if this occurs.
CAUTION!
Continuous driving with the Transmission
Temperature Warning Light illuminated will
eventually cause severe transmission
damage or transmission failure.
WARNING!
A malfunctioning catalytic converter, as
referenced above, can reach higher
temperatures than in normal operating
conditions. This can cause a fire if you drive
slowly or park over flammable substances
such as dry plants, wood, cardboard, etc.
This could result in death or serious injury to
the driver, occupants or others.
CAUTION!
Prolonged driving with the Malfunction
Indicator Light (MIL) on could cause damage
to the vehicle control system. It also could
affect fuel economy and driveability. If the
MIL is flashing, severe catalytic converter
damage and power loss will soon occur.
Immediate service is required.
21_DPF_OM_EN_USC_t.book Page 110
Page 119 of 463

GETTING TO KNOW YOUR INSTRUMENT PANEL117
EMISSIONS INSPECTION AND
MAINTENANCE PROGRAMS
In some localities, it may be a legal requirement
to pass an inspection of your vehicle's
emissions control system. Failure to pass could
prevent vehicle registration.
For states that require an Inspection
and Maintenance (I/M), this check
verifies the Malfunction Indicator
Light (MIL) is functioning and is not on
when the engine is running, and that the OBD II
system is ready for testing.
Normally, the OBD II system will be ready. The
OBD II system may not be ready if your vehicle
was recently serviced, recently had a depleted
battery or a battery replacement. If the OBD II
system should be determined not ready for the
I/M test, your vehicle may fail the test.
Your vehicle has a simple ignition actuated test,
which you can use prior to going to the test
station. To check if your vehicle's OBD II system
is ready, you must do the following:
1. Cycle the ignition switch to the ON position, but do not crank or start the engine.
NOTE:
If you crank or start the engine, you will have to
start this test over.
2. As soon as you cycle the ignition switch
to the ON position, you will see the
Malfunction Indicator Light (MIL) symbol
come on as part of a normal bulb check.
3. Approximately 15 seconds later, one of two things will happen:
The MIL will flash for about 10 seconds
and then return to being fully illuminated
until you turn OFF the ignition or start the
engine. This means that your vehicle's
OBD II system is not ready and you
should not proceed to the I/M station.
The MIL will not flash at all and will
remain fully illuminated until you place
the ignition in the off position or start the
engine. This means that your vehicle's
OBD II system is ready and you can
proceed to the I/M station. If your OBD II system is not ready,
you should
see an authorized dealer or repair facility. If your
vehicle was recently serviced or had a battery
failure or replacement, you may need to do
nothing more than drive your vehicle as you
normally would in order for your OBD II system
to update. A recheck with the above test routine
may then indicate that the system is now ready.
Regardless of whether your vehicle's OBD II
system is ready or not, if the MIL is illuminated
during normal vehicle operation you should
have your vehicle serviced before going to the
I/M station. The I/M station can fail your vehicle
because the MIL is on with the engine running.
3
21_DPF_OM_EN_USC_t.book Page 117
Page 122 of 463

120STARTING AND OPERATING
(Continued)
AUTOPARK — ROTARY SHIFTER AND
E
IGHT SPEED TRANSMISSION ONLY
AutoPark is a supplemental feature to assist in
placing the vehicle in PARK should the situations
on the following pages occur. It is a back up
system and should not be relied upon as the
primary method by which the driver shifts the
vehicle into PARK.
The conditions under which AutoPark will
engage are outlined on the following pages. If the vehicle is not in PARK and the driver turns
off the engine, the vehicle may AutoPark.
AutoPark will engage when all of these
conditions are met:
Vehicle is equipped with a rotary shifter and
an eight speed transmission
Vehicle is not in PARK
Vehicle speed is 1.2 mph (1.9 km/h) or less
Ignition switched from RUN to ACC
NOTE:
For Keyless Enter-N-Go equipped vehicles, the
engine will turn off and the ignition switch will
change to ACC mode. After 30 minutes the igni -
tion switches to OFF automatically, unless the
driver turns the ignition switch OFF. If the vehicle is not in PARK and the driver exits
the vehicle with the engine running, the vehicle
may AutoPark.
AutoPark will engage when all of these
conditions are met:
Vehicle is equipped with a rotary shifter and
an eight speed transmission
Vehicle is not in PARK
Vehicle speed is 1.2 mph (1.9 km/h) or less
Driver’s seat belt is unbuckled
Driver’s door is ajar
Brake pedal is not pressed
The message “ AutoPark Engaged Shift to P then
Shift to Gear ” will display in the instrument
cluster.
NOTE:
In some cases the ParkSense graphic will be
displayed in the instrument cluster, causing the
“ AutoPark Engaged Shift to P then Shift to Gear ”
to not be seen. In these cases, the shifter must
be returned to “P” to select desired gear.
WARNING!
Driver inattention could lead to failure to
place the vehicle in PARK. ALWAYS DO A
VISUAL CHECK that your vehicle is in PARK
by verifying that a solid (not blinking) “P” is
indicated in the instrument cluster display
and near the gear selector. If the "P" indi -
cator is blinking, your vehicle is not in PARK.
As an added precaution, always apply the
parking brake when exiting the vehicle.
AutoPark is a supplemental feature. It is not
designed to replace the need to shift your
vehicle into PARK. It is a back up system
and should not be relied upon as the
primary method by which the driver shifts
the vehicle into PARK.
WARNING! (Continued)
21_DPF_OM_EN_USC_t.book Page 120