engine RENAULT ESPACE 2012 J81 / 4.G Owner's Manual
[x] Cancel search | Manufacturer: RENAULT, Model Year: 2012, Model line: ESPACE, Model: RENAULT ESPACE 2012 J81 / 4.GPages: 267, PDF Size: 8.95 MB
Page 67 of 267
1.61
ENG_UD24102_1
Ordinateur de bord : messages d’alerte (X81 - J81 - Renault)
ENG_NU_932-3_X81ph3_Renault_1
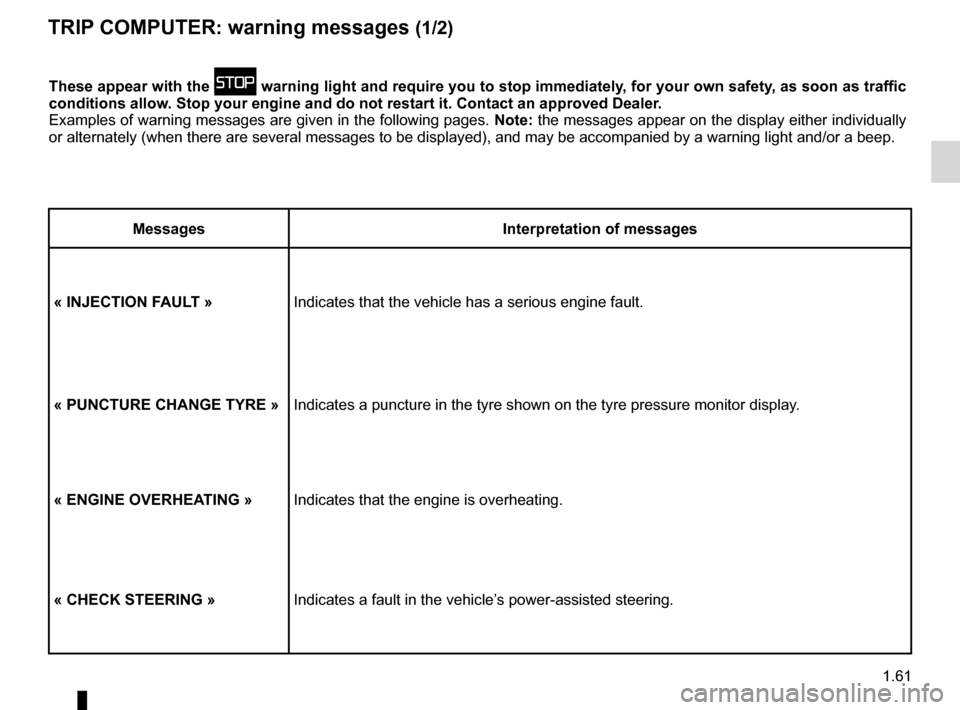
TrIP cOMPUTer: warning messages (1/2)
These appear with the û warning light and require you to stop immediately, for your own safety, as soon as traffic
conditions allow. stop your engine and do not restart it. contact an approved dealer.
Examples of warning messages are given in the following pages. note: the messages appear on the display either individually
or alternately (when there are several messages to be displayed), and \
may be accompanied by a warning light and/or a beep.
Messages Interpretation of messages
« InJecTIOn faULT » Indicates that the vehicle has a serious engine fault.
« PUncTUre cHanGe TYre »Indicates a puncture in the tyre shown on the tyre pressure monitor disp\
lay.
« enGIne OVerHea TInG »Indicates that the engine is overheating.
« cHecK sTeerInG » Indicates a fault in the vehicle’s power-assisted steering.
Page 68 of 267
1.62
ENG_UD24102_1
Ordinateur de bord : messages d’alerte (X81 - J81 - Renault)
ENG_NU_932-3_X81ph3_Renault_1
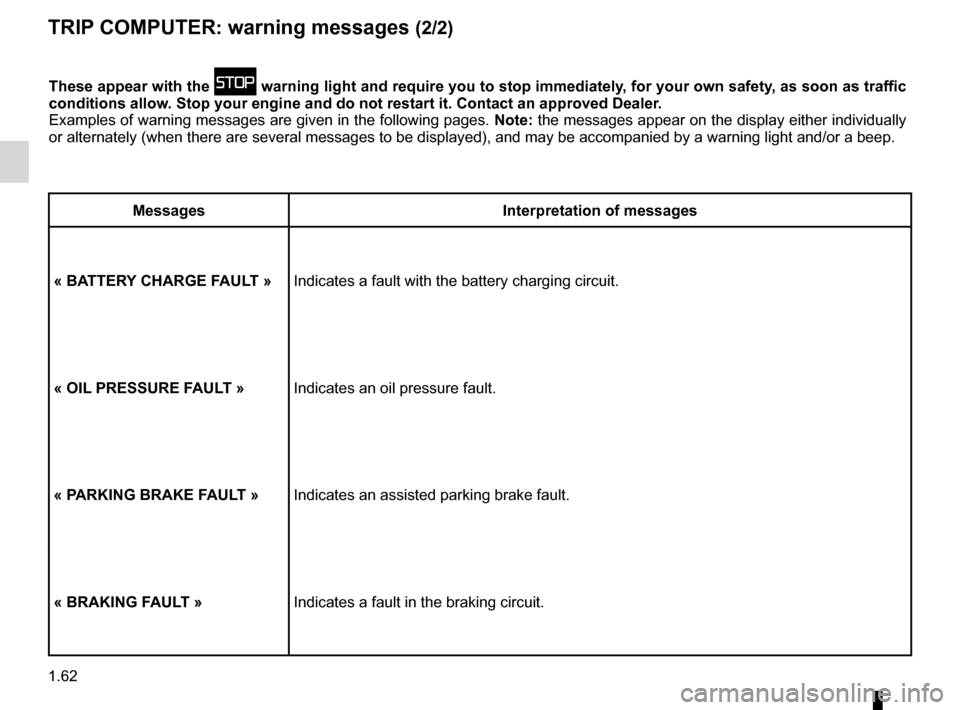
These appear with the û warning light and require you to stop immediately, for your own safety, as soon as traffic
conditions allow. stop your engine and do not restart it. contact an approved dealer.
Examples of warning messages are given in the following pages. note: the messages appear on the display either individually
or alternately (when there are several messages to be displayed), and \
may be accompanied by a warning light and/or a beep.
Messages Interpretation of messages
« Ba TTer Y cHarGe faULT » Indicates a fault with the battery charging circuit.
« OIL PressUre faULT » Indicates an oil pressure fault.
« P arKInG BraKe faULT » Indicates an assisted parking brake fault.
« BraKInG faULT » Indicates a fault in the braking circuit.
TrIP cOMPUTer: warning messages (2/2)
Page 70 of 267
rear view mirrors ................................... (up to the end of the DU)
1.64
ENG_UD20350_1
Rétroviseurs extérieurs (X81 - J81 - Renault)
ENG_NU_932-3_X81ph3_Renault_1
Rear view mirrors
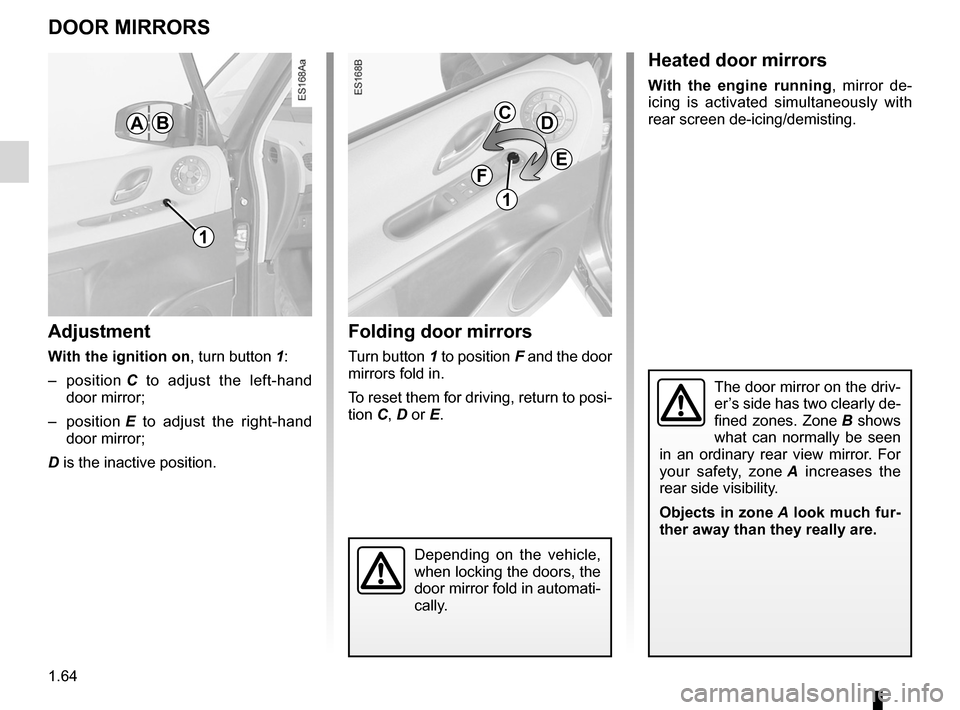
dOOr MIrrOrs
adjustment
With the ignition on , turn button 1:
– position C to adjust the left-hand
door mirror;
– position E to adjust the right-hand
door mirror;
D is the inactive position.
folding door mirrors
Turn button 1 to position F and the door
mirrors fold in.
To reset them for driving, return to posi-
tion C, D or E.
Heated door mirrors
With the engine running , mirror de-
icing is activated simultaneously with
rear screen de-icing/demisting.
Depending on the vehicle,
when locking the doors, the
door mirror fold in automati-
cally.
The door mirror on the driv-
er’s side has two clearly de-
fined zones. Zone B shows
what can normally be seen
in an ordinary rear view mirror. For
your safety, zone A increases the
rear side visibility.
Objects in zone A look much fur-
ther away than they really are.
aBcd
ef
1
1
Page 73 of 267

lights:dipped beam headlights ................................... (current page)
lights: side lights ......................................................... (current page)
1.67
ENG_UD20353_1
Eclairage et signalisation extérieure (X81 - J81 - Renault)
ENG_NU_932-3_X81ph3_Renault_1
Lighting and exterior signals
eXTerIOr LIGHTInG and sIGnaLs (1/3)
kdipped beam
headlights
automatic operation
With the engine running, the dipped
beam headlights are switched on or off
automatically depending on the level of
ambient light, without the need to oper-
ate stalk 1 (position 0).
This function can be deactivated or re-
activated.
– To deactivate it, with the ignition
on and engine switched off , turn
stalk 1 twice consecutively from po -
sition 0 to side lights. This action is
confirmed by an audible signal.
– To activate it, with the ignition
switched on and engine running or
off, turn stalk 1 twice consecutively
from position 0 to side lights. This
action is confirmed by an audible
signal.
– To select the main beam headlights,
pull stalk 1 towards you. To return to
the dipped beam headlight position,
pull the stalk towards you again.
– The lights go out when the engine
is stopped, when the driver’s door is
opened or when the vehicle is locked
with the RENAULT card.
Manual operation
Turn the end of stalk 1 until the symbol
is opposite mark 3.
An indicator light lights up on the instru-
ment panel in all cases.
daytime running lights
The daytime running lights come on
when the engine is started if stalk 1 is
in position 0.
If the dipped beam headlights oper -
ate automatically, the daytime running
lights only come on if the side lights are
off
1
2
1
3
uside lights
Turn the end of stalk 1 until the
symbol is opposite mark 3.
The instrument panel lights up, the
brightness can be adjusted by using
control knob 2.
Page 78 of 267
1.72
ENG_UD20355_1
Essuie-vitre/lave-vitre avant (X81 - J81 - Renault)
ENG_NU_932-3_X81ph3_Renault_1
WIndscreen W asH/WIPe (2/2)
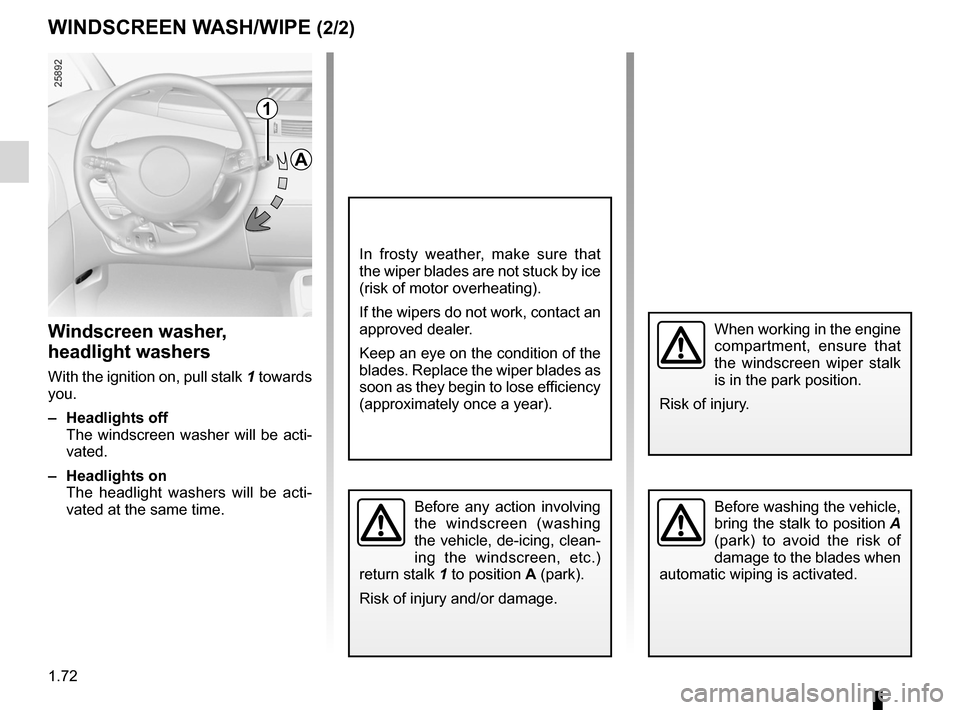
Windscreen washer,
headlight washers
With the ignition on, pull stalk 1 towards
you.
– Headlights off
The windscreen washer will be acti-
vated.
– Headlights on
The headlight washers will be acti -
vated at the same time.
1
a
Before washing the vehicle,
bring the stalk to position A
(park) to avoid the risk of
damage to the blades when
automatic wiping is activated.Before any action involving
the windscreen (washing
the vehicle, de-icing, clean -
ing the windscreen, etc.)
return stalk 1 to position a (park).
Risk of injury and/or damage.
When working in the engine
compartment, ensure that
the windscreen wiper stalk
is in the park position.
Risk of injury.
In frosty weather, make sure that
the wiper blades are not stuck by ice
(risk of motor overheating).
If the wipers do not work, contact an
approved dealer.
Keep an eye on the condition of the
blades. Replace the wiper blades as
soon as they begin to lose efficiency
(approximately once a year).
Page 80 of 267
fuel tank capacity .................................. (up to the end of the DU)
fuel grade ............................................... (up to the end of the DU)
fuel filling ................................................ (up to the end of the DU)
fuel filler cap ......................................... (up to the end of the DU)
fuel tank capacity ........................................... (up to the end of the DU)
1.74
ENG_UD24089_2
Réservoir à carburant (X81 - J81 - Renault)
ENG_NU_932-3_X81ph3_Renault_1
Jaune NoirNoir texte
Fuel tank (filling with fuel)
fUeL T anK (1/3)
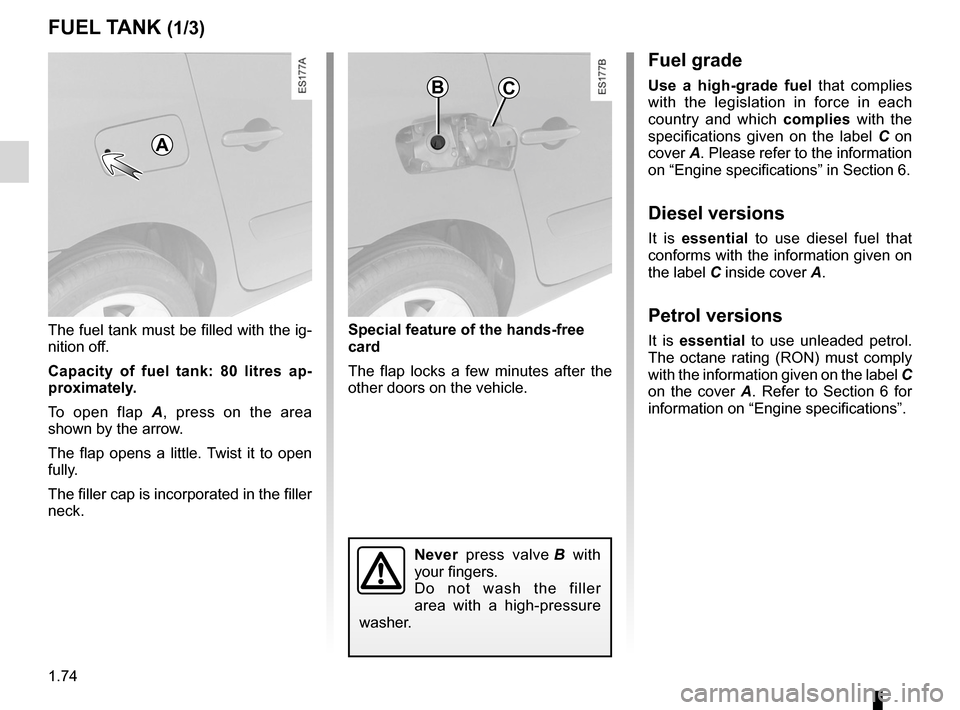
The fuel tank must be filled with the ig-
nition off.
capacity of fuel tank: 80 litres ap -
proximately.
To open flap A , press on the area
shown by the arrow.
The flap opens a little. Twist it to open
fully.
The filler cap is incorporated in the filler
neck.
a
B
n ever press valve B with
your fingers.
Do not wash the filler
area with a high-pressure
washer.
fuel grade
Use a high-grade fuel that complies
with the legislation in force in each
country and which complies with the
specifications given on the label C on
cover A. Please refer to the information
on “Engine specifications” in Section 6.
diesel versions
It is essential to use diesel fuel that
conforms with the information given on
the label C inside cover A.
Petrol versions
It is essential to use unleaded petrol.
The octane rating (RON) must comply
with the information given on the label C
on the cover A . Refer to Section 6 for
information on “Engine specifications”.
special feature of the hands-free
card
The flap locks a few minutes after the
other doors on the vehicle.
c
Page 81 of 267
JauneNoirNoir texte
1.75
ENG_UD24089_2
Réservoir à carburant (X81 - J81 - Renault)
ENG_NU_932-3_X81ph3_Renault_1
Vehicles running on ethanol -
based fuel
It is essential to use unleaded petrol or
fuel containing a maximum of 85% eth-
anol (E85).
In very cold conditions, it may be very
difficult or even impossible to start the
engine. To avoid this problem, use un-
leaded petrol or, on equipped vehicles,
use the heater integrated in the engine:
connect the special end of the exten -
sion piece supplied into the socket in -
tegrated into the radiator grille and the
other end into a 220V socket for at least
6 hours before starting.
nB: you may notice an increase in fuel
consumption with this type of fuel.
fUeL T anK (2/3)
filling with fuel
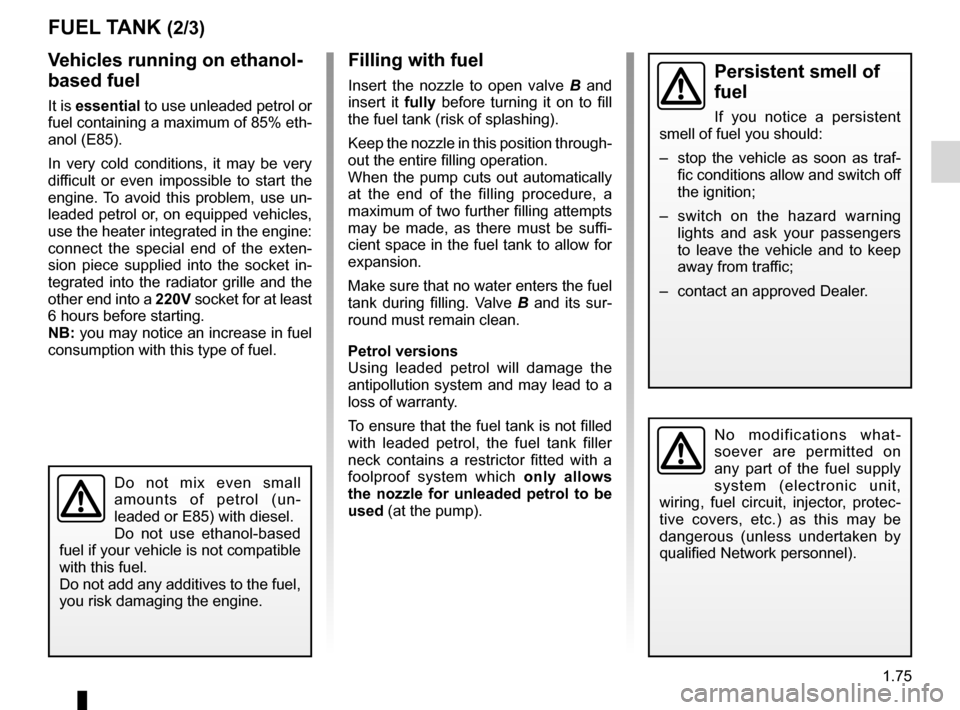
Insert the nozzle to open valve B and
insert it fully before turning it on to fill
the fuel tank (risk of splashing).
Keep the nozzle in this position through -
out the entire filling operation.
When the pump cuts out automatically
at the end of the filling procedure, a
maximum of two further filling attempts
may be made, as there must be suffi -
cient space in the fuel tank to allow for
expansion.
Make sure that no water enters the fuel
tank during filling. Valve B and its sur-
round must remain clean.
Petrol versions
Using leaded petrol will damage the
antipollution system and may lead to a
loss of warranty.
To ensure that the fuel tank is not filled
with leaded petrol, the fuel tank filler
neck contains a restrictor fitted with a
foolproof system which only allows
the nozzle for unleaded petrol to be
used (at the pump).
No modifications what -
soever are permitted on
any part of the fuel supply
system (electronic unit,
wiring, fuel circuit, injector, protec -
tive covers, etc.) as this may be
dangerous (unless undertaken by
qualified Network personnel).
Persistent smell of
fuel
If you notice a persistent
smell of fuel you should:
– stop the vehicle as soon as traf-
fic conditions allow and switch off
the ignition;
– switch on the hazard warning
lights and ask your passengers
to leave the vehicle and to keep
away from traffic;
– contact an approved Dealer.
Do not mix even small
amounts of petrol (un -
leaded or E85) with diesel.
Do not use ethanol-based
fuel if your vehicle is not compatible
with this fuel.
Do not add any additives to the fuel,
you risk damaging the engine.
Page 83 of 267
2.1
ENG_UD25601_4
Sommaire 2 (X81 - J81 - Renault)
ENG_NU_932-3_X81ph3_Renault_2
Section 2: Driving
(Advice on use relating to fuel economy and the environment)
Running in . . . . . . . . . . . . . . . . . . . . . . . . . . . . . . . . . . . . . . . . . . . . . . . . . . . . . . . . . . . . . . . . . . . . . 2.2
Starting/stopping the engine . . . . . . . . . . . . . . . . . . . . . . . . . . . . . . . . . . . . . . . . . . . . . . . . . . . . . . . 2.3
Special features of petrol versions . . . . . . . . . . . . . . . . . . . . . . . . . . . . . . . . . . . . . . . . . . . . . . . . . . 2.6
Special features of diesel versions . . . . . . . . . . . . . . . . . . . . . . . . . . . . . . . . . . . . . . . . . . . . . . . . . . 2.7
Electronic parking brake . . . . . . . . . . . . . . . . . . . . . . . . . . . . . . . . . . . . . . . . . . . . . . . . . . . . . . . . . . 2.8
Gear lever . . . . . . . . . . . . . . . . . . . . . . . . . . . . . . . . . . . . . . . . . . . . . . . . . . . . . . . . . . . . . . . . . . . . . 2.11
Power-assisted steering . . . . . . . . . . . . . . . . . . . . . . . . . . . . . . . . . . . . . . . . . . . . . . . . . . . . . . . . . . 2.11
Advice on emission control/fuel economy . . . . . . . . . . . . . . . . . . . . . . . . . . . . . . . . . . . . . . . . . . . . . 2.12
Environment . . . . . . . . . . . . . . . . . . . . . . . . . . . . . . . . . . . . . . . . . . . . . . . . . . . . . . . . . . . . . . . . . . . 2.15
Tyre pressure monitoring system . . . . . . . . . . . . . . . . . . . . . . . . . . . . . . . . . . . . . . . . . . . . . . . . . . . 2.16
Electronic Stability Programme: ESP . . . . . . . . . . . . . . . . . . . . . . . . . . . . . . . . . . . . . . . . . . . . . . . . 2.20
Traction control: ASR . . . . . . . . . . . . . . . . . . . . . . . . . . . . . . . . . . . . . . . . . . . . . . . . . . . . . . . . . . . . . 2.21
Anti-lock braking system: ABS . . . . . . . . . . . . . . . . . . . . . . . . . . . . . . . . . . . . \
. . . . . . . . . . . . . . . . . . 2.23
Emergency brake assist . . . . . . . . . . . . . . . . . . . . . . . . . . . . . . . . . . . . . . . . . . . . . . . . . . . . . . . . . . 2.25
Speed limiter . . . . . . . . . . . . . . . . . . . . . . . . . . . . . . . . . . . . . . . . . . . . . . . . . . . . . . . . . . . . . . . . . . . 2.26
Cruise control . . . . . . . . . . . . . . . . . . . . . . . . . . . . . . . . . . . . . . . . . . . . . . . . . . . . . . . . . . . . . . . . . . 2.29
Parking distance control . . . . . . . . . . . . . . . . . . . . . . . . . . . . . . . . . . . . . . . . . . . . . . . . . . . . . . . . . . 2.33
Using the automatic gearbox . . . . . . . . . . . . . . . . . . . . . . . . . . . . . . . . . . . . . . . . . . . . . . . . . . . . . . . 2.37
Page 84 of 267
ignition switch ........................................................ (current page)
starting the engine ................................................. (current page)
running in ............................................................... (current page)
driving ................................................... (up to the end of the DU)
2.2
ENG_UD25549_3
Rodage (X81 - Renault)
ENG_NU_932-3_X81ph3_Renault_2
Running in
RUNNING IN
– Petrol version
For the first 600 miles (1,000 km), do
not exceed 78 mph (130 km/h) in the
highest gear, or 3,000 to 3,500 rpm.
You may only expect top performance
from your vehicle after 1,800 miles
(3,000 km).
Service intervals: please refer to your
vehicle’s maintenance document. –
Diesel version
For the first 900 miles (1,500 km) ,
do not exceed 2,500 rpm. After com -
pleting this mileage you may drive
faster, although you may only expect
top performance after approximately
3,600 miles (6,000 km).
During the running in period, do not ac-
celerate hard while the engine is still
cold and do not let the engine over-rev.
Service intervals: please refer to your
vehicle’s maintenance document.
Page 85 of 267
engine start/stop button ........................ (up to the end of the DU)
ignition switch ....................................... (up to the end of the DU)
starting the engine ................................ (up to the end of the DU)
driving ................................................... (up to the end of the DU)
2.3
ENG_UD25550_3
Démarrage/arrêt moteur avec carte RENAULT mains libres (X81 - J81 - Renault)
ENG_NU_932-3_X81ph3_Renault_2
Starting/stopping the engine
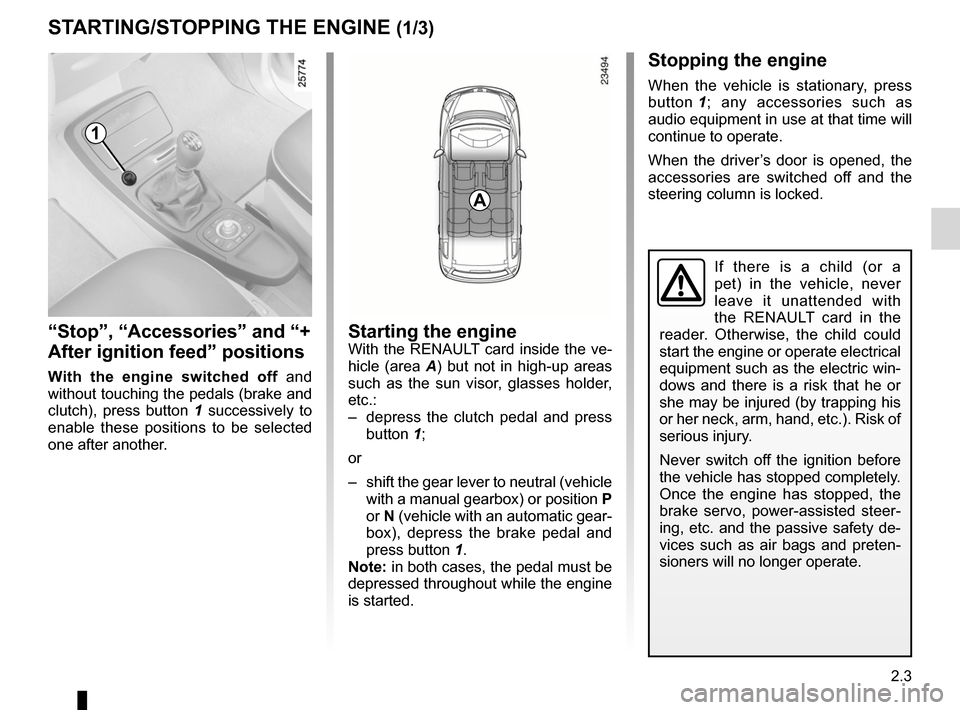
STARTING/STOPPING THE ENGINE (1/3)
“Stop”, “Accessories” and “+
After ignition feed” positions
With the engine switched off and
without touching the pedals (brake and
clutch), press button 1 successively to
enable these positions to be selected
one after another.
Starting the engineWith the RENAULT card inside the ve-
hicle (area A) but not in high-up areas
such as the sun visor, glasses holder,
etc.:
– depress the clutch pedal and press
button 1;
or
– shift the gear lever to neutral (vehicle
with a manual gearbox) or position P
or N (vehicle with an automatic gear-
box), depress the brake pedal and
press button 1.
Note: in both cases, the pedal must be
depressed throughout while the engine
is started.
Stopping the engine
When the vehicle is stationary, press
button 1 ; any accessories such as
audio equipment in use at that time will
continue to operate.
When the driver’s door is opened, the
accessories are switched off and the
steering column is locked.
If there is a child (or a
pet) in the vehicle, never
leave it unattended with
the RENAULT card in the
reader. Otherwise, the child could
start the engine or operate electrical
equipment such as the electric win-
dows and there is a risk that he or
she may be injured (by trapping his
or her neck, arm, hand, etc.). Risk of
serious injury.
Never switch off the ignition before
the vehicle has stopped completely.
Once the engine has stopped, the
brake servo, power-assisted steer -
ing, etc. and the passive safety de-
vices such as air bags and preten -
sioners will no longer operate.
A
1