key RENAULT KANGOO 1997 KC / 1.G Electrical Equipment User Guide
[x] Cancel search | Manufacturer: RENAULT, Model Year: 1997, Model line: KANGOO, Model: RENAULT KANGOO 1997 KC / 1.GPages: 83
Page 21 of 83
REPLACING THE INJECTION COMPUTER OR
CODED SOLENOID VALVE
The injection computer and coded solenoid valve
are supplied uncoded. The engine immobiliser
code must be programmed in when they are fit-
ted.
It is sufficient to carry out the following opera-
tions:
- switch the ignition on, without starting the en-
gine, using the vehicle’s coded key for a few
seconds,
- switch the ignition off, the immobiliser will be
activated approximately 10 seconds afterwards
(red immobiliser warning light flashes).
NOTE : starting prevention can be checked
using the XR25:
- Ignition off, wait for the warning light to
flash (slow flashing)
Enter
ignition still off (bargraph
9 LH illuminates).
- Switch the ignition on, the red immobiliser
warning light should flash more quickly and
the vehicle should be impossible to start.
NOTE : For removal - refitting information, refer
to the corresponding section (13 or 17).
IMMOBILISER
Coded key immobiliser system
12.Check the immobiliser system operates cor-
rectly with both keys.
Switch the ignition on and check that the red
warning light illuminates for 3 seconds then
extinguishes and that the vehicle can be star-
ted.
NOTE : starting prevention can be checked
using the XR25:
- Ignition off, wait for the warning light to
flash (slow flashing)
Enter
- Switch the ignition on and check the vehi-
cle cannot be started and that the red war-
ning light flashes (rapid flashing).
13.The procedure is complete. After turning the
ignition off and on again (for more than 2 se-
conds), check the vehicle can be started and
erase all faults present in the decoder unit.
Vehicles fitted with a remote control
After replacing the kit carry out a resynchronisa-
tion operation (see simple resynchronisation pro-
cedure, section 88).
82
G04*
G04*
82-10
Page 22 of 83
IMPORTANT: if an uncoded injection computer or
solenoid valve is being tested from stock (test
part), the decoder unit
MUST NOT be supplied du-
ring the operation.
If the decoder unit is supplied, switching the igni-
tion on causes a coded signal to be sent from the
decoder unit to the injection computer or coded
solenoid valve (and the code is then program-
med).
To avoid memorising a code which could make
the injection computer or coded solenoid valve
electronic unit unusable after the test, the fuse
(+ before ignition feed) for the decoder unit
must be removed (fuse showing the door locking
symbol). This prevents the coded signal being sent
when the ignition is switched on (the computer or
the coded solenoid valve electronic unit remains
uncoded).
For petrol vehicles, the computer used for the test
MUST have the same Part Number as the original
computer on the vehicle (test computer may be
damaged).
Checking (on petrol vehicle only)
If the test computer is to be returned to stock, it is
possible (before it is removed) to check using the
XR25 that the computer has not been coded du-
ring the test (example : incorrect operation).
Connect the XR25 to the diagnostic socket.
Position the ISO selector and enter the injection
code: bargraph
2 RH (immobiliser) should be illu-
minated.
After entering
the message
should be displayed on the XR25.
This shows that the injection computer is not co-
ded and may be returned to stock.
If bargraph
2 RH (immobiliser) is extinguished and
after entering
the message
is displayed on the XR25, this shows that the
computer has been programmed with the immo-
biliser code (incorrect operation). In this case the
computer must be decoded before being returned
to stock.
The procedure for decoding consists of replacing
the decoder unit on the vehicle with another de-
coder unit with a different code (with its key
head) and entering the security code for the vehi-
cle (security code number should be requested
from the local assistance network, example
DELTA
Assistance for France, NVSR for the UK by fax on-
ly) using the number in the head of the key for the
vehicle.
Ignition off, fit in place of the original decoder
unit on the vehicle, a decoder unit coded with a
different number (the procedure will not work
with an uncoded decoder unit or one which has
the same code as the injection computer).
IMMOBILISER
Coded key immobiliser system
SPECIAL NOTES FOR TESTING AN INJECTION
COMPUTER OR A CODED SOLENOID VALVE (test
part)
82
*22
*22
82-11
Page 23 of 83
NOTE : this fault may be shown by the XR25 (in
injection fault finding).
Connect the XR25 and enter the injection code.
The fault is shown by bargraph 2 RH side.
After entering
the message
on the XR25 display indicates a fault on the coded
line.
Diesel vehicle
If a system fault is detected by the decoder unit
when the engine is running, the red immobiliser
warning light will illuminate permanently until
the ignition is switched off.
IMPORTANT: In this case, after repair, the fault
memorised in the decoder unit must be erased by
entering command
on the XR25 to allow the engine immobiliser sys-
tem to operate again.
NOTE: this fault may be shown by the XR25 using
fault finding for the decoder unit (fiche no. 56).
Connect the XR25.
Set the ISO selector to S8.
Enter code
The fault may be shown by bargraph
6 RH or LH
side. Switch the ignition on, the red engine immobiliser
warning light will flash (rapid flashing).
Enter the vehicle security code (number corre-
sponding to the original key number).
After entering the security code, the red warning
light will flash again.
The XR25 display should show
(in injection fault finding). This indicates that the
injection computer has been decoded.
Switch the ignition off, remove the decoded
computer and return it to stock.
Refit the computer and decoder unit to the vehi-
cle.
NOTE : When testing the injection using the XR25
on a vehicle without an immobiliser, bargraph 2
RH side will illuminate (*22 = 2 def = computer
not coded). This is normal.
SYSTEM FAULT, ENGINE RUNNING
Petrol vehicle
If a fault in the system is noted by the injection
computer when the engine is running, the injec-
tion warning light on the instrument panel will
flash during deceleration and at idle speed (en-
gine speed less than 1500 rpm).
IMPORTANT: In this case, after repair, the fault
memorised in the injection computer and the de-
coder unit must be erased by entering command
on the XR25 or by disconnecting the battery (ap-
proximately 30 seconds) to allow the engine im-
mobiliser system to operate again.
IMMOBILISER
Coded key immobiliser system
82
*22
D56G0**
G0**
82-12
Page 24 of 83
4.Enter mode
on the XR25 then the security code number
and validate using
-If the code is correct
is displayed.
Bargraph 10 LH extinguishes.
The engine may be started.
The vehicle is protected once more :
• approximately 10 minutes after switching
the ignition off (automatically),
• after disconnecting the battery.
-If the code is incorrect
is displayed.
Bargraph 10 LH remains illuminated.
The engine may not be started.
The red immobiliser warning light and the in-
jection warning light (depending on version)
flash.
Switch the ignition off, then repeat the proce-
dure for entering the code.
IMPORTANT: you may make 3 attempts to enter
the code. If, after the third attempt, the code is in-
valid, you must wait for approximately 15 mi-
nutes before making another attempt.
When this period has expired, switch the ignition
off and on again and 3 more attempts may be
made.
NOTE : This procedure does not decode the injec-
tion computer or coded solenoid valve (depen-
ding on the type of engine)- it only authorises the
starting of the vehicle.
REMINDER : The ignition must be switched off
and on again between attempts to enter the
code.
IMMOBILISER
Coded key immobiliser system
82
G40*
*
PROCEDURE FOR ENTERING THE SECURITY CODE
With this immobiliser system, the procedure for
entering the security code is managed by the de-
coder unit.
The code is entered using the XR25 only.
The security code can only be entered if the en-
gine immobiliser system is active. The red immobi-
liser warning light must flash when the ignition is
switched on (rapid flashing).
After determining the security code number (re-
quest from the local assistance network, example
DELTA Assistance for France, NVSR for the UK by
fax only) , carry out the following operations:
1.Ignition off, the red engine immobiliser war-
ning light should flash (slow flashing).
2.Switch the ignition on, the injection warning
light (petrol vehicle) illuminates for approxi-
mately 3 seconds then extinguishes, while the
red immobiliser warning light should flash
more quickly.
3.Connect the XR25 to the vehicle and set the
ISO selector on S8.
Enter code
Bargraph 10 LH should be illuminated (fault
finding fiche n° 56).
D56
82-13
Page 25 of 83
IMMOBILISER
Coded key immobiliser system
82
13063R
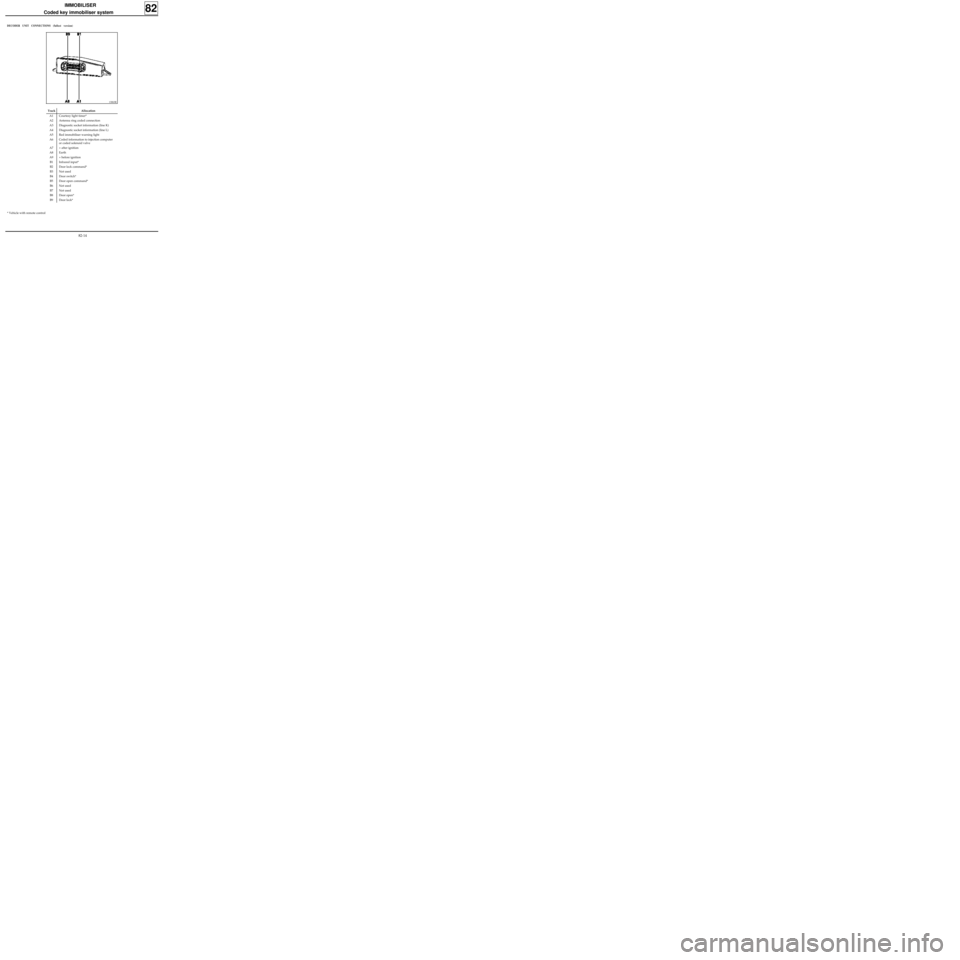
Track Allocation
A1 Courtesy light timer*
A2 Antenna ring coded connection
A3 Diagnostic socket information (line K)
A4 Diagnostic socket information (line L)
A5 Red immobiliser warning light
A6 Coded information to injection computer
or coded solenoid valve
A7 + after ignition
A8 Earth
A9 + before ignition
B1 Infrared input*
B2 Door lock command*
B3 Not used
B4 Door switch*
B5 Door open command*
B6 Not used
B7 Not used
B8 Door open*
B9 Door lock*
DECODER UNIT CONNECTIONS (fullest version)
* Vehicle with remote control
82-14
Page 26 of 83
IMMOBILISER
Coded key immobiliser system
82
PRO12827
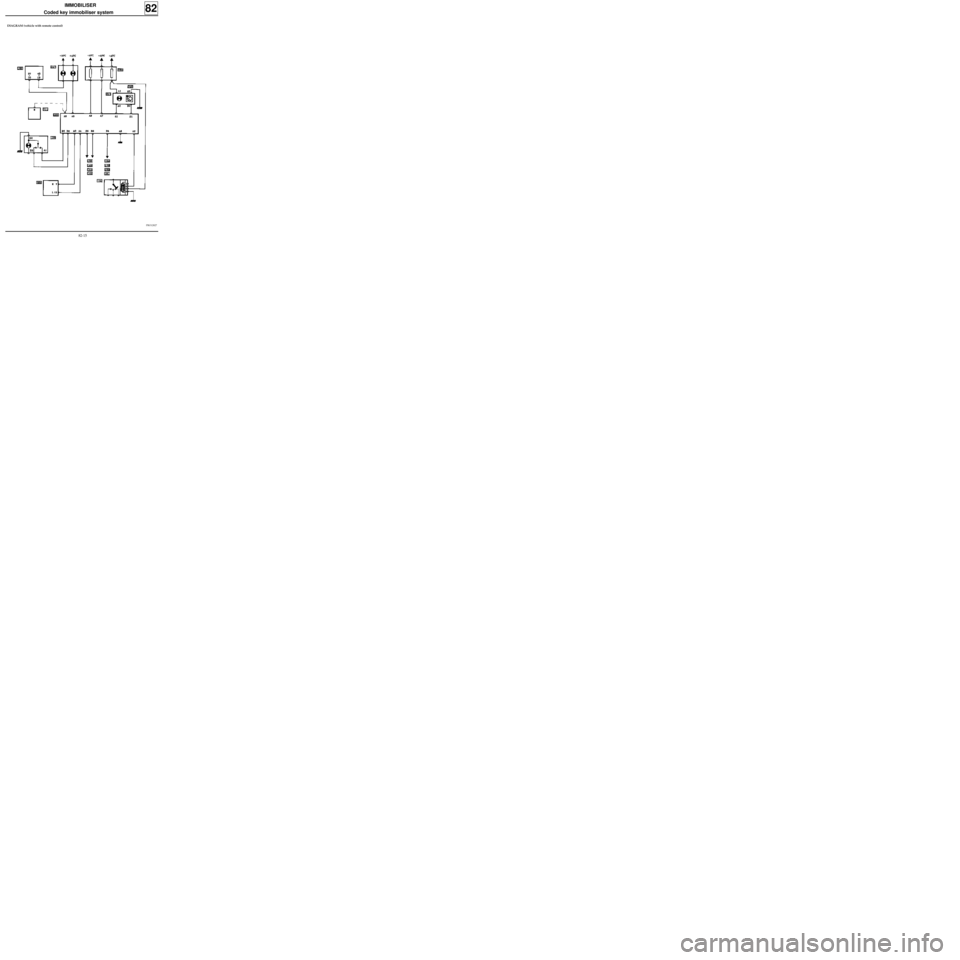
DIAGRAM (vehicle with remote control)
82-15
Page 27 of 83
IMMOBILISER
Coded key immobiliser system
82
KEY
104 Ignition switch
120 Injection computer
123 Door locking button
138 Rear right door locking motor
140 Driver’s door locking motor
141 Passenger’s door locking motor
142 Luggage compartment door locking motor
154 Luggage compartment door switch
178 Rear right door switch
180 Driver’s door switch
181 Passenger’s door switch
213 Courtesy light
225 Diagnostic socket
247 Injection warning light and red immobiliser
warning light on instrument panel
249 Remote control receiver
260 Passenger compartment fuse box
503 Decoder unit
711 Coded solenoid valveFAULT FINDING
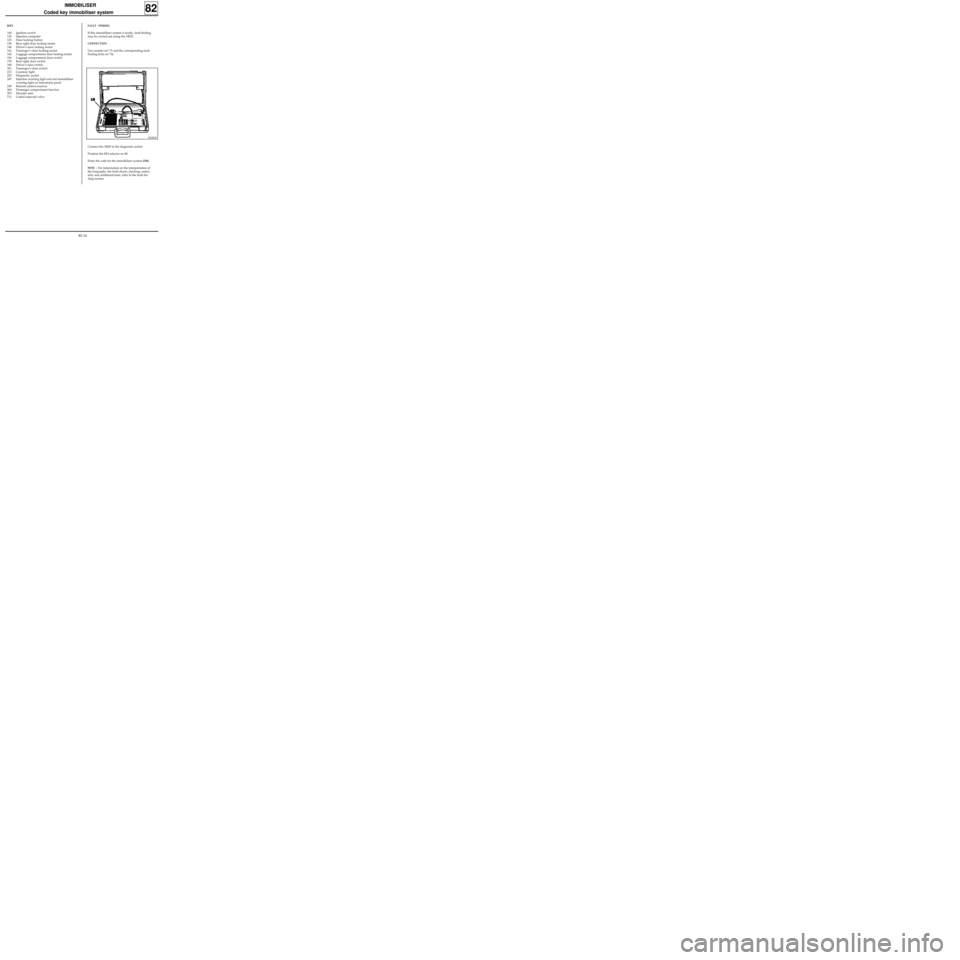
If this immobiliser system is faulty, fault finding
may be carried out using the XR25.
CONNECTION
Use cassette no° 17 and the corresponding fault
finding fiche no° 56.
92656S2
Connect the XR25 to the diagnostic socket.
Position the ISO selector on S8.
Enter the code for the immobiliser system D56.
NOTE : For information on the interpretation of
the bargraphs, the fault charts, checking confor-
mity and additional tests, refer to the fault fin-
ding section.
82-16
Page 46 of 83
CONTROLS - SIGNALS
Ignition switch
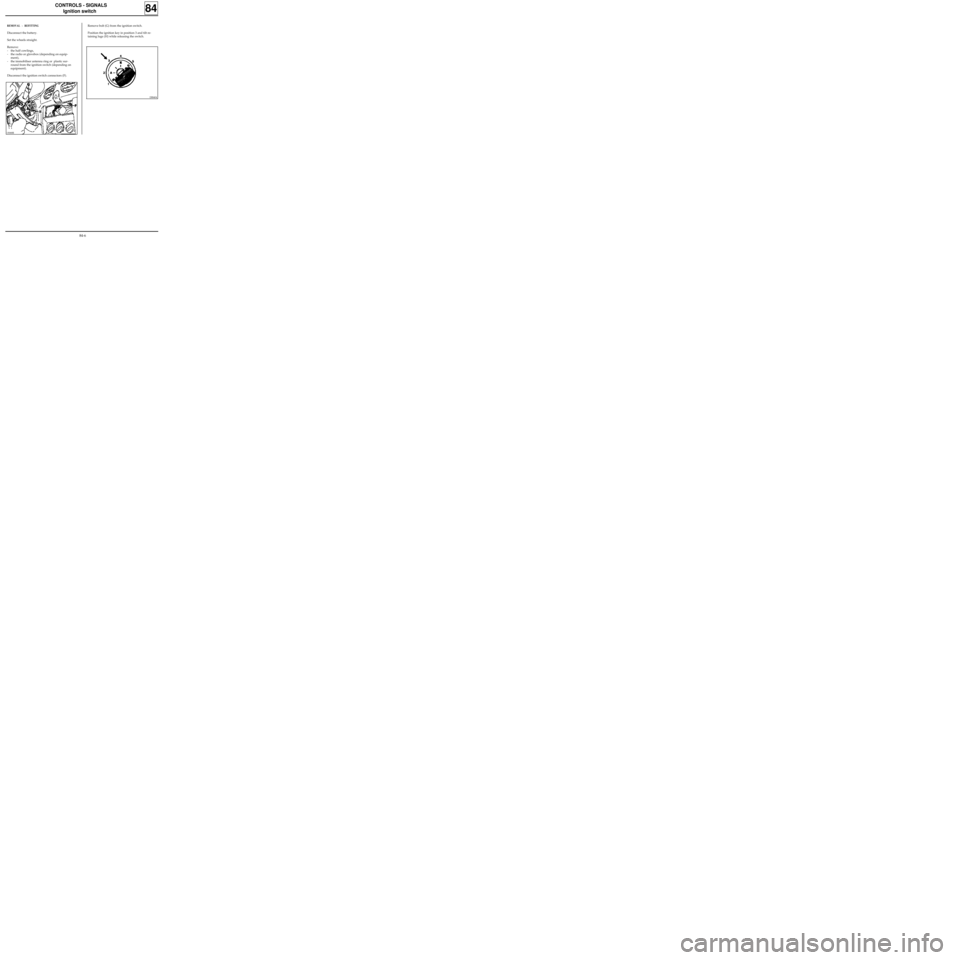
REMOVAL - REFITTING
Disconnect the battery.
Set the wheels straight.
Remove:
- the half cowlings,
- the radio or glovebox (depending on equip-
ment),
- the immobiliser antenna ring or plastic sur-
round from the ignition switch (depending on
equipment).
Disconnect the ignition switch connectors (F).
84
Remove bolt (G) from the ignition switch.
Position the ignition key in position 3 and tilt re-
taining lugs (H) while releasing the switch.
DI8404
13068R
84-6
Page 58 of 83

WIRING
Remote control for door locking
88
.GENERAL
These vehicles are equipped with an infrared or
radio frequency remote control with rolling code,
which prevents the code from being copied.
When a transmitter is replaced it will therefore be
necessary to resynchronise it so that the transmit-
ters are returned to phase with the decoder unit.
This remote control is only used for locking and
unlocking the opening elements (it has no effect
on the immobiliser).
IMPORTANT: this system cannot operate with
three remote controls (the decoder unit can only
manage two different rolling codes).
THE TRANSMITTER (PLIP)
Replacing or adding a remote control with immo-
biliser function without replacing the decoder
unit.
Order a spare key head using the number in the
head of one of the old keys or the label normally
attached to the keys when the vehicle is delivered
(eight alphanumeric characters).
If a key is being added or has been lost, remember
to order the insert with the key number.
Carry out the special resynchronisation procedure
using the XR25.
This procedure resets the remote control into se-
quence with the decoder unit (rolling code) and
should only be used if the decoder unit is not
being replaced (with immobiliser only).
1.Ignition off, connect the XR25 (ISO selector on
S8, code D56).
For vehicles fitted with an infra-red remote
control, enter command mode G04* (forced
protection mode) then switch the ignition on
again and enter the vehicle’s security code
(see procedure in section 82).
For vehicles fitted with a radio frequency re-
mote control, go to point 2.
2.Switch the ignition off and enter command
mode G32*.
From this moment, the operator has 10 se-
conds to carry out the next operation.
NOTE: The 10 seconds are shown by the illu-
mination of the red immobiliser warning light
and bargraph 17 LH on the XR25
(code D56,
fiche n° 56).
3.Press the remote control twice (the doors lock
and unlock and the red warning light extin-
guishes).
NOTE :
- When replacing a key head, resynchronisa-
tion of the second remote control (if fitted)
is not always necessary.
Check that the second control operates,
otherwise resynchronise it.
- If both remote controls (if fitted) are desyn-
chronised, two resynchronisation proce-
dures will have to be carried out (one for
each remote control).
IMPORTANT: To ensure that the infrared code
is correctly transmitted it is essential to direct
the transmitter correctly towards the receiver.
If the procedure fails it will be necessary to
restart from the beginning (infrared remote
control only).
4.The procedure is complete - check that the
doors lock correctly.
88-3
Page 59 of 83

WIRING
Remote control for door locking
88
Replacing or adding a remote control without im-
mobiliser function without replacing the decoder
unit.
If the vehicle does not have an immobiliser, the re-
mote control does not have a special number. A
key head without a number may therefore be or-
dered.
If a key is being added or has been lost, remember
to order the insert with the key number.
Carry out the special resynchronisation procedure
using the XR25.
This procedure resets the remote control into se-
quence with the decoder unit (rolling code) and
should only be used if the decoder unit is not
being replaced (with immobiliser only).
1.Ignition off, connect the XR25 (ISO selector on
S8, code D56).
2.Enter command mode G32* (the doors lock
and unlock).
From this moment, the operator has 10 se-
conds to carry out the next operation.
NOTE: The 10 seconds are shown by the illu-
mination of bargraph 17 LH on the XR25
(code
D56,
fiche n° 56).
3.Press the remote control twice (the doors lock
and unlock).
NOTE :
- When replacing a key head, resynchronisa-
tion of the second remote control (if fitted)
is not always necessary.
Check that the second control operates,
otherwise resynchronise it.
- If both remote controls (if fitted) are desyn-
chronised, two resynchronisation proce-
dures will have to be carried out (one for
each remote control).
IMPORTANT: To ensure that the infrared code
is correctly transmitted it is essential to direct
the transmitter correctly towards the receiver.
If the procedure fails it will be necessary to
restart from the beginning (infrared remote
control only).
4.The procedure is complete - check that the
doors lock correctly.
Simple resynchronisation procedure
This procedure allows the remote controls to be
reset with the decoder unit (rolling code).
This procedure is used:
- when the remote control code no longer lies
within the reception range of the decoder unit
(over 1,000 consecutive presses on the remote
control, away from the vehicle).
- when replacing a decoder unit alone (new de-
coder unit),
- when replacing a remote control if the decoder
unit is new (replacing a kit).
REMINDER: when replacing or adding a remote
control with immobiliser function without repla-
cing the decoder unit, refer to "Replacing or ad-
ding a remote control with or without immobili-
ser function without replacing the decoder unit"
(specific resynchronisation procedure).
88-4