RENAULT KANGOO ZERO EMISSION 2012 X61 / 2.G Manual Online
Manufacturer: RENAULT, Model Year: 2012, Model line: KANGOO ZERO EMISSION, Model: RENAULT KANGOO ZERO EMISSION 2012 X61 / 2.GPages: 213, PDF Size: 6.08 MB
Page 81 of 213
rear view mirrors ................................... (up to the end of the DU)
1.76
ENG_UD20959_2
Rétroviseurs (X61 - F61 - Renault)
ENG_NU_911-4_F61e_Renault_1
Rear-view mirrors
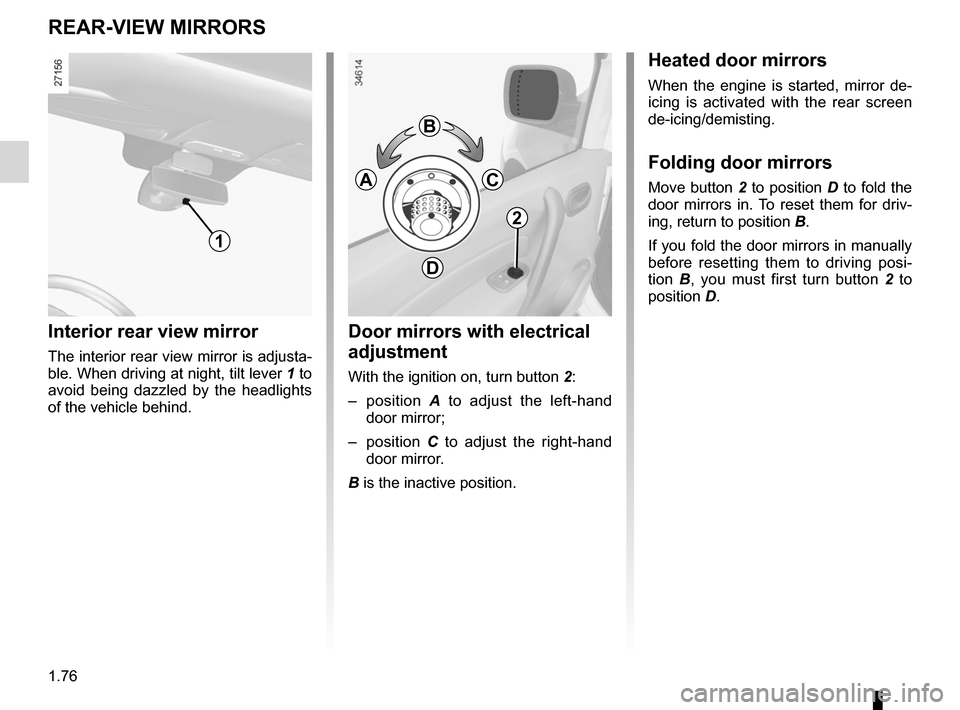
interior rear view mirror
The interior rear view mirror is adjusta-
ble. When driving at night, tilt lever 1 to
avoid being dazzled by the headlights
of the vehicle behind.
reAr-vieW mirrOrS
1
heated door mirrors
When the engine is started, mirror de-
icing is activated with the rear screen
de-icing/demisting.
Folding door mirrors
Move button 2 to position D to fold the
door mirrors in. To reset them for driv-
ing, return to position B.
If you fold the door mirrors in manually
before resetting them to driving posi -
tion B , you must first turn button 2 to
position D.
Door mirrors with electrical
adjustment
With the ignition on, turn button 2:
– position A to adjust the left-hand
door mirror;
– position C to adjust the right-hand
door mirror.
B is the inactive position.
2
B
c
D
A
Page 82 of 213
audible and visual signals.....................(up to the end of the DU)
hazard warning lights signal ................. (up to the end of the DU)
hazard warning lights signal ................. (up to the end of the DU)
indicators ............................................................... (current page)
horn ...................................................... (up to the end of the DU)
lights: hazard warning ............................... (up to the end of the DU)
horn: flash ................................................ (up to the end of the DU)
horn: sounding the horn ........................... (up to the end of the DU)
lights: direction indicators ........................................... (current page)
1.77
ENG_UD19078_1
Avertisseurs sonores et lumineux (X61 - F61 - Renault)
ENG_NU_911-4_F61e_Renault_1
Audible and visual signals
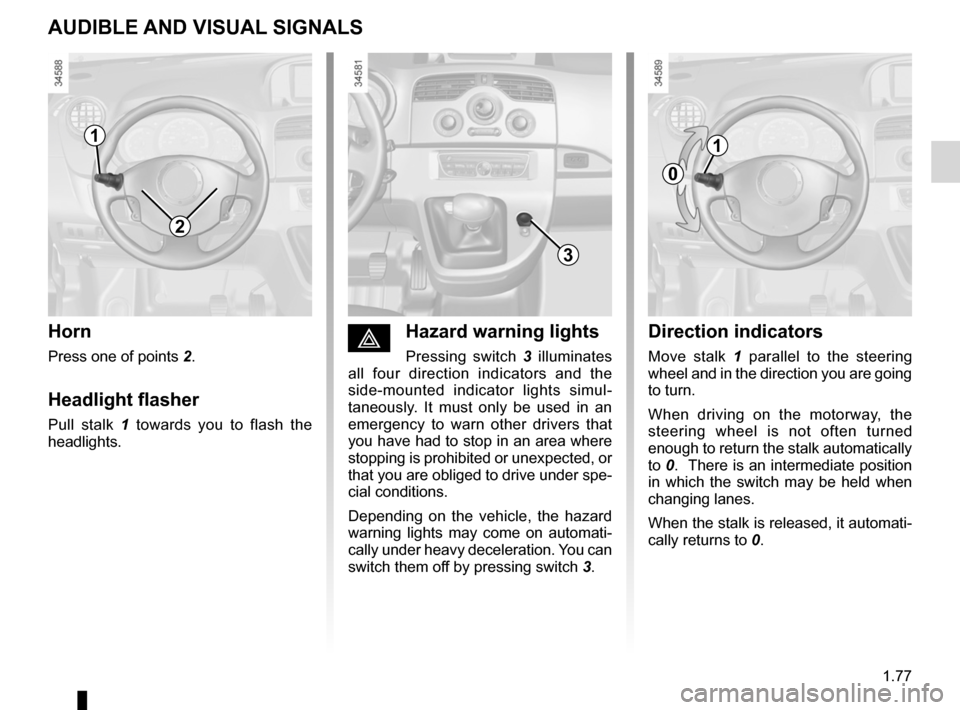
éhazard warning lights
Pressing switch 3 illuminates
all four direction indicators and the
side-mounted indicator lights simul -
taneously. It must only be used in an
emergency to warn other drivers that
you have had to stop in an area where
stopping is prohibited or unexpected, or
that you are obliged to drive under spe-
cial conditions.
Depending on the vehicle, the hazard
warning lights may come on automati -
cally under heavy deceleration. You can
switch them off by pressing switch 3.
Direction indicators
Move stalk 1 parallel to the steering
wheel and in the direction you are going
to turn.
When driving on the motorway, the
steering wheel is not often turned
enough to return the stalk automatically
to 0. There is an intermediate position
in which the switch may be held when
changing lanes.
When the stalk is released, it automati-
cally returns to 0.
horn
Press one of points 2.
headlight flasher
Pull stalk 1 towards you to flash the
headlights.
AUDiBle AND viSUAl SigNAlS
2
3
1
0
1
Page 83 of 213
pedestrian warning system .................................... (current page)
1.78
ENG_UD28708_1
Avertisseur sonore piétons (X61 électrique - Renault)
ENG_NU_911-4_F61e_Renault_1
Horn
PeDeStriAN hOrN
Electric vehicles are particularly quiet.
This system enables you to warn
people of your presence – especially
pedestrians and cyclists.
The system is activated automatically
when the engine is started. The sound
triggers when the vehicle speed is be-
tween 1 and 20 mph (1 and 30 km/h).
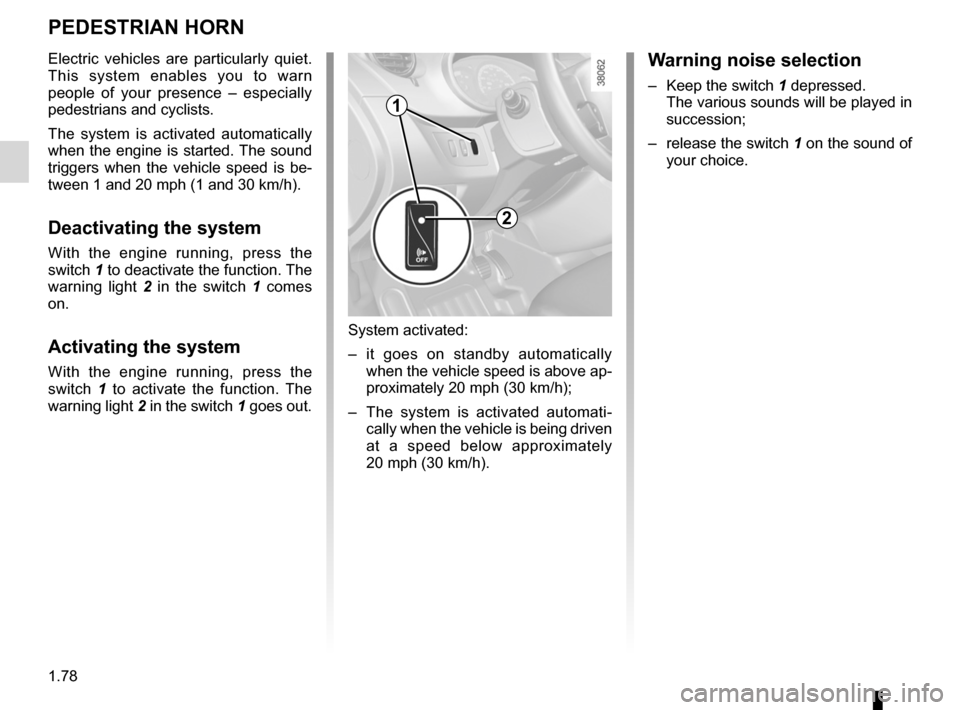
Deactivating the system
With the engine running, press the
switch 1 to deactivate the function. The
warning light 2 in the switch 1 comes
on.
Activating the system
With the engine running, press the
switch 1 to activate the function. The
warning light 2 in the switch 1 goes out.
System activated:
– it goes on standby automatically
when the vehicle speed is above ap-
proximately 20 mph (30 km/h);
– The system is activated automati -
cally when the vehicle is being driven
at a speed below approximately
20 mph (30 km/h).
Warning noise selection
– Keep the switch 1 depressed.
The various sounds will be played in
succession;
– release the switch 1 on the sound of
your choice.
1
2
Page 84 of 213
signals and lights .................................. (up to the end of the DU)
lights: side lights ......................................................... (current page)
lights: dipped beam headlights ................................... (current page)
lights: main beam headlights ...................................... (current page)
1.79
ENG_UD19079_1
Eclairage et signalisation extérieure (X61 - F61 - Renault)
ENG_NU_911-4_F61e_Renault_1
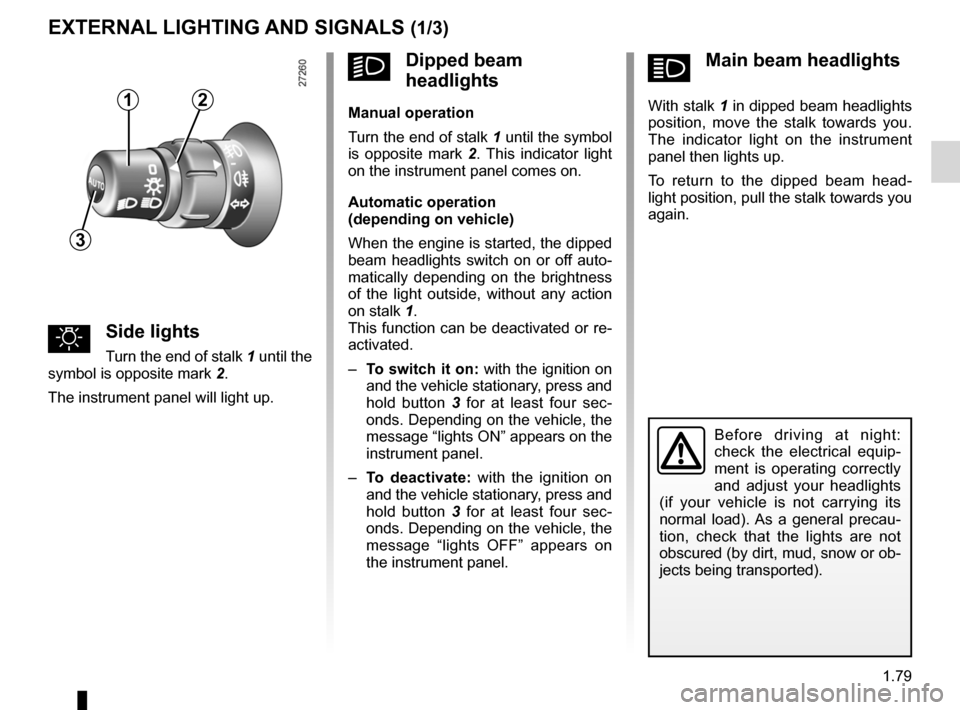
ámain beam headlights
With stalk 1 in dipped beam headlights
position, move the stalk towards you.
The indicator light on the instrument
panel then lights up.
To return to the dipped beam head -
light position, pull the stalk towards you
again.
External lighting and signals
uSide lights
Turn the end of stalk 1 until the
symbol is opposite mark 2.
The instrument panel will light up.
eXterNAl lightiNg AND SigNAlS (1/3)
Before driving at night:
check the electrical equip -
ment is operating correctly
and adjust your headlights
(if your vehicle is not carrying its
normal load). As a general precau -
tion, check that the lights are not
obscured (by dirt, mud, snow or ob-
jects being transported).
kDipped beam
headlights
manual operation
Turn the end of stalk 1 until the symbol
is opposite mark 2 . This indicator light
on the instrument panel comes on.
Automatic operation
(depending on vehicle)
When the engine is started, the dipped
beam headlights switch on or off auto-
matically depending on the brightness
of the light outside, without any action
on stalk 1.
This function can be deactivated or re-
activated.
– to switch it on: with the ignition on
and the vehicle stationary, press and
hold button 3 for at least four sec -
onds. Depending on the vehicle, the
message “lights ON” appears on the
instrument panel.
– to deactivate: with the ignition on
and the vehicle stationary, press and
hold button 3 for at least four sec -
onds. Depending on the vehicle, the
message “lights OFF” appears on
the instrument panel.12
3
Page 85 of 213
see-me-home lighting ............................................ (current page)
lights: main beam headlights ...................................... (current page)
lights-on warning buzzer ........................................ (current page)
1.80
ENG_UD19079_1
Eclairage et signalisation extérieure (X61 - F61 - Renault)
ENG_NU_911-4_F61e_Renault_1
Jaune NoirNoir texte
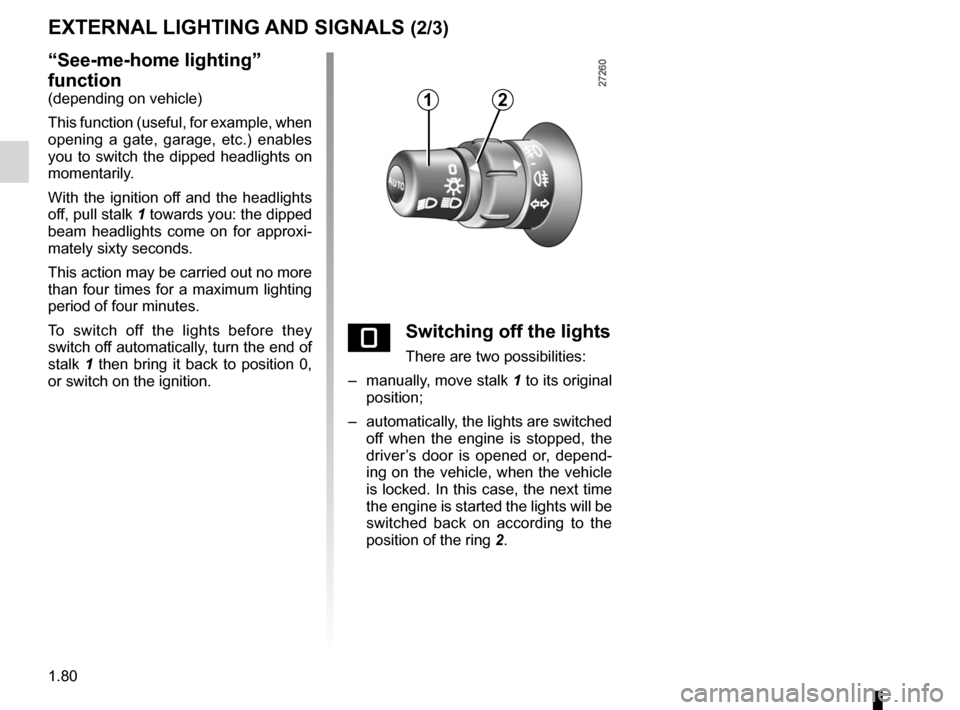
“See-me-home lighting”
function
(depending on vehicle)
This function (useful, for example, when
opening a gate, garage, etc.) enables
you to switch the dipped headlights on
momentarily.
With the ignition off and the headlights
off, pull stalk 1 towards you: the dipped
beam headlights come on for approxi -
mately sixty seconds.
This action may be carried out no more
than four times for a maximum lighting
period of four minutes.
To switch off the lights before they
switch off automatically, turn the end of
stalk 1 then bring it back to position 0,
or switch on the ignition.
eXterNAl lightiNg AND SigNAlS (2/3)
eSwitching off the lights
There are two possibilities:
– manually, move stalk 1 to its original
position;
– automatically, the lights are switched
off when the engine is stopped, the
driver’s door is opened or, depend -
ing on the vehicle, when the vehicle
is locked. In this case, the next time
the engine is started the lights will be
switched back on according to the
position of the ring 2.
12
Page 86 of 213
lights:fog lights .......................................................... (current page)
fog lights ................................................................ (current page)
JauneNoirNoir texte
1.81
ENG_UD19079_1
Eclairage et signalisation extérieure (X61 - F61 - Renault)
ENG_NU_911-4_F61e_Renault_1
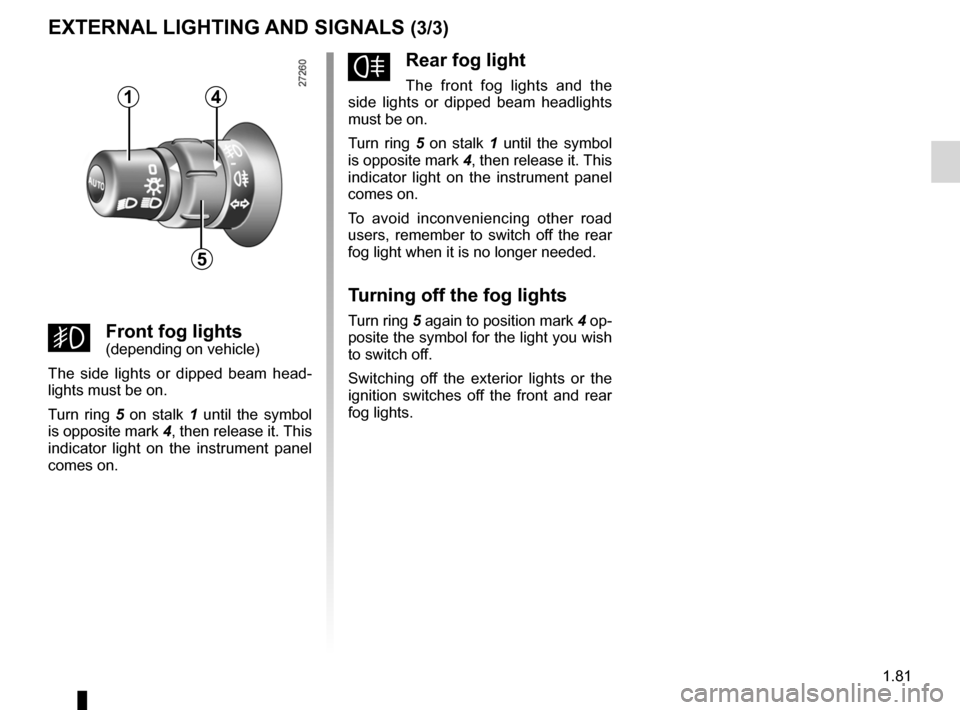
frear fog light
The front fog lights and the
side lights or dipped beam headlights
must be on.
Turn ring 5 on stalk 1 until the symbol
is opposite mark 4, then release it. This
indicator light on the instrument panel
comes on.
To avoid inconveniencing other road
users, remember to switch off the rear
fog light when it is no longer needed.
t urning off the fog lights
Turn ring 5 again to position mark 4 op-
posite the symbol for the light you wish
to switch off.
Switching off the exterior lights or the
ignition switches off the front and rear
fog lights.
gFront fog lights(depending on vehicle)
The side lights or dipped beam head -
lights must be on.
Turn ring 5 on stalk 1 until the symbol
is opposite mark 4, then release it. This
indicator light on the instrument panel
comes on.
eXterNAl lightiNg AND SigNAlS (3/3)
1
5
4
Page 87 of 213

headlight beam adjustment .................. (up to the end of the DU)
lights adjustment ...................................... (up to the end of the DU)
1.82
ENG_UD19080_1
Réglage électrique de la hauteur des faisceaux (X61 - F61 - Renau\
lt)
ENG_NU_911-4_F61e_Renault_1
Electric beam height adjustment
electricAl ADJUStmeNt OF the DiPPeD BeAm heADlightS
Control knob 1 is used to adjust the
height of the headlight beams accord -
ing to the load.
Turn control knob 1 downwards to
lower the headlights and upwards to
raise them.
Unladen, control knob 1 should be at 0.
When the vehicle is partially or com -
pletely laden, the headlight beam
should be set to light the road at be -
tween 50 and 100 metres. Then use
positions 1 to 4 on the control knob.
AB
100 m 50 m
A Poor adjustment: the lights are set
too high and could dazzle other
drivers. Turn the control knob
downwards to lower the beam.
B Good adjustment: the beam’s
maximum range is between 50
and 100 metres.
1
Page 88 of 213

windscreen washer ............................... (up to the end of the DU)
wipers ................................................... (up to the end of the DU)
1.83
ENG_UD19081_1
Essuie-vitre/lave-vitre avant (X61 - F61 - Renault)
ENG_NU_911-4_F61e_Renault_1
Wash/Wipe
Windscreen wiper
With the ignition on, move stalk 1 paral-
lel to the steering wheel:
A Park
B intermittent wiping
The wipers will pause for several
seconds between sweeps. It is
possible to change the time be -
tween sweeps by turning ring 2.
C Normal wiping speed
D Fast wiping speed
FrONt WiNDScreeN WASher/WiPer (1/2)
Special note
When the vehicle is being driven, the
wiping speed slows down whenever
the vehicle stops. For example, fast
wiping speed will slow to normal wiping
speed. As soon as the vehicle moves
off, wiping will return to the speed origi -
nally selected.
If stalk 1 is operated, it overrides and
cancels the automatic function.
If for any reason the wipers are
jammed (e.g. frozen to windscreen
by ice, etc.), the system will auto -
matically cut the power supply to
the wipers.
A
B
c
D
1
2
Automatic wiper function
(depending on vehicle)
With the engine running, move stalk 1.
A Park
B Automatic wiper function
When this position is selected, the
system detects the presence of
water on the windscreen and trig -
gers wiping at a suitable wiping
speed. The triggering threshold
and the time between sweeps can
be adjusted by turning ring 2.
NB: in foggy weather or during
snowfalls, the wiping is not automati-
cally triggered and remains under
the driver’s control.
C Normal wiping speed
D Fast wiping speed
Page 89 of 213
1.84
ENG_UD19081_1
Essuie-vitre/lave-vitre avant (X61 - F61 - Renault)
ENG_NU_911-4_F61e_Renault_1
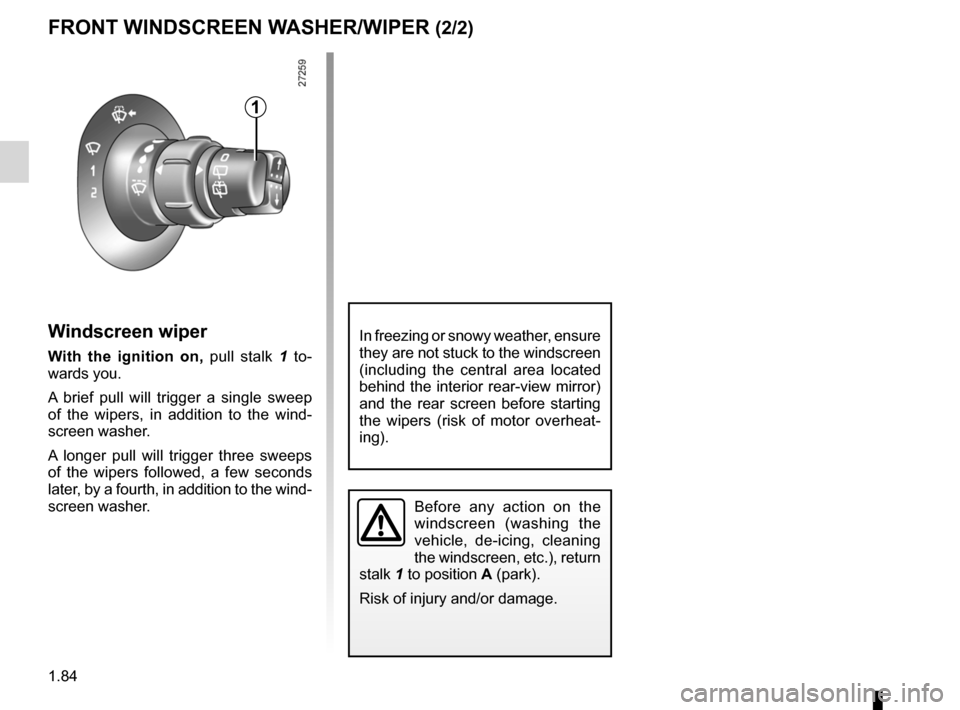
Windscreen wiper
With the ignition on, pull stalk 1 to -
wards you.
A brief pull will trigger a single sweep
of the wipers, in addition to the wind -
screen washer.
A longer pull will trigger three sweeps
of the wipers followed, a few seconds
later, by a fourth, in addition to the wind -
screen washer.
FrONt WiNDScreeN WASher/WiPer (2/2)
1
Before any action on the
windscreen (washing the
vehicle, de-icing, cleaning
the windscreen, etc.), return
stalk 1 to position A (park).
Risk of injury and/or damage.
In freezing or snowy weather, ensure
they are not stuck to the windscreen
(including the central area located
behind the interior rear-view mirror)
and the rear screen before starting
the wipers (risk of motor overheat -
ing).
Page 90 of 213
wipers ................................................... (up to the end of the DU)
windscreen washer ............................... (up to the end of the DU)
1.85
ENG_UD21467_2
Essuie-vitre/lave-vitre arrière (X61 - F61 - K61 - Renault)
ENG_NU_911-4_F61e_Renault_1
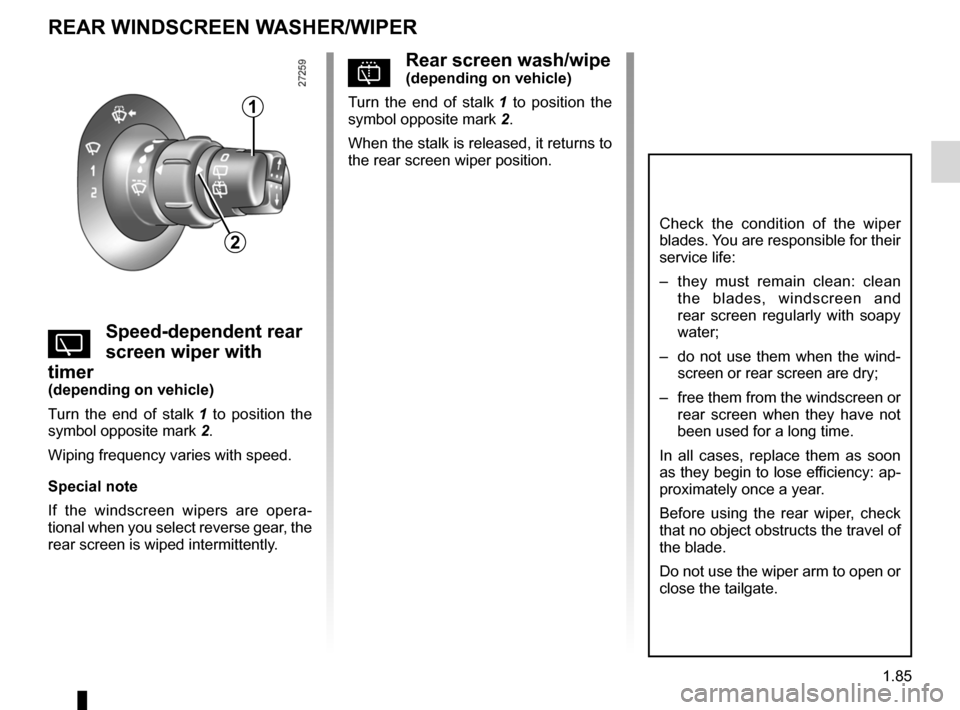
prear screen wash/wipe(depending on vehicle)
Turn the end of stalk 1 to position the
symbol opposite mark 2.
When the stalk is released, it returns to
the rear screen wiper position.
YSpeed-dependent rear
screen wiper with
timer
(depending on vehicle)
Turn the end of stalk 1 to position the
symbol opposite mark 2.
Wiping frequency varies with speed.
Special note
If the windscreen wipers are opera -
tional when you select reverse gear, the
rear screen is wiped intermittently.
reAr WiNDScreeN WASher/WiPer
1
2
Check the condition of the wiper
blades. You are responsible for their
service life:
– they must remain clean: clean
the blades, windscreen and
rear screen regularly with soapy
water;
– do not use them when the wind-
screen or rear screen are dry;
– free them from the windscreen or
rear screen when they have not
been used for a long time.
In all cases, replace them as soon
as they begin to lose efficiency: ap-
proximately once a year.
Before using the rear wiper, check
that no object obstructs the travel of
the blade.
Do not use the wiper arm to open or
close the tailgate.