RENAULT MEGANE 2005 X84 / 2.G Owners Manual
Manufacturer: RENAULT, Model Year: 2005, Model line: MEGANE, Model: RENAULT MEGANE 2005 X84 / 2.GPages: 250, PDF Size: 5.72 MB
Page 131 of 250
Downloaded from www.Manualslib.com manuals search engine
2
5
3
4
1
NU761_2_G2-FRA.qxd 4/11/05 10:48 Page 2.31
CRUISE CONTROL/SPEED LIMITER: cruise control function (continued)
Recalling the cruising speed
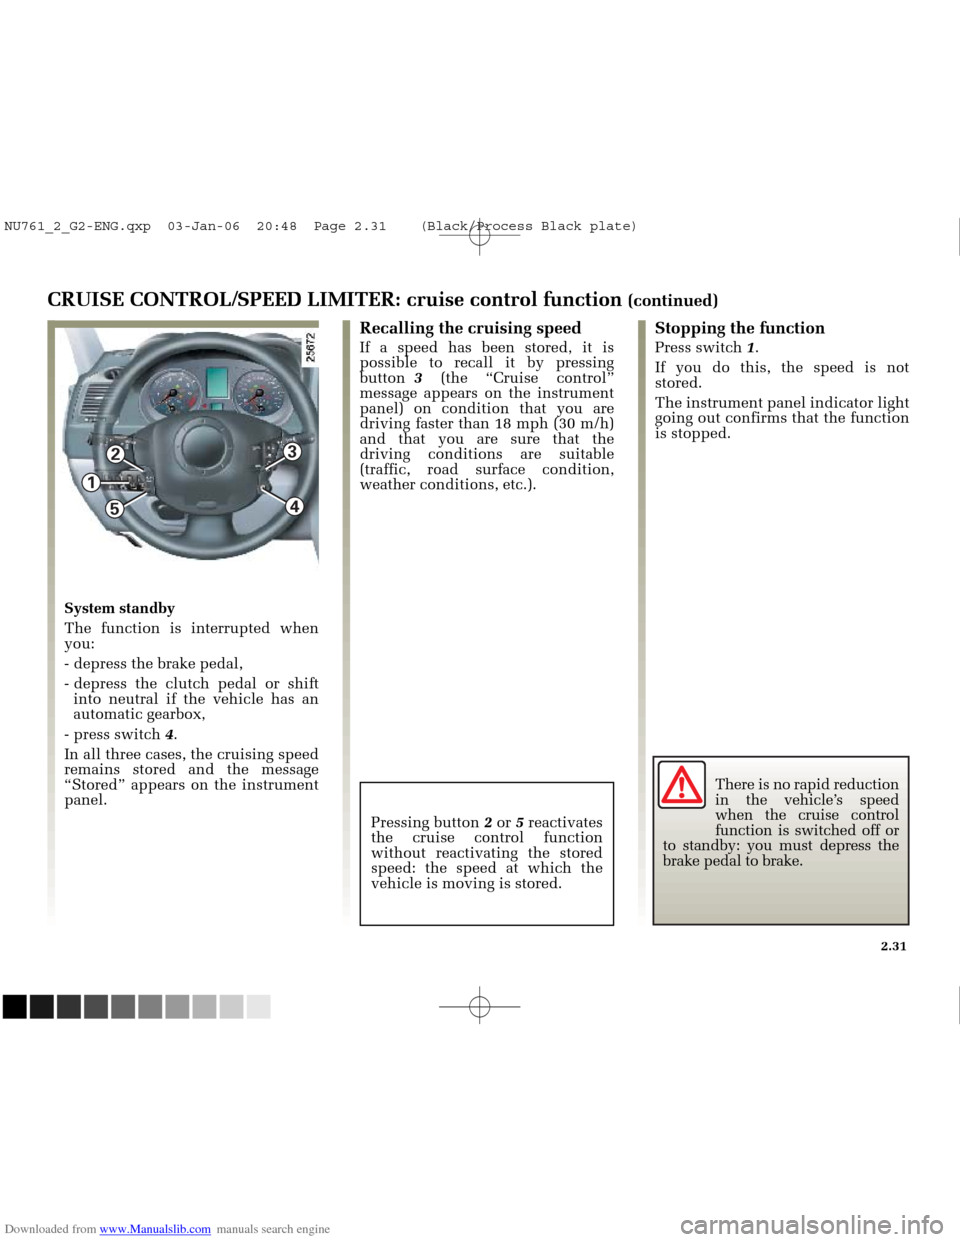
If a speed has been stored, it is
possible to recall it by pressing
button 3 (the “Cruise control”
message appears on the instrument
panel) on condition that you are
driving faster than 18 mph (30 m/h)
and that you are sure that the
driving conditions are suitable
(traffic, road surface condition,
weather conditions, etc.).
Stopping the function
Press switch 1.
If you do this, the speed is not
stored.
The instrument panel indicator light
going out confirms that the function
is stopped.
Pressing button 2or 5reactivates
the cruise control function
without reactivating the stored
speed: the speed at which the
vehicle is moving is stored.
System standby
The function is interrupted when
you:
- depress the brake pedal,
- depress the clutch pedal or shift into neutral if the vehicle has an
automatic gearbox,
- press switch 4.
In all three cases, the cruising speed
remains stored and the message
“Stored” appears on the instrument
panel.
2.31
There is no rapid reduction
in the vehicle’s speed
when the cruise control
function is switched off or
to standby: you must depress the
brake pedal to brake.
NU761_2_G2-ENG.qxp 03-Jan-06 20:48 Page 2.31 (Black/Process Black\
plate)
Page 132 of 250
Downloaded from www.Manualslib.com manuals search engine
NU761_2_G2-FRA.qxd 4/11/05 10:48 Page 2.32
2.32
PARKING PROXIMITY SENSOR
Operating faults
When the system detects an
operating fault there will be a 5
second continuous beep as a warning
when reverse gear is selected.
Contact your RENAULT Dealer.
Operating principle
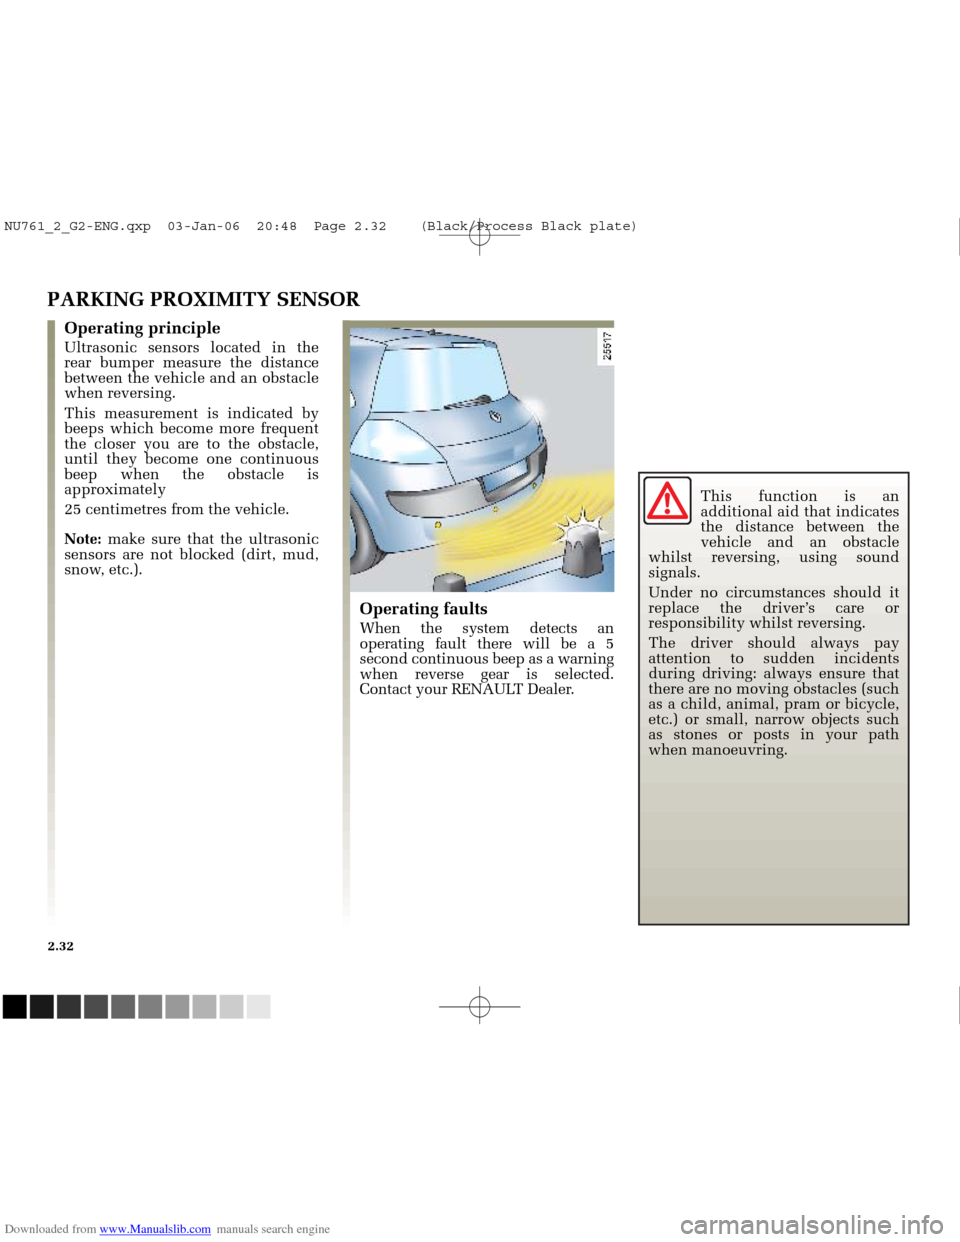
Ultrasonic sensors located in the
rear bumper measure the distance
between the vehicle and an obstacle
when reversing.
This measurement is indicated by
beeps which become more frequent
the closer you are to the obstacle,
until they become one continuous
beep when the obstacle is
approximately
25 centimetres from the vehicle.
Note:make sure that the ultrasonic
sensors are not blocked (dirt, mud,
snow, etc.). This function is an
additional aid that indicates
the distance between the
vehicle and an obstacle
whilst reversing, using sound
signals.
Under no circumstances should it
replace the driver’s care or
responsibility whilst reversing.
The driver should always pay
attention to sudden incidents
during driving: always ensure that
there are no moving obstacles (such
as a child, animal, pram or bicycle,
etc.) or small, narrow objects such
as stones or posts in your path
when manoeuvring.
NU761_2_G2-ENG.qxp 03-Jan-06 20:48 Page 2.32 (Black/Process Black\
plate)
Page 133 of 250
Downloaded from www.Manualslib.com manuals search engine
1
NU761_2_G2-FRA.qxd 4/11/05 10:48 Page 2.33
PARKING PROXIMITY SENSOR (continued)
Temporary deactivation of the
system
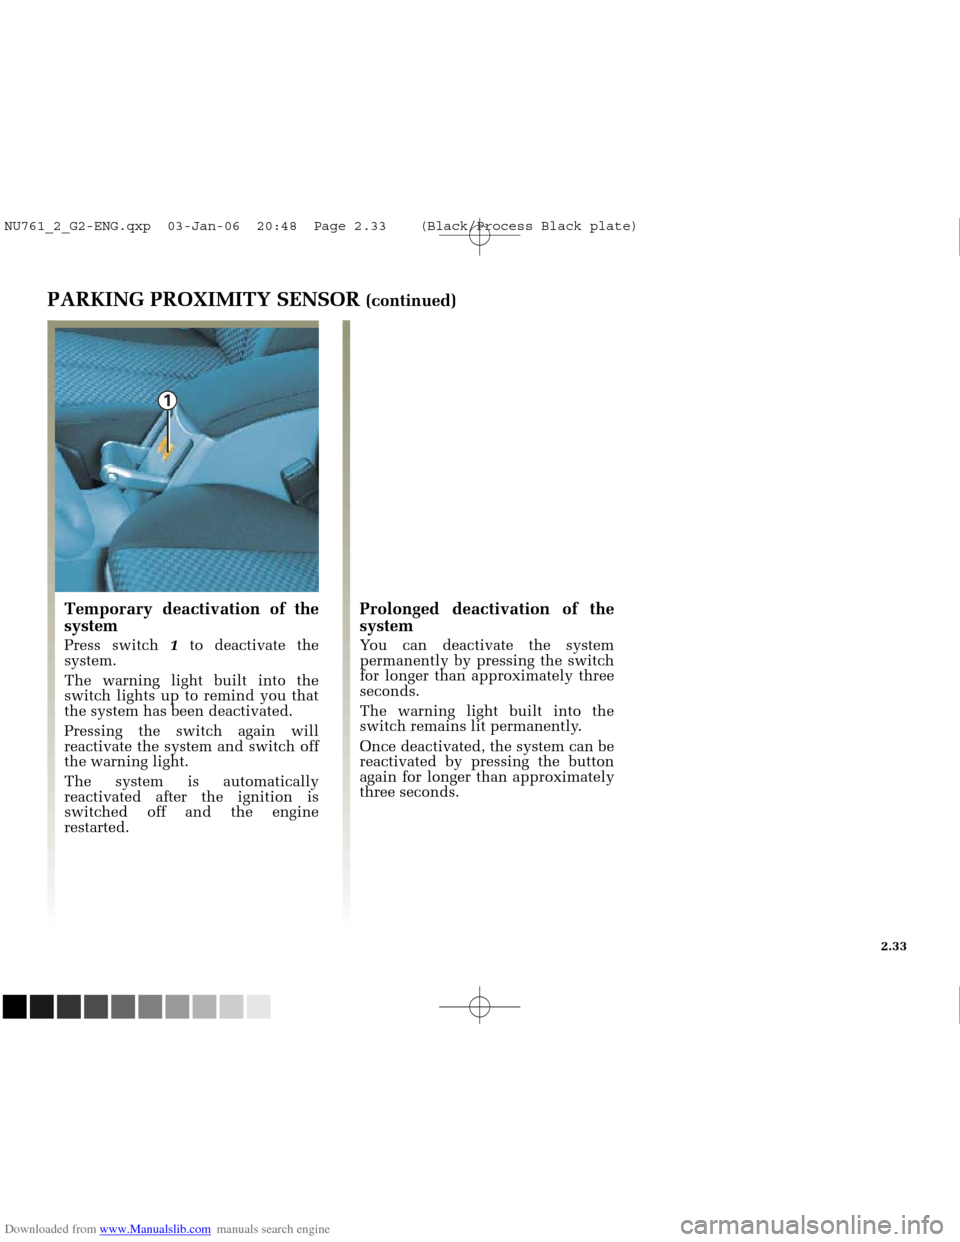
Press switch 1to deactivate the
system.
The warning light built into the
switch lights up to remind you that
the system has been deactivated.
Pressing the switch again will
reactivate the system and switch off
the warning light.
The system is automatically
reactivated after the ignition is
switched off and the engine
restarted.
Prolonged deactivation of the
system
You can deactivate the system
permanently by pressing the switch
for longer than approximately three
seconds.
The warning light built into the
switch remains lit permanently.
Once deactivated, the system can be
reactivated by pressing the button
again for longer than approximately
three seconds.
2.33
NU761_2_G2-ENG.qxp 03-Jan-06 20:48 Page 2.33 (Black/Process Black\
plate)
Page 134 of 250
Downloaded from www.Manualslib.com manuals search engine
1
1
NU761_2_G2-FRA.qxd 4/11/05 10:48 Page 2.34
2.34
AUTOMATIC GEARBOX
Operation
With the lever in position Por N,
switch on the ignition.
Foot on the brake pedal (the warning
light goes out), move the lever out of
position P.
Selector lever
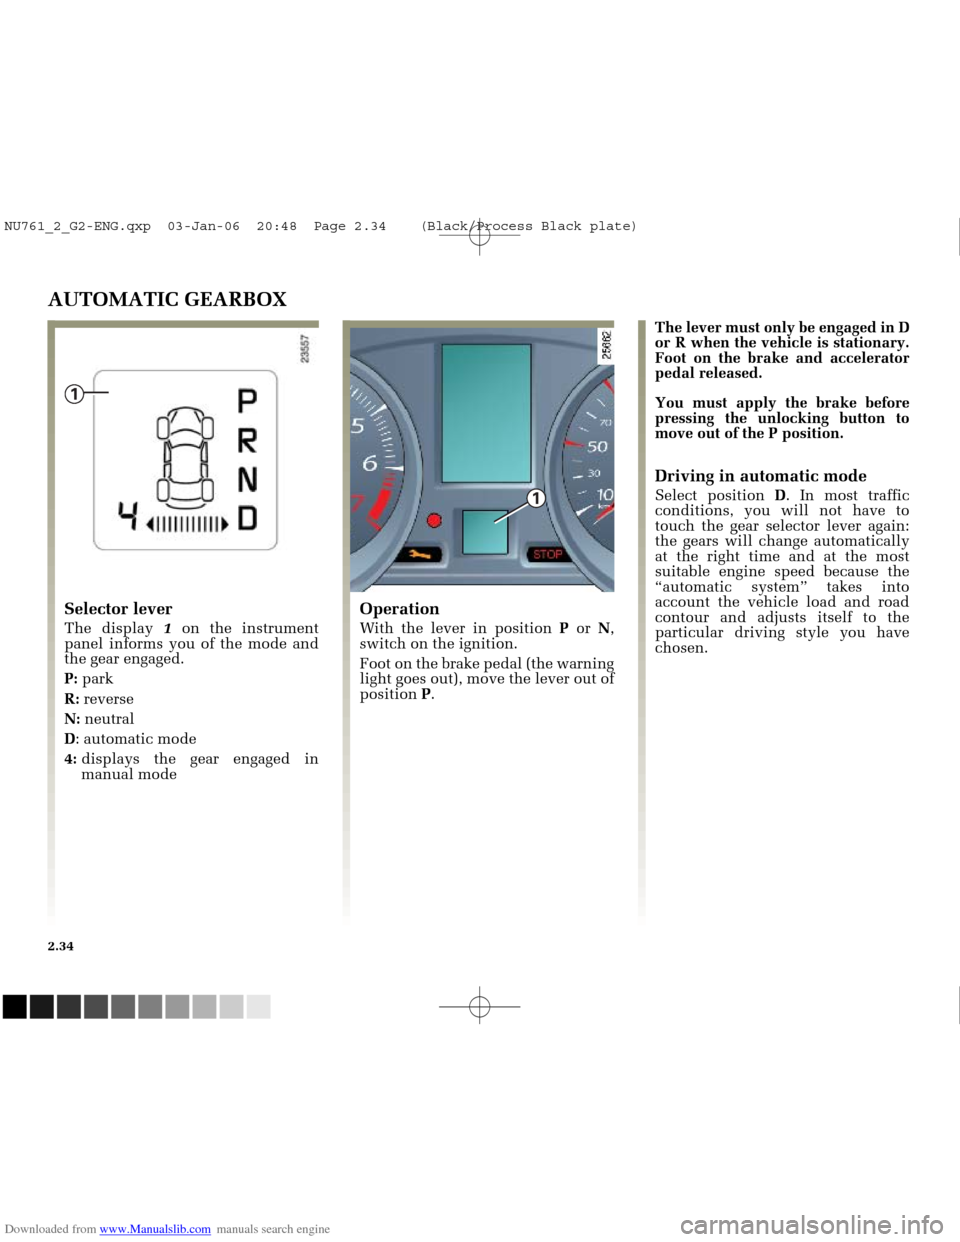
The display 1on the instrument
panel informs you of the mode and
the gear engaged.
P: park
R: reverse
N: neutral
D : automatic mode
4: displays the gear engaged in
manual mode The lever must only be engaged in D
or R when the vehicle is stationary.
Foot on the brake and accelerator
pedal released.
You must apply the brake before
pressing the unlocking button to
move out of the P position.
Driving in automatic mode
Select position
D. In most traffic
conditions, you will not have to
touch the gear selector lever again:
the gears will change automatically
at the right time and at the most
suitable engine speed because the
“automatic system” takes into
account the vehicle load and road
contour and adjusts itself to the
particular driving style you have
chosen.
NU761_2_G2-ENG.qxp 03-Jan-06 20:48 Page 2.34 (Black/Process Black\
plate)
Page 135 of 250
Downloaded from www.Manualslib.com manuals search engine
NU761_2_G2-FRA.qxd 4/11/05 10:48 Page 2.35
AUTOMATIC TRANSMISSION (continued)Driving in manual mode
With the selector lever in position D,
move the lever to the left.
Pushing the lever repeatedly allows
you to change gears manually.
- to move down through the gears, push the lever backwards.
- to move up through the gears, push the lever forwards.
The gear selected is displayed on the
instrument panel. Special cases
Under certain driving conditions
(e.g.: engine protection, with
electronic stability program (ESP)
operational: etc.) the “automatic
system” may change gear
automatically.
Likewise, to prevent “incorrect
manoeuvres”, a gear change may be
refused by the “automatic system”:
in this case the gear display flashes
for a few seconds as a warning.
How to drive as economically as
possible
Leave the selector in position
Don
the open road, depress the
accelerator pedal slightly to ensure
automatic gear changes at
comparatively low engine speeds.
Accelerating and overtaking
Depress the accelerator pedal
briskly and fully (so that it goes
beyond the kickdown point).
This will enable you to change
down to the optimal gear within the
engine range.
2.35
NU761_2_G2-ENG.qxp 03-Jan-06 20:48 Page 2.35 (Black/Process Black\
plate)
Page 136 of 250
Downloaded from www.Manualslib.com manuals search engine
NU761_2_G2-FRA.qxd 4/11/05 10:48 Page 2.36
2.36
AUTOMATIC TRANSMISSION (continued)Parking the vehicle
When the vehicle is stationary,
keeping your foot on the brake
pedal, move the lever to position P
(park): the gearbox is in neutral and
the drive wheels are mechanically
locked by the transmission.
Engage the handbrake.
Special circumstances
- If the bends and hills on the road
do not allow you to stay in
automatic mode (e.g.: in the
mountains), we recommend that
you change to manual mode.
This will prevent the automatic
transmission from changing gears
repeatedly when climbing, and
permit engine braking on long
descents.
- To prevent the engine stalling in
cold weather, start the engine and
wait a few seconds before shifting
the selector lever from position P
or Nand engaging it in Dor R.
- Vehicles not fitted with traction
control: on a slippery surface or
surface with a low level of
adhesion, change to manual mode
and select second gear (or even
third) before starting the engine to
avoid wheelspin when starting.
NU761_2_G2-ENG.qxp 03-Jan-06 20:48 Page 2.36 (Black/Process Black\
plate)
Page 137 of 250
Downloaded from www.Manualslib.com manuals search engine
NU761_2_G2-FRA.qxd 4/11/05 10:49 Page 2.37
AUTOMATIC TRANSMISSION (continued)
Operating faults
- when driving , if the message
“Check gearbox” along with the
warning light appears on the
instrument panel, this indicates a
fault.
Consult your RENAULT Dealer as
soon as possible.
- when driving , if the message
“Gearbox overheating” along with
the warning light appears on
the instrument panel, avoid leaving
the lever in position D(or R), traffic
permitting: systematically return to
position Nwhile stopping.
Consult your RENAULT Dealer as
soon as possible.
- Recovering a vehicle with an
automatic transmission : refer to
the information on Towing in
Section 5.
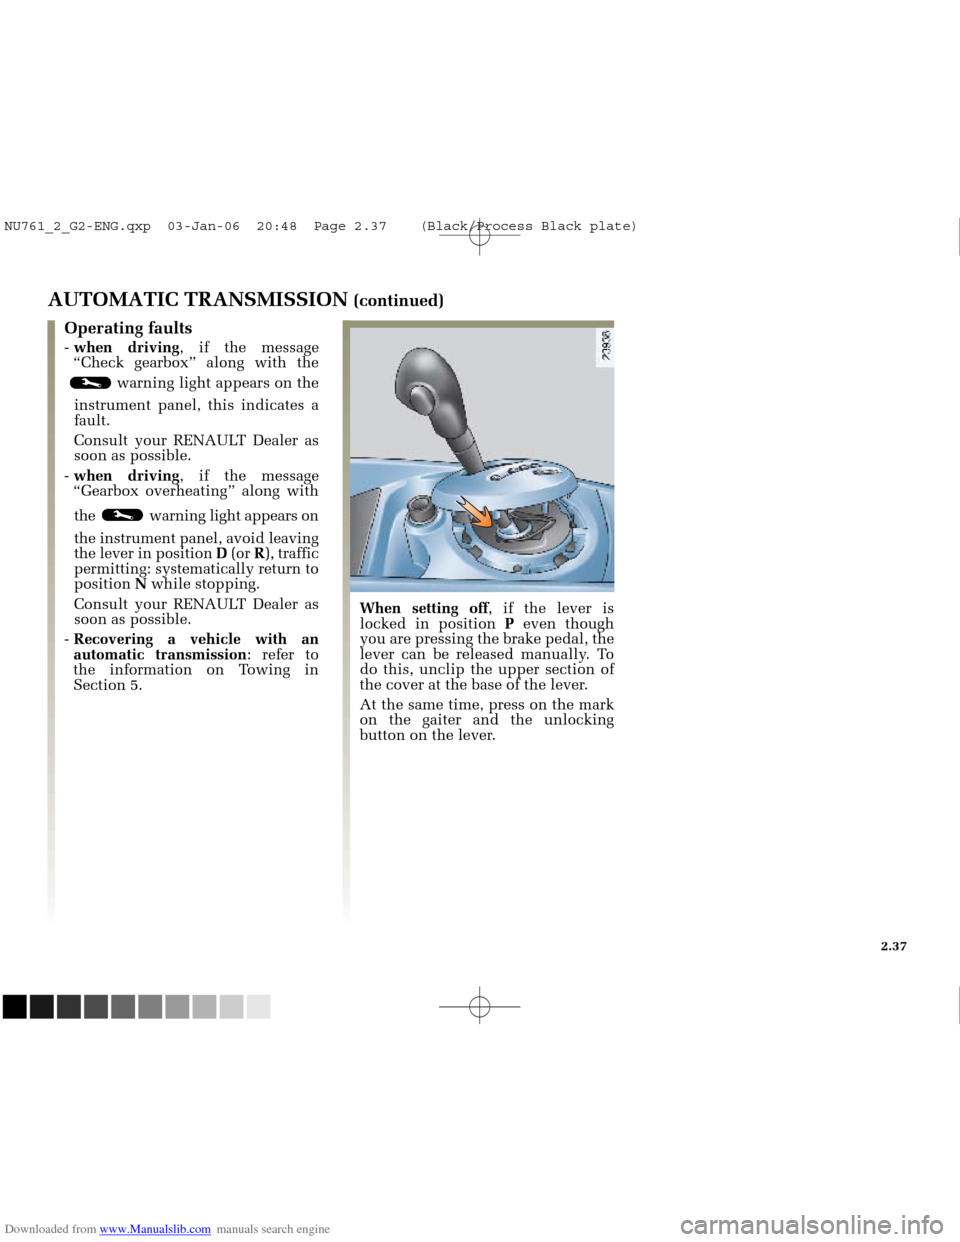
When setting off , if the lever is
locked in position Peven though
you are pressing the brake pedal, the
lever can be released manually. To
do this, unclip the upper section of
the cover at the base of the lever.
At the same time, press on the mark
on the gaiter and the unlocking
button on the lever.
2.37
NU761_2_G2-ENG.qxp 03-Jan-06 20:48 Page 2.37 (Black/Process Black\
plate)
Page 138 of 250
Downloaded from www.Manualslib.com manuals search engine
NU761_2_G2-FRA.qxd 4/11/05 10:49 Page 2.38
2.38
NU761_2_G2-ENG.qxp 03-Jan-06 20:48 Page 2.38 (Black/Process Black\
plate)
Page 139 of 250
Downloaded from www.Manualslib.com manuals search engine
NU761_2_G3-FRA.qxd 4/11/05 10:50 Page 3.01
Section 3: Your comfort
Air vents ........................................................................\
..........................................................................................3.02 - 3.03
Heating and air conditioning
........................................................................\
....................................................3.04 ➟3.16
Electric windows
........................................................................\
....................................................... ..................3.17 ➟3.20
Windscreen
........................................................................\
....................................................... .........................................3.20
Sun visor
........................................................................\
....................................................... ..............................................3.21
Electric sunroof
........................................................................\
....................................................... .......................3.22 - 3.23
Interior lighting
........................................................................\
....................................................... ..................................3.24
Storage compartments/passenger compartment fittings
........................................................................\
.....3.25 ➟3.28
Ashtrays/Cigarette lighter
........................................................................\
....................................................... ................3.29
Rear bench seat
........................................................................\
....................................................... ..................................3.30
Luggage compartment
........................................................................\
....................................................... .......................3.31
Rear parcel shelf
........................................................................\
....................................................... ..................................3.32
Storage compartments/luggage compartment fittings
........................................................................\
......................3.33
Transporting items in the luggage compartment
........................................................................\
...............................3.34
Roof rack
........................................................................\
....................................................... ..............................................3.35
3.01
NU761_2_G3-ENG.qxp 1/5/2006 5:28 PM Page 3.01 (Black plate)
Page 140 of 250
Downloaded from www.Manualslib.com manuals search engine
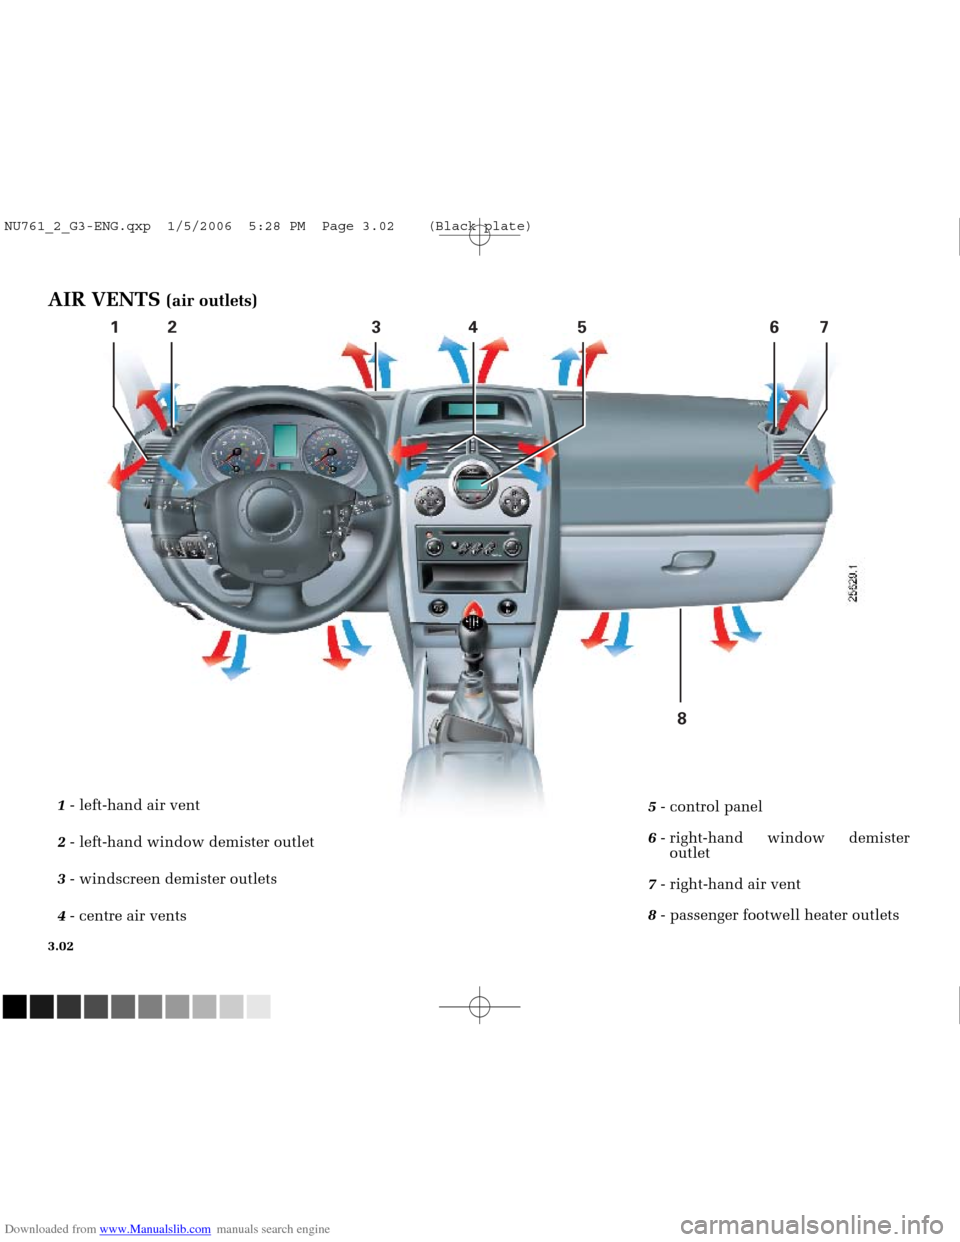
12 3 4 5 678
NU761_2_G3-FRA.qxd 4/11/05 10:50 Page 3.02
3.02
AIR VENTS (air outlets)
1- left-hand air vent
2 - left-hand window demister outlet
3 - windscreen demister outlets
4 - centre air vents 5
- control panel
6 - right-hand window demister
outlet
7 - right-hand air vent
8 - passenger footwell heater outlets
NU761_2_G3-ENG.qxp 1/5/2006 5:28 PM Page 3.02 (Black plate)