RENAULT MEGANE 2005 X84 / 2.G Owners Manual
Manufacturer: RENAULT, Model Year: 2005, Model line: MEGANE, Model: RENAULT MEGANE 2005 X84 / 2.GPages: 250, PDF Size: 5.72 MB
Page 91 of 250
Downloaded from www.Manualslib.com manuals search engine
1
2
0
NU761_2_G1-FRA.qxd 10/11/05 15:55 Page 1.81
1.81
THE HORN AND HAZARD LIGHTS
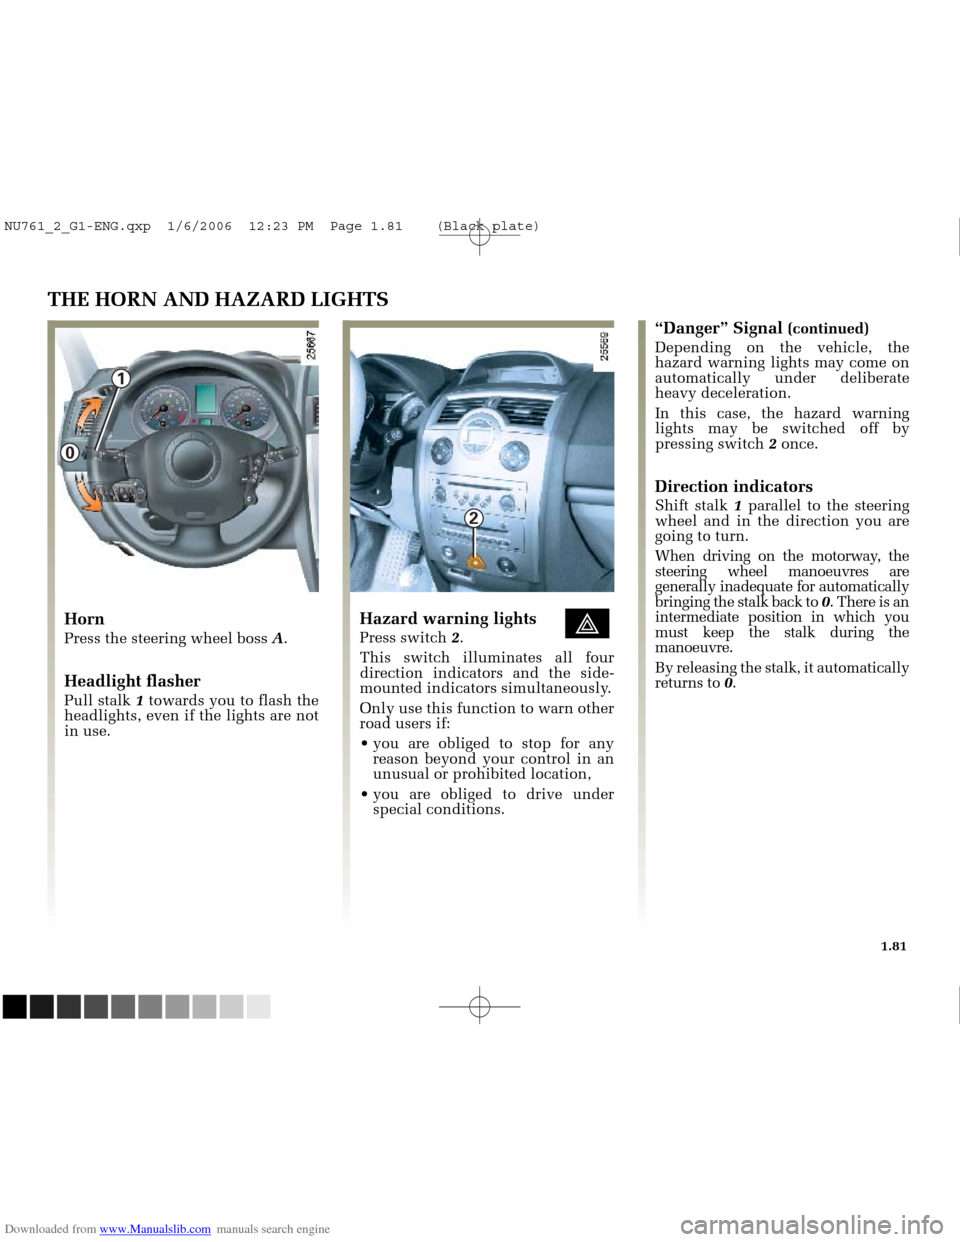
Horn
Press the steering wheel boss A.
Headlight flasher
Pull stalk 1towards you to flash the
headlights, even if the lights are not
in use.
Hazard warning lights éPress switch 2.
This switch illuminates all four
direction indicators and the side-
mounted indicators simultaneously.
Only use this function to warn other
road users if:
you are obliged to stop for any reason beyond your control in an
unusual or prohibited location,
you are obliged to drive under special conditions.
“Danger” Signal (continued)
Depending on the vehicle, the
hazard warning lights may come on
automatically under deliberate
heavy deceleration.
In this case, the hazard warning
lights may be switched off by
pressing switch 2once.
Direction indicators
Shift stalk 1parallel to the steering
wheel and in the direction you are
going to turn.
When driving on the motorway, the
steering wheel manoeuvres are
generally inadequate for automatically
bringing the stalk back to 0. There is an
intermediate position in which you
must keep the stalk during the
manoeuvre.
By releasing the stalk, it automatically
returns to 0.
NU761_2_G1-ENG.qxp 1/6/2006 12:23 PM Page 1.81 (Black plate)
Page 92 of 250
Downloaded from www.Manualslib.com manuals search engine
1
4
1
3
2
NU761_2_G1-FRA.qxd 10/11/05 15:55 Page 1.82
1.82
EXTERIOR LIGHTING AND SIGNALS
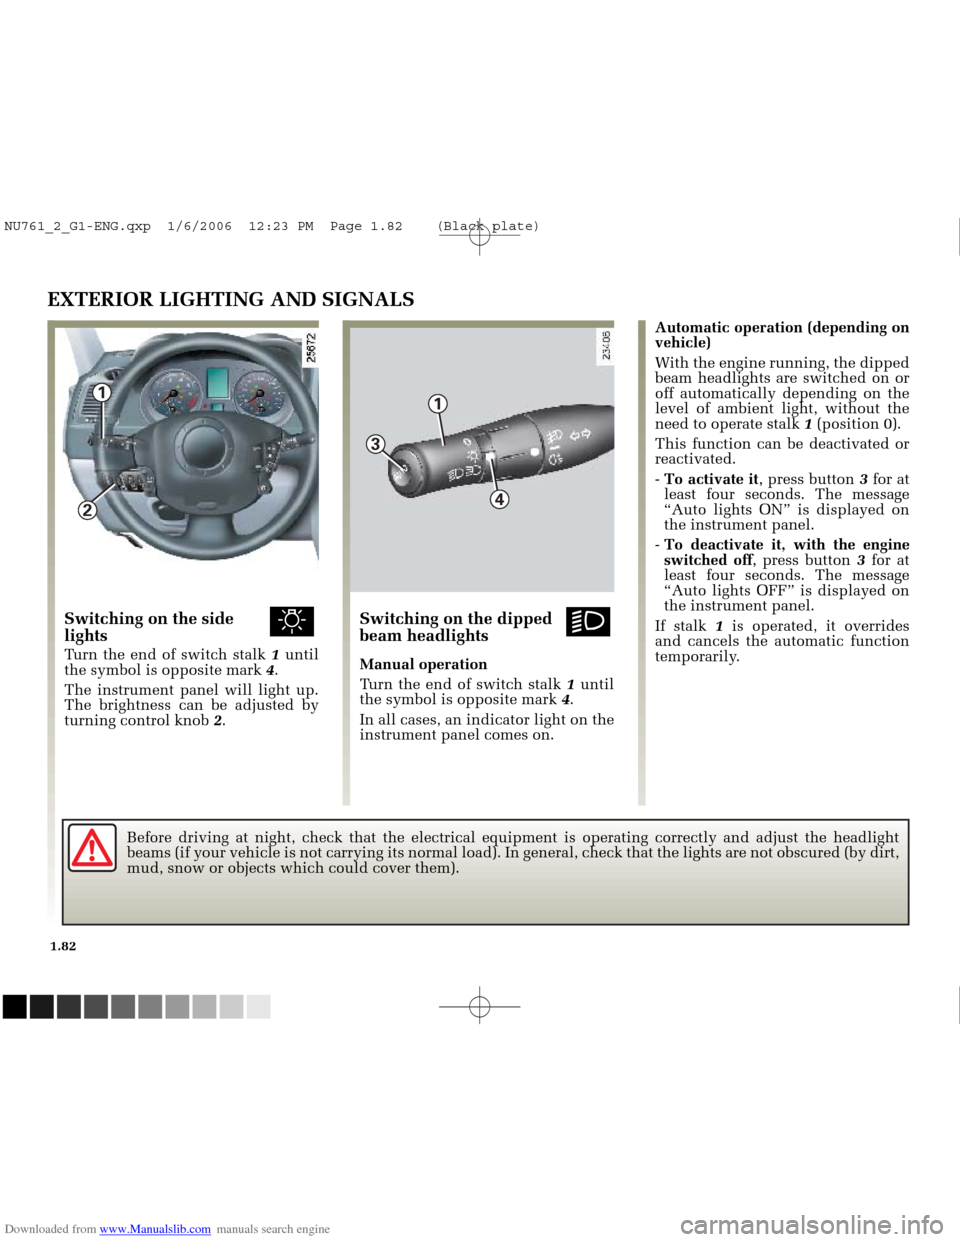
Switching on the side ulights
Turn the end of switch stalk 1until
the symbol is opposite mark 4.
The instrument panel will light up.
The brightness can be adjusted by
turning control knob 2.
Switching on the dipped kbeam headlights
Manual operation
Turn the end of switch stalk 1until
the symbol is opposite mark 4.
In all cases, an indicator light on the
instrument panel comes on. Automatic operation (depending on
vehicle)
With the engine running, the dipped
beam headlights are switched on or
off automatically depending on the
level of ambient light, without the
need to operate stalk
1(position 0).
This function can be deactivated or
reactivated.
- To activate it , press button 3for at
least four seconds. The message
“Auto lights ON” is displayed on
the instrument panel.
- To deactivate it, with the engine
switched off , press button 3for at
least four seconds. The message
“Auto lights OFF” is displayed on
the instrument panel.
If stalk 1is operated, it overrides
and cancels the automatic function
temporarily.
Before driving at night, check that the electrical equipment is operatin\
g correctly and adjust the headlight
beams (if your vehicle is not carrying its normal load). In general, c\
heck that the lights are not obscured (by dirt,
mud, snow or objects which could cover them).
NU761_2_G1-ENG.qxp 1/6/2006 12:23 PM Page 1.82 (Black plate)
Page 93 of 250
Downloaded from www.Manualslib.com manuals search engine
1
NU761_2_G1-FRA.qxd 10/11/05 15:55 Page 1.83
1.83
EXTERIOR LIGHTING AND SIGNALS (continued)Switching off the lights
Manual operation
There are two possibilities:
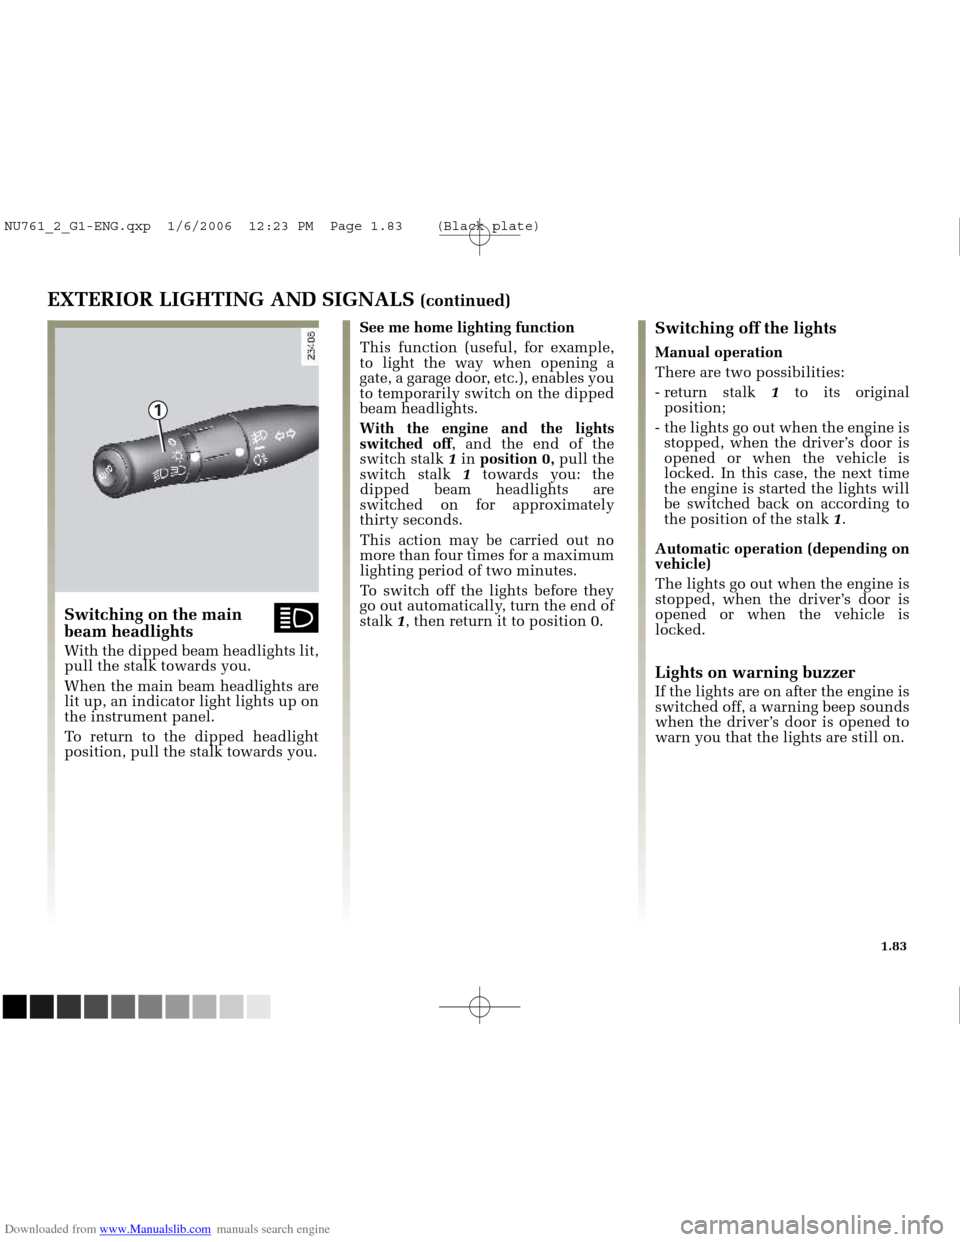
- return stalk 1to its original
position;
- the lights go out when the engine is stopped, when the driver’s door is
opened or when the vehicle is
locked. In this case, the next time
the engine is started the lights will
be switched back on according to
the position of the stalk 1.
Automatic operation (depending on
vehicle)
The lights go out when the engine is
stopped, when the driver’s door is
opened or when the vehicle is
locked.
Lights on warning buzzer
If the lights are on after the engine is
switched off, a warning beep sounds
when the driver’s door is opened to
warn you that the lights are still on.
See me home lighting function
This function (useful, for example,
to light the way when opening a
gate, a garage door, etc.), enables you
to temporarily switch on the dipped
beam headlights.
With the engine and the lights
switched off
, and the end of the
switch stalk 1 in position 0, pull the
switch stalk 1towards you: the
dipped beam headlights are
switched on for approximately
thirty seconds.
This action may be carried out no
more than four times for a maximum
lighting period of two minutes.
To switch off the lights before they
go out automatically, turn the end of
stalk 1, then return it to position 0.
Switching on the main ábeam headlights
With the dipped beam headlights lit,
pull the stalk towards you.
When the main beam headlights are
lit up, an indicator light lights up on
the instrument panel.
To return to the dipped headlight
position, pull the stalk towards you.
NU761_2_G1-ENG.qxp 1/6/2006 12:23 PM Page 1.83 (Black plate)
Page 94 of 250
Downloaded from www.Manualslib.com manuals search engine
5
6
NU761_2_G1-FRA.qxd 10/11/05 15:55 Page 1.84
1.84
EXTERIOR LIGHTING AND SIGNALS (continued)
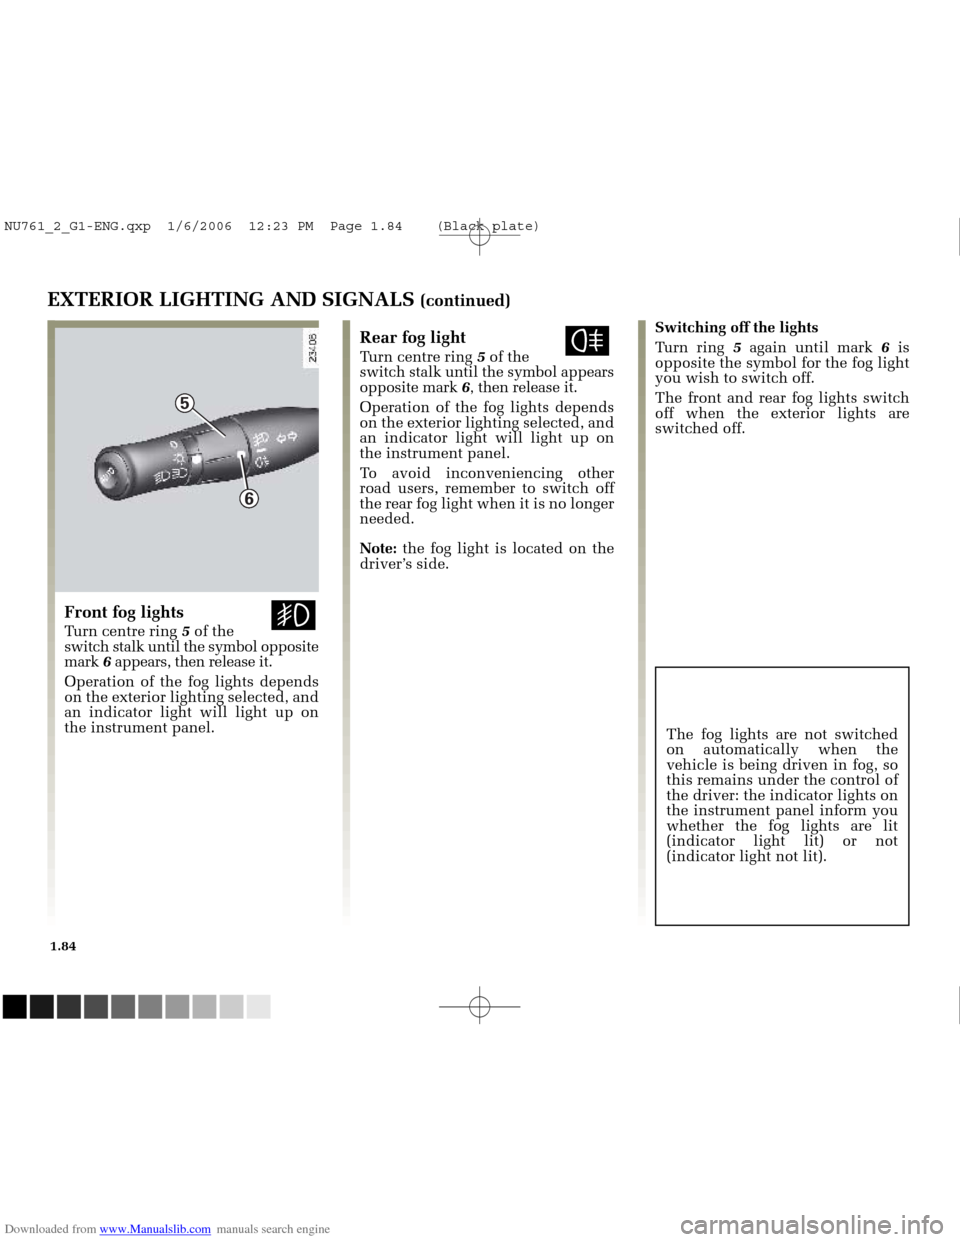
Switching off the lights
Turn ring 5again until mark 6is
opposite the symbol for the fog light
you wish to switch off.
The front and rear fog lights switch
off when the exterior lights are
switched off.Rear fog light fTurn centre ring 5 of the
switch stalk until the symbol appears
opposite mark 6, then release it.
Operation of the fog lights depends
on the exterior lighting selected, and
an indicator light will light up on
the instrument panel.
To avoid inconveniencing other
road users, remember to switch off
the rear fog light when it is no longer
needed.
Note: the fog light is located on the
driver’s side.
Front fog lights gTurn centre ring 5 of the
switch stalk until the symbol opposite
mark 6appears, then release it.
Operation of the fog lights depends
on the exterior lighting selected, and
an indicator light will light up on
the instrument panel. The fog lights are not switched
on automatically when the
vehicle is being driven in fog, so
this remains under the control of
the driver: the indicator lights on
the instrument panel inform you
whether the fog lights are lit
(indicator light lit) or not
(indicator light not lit).
NU761_2_G1-ENG.qxp 1/6/2006 12:23 PM Page 1.84 (Black plate)
Page 95 of 250
Downloaded from www.Manualslib.com manuals search engine
A
NU761_2_G1-FRA.qxd 10/11/05 15:55 Page 1.85
1.85
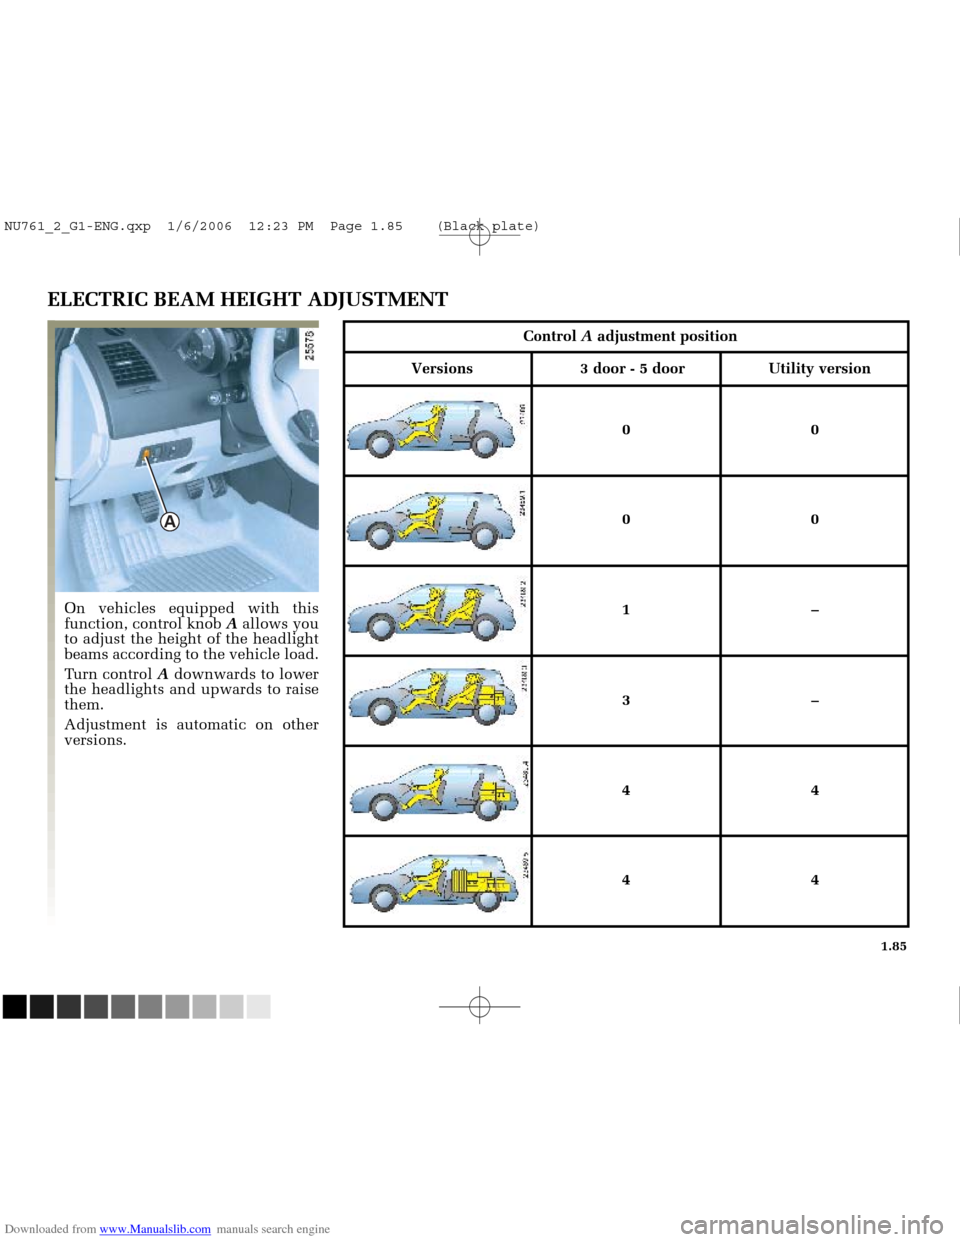
ELECTRIC BEAM HEIGHT ADJUSTMENT
On vehicles equipped with this
function, control knob Aallows you
to adjust the height of the headlight
beams according to the vehicle load.
Turn control Adownwards to lower
the headlights and upwards to raise
them.
Adjustment is automatic on other
versions.
Control Aadjustment position
Versions 3 door - 5 door Utility version
00
00
1–
3–
44
44
NU761_2_G1-ENG.qxp 1/6/2006 12:23 PM Page 1.85 (Black plate)
Page 96 of 250
Downloaded from www.Manualslib.com manuals search engine
1
C
B
A
1
2
D
NU761_2_G1-FRA.qxd 10/11/05 15:55 Page 1.86
1.86
WINDSCREEN WASH/WIPE
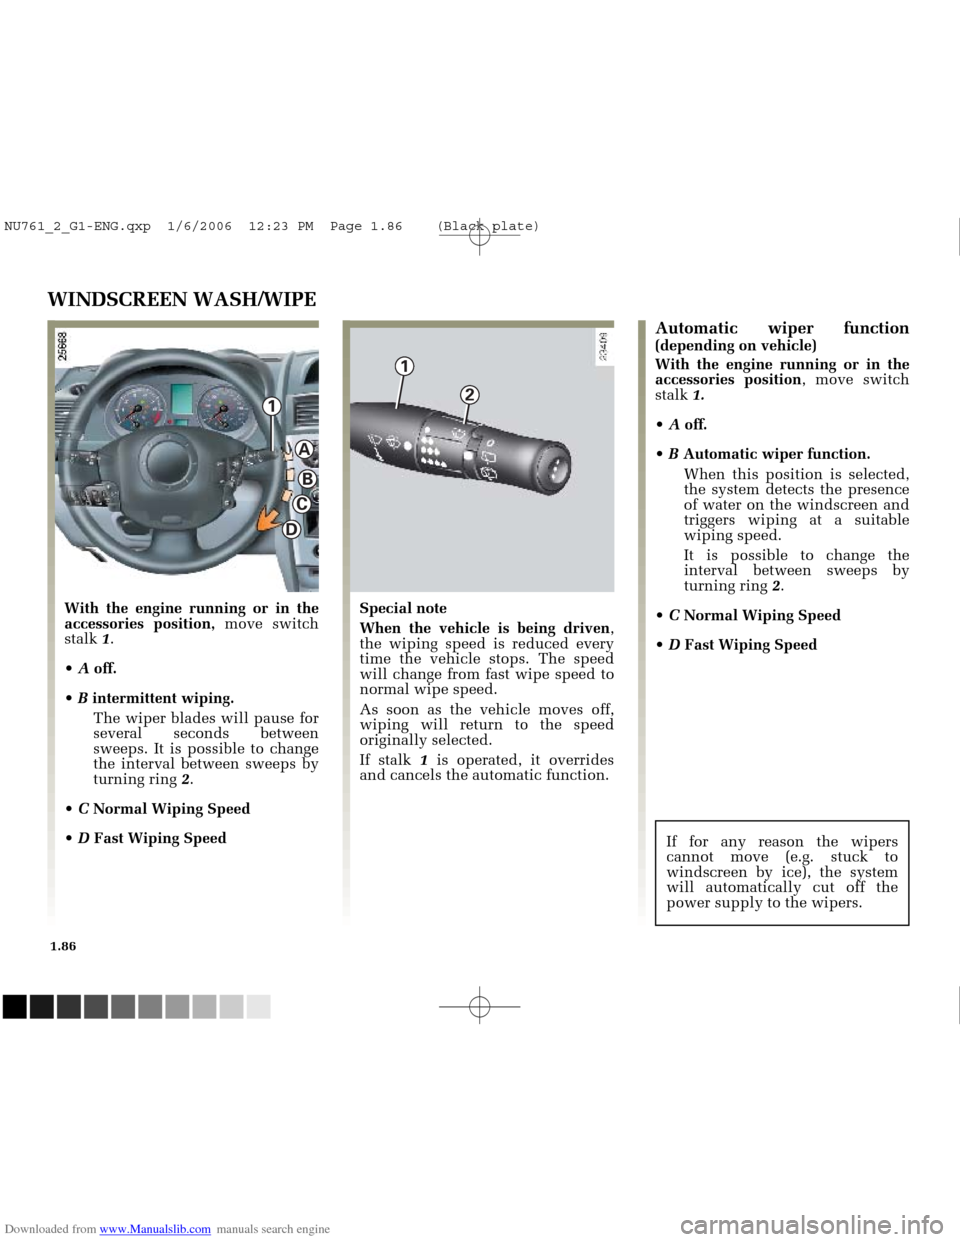
With the engine running or in the
accessories position,move switch
stalk 1.
A off.
B intermittent wiping.
The wiper blades will pause for
several seconds between
sweeps. It is possible to change
the interval between sweeps by
turning ring 2.
C Normal Wiping Speed
D Fast Wiping Speed Special note
When the vehicle is being driven
,
the wiping speed is reduced every
time the vehicle stops. The speed
will change from fast wipe speed to
normal wipe speed.
As soon as the vehicle moves off,
wiping will return to the speed
originally selected.
If stalk 1is operated, it overrides
and cancels the automatic function.
Automatic wiper function(depending on vehicle)
With the engine running or in the
accessories position , move switch
stalk 1.
A off.
B Automatic wiper function.
When this position is selected,
the system detects the presence
of water on the windscreen and
triggers wiping at a suitable
wiping speed.
It is possible to change the
interval between sweeps by
turning ring 2.
C Normal Wiping Speed
D Fast Wiping Speed
If for any reason the wipers
cannot move (e.g. stuck to
windscreen by ice), the system
will automatically cut off the
power supply to the wipers.
NU761_2_G1-ENG.qxp 1/6/2006 12:23 PM Page 1.86 (Black plate)
Page 97 of 250
Downloaded from www.Manualslib.com manuals search engine
1
1
C
B
A
D
NU761_2_G1-FRA.qxd 10/11/05 15:55 Page 1.87
1.87
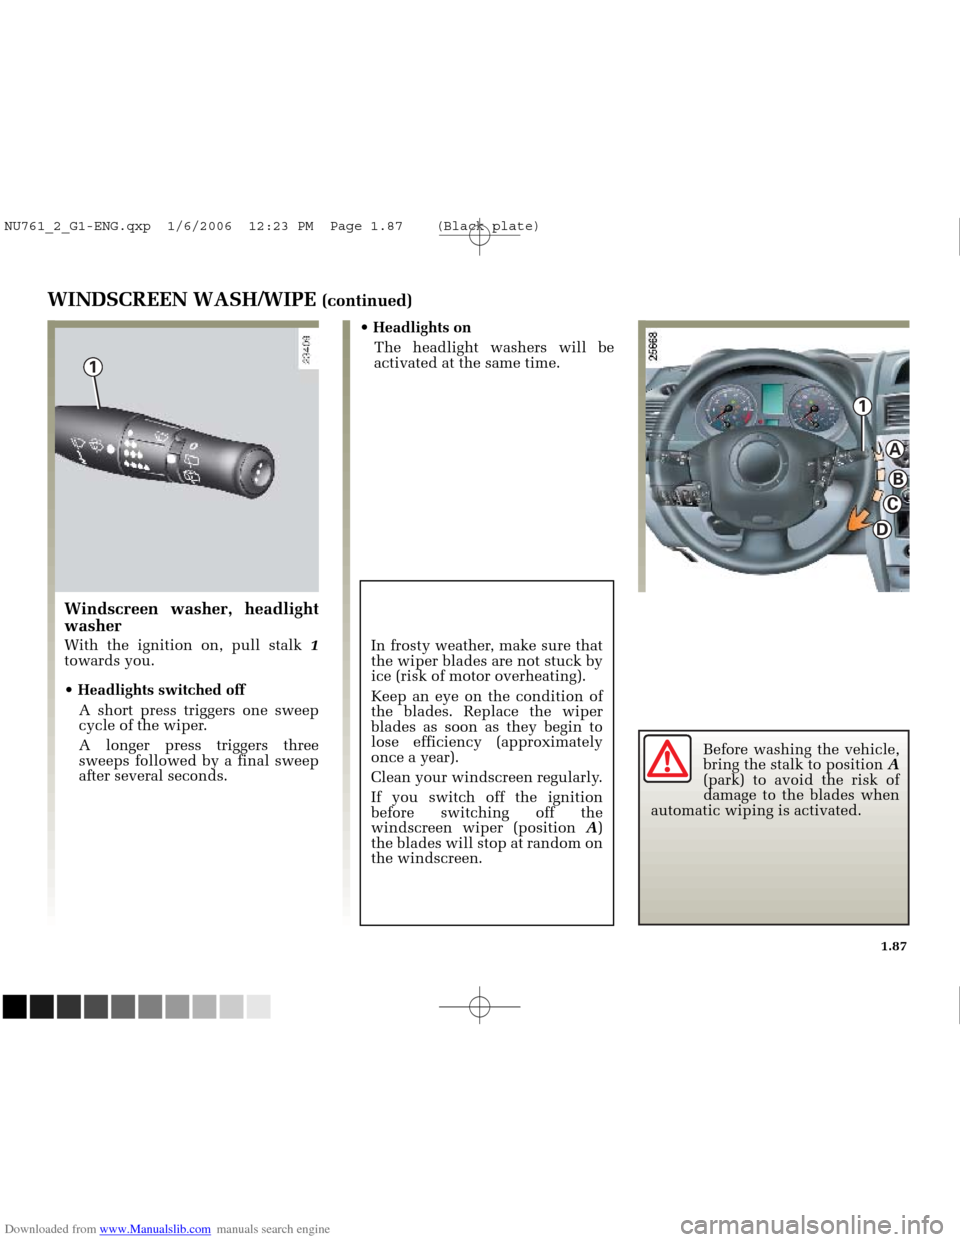
Before washing the vehicle,
bring the stalk to position A
(park) to avoid the risk of
damage to the blades when
automatic wiping is activated.
WINDSCREEN WASH/WIPE (continued)
In frosty weather, make sure that
the wiper blades are not stuck by
ice (risk of motor overheating).
Keep an eye on the condition of
the blades. Replace the wiper
blades as soon as they begin to
lose efficiency (approximately
once a year).
Clean your windscreen regularly.
If you switch off the ignition
before switching off the
windscreen wiper (position A)
the blades will stop at random on
the windscreen.
Windscreen washer, headlight
washer
With the ignition on, pull stalk 1
towards you.
Headlights switched off
A short press triggers one sweep
cycle of the wiper.
A longer press triggers three
sweeps followed by a final sweep
after several seconds. Headlights on
The headlight washers will be
activated at the same time.
NU761_2_G1-ENG.qxp 1/6/2006 12:23 PM Page 1.87 (Black plate)
Page 98 of 250
Downloaded from www.Manualslib.com manuals search engine
1
2
NU761_2_G1-FRA.qxd 10/11/05 15:55 Page 1.88
1.88
REAR SCREEN WASHER/WIPER
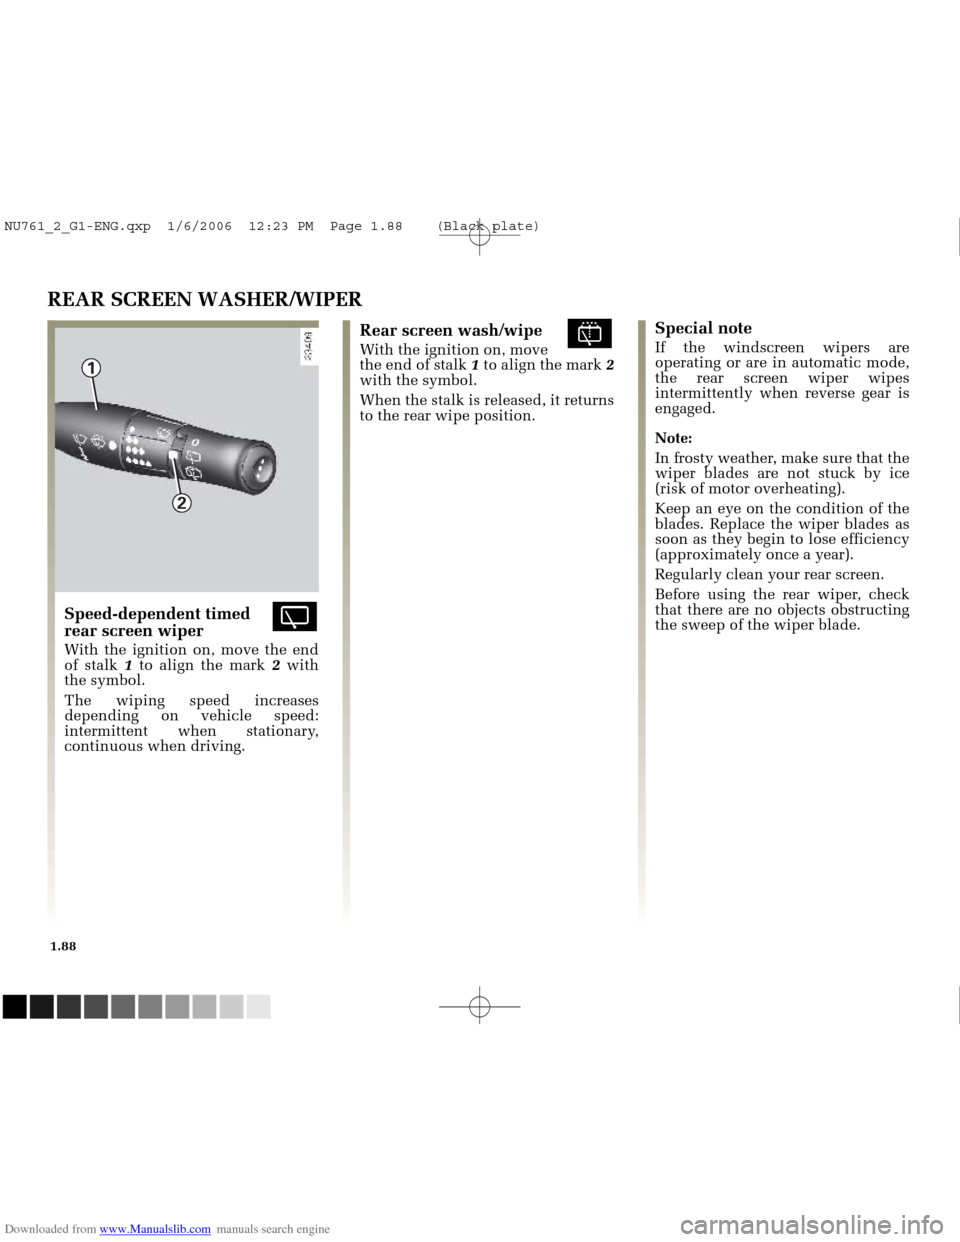
Speed-dependent timed erear screen wiper
With the ignition on, move the end
of stalk 1to align the mark 2with
the symbol.
The wiping speed increases
depending on vehicle speed:
intermittent when stationary,
continuous when driving.
Rear screen wash/wipe jWith the ignition on, move
the end of stalk 1to align the mark 2
with the symbol.
When the stalk is released, it returns
to the rear wipe position.
Special note
If the windscreen wipers are
operating or are in automatic mode,
the rear screen wiper wipes
intermittently when reverse gear is
engaged.
Note:
In frosty weather, make sure that the
wiper blades are not stuck by ice
(risk of motor overheating).
Keep an eye on the condition of the
blades. Replace the wiper blades as
soon as they begin to lose efficiency
(approximately once a year).
Regularly clean your rear screen.
Before using the rear wiper, check
that there are no objects obstructing
the sweep of the wiper blade.
NU761_2_G1-ENG.qxp 1/6/2006 12:23 PM Page 1.88 (Black plate)
Page 99 of 250
Downloaded from www.Manualslib.com manuals search engine
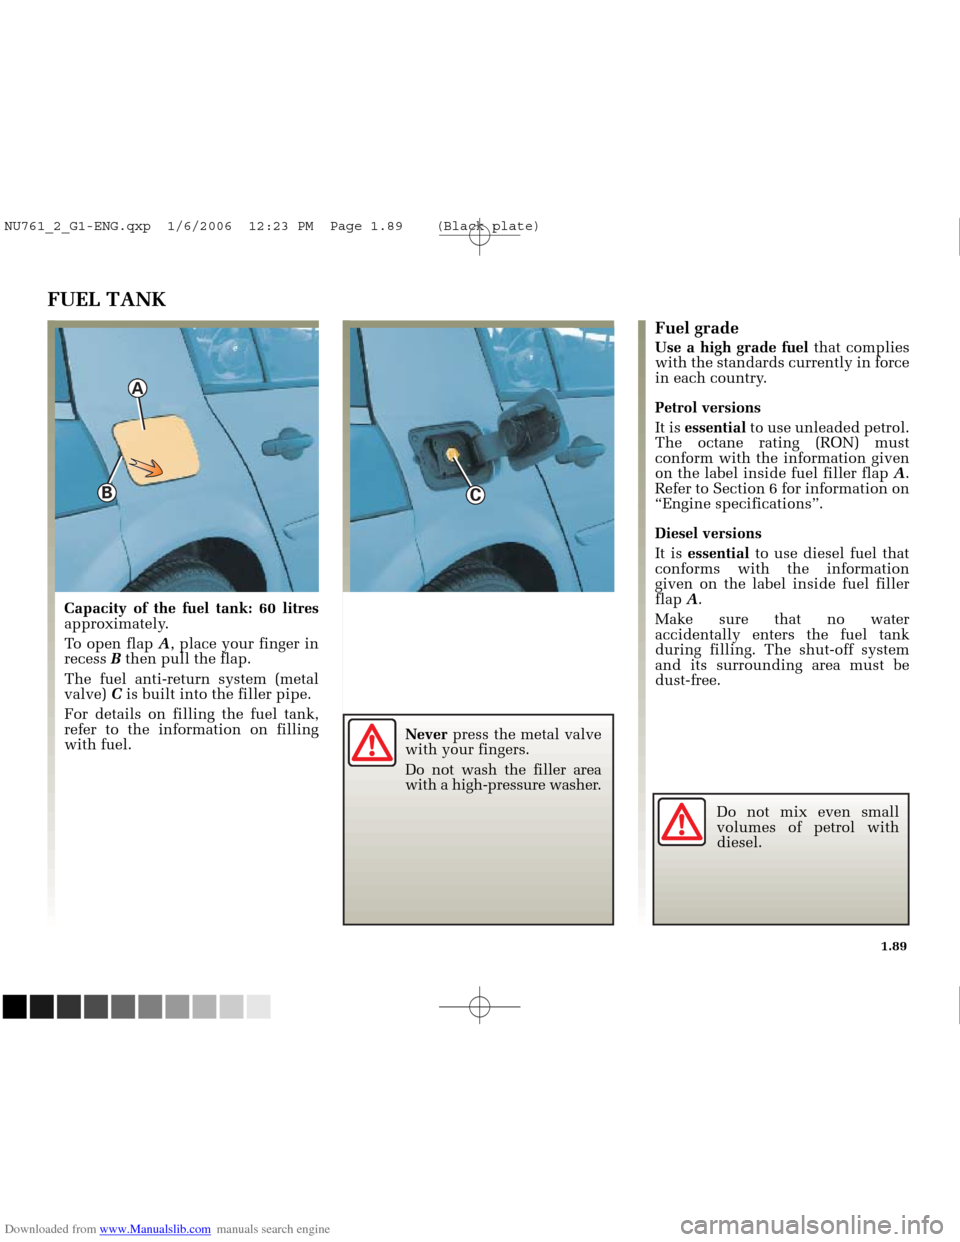
A
B
C
NU761_2_G1-FRA.qxd 10/11/05 15:55 Page 1.89
1.89
Do not mix even small
volumes of petrol with
diesel.
Never
press the metal valve
with your fingers.
Do not wash the filler area
with a high-pressure washer.
FUEL TANK
Capacity of the fuel tank: 60 litres
approximately.
To open flap A, place your finger in
recess Bthen pull the flap.
The fuel anti-return system (metal
valve) Cis built into the filler pipe.
For details on filling the fuel tank,
refer to the information on filling
with fuel.
Fuel grade
Use a high grade fuel that complies
with the standards currently in force
in each country.
Petrol versions
It is essential to use unleaded petrol.
The octane rating (RON) must
conform with the information given
on the label inside fuel filler flap A.
Refer to Section 6 for information on
“Engine specifications”.
Diesel versions
It is essential to use diesel fuel that
conforms with the information
given on the label inside fuel filler
flap A.
Make sure that no water
accidentally enters the fuel tank
during filling. The shut-off system
and its surrounding area must be
dust-free.
NU761_2_G1-ENG.qxp 1/6/2006 12:23 PM Page 1.89 (Black plate)
Page 100 of 250
Downloaded from www.Manualslib.com manuals search engine
NU761_2_G1-FRA.qxd 10/11/05 15:55 Page 1.90
1.90
No modifications what-
soever are permitted on
any part of the fuel supply
system (computers, wir-
ing, fuel circuit, injector, pro-
tection covers, etc.) as this may be
dangerous (such work must only
be undertaken by qualified
RENAULT Network personnel).
FUEL TANK (continued)
Filling up with fuel
Petrol versions
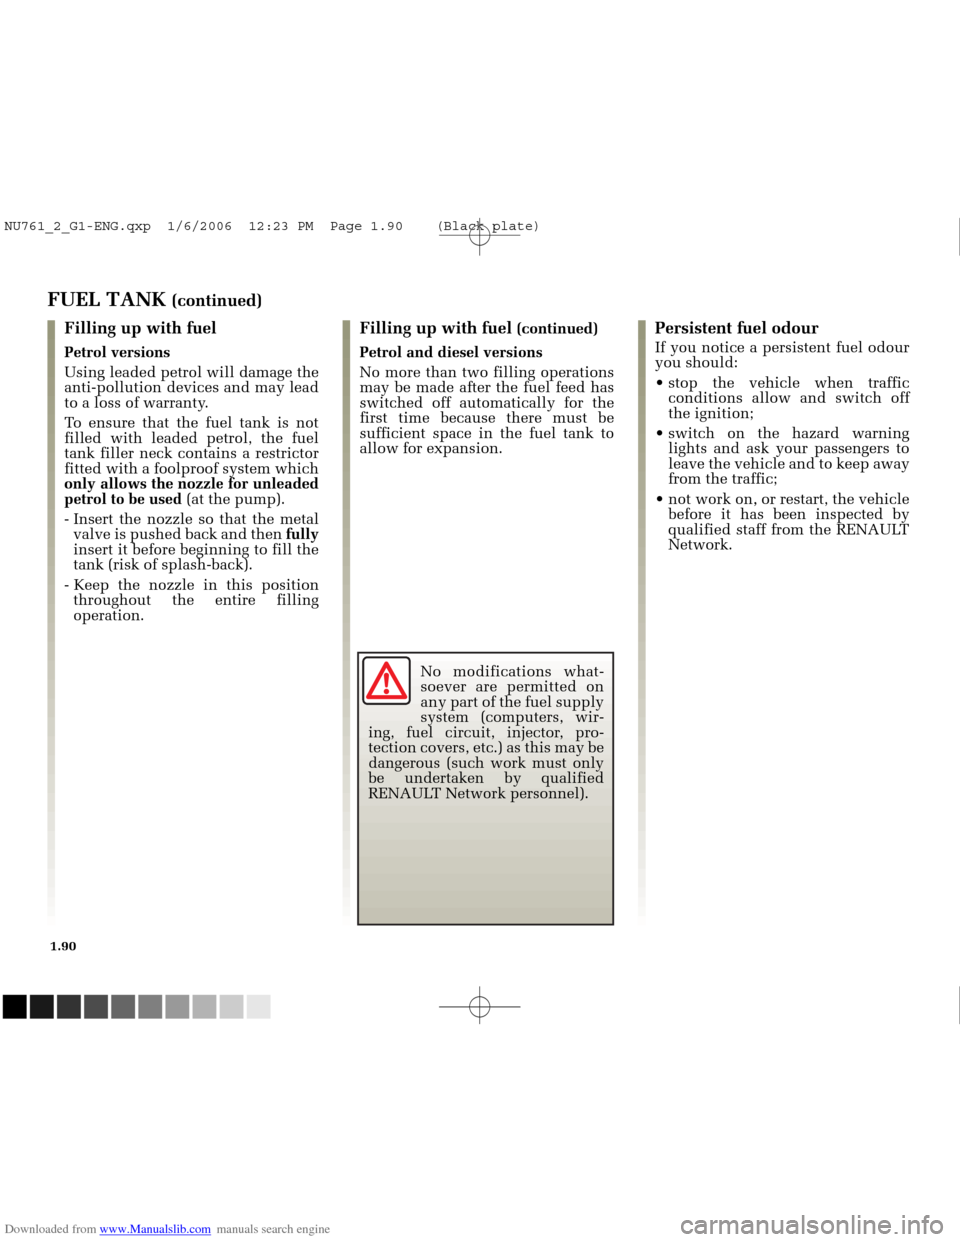
Using leaded petrol will damage the
anti-pollution devices and may lead
to a loss of warranty.
To ensure that the fuel tank is not
filled with leaded petrol, the fuel
tank filler neck contains a restrictor
fitted with a foolproof system which
only allows the nozzle for unleaded
petrol to be used (at the pump).
- Insert the nozzle so that the metal valve is pushed back and then fully
insert it before beginning to fill the
tank (risk of splash-back).
- Keep the nozzle in this position throughout the entire filling
operation.
Persistent fuel odour
If you notice a persistent fuel odour
you should:
stop the vehicle when traffic conditions allow and switch off
the ignition;
switch on the hazard warning lights and ask your passengers to
leave the vehicle and to keep away
from the traffic;
not work on, or restart, the vehicle before it has been inspected by
qualified staff from the RENAULT
Network.
Filling up with fuel (continued)
Petrol and diesel versions
No more than two filling operations
may be made after the fuel feed has
switched off automatically for the
first time because there must be
sufficient space in the fuel tank to
allow for expansion.
NU761_2_G1-ENG.qxp 1/6/2006 12:23 PM Page 1.90 (Black plate)