Pipe RENAULT SCENIC 2000 J64 / 1.G Technical Note 3426A Owner's Guide
[x] Cancel search | Manufacturer: RENAULT, Model Year: 2000, Model line: SCENIC, Model: RENAULT SCENIC 2000 J64 / 1.GPages: 118, PDF Size: 1.5 MB
Page 102 of 118
Downloaded from www.Manualslib.com manuals search engine STARTING - CHARGING
Starter
16
16-5
REMOVAL
Put the vehicle on a 2 post lift.
Disconnect the battery.
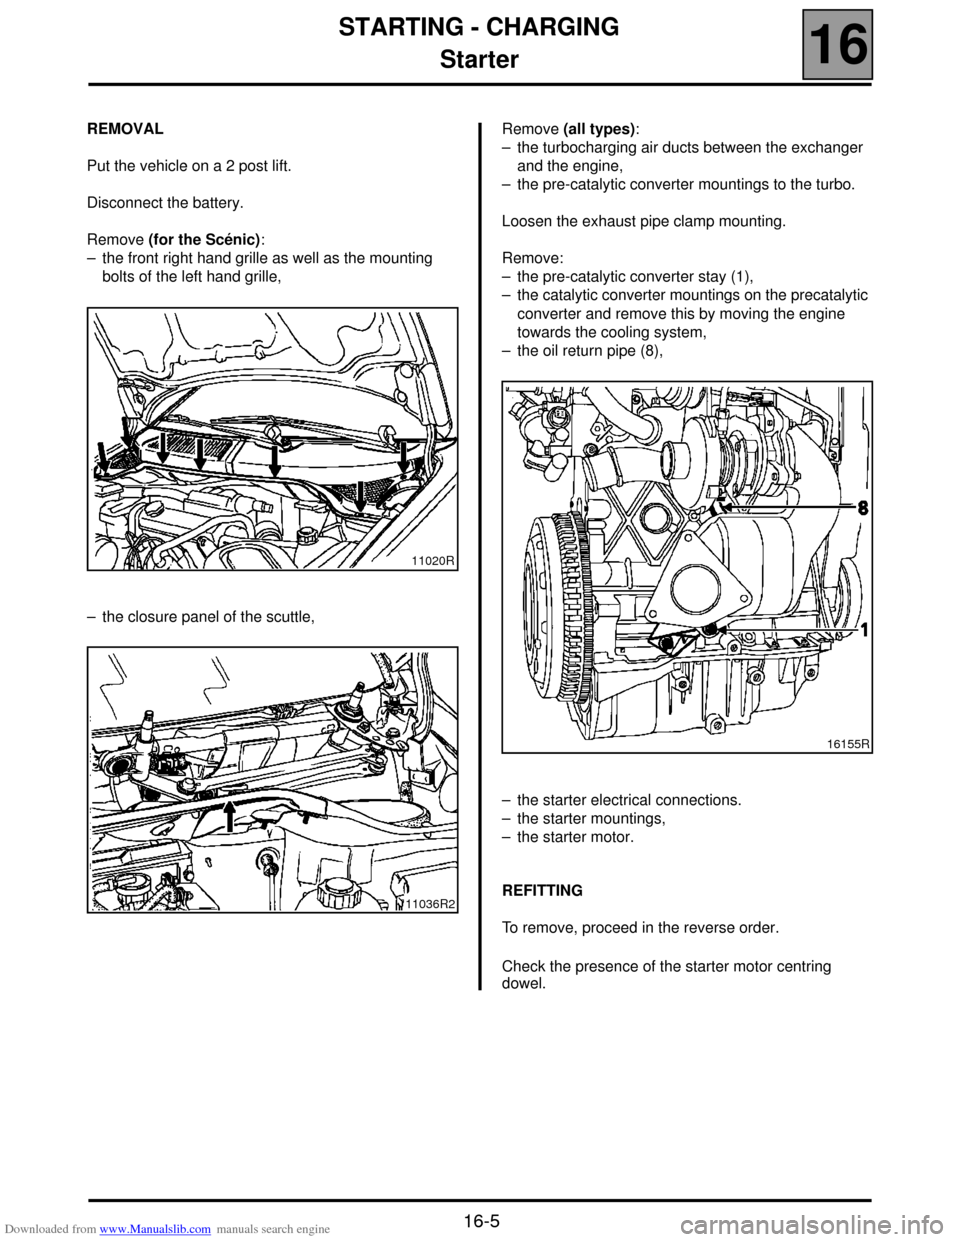
Remove (for the Scénic):
– the front right hand grille as well as the mounting
bolts of the left hand grille,
– the closure panel of the scuttle,Remove (all types):
– the turbocharging air ducts between the exchanger
and the engine,
– the pre-catalytic converter mountings to the turbo.
Loosen the exhaust pipe clamp mounting.
Remove:
– the pre-catalytic converter stay (1),
– the catalytic converter mountings on the precatalytic
converter and remove this by moving the engine
towards the cooling system,
– the oil return pipe (8),
– the starter electrical connections.
– the starter mountings,
– the starter motor.
REFITTING
To remove, proceed in the reverse order.
Check the presence of the starter motor centring
dowel.
11020R
11036R2
16155R
Page 103 of 118

Downloaded from www.Manualslib.com manuals search engine COOLING SYSTEM
Filling and bleeding
19
119 COOLING SYSTEM
Filling and bleeding
There is no heater matrix water control valve.
Water flow is continuous in the heater matrix, which
contributes to the cooling of the engine.
FILLING
It is essential to open the bleed screw on the
cylinder head coolant pipe housing outlet.
Fill the circuit through the expansion bottle opening.
Close the bleed screw as soon as the fluid runs out in
a continuous jet.
Start the engine (2500 rpm).
Adjust the level by overflow for a period of about
4 minutes.
Tighten the expansion bottle cap.
BLEEDING
Let the engine run for 20 minutes at 2500 rpm, until
the engine cooling fan operates (time required for
automatic degassing).
Check the liquid level is at the "Maximum" marker.
DO NOT OPEN THE BLEED SCREW(S) WITH THE
ENGINE RUNNING.
REFIT THE EXPANSION BOTTLE CAP WHILE THE
ENGINE IS WARM.
19-1
Page 113 of 118
Downloaded from www.Manualslib.com manuals search engine AIR CONDITIONING
Compressor
62
62-2
SCENIC Compressor
REMOVAL
Drain the R134a refrigerant circuit (refer to the
procedure described in the "Air conditioning" manual).
Disconnect the battery.
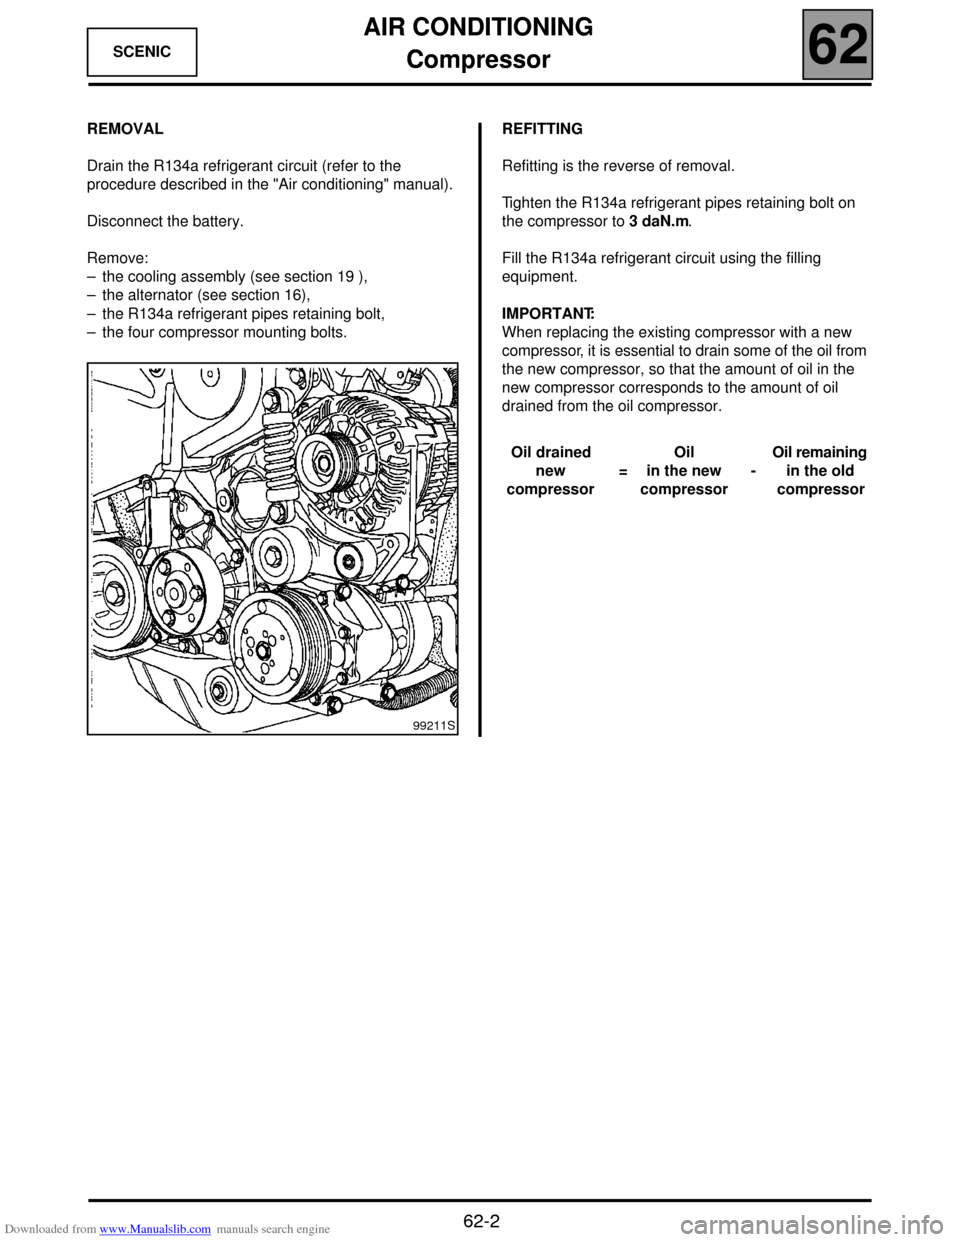
Remove:
– the cooling assembly (see section 19 ),
– the alternator (see section 16),
– the R134a refrigerant pipes retaining bolt,
– the four compressor mounting bolts.REFITTING
Refitting is the reverse of removal.
Tighten the R134a refrigerant pipes retaining bolt on
the compressor to 3 daN.m.
Fill the R134a refrigerant circuit using the filling
equipment.
IMPORTANT:
When replacing the existing compressor with a new
compressor, it is essential to drain some of the oil from
the new compressor, so that the amount of oil in the
new compressor corresponds to the amount of oil
drained from the oil compressor.
99211S
Oil drained
new
compressor=Oil
in the new
compressor-Oil remaining
in the old
compressor
Page 114 of 118
Downloaded from www.Manualslib.com manuals search engine AIR CONDITIONING
Dehydration canister
62
62-3
SCENIC Dehydration canister
REMOVAL
Drain the R134a refrigerant circuit using the filling
equipment (refer to the procedure described in the
"Air Conditioning" manual).
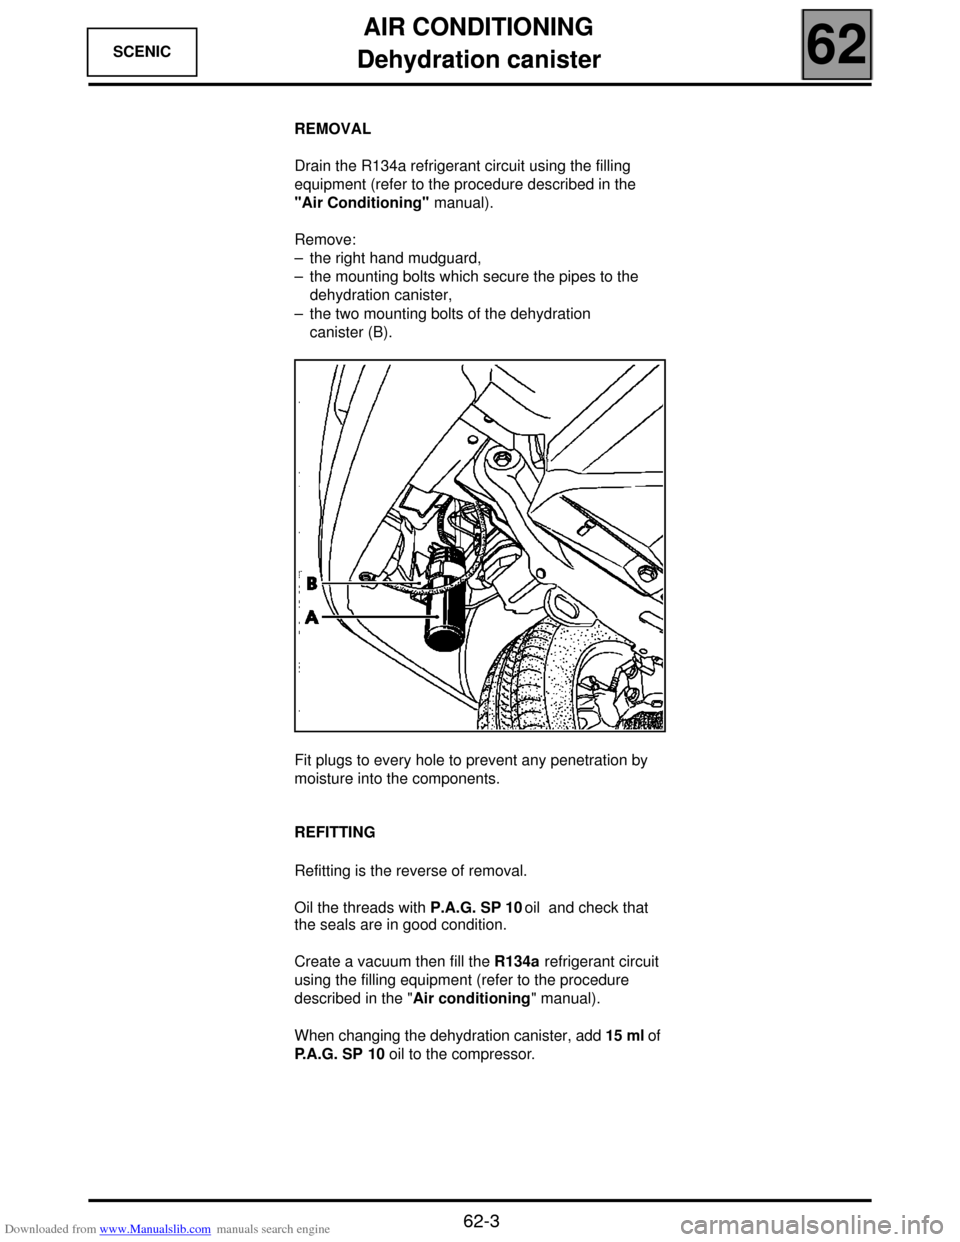
Remove:
– the right hand mudguard,
– the mounting bolts which secure the pipes to the
dehydration canister,
– the two mounting bolts of the dehydration
canister (B).
Fit plugs to every hole to prevent any penetration by
moisture into the components.
REFITTING
Refitting is the reverse of removal.
Oil the threads with P.A.G. SP 10 oil and check that
the seals are in good condition.
Create a vacuum then fill the R134a refrigerant circuit
using the filling equipment (refer to the procedure
described in the "Air conditioning" manual).
When changing the dehydration canister, add 15 ml of
P.A.G. SP 10 oil to the compressor.
16763R
Page 115 of 118
Downloaded from www.Manualslib.com manuals search engine AIR CONDITIONING
Condenser
62
62-4
SCENIC Condenser
REMOVAL
Place the vehicle on a lift.
Drain the R134a refrigerant circuit (refer to the
procedure described in the "Air conditioning"
manual).
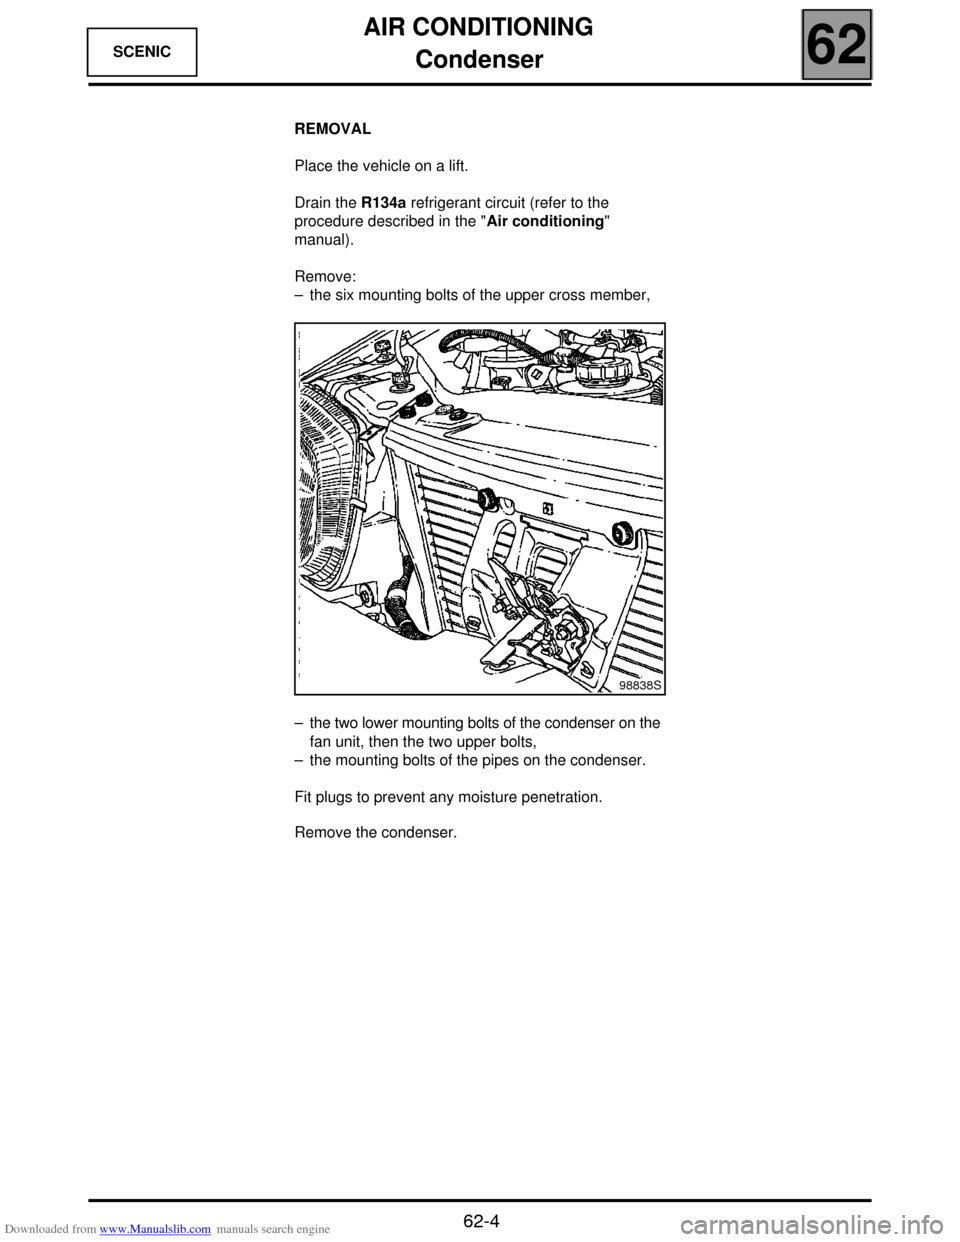
Remove:
– the six mounting bolts of the upper cross member,
– the two lower mounting bolts of the condenser on the
fan unit, then the two upper bolts,
– the mounting bolts of the pipes on the condenser.
Fit plugs to prevent any moisture penetration.
Remove the condenser.
98838S
Page 116 of 118
Downloaded from www.Manualslib.com manuals search engine AIR CONDITIONING
Pressure relief valve
62
62-5
SCENIC Pressure relief valve
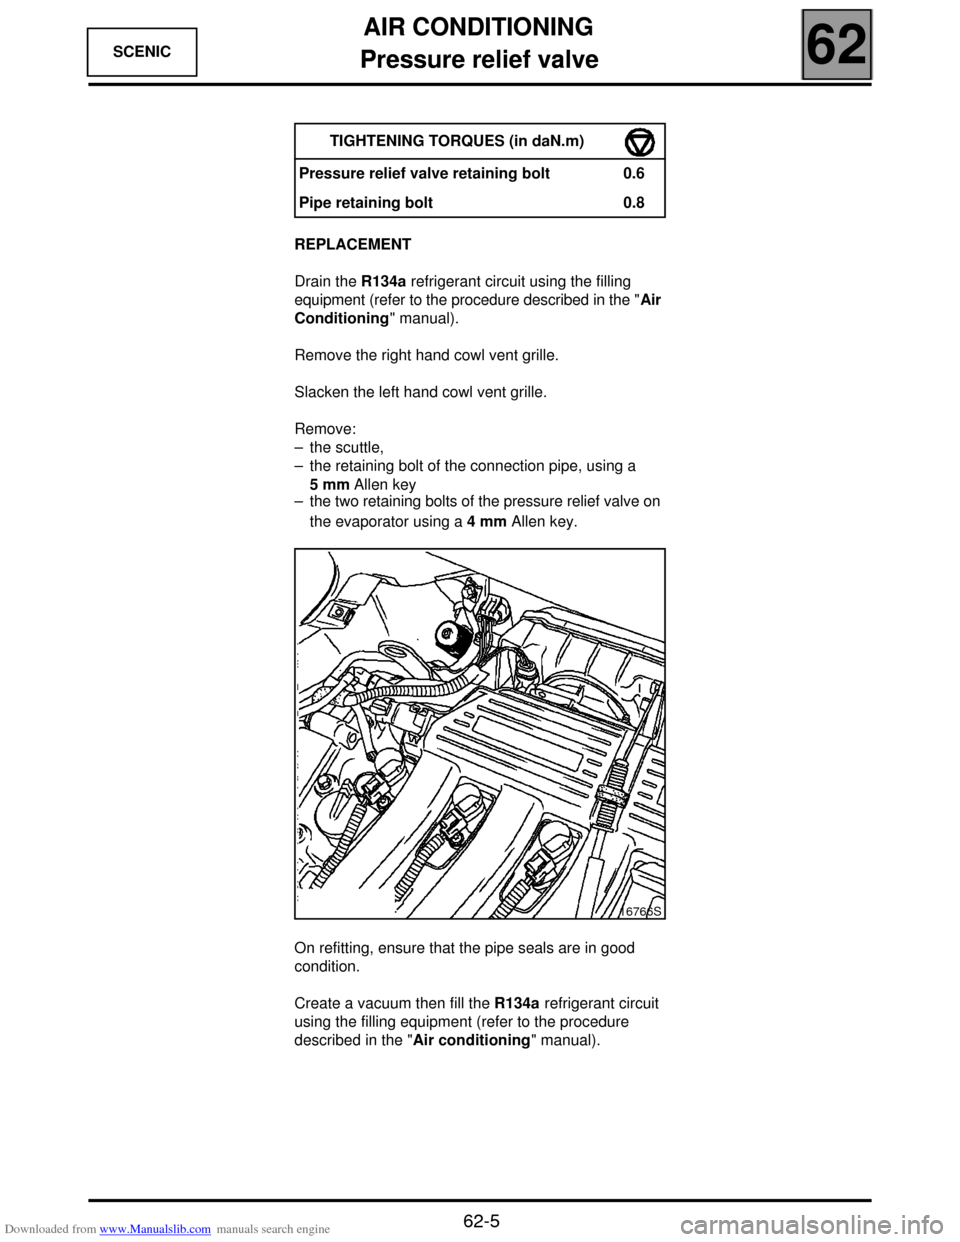
REPLACEMENT
Drain the R134a refrigerant circuit using the filling
equipment (refer to the procedure described in the "Air
Conditioning" manual).
Remove the right hand cowl vent grille.
Slacken the left hand cowl vent grille.
Remove:
– the scuttle,
– the retaining bolt of the connection pipe, using a
5 mm Allen key
– the two retaining bolts of the pressure relief valve on
the evaporator using a 4 mm Allen key.
On refitting, ensure that the pipe seals are in good
condition.
Create a vacuum then fill the R134a refrigerant circuit
using the filling equipment (refer to the procedure
described in the "Air conditioning" manual). TIGHTENING TORQUES (in daN.m)
Pressure relief valve retaining bolt 0.6
Pipe retaining bolt 0.8
16766S
Page 117 of 118
Downloaded from www.Manualslib.com manuals search engine AIR CONDITIONING
Connecting pipes
62
62-6
SCENIC Connecting pipes
Disconnect the battery.
Drain the R134a refrigerant circuit using the filling equipment (refer to the procedure described in the "Air
Conditioning" manual).
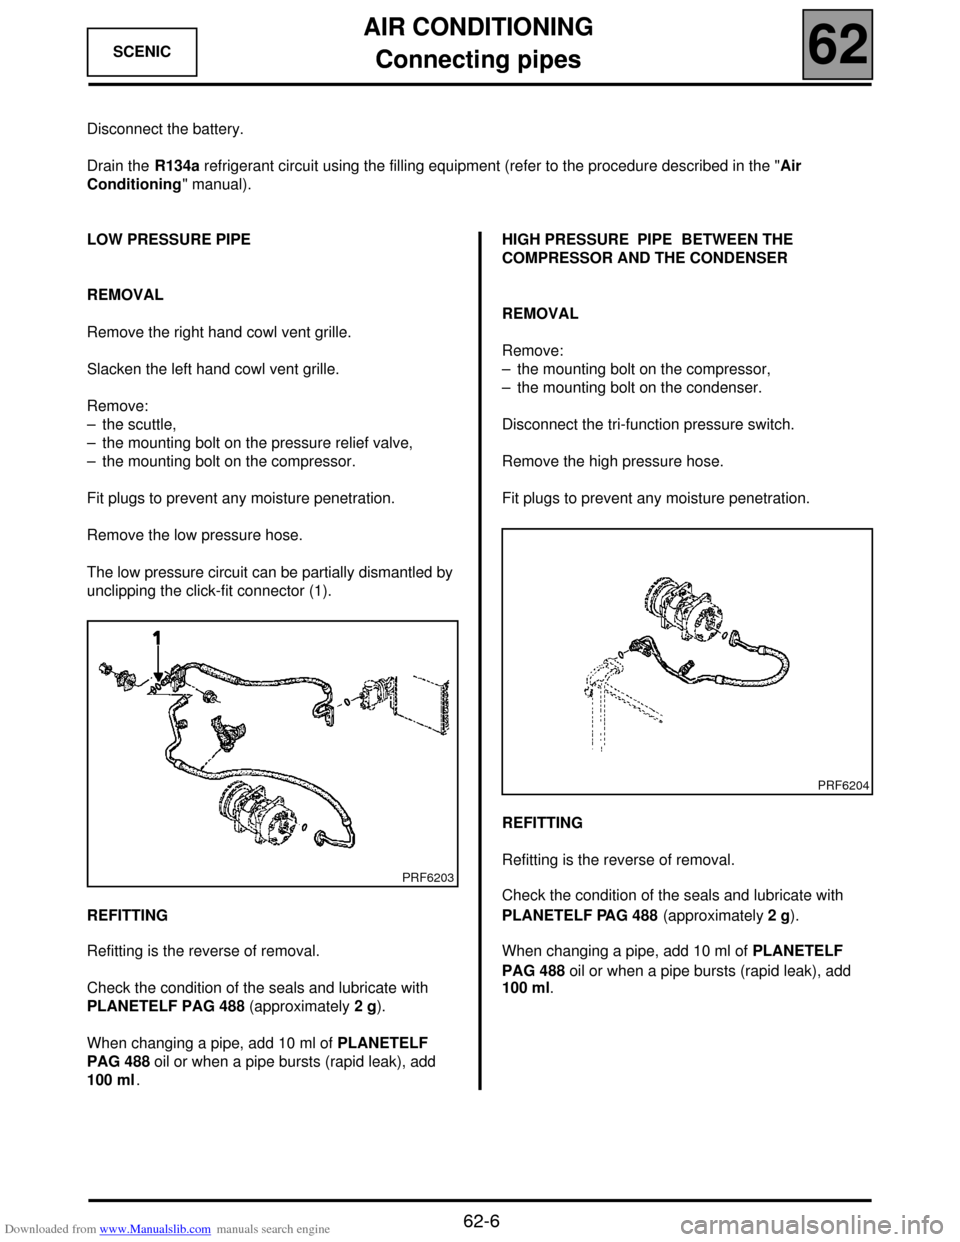
LOW PRESSURE PIPE
REMOVAL
Remove the right hand cowl vent grille.
Slacken the left hand cowl vent grille.
Remove:
– the scuttle,
– the mounting bolt on the pressure relief valve,
– the mounting bolt on the compressor.
Fit plugs to prevent any moisture penetration.
Remove the low pressure hose.
The low pressure circuit can be partially dismantled by
unclipping the click-fit connector (1).
REFITTING
Refitting is the reverse of removal.
Check the condition of the seals and lubricate with
PLANETELF PAG 488 (approximately 2 g).
When changing a pipe, add 10 ml of PLANETELF
PAG 488 oil or when a pipe bursts (rapid leak), add
100 ml.HIGH PRESSURE PIPE BETWEEN THE
COMPRESSOR AND THE CONDENSER
REMOVAL
Remove:
– the mounting bolt on the compressor,
– the mounting bolt on the condenser.
Disconnect the tri-function pressure switch.
Remove the high pressure hose.
Fit plugs to prevent any moisture penetration.
REFITTING
Refitting is the reverse of removal.
Check the condition of the seals and lubricate with
PLANETELF PAG 488 (approximately 2 g).
When changing a pipe, add 10 ml of PLANETELF
PAG 488 oil or when a pipe bursts (rapid leak), add
100 ml.
PRF6203
PRF6204
Page 118 of 118
Downloaded from www.Manualslib.com manuals search engine AIR CONDITIONING
Connecting pipes
62
62-7
SCENIC
Disconnect the battery.
Drain the R134a refrigerant circuit using the filling equipment (refer to the procedure described in the "Air
Conditioning" manual).
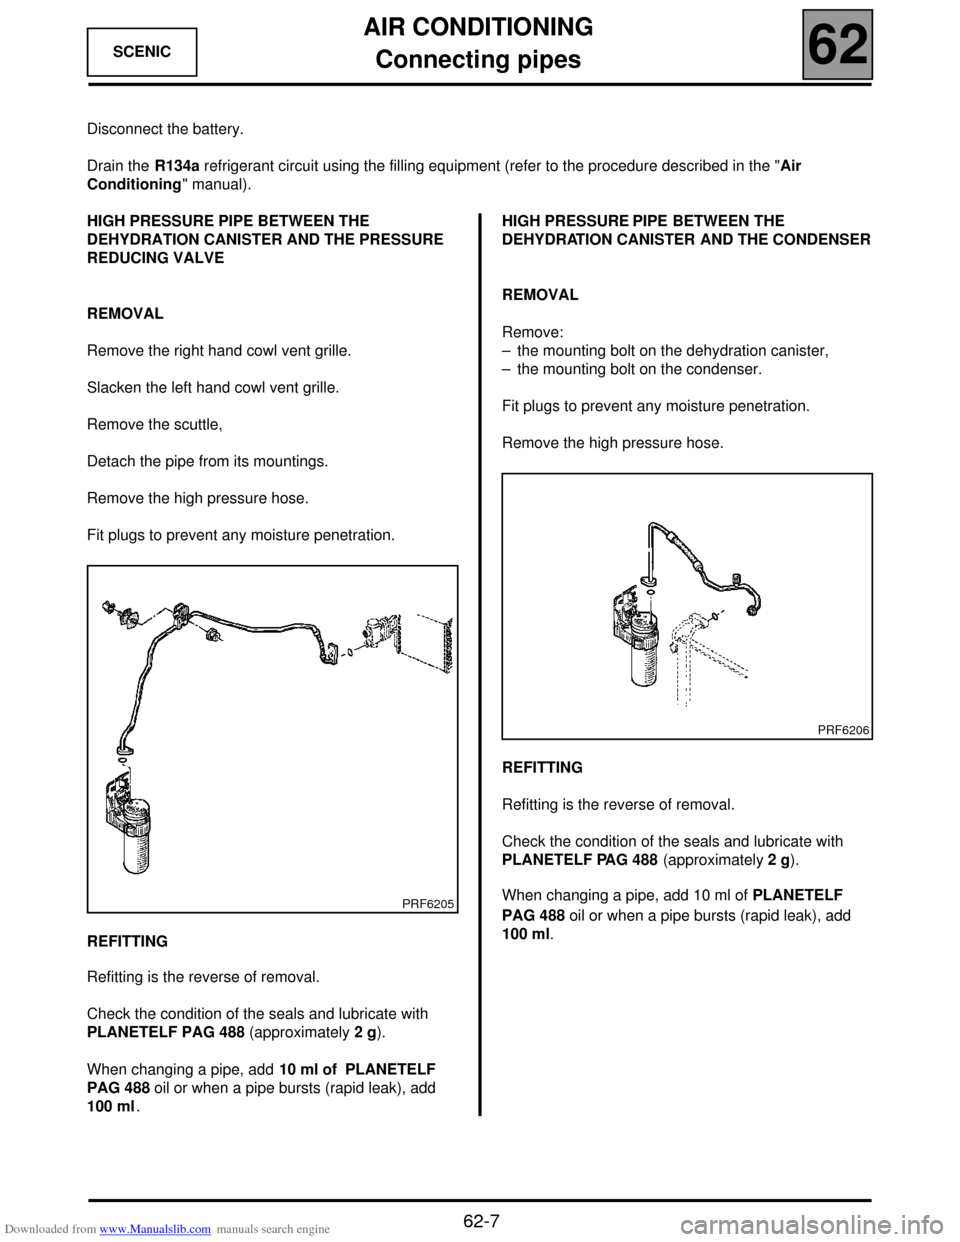
HIGH PRESSURE PIPE BETWEEN THE
DEHYDRATION CANISTER AND THE PRESSURE
REDUCING VALVE
REMOVAL
Remove the right hand cowl vent grille.
Slacken the left hand cowl vent grille.
Remove the scuttle,
Detach the pipe from its mountings.
Remove the high pressure hose.
Fit plugs to prevent any moisture penetration.
REFITTING
Refitting is the reverse of removal.
Check the condition of the seals and lubricate with
PLANETELF PAG 488 (approximately 2 g).
When changing a pipe, add 10 ml of PLANETELF
PAG 488 oil or when a pipe bursts (rapid leak), add
100 ml.HIGH PRESSURE PIPE BETWEEN THE
DEHYDRATION CANISTER AND THE CONDENSER
REMOVAL
Remove:
– the mounting bolt on the dehydration canister,
– the mounting bolt on the condenser.
Fit plugs to prevent any moisture penetration.
Remove the high pressure hose.
REFITTING
Refitting is the reverse of removal.
Check the condition of the seals and lubricate with
PLANETELF PAG 488 (approximately 2 g).
When changing a pipe, add 10 ml of PLANETELF
PAG 488 oil or when a pipe bursts (rapid leak), add
100 ml.
PRF6205
PRF6206