Seat Alhambra 2006 Manual Online
Manufacturer: SEAT, Model Year: 2006, Model line: Alhambra, Model: Seat Alhambra 2006Pages: 299, PDF Size: 6.33 MB
Page 81 of 299
Cockpit79
Safety FirstOperating instructionsTips and MaintenanceTe c h n i c a l D a t a
On board computer with multifunction
display*
Description
The information from the multi-function indicator and on board computer is
shown on these displays. The functions and indications of the multi-function
indicator are described in the chapter “Instruments”
When the ignition is switched on, the on-board computer continually controls
the working of certain systems and vehicle components while the vehicle is
in motion.
Faults in the operation or urgent repairs or services are indicated by sound
signals and light warnings in red or yellow, depending on priority, on the
instrument panel.
In addition to the red and yellow symbols, text messages appear on the
driver's display.
Note
•Depending on the model version or the country, it is possible that the
equipment installed in your vehicle does not display certain messages, or
they do not correspond with those in this manual. For this reason, we advise
you to consult the chapter “Luminous Indicators” for complementary informa-
tion on the different symbols and a description of their function.
Check operation
Vehicles with a manual gearbox
If faults exist, these will be indicated after the ignition is switched on. The
corresponding sound signal is emitted at the same time.
Vehicles with an automatic gearbox
Once the ignition is switched on with the lever in position P or N, the driver
warning appears on the display:
WITH CAR STOPPED, DEPRESS BRAKE TO SELECT GEAR
After selecting a gear (R, D, etc) the warning is erased.
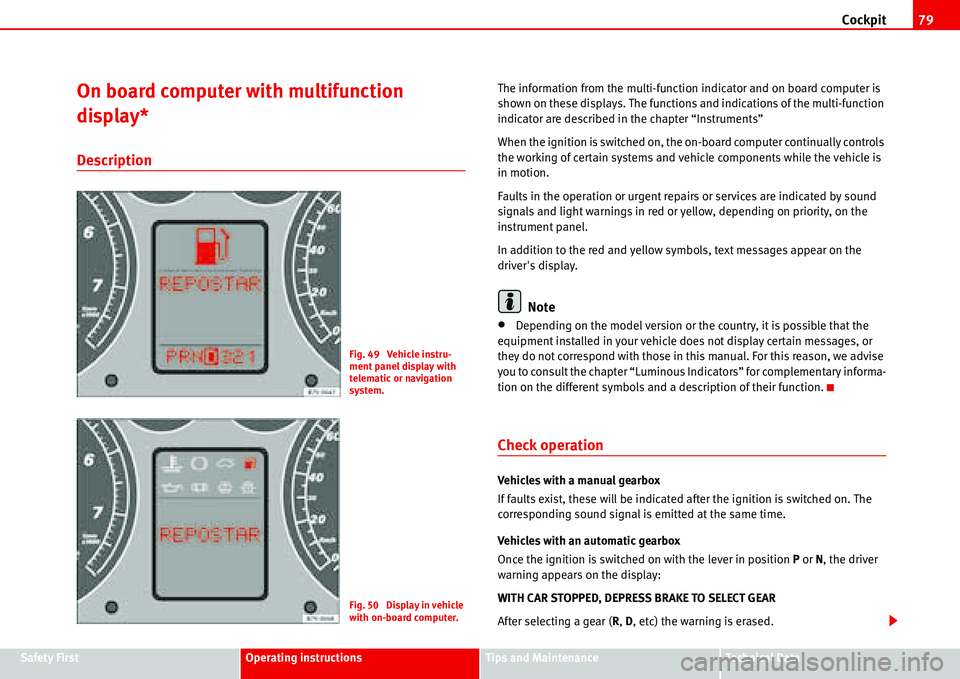
Fig. 49 Vehicle instru-
ment panel display with
telematic or navigation
system.
Fig. 50 Display in vehicle
with on-board computer.
Page 82 of 299
Cockpit 80
Where one or more faults exist, the warning disappears some 15 seconds
after the engine is started, and the corresponding fault symbols with their
respective text messages appear on the display.
For all vehicles
A sound signal is emitted in the event of a fault:
•Priority 1 - three buzzes
•Priority 2 - one buzz
If priority 1 and 2 faults occur at the same time, three buzzes are emitted.
In the event of a fault, the symbol with the corresponding text message is
displayed.
Note
Priority 2 faults are displayed after repairing or eliminating priority 1 faults.
Priority 1 (red symbols)
Priority 1 symbols warn of a dangerous situation. Therefore
the engine should be stopped and switched off.
Where various priority 1 faults exist, the symbols appear one by one for
approx 2 seconds The symbols will keep flashing until the faults have been
rectified.
The following priority 1 warnings or faults may appear:
Engine oil pressure
�E
The corresponding warning is:
STOP PRES. OIL
STOP ENGINE!If this symbol begins to flash while driving, stop and switch off the engine
immediately. Check the oil level and replace if necessary.
If the symbol continues flashing, even though the oil level is correct, do not
continue driving. The engine should not turn over even at idling speed, tech-
nical assistance is necessary.
Brake system
�H
The corresponding warning is:
STOP BRAKE FLUID
SERVICE MANUAL.
This symbol lights up if the level of brake fluid is too low. Stop the vehicle
immediately and check the level of the brake fluid
2. ABS, EDL*, TCS* and ESP* systems
The corresponding warning is:
STOP BRAKES FAULTY
SERVICE MANUAL.
If the brake warning light flashes while the ABS warning light is lit up, this
indicates that the ABS system is faulty and that the behaviour of the normal
brake system may be damaged.
The EDS system works in conjunction with the ABS. If the EDS stops working,
the ABS warning lamp comes on. When the ASR and the ESP fail this light also
comes on. Consult a Technical Service Centre as soon as possible.
3. Handbrake
The corresponding warning is:
HANDBRAKE ON
The handbrake warning lamp lights up when the handbrake is applied with
the ignition on It should go out when the handbrake is released. If it does not
this indicates a fault in the brake system.
Page 83 of 299
Cockpit81
Safety FirstOperating instructionsTips and MaintenanceTe c h n i c a l D a t a An audible signal is also given if the car is driven faster than 6 km/h (approx.
4 mph) with the handbrake applied.
Coolant temperature/level gauge
�v
The corresponding warning is:
STOP CHECK LEVEL COOLANT
SERVICE MANUAL.
If the symbol flashes while driving, this means that either the coolant temper-
ature is too high or the coolant level is too low. Stop immediately, switch off
the engine and check the level. Top up coolant if necessary.
If the coolant level is correct, the overheating may be caused by a malfunction
of the radiator fan. In this case, check the radiator fan fuse, and replace if
necessary.
If the warning light does not go out, although the coolant level is correct and
the fan fuse is correct, do not continue driving. Obtain technical assistance.
If the fault is only in the radiator fan, it is possible to continue driving as far
as the nearest Technical Service Centre, as long as the coolant level is correct
and the display light is off.
Alternator
�F
The corresponding warning is:
ALTERNATOR WORKSHOP!
The warning lamp lights up when the ignition is switched on. It should go out
when the engine is started.
The alternator is operated by a long-lasting drive belt.
If the warning light lights up while driving, stop, switch off the engine and
check the drive belt. If the belt is loose or broken, do not continue driving, as
the coolant pump will not be driven. The belt should be checked or replaced.If the warning light comes on even though the belt is neither loose nor
broken, it is usually possible to continue driving to the nearest Technical
Service Centre.
As the vehicle battery will discharge, it is advisable to switch off all non-vital
electrical consumers.
Seat belt warning lamp
�h
The corresponding warning is:
FASTEN SEAT BELT
This warning light (only in some countries) lights up for approximately 6
seconds when the ignition is switched on to remind occupants to fasten seat-
belts. If the seat belts are not fastened, a sound signal is emitted when the
ignition is switched on which will stop when the seat belts are fastened or
after approximately 6 seconds.
WARNING
•If the brake fluid level is below the “MIN” mark, you should wait for
assistance from specialised personnel before continuing to drive.
•If the fluid level is correct, the fault may lie in the ABS. If the ABS control
system fails, the rear wheels may block rapidly on braking. This, in certain
circumstances, could cause the vehicle to skid.
•Never open the bonnet if you see steam or coolant escaping from the
engine compartment. Risk of burns. Wait until you can no longer see or
hear escaping steam or coolant.
•Do not touch the fan, as it could suddenly start to operate, even if the
ignition is switched off.
•To prevent burns from boiling coolant, the following should be
observed:
•Take care when opening the coolant expansion tank!. When the engine
is warm or hot, the system is pressurised! Therefore wait until the engine
cools before opening the cap.
Page 84 of 299
Cockpit 82
•To protect your face, hands and arms from hot steam or fluid, cover the
fan cap with a large cloth in order to open it.
•Take care to avoid coolant spilling on the exhaust pipe or any other hot
component as antifreeze is inflammable.
Priority 2 (yellow symbols)
If a yellow symbol appears, a sound signal is emitted. The symbols indicate
a dangerous situation. The function shown should be controlled as fast as
possible. If various faults occur at the same time, the symbols will be
displayed one by one for approx. 2 seconds.
Oil level too low
�E
The corresponding warning is:
CHECK LEVEL OIL
If this sign lights up: stop, switch off the engine and check the oil level; top
up where necessary.
Oil level too low
�E
The corresponding warning is:
OIL SENSOR WORKSHOP!
If the symbol flashes this probably means that the oil level sensor is defec-
tive. The vehicle should immediately be taken to a Technical Service Centre.
It is possible to continue driving, but the oil level should be continually moni-
tored, e.g. every time the vehicle is refuelled.
Engine fault
- Petrol engine
�%�0�#
- Diesel engine�D
The corresponding warning is:
ENGINE FAULT WORKSHOP!
If a fault in the running of the engine arises while driving, the corresponding
light will come on (petrol engine) or flash (diesel engine). In this case the
engine should be checked immediately by a Technical Service Centre.
Anti-lock brake system (ABS)
�J
The corresponding warning is:
ABS FAULT
A fault in the ABS system is shown in the following manner:
If the ABS warning light comes on separately, it is possible to brake the
vehicle using the normal brake system (without ABS). Consult a Technical
Service Centre as soon as possible.
Electronic immobilizer
�
The corresponding warning is:
IMMOBILIZ.ACTIVE
When the ignition is switched on, the vehicle key data is automatically
consulted. The warning light will flash to confirm that the data is being
checked
If an unauthorised key is used, the warning light will flash constantly. It will
not be possible to start the vehicle.
Tailgate/bonnet open display*
�4
The corresponding warning is:
TAILGATE OPEN
This warning light only indicates that the tailgate is open.
WARNING (continued)
Page 85 of 299
Cockpit83
Safety FirstOperating instructionsTips and MaintenanceTe c h n i c a l D a t a The warning light only goes off when the tailgate is completely closed ( to the
second position)
Windscreen washer*
�S
The corresponding warning is:
TOPUP WASHER FLUID
This symbol lights up to indicate that the windscreen washer level is too low.
Top up windscreen washer and headlight washer water*
Fuel level low
�z
The corresponding warning is:
PLEASE REFUEL!
Navigation system*
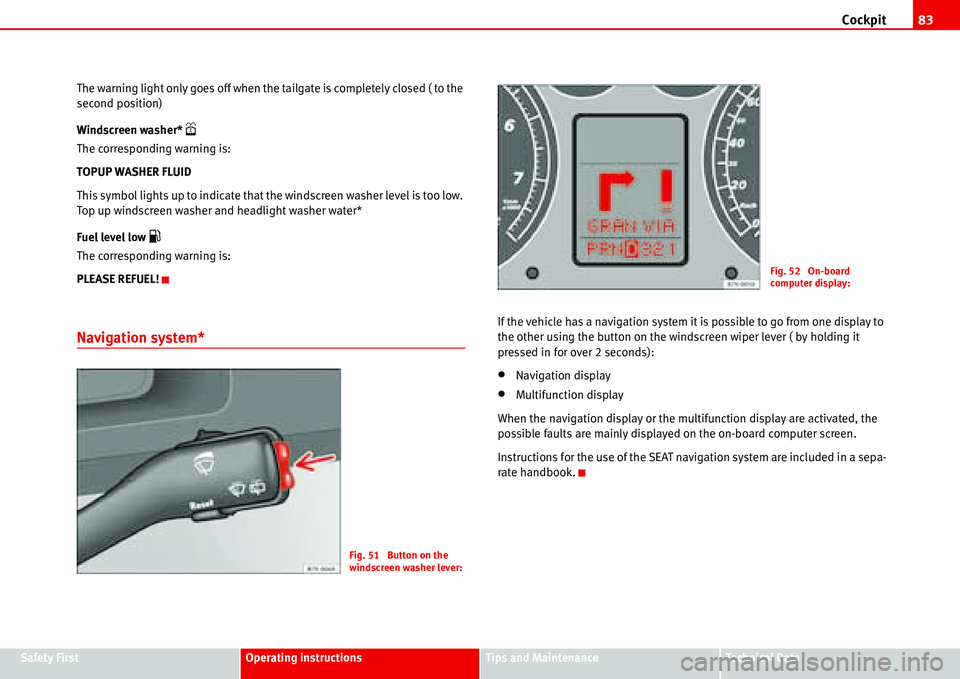
If the vehicle has a navigation system it is possible to go from one display to
the other using the button on the windscreen wiper lever ( by holding it
pressed in for over 2 seconds):
•Navigation display
•Multifunction display
When the navigation display or the multifunction display are activated, the
possible faults are mainly displayed on the on-board computer screen.
Instructions for the use of the SEAT navigation system are included in a sepa-
rate handbook.
Fig. 51 Button on the
windscreen washer lever:
Fig. 52 On-board
computer display:
Page 86 of 299
Steering wheel controls 84
Steering wheel controls
Steering wheel
Multifunction steering wheel
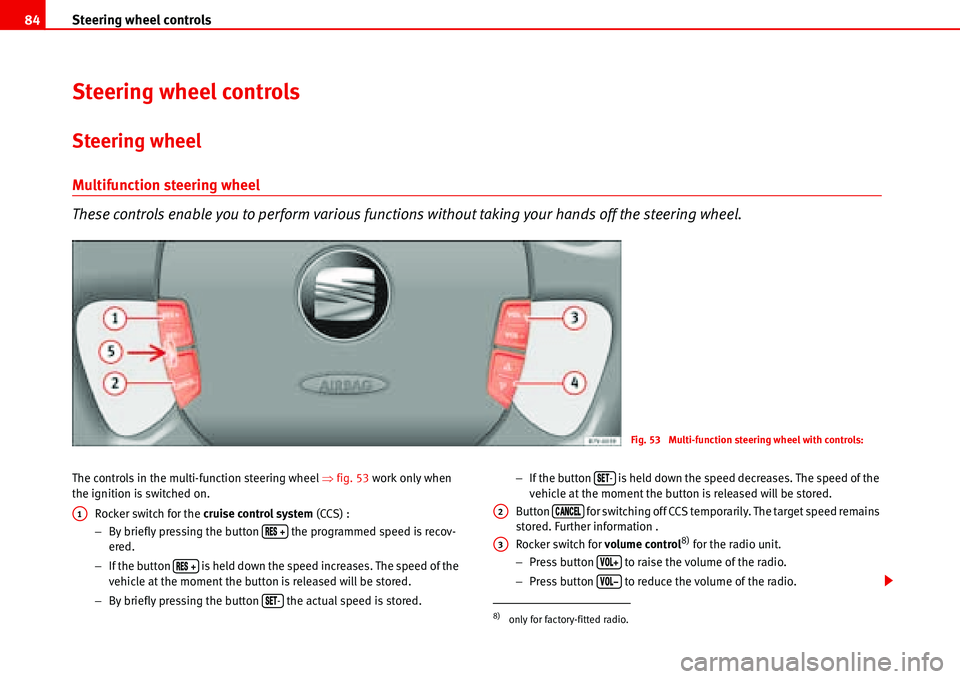
These controls enable you to perform various functions without taking your hands off the steering wheel.
The controls in the multi-function steering wheel �Ÿfig. 53 work only when
the ignition is switched on.
Rocker switch for the cruise control system (CCS) :
−By briefly pressing the button the programmed speed is recov-
ered.
−If the button is held down the speed increases. The speed of the
vehicle at the moment the button is released will be stored.
−By briefly pressing the button the actual speed is stored.−If the button is held down the speed decreases. The speed of the
vehicle at the moment the button is released will be stored.
Button for switching off CCS temporarily. The target speed remains
stored. Further information .
Rocker switch for volume control
8) for the radio unit.
−Press button to raise the volume of the radio.
−Press button to reduce the volume of the radio.
Fig. 53 Multi-function steering wheel with controls:
A1
�2�%�3 �€
�2�%�3 �€
�3�%�4-8)only for factory-fitted radio.
�3�%�4-
A2�#�!�.�#�%�,
A3
�6�/�,�
Page 87 of 299
Steering wheel controls85
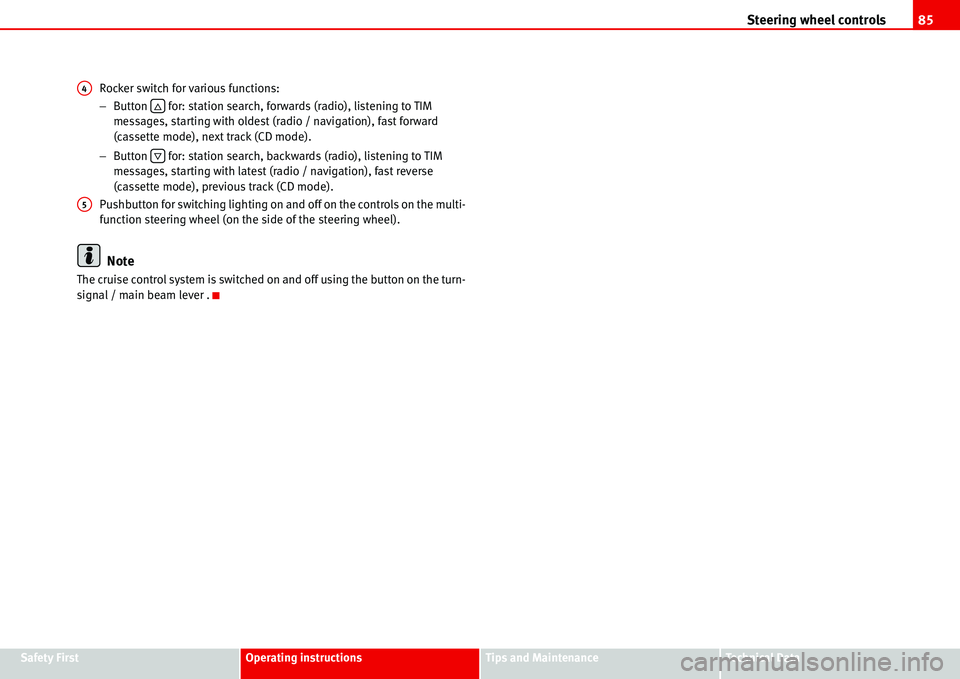
Safety FirstOperating instructionsTips and MaintenanceTe c h n i c a l D a t a Rocker switch for various functions:
−Button for: station search, forwards (radio), listening to TIM
messages, starting with oldest (radio / navigation), fast forward
(cassette mode), next track (CD mode).
−Button for: station search, backwards (radio), listening to TIM
messages, starting with latest (radio / navigation), fast reverse
(cassette mode), previous track (CD mode).
Pushbutton for switching lighting on and off on the controls on the multi-
function steering wheel (on the side of the steering wheel).
Note
The cruise control system is switched on and off using the button on the turn-
signal / main beam lever .
A4
�…
�†
A5
Page 88 of 299
Unlocking and locking 86
Unlocking and locking
Keys
Key set
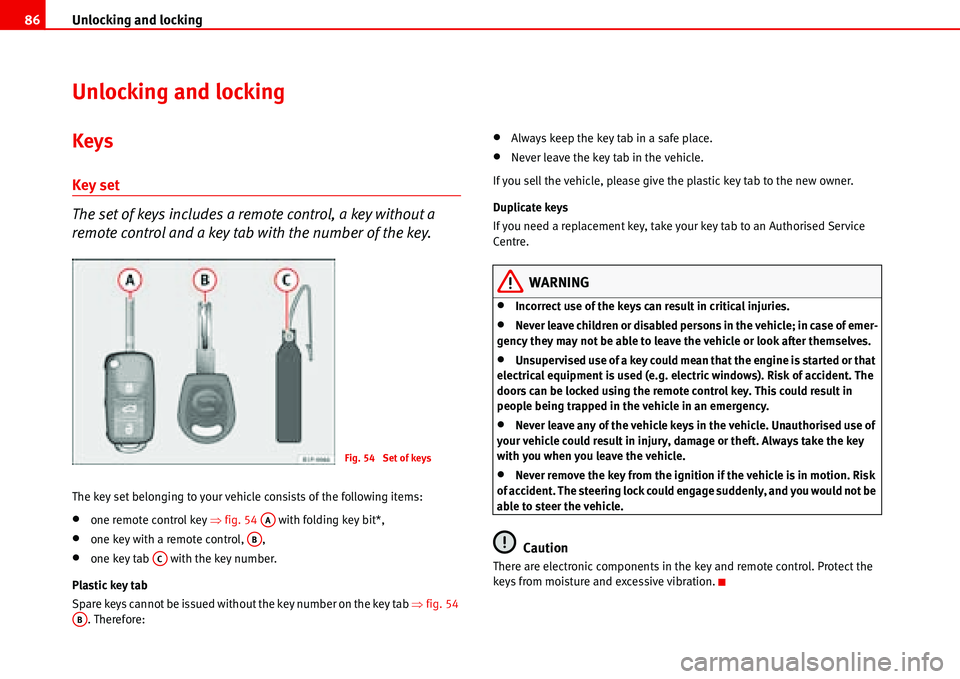
The set of keys includes a remote control, a key without a
remote control and a key tab with the number of the key.
The key set belonging to your vehicle consists of the following items:
•one remote control key �Ÿfig. 54 with folding key bit*,
•one key with a remote control, ,
•one key tab with the key number.
Plastic key tab
Spare keys cannot be issued without the key number on the key tab �Ÿfig. 54
. Therefore:
•Always keep the key tab in a safe place.
•Never leave the key tab in the vehicle.
If you sell the vehicle, please give the plastic key tab to the new owner.
Duplicate keys
If you need a replacement key, take your key tab to an Authorised Service
Centre.
WARNING
•Incorrect use of the keys can result in critical injuries.
•Never leave children or disabled persons in the vehicle; in case of emer-
gency they may not be able to leave the vehicle or look after themselves.
•Unsupervised use of a key could mean that the engine is started or that
electrical equipment is used (e.g. electric windows). Risk of accident. The
doors can be locked using the remote control key. This could result in
people being trapped in the vehicle in an emergency.
•Never leave any of the vehicle keys in the vehicle. Unauthorised use of
your vehicle could result in injury, damage or theft. Always take the key
with you when you leave the vehicle.
•Never remove the key from the ignition if the vehicle is in motion. Risk
of accident. The steering lock could engage suddenly, and you would not be
able to steer the vehicle.
Caution
There are electronic components in the key and remote control. Protect the
keys from moisture and excessive vibration.
Fig. 54 Set of keys
AA
AB
AC
AB
Page 89 of 299
Unlocking and locking87
Safety FirstOperating instructionsTips and MaintenanceTe c h n i c a l D a t a
Remote control keys*
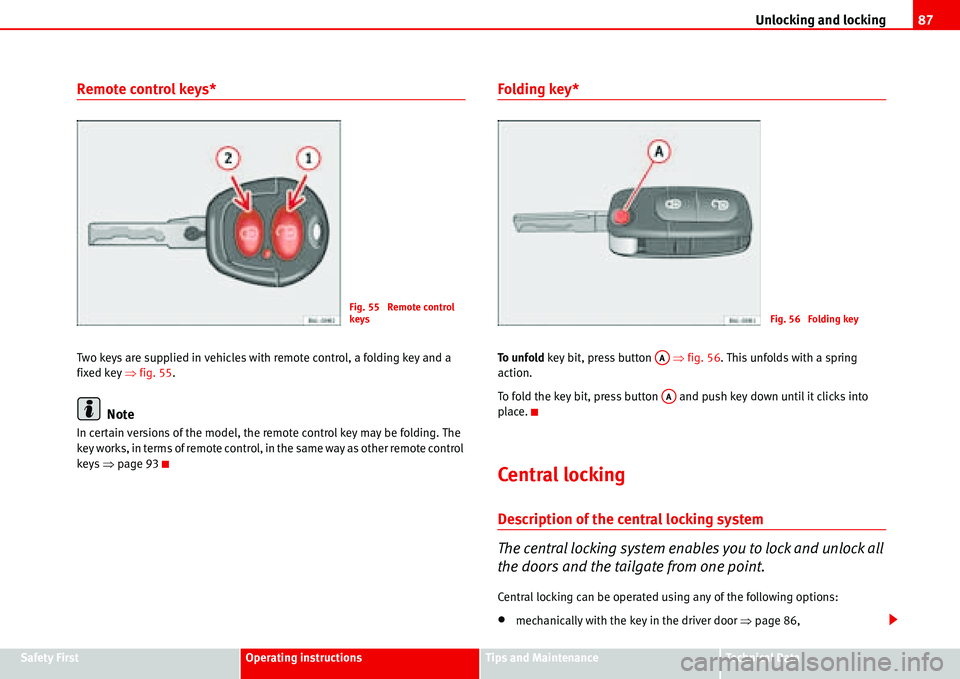
Two keys are supplied in vehicles with remote control, a folding key and a
fixed key �Ÿfig. 55.
Note
In certain versions of the model, the remote control key may be folding. The
key works, in terms of remote control, in the same way as other remote control
keys �Ÿpage 93
Folding key*
To u n f o l d key bit, press button �Ÿfig. 56. This unfolds with a spring
action.
To fold the key bit, press button and push key down until it clicks into
place.
Central locking
Description of the central locking system
The central locking system enables you to lock and unlock all
the doors and the tailgate from one point.
Central locking can be operated using any of the following options:
•mechanically with the key in the driver door �Ÿpage 86,
Fig. 55 Remote control
keysFig. 56 Folding key
AA
AA
Page 90 of 299
Unlocking and locking 88
•the key with remote control9) �Ÿpage 93,
•with the central locking button �Ÿpage 90.
Individual opening of doors
9)
An Authorised SEAT Service Centre can programme the individual opening of
doors.
When the key is turned once in the driver's door lock, in the direction of
opening, or when button �Ÿpage 93, fig. 61 on the remote control key is
pressed, only the driver's door will unlock.
When the key is turned a second time or the button is pressed a second
time, all the doors and the tailgate are unlocked.
WARNING
•Do not leave anyone in the car if it has been locked from the outside. It
is not possible to open the doors from the inside. Locked doors could delay
assistance in an emergency. People could become trapped inside in an
emergency.
•Never close the doors without observing and ensuring it is clear, to do
otherwise could cause serious injury to you and others. Make sure that no
one is in the path of the door.
Note
The entire vehicle is unlocked if the airbags are triggered during an accident.
The vehicle cannot be locked from the inside unless the ignition is first
switched off and back on. Following an accident, the vehicle cannot be locked
from the outside. Contact an Authorised Service Centre.
Opening and closing the doors with the key
Opening the doors
– Insert the key in the lock on the driver door.
– Turn the key to the open position. The doors and the tailgate are
unlocked.
Closing the doors
– Insert the key in the lock on the driver door.
– First turn the key once to the locking position �Ÿ. The doors
and the tailgate are locked.
Notes on unlocking
The following applies if you wish to unlock your vehicle manually using the
key:
•The deadlock mechanism, the interior monitoring system10) and the anti-
theft alarm10) will be deactivated immediately. The deactivation is confirmed
by the turn signals flashing briefly twice.
•The interior lights in the courtesy position will be switched on for approx-
imately 20 seconds when the vehicle is unlocked.
•If the key is held in the unlocking position, all windows (apart from the
electric vent wing at the rear) will be opened on vehicles equipped with elec-
tric windows.
Notes on locking
The following applies if you wish to lock your vehicle manually using the key:
9)Optional equipment
A1
�0
10)Optional equipment