stop start Seat Alhambra 2011 Owner's Manual
[x] Cancel search | Manufacturer: SEAT, Model Year: 2011, Model line: Alhambra, Model: Seat Alhambra 2011Pages: 385, PDF Size: 7.92 MB
Page 5 of 385
Table of Contents
Manual structure
. . . . . . . . . . . . . . . . . . . . 5
Content . . . . . . . . . . . . . . . . . . . . . . . . . . . . . . . . 6
Safety First . . . . . . . . . . . . . . . . . . . . . . . . . . . . 7
Safe driving . . . . . . . . . . . . . . . . . . . . . . . . . . . . . . . 7
Dear SEAT Driver . . . . . . . . . . . . . . . . . . . . . . . . . . 7
Tips for driving . . . . . . . . . . . . . . . . . . . . . . . . . . . 7
Adjusting the seat position . . . . . . . . . . . . . . . . . 10
Transporting objects . . . . . . . . . . . . . . . . . . . . . . . 13
Seat belts . . . . . . . . . . . . . . . . . . . . . . . . . . . . . . . . . 16
Brief introduction . . . . . . . . . . . . . . . . . . . . . . . . . 16
Why wear seat belts? . . . . . . . . . . . . . . . . . . . . . . 19
Seat belts . . . . . . . . . . . . . . . . . . . . . . . . . . . . . . . 21
Seat belt tensioners . . . . . . . . . . . . . . . . . . . . . . . 26
Airbag system . . . . . . . . . . . . . . . . . . . . . . . . . . . . . 28
Brief introduction . . . . . . . . . . . . . . . . . . . . . . . . . 28
Airbag system . . . . . . . . . . . . . . . . . . . . . . . . . . . . 31
Child safety . . . . . . . . . . . . . . . . . . . . . . . . . . . . . . . 39
Child seats (accessories) . . . . . . . . . . . . . . . . . . . 39
Integrated child seat . . . . . . . . . . . . . . . . . . . . . . . 46
Operating instructions . . . . . . . . . . . . . 53
Cockpit . . . . . . . . . . . . . . . . . . . . . . . . . . . . . . . . . . . 53
Overview . . . . . . . . . . . . . . . . . . . . . . . . . . . . . . . . 53
Instrument panel . . . . . . . . . . . . . . . . . . . . . . . . . . 54
Instruments . . . . . . . . . . . . . . . . . . . . . . . . . . . . . . 57
SEAT information system . . . . . . . . . . . . . . . . . . . 62 Unlocking and locking
. . . . . . . . . . . . . . . . . . . . . 71
Vehicle key set . . . . . . . . . . . . . . . . . . . . . . . . . . . 71
Central locking and locking system . . . . . . . . . . . 74
Doors . . . . . . . . . . . . . . . . . . . . . . . . . . . . . . . . . . . 80
Sliding doors . . . . . . . . . . . . . . . . . . . . . . . . . . . . . 81
Tailgate . . . . . . . . . . . . . . . . . . . . . . . . . . . . . . . . . 84
Electric windows . . . . . . . . . . . . . . . . . . . . . . . . . . 89
Panorama sliding sunroof* . . . . . . . . . . . . . . . . . 92
Lights and visibility . . . . . . . . . . . . . . . . . . . . . . . . 95
Lights . . . . . . . . . . . . . . . . . . . . . . . . . . . . . . . . . . . 95
Sun blind . . . . . . . . . . . . . . . . . . . . . . . . . . . . . . . . 103
Windscreen wiper and washer . . . . . . . . . . . . . . . 105
Rear vision mirror . . . . . . . . . . . . . . . . . . . . . . . . . 110
Seats and storage compartments . . . . . . . . . . 114
Seat adjustment . . . . . . . . . . . . . . . . . . . . . . . . . . 114
Seat functions . . . . . . . . . . . . . . . . . . . . . . . . . . . . 117
Head restraints . . . . . . . . . . . . . . . . . . . . . . . . . . . 123
Centre armrest . . . . . . . . . . . . . . . . . . . . . . . . . . . . 125
Loading luggage compartment . . . . . . . . . . . . . . 125
Roof carrier system* . . . . . . . . . . . . . . . . . . . . . . . 138
Storage compartments . . . . . . . . . . . . . . . . . . . . . 141
Cup holders . . . . . . . . . . . . . . . . . . . . . . . . . . . . . . 148
Ashtray and cigarette lighter* . . . . . . . . . . . . . . . 150
Sockets . . . . . . . . . . . . . . . . . . . . . . . . . . . . . . . . . 151
Heating, Ventilation and Air conditioning . . . 155
Climate Control . . . . . . . . . . . . . . . . . . . . . . . . . . . 155
Auxiliary heater* (additional heater) . . . . . . . . . . 163
Driving . . . . . . . . . . . . . . . . . . . . . . . . . . . . . . . . . . . . 167
Steering . . . . . . . . . . . . . . . . . . . . . . . . . . . . . . . . . 167
Stopping and starting the engine . . . . . . . . . . . . 170
Changing gear . . . . . . . . . . . . . . . . . . . . . . . . . . . . 174
Braking, stopping and parking . . . . . . . . . . . . . . 183
Start assist systems . . . . . . . . . . . . . . . . . . . . . . . 194
Parking sensor system* . . . . . . . . . . . . . . . . . . . . 198 Park Assist system* . . . . . . . . . . . . . . . . . . . . . . . 202
Rear Assist system* . . . . . . . . . . . . . . . . . . . . . . . 207
Cruise control system* . . . . . . . . . . . . . . . . . . . . . 212
Lane Assist system* . . . . . . . . . . . . . . . . . . . . . . . 215
Sign Assist* . . . . . . . . . . . . . . . . . . . . . . . . . . . . . . 218
Tyre monitoring systems . . . . . . . . . . . . . . . . . . . . 221
Practical tips . . . . . . . . . . . . . . . . . . . . . . . . . . 225
Driving and the environment . . . . . . . . . . . . . . . 225
Running-in . . . . . . . . . . . . . . . . . . . . . . . . . . . . . . . 225
Ecological driving . . . . . . . . . . . . . . . . . . . . . . . . . 225
Engine management and exhaust gas
purific ation sy
stem . . . . . . . . . . . . . . . . . . . . . . . . 228
Trailer towing . . . . . . . . . . . . . . . . . . . . . . . . . . . . . . 231
Introduction . . . . . . . . . . . . . . . . . . . . . . . . . . . . . . 231
Driving with a trailer . . . . . . . . . . . . . . . . . . . . . . . 233
Vehicle maintenance and cleaning . . . . . . . . . 242
Care and cleaning the vehicle exterior . . . . . . . . 242
Caring for and cleaning the vehicle interior . . . . 249
Notes for the user . . . . . . . . . . . . . . . . . . . . . . . . . 255
Accessories, parts replacement and
modifications . . . . . . . . . . . . . . . . . . . . . . . . . . . . .
257
Accessories, replacement of parts and
modifications
. . . . . . . . . . . . . . . . . . . . . . . . . . . . 257
Checking and refilling levels . . . . . . . . . . . . . . . 264
Filling the tank . . . . . . . . . . . . . . . . . . . . . . . . . . . . 264
Fuel . . . . . . . . . . . . . . . . . . . . . . . . . . . . . . . . . . . . 267
Selective Catalytic Reduction* (AdBlue) . . . . . . . 271
Working in the engine compartment . . . . . . . . . . 275
Engine oil . . . . . . . . . . . . . . . . . . . . . . . . . . . . . . . . 279
Engine coolant . . . . . . . . . . . . . . . . . . . . . . . . . . . 283
Vehicle battery . . . . . . . . . . . . . . . . . . . . . . . . . . . 288 3
Table of Contents
Page 21 of 385
19
Seat belts
Why wear seat belts? Front a
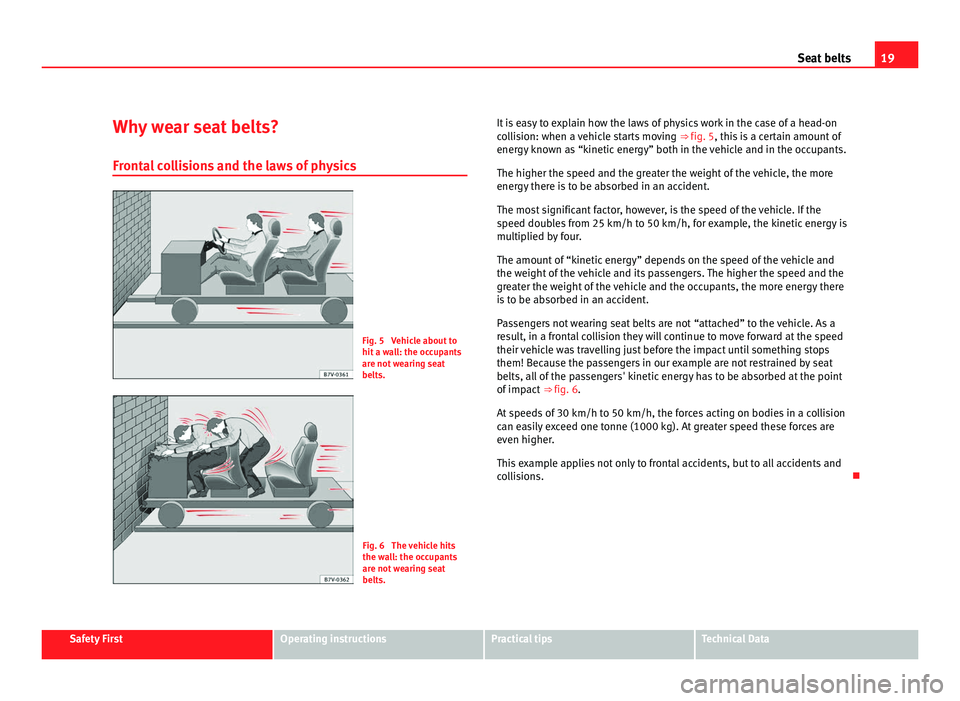
l collisions and the laws of physics Fig. 5 Vehicle about to
hit a w
a
ll: the occupants
are not wearing seat
belts. Fig. 6 The vehicle hits
the wa
l
l: the occupants
are not wearing seat
belts. It is easy to explain how the laws of physics work in the case of a head-on
col
lision: when a vehicle starts moving ⇒ fig. 5, this is a certain amount of
energy known as “kinetic energy” both in the vehicle and in the occupants.
The higher the speed and the greater the weight of the vehicle, the more
energy there is to be absorbed in an accident.
The most significant factor, however, is the speed of the vehicle. If the
speed doubles from 25 km/h to 50 km/h, for example, the kinetic energy is
multiplied by four.
The amount of “kinetic energy” depends on the speed of the vehicle and
the weight of the vehicle and its passengers. The higher the speed and the
greater the weight of the vehicle and the occupants, the more energy there
is to be absorbed in an accident.
Passengers not wearing seat belts are not “attached” to the vehicle. As a
result, in a frontal collision they will continue to move forward at the speed
their vehicle was travelling just before the impact until something stops
them! Because the passengers in our example are not restrained by seat
belts, all of the passengers' kinetic energy has to be absorbed at the point
of impact ⇒ fig. 6.
At speeds of 30 km/h to 50 km/h, the forces acting on bodies in a collision
can easily exceed one tonne (1000 kg). At greater speed these forces are
even higher.
This example applies not only to frontal accidents, but to all accidents and
collisions. Safety First Operating instructions Practical tips Technical Data
Page 56 of 385
54
Cockpit
Radio or navigation system (fitted at factory) ⇒ Booklet Ra-
dio or ⇒ Booklet Navigation system
Storage compartment . . . . . . . . . . . . . . . . . . . . . . . . . . . . . . . . . . . . . 141
Hazard warning lights switch . . . . . . . . . . . . . . . . . . . . . . . . . . . . 312
Switches for:
– Climatic . . . . . . . . . . . . . . . . . . . . . . . . . . . . . . . . . . . . . . . . . . . . . . . . 155
– C
limatronic . . . . . . . . . . . . . . . . . . . . . . . . . . . . . . . . . . . . . . . . . . . . . 155
Right se
at heating controls . . . . . . . . . . . . . . . . . . . . . . . . . . . . . . 117
Button for:
– Anti-slip r
egulation (ASR) . . . . . . . . . . . . . . . . . . . . . . . . . . 183
– Start/stop operation . . . . . . . . . . . . . . . . . . . . . . . . . . . . . . . . . 194
– Parking distance warning system (Park Pilot) . . . . . . . . . . 198
– Park Assist system . . . . . . . . . . . . . . . . . . . . . . . . . . . . . . . . . . . 202
– Tyre pressure monitor
. . . . . . . . . . . . . . . . . . . . . . . . . . . . . 221
– Opening the tailgate . . . . . . . . . . . . . . . . . . . . . . . . . . . . . . . . . 84
– Opening and closing of electric sliding doors . . . . . . . . . 81
Loc
king lever to open glove compartment . . . . . . . . . . . . . . . . . .141
Position of passenger front airbag on the instrument panel . .31
Key-operated switch in glove box for deactivating front pas-
senger's
airbag . . . . . . . . . . . . . . . . . . . . . . . . . . . . . . . . . . . . . . . . . . . 31
Passenger front airbag off warning lamp . . . . . . . . . . . . . . . . . . .31
Lever for:
– Manual g
earbox . . . . . . . . . . . . . . . . . . . . . . . . . . . . . . . . . . . . . . . . 174
– Automatic gearbox . . . . . . . . . . . . . . . . . . . . . . . . . . . . . . . . . . . . . 174
12 V
olt socket . . . . . . . . . . . . . . . . . . . . . . . . . . . . . . . . . . . . . . . . . . . . . 151
Auto Hold Switch - . . . . . . . . . . . . . . . . . . . . . . . . . . . . . . . . . 194
Electr
onic parking brake switch . . . . . . . . . . . . . . . . . . . . . . . . . 183
Ignition lock . . . . . . . . . . . . . . . . . . . . . . . . . . . . . . . . . . . . . . . . . . . . . . 170
Pedals . . . . . . . . . . . . . . . . . . . . . . . . . . . . . . . . . . . . . . . . . . . . . . . . . . . . 174
Steering column adjustment lever . . . . . . . . . . . . . . . . . . . . . . . . . . 10
13 14
15
16
17
18
19
20
21
22
23
24
25
26
27
28
29 Fuse box cover
. . . . . . . . . . . . . . . . . . . . . . . . . . . . . . . . . . . . . . . . . . . . 322
Lever for:
– Crui se c
ontrol system (GRA) – – – / -
- / -- . . . . . . . . . . . . . . . . . . . . . . . . . . . . . . . . . . . . . . . . . . . . . 212
Open bonnet lever . . . . . . . . . . . . . . . . . . . . . . . . . . . . . . . . . . . . . . . . 275
Controls for:
– Electric w
indows . . . . . . . . . . . . . . . . . . . . . . . . . . . . . . . . . . . . . 89
– Childproof locks . . . . . . . . . . . . . . . . . . . . . . . . . . . . . . . . . . . . . 80 Note
● Some of the items of equipment listed here are fitted only on certain
model s/model
years or are optional extras.
● In versions with the steering wheel on the right, the layout of the control
elements i
s somewhat different. But the symbols assigned to the controls
correspond to the symbols used in the versions with the steering wheel on
the left
Instrument panel Contro
l and warning lamps The control and warning lamps are indicators of warnings,
⇒ , faults
⇒ or certain functions. Some control and warning lamps come on when the ig-
nition is
sw
itched on, and go out when the engine starts running, or while
driving.
Depending on the model, additional text messages may be viewed on the
instrument panel display. These may be purely informative or they may be
advising of the need for action ⇒ page 57, Instruments.
30 31
32
33
Page 60 of 385
58
Cockpit
Clock set button 1)
.
– Pre s
s button to select the hour or minute display.
– To c ontinue settin
g the time, press button 0.0 / SET
7 . Hold button
down t o s
croll through the numbers quickly.
– Press button again to end the clock setting.
Rev c
ounter (with the engine running, in thousands of revolutions per
minute).
The beginning of the red zone of the rev counter indicates the maxi-
mum speed in any gear after running-in and with the engine hot. How-
ever, it is advisable to change up a gear or move the selector lever to D
(or lift your foot off the accelerator) before the needle reaches the red
zone ⇒ .
Engine c oo
lant temperature display ⇒ page 283.
Displays on the screen ⇒ page 58.
Fuel reserve display ⇒ page 264.
Speedometer.
Reset knob for trip recorder (trip).
– Press button 0.0 / SET to reset to zero.
CAUTION
To prevent damage to the engine, the rev counter needle should only re-
main in the r ed
zone for a short period of time. For the sake of the environment
Changing up a gear in time reduces fuel consumption and noise.
Displays on screen A variety of information can be viewed on the instrument panel display
⇒
fig. 35 4 , depending on the vehicle equipment:
1
2
3
4
5
6
7 ●
Warning and information texts
● Mil
eage
● Time
● Ambient temperature
● Compass
● Selector lever positions ⇒ page 174
● R
ecommended gear (manual gearbox) ⇒ page 174
● M
ultifunction display (MFI) and menus for different setting options
⇒ page 62
● Ser
vice interval display ⇒ page 61
● Sec
ond speed display (menu Configuration
) ⇒ page 62
● Start/Stop operation indicator ⇒ pag
e 59
Warning and information texts
The system runs a check on certain components and functions when the ig-
nition is switched on and while the vehicle is moving. Faults in the opera-
tion are displayed on the screen using red and yellow symbols and messag-
es on the instrument panel display ( ⇒ page 54) and, in some cases, with
audible warnings. The display may vary according to the type of instrument
panel fitted.
Page 61 of 385
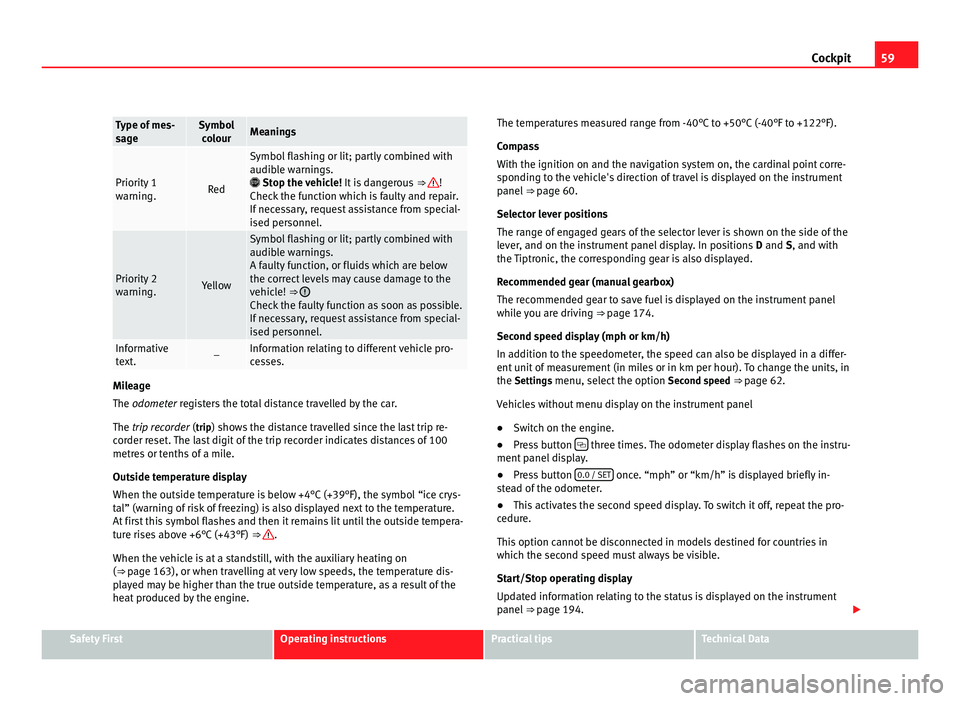
59
Cockpit Type of mes-
sag
e Symbol
co lour Meanings
Priority 1
warnin
g. Red Symbol flashing or lit; partly combined with
audibl
e w
arnings.
Stop the vehicle! It is dangerous ⇒ !
Check the f
unction which is faulty and repair.
If necessary, request assistance from special-
ised personnel. Priority 2
warnin
g. Yellow Symbol flashing or lit; partly combined with
audibl
e w
arnings.
A faulty function, or fluids which are below
the correct levels may cause damage to the
vehicle! ⇒ Check the faulty function as soon as possible.
If nec
e
ssary, request assistance from special-
ised personnel. Informative
te
xt
. – Information relating to different vehicle pro-
ce
s
ses. Mileage
The odometer
r
egisters the total distance travelled by the car.
The trip recorder (trip) shows the distance travelled since the last trip re- corder reset. The last digit of the trip recorder indicates distances of 100
metres or tenths of a mile.
Outside temperature display
When the outside temperature is below +4°C (+39°F), the symbol “ice crys-
tal” (warning of risk of freezing) is also displayed next to the temperature.
At first this symbol flashes and then it remains lit until the outside tempera-
ture rises above +6°C (+43°F) ⇒ .
When the v ehic
le is at a standstill, with the auxiliary heating on
(⇒ page 163), or when travelling at very low speeds, the temperature dis-
played may be higher than the true outside temperature, as a result of the
heat produced by the engine. The temperatures measured range from -40°C to +50°C (-40°F to +122°F).
Compa
ss
With the ignition on and the navigation system on, the cardinal point corre-
sponding to the vehicle's direction of travel is displayed on the instrument
panel ⇒ page 60.
Selector lever positions
The range of engaged gears of the selector lever is shown on the side of the
lever, and on the instrument panel display. In positions D and S, and with
the Tiptronic, the corresponding gear is also displayed.
Recommended gear (manual gearbox)
The recommended gear to save fuel is displayed on the instrument panel
while you are driving ⇒ page 174.
Second speed display (mph or km/h)
In addition to the speedometer, the speed can also be displayed in a differ-
ent unit of measurement (in miles or in km per hour). To change the units, in
the Settings menu, select the option Second speed ⇒ page 62.
Vehicles without menu display on the instrument panel
● Switch on the engine.
● Press button three times. The odometer display flashes on the instru-
ment p anel
display.
● Press button 0.0 / SET once. “mph” or “km/h” is displayed briefly in-
st e
ad of the odometer.
● This activates the second speed display. To switch it off, repeat the pro-
cedure.
Thi
s option cannot be disconnected in models destined for countries in
which the second speed must always be visible.
Start/Stop operating display
Updated information relating to the status is displayed on the instrument
panel ⇒ page 194. Safety First Operating instructions Practical tips Technical Data
Page 73 of 385
71
Unlocking and locking
Unlocking and locking
Vehicle key set
Introduction Additional information and warnings:
●
Adjustments to the SEAT information system ⇒ page 62
● C
entral locking and locking system ⇒ page 74
● St
art and stop the engine ⇒ page 170
● Not
es for the user ⇒ page 255
● Emer
gency locking and unlocking ⇒ page 314WARNING
Careless or incorrect use of vehicle keys may result in severe injury and
acc ident
.
● Always take all the keys with you whenever you leave the vehicle.
Childr
en and unauthorised individuals could lock the doors or the tail-
gate, start the engine or turn the ignition on activating electrical sys-
tems, for example: the electric windows.
● Never leave children or disabled people alone in the car. They could
be trapped in the c
ar in an emergency and will not be able to get them-
selves to safety. For example, depending on the time of the year, temper-
atures inside a locked and closed vehicle can be extremely high or ex-
tremely low resulting in serious injuries and illness or even death, partic-
ularly for young children.
● Never remove the key from the ignition if the vehicle is in motion. The
steerin
g may lock and it will not be possible to turn the steering wheel. Vehicle key
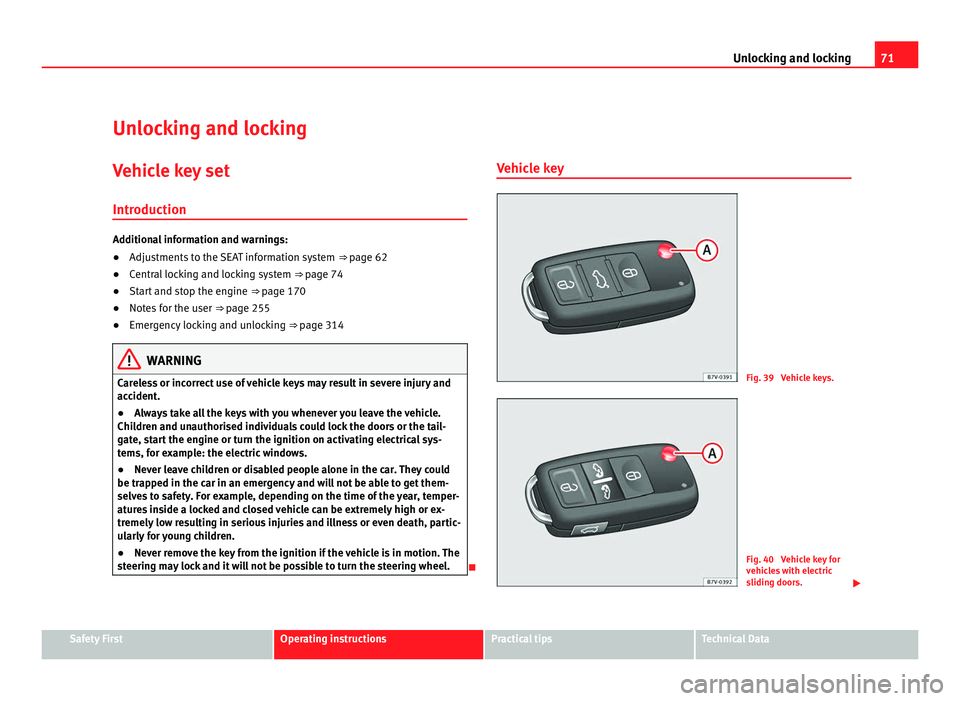
Fig. 39 Vehicle keys.
Fig. 40 Vehicle key for
vehic
l
es with electric
sliding doors. Safety First Operating instructions Practical tips Technical Data
Page 85 of 385
83
Unlocking and locking
If an object gets in the way of the sliding door while it is closing , it opens
again.
If an object gets in the way of the sliding door while it is opening, the door
stops moving.
● Check the reason for which the sliding door does not open or close.
● Try to open or close the sliding door again.
To clo
se the sliding door without the rollback anti-trap function
● Turn off the ignition and turn it on again.
● Press and hold the ⇒
fig. 51 b
utton. The sliding door closes with full
force. WARNING
Closing the electric windows without the anti-trap function can cause se-
rious injur
y.
● Always close the sliding doors carefully.
● Nobody should ever get in the way of the electric sliding doors, espe-
cia
lly when closing without the anti-trap function.
● The anti-trap function does not prevent fingers or other parts of the
body gettin
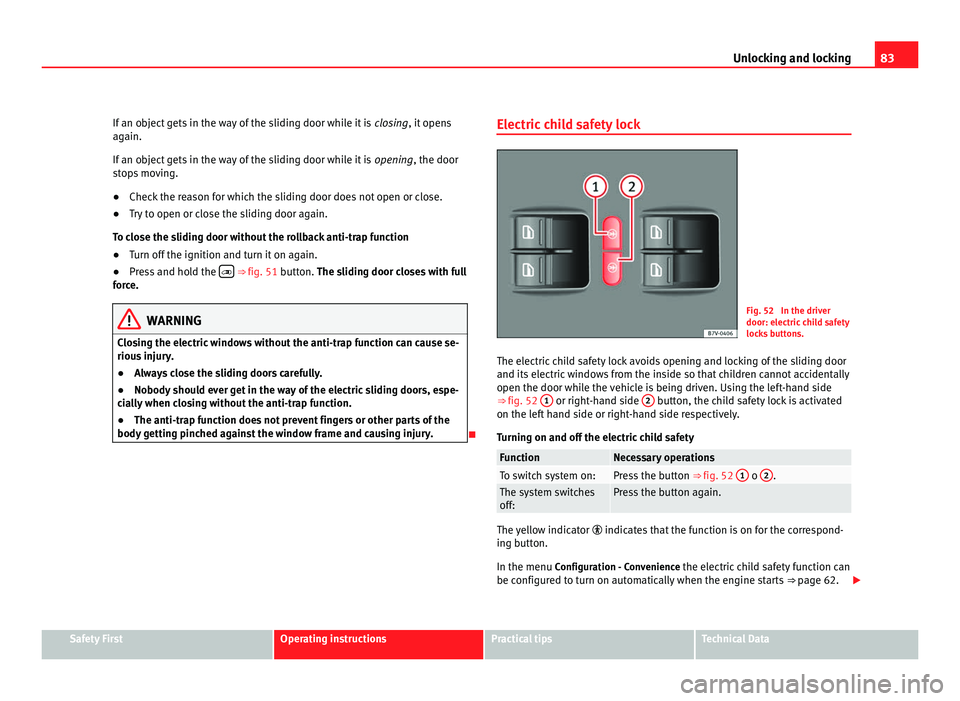
g pinched against the window frame and causing injury. Electric child safety lock Fig. 52 In the driver
door: electric
c
hild safety
locks buttons.
The electric child safety lock avoids opening and locking of the sliding door
and its electric
windows from the inside so that children cannot accidentally
open the door while the vehicle is being driven. Using the left-hand side
⇒ fig. 52 1 or right-hand side
2 button, the child safety lock is activated
on the lef t
hand side or right-hand side respectively.
Turning on and off the electric child safety Function Necessary operations
To switch system on: Press the button
⇒ fig. 52 1 o
2 .
The system switches
off: Press the button again.
The yellow indicator
indicate
s that the function is on for the correspond-
ing button.
In the menu Configuration - Convenience the electric child safety function can
be configured to turn on automatically when the engine starts ⇒ page 62. Safety First Operating instructions Practical tips Technical Data
Page 117 of 385
115
Seats and storage compartments
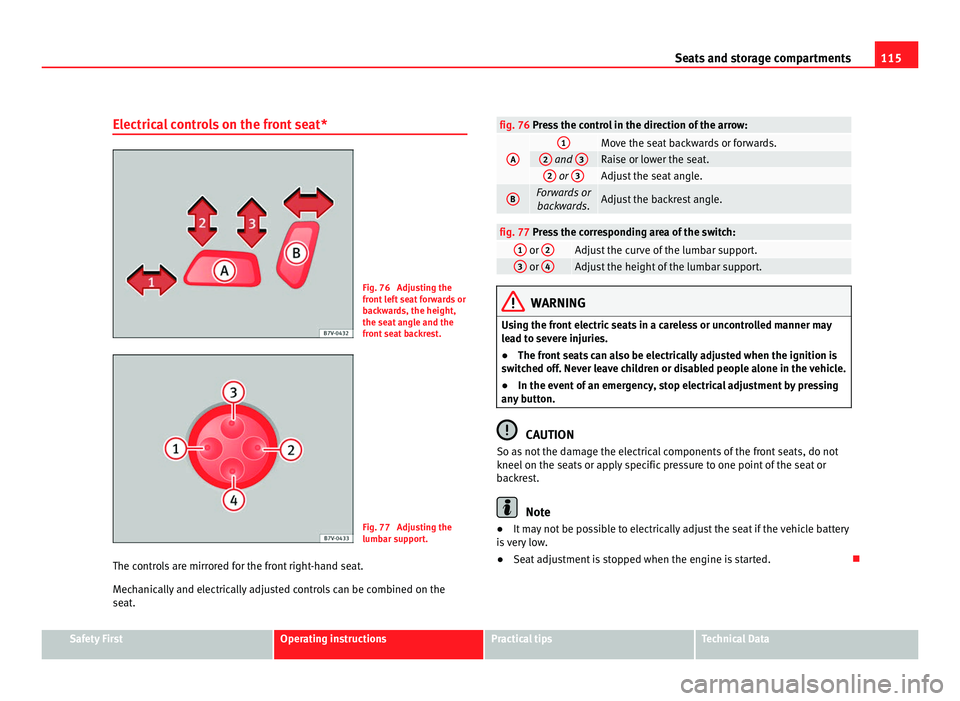
Electrical controls on the front seat* Fig. 76 Adjusting the
front
l
eft seat forwards or
backwards, the height,
the seat angle and the
front seat backrest. Fig. 77 Adjusting the
lumbar s
up
port.
The controls are mirrored for the front right-hand seat.
Mech
anically and electrically adjusted controls can be combined on the
seat. fig. 76 Press the control in the direction of the arrow:
A 1
Move the seat backwards or forwards.
2
and
3 Raise or lower the seat.
2
or
3 Adjust the seat angle.
B Forwards or
backwar ds. Adjust the backrest angle.
fig. 77 Press the corresponding area of the switch:
1
or
2 Adjust the curve of the lumbar support.
3
or
4 Adjust the height of the lumbar support.
WARNING
Using the front electric seats in a careless or uncontrolled manner may
le a
d to severe injuries.
● The front seats can also be electrically adjusted when the ignition is
switc
hed off. Never leave children or disabled people alone in the vehicle.
● In the event of an emergency, stop electrical adjustment by pressing
any b
utton. CAUTION
So as not the damage the electrical components of the front seats, do not
kneel on the se ats
or apply specific pressure to one point of the seat or
backrest. Note
● It may not be possible to electrically adjust the seat if the vehicle battery
i s
very low.
● Seat adjustment is stopped when the engine is started. Safety First Operating instructions Practical tips Technical Data
Page 154 of 385
152
Seats and storage compartments WARNING
Improper use of the sockets or electrical devices could lead to a fire and
cau se seriou
s injuries.
● Never leave children unsupervised in the vehicle. The sockets and
equipment connect
ed to them can be used when the ignition is switched
on.
● Should a connected electrical device overheat, switch it off and un-
plug it immedi
ately. CAUTION
● To avoid damage to the vehicle's electrical system, never connect equip-
ment th
at generates electrical current, such as solar panels or battery charg-
ers, to the 12 Volt sockets in order to charge the vehicle's battery.
● Only use accessories with approved electromagnetic compatibility ac-
cordin
g to current regulations.
● To avoid damage due to voltage variations, switch off all appliances con-
nected to the 12
V sockets before switching the ignition on or off and before
starting the engine.
● Never connect an appliance to the 12 Volt socket that consumes more
than the pow
er indicated in watts. Exceeding the maximum power absorp-
tion could damage the vehicle's electrical system. For the sake of the environment
Do not leave the engine running when the vehicle is at a standstill. Note
● Using electrical appliances with the engine stopped and the ignition
sw it
ched on will drain the battery.
● Unshielded equipment can cause interference on the radio equipment
and the vehic
le's electrical system.
● Interference can occur on the radio's AM waveband if electrical applian-
ces
are used near the rear window aerial.
Page 155 of 385
153
Seats and storage compartments
Vehicle sockets Depending on your vehicle's version, you may have a 12-
volt
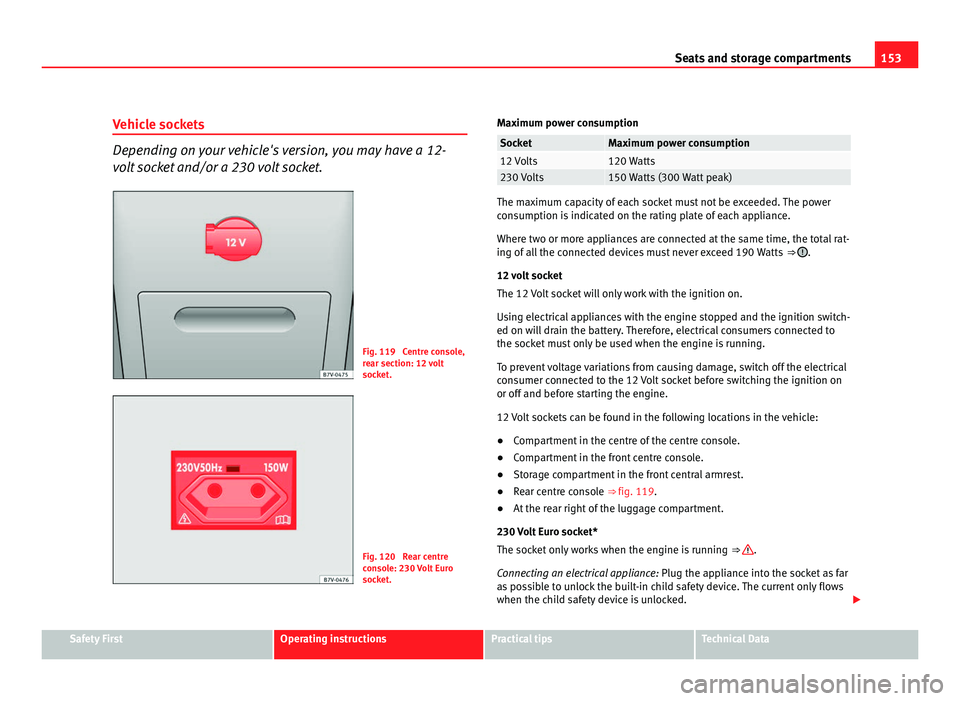
socket and/or a 230 volt socket. Fig. 119 Centre console,
re
ar section: 12
volt
socket. Fig. 120 Rear centre
con
so
le: 230 Volt Euro
socket. Maximum power consumption Socket Maximum power consumption
12 Volts 120 Watts
230 Volts 150 Watts (300 Watt peak)
The maximum capacity of each socket must not be exceeded. The power
con
s
umption is indicated on the rating plate of each appliance.
Where two or more appliances are connected at the same time, the total rat-
ing of all the connected devices must never exceed 190 Watts ⇒ .
12 v o
lt socket
The 12 Volt socket will only work with the ignition on.
Using electrical appliances with the engine stopped and the ignition switch-
ed on will drain the battery. Therefore, electrical consumers connected to
the socket must only be used when the engine is running.
To prevent voltage variations from causing damage, switch off the electrical
consumer connected to the 12 Volt socket before switching the ignition on
or off and before starting the engine.
12 Volt sockets can be found in the following locations in the vehicle:
● Compartment in the centre of the centre console.
● Compartment in the front centre console.
● Storage compartment in the front central armrest.
● Rear centre console ⇒ fig. 119.
● At the rear right of the luggage compartment.
230 Vo
lt Euro socket*
The socket only works when the engine is running ⇒ .
Conn e
cting an electrical appliance: Plug the appliance into the socket as far
as possible to unlock the built-in child safety device. The current only flows
when the child safety device is unlocked. Safety First Operating instructions Practical tips Technical Data