ECO mode Seat Alhambra 2011 Owner's Guide
[x] Cancel search | Manufacturer: SEAT, Model Year: 2011, Model line: Alhambra, Model: Seat Alhambra 2011Pages: 385, PDF Size: 7.92 MB
Page 210 of 385
208
Driving
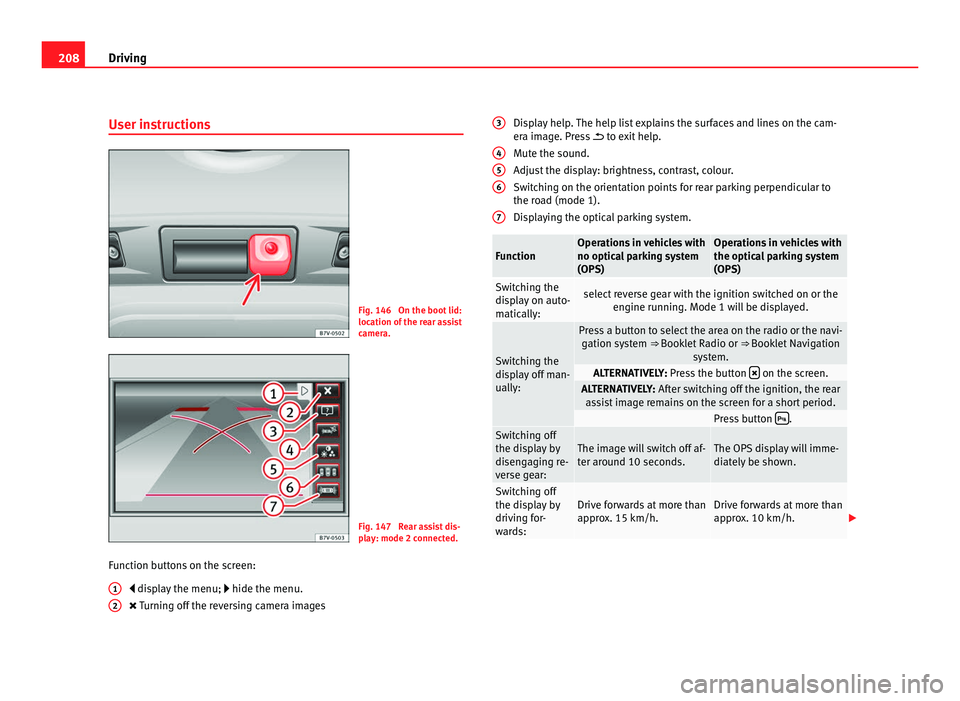
User instructions Fig. 146 On the boot lid:
location of
the r
ear assist
camera. Fig. 147 Rear assist dis-
pl
a
y: mode 2 connected.
Function buttons on the screen: disp
lay the menu; hide the menu.
Turning off the reversing camera images
1 2 Display help. The help list explains the surfaces and lines on the cam-
era im
ag
e. Press to exit help.
Mute the sound.
Adjust the display: brightness, contrast, colour.
Switching on the orientation points for rear parking perpendicular to
the road (mode 1).
Displaying the optical parking system. Function Operations in vehicles with
no optica
l
parking system
(OPS) Operations in vehicles with
the optica
l
parking system
(OPS) Switching the
dis
p
lay on auto-
matically: select reverse gear with the ignition switched on or the
engine ru nnin
g. Mode 1 will be displayed. Switching the
dis
p
lay off man-
ually: Press a button to select the area on the radio or the navi-
gation sy s
tem ⇒ Booklet Radio or ⇒ Booklet Navigation
system. ALTERNATIVELY: Pre
s
s the button on the screen.
ALTERNATIVELY: Aft
er sw
itching off the ignition, the rear
assist image remains on the screen for a short period. Press button
.
Switching off
the dis
p
lay by
disengaging re-
verse gear: The image will switch off af-
ter ar
ou
nd 10 seconds. The OPS display will imme-
diat
ely
be shown. Switching off
the dis
p
lay by
driving for-
wards: Drive forwards at more than
appr
o
x. 15 km/h. Drive forwards at more than
appr
o
x. 10 km/h. 3
4
5
6
7
Page 211 of 385
209
Driving
Things to note 1) Do not use the rear assist system in the following cases:
– If there is a fault in the dynamic chassis control (DCC).
– If the image displayed is not very clear or reliable (low visibility or dirty
len
s). – If the space behind the vehicle cannot be clearly or completely recog-
nised.
– If the vehicle has been overloaded at the rear.
– If the driver is not familiar with the system.
– If the tailgate is open.
– If the position and installation angle of the camera have been changed,
e.g. in a r
e
ar-end collision. Have a specialised workshop check the system. 2) Optical illusions of the camera (examples)
The rear assist camera produces two-dimensional images. Any cracks in or
ob
j
ects protruding from the ground or from other vehicles are more diffi-
cult to spot or cannot be seen due to a lack of depth in the image dis-
played. Objects or other vehicles may seem to be closer or further away than what
they r
e
ally are: – On changing from a flat surface to a slope or gradient.
– On changing from a slope or gradient to a flat surface.
– If the vehicle has been overloaded at the rear.
– On approaching protruding objects. These objects may be outside the
angl
e of
vision of the camera when reversing. Cleaning the camera lens
Keep the c
amer
a lens clean and clear of snow and ice:
● Moisten the lens using a commercially available, alcohol-based glass
cle
aning agent and clean the lens with a dry cloth ⇒ .
● Remove snow using a small brush.
● Use de-icing spray to remove any ice ⇒ . CAUTION
● Never use abrasive cleaners to clean the camera lens.
● Nev er r
emove snow or ice from the camera lens using warm or hot water.
This c
ould damage the lens. Note
● SEAT recommends that you practise parking with the rear assist system
in a quiet loc
ation or in a car park to become familiar with the system, in-
cluding the orientation lines and their function.
● The orientation lines will not be displayed on the screen if the tailgate is
open or the factor
y-fitted towing bracket is electrically connected to a trailer.
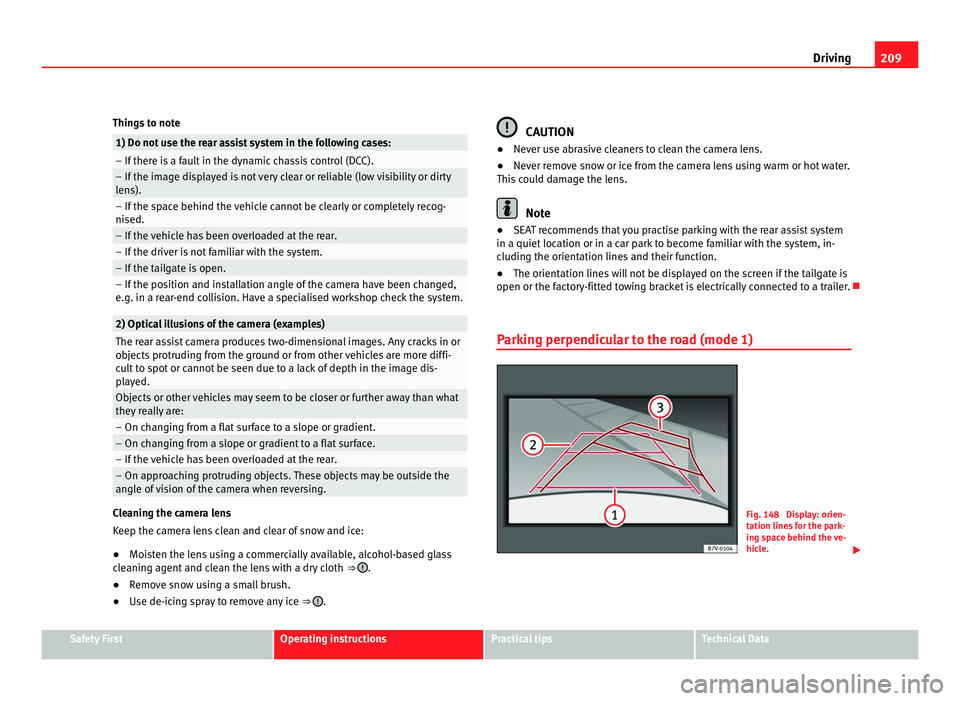
Parking perpendicular to the road (mode 1) Fig. 148 Display: orien-
tation line
s
for the park-
ing space behind the ve-
hicle. Safety First Operating instructions Practical tips Technical Data
Page 218 of 385
216
Driving
Control lamps Blinks or lights
up Possible cause Solution
(yellow) Lane assist system con-
nected b
ut
inactive. The system cannot clearly
detect
the l
ane. See and
page 217, The lane assist
system is inactive (control
lamp lit in yellow). (green) Lane assist system con-
nected and activ
e. –
Several warning and control lamps should light up for a few seconds when
the ignition is
sw
itched. This signals that the lamp is working properly. They
will switch off after a few seconds. WARNING
If the warning lamps and messages are ignored, the vehicle may stall in
traffic, or m a
y cause accidents and severe injuries.
● Never ignore the warning lamps or text messages.
● Stop the vehicle safely as soon as possible. CAUTION
Failure to heed the warning lamps and text messages when they appear
ma y
result in faults in the vehicle. Operation mode
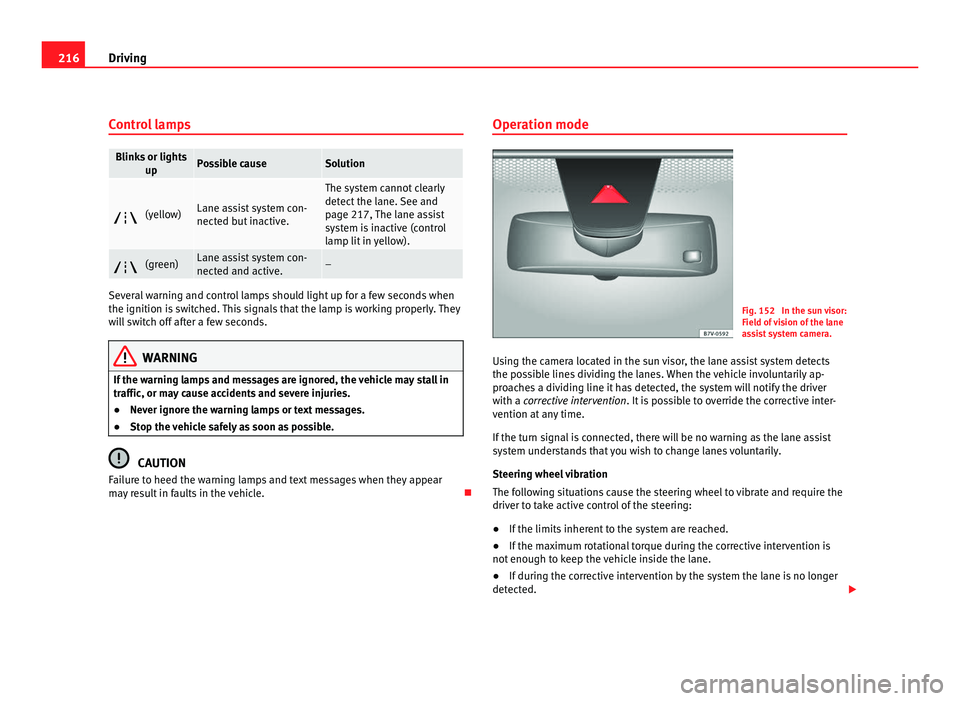
Fig. 152 In the sun visor:
Field of
vision of the lane
assist system camera.
Using the camera located in the sun visor, the lane assist system detects
the poss
ible lines dividing the lanes. When the vehicle involuntarily ap-
proaches a dividing line it has detected, the system will notify the driver
with a corrective intervention. It is possible to override the corrective inter-
vention at any time.
If the turn signal is connected, there will be no warning as the lane assist
system understands that you wish to change lanes voluntarily.
Steering wheel vibration
The following situations cause the steering wheel to vibrate and require the
driver to take active control of the steering:
● If the limits inherent to the system are reached.
● If the maximum rotational torque during the corrective intervention is
not enough to k
eep the vehicle inside the lane.
● If during the corrective intervention by the system the lane is no longer
detected.
Page 221 of 385
219
Driving
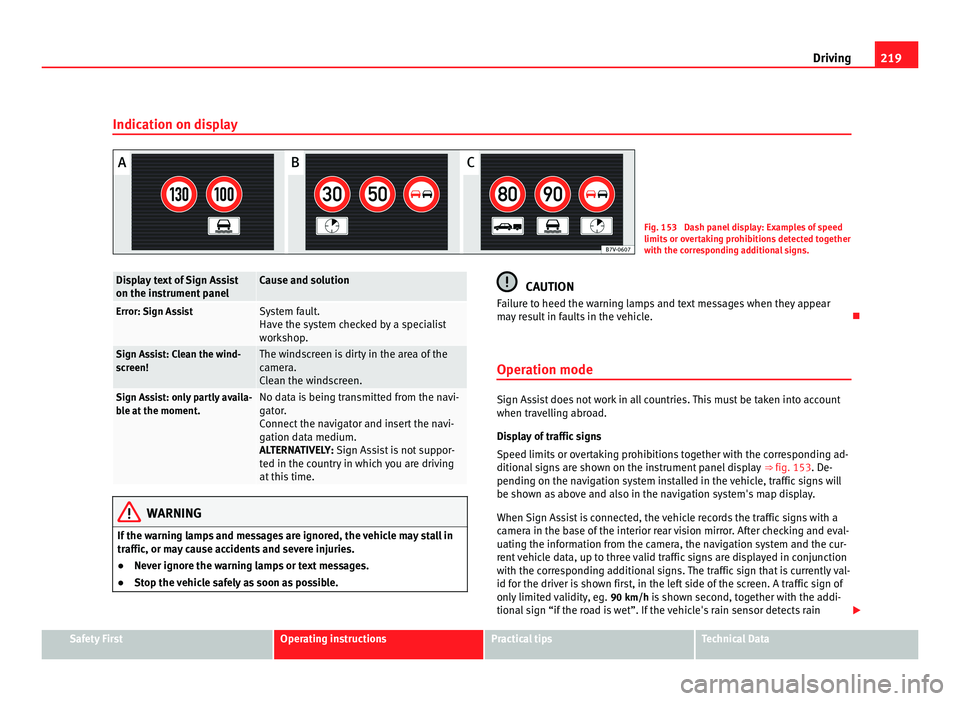
Indication on display Fig. 153 Dash panel display: Examples of speed
limits
or o
vertaking prohibitions detected together
with the corresponding additional signs. Display text of Sign Assist
on the ins
trument
panel Cause and solution
Error: Sign Assist System fault.
Have the sy
s
tem checked by a specialist
workshop. Sign Assist: Clean the wind-
sc
r
een! The windscreen is dirty in the area of the
camer
a.
C
lean the windscreen. Sign Assist: only partly availa-
bl
e at
the moment. No data is being transmitted from the navi-
gat
or
.
Connect the navigator and insert the navi-
gation data medium.
ALTERNATIVELY: Sign Assist is not suppor-
ted in the country in which you are driving
at this time. WARNING
If the warning lamps and messages are ignored, the vehicle may stall in
traffic, or m a
y cause accidents and severe injuries.
● Never ignore the warning lamps or text messages.
● Stop the vehicle safely as soon as possible. CAUTION
Failure to heed the warning lamps and text messages when they appear
ma y
result in faults in the vehicle.
Operation mode Sign Assist does not work in all countries. This must be taken into account
when trav
el
ling abroad.
Display of traffic signs
Speed limits or overtaking prohibitions together with the corresponding ad-
ditional signs are shown on the instrument panel display ⇒ fig. 153. De-
pending on the navigation system installed in the vehicle, traffic signs will
be shown as above and also in the navigation system's map display.
When Sign Assist is connected, the vehicle records the traffic signs with a
camera in the base of the interior rear vision mirror. After checking and eval-
uating the information from the camera, the navigation system and the cur-
rent vehicle data, up to three valid traffic signs are displayed in conjunction
with the corresponding additional signs. The traffic sign that is currently val-
id for the driver is shown first, in the left side of the screen. A traffic sign of
only limited validity, eg. 90 km/h is shown second, together with the addi-
tional sign “if the road is wet”. If the vehicle's rain sensor detects rain Safety First Operating instructions Practical tips Technical Data
Page 225 of 385
223
Driving WARNING (Continued)
● If tyres are inflated at different pressures or a tyre pressure is too low,
a ty r
e may be damaged and burst resulting in a loss of control of the ve-
hicle.
● The driver is responsible for ensuring that all of the vehicle tyres are
correctly
inflated to the right pressure. The recommended tyre pressure
is indicated on the label ⇒ fig. 176.
● The tyre monitoring system can only operate correctly if all of the
tyre
s are inflated to the correct pressure when cold.
● Driving with tyres at the wrong pressure can cause damage to them
and res
ult in an accident. Ensure that the tyre pressures of all the tyres
correspond to the vehicle load.
● Before starting a journey, always inflated tyres to the correct pres-
sure.
● If
tyre pressure is too low then the tyre is subject to greater forces
and it ma
y be heated to such an extent that the tread can rupture and the
tyre will burst.
● With an overloaded vehicle at high speed, the tyres can overheat and
burs
t resulting in a loss of vehicle control.
● Tyre pressures which are too high or too low reduce the useful life of
the tyre, aff
ecting the vehicle's performance.
● If a tyre has not been punctured then it does not have to be changed
immediately; driv
e to the nearest specialist workshop at a moderate
speed and have the tyre checked and inflated to the correct pressure. WARNING
If the warning lamps and messages are ignored, the vehicle may stall in
traffic, or m a
y cause accidents and severe injuries.
● Never ignore the warning lamps or text messages.
● Stop the vehicle safely as soon as possible. CAUTION
Failure to heed the warning lamps and text messages when they appear
ma y
result in faults in the vehicle.
Tyre monitoring indicator Fig. 154 Detailed view of
the centr
e c
onsole: but-
ton for the tyre pressure
monitoring indicator.
The tyre monitor indicator compares wheel revolutions and, with this infor-
mation, the tr e
ad of each wheel using the ABS sensors. If the tread of a
wheel is changed, the tyre monitoring indicator will indicate as such on the
instrument panel. The wheel tread changes when:
● Tyre pressure is insufficient.
● Tyre structure is damaged.
● The vehicle is unbalanced because of a load.
● The wheels on an axle are subject to a heavier load (e.g. when towing a
trail
er). Safety First Operating instructions Practical tips Technical Data
Page 227 of 385
225
Driving and the environment
Practical tips Drivin g and the en
vironment
Running-in Please observe the instructions for running-in new components.
Ru
nnin
g-in the engine
The engine needs to be run-in over the first 1500 km (1000 miles). During
its first few hours of running, the internal friction in the engine is greater
than later on when all the moving parts have bedded down.
How the vehicle is driven for the first 1500 km (1000 miles) influences the
future engine performance. Throughout the life of the vehicle, it should be
driven at a moderate speed – especially when the engine is cold – this will
reduce engine wear and increase its useful life. Never drive at extremely low
engine speeds. Always engage a lower gear when the engine works “irregu-
larly”. For the first 1000 km or 600 miles, please note:
● Do not use full throttle.
● Do not force the engine above two thirds of its maximum speed.
● Do not tow a trailer.
Between 1000 and 1500 k
ilometres (600 to 1000 miles) , gradually in-
crease power until reaching the maximum speed and high engine speeds.
Running in new tyres and brake pads
● Replacement of new tyres and wheel rims ⇒ pag
e 293
● Notes on the brakes ⇒ pag
e 187 For the sake of the environment
If the engine is run in gently, the life of the engine will be increased and the
engine oi l
consumption reduced.
Ecological driving Introduction Fuel consumption, environmental impact and engine, brake and tyre wear
depend lar
g
ely on three factors:
● Personal driving style.
● Conditions of use (weather, road surface).
● Technical requirements.
Saving
s of up to 25% in fuel consumption are possible with an appropriate
driving style and the adoption of certain simple tips. WARNING
Always adapt your speed and the distance to the vehicles ahead in line
with v
isibility, weather conditions, the condition of the road and the traf-
fic situation.
Safety First Operating instructions Practical tips Technical Data
Page 228 of 385
226
Driving and the environment
Economic driving style Changing gear early
General
in
structions: The highest gear is always the most economical gear.
As a guideline, for the majority of vehicles: At a speed of 30 km/h, drive in
third gear, at 40 km/h in fourth gear and at 50 km/h in fifth gear.
In addition, skipping gears when shifting up helps to save fuel, weather and
traffic conditions permitting.
Do not wait until the last moment before changing gear. Only use first gear
when you move off and change to second gear quickly. Avoid the kick-down
function in vehicles with automatic gearbox.
Vehicles with a gear display help to achieve an economical driving style as
the display indicates the best moment to change gear.
Let the vehicle roll
If you take your foot off the accelerator, the fuel supply is stopped and con-
sumption is reduced.
Allow the vehicle to roll without accelerating, for example when approach-
ing a red traffic light. However, if the vehicle is rolling too slowly or the dis-
tance is too long, the clutch pedal should be pressed to declutch. The en-
gine will then operate at idle speed.
If the vehicle is going to be at a standstill for a period of time, switch off the
engine; for example, while waiting at a level crossing. In vehicles which
have the Start-Stop function on, the engine switches off automatically when
the vehicle is not moving.
Think ahead and “flow” with the traffic
Frequent acceleration and braking considerably increase fuel consumption.
If you think ahead as you drive and keep a safe distance from the vehicle in
front, it is possible to slow down by simply lifting your foot off the accelera-
tor. This eliminates the need for constant braking and acceleration. Calm and steady driving
Cons
tancy is more important than speed: The more you drive at a constant
speed, the lower the fuel consumption.
When driving on the motorway, it is more efficient to drive at a constant and
more moderate speed than to be continuously accelerating and braking. As
a general rule, you will reach your destination just as quickly when you drive
at a constant speed.
The cruise control function helps you to achieve a constant style of driving.
Moderate use of additional electrical appliances
It is important to travel in comfort, but convenience systems should be used
in an ecological manner.
Some equipment, when connected, increase fuel consumption considera-
bly, for example:
● Air conditioning cooling system: If the air conditioning system is re-
quired to c
ool to significantly lower temperatures than the true outside tem-
perature, it will require a large quantity of energy from the engine. There-
fore, we recommend that the selected temperature for the vehicle is not too
different to the outside temperature. It is a good idea to open all the win-
dows of the car before starting your journey, and to drive a short distance
with all the windows open to allow the vehicle to cool down slightly. Only
then should you close all the windows and switch on the air conditioning.
Keep windows closed when travelling at high speeds. Driving with the win-
dows open increases fuel consumption.
● Switch off the seat heating when the seats have warmed up.
● Switch off the heated rear window and the windscreen heating when the
window
s have demisted and are free of ice.
● Do not leave the auxiliary heater switched on when the vehicle is mov-
ing ⇒ p
age 163.
Page 234 of 385
232
Trailer towing WARNING (Continued)
● Trailers with a high centre of gravity can overturn more easily than
tr ai
lers with a low centre of gravity.
● Avoid brusque manoeuvres and sudden braking.
● Always take the following precautions seriously.
● Reduce your speed immediately if you observe the trailer rocking
from side t
o side.
● Never drive at more than 80 km an hour when towing a trailer (or 100
km an hour in exc
eptional circumstances). This also applies in countries
where higher speeds are permitted. Always take the speed limits for ve-
hicles with and without trailers in each country into account.
● Never try to stop the “snaking” by increasing speed. WARNING
When driving with a trailer and using a trailer hitch that was not installed
by
SEAT, the Start-Stop function must be manually deactivated. Other-
wise, this could cause a braking anomaly that could result in an accident
with serious consequences.
● Always manually deactivate the Start-Stop function when a trailer is
being used on a tr
ailer hitch that has not been installed by SEAT. Note
● Always turn off the anti-theft alarm system before connecting or discon-
nectin g a tr
ailer ⇒ page 78. Otherwise, the tilt sensor may erroneously acti-
vate the alarm.
● Never use a trailer with a new engine (for the first 1000 km or 600 miles)
⇒ p
age 257. ●
At SEAT, we recommend folding in the trailer hitch ball when a trailer is
not bein
g used. In case of a rear collision, the damage caused to the vehicle
with the extended trailer hitch ball could be more extensive.
● In some models, a trailer hitch is necessary for towing vehicles. For this
rea
son, you should store the tow hitch in the vehicle at all times.
Page 240 of 385
238
Trailer towing
●The vehicle centre of gravity and handling change because of the trailer
lo a
d and because of the increased combined mass of the vehicle and trail-
er.
● If the towing vehicle is empty and the trailer loaded then the load distri-
bution is
incorrect. If you must travel in these conditions, drive carefully and
reduce your speed accordingly.
Hill starts with a trailer
Depending on the hill and the gross combined weight, it is possible that the
combined vehicle and trailer move backwards slightly when starting.
For a hill start with a trailer, proceed as follows:
● Press and hold the brake pedal.
● Press the button once to turn off the electric parking brake
⇒ p ag
e 183.
● Press and hold the button to hold the vehicle and trailer combination
us in
g the parking brake.
● With a manual gearbox: press the clutch pedal to the floor.
● Engage first gear or the gear range D ⇒ page 174, Ch
anging gear.
● Release the brake pedal.
● Move off slowly. To do this, gently release the clutch pedal (for manual
gearbo
x).
● Release the button only when the engine provides sufficient power
to mo v
e the vehicle and trailer combination. WARNING
Jerking the trailer in an unsuitable manner could cause loss of vehicle
contr o
l with the subsequent serious consequences.
● Driving with a trailer and transporting heavy or a large objects will
chan
ge the vehicle handling and braking distances. WARNING (Continued)
● Antic ipate traffic and be extremely cautious. Brake early.
● Adju
s
t your speed and driving style to visibility, road, traffic and
weather c
onditions. Reduce your speed, especially on steep hills.
● Accelerate gently and carefully. Avoid brusque manoeuvres and sud-
den brakin
g.
● Always take the following precautions seriously. Reduce your speed
immediately
if you observe the trailer rocking from side to side.
● Never try to stop the “snaking” by increasing speed.
● Always take the speed limits for vehicles with and without trailers in
each c
ountry into account.
Stabilising the vehicle and trailer combination Stabilisation of the vehicle and trailer combination is an extension of the
electr
onic
stability control ESC (ESP) and helps, with the assistance of the
trajectory control, to reduce trailer “snaking”.
Stabilisation of the vehicle and trailer combination is active when the ESC
(ESP) indicator on the dashboard remains lit for about two seconds more
than the ABS indicator.
Requirements for stabilising the vehicle/trailer combination
● An original tow hitch is fitted by the manufacturer or a compatible model
is r
etrofitted.
● The ESC (ESP) is on. The warning indicator in the control panel is not
lit
.
● The trailer is connected to the vehicle using the socket.
● The vehicle is driven faster than 60 km/h.
● The maximum drawbar load is used.
Page 251 of 385
249
Vehicle maintenance and cleaning WARNING
Additional underseal or anti-corrosion products could catch fire due to
the high temper at
ures reached by the exhaust gas system and other en-
gine components.
● Do not apply additional underseal or anti-corrosion products to the
exhau
st pipes, catalytic converters, heat shields or other parts of the ve-
hicle which reach high temperatures.
Cleaning the engine compartment The engine compartment of any motor vehicle is a potentially hazardous
are
a
⇒ page 275.
The engine compartment should only be cleaned by qualified personnel. If
it is not correctly cleaned, the anti-corrosion coating and consequently elec-
trical components may be damaged. Moreover, water may filter directly into
the vehicle interior through the water chamber ⇒ .
If the en gine c
ompartment is very dirty, always take the vehicle to a Techni-
cal Service for professional cleaning. SEAT recommends visiting a Technical
Service.
Water box
The water box is in the engine compartment, between the windscreen and
the engine, and beneath a perforated cover. Air is taken in through the wa-
ter box from outside to the vehicle interior via the heating and air condition-
ing system.
Leaves and other loose objects should be regularly cleaned away from the
water box either by hand or with a vacuum. WARNING
When working on the engine or in the engine compartment, there is a
risk of
injury, burns, accident or fire.
● Before starting work, please ensure you are familiar with the required
procedur
e and the safety precautions ⇒ page 275.
● SEAT recommends you have this work performed by a qualified deal-
ership. CAUTION
If water is manually poured into the water box (for example, using a high
pre s
sure cleaning appliance), this could cause significant damage to the ve-
hicle. For the sake of the environment
Only wash the engine compartment in areas allocated for this purpose, to
prev ent
dirty water which may be contaminated by oil, grease or fuel, from
entering the drains. In some districts, the engine compartment may not be
washed outside the wash bays provided for this purpose.
Caring for and cleaning the vehicle interior Introduction The dye from many items of modern clothing (e.g. dark jeans) is not always
solid enough.
Se
at upholstery (material and leather), especially when light-
coloured, may visibly discolour if the dye comes out of clothing (even when
used correctly). This is not an upholstery defect but indicates that the dye in
the item of clothing is not solid enough. Safety First Operating instructions Practical tips Technical Data