key Seat Altea 2015 Owner's Manual
[x] Cancel search | Manufacturer: SEAT, Model Year: 2015, Model line: Altea, Model: Seat Altea 2015Pages: 236, PDF Size: 4.23 MB
Page 5 of 236
Table of Contents
Table of Contents
Safety . . . . . . . . . . . . . . . . . . . . . . . . . . . . . . . . 5
Safe driving . . . . . . . . . . . . . . . . . . . . . . . . . . . . 5
Safety first! . . . . . . . . . . . . . . . . . . . . . . . . . . . . . 5
Advice about driving . . . . . . . . . . . . . . . . . . . . . 5
Proper sitting position for occupants . . . . . . . . 6
Pedal area . . . . . . . . . . . . . . . . . . . . . . . . . . . . . . 11
Seat belts . . . . . . . . . . . . . . . . . . . . . . . . . . . . . . 11
The reason why we should wear seat belts . . . 11
How to properly adjust your seatbelt . . . . . . . . 14
Seat belt tensioners . . . . . . . . . . . . . . . . . . . . . . 16
Airbag system . . . . . . . . . . . . . . . . . . . . . . . . . . 17
Brief introduction . . . . . . . . . . . . . . . . . . . . . . . . 17
Airbag overview . . . . . . . . . . . . . . . . . . . . . . . . . 20
Deactivating airbags . . . . . . . . . . . . . . . . . . . . . 23
Transporting children safety . . . . . . . . . . . . . . . 24
Safety for children . . . . . . . . . . . . . . . . . . . . . . . 24
Child seats . . . . . . . . . . . . . . . . . . . . . . . . . . . . . 26
Operation . . . . . . . . . . . . . . . . . . . . . . . . . . . . . 31
Dash panel . . . . . . . . . . . . . . . . . . . . . . . . . . . . . 31
Overview . . . . . . . . . . . . . . . . . . . . . . . . . . . . . . . 31
Instruments . . . . . . . . . . . . . . . . . . . . . . . . . . . . 32
Warning lamps . . . . . . . . . . . . . . . . . . . . . . . . . . 35
Digital instrument panel display . . . . . . . . . . . . 47
Instrument panel menus* . . . . . . . . . . . . . . . . . 50
Steering wheel controls* . . . . . . . . . . . . . . . . . . 57
General information . . . . . . . . . . . . . . . . . . . . . . 57
Audio system . . . . . . . . . . . . . . . . . . . . . . . . . . . 57
Radio navigation system . . . . . . . . . . . . . . . . . . 61
Opening and closing . . . . . . . . . . . . . . . . . . . . . 63
Central locking . . . . . . . . . . . . . . . . . . . . . . . . . . 63
Keys . . . . . . . . . . . . . . . . . . . . . . . . . . . . . . . . . . . 66
Radio frequency remote control . . . . . . . . . . . . 67
Anti-theft alarm system* . . . . . . . . . . . . . . . . . . 68
Boot hatch . . . . . . . . . . . . . . . . . . . . . . . . . . . . . 71 Electric windows . . . . . . . . . . . . . . . . . . . . . . . . . 72
Sliding/tilting sunroof* . . . . . . . . . . . . . . . . . . . 74
Lights and visibility
. . . . . . . . . . . . . . . . . . . . . . 75
Lights . . . . . . . . . . . . . . . . . . . . . . . . . . . . . . . . . 75
Interior lights . . . . . . . . . . . . . . . . . . . . . . . . . . . 82
Visibility . . . . . . . . . . . . . . . . . . . . . . . . . . . . . . . 83
Windscreen wiper and rear window wiper
systems . . . . . . . . . . . . . . . . . . . . . . . . . . . . . . . . 84
Rear vision mirrors . . . . . . . . . . . . . . . . . . . . . . . 86
Seats and head restraints . . . . . . . . . . . . . . . . . 88
Adjusting the seat and head restraints . . . . . . 88
Seat functions . . . . . . . . . . . . . . . . . . . . . . . . . . 91
Rear seats . . . . . . . . . . . . . . . . . . . . . . . . . . . . . . 92
Transport and practical equipment . . . . . . . . . 93
Compartments . . . . . . . . . . . . . . . . . . . . . . . . . . 93
Multi-purpose mobile storage compartment* . 96
Ashtray*, cigarette lighter* and power sockets 98
First-aid kit, warning triangle, fire extinguisher 100
Luggage compartment . . . . . . . . . . . . . . . . . . . . 101
Roof carrier/rack system* . . . . . . . . . . . . . . . . . 104
Air conditioning . . . . . . . . . . . . . . . . . . . . . . . . . 107
Heating . . . . . . . . . . . . . . . . . . . . . . . . . . . . . . . . 107
Climatic* . . . . . . . . . . . . . . . . . . . . . . . . . . . . . . . 109
2C-Climatronic* . . . . . . . . . . . . . . . . . . . . . . . . . 112
General notes . . . . . . . . . . . . . . . . . . . . . . . . . . . 116
Driving . . . . . . . . . . . . . . . . . . . . . . . . . . . . . . . . 117
Power steering (servotronic*) . . . . . . . . . . . . . . 117
All-wheel drive* . . . . . . . . . . . . . . . . . . . . . . . . . 117
Driving with LPG* . . . . . . . . . . . . . . . . . . . . . . . . 118
Journeys abroad . . . . . . . . . . . . . . . . . . . . . . . . . 120
Ignition lock . . . . . . . . . . . . . . . . . . . . . . . . . . . . 120
Braking and parking . . . . . . . . . . . . . . . . . . . . . 123
Manual gearbox . . . . . . . . . . . . . . . . . . . . . . . . . 126
Automatic gearbox/DSG automatic gearbox* . 127
Run-in and economical driving . . . . . . . . . . . . . 130
Driver assistance systems . . . . . . . . . . . . . . . . . 134
Braking and stability systems . . . . . . . . . . . . . . 134
Start-Stop System* . . . . . . . . . . . . . . . . . . . . . . . 138 Parking aid acoustic system* . . . . . . . . . . . . . . 140
Cruise speed* (cruise control system - CCS) . . . 142
Towing bracket device
. . . . . . . . . . . . . . . . . . . . 144
Trailer towing . . . . . . . . . . . . . . . . . . . . . . . . . . . 144
Advice . . . . . . . . . . . . . . . . . . . . . . . . . . . . . . . . 147
Care and maintenance . . . . . . . . . . . . . . . . . . . . 147
Accessories and technical modifications . . . . . 147
Care and cleaning . . . . . . . . . . . . . . . . . . . . . . . 148
Care of the vehicle exterior . . . . . . . . . . . . . . . . 149
Caring for the vehicle interior . . . . . . . . . . . . . . 153
Checking and refilling levels . . . . . . . . . . . . . . . 158
Fuel . . . . . . . . . . . . . . . . . . . . . . . . . . . . . . . . . . . 158
Petrol . . . . . . . . . . . . . . . . . . . . . . . . . . . . . . . . . . 159
Diesel . . . . . . . . . . . . . . . . . . . . . . . . . . . . . . . . . 160
LPG system (Liquefied petroleum gas)* . . . . . . 160
Working in the engine compartment . . . . . . . . 163
Engine oil . . . . . . . . . . . . . . . . . . . . . . . . . . . . . . 166
Cooling system . . . . . . . . . . . . . . . . . . . . . . . . . . 169
Windscreen washer reservoir . . . . . . . . . . . . . . 171
Brake fluid . . . . . . . . . . . . . . . . . . . . . . . . . . . . . 172
Vehicle battery . . . . . . . . . . . . . . . . . . . . . . . . . . 173
Wheels . . . . . . . . . . . . . . . . . . . . . . . . . . . . . . . . 175
Wheels and tyres . . . . . . . . . . . . . . . . . . . . . . . . 175
Winter service . . . . . . . . . . . . . . . . . . . . . . . . . . . 180
Emergencies . . . . . . . . . . . . . . . . . . . . . . . . . . . . 181
Vehicle tools, spare wheel . . . . . . . . . . . . . . . . . 181
Wheel change . . . . . . . . . . . . . . . . . . . . . . . . . . . 182
Tyre repair . . . . . . . . . . . . . . . . . . . . . . . . . . . . . . 186
Jump-starting . . . . . . . . . . . . . . . . . . . . . . . . . . . 189
Towing and tow-starting . . . . . . . . . . . . . . . . . . 191
Emergency locking and unlocking . . . . . . . . . . 193
Changing the wiper blades . . . . . . . . . . . . . . . . 194
Fuses and bulbs . . . . . . . . . . . . . . . . . . . . . . . . . 196
Fuses . . . . . . . . . . . . . . . . . . . . . . . . . . . . . . . . . . 196
Changing the lights . . . . . . . . . . . . . . . . . . . . . . 198
3
Page 20 of 236
Safety
Children up to 12 years old should always
travel on the rear seat. Never transport chil-
dren in the vehicle if they are not restrained
or the restraint system is not appropriate for
their age, size or weight.
●
If you are not wearing a seat belt, or if you
lean forward or to the side while travelling or
assume an incorrect sitting position, there is
a substantially increased risk of injury. This
increased risk of injury will be further in-
creased if you are struck by an inflating air-
bag.
● To reduce the risk of injury from an inflating
airbag, always wear the seat belt properly
››› page 11.
● Alw
ays adjust the front seats properly. Description of airbag system
The airbag system mainly comprises (as per
vehicle equipment):
●
an electronic control and monitoring sys-
tem (control unit)
● frontal airbags for driver and passenger,
● side airbags,
● curtain (head) airbags,
● a control lamp on the dash panel
››› page 19 .
● a k ey
-operated switch for front passenger
airbag, ●
a control lamp for disabling/enabling the
front passenger airbag.
The airbag system operation is monitored
electronically. The airbag control lamp will il-
luminate for a few seconds every time the ig-
nition is switched on (self-diagnosis).
There is a fault in the system if the control
lamp :
● does
not light up when the ignition is
switched on ››› page 19,
● turn
s off after 4 seconds after the ignition
is switched on
● turns off and then lights up again after the
ignition is switched on
● illuminates or flashes while the vehicle is
moving.
The airbag system is not triggered if:
● the ignition is switched off
● there is a minor frontal collision
● there is a minor side collision
● there is a rear-end collision
● the vehicle turns over. WARNING
● The seat belts and airbags can only provide
maximum protection if the occupants are
seated correctly ››› page 6, Proper sitting po-
sition for occupants. ●
If a fault has occurred in the airbag system,
have the system checked immediately by a
specialised workshop. Otherwise, during a
frontal collision the system might not trigger
correctly or may fail to trigger at all. Airbag activation
The airbags deploy extremely rapidly, within
thousandths of a second, to provide addi-
tional protection in the event of an accident.
A fine dust may develop when the airbag de-
ploys. This is normal and it is not an indica-
tion of fire in the vehicle.
The airbag system is only ready to function
when the ignition is on.
In special cases of an accident, several air-
bags may activate at the same time.
In the event of minor head-on and side colli-
sions, rear-end collisions, overturning or roll-
over of the vehicle, airbags
do not activate.
Activation factors
The conditions that lead to the airbag system
activating in each situation cannot be gener-
alised. There are some factors that play an
important role, such as the properties of the
object the vehicle hits (hard/soft), angle of
impact, vehicle speed, etc.
The deceleration trajectory is key for airbag
activation.
18
Page 25 of 236
Airbag system
●
Any work on the head-protection airbag
system or removal and installation of the air-
bag components for other repairs (such as re-
moval of the roof lining) should only be per-
formed by a specialised workshop. Other-
wise, faults may occur during the airbag sys-
tem operation.
● Do not attempt to modify components of
the airbag system in any way.
● The side and head airbags are managed
through sensors located in the interior of the
front doors. To ensure the correct operation of
the side and curtain airbags, neither the
doors nor the door panels should be modified
in any way (e.g. fitting loudspeakers). If the
front door is damaged, the airbag system
may not work correctly. All work carried out
on the front door must be done in a special-
ised workshop. Deactivating airbags
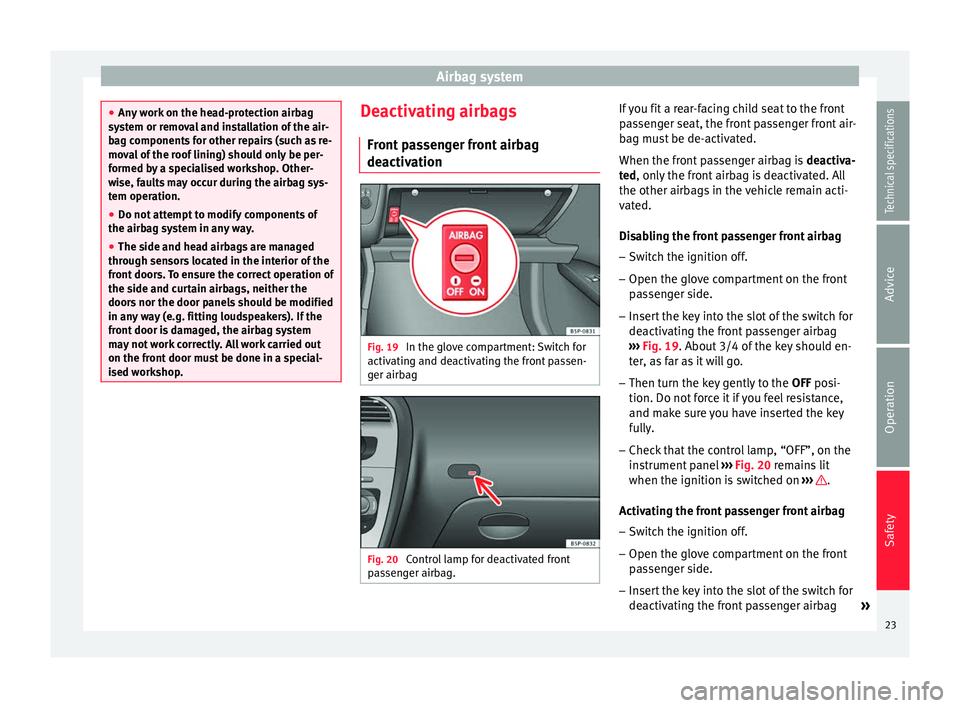
Front passenger front airbag
deactivation Fig. 19
In the glove compartment: Switch for
activating and deactivating the front passen-
ger airbag Fig. 20
Control lamp for deactivated front
passenger airbag. If you fit a rear-facing child seat to the front
passenger seat, the front passenger front air-
bag must be de-activated.
When the front passenger airbag is
deactiva-
ted , only the front airbag is deactivated. All
the other airb ag
s in the vehicle remain acti-
vated.
Disabling the front passenger front airbag
– Switch the ignition off.
– Open the glove compartment on the front
passenger side.
– Insert the key into the slot of the switch for
deactivating the front passenger airbag
››› Fig. 19. About 3/4 of the key should en-
ter
, as far as it will go.
– Then turn the key gently to the OFF posi-
tion. Do not f
orce it if you feel resistance,
and make sure you have inserted the key
fully.
– Check that the control lamp, “OFF”, on the
instrument panel ››› Fig. 20 remains lit
when the ignition is
switched on ››› .
Activating the front passenger front airbag – Switch the ignition off.
– Open the glove compartment on the front
passenger side.
– Insert the key into the slot of the switch for
deactivating the front passenger airbag
»
23
Technical specifications
Advice
Operation
Safety
Page 26 of 236
Safety
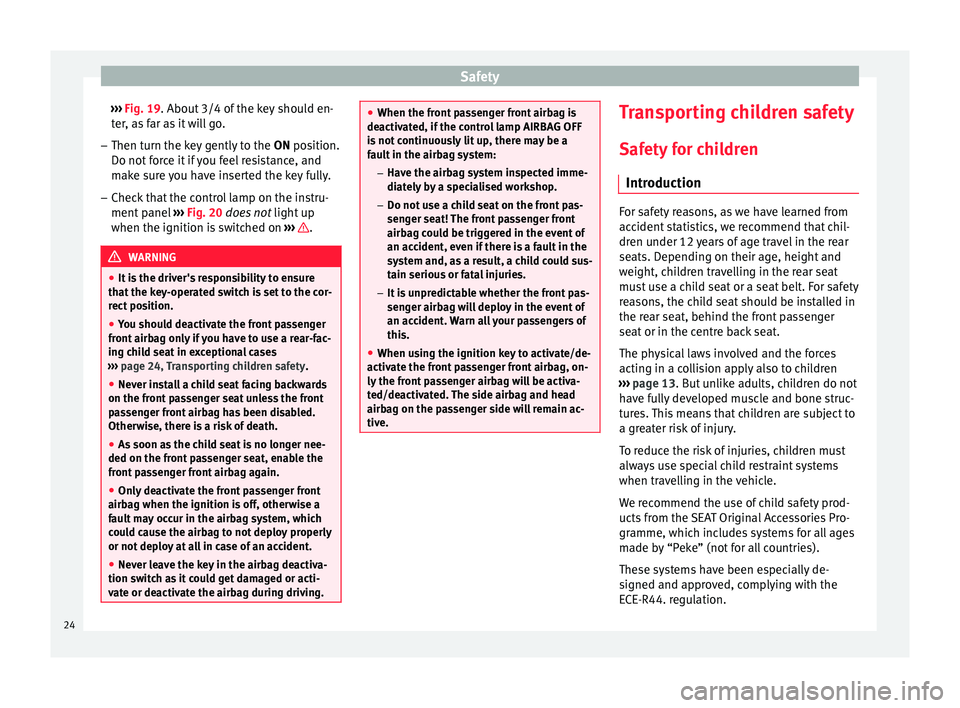
››› Fig. 19 . About 3/4 of the key should en-
t er
, as far as it will go.
– Then turn the key gently to the ON position.
Do not f
orce it if you feel resistance, and
make sure you have inserted the key fully.
– Check that the control lamp on the instru-
ment panel ››› Fig. 20 does not light up
when the ignition i
s switched on ››› .
WARNING
● It is the driver's responsibility to ensure
that the key-operated switch is set to the cor-
rect position.
● You should deactivate the front passenger
front airbag only if you have to use a rear-fac-
ing child seat in exceptional cases
››› page 24, Transporting children safety.
● Never install a child seat facing backwards
on the front passenger seat unless the front
passenger front airbag has been disabled.
Otherwise, there is a risk of death.
● As soon as the child seat is no longer nee-
ded on the front passenger seat, enable the
front passenger front airbag again.
● Only deactivate the front passenger front
airbag when the ignition is off, otherwise a
fault may occur in the airbag system, which
could cause the airbag to not deploy properly
or not deploy at all in case of an accident.
● Never leave the key in the airbag deactiva-
tion switch as it could get damaged or acti-
vate or deactivate the airbag during driving. ●
When the front passenger front airbag is
deactivated, if the control lamp AIRBAG OFF
is not continuously lit up, there may be a
fault in the airbag system:
– Have the airbag system inspected imme-
diately by a specialised workshop.
– Do not use a child seat on the front pas-
senger seat! The front passenger front
airbag could be triggered in the event of
an accident, even if there is a fault in the
system and, as a result, a child could sus-
tain serious or fatal injuries.
– It is unpredictable whether the front pas-
senger airbag will deploy in the event of
an accident. Warn all your passengers of
this.
● When using the ignition key to activate/de-
activate the front passenger front airbag, on-
ly the front passenger airbag will be activa-
ted/deactivated. The side airbag and head
airbag on the passenger side will remain ac-
tive. Transporting children safety
Safety for children Introduction For safety reasons, as we have learned from
accident statistics, we recommend that chil-
dren under 12 years of age travel in the rear
seats. Depending on their age, height and
weight, children travelling in the rear seat
must use a child seat or a seat belt. For safety
reasons, the child seat should be installed in
the rear seat, behind the front passenger
seat or in the centre back seat.
The physical laws involved and the forces
acting in a collision apply also to children
››› page 13 . But unlike adults, children do not
h av
e fully developed muscle and bone struc-
tures. This means that children are subject to
a greater risk of injury.
To reduce the risk of injuries, children must
always use special child restraint systems
when travelling in the vehicle.
We recommend the use of child safety prod-
ucts from the SEAT Original Accessories Pro-
gramme, which includes systems for all ages
made by “Peke” (not for all countries).
These systems have been especially de-
signed and approved, complying with the
ECE-R44. regulation.
24
Page 27 of 236
Transporting children safety
Follow the manufacturer's instructions and
observe any statutory requirements when in-
stalling and using child seats. Always read
and note ››› page 25 .
W e r
ecommend you always carry the manu-
facturer's Child Seat Instruction Manual to-
gether with the on-board documentation.
Important information regarding the
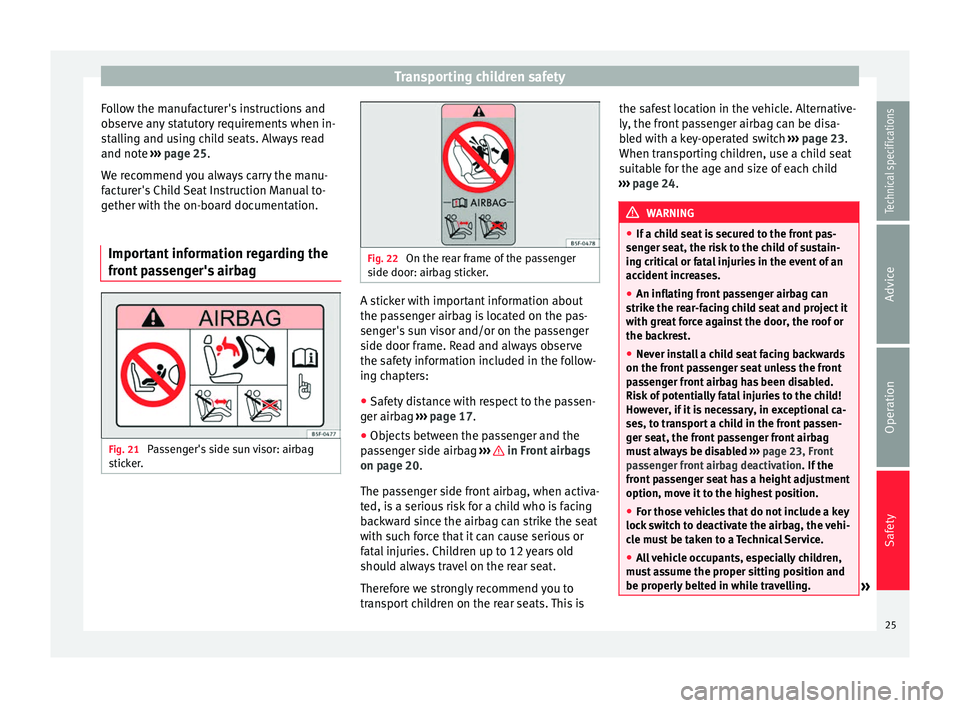
front passenger's airbag Fig. 21
Passenger's side sun visor: airbag
sticker. Fig. 22
On the rear frame of the passenger
side door: airbag sticker. A sticker with important information about
the passenger airbag is located on the pas-
senger's sun visor and/or on the passenger
side door frame. Read and always observe
the safety information included in the follow-
ing chapters:
● Safety distance with respect to the passen-
ger airbag ››› page 17 .
● Ob
jects between the passenger and the
passenger side airbag ››› in Front airbags
on page 20 .
The p a
ssenger side front airbag, when activa-
ted, is a serious risk for a child who is facing
backward since the airbag can strike the seat
with such force that it can cause serious or
fatal injuries. Children up to 12 years old
should always travel on the rear seat.
Therefore we strongly recommend you to
transport children on the rear seats. This is the safest location in the vehicle. Alternative-
ly, the front passenger airbag can be disa-
bled with a key-operated switch
››› page 23.
When transporting children, use a child seat
suitable for the age and size of each child
››› page 24. WARNING
● If a child seat is secured to the front pas-
senger seat, the risk to the child of sustain-
ing critical or fatal injuries in the event of an
accident increases.
● An inflating front passenger airbag can
strike the rear-facing child seat and project it
with great force against the door, the roof or
the backrest.
● Never install a child seat facing backwards
on the front passenger seat unless the front
passenger front airbag has been disabled.
Risk of potentially fatal injuries to the child!
However, if it is necessary, in exceptional ca-
ses, to transport a child in the front passen-
ger seat, the front passenger front airbag
must always be disabled ››› page 23, Front
passenger front airbag deactivation . If the
front passenger seat has a height adjustment
option, move it to the highest position.
● For those vehicles that do not include a key
lock switch to deactivate the airbag, the vehi-
cle must be taken to a Technical Service.
● All vehicle occupants, especially children,
must assume the proper sitting position and
be properly belted in while travelling. » 25
Technical specifications
Advice
Operation
Safety
Page 41 of 236
Dash panel
● Coolant symbol with the warning mes-
s ag
e STOP SEE COOLANT INSTRUCTION MAN-
UAL.
● Engine oil pressure symbol with the
warnin
g message STOP ENGINE OIL PRESSURE
LOW! INSTRUCTION MANUAL.
Warning messages, Priority 2 (yellow)
If one of these faults occurs, the correspond-
ing warning lamp lights up and is accompa-
nied by an audible warning. Check the corre-
sponding function as soon as possible al-
though the vehicle may be used without risk.
If several priority 2 warning messages are de-
tected at the same time, the symbols are dis-
played one after the other for about 2 sec-
onds at a time. After a set time, the informa-
tion text will disappear and the symbol will
be shown as a reminder at the side of the
display.
Priority 2 warning messages will not be
shown until all Priority 1 warning messages
have been dealt with!
Examples of priority 2 warning messages
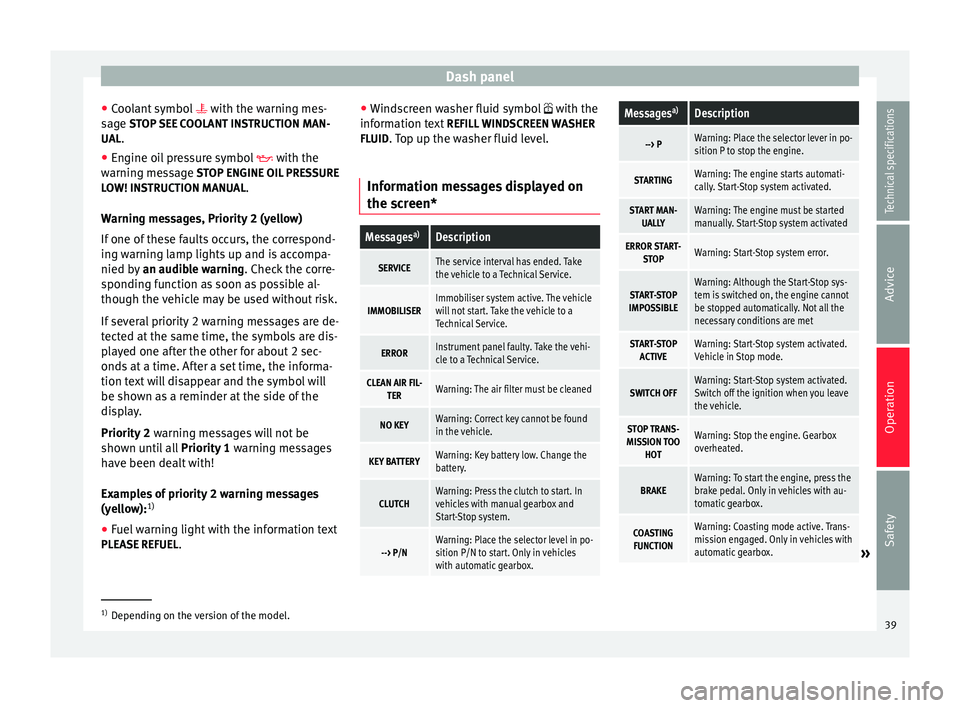
(yellow): 1)
● Fuel warning light with the information text
PLEASE REFUEL . ●
Windscreen washer fluid symbol with the
inform
ation text REFILL WINDSCREEN WASHER
FLUID. Top up the washer fluid level.
Information messages displayed on
the screen*
Messages a)Description
SERVICEThe service interval has ended. Take
the vehicle to a Technical Service.
IMMOBILISERImmobiliser system active. The vehicle
will not start. Take the vehicle to a
Technical Service.
ERRORInstrument panel faulty. Take the vehi-
cle to a Technical Service.
CLEAN AIR FIL-
TERWarning: The air filter must be cleaned
NO KEYWarning: Correct key cannot be found
in the vehicle.
KEY BATTERYWarning: Key battery low. Change the
battery.
CLUTCHWarning: Press the clutch to start. In
vehicles with manual gearbox and
Start-Stop system.
--> P/NWarning: Place the selector level in po-
sition P/N to start. Only in vehicles
with automatic gearbox.
Messages a)Description
--> PWarning: Place the selector lever in po-
sition P to stop the engine.
STARTINGWarning: The engine starts automati-
cally. Start-Stop system activated.
START MAN-
UALLYWarning: The engine must be started
manually. Start-Stop system activated
ERROR START- STOPWarning: Start-Stop system error.
START-STOP
IMPOSSIBLEWarning: Although the Start-Stop sys-
tem is switched on, the engine cannot
be stopped automatically. Not all the
necessary conditions are met
START-STOP ACTIVEWarning: Start-Stop system activated.
Vehicle in Stop mode.
SWITCH OFFWarning: Start-Stop system activated.
Switch off the ignition when you leave
the vehicle.
STOP TRANS-
MISSION TOO HOTWarning: Stop the engine. Gearbox
overheated.
BRAKEWarning: To start the engine, press the
brake pedal. Only in vehicles with au-
tomatic gearbox.
COASTINGFUNCTIONWarning: Coasting mode active. Trans-
mission engaged. Only in vehicles with
automatic gearbox.
» 1)
Depending on the version of the model.
39
Technical specifications
Advice
Operation
Safety
Page 48 of 236
Operation
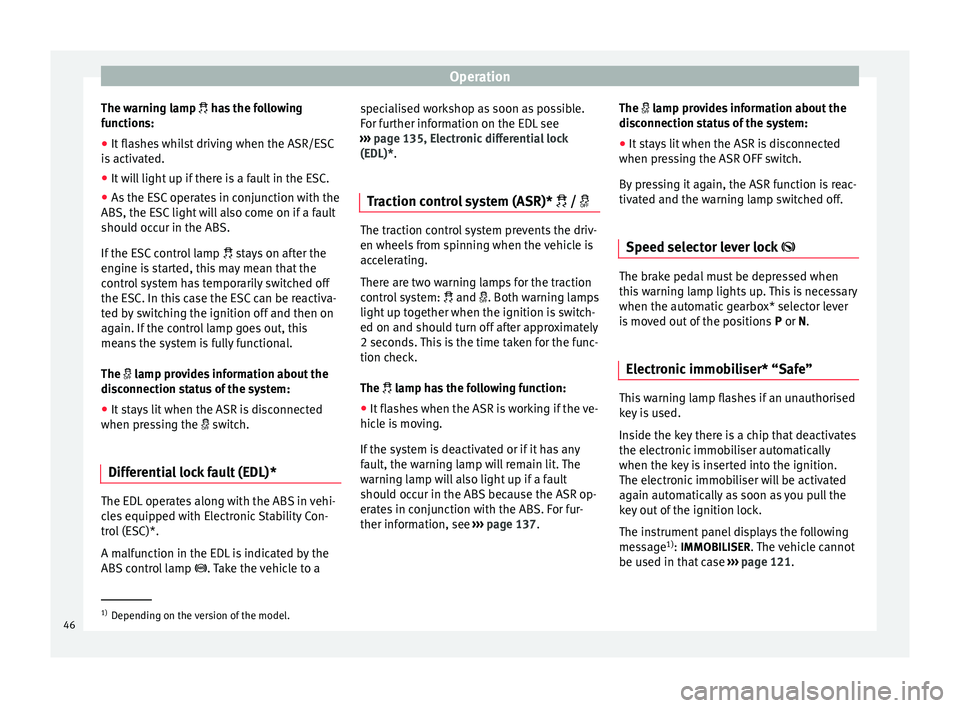
The warning lamp
has the following
f
unctions:
● It flashes whilst driving when the ASR/ESC
is activated.
● It will light up if there is a fault in the ESC.
● As the ESC operates in conjunction with the
ABS, the ESC light will also come on if a fault
should occur in the ABS.
If the ESC control lamp
stays on after the
engine is started, this may mean that the
control system has temporarily switched off
the ESC. In this case the ESC can be reactiva-
ted by switching the ignition off and then on
again. If the control lamp goes out, this
means the system is fully functional.
The lamp provides information about the
disconnection status of the system:
● It stays lit when the ASR is disconnected
when pressing the switch.
Differential lock fault (EDL)* The EDL operates along with the ABS in vehi-
cles equipped with Electronic Stability Con-
trol (ESC)*.
A malfunction in the EDL is indicated by the
ABS control lamp
. Take the vehicle to a specialised workshop as soon as possible.
For further information on the EDL see
››› page 135, Electronic differential lock
(EDL)* .
T r
action control system (ASR)* / The traction control system prevents the driv-
en wheels from spinning when the vehicle is
accelerating.
There are two warning lamps for the traction
control system:
and . Both warning lamps
light up together when the ignition is switch-
ed on and should turn off after approximately
2 seconds. This is the time taken for the func-
tion check.
The lamp has the following function:
● It flashes when the ASR is working if the ve-
hicle is moving.
If the system is deactivated or if it has any
fault, the warning lamp will remain lit. The
warning lamp will also light up if a fault
should occur in the ABS because the ASR op-
erates in conjunction with the ABS. For fur-
ther information, see ›››
page 137. The
lamp provides information about the
di
sconnection status of the system:
● It stays lit when the ASR is disconnected
when pressing the ASR OFF switch.
By pressing it again, the ASR function is reac-
tivated and the warning lamp switched off.
Speed selector lever lock The brake pedal must be depressed when
this warning lamp lights up. This is necessary
when the automatic gearbox* selector lever
is moved out of the positions
P
or N
.
Electronic immobiliser* “Safe” This warning lamp flashes if an unauthorised
key is used.
Inside the key there is a chip that deactivates
the electronic immobiliser automatically
when the key is inserted into the ignition.
The electronic immobiliser will be activated
again automatically as soon as you pull the
key out of the ignition lock.
The instrument panel displays the following
message
1)
: IMMOBILISER
. The vehicle cannot
be used in that case ›››
page 121. 1)
Depending on the version of the model.
46
Page 49 of 236
Dash panel
The engine can, however, be started if the
appropriate coded SEAT genuine key is used. Note
A perfect operation of the vehicle is ensured
if genuine SEAT keys are used. Digital instrument panel
display
Display (without warning or
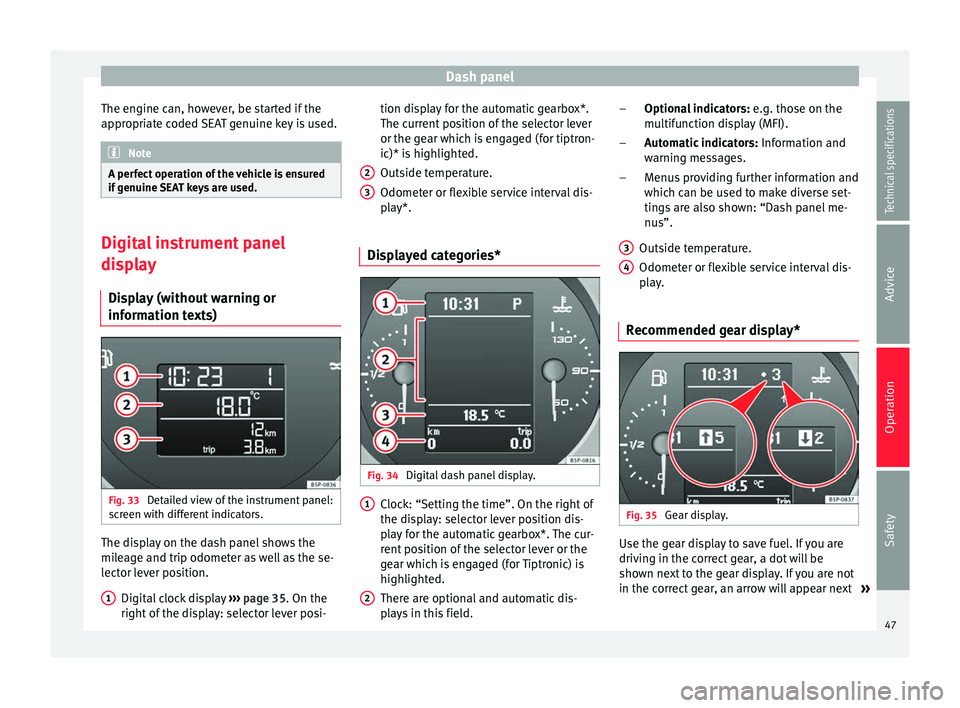
information texts) Fig. 33
Detailed view of the instrument panel:
screen with different indicators. The display on the dash panel shows the
mileage and trip odometer as well as the se-
lector lever position.
Digital clock display ››› page 35. On the
right of the display: selector lever posi-
1 tion display for the automatic gearbox*.
The current position of the selector lever
or the gear which is engaged (for tiptron-
ic)* is highlighted.
Outside temperature.
Odometer or flexible service interval dis-
play*.
Displayed categories* Fig. 34
Digital dash panel display. Clock: “Setting the time”. On the right of
the display: selector lever position dis-
play for the automatic gearbox*. The cur-
rent position of the selector lever or the
gear which is engaged (for Tiptronic) is
highlighted.
There are optional and automatic dis-
plays in this field.
2 3
1
2 Optional indicators:
e.g. those on the
multifunction display (MFI).
Automatic indicators: Information and
warning messages.
Menus providing further information and
which can be used to make diverse set-
tings are also shown: “Dash panel me-
nus”.
Outside temperature.
Odometer or flexible service interval dis-
play.
Recommended gear display* Fig. 35
Gear display. Use the gear display to save fuel. If you are
driving in the correct gear, a dot will be
shown next to the gear display. If you are not
in the correct gear, an arrow will appear next
»
–
–
–
3 4
47Technical specifications
Advice
Operation
Safety
Page 57 of 236
Dash panelDisplayed on
the screenFunction
TimeThe hours and minutes of the clock
and the navigation system can be
changed. Choose between 12 and 24-
hour format and change to summer
time.
Winter tyresThe menu allows the setting of a
speed at which an optical and acous-
tic warning will be given by the sys-
tem. You can use this function, for ex-
ample, if you have fitted winter tyres
which are not suited for the top speed
of your vehicle. Please see the section
“Wheels and tyres”.
LanguageThe display texts and the navigation
system texts can be seen in different
languages.
UnitsThis option allows you to select the
units for displaying temperature, fuel
consumption values and distances.
sel. speedThe instrument panel also displays
the speed in another different unit of
measurement (mph or km/h) to that
given on the speedometer.
Inter. ServiceConsult service messages and reset
service interval display here.
Factory set-
tingsThe manufacturer's predefined values
for the functions of this menu are re-
stored.
Back a)This returns to the main menu.
a)
Only if the windscreen wiper lever is used (MFI). Note
● For electronic and vehicle equipment one or
more of these menus will be displayed.
● SEAT dealerships are able to programme
other functions or change the existing func-
tions depending upon the vehicle equipment.
● The Configuration menu is only accessible
when the vehicle is at a standstill. Convenience menu
Open menu Convenience
– Choose the option Configuration
from the
m
ain menu and press the button OK
A ›››
Fig. 36 on the windscreen wiper lever.
– Pr e
ss button or
on the multifunction
steering wheel* ›››
Fig. 37 until the
C
onfigu-
r
ation menu is displayed.
– Choose the option
Convenience from the
main menu and press the button A on the
windscreen wiper lever.
Example of menu use ›››
page 50
Displayed on
the screenFunction
Central lock-
ing.One door: Individual unlocking activa-
ted.
Auto lock: The doors are automatically
locked when the vehicle is travelling
at more than approx. 15 km/h
(10 mph).
Auto unlock: the doors are unlocked
when the key is removed from the ig-
nition.
Elec. window
controlOpening and closing electric win-
dows: this determines whether to
open or close all the windows when
the vehicle is unlocked or locked. The
open function can also be activated
for the driver door only.
Exterior mirror
adjust.If synchronised adjustment is selec-
ted, when the driver side exterior mir-
ror is adjusted, the passenger exterior
mirror is also moved.
Factory set-
tingsThe predefined factory values for the
functions of this menu are restored.
BackThis returns to the Configuration
menu. Note
For electronic and vehicle equipment one or
more of these menus will be displayed. 55
Technical specifications
Advice
Operation
Safety
Page 65 of 236
Opening and closing
Opening and closing Central locking Basic functions The central locking system enables you to
lock and unlock all doors and the rear lid by
just pushing the button.
Description
Central locking can be activated by using any
of the following options:
● the key , by inserting it into the driver door
cylinder and r ot
ating it manually,
● the central lock button in the vehicle interi-
or ›››
page 65
.
● the radio frequency remote control , using
the buttons on the key ›››
page 67.
Various functions are available to improve
the vehicle safety: “Safe” locking system
Selective unlocking system*
Automatic speed-dependent locking and
unlocking system*
Self-locking system to prevent involunta-
ry unlocking
Emergency unlocking system
–
–
–
–
– Unlocking the vehicle*
Press button
››› Fig. 50 on remote
c ontr
ol to unlock all the doors and rear
lid.
Locking the vehicle* Press button
››› Fig. 50 on the remote
c ontr
ol to lock all doors and the rear lid
or turn the key in the door to lock all
doors and the rear lid. WARNING
● Never leave children or disabled persons in
the vehicle. In case of emergency, they may
not be able to leave the vehicle or manage on
their own.
● Never allow children to play in or around
the vehicle. A locked vehicle can be subjected
to extremely high and low temperatures, de-
pending on the time of year, thus causing se-
rious injuries/illness. It could even have fatal
consequences. Close and lock both the rear
lid and all the other doors when you are not
using the vehicle.
● Always take you car keys with you when
you leave the vehicle. Misuse of the keys, for
example, by children, may result in serious
damage and accident.
– The engine may accidentally be started
and be out of control.
– If the ignition is switched on, the electric
equipment could be activated with risk of –
– injury, for example, in the electric win-
dows.
– The doors can be locked using the remote
control key. This could become an obsta-
cle for assistance in an emergency situa-
tion.
– Always take the key with you when you
leave the vehicle.
● Never remove the key from the ignition if
the vehicle is in motion. The steering lock
could suddenly engage, and you would not be
able to steer the vehicle. Note
● While the driver door is open, the vehicle
cannot be locked with the remote control.
This avoids the user from forgetting his key
inside the vehicle.
● If the driver door is unlocked with the key
shaft, only the driver door is unlocked, the
rest of the doors remain locked. When the ig-
nition is switched on, the door “deadlock”
function is deactivated (although the doors
remain locked) and the central lock button is
activated. See ››› page 68.
● If the c
entral locking or anti-theft alarm are
faulty, the driver door control lamp remains
lit for approx. 30 seconds after the vehicle
locks.
● For anti-theft security, only the driver door
is fitted with a lock cylinder. 63
Technical specifications
Advice
Operation
Safety