ECO Seat Exeo ST 2013 MEDIA SYSTEM E
[x] Cancel search | Manufacturer: SEAT, Model Year: 2013, Model line: Exeo ST, Model: Seat Exeo ST 2013Pages: 167, PDF Size: 5.48 MB
Page 132 of 167
Navigation (NAV)*131
Operating
RADIO, MEDIA (audiovisual
systems)
NAME, TEL
NAV, INFO
CAR, SETUP
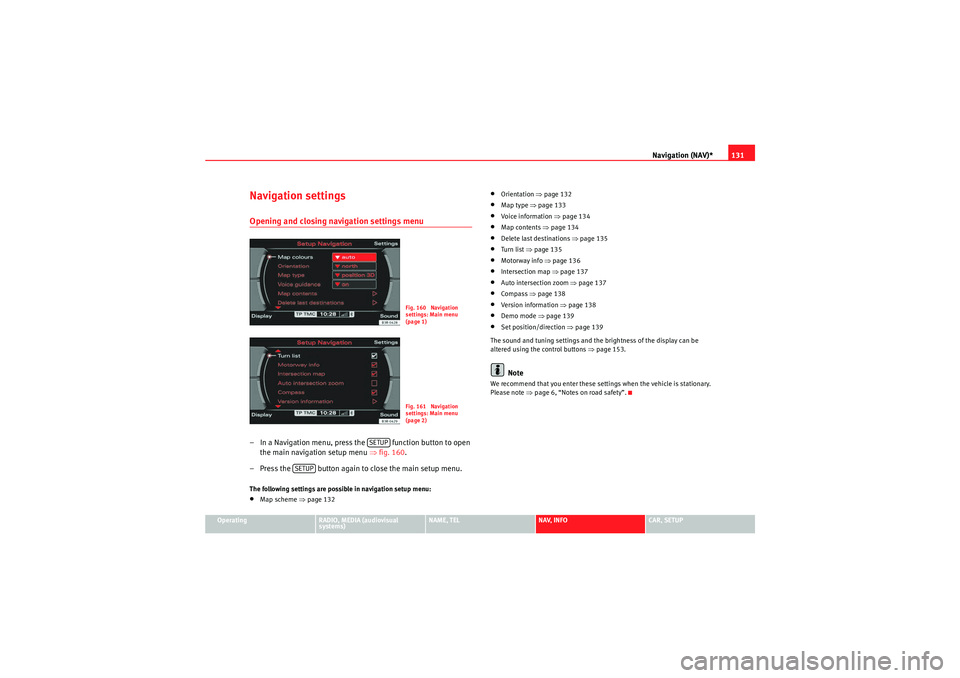
Navigation settingsOpening and closing navigation settings menu– In a Navigation menu, press the function button to open
the main navigation setup menu ⇒fig. 160 .
– Press the button again to close the main setup menu.The following settings are possible in navigation setup menu:•Map scheme ⇒ page 132
•Orientation ⇒page 132•Map type ⇒ page 133•Voice information ⇒ page 134•Map contents ⇒page 134•Delete last destinations ⇒page 135•Turn list ⇒page 135•Motorway info ⇒ page 136•Intersection map ⇒page 137•Auto intersection zoom ⇒page 137•Compass ⇒page 138•Version information ⇒page 138•Demo mode ⇒page 139•Set position/direction ⇒page 139
The sound and tuning settings and the brightness of the display can be
altered using the control buttons ⇒page 153.Note
We recommend that you enter these settings when the vehicle is stationary.
Please note ⇒ page 6, “Notes on road safety”.
Fig. 160 Navigation
settings: Main menu
(page 1)Fig. 161 Navigation
settings: Main menu
(page 2)
SETUP
SETUP
media_systemE_EN.book Seite 131 Montag, 21. September 2009 1:48 13
Page 133 of 167
Navigation (NAV)*
132Map scheme
The map representation can be changed according to driving
conditions (day or night).– Press the ⇒page 9 function button in the navigation
menu.
– Select Map scheme ⇒ page 131, fig. 160 .
– Select day , night or auto as desired.Day
The map representation contains all type of topographical details. The back-
ground is shown in light colours. This makes map features easy to recognise.
The daytime view is optimised for ambient light ⇒page 101, fig. 117 .
Night
The map representation contains all type of topographical details. The back-
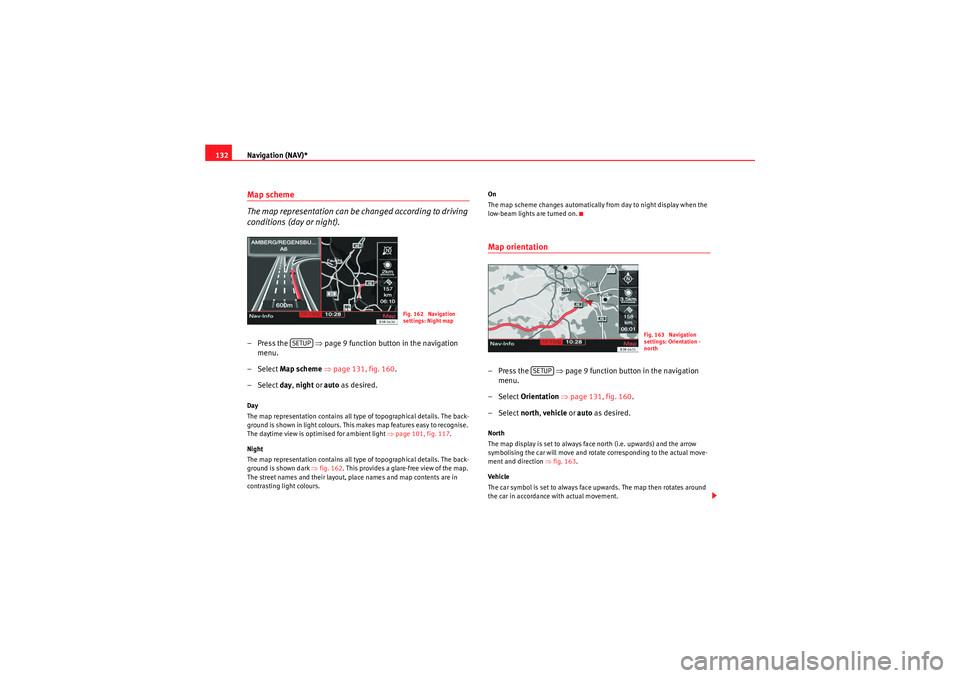
ground is shown dark ⇒fig. 162 . This provides a glare-free view of the map.
The street names and their layout, place names and map contents are in
contrasting light colours. On
The map scheme changes automatically from day to night display when the
low-beam lights are turned on.
Map orientation–Press the ⇒
page 9 function button in the navigation
menu.
– Select Orientation ⇒page 131, fig. 160 .
– Select north, vehicle or auto as desired.North
The map display is set to always face north (i.e. upwards) and the arrow
symbolising the car will move and rotate corresponding to the actual move-
ment and direction ⇒fig. 163.
Vehicle
The car symbol is set to always face upwards. The map then rotates around
the car in accordance with actual movement.
Fig. 162 Navigation
settings: Night map
SETUP
Fig. 163 Navigation
settings: Orientation -
north
SETUP
media_systemE_EN.book Seite 132 Montag, 21. September 2009 1:48 13
Page 136 of 167
Navigation (NAV)*135
Operating
RADIO, MEDIA (audiovisual
systems)
NAME, TEL
NAV, INFO
CAR, SETUP
–Select Map contents ⇒ page 131, fig. 160 .
– Use the rotary pushbutton to remove the tick
if you do not want
to have the information shown on the map.
Deactivating all map contents
– Press the ⇒page 9 function button in the navigation
menu.
–Select Map contents ⇒ page 131, fig. 160 .
– First select the All filters option and press the control knob so
that the tick box appears after it
. The tick box
will also
appear after all the options.
– Then press the control knob again and the check marks
after
all the options will disappear.
In addition to the information displayed automatically, the map can also
display other information.
You can select the map contents to be displayed as desired. The map
contents are displayed in accordance with the selected map scale.Delete last destinations– Press the ⇒page 9 function button in the navigation
menu.
–Select Delete last destinations ⇒ page 131, fig. 160 .
–Confirm Are you sure you want to delete the route? with Ye s. The
entire list of last destinations is deleted ⇒page 116.
Turn l ist
During the route guidance a list of upcoming turns (including
distance) is displayed.–Press the ⇒page 9 function button in the navigation
menu.
– Place a tick
⇒ page 131, fig. 161 next to the option Tu r n l ist to
activate the option.
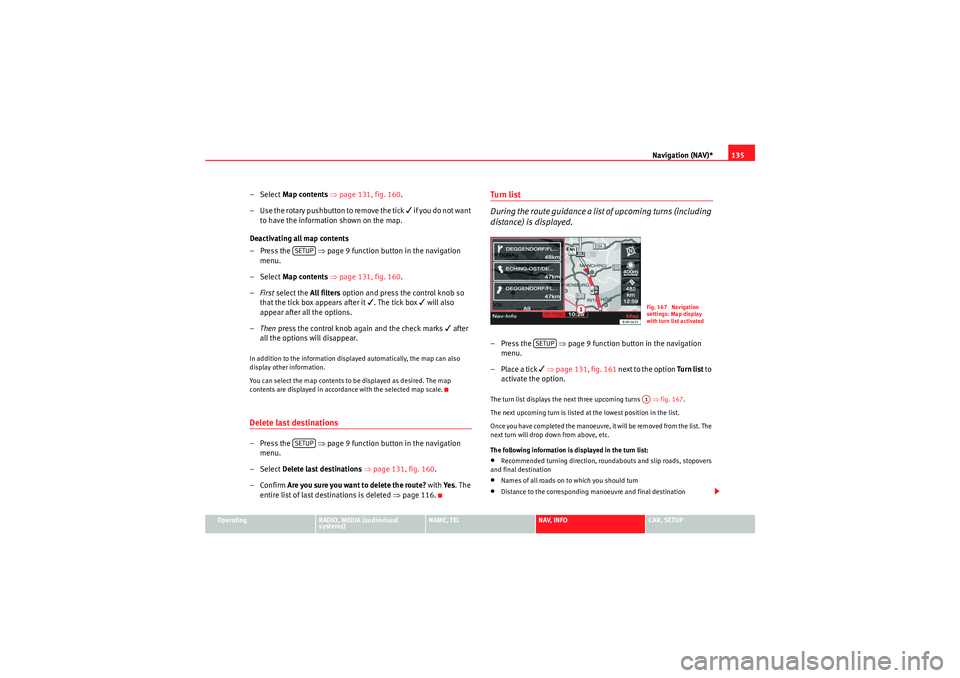
The turn list displays the next three upcoming turns ⇒ fig. 167.
The next upcoming turn is listed at the lowest position in the list.
Once you have completed the manoeuvre, it will be removed from the list. The
next turn will drop down from above, etc.
The following information is displayed in the turn list:•Recommended turning direction, roundabouts and slip roads, stopovers
and final destination•Names of all roads on to which you should turn•Distance to the corresponding manoeuvre and final destination
SETUPSETUP
Fig. 167 Navigation
settings: Map display
with turn list activated
SETUP
A1
media_systemE_EN.book Seite 135 Montag, 21. September 2009 1:48 13
Page 139 of 167
Navigation (NAV)*
138If you have activated the Auto intersection zoom and have set the
Destination , Location or Location 3D map type ⇒page 133, the map will
automatically zoom in at intersections. This provides a better view of the road
layout.
If you activate the Auto intersection zoom function, the Intersection map
function will be deactivated automatically. These two functions are mutually
exclusive.Co mp ass
–Press the ⇒ page 9 function button in the navigation
menu.
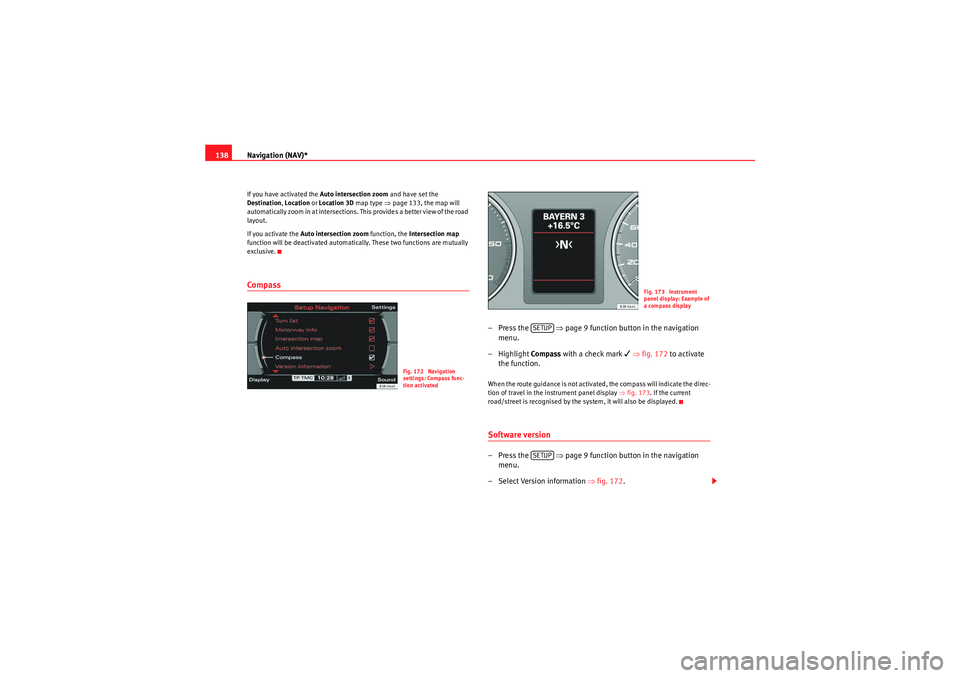
– Highlight Compass with a check mark
⇒ fig. 172 to activate
the function.
When the route guidance is not activated, the compass will indicate the direc-
tion of travel in the instrument panel display ⇒fig. 173. If the current
road/street is recognised by the system, it will also be displayed.Software version–Press the ⇒ page 9 function button in the navigation
menu.
– Select Version information ⇒fig. 172 .
Fig. 172 Navigation
settings: Compass func-
tion activated
Fig. 173 Instrument
panel display: Example of
a compass display
SETUPSETUP
media_systemE_EN.book Seite 138 Montag, 21. September 2009 1:48 13
Page 141 of 167
Navigation (NAV)*
140
– Select OK in the active side menu ⇒ page 139, fig. 175.
– Set the direction of the location ⇒page 139, fig. 176 by rotating
the control knob.
– When you press the control knob, the system automatically jumps back to the navigation setup menu.You can calculate the route from anothe r position than the present vehicle
location.
We recommend entering the data for the starting point into a destination
entry menu ⇒page 104, fig. 121 before you select the Set
Position/Direction . That way the system will jump to the point entered on the
map display. It is easier to set the location on the map from this point.
You can use the cursor to search for the starting point ⇒page 129. You can
manually enter the starting location of the vehicle, for example to calculate
future navigation routes starting from a location other than the current loca-
tion of the vehicle. Once you have set a location on the map, you can switch
to the destination input menu to enter the information for the desired desti-
nation. Use the demo mode to simulate a route guidance ⇒page 139.
Note
For technical reasons, setting the start location manually and simulating
route guidance in demo mode is only possible when the vehicle is stationary
and there is no GPS reception ⇒page 98 (e.g. in an underground garage).
media_systemE_EN.book Seite 140 Montag, 21. September 2009 1:48 13
Page 142 of 167
INFO (Traffic information)141
Operating
RADIO, MEDIA (audiovisual
systems)
NAME, TEL
NAV, INFO
CAR, SETUP
INFO (Traffic information)IntroductionIntroduction
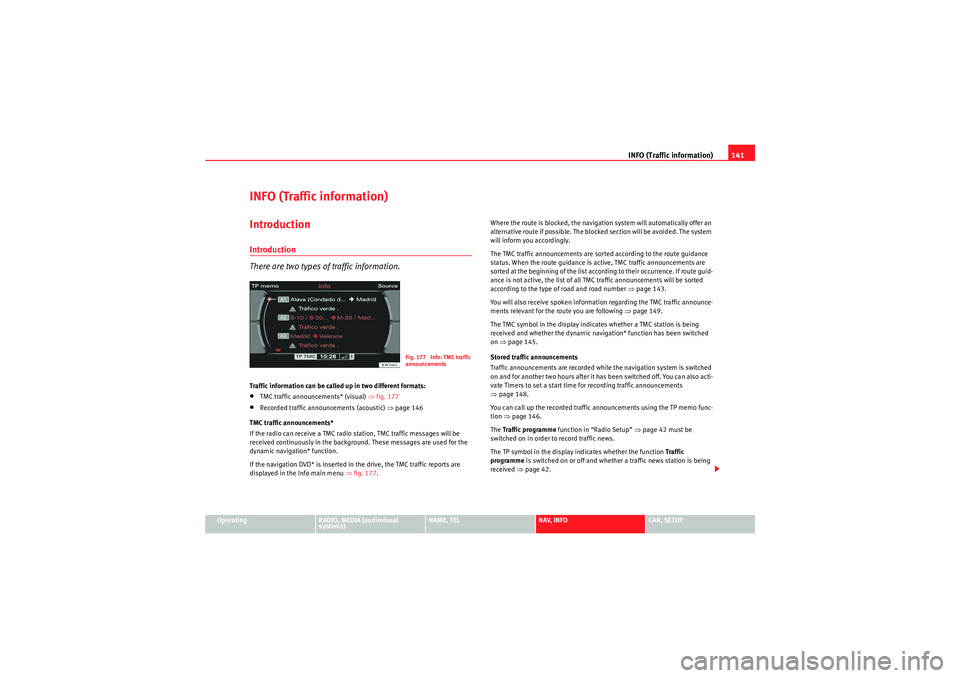
There are two types of traffic information.Traffic information can be called up in two different formats:•TMC traffic announcements* (visual) ⇒fig. 177•Recorded traffic announcements (acoustic) ⇒ page 146
TMC traffic announcements*
If the radio can receive a TMC radio station, TMC traffic messages will be
received continuously in the background. These messages are used for the
dynamic navigation* function.
If the navigation DVD* is inserted in the drive, the TMC traffic reports are
displayed in the Info main menu ⇒fig. 177 . Where the route is blocked, the navigation system will automatically offer an
alternative route if possible. The blocked section will be avoided. The system
will inform you accordingly.
The TMC traffic announcements are sorted according to the route guidance
status. When the route guidance is active, TMC traffic announcements are
sorted at the beginning of the list according to their occurrence. If route guid-
ance is not active, the list of all TMC traffic announcements will be sorted
according to the type of road and road number
⇒page 143.
You will also receive spoken information regarding the TMC traffic announce-
ments relevant for the route you are following ⇒ page 149.
The TMC symbol in the display indicates whether a TMC station is being
received and whether the dynamic navigation* function has been switched
on ⇒page 145.
Stored traffic announcements
Traffic announcements are recorded while the navigation system is switched
on and for another two hours after it has been switched off. You can also acti-
vate Timers to set a start time for recording traffic announcements
⇒ page 148.
You can call up the recorded traffic announcements using the TP memo func-
tion ⇒page 146.
The Traffic programme function in “Radio Setup” ⇒page 42 must be
switched on in order to record traffic news.
The TP symbol in the display indicates whether the function Traffic
programme is switched on or off and whether a traffic news station is being
received ⇒page 42.
Fig. 177 Info: TMC traffic
announcements
media_systemE_EN.book Seite 141 Montag, 21. September 2009 1:48 13
Page 143 of 167
INFO (Traffic information)
142
Note•You can select a preferred station for TMC reports* ⇒page 147.•When the dynamic navigation* ⇒page 121 is switched on, the route
guidance will automatically avoid any obstructions.Selecting traffic information
TMC traffic announcements* are displayed in the main menu;
recorded traffic announcements can be called up via “TP
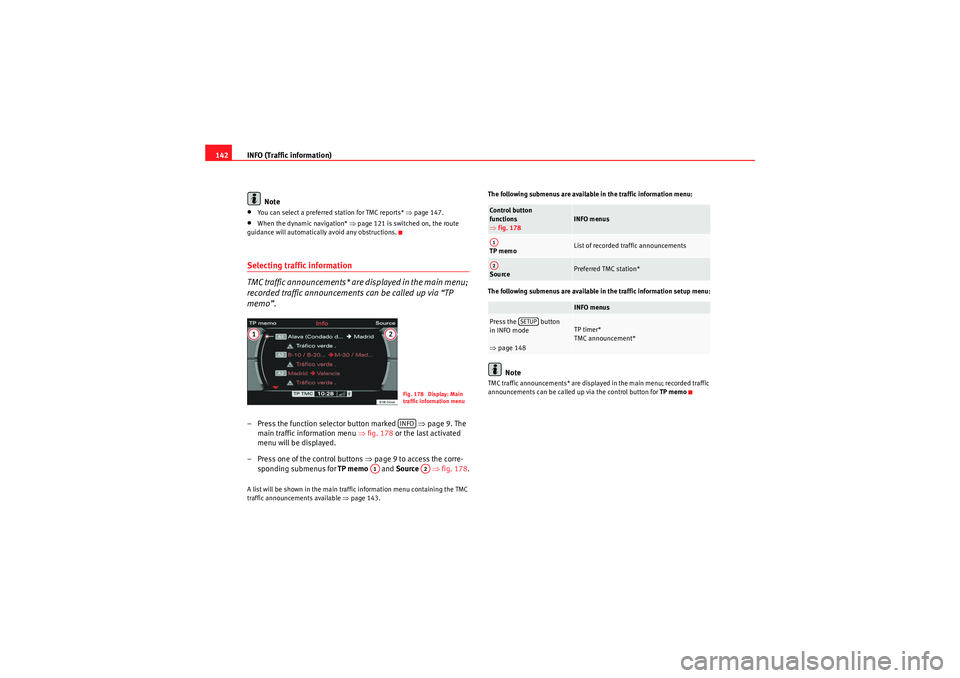
memo”.– Press the function selector button marked ⇒ page 9. The
main traffic information menu ⇒fig. 178 or the last activated
menu will be displayed.
– Press one of the control buttons ⇒page 9 to access the corre-
sponding submenus for TP memo and Source ⇒fig. 178 .A list will be shown in the main traffic information menu containing the TMC
traffic announcements available ⇒page 143. The following submenus are available in the traffic information menu:
The following submenus are available in the traffic information setup menu:
Note
TMC traffic announcements* are displayed in the main menu; recorded traffic
announcements can be called up via the control button for
TP memo
Fig. 178 Display: Main
traffic information menuINFO
A1
A2
Control button
functions
⇒fig. 178
INFO menus
TP memo
List of recorded traffic announcements
Source
Preferred TMC station*INFO menus
Press the button
in INFO mode
⇒page 148
TP timer*
TMC announcement*
A1A2
SETUP
media_systemE_EN.book Seite 142 Montag, 21. September 2009 1:48 13
Page 144 of 167
INFO (Traffic information)143
Operating
RADIO, MEDIA (audiovisual
systems)
NAME, TEL
NAV, INFO
CAR, SETUP
Main traffic information menuTraffic announcements
The most current TMC traffic announcements are sorted in the
display according to road category and road number and are
shown in the main traffic information menu.– Press the ⇒page 9 function button if another menu is
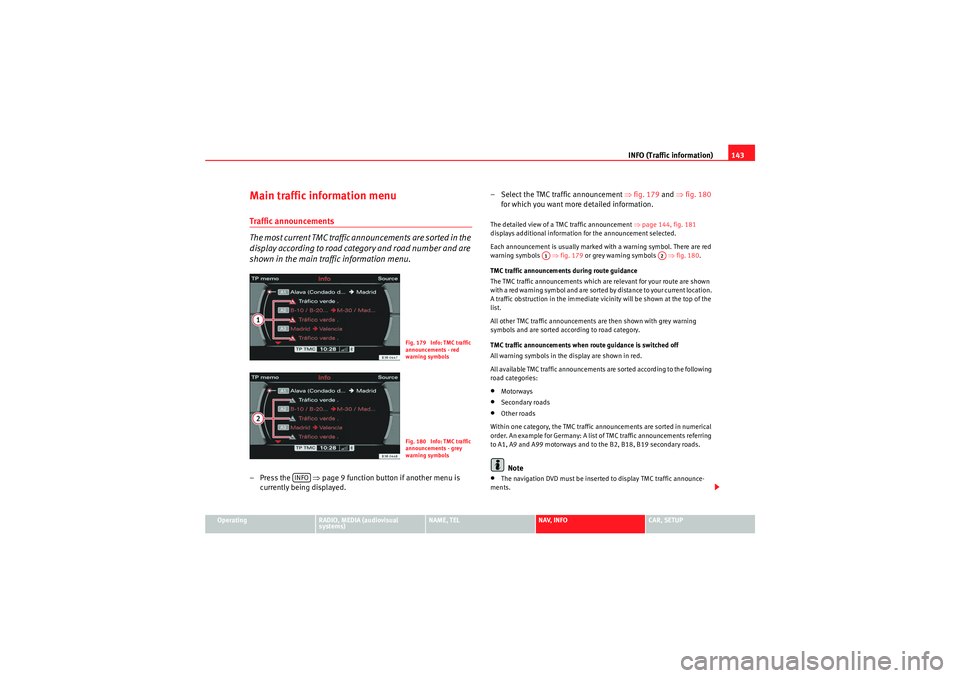
currently being displayed. – Select the TMC traffic announcement
⇒fig. 179 and ⇒ fig. 180
for which you want more detailed information.
The detailed view of a TMC traffic announcement ⇒page 144, fig. 181
displays additional information for the announcement selected.
Each announcement is usually marked with a warning symbol. There are red
warning symbols ⇒fig. 179 or grey warning symbols ⇒fig. 180.
TMC traffic announcements during route guidance
The TMC traffic announcements which are relevant for your route are shown
with a red warning symbol and are sorted by distance to your current location.
A traffic obstruction in the immediate vicinity will be shown at the top of the
list.
All other TMC traffic announcements are then shown with grey warning
symbols and are sorted according to road category.
TMC traffic announcements when route guidance is switched off
All warning symbols in the display are shown in red.
All available TMC traffic announcements are sorted according to the following
road categories:•Motorways•Secondary roads•Other roads
Within one category, the TMC traffic announcements are sorted in numerical
order. An example for Germany: A list of TMC traffic announcements referring
to A1, A9 and A99 motorways and to the B2, B18, B19 secondary roads.Note
•The navigation DVD must be inserted to display TMC traffic announce-
ments.
Fig. 179 Info: TMC traffic
announcements - red
warning symbolsFig. 180 Info: TMC traffic
announcements - grey
warning symbols
INFO
A1
A2
media_systemE_EN.book Seite 143 Montag, 21. September 2009 1:48 13
Page 148 of 167
INFO (Traffic information)147
Operating
RADIO, MEDIA (audiovisual
systems)
NAME, TEL
NAV, INFO
CAR, SETUP
You will receive a message in the display if no traffic announcements are
stored.
Traffic announcements are cancelled when you change to another main func-
tion.
You can also specify times for recording traffic announcements using the
TP
memo timer function ⇒page 148.
Note
A traffic announcement will not be recorded if you use the Cancel function
while it is playing. This means you will not be able to access the announce-
ment using the TP memo function.Source function buttonPreferred TMC
It is possible to select a preferred station for receiving TMC
traffic announcements.
TMC stands for “Traffic Message Channel”.
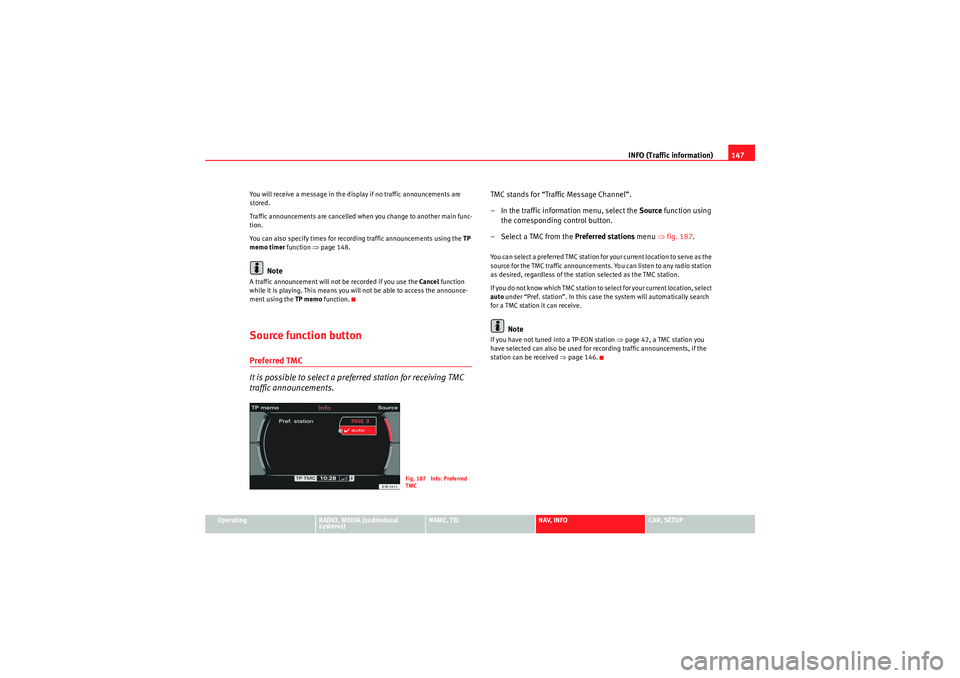
– In the traffic information menu, select the Source function using
the corresponding control button.
– Select a TMC from the Preferred stations menu ⇒fig. 187 .You can select a preferred TMC station for your current location to serve as the
source for the TMC traffic announcements. You can listen to any radio station
as desired, regardless of the station selected as the TMC station.
If you do not know which TMC station to select for your current location, select
auto under “Pref. station”. In this case the system will automatically search
for a TMC station it can receive.
Note
If you have not tuned into a TP-EON station ⇒page 42, a TMC station you
have selected can also be used for recording traffic announcements, if the
station can be received ⇒page 146.
Fig. 187 Info: Preferred
TMC
media_systemE_EN.book Seite 147 Montag, 21. September 2009 1:48 13
Page 149 of 167
INFO (Traffic information)
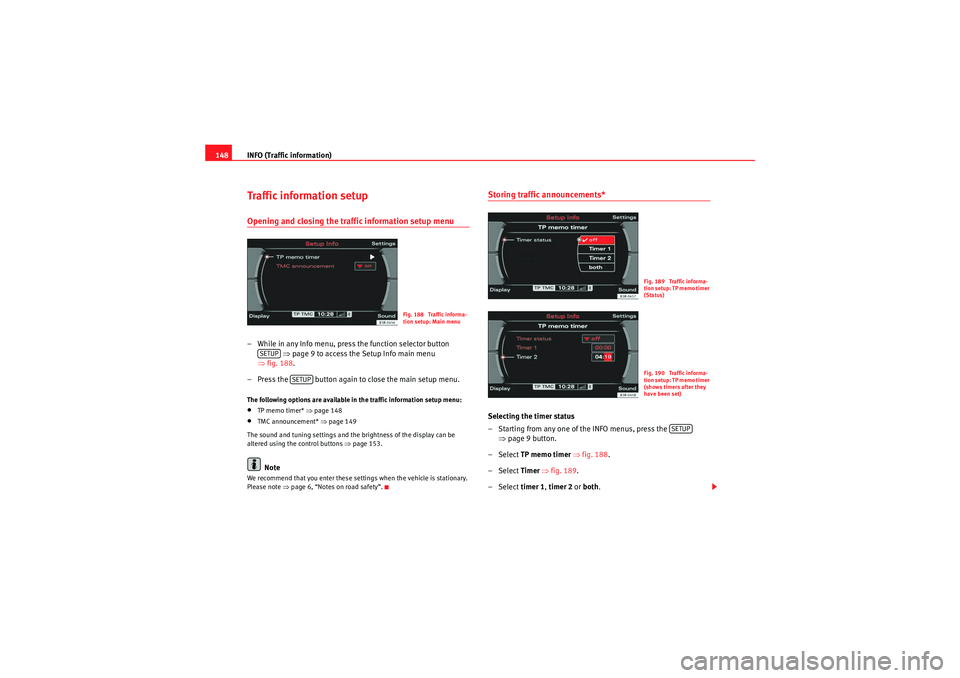
148Traffic information setupOpening and closing the traffic information setup menu– While in any Info menu, press the function selector button
⇒ page 9 to access the Setup Info main menu
⇒ fig. 188 .
– Press the button again to close the main setup menu.The following options are available in the traffic information setup menu:•TP memo timer* ⇒ page 148•TMC announcement* ⇒ page 149
The sound and tuning settings and the brightness of the display can be
altered using the control buttons ⇒page 153.Note
We recommend that you enter these settings when the vehicle is stationary.
Please note ⇒ page 6, “Notes on road safety”.
Storing traffic announcements*Selecting the timer status
– Starting from any one of the INFO menus, press the
⇒page 9 button.
– Select TP memo timer ⇒ fig. 188 .
– Select Timer ⇒ fig. 189.
– Select timer 1, timer 2 or both .
Fig. 188 Traffic informa-
tion setup: Main menu
SETUP
SETUP
Fig. 189 Traffic informa-
tion setup: TP memo timer
(Status)Fig. 190 Traffic informa-
tion setup: TP memo timer
(shows timers after they
have been set)
SETUP
media_systemE_EN.book Seite 148 Montag, 21. September 2009 1:48 13