technical data Seat Ibiza SC 2009 Workshop Manual
[x] Cancel search | Manufacturer: SEAT, Model Year: 2009, Model line: Ibiza SC, Model: Seat Ibiza SC 2009Pages: 257, PDF Size: 6.61 MB
Page 105 of 257
Seats and stowage103
Safety First
Controls and equipment
Practical tips
Technical Data
•When fitting the head restraints again, insert the tubes as far as possible
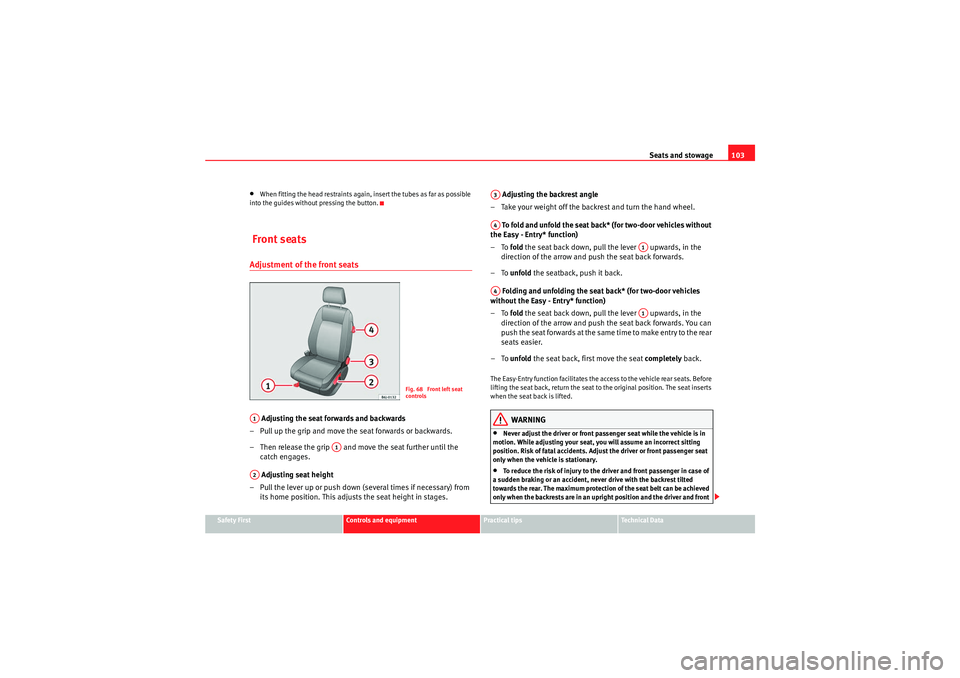
into the guides without pressing the button. Front seatsAdjustment of the front seats Adjusting the seat forwards and backwards
– Pull up the grip and move the seat forwards or backwards.
– Then release the grip and move the seat further until the catch engages.
Adjusting seat height
– Pull the lever up or push down (several times if necessary) from its home position. This adjust s the seat height in stages. Adjusting the backrest angle
– Take your weight off the backrest and turn the hand wheel.
To fold and unfold the seat back* (for two-door vehicles without
the Easy - Entry* function)
–To fold the seat back down, pull the lever upwards, in the
direction of the arrow and push the seat back forwards.
–To unfold the seatback, push it back.
Folding and unfolding the seat back* (for two-door vehicles
without the Easy - Entry* function)
–To fold the seat back down, pull the lever upwards, in the
direction of the arrow and push the seat back forwards. You can
push the seat forwards at the same time to make entry to the rear
seats easier.
–To unfold the seat back, first move the seat completely back.
The Easy-Entry function facilitates the access to the vehicle rear seats. Before
lifting the seat back, return the seat to the original position. The seat inserts
when the seat back is lifted.
WARNING
•Never adjust the driver or front passenger seat while the vehicle is in
motion. While adjusting your seat, you will assume an incorrect sitting
position. Risk of fatal accidents. Adjust the driver or front passenger seat
only when the vehicle is stationary.•To reduce the risk of injury to the driver and front passenger in case of
a sudden braking or an accident, ne ver drive with the backrest tilted
towards the rear. The maximum protection of the seat belt can be achieved
only when the backrests are in an upright position and the driver and front
Fig. 68 Front left seat
controls
A1
A1
A2
A3A4
A1
A4
A1
IbizaSC_EN.book Seite 103 Mittwoch, 16. September 2009 12:11 12
Page 107 of 257
Seats and stowage105
Safety First
Controls and equipment
Practical tips
Technical Data
Rear seat benchFolding down rear seats
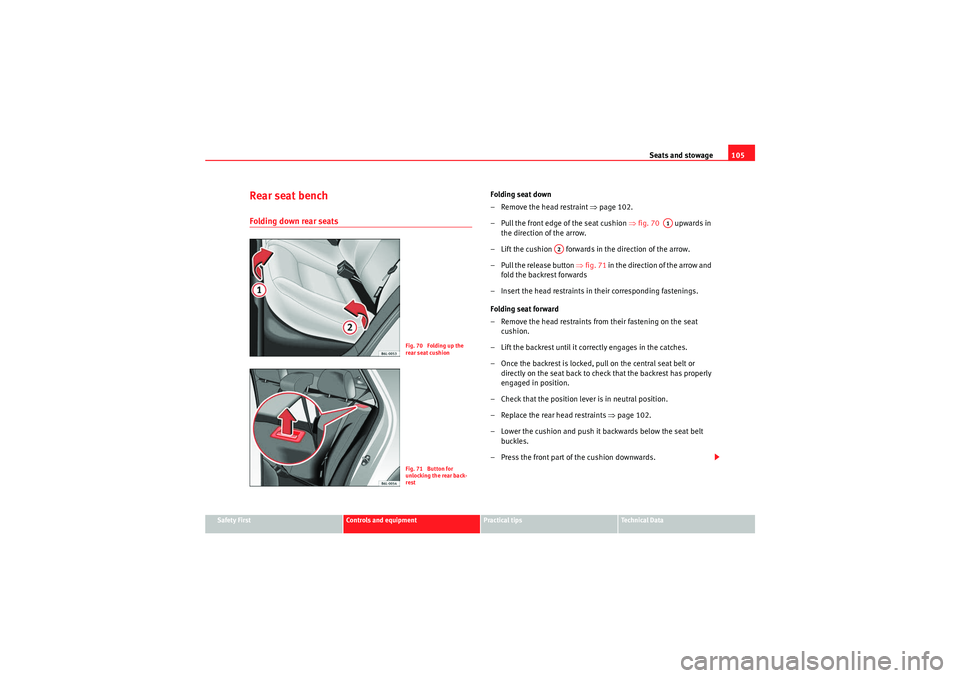
Folding seat down
– Remove the head restraint ⇒page 102.
– Pull the front edge of the seat cushion ⇒fig. 70 upwards in
the direction of the arrow.
– Lift the cushion forwards in the direction of the arrow.
– Pull the release button ⇒fig. 71 in the direction of the arrow and
fold the backrest forwards
– Insert the head restraints in their corresponding fastenings.
Folding seat forward
– Remove the head restraints from their fastening on the seat cushion.
– Lift the backrest until it co rrectly engages in the catches.
– Once the backrest is locked, pull on the central seat belt or directly on the seat back to check that the backrest has properly
engaged in position.
– Check that the position lever is in neutral position.
– Replace the rear head restraints ⇒page 102.
– Lower the cushion and push it backwards below the seat belt
buckles.
– Press the front part of the cushion downwards.
Fig. 70 Folding up the
rear seat cushionFig. 71 Button for
unlocking the rear back-
rest
A1
A2
IbizaSC_EN.book Seite 105 Mittwoch, 16. September 2009 12:11 12
Page 109 of 257
Seats and stowage107
Safety First
Controls and equipment
Practical tips
Technical Data
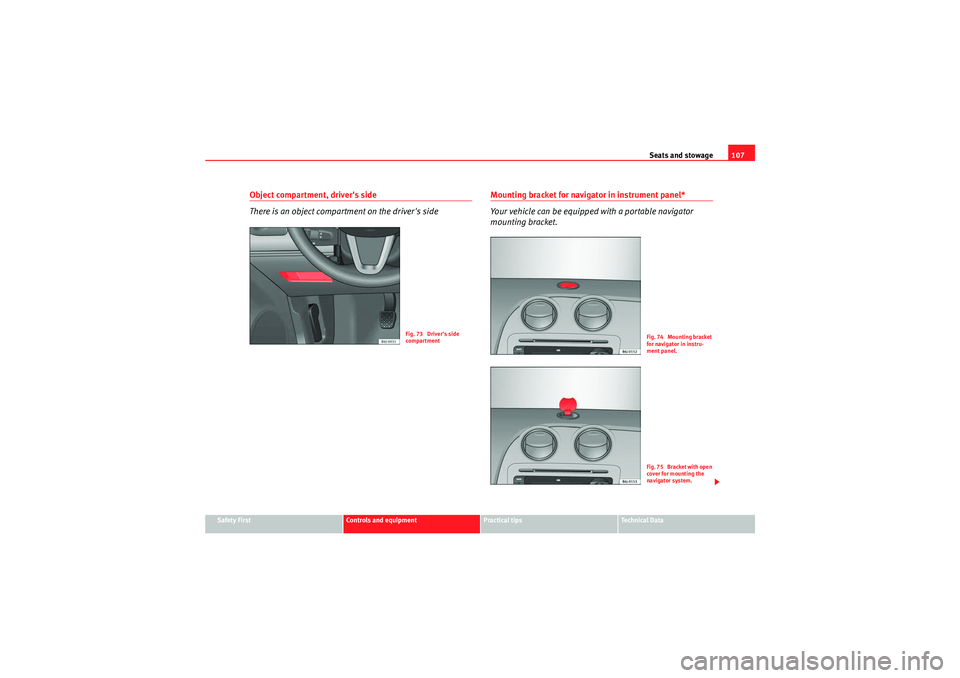
Object compartment, driver's side
There is an object compartment on the driver's side
Mounting bracket for navigator in instrument panel*
Your vehicle can be equipped with a portable navigator
mounting bracket.
Fig. 73 Driver's side
compartment
Fig. 74 Mounting bracket
for navigator in instru-
ment panel.F i g . 7 5 B r a c k e t w i t h o p e n
cover for mounting the
navigator system.
IbizaSC_EN.book Seite 107 Mittwoch, 16. September 2009 12:11 12
Page 111 of 257
Seats and stowage109
Safety First
Controls and equipment
Practical tips
Technical Data
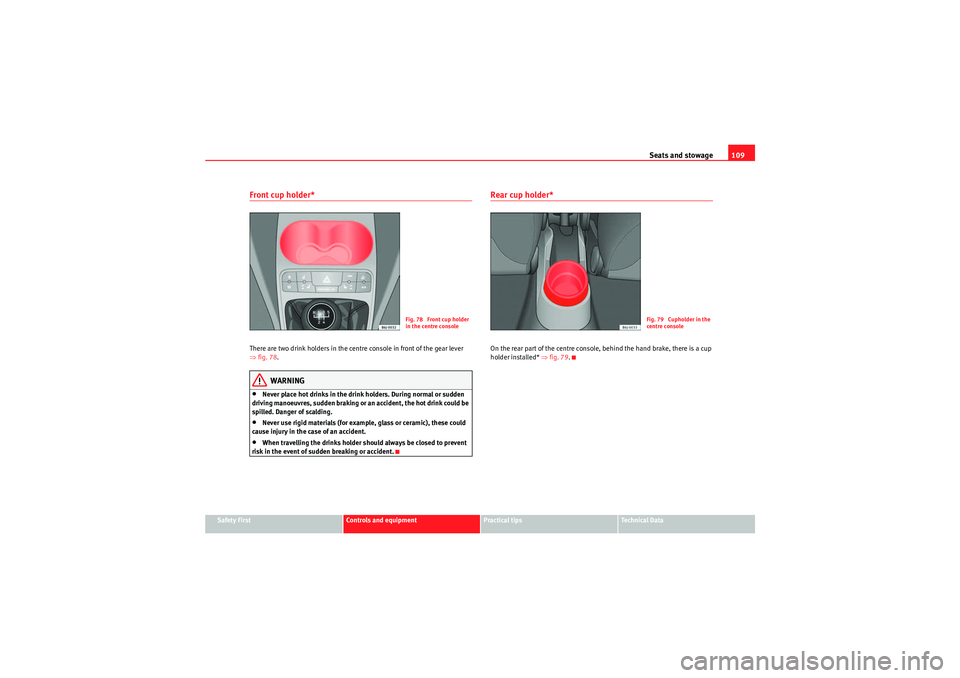
Front cup holder* There are two drink holders in the centre console in front of the gear lever
⇒fig. 78 .
WARNING
•Never place hot drinks in the drink holders. During normal or sudden
driving manoeuvres, sudden braking or an accident, the hot drink could be
spilled. Danger of scalding.•Never use rigid materials (for example, glass or ceramic), these could
cause injury in the case of an accident.•When travelling the drinks holder should always be closed to prevent
risk in the event of sudden breaking or accident.
Rear cup holder* On the rear part of the centre console, behind the hand brake, there is a cup
holder installed* ⇒fig. 79.
Fig. 78 Front cup holder
in the centre console
Fig. 79 Cupholder in the
centre console
IbizaSC_EN.book Seite 109 Mittwoch, 16. September 2009 12:11 12
Page 113 of 257
Seats and stowage111
Safety First
Controls and equipment
Practical tips
Technical Data
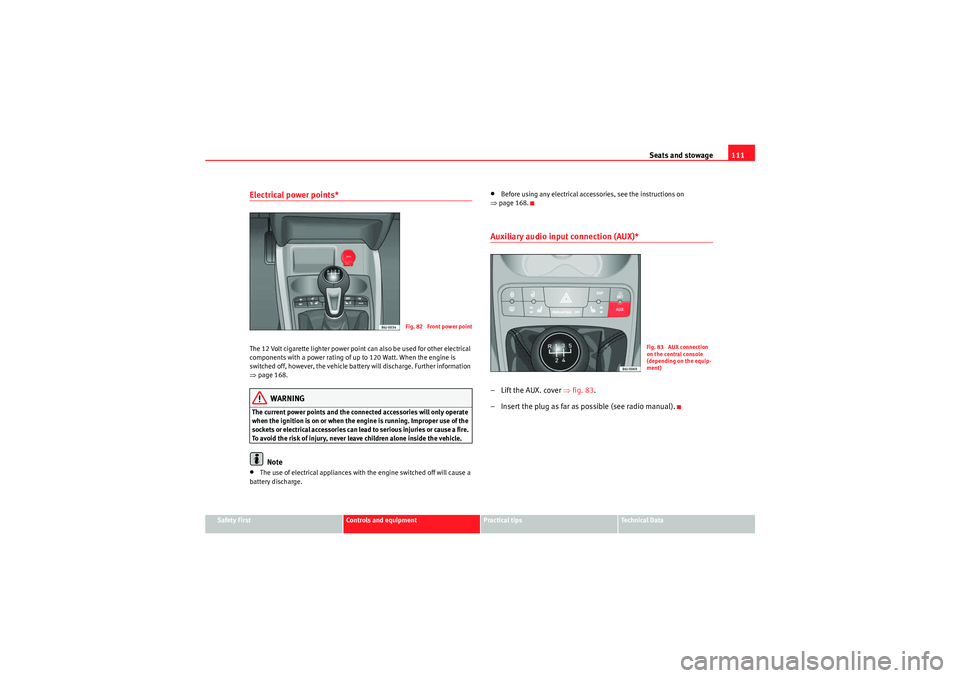
Electrical power points* The 12 Volt cigarette lighter power point can also be used for other electrical
components with a power rating of up to 120 Watt. When the engine is
switched off, however, the vehicle battery will discharge. Further information
⇒page 168.
WARNING
The current power points and the connected accessories will only operate
when the ignition is on or when the engine is running. Improper use of the
sockets or electrical accessories can lead to serious injuries or cause a fire.
To avoid the risk of injury, never leave children alone inside the vehicle.
Note
•The use of electrical appliances with the engine switched off will cause a
battery discharge.
•Before using any electrical accessories, see the instructions on
⇒ page 168.Auxiliary audio input connection (AUX)*– Lift the AUX. cover ⇒fig. 83 .
– Insert the plug as far as possible (see radio manual).
Fig. 82 Front power point
Fig. 83 AUX connection
on the central console
(depending on the equip-
ment)
IbizaSC_EN.book Seite 111 Mittwoch, 16. September 2009 12:11 12
Page 115 of 257

Seats and stowage113
Safety First
Controls and equipment
Practical tips
Technical Data
WARNING
•Loose luggage and other loose items in the vehicle may cause serious
injuries.•Loose objects in the luggage compartment can suddenly move and
change the way the vehicle handles.•In case of sudden manoeuvres or accidents, loose objects in the
passenger compartment can be flung forward, injuring passengers.•Always put objects in the boot.•When you transport heavy objects, always take in account that a
change in the centre of gravity can also cause changes in vehicle handling.•Please observe information on safe driving ⇒page 7, “Safe driving”.Caution
Hard objects on the shelf could chafe against the wires of the heating
element in the rear window and cause damage.
Note
The ventilation slots in front of the rear side windows must not be covered as
this would prevent stale air being extracted from the vehicle.
Open stowage compartmentRemoving the cover
– Disengage the loops ⇒fig. 85 from the retaining pins
– Extract the cover from its slot, in its rest position and pull outwards.
WARNING
Do not place heavy or hard objects on the open stowage compartment,
because they will endanger the vehicle occupants in case of sudden
braking.
Caution
•Before closing the tailgate, ensure that the stowage compartment tray is
correctly fitted.
Fig. 85 Stowage tray
AB
AA
IbizaSC_EN.book Seite 113 Mittwoch, 16. September 2009 12:11 12
Page 116 of 257
Seats and stowage
114•An overloaded boot could mean that the rear stowage tray is not correctly
seated and it may be bent or damaged.•If the boot is overloaded, remove the tray.Note
•Ensure that, when placing items of clothing on the luggage compartment
cover, rear visibility is not reduced.Roof carrier*Please observe the following points if you intend to carry loads on the roof:•For safety reasons, only luggage racks and accessories approved by SEAT
should be used.•It is essential that you follow the assembly instructions included with the
bars exactly, being especially careful to position front and rear luggage
compartment cover bars on the special housings on the longitudinal bars.
You must also respect their position according to the direction of travel indi-
cated in the assembly manual. Not following these instructions may damage
the bodywork.•Pay special attention to the tightening torque of the attachment bolts and
check them following a short journey. If necessary, retighten the bolts and
check them at regular intervals.•Distribute the load evenly. A maximum load of 40 kg only is permitted for
each roof carrier system support bar, the load must be distributed evenly
along the entire length. However, the maximum load permitted for the entire
roof (including the support system) of 75 kg must not be exceeded nor should
the total weight of the vehicle be exceeded. See the chapter on “Technical
Data”.•When transporting heavy or large objects on the roof, any change in the
normal vehicle behaviour due to a change in the centre of gravity or an increased wind resistance must be taken into account. For this reason, a suit-
able speed and driving style must be used.
•For those vehicles fitted with a sunroof*, ensure that it does not interfere
with the load on the roof carrier system when opened.
IbizaSC_EN.book Seite 114 Mittwoch, 16. September 2009 12:11 12
Page 117 of 257
Heating, Ventilation and Air conditioning115
Safety First
Controls and equipment
Practical tips
Technical Data
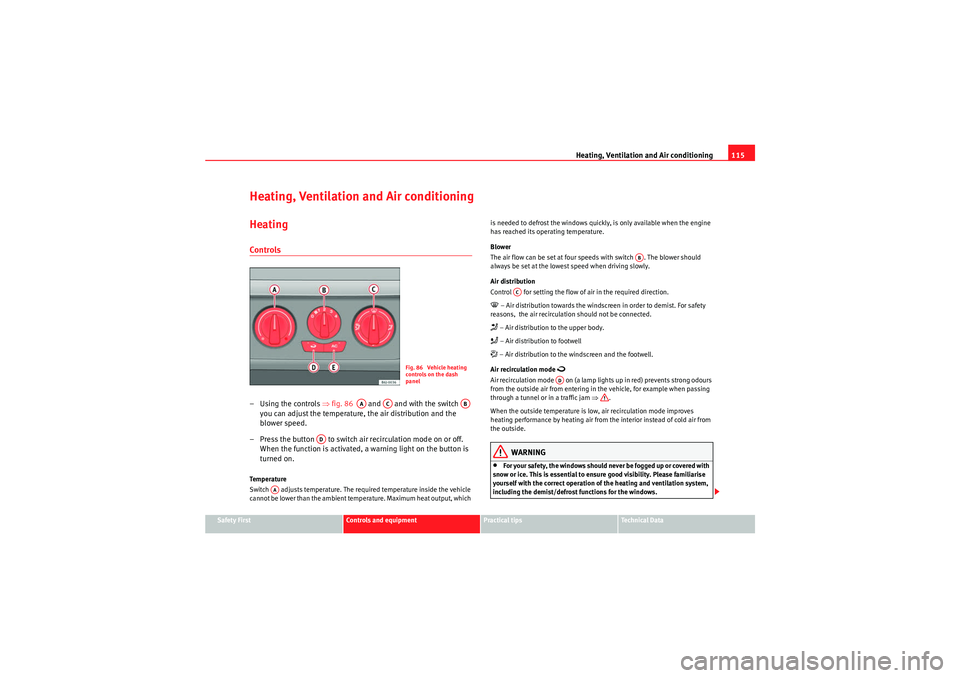
Heating, Ventilation and Air conditioningHeatingControls–Using the controls ⇒fig. 86 and and with the switch
you can adjust the temperature, the air distribution and the
blower speed.
– Press the button to switch ai r recirculation mode on or off.
When the function is activated, a warning light on the button is
turned on.Te m p e r a t u r e
Switch adjusts temperature. The required temperature inside the vehicle
cannot be lower than the ambient temperature. Maximum heat output, which is needed to defrost the windows quickly, is only available when the engine
has reached its operating temperature.
Blower
The air flow can be set at four speeds with switch . The blower should
always be set at the lowest speed when driving slowly.
Air distribution
Control for setting the flow of air in the required direction.
– Air distribution towards the windscreen in order to demist. For safety
reasons, the air recirculation should not be connected. – Air distribution to the upper body. – Air distribution to footwell – Air distribution to the windscreen and the footwell.
Air recirculation mode
Air recirculation mode on (a lamp lights up in red) prevents strong odours
from the outside air from entering in the vehicle, for example when passing
through a tunnel or in a traffic jam ⇒.
When the outside temperature is low, air recirculation mode improves
heating performance by heating air from the interior instead of cold air from
the outside.
WARNING
•For your safety, the windows should never be fogged up or covered with
snow or ice. This is essential to ensure good visibility. Please familiarise
yourself with the correct operation of the heating and ventilation system,
including the demist/defrost functions for the windows.
Fig. 86 Vehicle heating
controls on the dash
panel
AA
AC
AB
AD
AA
AB
AC
AD
IbizaSC_EN.book Seite 115 Mittwoch, 16. September 2009 12:11 12
Page 119 of 257

Heating, Ventilation and Air conditioning117
Safety First
Controls and equipment
Practical tips
Technical Data
– Close outlets .
– Open and turn outlets towards side windows.Once the windows are demisted and as a preventive measure, the control
can be set in position
, thus obtaining greater comfort while preventing the
windows from misting again. Heating
Maximum heat output, which is needed to defrost the windows quickly, is
only available when the engine has reached its operating temperature.
Note
Remember that the temperature of the
engine coolant should be optimum to
ensure that the heating system functions correctly (except in vehicles fitted
with additional heating*)
Air outlets
A3
A4
AC
Fig. 88 Air vent
IbizaSC_EN.book Seite 117 Mittwoch, 16. September 2009 12:11 12
Page 121 of 257
Heating, Ventilation and Air conditioning119
Safety First
Controls and equipment
Practical tips
Technical Data
– Turn the fan control to one of the two levels depending on the
speed required.
– Rotate the temperature control to the desired level of comfort.
– Close outlets .
– Open and turn outlets towards side windows.
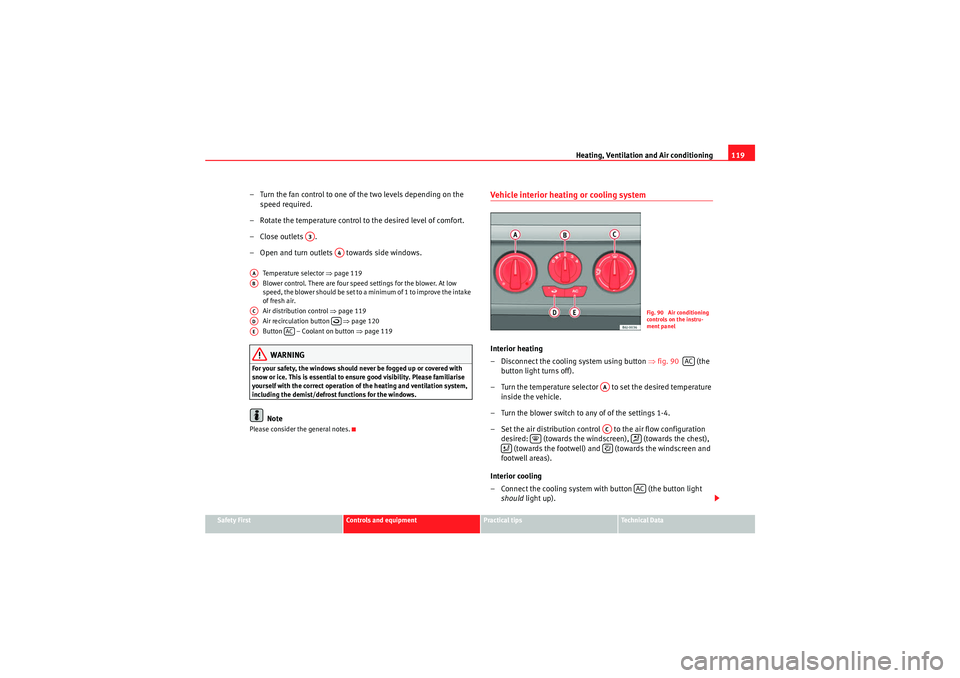
Temperature selector ⇒page 119
Blower control. There are four speed settings for the blower. At low
speed, the blower should be set to a minimum of 1 to improve the intake
of fresh air.
Air distribution control ⇒page 119
Air recirculation button ⇒page 120
Button – Coolant on button ⇒page 119WARNING
For your safety, the windows should never be fogged up or covered with
snow or ice. This is essential to ensure good visibility. Please familiarise
yourself with the correct operation of the heating and ventilation system,
including the demist/defrost functions for the windows.
Note
Please consider the general notes.
Vehicle interior heating or cooling system Interior heating
– Disconnect the cooling system using button ⇒fig. 90 (the
button light turns off).
– Turn the temperature selector to set the desired temperature inside the vehicle.
– Turn the blower switch to any of of the settings 1-4.
– Set the air distribution control to the air flow configuration
desired: (towards the windscreen), (towards the chest), (towards the footwell) and (towards the windscreen and
footwell areas).
Interior cooling
– Connect the cooling system with button (the button light should light up).
A3
A4
AAABACAD
AE
AC
Fig. 90 Air conditioning
controls on the instru-
ment panel
AC
AAAC
AC
IbizaSC_EN.book Seite 119 Mittwoch, 16. September 2009 12:11 12