Seat Leon SC 2014 MEDIA SYSTEM 2.2
Manufacturer: SEAT, Model Year: 2014, Model line: Leon SC, Model: Seat Leon SC 2014Pages: 114, PDF Size: 2.47 MB
Page 31 of 114
30Audio mode
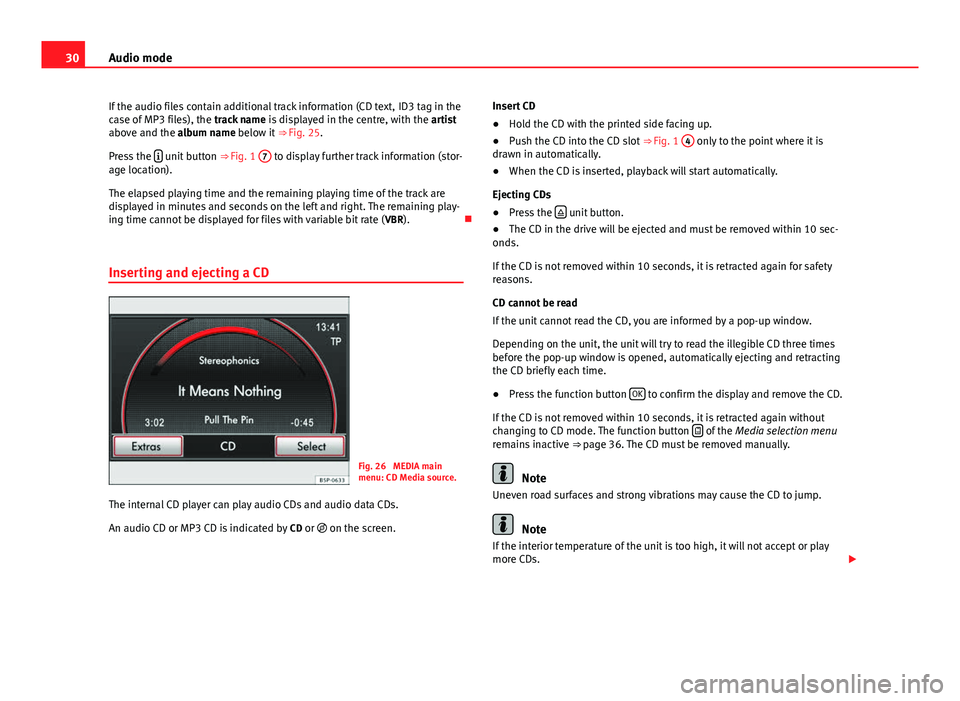
If the audio files contain additional track information (CD text, ID3 tag in the
case of MP3 files), the track name is displayed in the centre, with the artist
above and the album name below it ⇒ Fig. 25.
Press the
unit button
⇒ Fig. 1 7 to display further track information (stor-
age location).
The elapsed playing time and the remaining playing time of the track are
displayed in minutes and seconds on the left and right. The remaining play-
ing time cannot be displayed for files with variable bit rate ( VBR).
Inserting and ejecting a CD
Fig. 26 MEDIA main
menu: CD Media source.
The internal CD player can play audio CDs and audio data CDs.
An audio CD or MP3 CD is indicated by CD or on the screen. Insert CD
●
Hold the CD with the printed side facing up.
● Push the CD into the CD slot ⇒ Fig. 1 4
only to the point where it is
drawn in automatically.
● When the CD is inserted, playback will start automatically.
Ejecting CDs
● Press the
unit button.
● The CD in the drive will be ejected and must be removed within 10 sec-
onds.
If the CD is not removed within 10 seconds, it is retracted again for safety
reasons.
CD cannot be read
If the unit cannot read the CD, you are informed by a pop-up window.
Depending on the unit, the unit will try to read the illegible CD three times
before the pop-up window is opened, automatically ejecting and retracting
the CD briefly each time.
● Press the function button OK
to confirm the display and remove the CD.
If the CD is not removed within 10 seconds, it is retracted again without
changing to CD mode. The function button
of the
Media selection menu
remains inactive ⇒ page 36. The CD must be removed manually.
Note
Uneven road surfaces and strong vibrations may cause the CD to jump.
Note
If the interior temperature of the unit is too high, it will not accept or play
more CDs.
Page 32 of 114
31
Audio mode
Note
If you insert a number of different CDs and receive the message CD drive er-
ror every time, contact a specialised workshop.
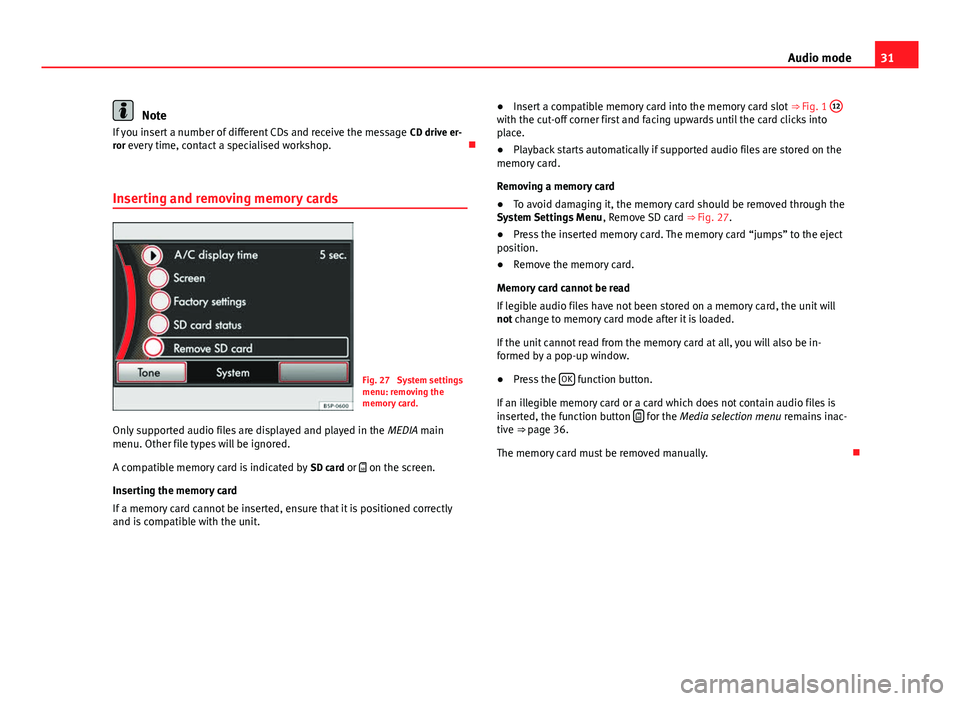
Inserting and removing memory cards
Fig. 27 System settings
menu: removing the
memory card.
Only supported audio files are displayed and played in the MEDIA main
menu. Other file types will be ignored.
A compatible memory card is indicated by SD card or on the screen.
Inserting the memory card
If a memory card cannot be inserted, ensure that it is positioned correctly
and is compatible with the unit. ●
Insert a compatible memory card into the memory card slot ⇒ Fig. 1 12
with the cut-off corner first and facing upwards until the card clicks into
place.
● Playback starts automatically if supported audio files are stored on the
memory card.
Removing a memory card
● To avoid damaging it, the memory card should be removed through the
System Settings Menu , Remove SD card ⇒ Fig. 27.
● Press the inserted memory card. The memory card “jumps” to the eject
position.
● Remove the memory card.
Memory card cannot be read
If legible audio files have not been stored on a memory card, the unit will
not change to memory card mode after it is loaded.
If the unit cannot read from the memory card at all, you will also be in-
formed by a pop-up window.
● Press the OK
function button.
If an illegible memory card or a card which does not contain audio files is
inserted, the function button
for the Media selection menu
remains inac-
tive ⇒ page 36.
The memory card must be removed manually.
Page 33 of 114
32Audio mode
External audio source connected to the AUX-IN multimedia
socket
Fig. 28 External audio
source connected to AUX
IN multimedia socket.
The AUX-IN multimedia socket ⇒ Fig. 1 9
can only be used with a 3.5 mm
jack plug.
The external audio source connected to it is played over the vehicle speak-
ers and cannot be controlled via the radio-navigation system.
An external audio source connected to the socket is indicated by AUX on the
screen.
Connecting an external audio source to the AUX IN multimedia socket
● Lower the base volume on the radio-navigation system
⇒ page 8.
● Connect the external audio source to the AUX-IN multimedia socket.
● Start playback on the external audio source.
● In the MEDIA main menu, press the MEDIA
unit button to open the
media
selection menu ⇒ Fig. 34.
● Press the AUX
function button to start playback of the external audio
source over the vehicle speakers ⇒ page 36. The output volume
of the connected external audio source should be adjus-
ted to the volume of the other audio sources ⇒ page 39.
Information on operating an external audio source connected to the AUX-IN
multimedia socket
ActionEffectSelection of another audio source
on the radio-navigation system.The external audio source continues
to run in the background.
Stopping playback on the external
audio source.The radio-navigation system re-
mains in the AUX menu.
Disconnecting the plug from the
AUX-IN multimedia socket.The radio and navigation system
switches to playback of the previous
Media source.
Note
Interference may be heard if the external audio source is powered from the
vehicle’s 12-volt socket.
Note
Please read and observe the manufacturer's manual for the external audio
source.
Page 34 of 114
33
Audio mode
Additional AUX2 external audio source
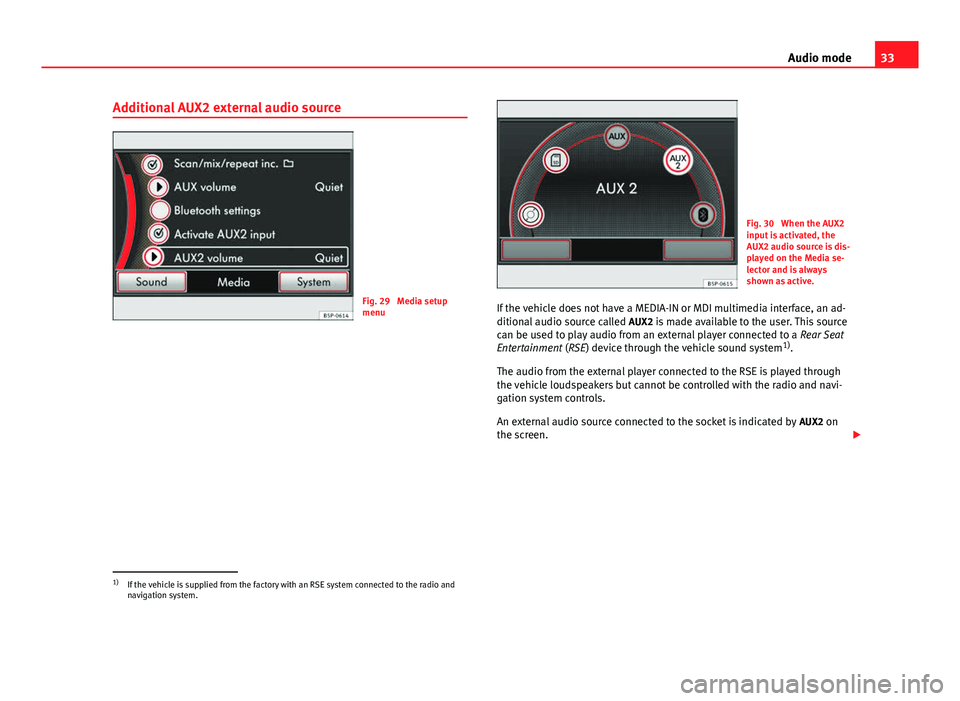
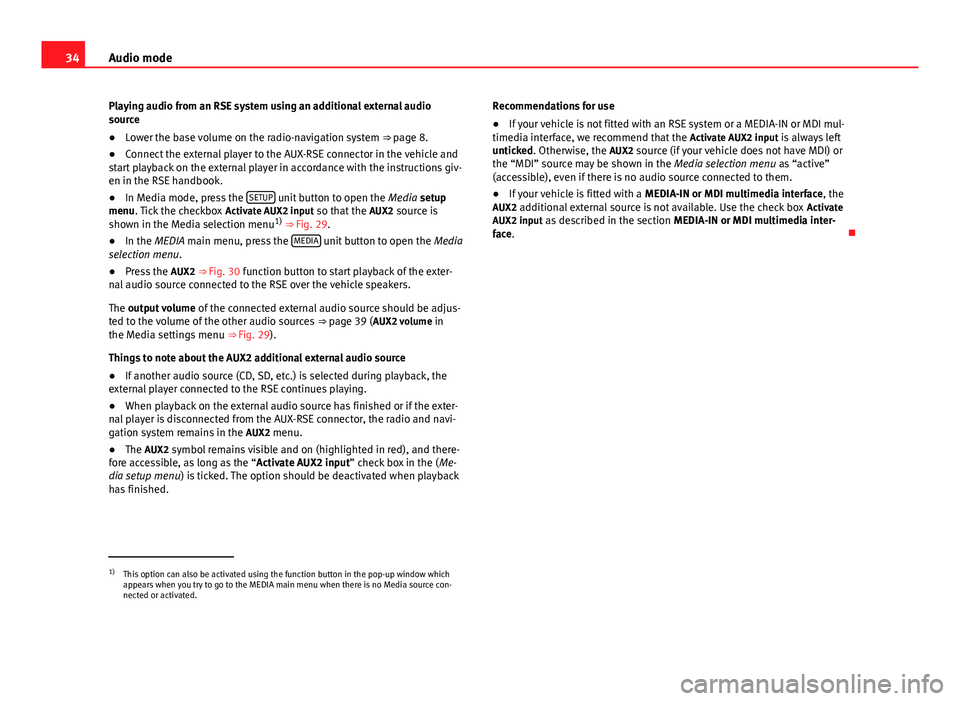
Fig. 29 Media setup
menu
Fig. 30 When the AUX2
input is activated, the
AUX2 audio source is dis-
played on the Media se-
lector and is always
shown as active.
If the vehicle does not have a MEDIA-IN or MDI multimedia interface, an ad-
ditional audio source called AUX2 is made available to the user. This source
can be used to play audio from an external player connected to a Rear Seat
Entertainment (RSE) device through the vehicle sound system 1)
.
The audio from the external player connected to the RSE is played through
the vehicle loudspeakers but cannot be controlled with the radio and navi-
gation system controls.
An external audio source connected to the socket is indicated by AUX2 on
the screen.
1)
If the vehicle is supplied from the factory with an RSE system connected to the radio and
navigation system.
Page 35 of 114
34Audio mode
Playing audio from an RSE system using an additional external audio
source
● Lower the base volume on the radio-navigation system ⇒ page 8.
● Connect the external player to the AUX-RSE connector in the vehicle and
start playback on the external player in accordance with the instructions giv-
en in the RSE handbook.
● In Media mode, press the SETUP
unit button to open the
Media setup
menu. Tick the checkbox Activate AUX2 input so that the AUX2 source is
shown in the Media selection menu 1)
⇒ Fig. 29.
● In the MEDIA main menu, press the MEDIA
unit button to open the
Media
selection menu.
● Press the AUX2 ⇒ Fig. 30 function button to start playback of the exter-
nal audio source connected to the RSE over the vehicle speakers.
The output volume of the connected external audio source should be adjus-
ted to the volume of the other audio sources ⇒ page 39 ( AUX2 volume in
the Media settings menu ⇒ Fig. 29).
Things to note about the AUX2 additional external audio source
● If another audio source (CD, SD, etc.) is selected during playback, the
external player connected to the RSE continues playing.
● When playback on the external audio source has finished or if the exter-
nal player is disconnected from the AUX-RSE connector, the radio and navi-
gation system remains in the AUX2 menu.
● The AUX2 symbol remains visible and on (highlighted in red), and there-
fore accessible, as long as the “ Activate AUX2 input” check box in the ( Me-
dia setup menu ) is ticked. The option should be deactivated when playback
has finished. Recommendations for use
●
If your vehicle is not fitted with an RSE system or a MEDIA-IN or MDI mul-
timedia interface, we recommend that the Activate AUX2 input is always left
unticked. Otherwise, the AUX2 source (if your vehicle does not have MDI) or
the “MDI” source may be shown in the Media selection menu as “active”
(accessible), even if there is no audio source connected to them.
● If your vehicle is fitted with a MEDIA-IN or MDI multimedia interface, the
AUX2 additional external source is not available. Use the check box Activate
AUX2 input as described in the section MEDIA-IN or MDI multimedia inter-
face.
1)
This option can also be activated using the function button in the pop-up window which
appears when you try to go to the MEDIA main menu when there is no Media source con-
nected or activated.
Page 36 of 114
35
Audio mode
External audio source connected via Bluetooth ®
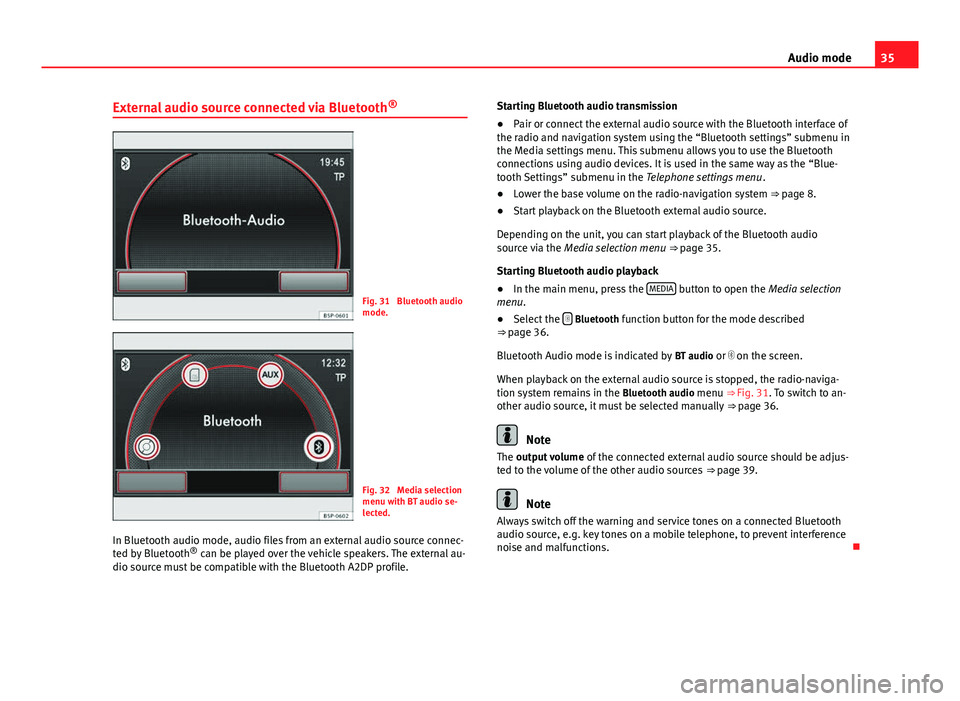
Fig. 31 Bluetooth audio
mode.
Fig. 32 Media selection
menu with BT audio se-
lected.
In Bluetooth audio mode, audio files from an external audio source connec-
ted by Bluetooth ®
can be played over the vehicle speakers. The external au-
dio source must be compatible with the Bluetooth A2DP profile. Starting Bluetooth audio transmission
●
Pair or connect the external audio source with the Bluetooth interface of
the radio and navigation system using the “Bluetooth settings” submenu in
the Media settings menu. This submenu allows you to use the Bluetooth
connections using audio devices. It is used in the same way as the “Blue-
tooth Settings” submenu in the Telephone settings menu .
● Lower the base volume on the radio-navigation system ⇒ page 8.
● Start playback on the Bluetooth external audio source.
Depending on the unit, you can start playback of the Bluetooth audio
source via the Media selection menu ⇒ page 35.
Starting Bluetooth audio playback
● In the main menu, press the MEDIA
button to open the Media selection
menu.
● Select the
Bluetooth function button for the mode described
⇒ page 36.
Bluetooth Audio mode is indicated by BT audio or on the screen.
When playback on the external audio source is stopped, the radio-naviga-
tion system remains in the Bluetooth audio menu ⇒ Fig. 31. To switch to an-
other audio source, it must be selected manually ⇒ page 36.
Note
The output volume of the connected external audio source should be adjus-
ted to the volume of the other audio sources ⇒ page 39.
Note
Always switch off the warning and service tones on a connected Bluetooth
audio source, e.g. key tones on a mobile telephone, to prevent interference
noise and malfunctions.
Page 37 of 114
36Audio mode
Selecting a Media source
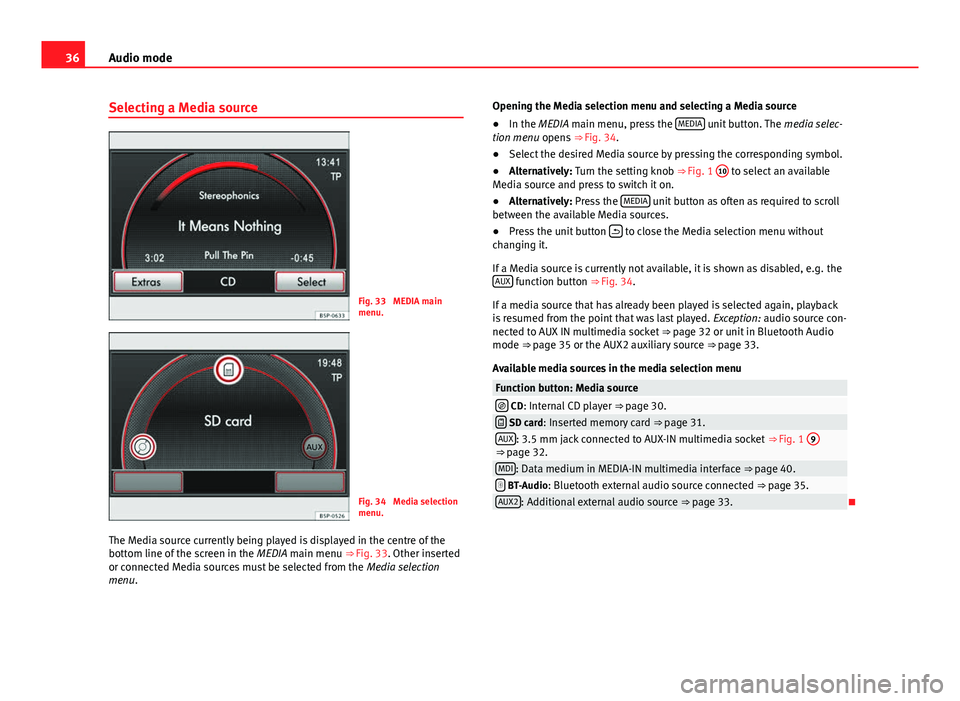
Fig. 33 MEDIA main
menu.
Fig. 34 Media selection
menu.
The Media source currently being played is displayed in the centre of the
bottom line of the screen in the MEDIA main menu ⇒ Fig. 33. Other inserted
or connected Media sources must be selected from the Media selection
menu. Opening the Media selection menu and selecting a Media source
● In the MEDIA main menu, press the MEDIA
unit button. The
media selec-
tion menu opens ⇒ Fig. 34.
● Select the desired Media source by pressing the corresponding symbol.
● Alternatively: Turn the setting knob ⇒ Fig. 1 10
to select an available
Media source and press to switch it on.
● Alternatively: Press the MEDIA
unit button as often as required to scroll
between the available Media sources.
● Press the unit button
to close the Media selection menu without
changing it.
If a Media source is currently not available, it is shown as disabled, e.g. the AUX
function button ⇒ Fig. 34.
If a media source that has already been played is selected again, playback
is resumed from the point that was last played. Exception: audio source con-
nected to AUX IN multimedia socket ⇒ page 32 or unit in Bluetooth Audio
mode ⇒ page 35 or the AUX2 auxiliary source ⇒ page 33.
Available media sources in the media selection menu
Function button: Media source CD: Internal CD player ⇒ page 30. SD card: Inserted memory card ⇒ page 31.AUX: 3.5 mm jack connected to AUX-IN multimedia socket ⇒ Fig. 1 9⇒ page 32.MDI: Data medium in MEDIA-IN multimedia interface ⇒ page 40. BT-Audio: Bluetooth external audio source connected
⇒ page 35.AUX2: Additional external audio source ⇒ page 33.
Page 38 of 114
37
Audio mode
Changing track manually
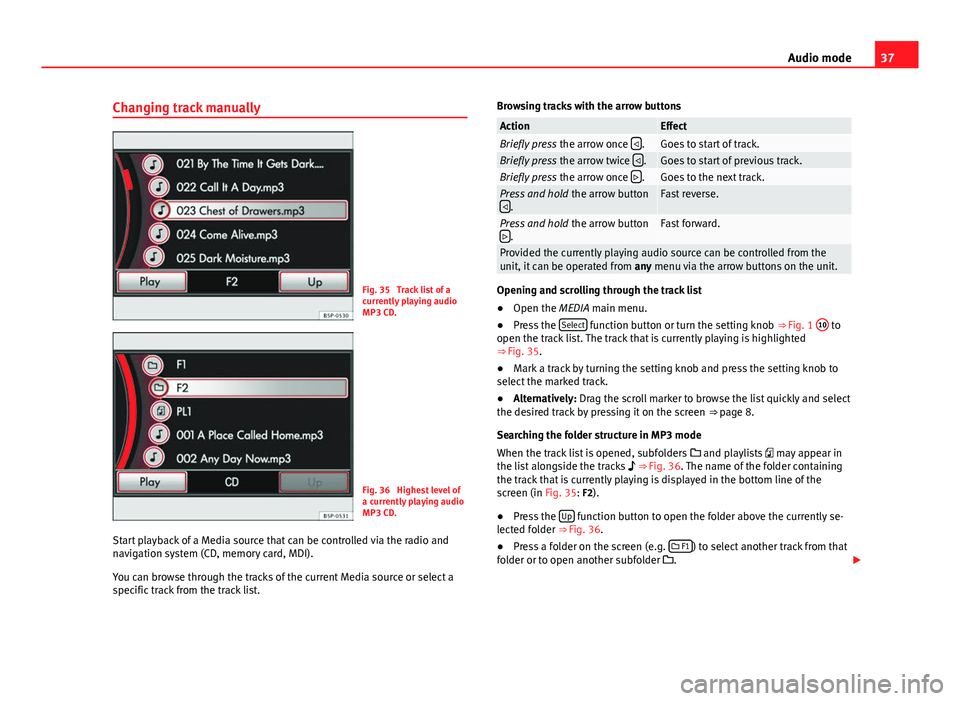
Fig. 35 Track list of a
currently playing audio
MP3 CD.
Fig. 36 Highest level of
a currently playing audio
MP3 CD.
Start playback of a Media source that can be controlled via the radio and
navigation system (CD, memory card, MDI).
You can browse through the tracks of the current Media source or select a
specific track from the track list. Browsing tracks with the arrow buttons
ActionEffectBriefly press
the arrow once .Goes to start of track.Briefly press
the arrow twice .Goes to start of previous track.Briefly press
the arrow once .Goes to the next track.Press and hold
the arrow button
.Fast reverse.
Press and hold the arrow button
.Fast forward.
Provided the currently playing audio source can be controlled from the
unit, it can be operated from any menu via the arrow buttons on the unit.
Opening and scrolling through the track list
●Open the MEDIA main menu.
● Press the Select
function button or turn the setting knob
⇒ Fig. 1 10 to
open the track list. The track that is currently playing is highlighted
⇒ Fig. 35.
● Mark a track by turning the setting knob and press the setting knob to
select the marked track.
● Alternatively: Drag the scroll marker to browse the list quickly and select
the desired track by pressing it on the screen ⇒ page 8.
Searching the folder structure in MP3 mode
When the track list is opened, subfolders and playlists may appear in
the list alongside the tracks ⇒ Fig. 36. The name of the folder containing
the track that is currently playing is displayed in the bottom line of the
screen (in Fig. 35: F2).
● Press the Up
function button to open the folder above the currently se-
lected folder ⇒ Fig. 36.
● Press a folder on the screen (e.g.
F1
) to select another track from that
folder or to open another subfolder .
Page 39 of 114
38Audio mode
● OR: Turn the setting knob, select the folder and turn and press the knob
again to select the track or open the subfolder .
● Repeatedly pressing the Up
function button moves up through the fold-
er structure until you reach the root directory of the media source that is cur-
rently playing. In the root directory, the Up
function button is disabled. The
Media source currently playing is displayed in the bottom line of the screen
⇒ Fig. 36.
If a MEDIA-IN multimedia interface is installed and an iPod ®1)
or iPhone 1)
is
connected, a special iPod selection menu is displayed at the top selection
level (root directory) ⇒ Fig. 42.
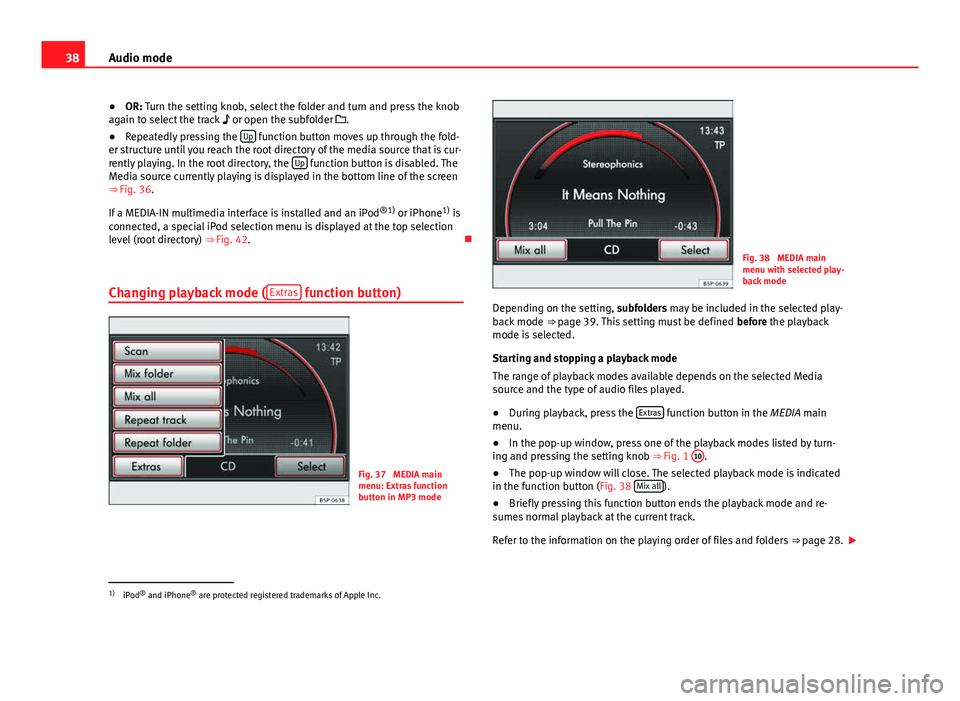
Changing playback mode ( Extras
function button)
Fig. 37 MEDIA main
menu: Extras function
button in MP3 mode
Fig. 38 MEDIA main
menu with selected play-
back mode
Depending on the setting, subfolders may be included in the selected play-
back mode ⇒ page 39. This setting must be defined
before the playback
mode is selected.
Starting and stopping a playback mode
The range of playback modes available depends on the selected Media
source and the type of audio files played.
● During playback, press the Extras
function button in the MEDIA main
menu.
● In the pop-up window, press one of the playback modes listed by turn-
ing and pressing the setting knob ⇒ Fig. 1 10
.
● The pop-up window will close. The selected playback mode is indicated
in the function button (Fig. 38 Mix all
).
● Briefly pressing this function button ends the playback mode and re-
sumes normal playback at the current track.
Refer to the information on the playing order of files and folders ⇒ page 28.
1)
iPod ®
and iPhone ®
are protected registered trademarks of Apple Inc.
Page 40 of 114

39
Audio mode
The scan function can also be started and stopped by briefly pressing the
setting knob ⇒ Fig. 1 10
.
Available playback modes
Function button: EffectScan: Each track of the current folder or current Media source will be
played for 10 seconds. The scan function starts at the next track.
Mix: The tracks of the current audio CD will be played in random order.Mix folder: The tracks of the current folder will be played in random order.Mix all: The tracks of the current data medium will be played in random or-
der.
Repeat track: Repeats the currently playing title.Repeat CD: At the end of the current audio CD, its tracks will be played
again.
Repeat folder: At the end of the current folder, its tracks will be played
again.
The random play and repeat functions remain active for the corresponding
Media source until they are closed for that source.
Media setup menu (SETUP)
In Media mode, press the SETUP unit button to open the
Media setup menu.
The selection options depend on the type of unit and equipment.
Function button: EffectTraffic programme (TP): To activate or deactivate the TP function ⇒ page 19. Scan/Mix/Repeat incl. : Subfolders are included in the selected playback
mode ⇒ page 38.
This setting must be defined before the playback mode is activated.
AUX input level: Adjust the input volume for an external audio source in the
AUX-IN multimedia socket ⇒ Fig. 1 9 to the output volume
of the other
audio sources ⇒ page 32.
Function button: EffectBluetooth settings: Press to enter the BT settings menu to view the list of de-
vices connected, search for devices, etc.
BT-Audio volume: Adjust the input volume for a Bluetooth audio source to
the playback volume of the other audio sources.
Activating the AUX2 input: Press to activate the AUX2 audio input. If your ve-
hicle does not have an RSE system, or a MEDIA-IN or MDI multimedia inter-
face, this checkbox should always be left unmarked ⇒ page 33.
MDI volume: Adjust the input volume for an iPod®
or iPhone ®
or other de-
vice connected to the MEDIA-IN multimedia interface to the playback vol-
ume of the other audio sources ⇒ page 40.
AUX2 volume: Adjust the input volume for the AUX2 ⇒ table on page 39
external audio source to the playback volume of the other audio sources
⇒ page 32.
Adjusting playback volume
If you need to increase the output volume of an external audio source, first
lower the base volume on the radio-navigation system ⇒ page 9.
If the sound from the external audio source is too quiet, increase the output
volume on the external audio source if possible. If it is too low, increase the
input volume .
If the sound from the connected external audio source is too loud or distor-
ted, lower the output volume on the external audio source if possible. If it is
still too loud, lower the input volume.
WARNING
If the volume is too high, you could damage your hearing. Even if the vol-
ume is too loud for a short period only.
CAUTION
The vehicle loudspeakers may be damaged if the volume is too high or the
sound is distorted.