turn Seat Leon SC 2017 User Guide
[x] Cancel search | Manufacturer: SEAT, Model Year: 2017, Model line: Leon SC, Model: Seat Leon SC 2017Pages: 332, PDF Size: 7.25 MB
Page 33 of 332
The essentialsSym-
bolIgnition switched
offIgnition is
switched on
Fog lights, dipped
beam and side lights
off.Light off or daytime
driving light on.
The “Coming home”
and “Leaving home”
guide lights may be
switched on.Automatic control of
dipped beam and
daytime running
light.
Side light on.
Dipped beam head-
light offDipped beam
switched on.
Front fog lights: mo
ve the switch to the
first position, from positions , or .
Rear fog light: move the switch completely
from positions , or .
● Switching off fog lights: Push the switch or
turn it t
o the position.
››› in Side light and dipped beam head-
light on page 140
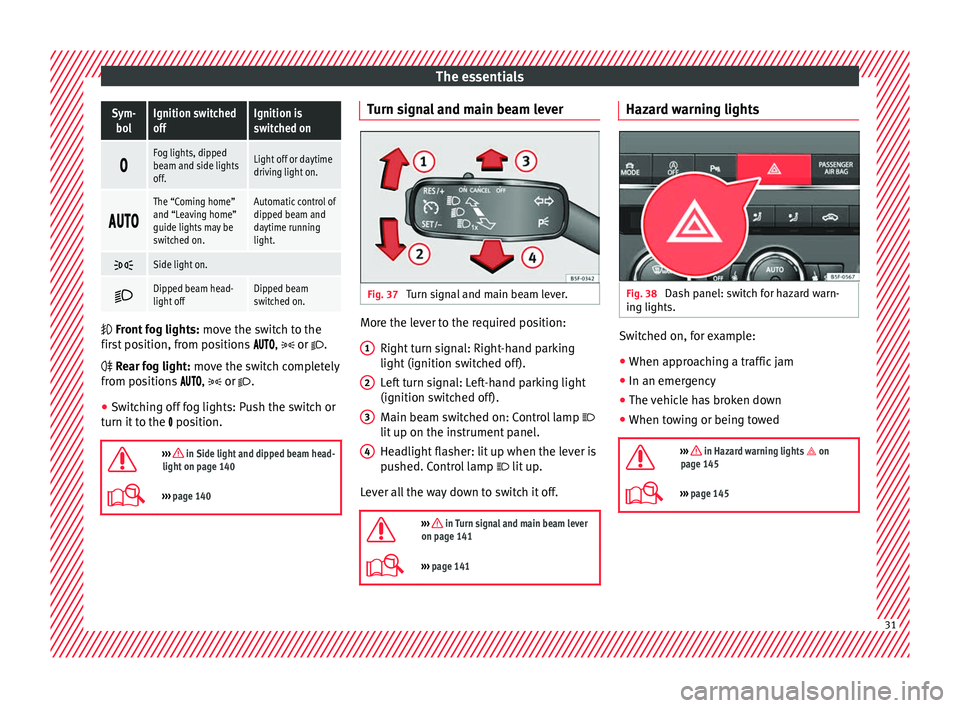
››› page 140 Turn signal and main beam lever
Fig. 37
Turn signal and main beam lever. More the lever to the required position:
Right t
urn s
ignal: Right-hand parking
light (ignition switched off).
Left turn signal: Left-hand parking light
(ignition switched off).
Main beam switched on: Control lamp
lit up on the instrument panel.
Headlight flasher: lit up when the lever is
pushed. Control lamp lit up.
Lever all the way down to switch it off.
››› in Turn signal and main beam lever
on page 141
››› page 141 1
2
3
4 Hazard warning lights
Fig. 38
Dash panel: switch for hazard warn-
in g lights. Switched on, for example:
●
When approaching a traffic jam
● In an emergency
● The vehicle has broken down
● When towing or being towed
››› in Hazard warning lights on
page 145
››› page 145 31
Page 34 of 332
The essentials
Interior lights Fig. 39
Detail of headliner: front interior light-
in g.KnobFunction
Switches interior lights off.
Switches interior lights on.
Central position
or
a)
Door contact switch-on.
The interior lights come on automati-
cally when the vehicle is unlocked, a
door is opened or the key is removed
from the ignition.
The light goes off a few seconds af-
ter all the doors are closed, the vehi-
cle is locked or the ignition is switch-
ed on.
KnobFunction
Turning the reading light on and off
a)
Depending on version.
››› page 147 Windscreen wipers and window wiper
bl
a
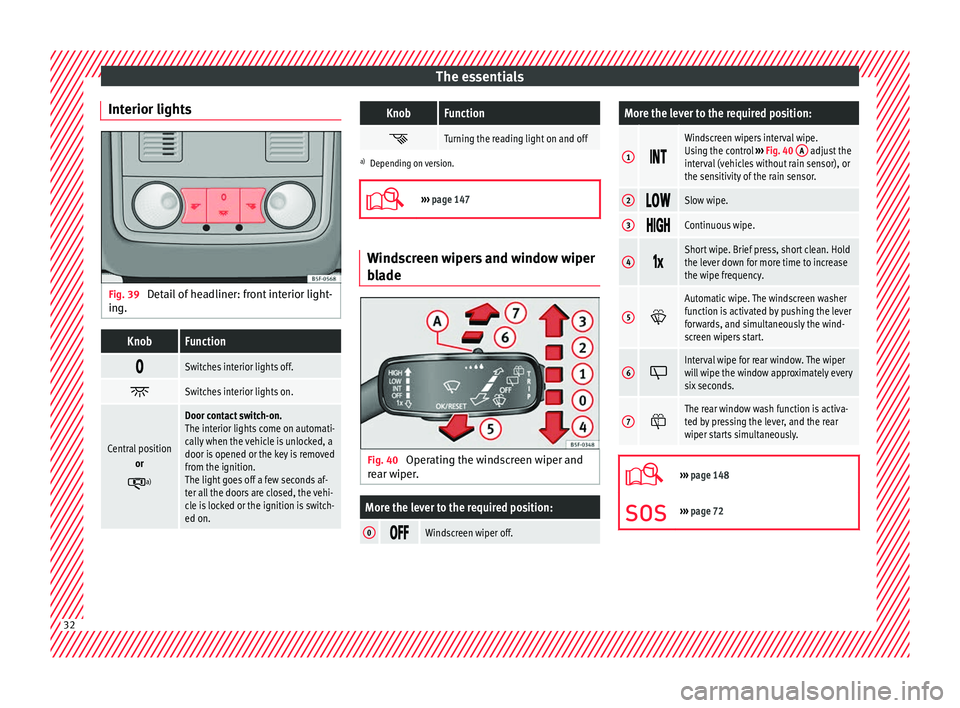
de Fig. 40
Operating the windscreen wiper and
r e
ar w
iper.
More the lever to the required position:
0 Windscreen wiper off.
More the lever to the required position:
1
Windscreen wipers interval wipe.
Using the control
››› Fig. 40 A adjust the
interval (vehicles without rain sensor), or
the sensitivity of the rain sensor.
2 Slow wipe.
3
Continuous wipe.
4
Short wipe. Brief press, short clean. Hold
the lever down for more time to increase
the wipe frequency.
5
Automatic wipe. The windscreen washer
function is activated by pushing the lever
forwards, and simultaneously the wind-
screen wipers start.
6
Interval wipe for rear window. The wiper
will wipe the window approximately every
six seconds.
7
The rear window wash function is activa-
ted by pressing the lever, and the rear
wiper starts simultaneously.
›››
page 148
››› page 72 32
Page 36 of 332
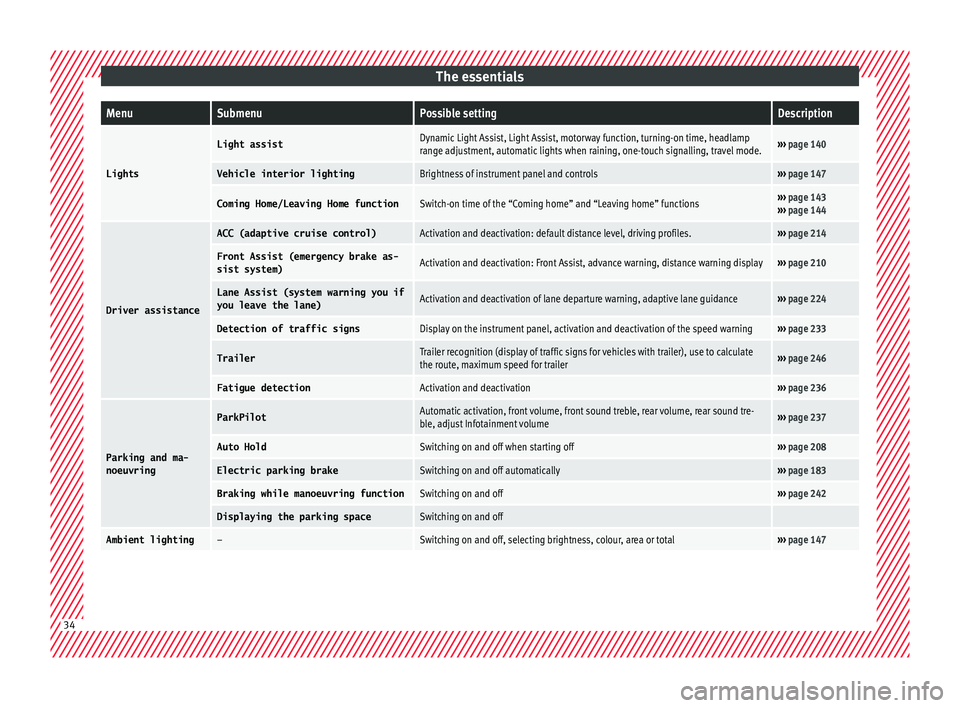
The essentialsMenuSubmenuPossible settingDescription
Lights
Light assistDynamic Light Assist, Light Assist, motorway function, turning-on time, headlamp
range adjustment, automatic lights when raining, one-touch signalling, travel mode.›››
page 140
Vehicle interior lightingBrightness of instrument panel and controls››› page 147
Coming Home/Leaving Home functionSwitch-on time of the “Coming home” and “Leaving home” functions››› page 143
››› page 144
Driver assistance
ACC (adaptive cruise control)Activation and deactivation: default distance level, driving profiles.››› page 214
Front Assist (emergency brake as-
sist system)Activation and deactivation: Front Assist, advance warning, distance warning display››› page 210
Lane Assist (system warning you if
you leave the lane)Activation and deactivation of lane departure warning, adaptive lane guidance››› page 224
Detection of traffic signsDisplay on the instrument panel, activation and deactivation of the speed warning››› page 233
TrailerTrailer recognition (display of traffic signs for vehicles with trailer), use to calculate
the route, maximum speed for trailer››› page 246
Fatigue detectionActivation and deactivation››› page 236
Parking and ma-
noeuvring
ParkPilotAutomatic activation, front volume, front sound treble, rear volume, rear sound tre-
ble, adjust Infotainment volume››› page 237
Auto HoldSwitching on and off when starting off››› page 208
Electric parking brakeSwitching on and off automatically››› page 183
Braking while manoeuvring functionSwitching on and off››› page 242
Displaying the parking spaceSwitching on and off
Ambient lighting–Switching on and off, selecting brightness, colour, area or total››› page 147 34
Page 39 of 332
The essentials
Enabling the main menu
● Switch the ignition on.
● If a message or vehicle pictogram appears,
pr e
s
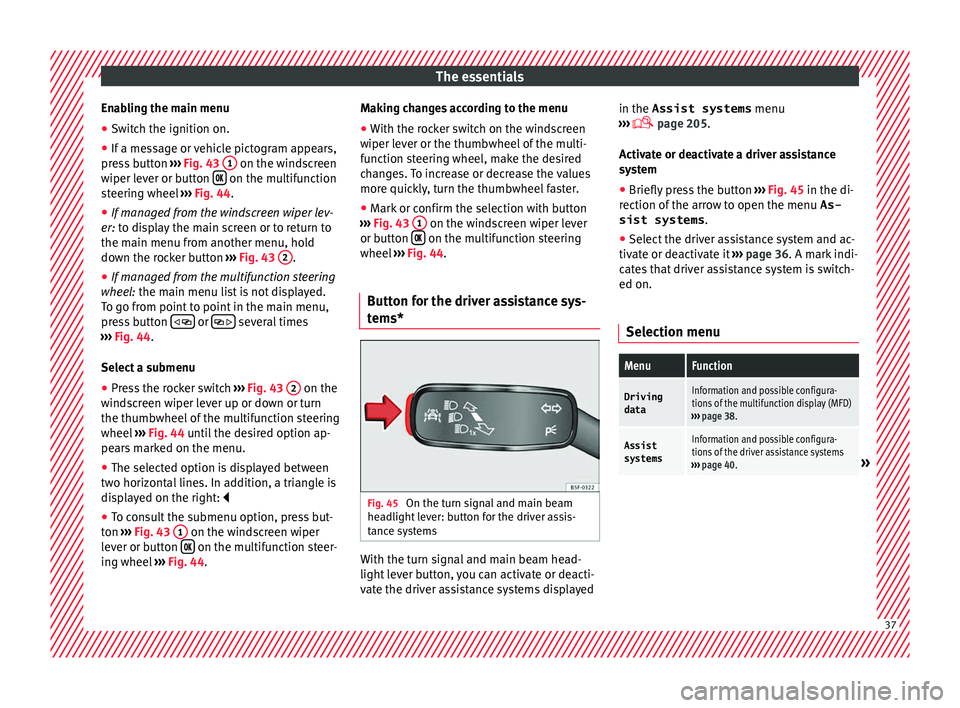
s button ››› Fig. 43 1 on the windscreen
w iper l
ev
er or button on the multifunction
s t
eerin
g wheel ››› Fig. 44.
● If managed from the windscreen wiper lev-
er: to dis
play the main screen or to return to
the main menu from another menu, hold
down the rocker button ››› Fig. 43 2 .
● If managed from the multifunction steering
whe e
l:
the main menu list is not displayed.
To go from point to point in the main menu,
press button
or
several times
› ›
›
Fig. 44.
Select a submenu ● Press the rocker switch ›››
Fig. 43 2 on the
w ind
s
creen wiper lever up or down or turn
the thumbwheel of the multifunction steering
wheel ››› Fig. 44 until the desired option ap-
pears marked on the menu.
● The selected option is displayed between
two horizont
al lines. In addition, a triangle is
displayed on the right:
● To consult the submenu option, press but-
ton ››
› Fig. 43 1 on the windscreen wiper
l ev
er or b
utton on the multifunction steer-
in g wheel
›
›› Fig. 44. Making changes according to the menu
● With the rocker switch on the windscreen
wiper lev
er or the thumbwheel of the multi-
function steering wheel, make the desired
changes. To increase or decrease the values
more quickly, turn the thumbwheel faster.
● Mark or confirm the selection with button
›››
Fig. 43 1 on the windscreen wiper lever
or b utt
on on the multifunction steering
wheel
›
›
› Fig. 44.
Button for the driver assistance sys-
tems* Fig. 45
On the turn signal and main beam
he a
dlight
lever: button for the driver assis-
tance systems With the turn signal and main beam head-
light
l
ev
er button, you can activate or deacti-
vate the driver assistance systems displayed in the Assist systems
menu
›››
page 205.
Activate or deactivate a driver assistance
system ● Briefly press the button ›››
Fig. 45 in the di-
rection of the arrow to open the menu As-
sist systems .
● Select the driver assistance system and ac-
tivate or de
activate it ››› page 36. A mark indi-
cates that driver assistance system is switch-
ed on.
Selection menu
MenuFunction
Driving
dataInformation and possible configura-
tions of the multifunction display (MFD)
››› page 38.
Assist
systemsInformation and possible configura-
tions of the driver assistance systems
››› page 40.
» 37
Page 40 of 332
The essentialsMenuFunction
Navigation
Information instructions from the acti-
vated navigation system: when a route
guidance is activated, the turning ar-
rows and proximity bars are displayed.
The appearance is similar to the Easy
Connect system.
If route guidance is not activated, the
direction of travel (compass) and the
name of the street along which you are
driving are shown
››› Booklet Naviga-
tion system.
Audio
Station display on the radio.
Track name on the CD.
Track name in Media mode ››› Booklet
Radio or ››› Booklet Navigation system.
Telephone
Information and possible configura-
tions of the mobile phone preinstalla-
tion ››› Booklet Radio or ››› Booklet Nav-
igation system.
Lap timer
In a racing circuit, measurement and
memorisation of lap times by the vehi-
cle and comparison with previously
measured best times ››› page 40.
Vehicle
statusDisplay of the current warning or infor-
mation texts and other system compo-
nents, according to equipment
››› page 33. Driving data
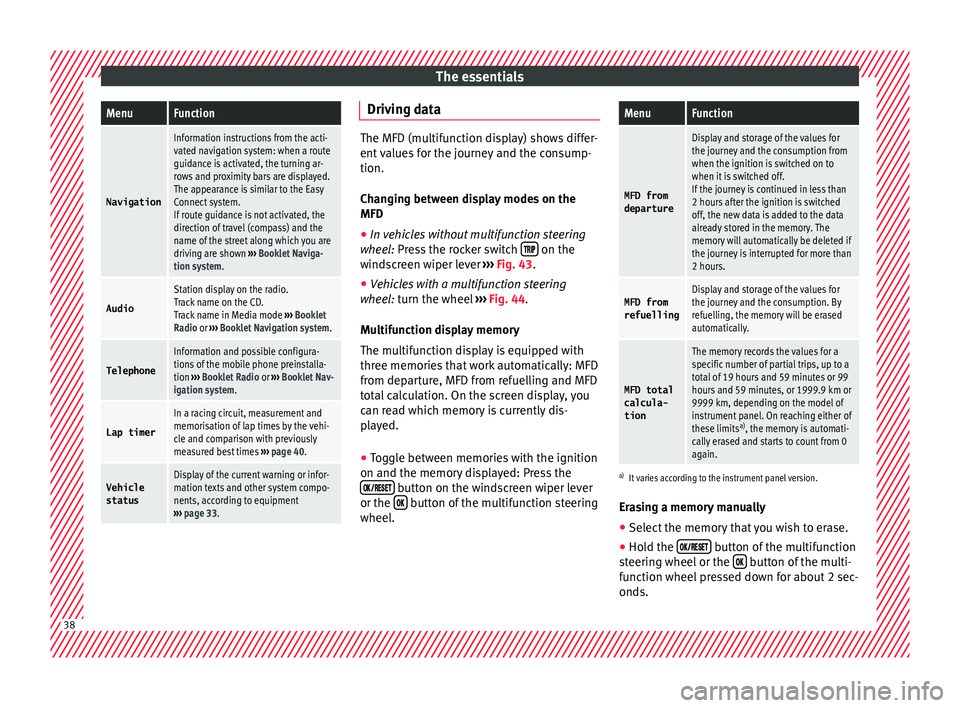
The MFD (multifunction display) shows differ-
ent
v
alues for the journey and the consump-
tion.
Changing between display modes on the
MFD
● In vehicles without multifunction steering
wheel:
Press the rocker switch on the
wind s
creen wiper lever ››› Fig. 43.
● Vehicles with a multifunction steering
wheel:
turn the wheel ››› Fig. 44.
Multifunction display memory
The multifunction display is equipped with
three memories that work automatically: MFD
from departure, MFD from refuelling and MFD
total calculation. On the screen display, you
can read which memory is currently dis-
played.
● Toggle between memories with the ignition
on and the memory di
splayed: Press the
button on the windscreen wiper lever
or the button of the multifunction steering
wheel .
MenuFunction
MFD from
departure
Display and storage of the values for
the journey and the consumption from
when the ignition is switched on to
when it is switched off.
If the journey is continued in less than
2 hours after the ignition is switched
off, the new data is added to the data
already stored in the memory. The
memory will automatically be deleted if
the journey is interrupted for more than
2 hours.
MFD from refuellingDisplay and storage of the values for
the journey and the consumption. By
refuelling, the memory will be erased
automatically.
MFD total
calcula-
tion
The memory records the values for a
specific number of partial trips, up to a
total of 19 hours and 59 minutes or 99
hours and 59 minutes, or 1999.9 km or
9999 km, depending on the model of
instrument panel. On reaching either of
these limits a)
, the memory is automati-
cally erased and starts to count from 0
again.
a) It varies according to the instrument panel version.
Erasing a memory manually
● Select the memory that you wish to erase.
● Hold the button of the multifunction
s t
eerin
g wheel or the button of the multi-
f u nction wheel
pressed down for about 2 sec-
onds. 38
Page 41 of 332
The essentials
Personalising the displays
In the E a
sy
Connect system you can adjust
which of the possible displays of the MFD can
be shown on the instrument panel display
with the button and the
S
ET
TINGS function
b utt
on ›
›› page 120.
Data summary
MenuFunction
Current fuel
consumption
The current fuel consumption dis-
play operates throughout the jour-
ney, in litres/100 km; and with the
engine running and the vehicle
stopped, in litres/hour.
Average fuel consumption a)
After turning on the ignition, aver-
age fuel consumption in li-
tres/100 km will be displayed after
travelling about 100 metres. Other-
wise horizontal lines are displayed.
The value shown is updated approxi-
mately every 5 seconds.
ACT®
*: Depending on the equip-
ment, number of active cylinders.
Operating range a)
Approximate distance in km that can
still be travelled with the fuel re-
maining in the tank, assuming the
same style of driving is maintained.
This is calculated using the current
fuel consumption.
Travelling
timeThis indicates the hours (h) and mi-
nutes (min) since the ignition was
switched on.
MenuFunction
JourneyDistance covered in km (m) after
switching on the ignition.
CNG quality
Whenever you refuel the quality of
the natural gas is automatically veri-
fied and is displayed when the igni-
tion is switched on. The display is
made in a percentage of between
70% and 100%. The greater the per-
centage displayed the lower the con-
sumption may be.
Average
speed
The average speed will be shown af-
ter a distance of about 100 metres
has been travelled. Otherwise hori-
zontal lines are displayed. The value
shown is updated approximately ev-
ery 5 seconds.
Digital dis-play of
speedCurrent speed displayed in digital
format.
Speed warn-
ing at ---
km/h or Speed
warning at
--- mphIf the stored speed is exceeded (be-
tween 30 - 250 km/h, or 19 -
155 mph), an audible warning is
given together with a visual warn-
ing.
Detection of
traffic
signsThe traffic signs detected are dis-
played.
Oil tempera- tureUpdated engine oil temperature dig-
ital display
Coolant tem-
perature
gaugeDigital display of the current temper-
ature of the liquid coolant.
MenuFunction
Convenience consumersInformation about the vehicle’s
main convenience consumers. It is
displayed by means of a consump-
tion indicator bar.
Eco tipsTips on how to save fuel.
Reset data “when set-
ting off”Reset journey data when setting off.
Reset data
for “total
calculation”Reset travel journey to zero.
a) In vehicles with a natural gas engine, range and average con-
sumption refer only to data or natural gas consumption. If you
are in “petrol mode”, the information of both data only appears
on the dash panel and not on the multifunction screen.
Storing a speed with the speed warning
● Select the display Speed warning at
--- km/h (---
mph)
● Press the button
on the windscreen
w iper l
ev
er or the button on the multifunc-
tion s t
eerin
g wheel to store the current speed
and activate the warning.
● To switch system on: adjust to the desired
speed within 5 sec
onds using the rocker
switch on the windscreen wiper lever or
b y
t
urning the thumbwheel on the multifunc-
tion steering wheel. Next, press the button or
again or wait several seconds.
The s peed i
s
stored and the warning activa-
ted. » 39
Page 42 of 332

The essentials
● To sw
it
ch system off: press the but-
ton or
. The stored speed is de-
l et
ed.
Assist systems menu
MenuFunction
ACCDisplay of Adaptive Cruise Control
(ACC) ››› page 214.
Front AssistSwitching the monitoring system
on and off ››› page 210.
Lane Assist *Switching the Lane Assist system
on or off ››› page 225.
Detection of
traffic signsDisplay of traffic signs
››› page 233:
Fatigue detec-
tion *Switching the fatigue detection
on or off (pause recommenda-
tion) ››› page 236. Timer*
You can access the timer via the selection
menu
››
›
page 37.
It allows you to manually time lap times on a
racing circuit, memorise them and compare
them to the vehicle's previous best times.
The following menus can be displayed:
● Stop ●
Lap
● Pause
● Partial time
● Statistics
Chang
e from one menu to another
● Vehicles without multifunction steering
wheel:
press the rocker switch in the
w ind
s
creen wiper lever.
● Vehicles with multifunction steering wheel:
turn the wheel ›
›› Fig. 44.
Menu “Stop”
Start
The timer starts.
If there are existing laps and they are
included in the statistics, it will begin
with the number of laps in question.
It is only possible to begin with a new
first lap if the statistics have been re-
set first in the Statistics menu.
Since start
The timer begins when the vehicle
sets off.
If the vehicle is already moving, the
timer begins once the vehicle has
stopped.
StatisticsThe Statistics menu is displayed
on the screen.
Menu “Lap”
New lap
The timer of the current lap stops and
a new lap starts immediately. The time
for the lap you have just completed is
included in the statistics.
Partial timeFor about 5 seconds a partial time is
displayed. The timer continues in par-
allel.
StopThe current lap timer will be interrup-
ted. The lap does not end. The Pause
menu is displayed.
Menu “Pause”
ContinueThe interrupted timer continues.
New lapA new timer starts. The halted lap
ends and is included in the statistics.
Interr. lapThe timer of the current lap ends and
is cancelled. It is not included in the
statistics.
EndThe current timer ends. The lap is in-
cluded in the statistics.
Menu “Partial time”
Partial
timeFor about 5 seconds a partial time is
displayed. The timer continues in par-
allel.
New lap
The timer of the current lap stops and
a new lap starts immediately. The time
for the lap you have just completed is
included in the statistics. 40
Page 43 of 332

The essentialsMenu “Partial time”
StopThe current lap timer will be interrup-
ted. The lap does not end. The
Pause
menu is displayed.
Menu “Statistics”
View of the latest lap times:
– total time
– best lap time
– worst lap time
– average lap duration
A maximum of 10 laps is possible, and
a total duration of 99 hours, 59 mi-
nutes and 59 seconds.
If one of the 2 limits is reached, you
will have to reset the statistics in order
to begin a new timer.
BackThis returns to the previous menu.
Resetting
to zeroAll the memorised statistical data are
reset. WARNING
Do your best to avoid handling the timer
whil e driv
ing.
● Only set the timer or consult statistics
when the vehic
le is stationary.
● While driving, do not handle the timer in
complic
ated driving situations. Status display
Bonnet, r e
ar lid and door
s open Fig. 46
A: bonnet open; B: rear lid open; C:
fr ont
l
eft door open; D: rear right door open
(5-door vehicles only). When the ignition is switched on or when
driv
in
g, the bonnet, r
ear lid or doors that are
open will be indicated on the instrument pan-
el display, and, as applicable, this will be in-
dicated audibly. The display may vary accord-
ing to the type of instrument panel fitted.
Illustra- tionKey to ››› Fig. 46
A Do not continue driving!
The bonnet is open or is not properly
closed ››› page 270.
B Do not continue driving!
The rear lid is open or is not properly
closed ››› page 135.
C, D Do not continue driving!
A vehicle door is open or is not properly
closed ››› page 125.
›››
page 115 Warning and information messages
The system runs a check on certain compo-
nents
and f
u
nctions when the ignition is
switched on and while the vehicle is moving.
Faults in the operation are displayed on the
screen using red and yellow symbols and
messages on the instrument panel display
( ›››
page 119) and, in some cases, with
audible warnings. The display may vary ac-
cording to the type of instrument panel fitted. » 41
Page 45 of 332
The essentials
When the vehicle is at a standstill or when
tr av
el
ling at very low speeds, the tempera-
ture displayed may be higher than the true
outside temperature as a result of the heat
produced by the engine.
The temperatures measured range from
-40°C to +50°C (-40°F to +122°F).
Engine oil temperature display Vehicles without multifunction steering
wheel
● Press the rocker switch ›
››
Fig. 43 2 until
the m ain menu ap
pe
ars. Enter into Driving
data . With the button 2 move to the oil
t emper
at
ure gauge.
Vehicles with multifunction steering wheel
● Enter the submenu Driving data and
turn the thumbwheel
until the oil tempera-
ture display appears.
The engine reaches its operating temperature
when in normal driving conditions, the oil
temperature is between 80°C (180°F) and
120°C (250°F) . If the engine is required to
work hard and the outside temperature is
high, the engine oil temperature can in-
crease. This does not present any problem as
long as the warning lamps ›››
table on
page 48 or ››› table on page 48 do not
appear on the display. Additional consumers ●
Operation with the windscreen wiper lever*:
Pre s
s the rocker switch ››› Fig. 43 2 until the
main menu ap pe
ars. Enter into the section
Driving data . With the rocker switch,
move to the display Convenience con-
sumers .
● Operation with the multi-function steering
wheel*:
move with the buttons
or
to Driving data
and enter with
OK. Turn
the right thumbwheel until the Conven-
ience consumers display appears.
In addition, a scale will inform you of the cur-
rent sum of all the additional appliances.
Saving tips Tips on how to save fuel will be displayed in
c
ondition
s
that increase fuel consumption.
Follow them to reduce consumption. The indi-
cations appear automatically only with the ef-
ficiency programme. After a time, the tips will
disappear automatically.
If you wish to hide a saving tip immediately
after it appears, press any button on the
windscreen wiper lever*/multifunction steer-
ing wheel*. Note
● If y
ou hide a saving tip, it will reappear af-
ter you switch the ignition on again.
● The saving tips do not appear in all situa-
tions, but
rather with a large separation of
time. Speed warning device
The speed warning device warns the driver
when they h
av
e exceeded the pre-set speed
limit by 3 km/h (2 mph). An audible warning
signal sounds, and the warning lamp and
the driver message Speed limit excee-
ded! will be displayed simultaneously on the
instrument panel. The warning lamp
switches off when reducing speed below the
stored maximum limit.
Speed warning programming is recommen-
ded if you wish to be reminded of a maxi-
mum speed, such as when travelling in a
country with different speed limits or for a
maximum speed for winter tyres.
Setting speed limit warning
You can use the radio or the Easy Connect* to
set, alter or cancel the speed limit warning.
● Vehicles with radio : pres
s the button SETUP > control button Driver Assistant
>
Speed warning . » 43
Page 48 of 332
The essentials
Operation of the turn signal lever
● Switching on the CCS: Move switch
› ›
›
Fig. 49 1 to .
The system is on. If no
s peed h
as been programmed, the system will
not control it.
● Activating the CCS: Press button ›››
Fig. 49
2 in the ar
e
a. The current speed is
memorised and controlled.
● Temporarily switching off the CCS: Move
switc
h ››› Fig. 49 1 to
or push the
br ak
e. The cruise control system is switched
off temporarily.
● Reactivating the CCS: Press button
›››
Fig. 49 2 in
. The memorised speed
i
s saved and controlled again.
● Increasing stored speed during CCS regula-
tion: pres
s button 2 in
. The vehicle ac-
c
elerates until the new stored speed. ●
Reducin
g stored speed during CCS regula-
tion: press button 2 in t
o lower the
s peed b
y 1 km/h (1 mph). Speed is reduced
until reaching the new stored speed.
● Switching off the CCS: Move switch
›››
Fig. 49 1 to .
The system is disconnec-
t ed and the memori
sed speed is deleted.
Operation using the third lever
● Switching on the CCS: move the third lever
to
››› Fig. 50. The system switches on but it
does not control the speed as no speed has
been programmed.
● Activating the CCS: press the ›››
Fig. 50
button. It memorises and maintains the cur-
rent speed.
● Temporarily switching off the CCS: move
the lever t
o ››› Fig. 50 and release it or press the brake pedal. The cruise control sys-
tem is
switched off temporarily.
● Reactivating the CCS: move the lever to
›
›› Fig. 50 and release it. The memo-
rised speed is saved and controlled again.
● Switching off the CCS: move the third lever
to pos
ition ››› Fig. 50. The system is dis-
connected and the memorised speed is de-
leted.
››› in Operation on page 210
››› page 209 46