technical data Seat Toledo 2016 Repair Manual
[x] Cancel search | Manufacturer: SEAT, Model Year: 2016, Model line: Toledo, Model: Seat Toledo 2016Pages: 248, PDF Size: 5.82 MB
Page 173 of 248

Driver assistance systems
Adjusting the display and audible
w arnin
g
s The settings for the display and audible
warnin
g
s are controlled via the Easy Con-
nect*.
Automatic activation
on – activates the Automatic activa-
tion option ››› page 169.
off – deactivates the Automatic ac-
tivation option ››› page 169.
Front volume*
Volume in the front and rear area.
Front sound settings/sharpness*
Frequency (tone) of the sound in the front
area.
Rear volume*
Volume in the rear area.
Rear sound settings/sharpness*
Frequency (tone) of the sound in the rear
area.
Adjust volume
With the parking aid switched on, the active
audio/video source volume will be reduced
to the intensity of the selected setting. Error messages When the Parking Aid is activated or when it
is
sw
itched on, if a continuous warning can
be heard for several seconds (additionally, in
the case of Parking system Plus, the LED of
the button flashes), there is a fault in the
system.
Parking System Plus*
If there is a fault in a sensor, the symbol is
displayed on the Easy Connect display in
front of/behind the vehicle. If a rear sensor is
faulty, only the obstacles in the areas A and
B are displayed
››
›
Fig. 181. If a front sensor
is faulty, only the obstacles in the areas C and
D are displayed.
Hav e the f
au
lt corrected by a specialised
workshop without delay.
Towing bracket In vehicles equipped with a towing bracket
dev
ic
e fr
om the factory, when the trailer is
connected electrically, the Parking Aid rear
sensors will not be activated when reverse
gear is engaged, when the selector lever is
turned to position R or when the button is
pressed. Parking System Plus
The dist
ance to possible obstacles at the rear
of the vehicle will not be displayed on the
screen and nor will it be indicated by means
of audible sound signals.
The Easy Connect system screen will only dis-
play objects detected at the front, and the ve-
hicle's trajectory will be hidden.
Rear Assist “Rear View Cam-
era”*
Operatin
g and safety warnings WARNING
● The Re ar As
sist does not make it possible
to precisely calculate the distance from ob-
stacles (people, vehicles, etc.) and nor can it
overcome the system's own limits, hence us-
ing it may cause serious accidents and inju-
ries if used negligently or without due care.
The driver should be aware of his/her sur-
roundings at all times to ensure safe driving.
● The camera lens expands and distorts the
field of
vision and displays the objects on the
screen in a different, vague manner. The per-
ception of distances is also distorted by this
effect. » 171
Technical data
Advice
Operation
Emergencies
Safety
Page 175 of 248
Driver assistance systems
● Sw it
c
h the ignition on.
● If necessary, switch on the Infotainment
syst
em.
● Engage reverse gear or turn the selector
lever t
o position R.
● Press the --- function button displayed on
the right of the im
age.
● Make the desired adjustments on the menu
by pr
essing the –/+ function buttons or by
moving the corresponding scroll button.
Necessary conditions for parking and ma-
noeuvring with the rear assist
The system should not be used in the follow-
ing cases:
● If the image displayed is not very reliable or
is di
storted, for example low visibility or dirty
lens.
● If the area behind the vehicle is not dis-
pla
yed very clearly or is incomplete.
● If the vehicle is heavily loaded at the rear.
● If the position and installation angle of the
camera h
ave been changed, e.g. after a rear-
end collision. Have the system checked by a
specialised workshop.
Familiarising yourself with the system
To familiarise yourself with the system, the
orientation lines and their function, SEAT rec-
ommends practising parking and manoeu-
vring with the rear assist in a place without too much traffic or in a car park when there
are good w
eather and visibility conditions.
Cleaning the camera lens
Keep the camera lens clean and clear of snow
and ice:
● Moisten the lens using a normal alcohol-
based gl
ass cleaning product and clean the
lens with a dry cloth.
● Remove snow using a small brush.
● Use de-icing spray to remove any ice. CAUTION
● Never u se abr
asive cleaning products to
clean the camera lens.
● Do not use hot or warm water to remove ice
or snow fr
om the camera lens. Doing so could
damage the camera. Parking and manoeuvring with the
r
e
ar a
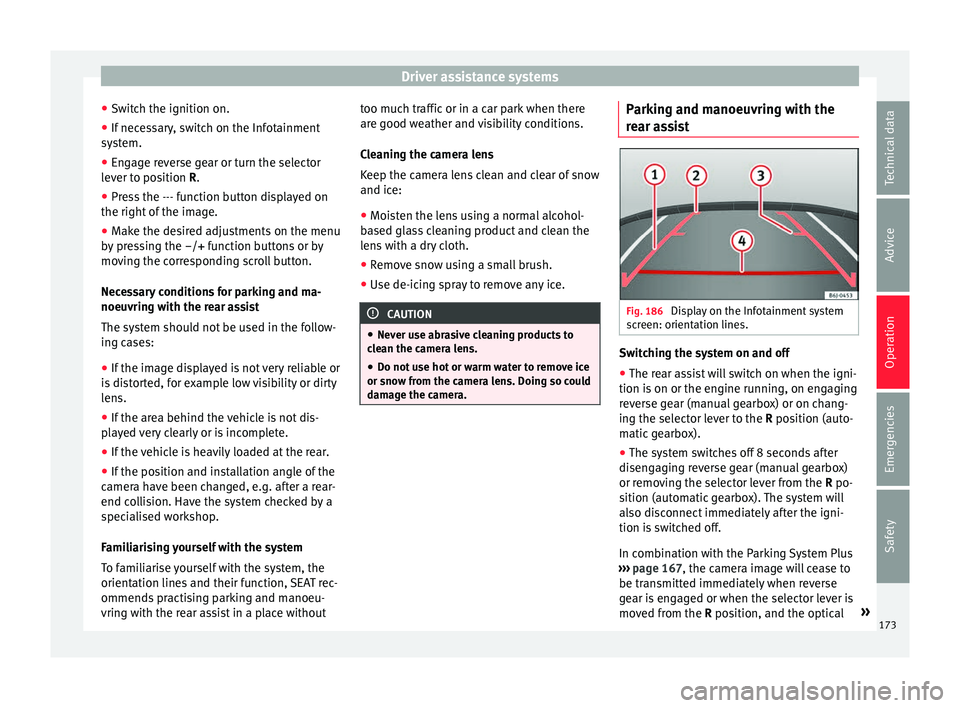
ssist Fig. 186
Display on the Infotainment system
s c
r
een: orientation lines. Switching the system on and off
●
The rear assist will switch on when the igni-
tion i s
on or the en
gine running, on engaging
reverse gear (manual gearbox) or on chang-
ing the selector lever to the R position (auto-
matic gearbox).
● The system switches off 8 seconds after
diseng
aging reverse gear (manual gearbox)
or removing the selector lever from the R po-
sition (automatic gearbox). The system will
also disconnect immediately after the igni-
tion is switched off.
In combination with the Parking System Plus
››› page 167, the camera image will cease to
be transmitted immediately when reverse
gear is engaged or when the selector lever is
moved from the R position, and the optical »
173
Technical data
Advice
Operation
Emergencies
Safety
Page 177 of 248
Driver assistance systems
use the brake pedal in good time to slow the
vehic
l
e. Note
● In vehic
les with an automatic gearbox, the
cruise control system cannot be switched on
if the selector lever is in position P, N or R.
● In vehicles with a manual gearbox, the
cruise c
ontrol cannot be switched on if first
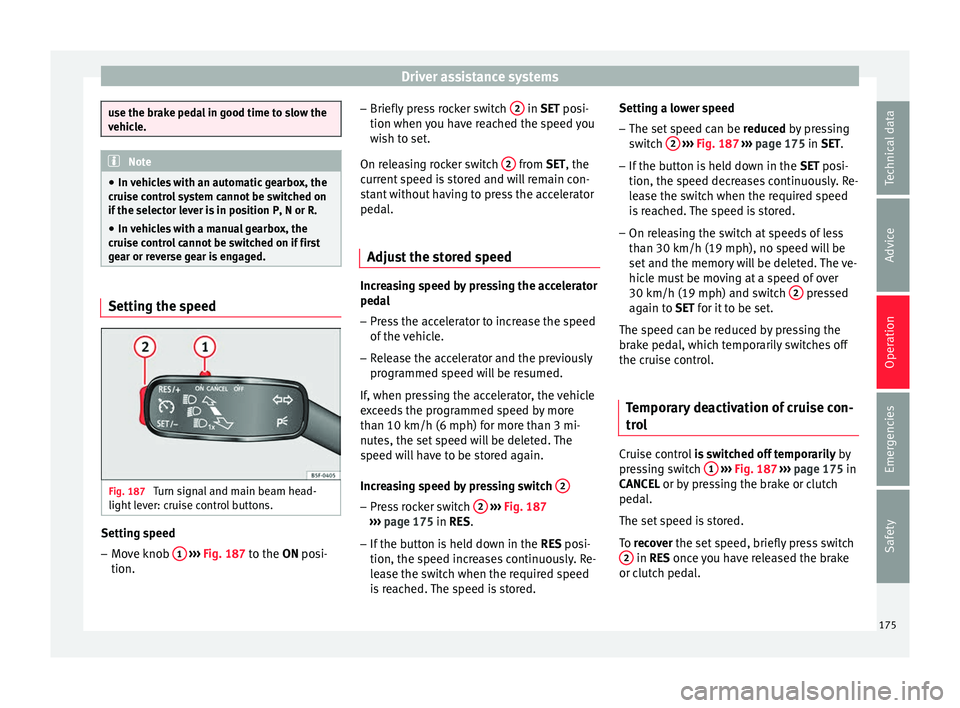
gear or reverse gear is engaged. Setting the speed
Fig. 187
Turn signal and main beam head-
light l
ev
er: cruise control buttons. Setting speed
– Move knob 1
› ›
› Fig. 187
to the ON posi-
tion. –
Briefly pre
ss rocker switch 2 in S
ET posi-
tion when y
ou have reached the speed you
wish to set.
On releasing rocker switch 2 from S
ET, the
c urr
ent speed is stored and will remain con-
stant without having to press the accelerator
pedal.
Adjust the stored speed Increasing speed by pressing the accelerator
ped
a
l
– Pr
ess the accelerator to increase the speed
of the v
ehicle.
– Release the accelerator and the previously
programmed s
peed will be resumed.
If, when pressing the accelerator, the vehicle
exceeds the programmed speed by more
than 10 km/h (6 mph) for more than 3 mi-
nutes, the set speed will be deleted. The
speed will have to be stored again.
Increasing speed by pressing switch 2 –
Press rocker switch 2
› ›
›
Fig. 187
››› page 175 in RES.
– If the button is held down in the RES po
si-
tion, the speed increases continuously. Re-
lease the switch when the required speed
is reached. The speed is stored. Setting a lower speed
– The set speed can be reduced
by pressing
switch 2
› ››
Fig. 187
››› page 175 in SET.
– If the button is held down in the SET po
si-
tion, the speed decreases continuously. Re-
lease the switch when the required speed
is reached. The speed is stored.
– On releasing the switch at speeds of less
than 30 km/h (19 mph), no speed w
ill be
set and the memory will be deleted. The ve-
hicle must be moving at a speed of over
30 km/h (19 mph) and switch 2 pressed
ag ain t
o
SET for it to be set.
The speed can be reduced by pressing the
brake pedal, which temporarily switches off
the cruise control.
Temporary deactivation of cruise con-
trol Cruise control
is
sw
itched off temporarily by
pressing switch 1
› ›
›
Fig. 187 ›››
page 175 in
CANCEL or by pressing the brake or clutch
pedal.
The set speed is stored.
To recover the set speed, briefly press switch 2 in RE
S once you have released the brake
or c lut
ch pedal.
175
Technical data
Advice
Operation
Emergencies
Safety
Page 179 of 248

Driver assistance systems
●
Durin g driv
ing, the Front Assist does not re-
act to people or animals or vehicles crossing
your path or which approach you head-on in
the same lane.
● The driver must always be ready to take
over the c
ontrol of the vehicle. Note
● When the Fr ont As
sist causes a braking,
the brake pedal is “harder”.
● Automatic interventions by the Front Assist
on the brake
s may be interrupted by pressing
the clutch, accelerator or moving the wheel.
● If the Front Assist does not work as descri-
bed in this c
hapter (e.g. in intervenes several
times unnecessarily), switch it off. Have the
system checked by a specialised workshop.
SEAT recommends visiting a SEAT dealership. On-screen warning lamps and mes-
s
ag
e
s Fig. 188
On the instrument panel display:
W arnin
g indic
ations. Distance warning
If
the s
af
e distance with regard to the vehicle
in front is exceeded, the relevant warning will
appear on the instrument panel display
. WARNING
Observe the safety warnings ›››
in Warning
and contr o
l lamps on page 98. Note
When the Front Assist is connected, the indi-
cation s
on the instrument panel screen may
be concealed by warnings from other func-
tions, such as an incoming call. Radar sensor
Fig. 189
On the front bumper: radar sensor. A radar sensor is installed on the front bump-
er t
o det
ermine the tr
affic situation
››› Fig. 189 1 . This sensor can detect vehi-
c l
e
s in front up to a distance of approximately
120 m.
The radar sensor's visibility may be impaired
by dirt, mud or snow, or by environmental in-
fluences such as rain or mist. In this case the
Front Assist monitoring system does not
work. The instrument panel displays the fol-
lowing message: Front Assist: No sensor vision! If necessary clean the ra-
dar sensor ››› .
When the r a
d
ar sensor begins to operate
properly again, the Front Assist will automati-
cally be available again. The message will
disappear from the instrument panel display. »
177
Technical data
Advice
Operation
Emergencies
Safety
Page 181 of 248

Driver assistance systems
● OR: sw it
c
h the system on or off in the Easy
Connect system with the button and the
f u
nction b
uttons and
Driv
er As
s ist›››
p
age 21.
When the Fr ont
Assist monitoring system is
switched off, the instrument panel will inform
that it has been switched off with the follow-
ing indicator ››› Fig. 190.
Switching the advance warning function on
or off
The pre-warning function can be switched on
or off in the Easy Connect system with the
button and the function buttons
and
Driv er As
s
ist
› ›
›
page 21.
The system will store the setting for the next
time the ignition is switched on.
SEAT recommends keeping the advance
warning function switched on at all times.
Switching distance warning on and off
If the safe distance with regard to the vehicle
in front is exceeded, the relevant warning will
appear on the instrument panel display
. In this case, increase the safe dis-
tance.
The distance warning function can be activa-
ted or deactivated in the Easy Connect sys-
tem with the button and the function but-
t on
s
and
Driv
er As
s ist
› ›
›
page 21. The system will store the setting for the next
time the ignition is sw
itched on.
SEAT recommends keeping the distance
warning switched on at all times.
Switching the Front Assist Monitoring
Sys
tem off in the following situations In the following situations the Front Assist
Monitorin
g
System should be deactivated
due to the system's limitations ››› :
● When the vehicle is to be towed.
● If the vehicle is on a test bed.
● When the radar sensor is damaged.
● If the radar sensor takes a heavy knock, for
e xamp
le in a rear collision.
● If it intervenes several times unnecessarily.
● If the radar sensor is covered temporarily
with some kind of
accessory, such as an ad-
ditional headlight or the like.
● When the vehicle is to be loaded on a lorry,
ferry
or train. WARNING
If the Front Assist is not switched off in the
sit uation
s described, serious accidents and
injuries may occur.
● Switch off the Front Assist in critical situa-
tions. System limitations
The Front Assist Monitoring System has cer-
tain ph
y
sical limitations inherent in the sys-
tem. Thus, in certain circumstances some of
the system's reactions may be inopportune
or be delayed from the driver's standpoint.
So pay attention in order to intervene if nec-
essary.
The following conditions may cause the Front
Assist Monitoring System not to react or do
so too late:
● On taking tight bends.
● Pressing the accelerator all the way down.
● If the Front Assist is switched off or dam-
aged.
● If the ASR h
as been manually disconnec-
ted.
● If the E
SC is controlling.
● If several brake lights of the vehicle or elec-
trically
connected trailer are damaged.
● If the radar sensor is dirty or covered.
● If there are metal objects, e.g. rails on the
roa
d or sheets used in road works.
● If the vehicle is reversing.
● If the vehicle over-accelerates.
● In case of snow or heavy rain.
● In case of narrow vehicles, such as motor-
bike
s. »
179
Technical data
Advice
Operation
Emergencies
Safety
Page 183 of 248
Driver assistance systems
interrupted by pressing the clutch, accelera-
tor or mo
v
ing the wheel.
● The City Emergency braking function can
brake the
vehicle until it stops completely.
However, the brake system does not halt the
vehicle permanently. Use the foot brake!
● If several inopportune intervenes occur,
switc
h off the Front Assist and with it the City
Emergency braking function. Take it to a spe-
cialised workshop, SEAT recommends visiting
a SEAT dealership.
● If numerous unnecessary interventions oc-
cur, the C
ity Emergency braking function may
switch off automatically. Start-Stop System*
Oper atin
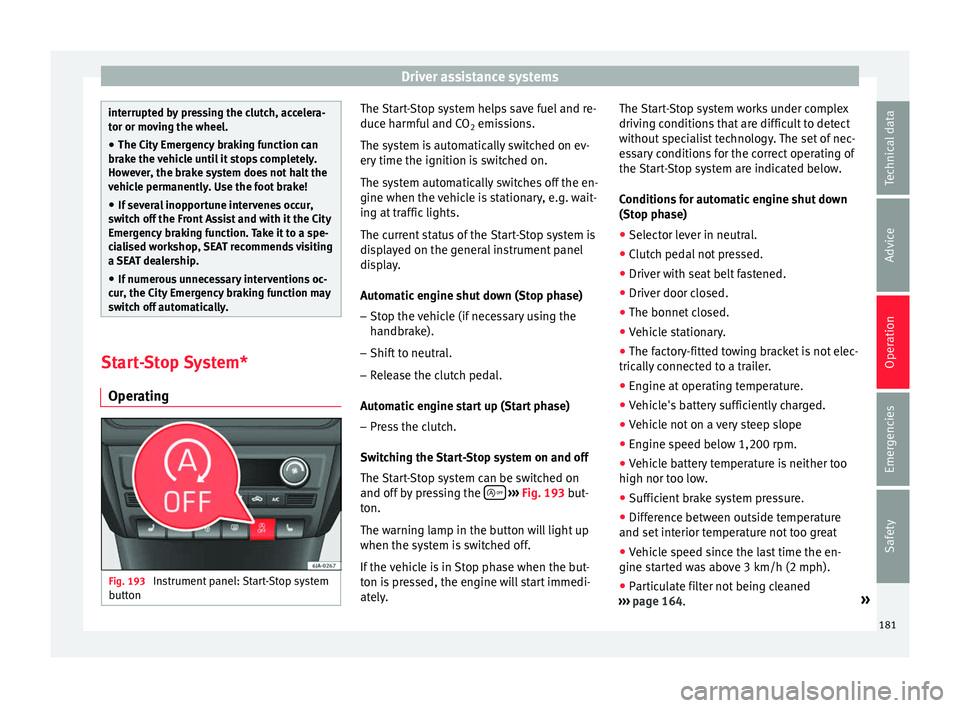
g Fig. 193
Instrument panel: Start-Stop system
b utt
on The Start-Stop system helps save fuel and re-
duc
e h
armf
ul and CO2 emissions.
The system is automatically switched on ev-
ery time the ignition is switched on.
The system automatically switches off the en-
gine when the vehicle is stationary, e.g. wait-
ing at traffic lights.
The current status of the Start-Stop system is
displayed on the general instrument panel
display.
Automatic engine shut down (Stop phase)
– Stop the vehicle (if necessary using the
handbrak
e).
– Shift to neutral.
– Release the clutch pedal.
Automatic
engine start up (Start phase)
– Press the clutch.
Switc
hing the Start-Stop system on and off
The Start-Stop system can be switched on
and off by pressing the
› ›
› Fig. 193
but-
ton.
The warning lamp in the button will light up
when the system is switched off.
If the vehicle is in Stop phase when the but-
ton is pressed, the engine will start immedi-
ately. The Start-Stop system works under complex
driving c
onditions that are difficult to detect
without specialist technology. The set of nec-
essary conditions for the correct operating of
the Start-Stop system are indicated below.
Conditions for automatic engine shut down
(Stop phase)
● Selector lever in neutral.
● Clutch pedal not pressed.
● Driver with seat belt fastened.
● Driver door closed.
● The bonnet closed.
● Vehicle stationary.
● The factory-fitted towing bracket is not elec-
trically
connected to a trailer.
● Engine at operating temperature.
● Vehicle's battery sufficiently charged.
● Vehicle not on a very steep slope
● Engine speed below 1,200 rpm.
● Vehicle battery temperature is neither too
high nor too low
.
● Sufficient brake system pressure.
● Difference between outside temperature
and set interior t
emperature not too great
● Vehicle speed since the last time the en-
gine star
ted was above 3 km/h (2 mph).
● Particulate filter not being cleaned
›››
page 164. »
181
Technical data
Advice
Operation
Emergencies
Safety
Page 185 of 248
Driver assistance systems
Note
● Fatigue det ection h
as been developed for
driving on motorways and well paved roads
only.
● If there is a fault in the system, have it
check
ed by a specialised workshop. Function and operation
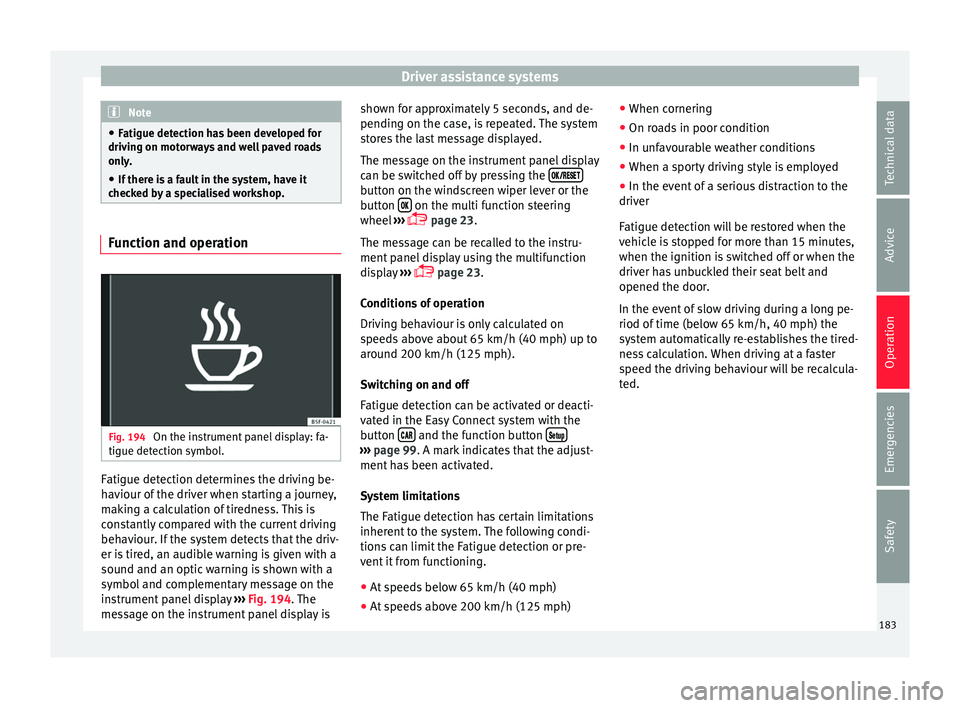
Fig. 194
On the instrument panel display: fa-
tigue det ection symbo
l
.Fatigue detection determines the driving be-
h
av
iour of
the driver when starting a journey,
making a calculation of tiredness. This is
constantly compared with the current driving
behaviour. If the system detects that the driv-
er is tired, an audible warning is given with a
sound and an optic warning is shown with a
symbol and complementary message on the
instrument panel display ››› Fig. 194. The
message on the instrument panel display is shown for approximately 5 seconds, and de-
pending on the ca
se, is repeated. The system
stores the last message displayed.
The message on the instrument panel display
can be switched off by pressing the button on the windscreen wiper lever or the
b
utt
on on the multi function steering
wheel
›
›
› page 23.
The message can be recalled to the instru-
ment panel display using the multifunction
display ›››
page 23.
Conditions of operation
Driving behaviour is only calculated on
speeds above about 65 km/h (40 mph) up to
around 200 km/h (125 mph).
Switching on and off
Fatigue detection can be activated or deacti-
vated in the Easy Connect system with the
button and the function button
›››
pag e 99. A mark indicates that the adjust-
ment
has been activated.
System limitations
The Fatigue detection has certain limitations
inherent to the system. The following condi-
tions can limit the Fatigue detection or pre-
vent it from functioning. ● At speeds below 65 km/h (40 mph)
● At speeds above 200 km/h (125 mph) ●
When cornerin g
● On r
oads in poor condition
● In unfavourable weather conditions
● When a sporty driving style is employed
● In the event of a serious distraction to the
driver
Fatigue det
ection will be restored when the
vehicle is stopped for more than 15 minutes,
when the ignition is switched off or when the
driver has unbuckled their seat belt and
opened the door.
In the event of slow driving during a long pe-
riod of time (below 65 km/h, 40 mph) the
system automatically re-establishes the tired-
ness calculation. When driving at a faster
speed the driving behaviour will be recalcula-
ted. 183Technical data
Advice
Operation
Emergencies
Safety
Page 187 of 248

Towing bracket device
Driving with a trailer Exterior mirrors
Check
whether
you can see enough of the
road behind the trailer with the standard rear
vision mirrors. If this is not the case, you
should have additional exterior mirrors fitted.
Observe the relevant statutory requirements
of the country you are in.
Headlights
Before starting a journey, also check the
headlight beam settings with the trailer
hitched up. Adjust the headlight range set-
tings if necessary ›››
page 117, Main light
range control .
Driving speed
For your own safety do not drive faster than
the maximum permitted speed indicated on
the trailer.
At all times, immediately reduce speed if you
detect the slightest swaying movement of the
trailer. Never try to “return the trailer to a
straight position” by accelerating.
Brakes
Brake in due course! If the trailer has an over-
run brake, apply the brakes gently at first and
then, firmly. This will prevent the jerking that
can be caused by locking of trailer wheels.
Change to a lower gear in good time before descending a slope in order to take advant-
age of
the en
gine brake.
The trailer is incorporated into the vehicle's
anti-theft alarm system:
● When the vehicle has a factory-fitted anti-
theft al
arm and a towing bracket.
● When the trailer is electrically connected to
the vehic
le via the towing bracket socket.
● When the vehicle electrical device and the
tow
ing bracket are operational.
● When the vehicle is locked and the vehi-
cle's
anti-theft alarm device is activated.
Once the electrical connection is interrupted
with the vehicle trailer locked, the alarm
sounds.
Always switch off the vehicle anti-theft alarm
device before connecting or disconnecting a
trailer. The vehicle anti-theft alarm device
could cause the alarm to sound ››› page 112,
Anti-theft alarm system*.
Engine overheating
In the event that the coolant temperature
gauge needle moves to the right section of
the scale or to the red area, immediately re-
duce speed. If the control lamp flashes on
the general instrument panel, stop the vehi-
cle and switch off the engine. Wait several
minutes and check the coolant level in the
tank ››› page 208. Please observe the following indications
›››
page 208, Control lamp .
The coolant temperature can be reduced by
switching on the heating. WARNING
● Adjus t
your speed to suit the road and traf-
fic conditions.
● An electrical installation that is connected
incorrectly
or by non-specialised personnel
can prevent the connection of the current to
the trailer and cause faults in the operation of
the electrical system throughout the entire
vehicle, leading to accidents and serious in-
jury.
● All electrical work must be carried out only
by s
pecialised services.
● Never directly connect the trailer electrical
device t
o the electrical sockets of the reverse
driving lights or other sources of electrical
current. CAUTION
● Av oid c
orners, and sudden and sharp brak-
ing.
● Once the trailing arm has been removed,
plac
e the corresponding cover on the hole of
the fastening point. This prevents dirt from
entering the hole – see the trailer system as-
sembly manual. » 185
Technical data
Advice
Operation
Emergencies
Safety
Page 189 of 248
Towing bracket device
Clamping bush
C l
ampin
g bush cap
Ball head cover
Ball-headed bar
Locking balls
Centred
Red marking on the manual regulator
Manual regulator
Key
Key slot cover
Red marking on the manual regulator
White marking on the ball-headed bar Note
Contact an Authorised Service Partner if you
lose y
our key. 3
4
5
6
7
8
9
10
11
12
13
14 Placing in service position
Fig. 196
Placing in service position. Fig. 197
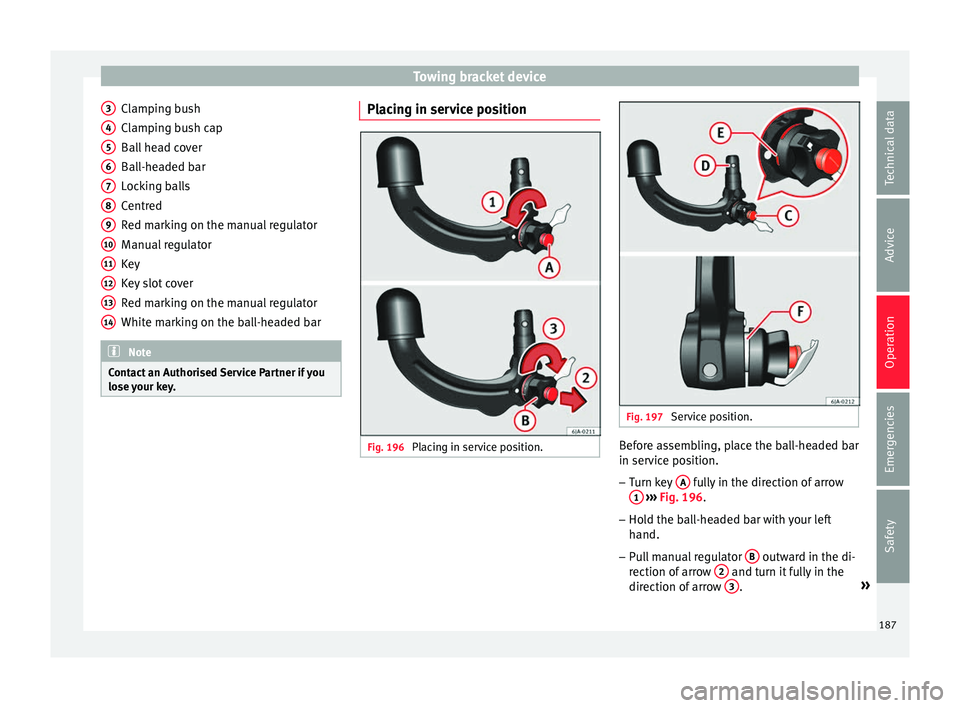
Service position. Before assembling, place the ball-headed bar
in ser
v
ic
e position.
– Turn key A fully in the direction of arrow
1
› ›
› Fig. 196
.
– Hold the ball-headed bar with your left
hand.
– Pu
ll manual regulator B outward in the di-
r ection of
arr
ow 2 and turn it fully in the
dir ection of
arr
ow 3 .
»
187
Technical data
Advice
Operation
Emergencies
Safety
Page 191 of 248
Towing bracket device
– Verif
y
the correct placement of the ball-
headed bar ››› page 189. WARNING
● Do not ho l
d the manual regulator with your
hand when fitting the ball-headed bar since
you could sustain injuries to your fingers.
● When mounting the ball-headed bar, al-
way
s lock it with a key and remove the key
from the slot.
● The ball-headed bar must not be in the
servic
e position with the key in the key slot.
● If the ball-headed bar is not placed in the
servic
e position you will not be able to place
it in the clamping bush. CAUTION
When removing the key, always place the
co v
er over the key slot of the manual regula-
tor to prevent dirt from entering. Note
Once removed, place the clamping bush cap
in an appr opri
ate location in the boot. Verification of correct placement
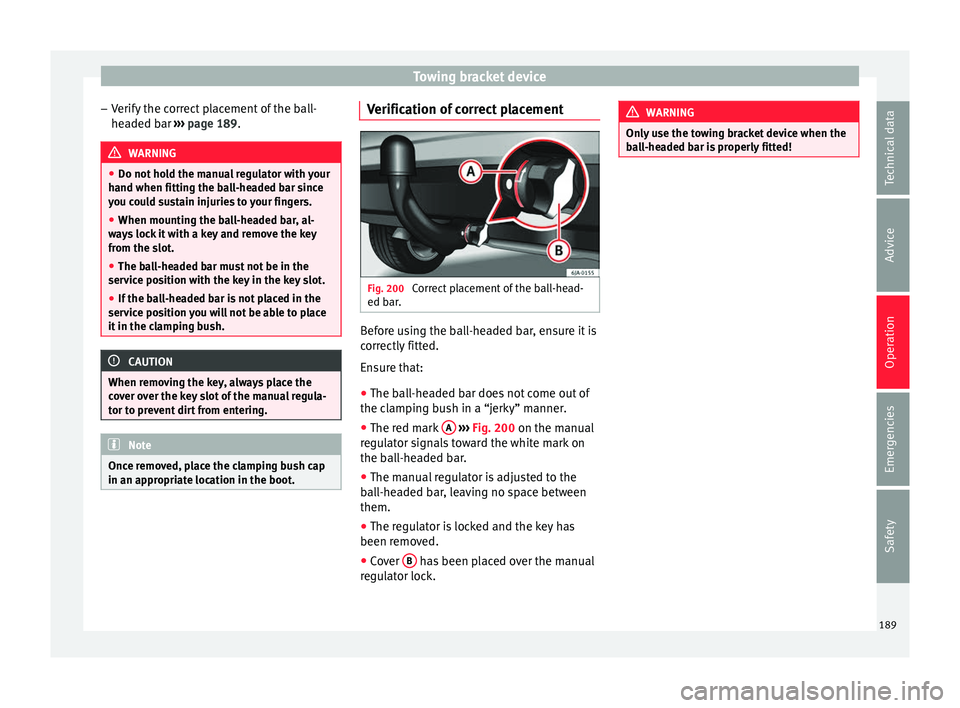
Fig. 200
Correct placement of the ball-head-
ed b ar
. Before using the ball-headed bar, ensure it is
c
orr
ectly
fitted.
Ensure that:
● The ball-headed bar does not come out of
the clampin
g bush in a “jerky” manner.
● The red mark A
› ›
› Fig. 200
on the manual
regulator signals toward the white mark on
the ball-headed bar.
● The manual regulator is adjusted to the
ball-he
aded bar, leaving no space between
them.
● The regulator is locked and the key has
been remov
ed.
● Cover B has been placed over the manual
r e gu
lator lock. WARNING
Only use the towing bracket device when the
ba l
l-headed bar is properly fitted! 189
Technical data
Advice
Operation
Emergencies
Safety