technical data SKODA FABIA 2004 1.G / 6Y Owner's Guide
[x] Cancel search | Manufacturer: SKODA, Model Year: 2004, Model line: FABIA, Model: SKODA FABIA 2004 1.G / 6YPages: 247
Page 46 of 247
Unlocking and locking45
Using the systemSafetyDriving TipsGeneral MaintenanceBreakdown assistanceTechnical Data
The boot lid is closed by slamming it closed.
Open the boot lid by pulling on the actuating lever if it is not completely
closed and lift the boot lid right up. Slam the boot lid slightly closed.
Opening the boot lid for vehicles
with a central locking system
Open the boot lid by pressing the hand grip above the licence plate after
unlocking the vehicle using the key or the radio remote control*
⇒ page 44, fig. 26 .
The boot lid can also be opened by pressing on the button on the remote
control with the ignition switched off. Here one should press on the button
for the remote control for over one second. The boot lid springs open and
the anti-theft alarm system* is deactivated. The anti-theft alarm system is
reactivated after the boot lid is closed.
The boot lid is closed by slamming it closed.
Open the boot lid by pulling on the actuating lever if it is not completely
closed and lift the boot lid right up. Slam the boot lid slightly closed.
WARNING
•Ensure that the lock is properly engaged after closing the boot
lid. Otherwise the boot lid could open while driving - risk of acci-
dent!
•Never drive with the boot lid slightly ajar or even fully opened
otherwise exhaust gases may get into the interior of the vehicle -
risk of poisoning!
•Do not press on the rear window when closing the boot lid, it
could crack - risk of injury!
Note
•After closing the boot lid, it is automatically locked within
5 seconds and the anti-theft alarm system* is activated. This applies
only if the vehicle was locked before closing the boot lid.
•The function of the hand grip above the licence plate is deactivated
when starting off or at a speed of more than 5 km/hour for vehicles with
central locking. The function is activated again when the front doors are
opened.
Remote control*
Description
You can use the remote control:
•to unlock and lock the car
•unlocking boot lid
The transmitter with the battery is housed in the handle of the master key.
The receiver is located in the interior of the car. The operating range of the
remote control is 10 metres but this range can be reduced if the batteries
are waek.
The master key has a fold-open key bit which can be used for unlocking
and locking the car manually and also for starting the engine.
If a lost key is replaced or if the receiver unit has been repaired or a new
unit installed, it is then necessary for a Škoda Dealer to initialise the
system. Only after this is it possible to again use the remote control.
Note
•The remote control is automatically deactivated when the ignition is
switched on.
•The operation of the remote control may temporarily be affected by
interference from transmitters close to the car and which operate in the
same frequency range (e.g. mobile phone, TV transmitter).
Page 48 of 247
Unlocking and locking47
Using the systemSafetyDriving TipsGeneral MaintenanceBreakdown assistanceTechnical Data
Folding out of the key
– Press button .
Folding up of the key
– Press button and collapse the key bit in the housing.
The turn signal lights flash twice as confirmation that the vehicle has been
unlocked. The vehicle will lock again automatically if you unlock the
vehicle using button but do not open a door or the boot lid within the
next 30 seconds. This function is intended to prevent the car being
unlocked unintentionally.
The safe securing system along with the anti-theft alarm system* are,
however, deactivated during these 30 seconds.
If the single door opening function has been activated on your car, you
unlock only the driver door by pressing button once and the complete
vehicle by pressing the button twice ⇒page 40.
When the vehicle is unlocked or locked, the interior lights in the door
contact are automatically switched on or off.
The turn signal lights flash once to confirm that the vehicle has been
correctly locked.
The turn signal lights flash once to confirm that the vehicle has been
correctly locked. If the turn signal lights do not flash, check the doors,
bonnet and boot lid again to ensure that they are closed. If the doors, the
bonnet or the boot lid remain open when the anti-theft alarm system* is
activated, the turn signal lights do not flash until after they have been
closed.
WARNING
If the vehicle is locked from the outside and the safe securing
system is activated, there must not be any person in the vehicle as it is then not possible to open either a door or a window from the
inside. The locked doors make it more difficult for rescuers to get
into the vehicle in an emergency - hazard!
Note
•Operate the radio remote control only when the doors and boot lid are
closed and you have visual contact with the vehicle.
•Once in the car, you must not press the lock button of the master key
before inserting the key into the ignition lock in order to avoid the car being
inadvertently locked and, in addition, the anti-theft alarm system* being
switched on. Should this happen, press the unlock button
of the master
key.
Synchonisation of the remote control
If the vehicle cannot be unlocked by actuating the remote control system
then it is possible that the code in the key and the control unit in the vehicle
are no longer synchronised. This can occur when the buttons on the radio-
operated key are actuated a number of times outside of the operative
range of the equipment or the battery on the remote control was replaced.
This means it is necessary to synchronise the code as follows:
•Press any button on the remote control.
•Pressing of the button means that the door will unlock with the key
within 1 minute.
A3
A3
A1
AA
WARNING (continued)
Page 50 of 247
Unlocking and locking49
Using the systemSafetyDriving TipsGeneral MaintenanceBreakdown assistanceTechnical Data
Power windows*
Switch
The power windows operate only when ignition is switched on.
Opening a window
– A window is opened by pressing lightly on the respective
switch in the door. The process stops when one releases the
switch.
– Pressing of the switch in the driver's door down to the stop will cause the window to be opened completey, automatically.
Renewed pressing of the switch causes the window to stop
immediately. Closing a window
– A window is closed through pulling lightly on the respective
switch in the door. The closing process stops when one
releases the switch.
– Pulling of the switch in the driver's door to the stop will cause the window to be closed completey, automatically. Renewed
pulling of the switch causes the window to stop immediately.
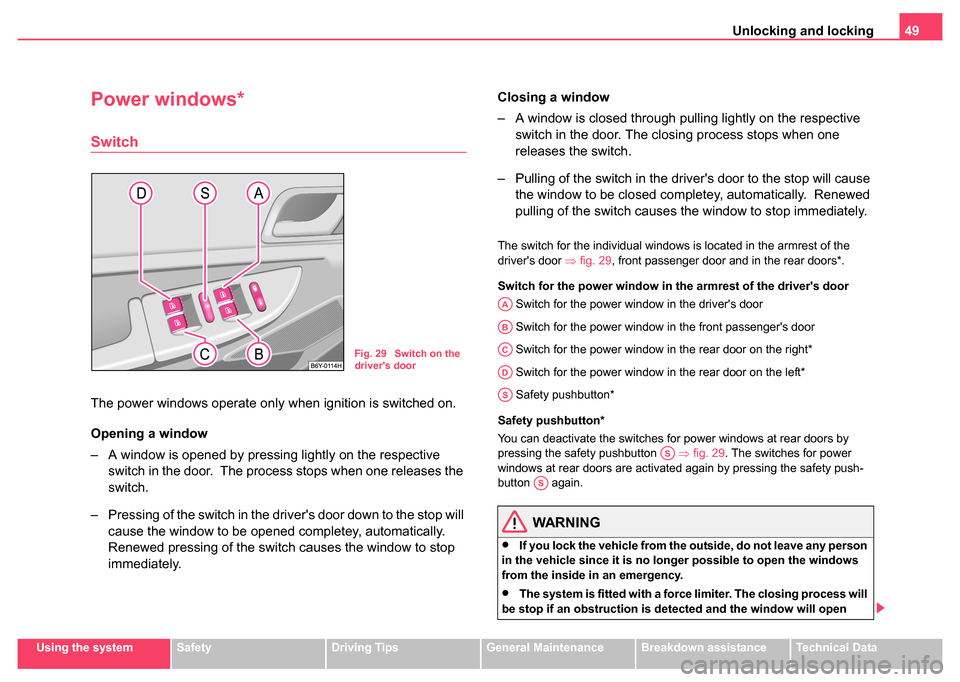
The switch for the individual windows is located in the armrest of the
driver's door ⇒fig. 29, front passenger door and in the rear doors*.
Switch for the power window in the armrest of the driver's door Switch for the power window in the driver's door
Switch for the power window in the front passenger's door
Switch for the power window in the rear door on the right*
Switch for the power window in the rear door on the left*
Safety pushbutton*
Safety pushbutton*
You can deactivate the switches for power windows at rear doors by
pressing the safety pushbutton ⇒fig. 29 . The switches for power
windows at rear doors are activated again by pressing the safety push-
button again.
WARNING
•If you lock the vehicle from the outside, do not leave any person
in the vehicle since it is no longer possible to open the windows
from the inside in an emergency.
•The system is fitted with a force limiter. The closing process will
be stop if an obstruction is detected and the window will open
Fig. 29 Switch on the
driver's door
AA
AB
AC
AD
AS
AS
AS
Page 52 of 247
Unlocking and locking51
Using the systemSafetyDriving TipsGeneral MaintenanceBreakdown assistanceTechnical Data
Proceed as follows to close the window fully:
•Turn the key in the lock of the driver door into the closing position and
hold it there until all of the windows are closed.
•Repeat this operatiive cycle when the window stops.
WARNING
•Obstruction protection is not active during the closing of the
windows ⇒ in “Switch” on page 49.
•You should take particular care when closing the windows! A
person may otherwise suffer severe injuries as a result of getting
an arm, for example, jammed in the window!
Electric slidin g/tilting roof*
Description
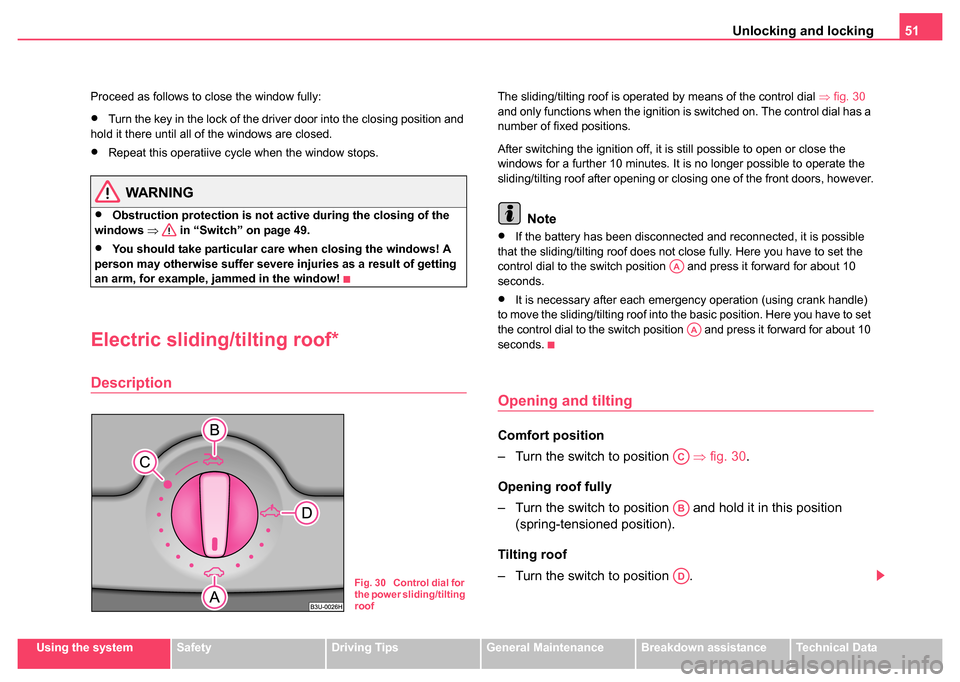
The sliding/tilting roof is operated by means of the control dial ⇒fig. 30
and only functions when the ignition is switched on. The control dial has a
number of fixed positions.
After switching the ignition off, it is still possible to open or close the
windows for a further 10 minutes. It is no longer possible to operate the
sliding/tilting roof after opening or closing one of the front doors, however.
Note
•If the battery has been disconnected and reconnected, it is possible
that the sliding/tilting roof does not close fully. Here you have to set the
control dial to the switch position and press it forward for about 10
seconds.
•It is necessary after each emergency operation (using crank handle)
to move the sliding/tilting roof into the basic position. Here you have to set
the control dial to the switch position and press it forward for about 10
seconds.
Opening and tilting
Comfort position
– Turn the switch to position ⇒fig. 30 .
Opening roof fully
– Turn the switch to position and hold it in this position (spring-tensioned position).
Tilting roof
– Turn the switch to position .
Fig. 30 Control dial for
the power sliding/tilting
roof
AA
AA
AC
AB
AD
Page 54 of 247

Unlocking and locking53
Using the systemSafetyDriving TipsGeneral MaintenanceBreakdown assistanceTechnical Data
You can close the sliding/tilting roof by hand if the system is
defect.
– Carefully remove the plastic covering using a screwdriver.
– Remove the crank from its holder, insert it in the opening down
to the stop and then turn it to close or open the sliding/tilting
roof.
– Put the crank into its holder and place the covering in place again.
– Have the fault rectified by a Škoda dealer.
Note
It is necessary after each emergency operation (using crank handle) to
move the sliding/tilting roof into the basic position. Here you have to press
the control dial forward to switch position ⇒page 51, fig. 30 for about
10 seconds.
AA
Page 56 of 247
Lights and Visibility55
Using the systemSafetyDriving TipsGeneral MaintenanceBreakdown assistanceTechnical Data
•The switching on of the described lights should only be undertaken in
accordance with the legal requirements.
Fog lights*
Switching on the fog lights
– First of all turn the light switch ⇒page 54, fig. 32 into position
or .
– Pull the light switch out to the first notch .
The rear fog light warning light ⇒ page 27 lights up in the instrument
cluster when the fog light is switched off.
The rear fog light
Switching on the rear fog light
– First of all turn the light switch ⇒page 54, fig. 32 into position
or .
– Pull the light switch out to the second notch .
The rear fog light warning light ⇒ page 27 lights up in the instrument
cluster when the fog light is switched off.
Only the rear fog light of the trailer lights up automatically when you are
towing a trailer using a factory-fitted towing device which is fitted with
the rear fog light .
Caution
The rear fog light should only be switched on if visibility is particularly poor
(conform with any varying legal provisions) to avoid dazzling vehicles
behind your vehicle.
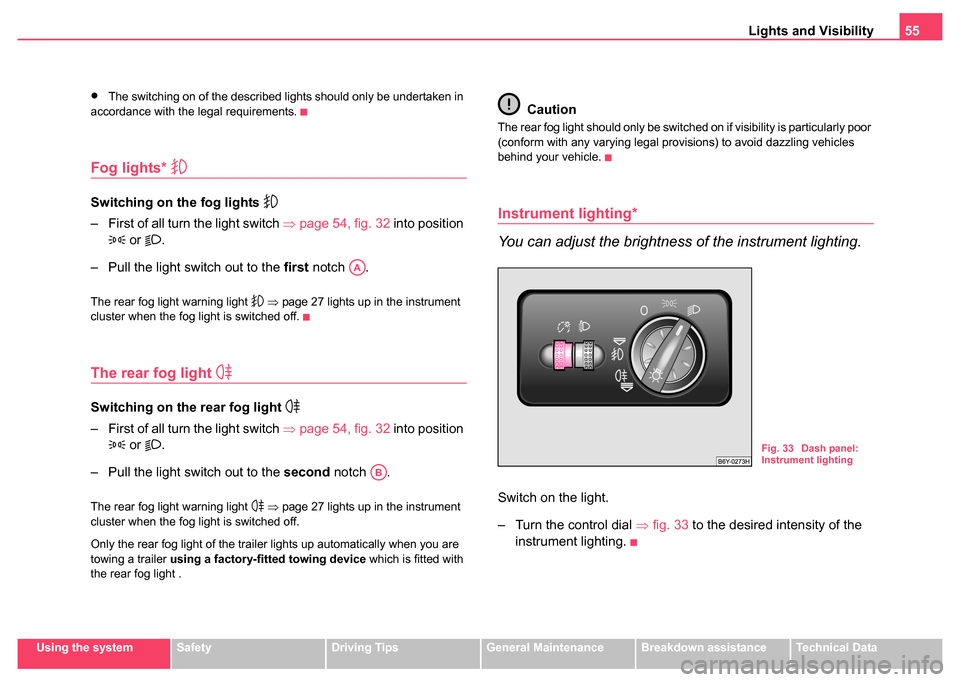
Instrument lighting*
You can adjust the brightness of the instrument lighting.
Switch on the light.
– Turn the control dial ⇒fig. 33 to the desired intensity of the
instrument lighting.
AA
AB
Fig. 33 Dash panel:
Instrument lighting
Page 58 of 247
Lights and Visibility57
Using the systemSafetyDriving TipsGeneral MaintenanceBreakdown assistanceTechnical Data
Please comply with any legal requirements when using the hazard
warning light system.
Note
Switch on the hazard warning light system if, for example:
•you encounter traffic congestion,
•your car breaks down or an emergency situation occurs,
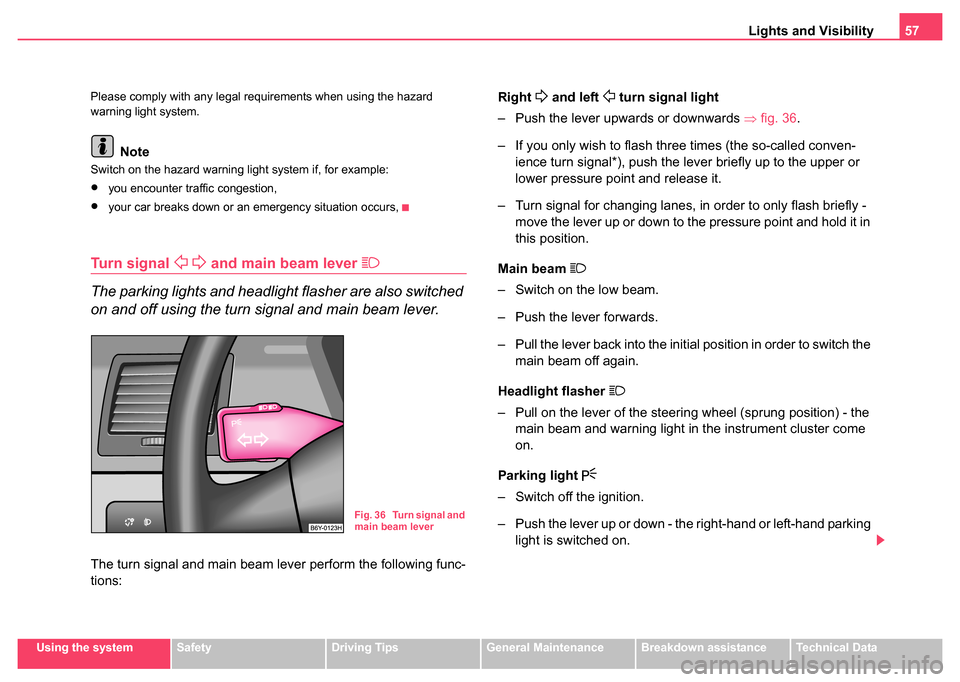
Turn signal and main beam lever
The parking lights and headlight flasher are also switched
on and off using the turn signal and main beam lever.
The turn signal and main beam lever perform the following func-
tions:
Right
and left turn signal light
– Push the lever upwards or downwards ⇒fig. 36 .
– If you only wish to flash three times (the so-called conven- ience turn signal*), push the lever briefly up to the upper or
lower pressure point and release it.
– Turn signal for changing lanes, in order to only flash briefly - move the lever up or down to the pressure point and hold it in
this position.
Main beam
– Switch on the low beam.
– Push the lever forwards.
– Pull the lever back into the initial position in order to switch the main beam off again.
Headlight flasher
– Pull on the lever of the steering wheel (sprung position) - the main beam and warning light in the instrument cluster come
on.
Parking light
– Switch off the ignition.
– Push the lever up or down - the right-hand or left-hand parking light is switched on.
Fig. 36 Turn signal and
main beam lever
Page 60 of 247
Lights and Visibility59
Using the systemSafetyDriving TipsGeneral MaintenanceBreakdown assistanceTechnical Data
– On the version without reading lights press the switch to
the right, the symbol O appears.
Reading lights
– Press on one of the switches ⇒page 58, fig. 37 in order to
switch the right or left reading light on or off.
Lighting of storage compar tment on the front passenger
side
– Open the flap of the storage compartment on the front passenger side.
– The light switches on automatically when the parking light is switched on and goes out when the flap is closed.
The interior light is switched on for about 20 seconds when a vehicle with
a central locking system is unlocked, when a door is opened or when the
ignition key is removed. The requirement for this is that the switch is in
the door contact position. The inner light goes out out immediately after
the ignition is switched on.
A time delay switch* causes the inner lighting on vehicles without a central
locking system stays on for a few seconds after the doors have been
closed. The inner light goes out out immediately after the ignition is
switched on.
The interior lighting is switched off after about 30 minutes when a door has
been left open in order to avoid discharging the battery of the vehicle.
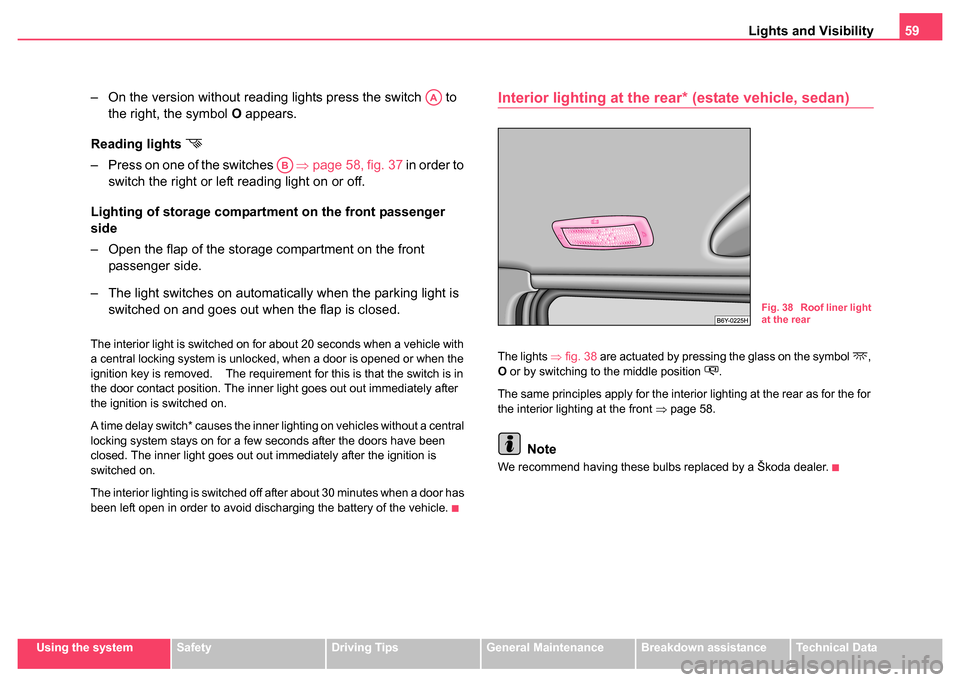
Interior lighting at the r ear* (estate vehicle, sedan)
The lights ⇒fig. 38 are actuated by pressing the glass on the symbol ,
O or by switching to the middle position .
The same principles apply for the interior lighting at the rear as for the for
the interior lighting at the front ⇒ page 58.
Note
We recommend having these bulbs replaced by a Škoda dealer.
AA
AB
Fig. 38 Roof liner light
at the rear
Page 62 of 247
Lights and Visibility61
Using the systemSafetyDriving TipsGeneral MaintenanceBreakdown assistanceTechnical Data
Sun visors
Using the sun visors can contribute to increasing road
safety.
You can pull the sun visors for the driver and front passenger out of their
fixture and swivel them toward the doors in the direction of the arrow
⇒fig. 41 . The visor above the interior mirror* can only be folded down.
The vanity mirrors* in the sun visors are provided with covers.
The windscreen wiper and washing
system
Windscreen wipers
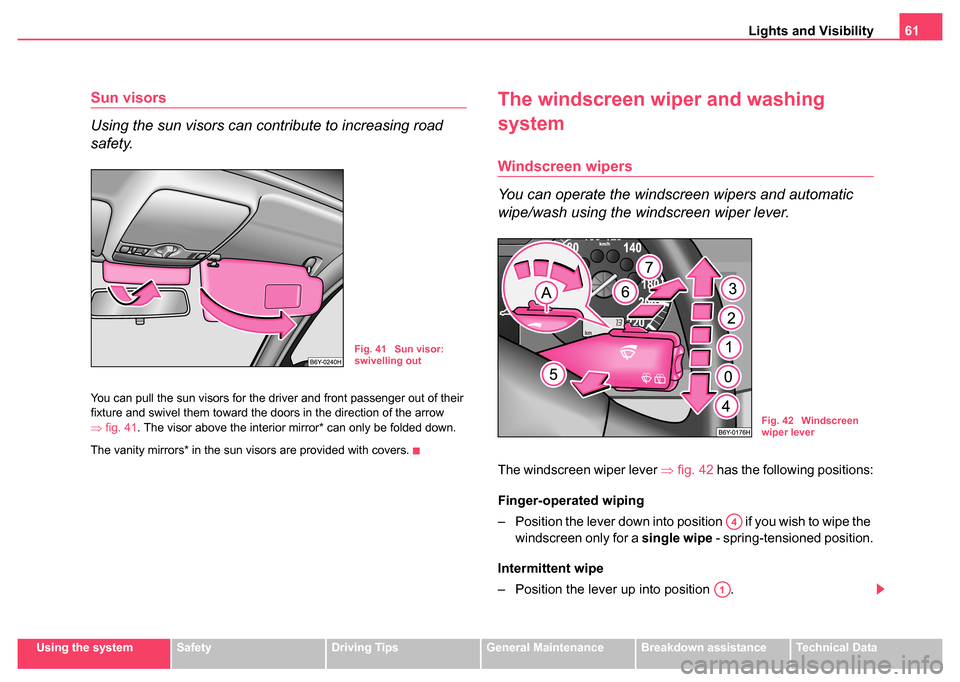
You can operate the windscreen wipers and automatic
wipe/wash using the windscreen wiper lever.
The windscreen wiper lever ⇒fig. 42 has the following positions:
Finger-operated wiping
– Position the lever down into position if you wish to wipe the windscreen only for a single wipe - spring-tensioned position.
Intermittent wipe
– Position the lever up into position .
Fig. 41 Sun visor:
swivelling out
Fig. 42 Windscreen
wiper lever
A4
A1
Page 64 of 247
Lights and Visibility63
Using the systemSafetyDriving TipsGeneral MaintenanceBreakdown assistanceTechnical Data
screen may result in damage both to the blades and the motor of the wind-
screen wipers!
Headlight cleaning system*
The headlights are being cleaned after the windscreen wiper has wiped
for the fifth time, the low beam or main beam are switched on and the
windscreen wiper lever was held in the position
⇒page 61, fig. 42 for
about 1 second.
You should remove stubborn dirt (such as insect residues) from the head-
light lenses at regular intervals, for example when refuelling. Please refer
to the following guidelines ⇒page 173, “The headlight lenses”.
You should remove any snow from the fixtures of the washer nozzles and
clear ice in winter with a de-icing spray in order to ensure proper operation
of the cleaning system.
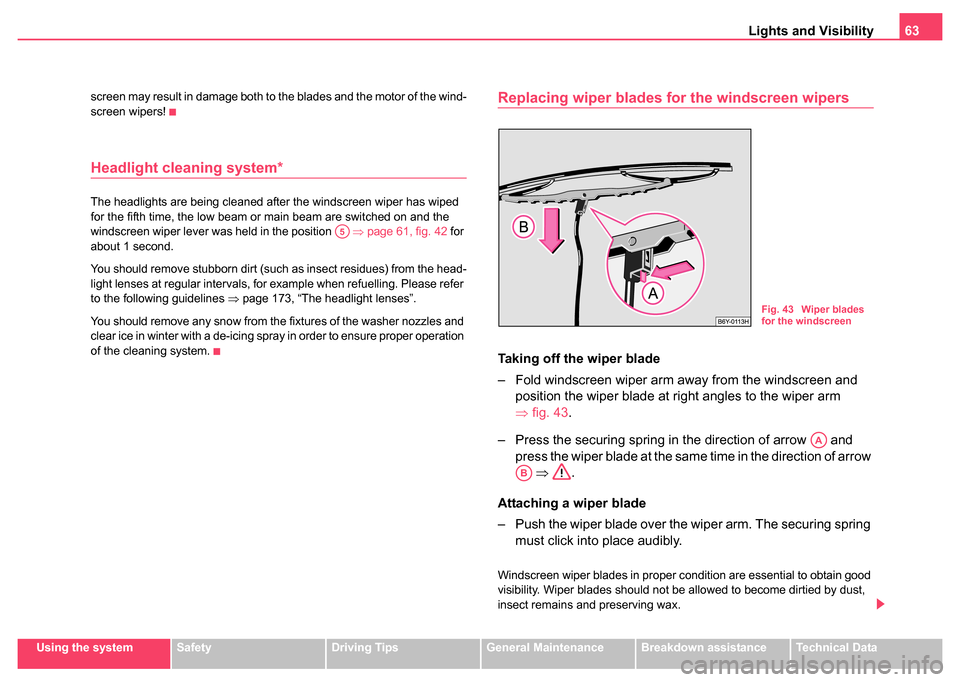
Replacing wiper blades for the windscreen wipers
Taking off the wiper blade
– Fold windscreen wiper arm away from the windscreen and position the wiper blade at right angles to the wiper arm
⇒fig. 43 .
– Press the securing spring in the direction of arrow and press the wiper blade at the same time in the direction of arrow ⇒ .
Attaching a wiper blade
– Push the wiper blade over the wiper arm. The securing spring must click into place audibly.
Windscreen wiper blades in proper condition are essential to obtain good
visibility. Wiper blades should not be allowed to become dirtied by dust,
insect remains and preserving wax.
A5
Fig. 43 Wiper blades
for the windscreen
AA
AB