roof rack SKODA FABIA 2014 2.G / 5J Owner's Manual
[x] Cancel search | Manufacturer: SKODA, Model Year: 2014, Model line: FABIA, Model: SKODA FABIA 2014 2.G / 5JPages: 197, PDF Size: 13.56 MB
Page 5 of 197

Table of Contents
Abbreviations
Safety
Passive Safety
6
General information
6
Correct and safe seated position
7
Seat belts
10
Wearing seat belts
10
Inertia reel and belt pretensioners
13
Airbag system
14
Description of the airbag system
14
Airbag overview
15
Deactivating airbags
17
Transporting children safely
19
Child seat
19
Fastening systems
22
Using the system
Cockpit
25
Overview
24
Instruments and Indicator Lights
26
Instrument cluster
26
Multifunction display (MFD)
29
Service Interval Display
32
MAXI DOT display
33
Warning lights
35
Unlocking and locking
42
Unlocking and locking
42
Central locking system
45
Remote control
48
Anti-theft alarm system
49
Tailgate
50Electrical power windows51Electric sliding/tilting roof53
Lights and visibility
55
Lights
55
Interior lights
59
Visibility
61
Windscreen wipers and washers
61
Rear window
63
Seats and storage
65
Front seats
65
Rear seats
66
Head restraints
67
Boot
68
Variable loading floor in the luggage
compartment (Fabia Estate)
72
Net partition (Fabia Estate)
73
Bicycle carrier in the luggage compartment
75
Roof rack system
76
Useful equipment
77
Storage compartments
80
Heating and air conditioning
84
Heating, ventilation, cooling
84
Heating
86
Air conditioning system (manual air
conditioning system)
87
Climatronic (automatic air conditioning
system)
90
Communication and multimedia
92
Universal telephone preinstallation GSM II
92
Voice control
97
Multimedia
98
Driving
Starting-off and Driving
101
Starting and stopping the engine
101
Brakes
102Manual gear shifting and pedals104Automatic transmission105
Running in
108
Economical driving and respect the
environment
109
Avoiding damage to your vehicle
112
Driving abroad
113
Assist systems
114
Brake assist systems
114
Parking aid
116
Cruise control system
117
START-STOP
118
Towing a trailer
120
Towing device
120
Trailer
124
General Maintenance
Car care
126
Services, modifications and technical
alterations
126
Washing the car
128
Vehicle exterior care
129
Care of the interior
132
Inspecting and replenishing
135
Fuel
135
Engine compartment
138
Engine oil
141
Coolant
143
Brake fluid
145
Vehicle battery
145
Wheels
149
Tyres and rims
149
Winter use
1563Table of Contents
Page 78 of 197
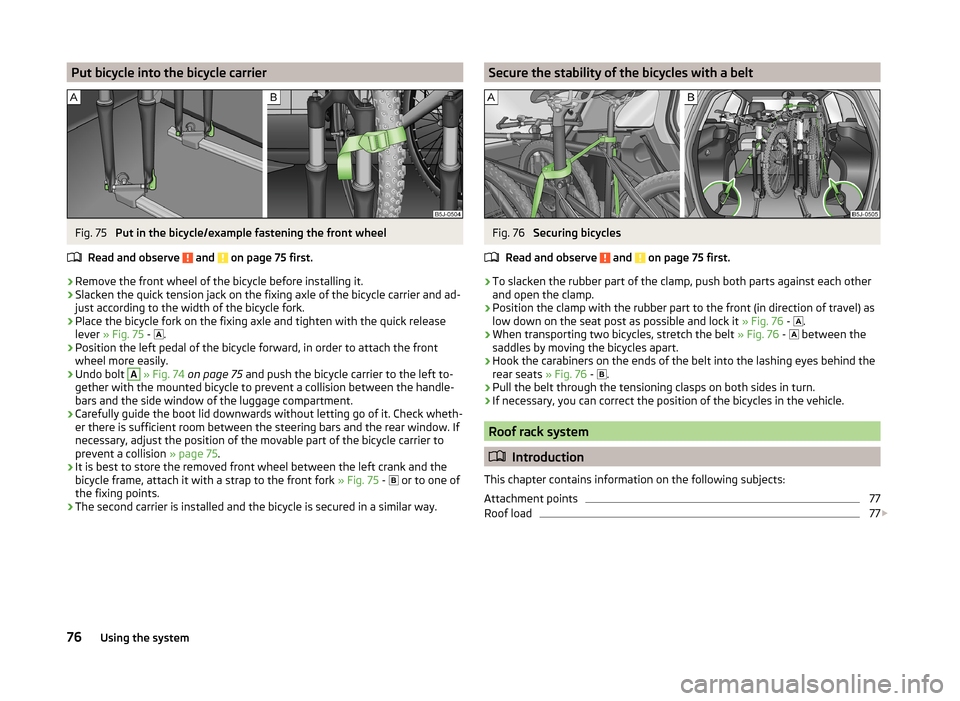
Put bicycle into the bicycle carrierFig. 75
Put in the bicycle/example fastening the front wheel
Read and observe
and on page 75 first.
›
Remove the front wheel of the bicycle before installing it.
›
Slacken the quick tension jack on the fixing axle of the bicycle carrier and ad-
just according to the width of the bicycle fork.
›
Place the bicycle fork on the fixing axle and tighten with the quick release
lever » Fig. 75 -
.
›
Position the left pedal of the bicycle forward, in order to attach the front
wheel more easily.
›
Undo bolt
A
» Fig. 74 on page 75 and push the bicycle carrier to the left to-
gether with the mounted bicycle to prevent a collision between the handle-
bars and the side window of the luggage compartment.
›
Carefully guide the boot lid downwards without letting go of it. Check wheth-
er there is sufficient room between the steering bars and the rear window. If
necessary, adjust the position of the movable part of the bicycle carrier to
prevent a collision » page 75.
›
It is best to store the removed front wheel between the left crank and the
bicycle frame, attach it with a strap to the front fork » Fig. 75 -
or to one of
the fixing points.
›
The second carrier is installed and the bicycle is secured in a similar way.
Secure the stability of the bicycles with a beltFig. 76
Securing bicycles
Read and observe
and on page 75 first.
›
To slacken the rubber part of the clamp, push both parts against each other
and open the clamp.
›
Position the clamp with the rubber part to the front (in direction of travel) as
low down on the seat post as possible and lock it » Fig. 76 -
.
›
When transporting two bicycles, stretch the belt
» Fig. 76 -
between the
saddles by moving the bicycles apart.
›
Hook the carabiners on the ends of the belt into the lashing eyes behind the
rear seats » Fig. 76 -
.
›
Pull the belt through the tensioning clasps on both sides in turn.
›
If necessary, you can correct the position of the bicycles in the vehicle.
Roof rack system
Introduction
This chapter contains information on the following subjects:
Attachment points
77
Roof load
77
76Using the system
Page 79 of 197
WARNING■The items being transported on the roof rack must be reliably attached –
there is the risk of an accident.■
Always secure the load with appropriate and undamaged lashing straps
or tensioning straps.
■
Distribute the load evenly over the roof rack system.
■
The handling properties of your vehicle change when you transport heavy
or bulky items on the roof rack system as a result of the centre of gravity
being shifted and the greater area exposed to the wind – there is the risk
of an accident. The style of driving and speed must therefore be adapted to
the current circumstances.
■
Avoid abrupt and sudden driving/braking manoeuvres.
■
Adjust the speed and driving style to the visibility, weather, road and traf-
fic conditions.
■
The permissible roof load, permissible axle loads and gross permissible
weight of the vehicle must not be exceeded under any circumstances –
there is the risk of an accident.
CAUTION
■ Only roof racks from the ŠKODA Original Accessories range should be used.■The fitting instructions supplied with the roof luggage rack system must be
observed when handling roof racks.■
On models fitted with a power sliding/tilting roof, ensure that the opened
sliding/tilting roof does not strike any items of luggage transported on the
roof.
■
Ensure that the boot lid does not hit the roof load when opened.
■
The height of the vehicle changes after mounting a roof luggage rack system
and the load that is secured to it. Compare the vehicle height with available
clearances, such as underpasses and garage doors.
■
Always remove the roof luggage rack system before entering an automated
car wash.
■
Ensure the roof aerial is not impaired by the secured load.
For the sake of the environment
The increased aerodynamic drag results in a higher fuel consumption.
Note
If the vehicle is not factory-equipped with a roof rack, it can be purchased from
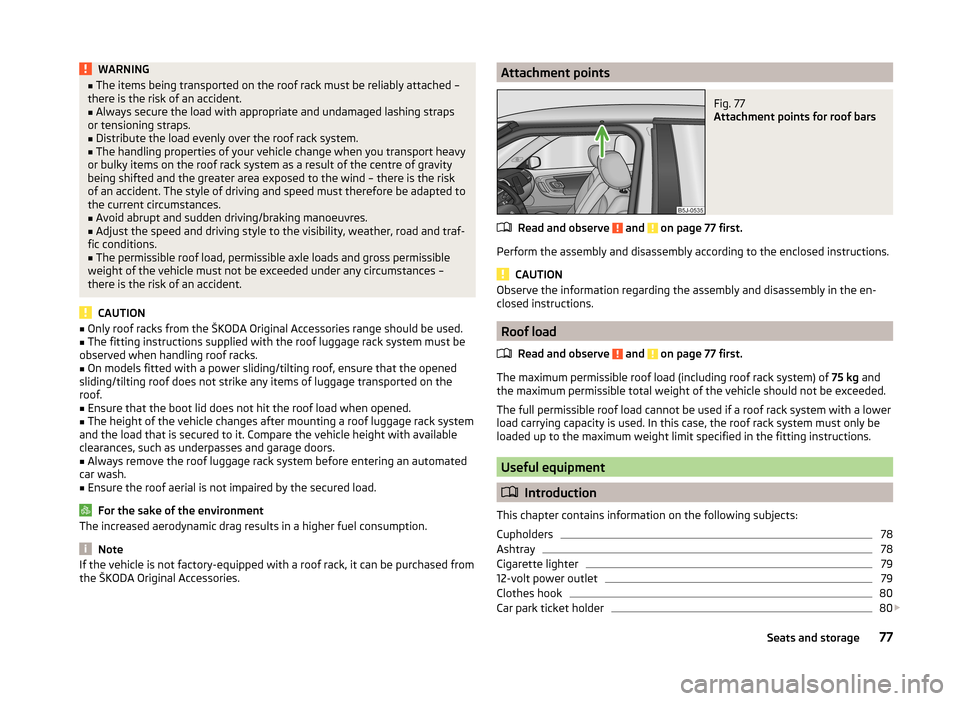
the ŠKODA Original Accessories.Attachment pointsFig. 77
Attachment points for roof bars
Read and observe and on page 77 first.
Perform the assembly and disassembly according to the enclosed instructions.
CAUTION
Observe the information regarding the assembly and disassembly in the en-
closed instructions.
Roof load
Read and observe
and on page 77 first.
The maximum permissible roof load (including roof rack system) of 75 kg and
the maximum permissible total weight of the vehicle should not be exceeded.
The full permissible roof load cannot be used if a roof rack system with a lower
load carrying capacity is used. In this case, the roof rack system must only be
loaded up to the maximum weight limit specified in the fitting instructions.
Useful equipment
Introduction
This chapter contains information on the following subjects:
Cupholders
78
Ashtray
78
Cigarette lighter
79
12-volt power outlet
79
Clothes hook
80
Car park ticket holder
80
77Seats and storage
Page 113 of 197
Always ensure the tyre inflation pressure is correct. If the pressure is too low,
the tyres will have to overcome a higher rolling resistance. This will not only
increase fuel consumption but also tyre wear and the driving behaviour will
worsen.
Always check the tyre inflation pressure when the tyres are cold.
Avoiding unnecessary ballast
Read and observe
on page 109 first.
Transporting ballast costs fuel.
Each kilogramme of weight increases the fuel consumption. Therefore, we rec-
ommend that you carry no unnecessary weight.
It is particularly in town traffic, when one is accelerating quite often, that the
vehicle weight will have a significant effect upon the fuel consumption. A rule
of thumb here is that an increase in weight of 100 kilograms will cause an in-
crease in fuel consumption of about 1 litre/100 kilometres.
At a speed of 100 - 120 km/h, a vehicle fitted with a roof rack cross member
without a load will use about 10 % more fuel than normal due to the increased
aerodynamic drag.
Regular maintenance
Read and observe
on page 109 first.
A poorly tuned engine uses an unnecessarily high amount of fuel.
By having your vehicle regularly maintained by a specialist garage, you create
the conditions needed for driving economically. The maintenance state of your
vehicle has a positive effect on traffic safety and value retention
A poorly tuned engine can result in a fuel consumption which is 10 % higher
than normal.
Check the oil level at regular intervals, e.g. when refuelling. Oil consumption is
dependent to a considerable extent on the load and speed of the engine. Oil
consumption could be as high as 0.5 litres/1 000 km depending on your style
of driving.
It is quite normal that a new engine has a higher oil consumption at first, and
reaches its lowest level only after a certain running in time. The oil consump-
tion of a new vehicle can therefore only be correctly assessed after driving
about 5 000 km.
For the sake of the environment■ Additional improvements to the fuel economy can be made by using synthet-
ic high-lubricity oils.■
Regularly check the ground under the vehicle. Have your vehicle inspected by
a specialist garage if you find any stains caused by oil or other fluids on the
ground.
Note
We recommend that your vehicle is serviced on a regular basis by a ŠKODA
Service Partner.
Saving electrical energy
Read and observe
on page 109 first.
When the engine is running, the alternator generates and supplies electricalpower. If more electrical components of the electrical system are switched on,
more fuel is needed to operate the alternator. We therefore recommend
switching off electrical components if these are no longer required.
Environmental compatibility
Read and observe
on page 109 first.
Environmental protection has played a major role in the design, selection ofmaterials, and manufacture of your new ŠKODA. Particular emphasis has been
placed on the following points.
Design measures › Joints designed to be easily detached.
› Simplified disassembly due to the modular structure system.
› Improved purity of different classes of materials.
› Identification of all plastic parts in accordance with VDA Recommendation
260.
› Reduced fuel consumption and exhaust emission CO
2.
› Minimum fuel leakage during accidents.
› Reduced noise.
Choice of materials
› Extensive use of recyclable material.
› Air conditioning filled with CFC-free refrigerant.
› No cadmium.
111Starting-off and Driving
Page 131 of 197
Automatic car wash systemsRead and observe
and on page 128 first.
The usual precautionary measures must be taken before washing the vehicle
in an automatic car wash system (e.g. closing the windows including the slid-
ing/tilting roof, etc.).
If your vehicle is fitted with any particular mounted parts, such as a spoiler,
roof rack, two-way radio aerial – it is best to consult the operator of the car
wash system beforehand.
The lips of the windscreen wiper rubbers must be cleaned and degreased with
cleaning agents especially formulated for the task after an automatic wash
with wax.
WARNINGFold in the exterior mirrors to prevent damage before washing the vehicle
in an automatic car wash system.
Washing with a high-pressure cleaner
Read and observe
and on page 128 first.
When washing the vehicle with a high-pressure cleaner, the instructions for
use of the equipment must be observed. This applies in particular to the pres-
sure used and to the spraying distance .
Maintain a sufficiently large distance to the parking aid sensors and soft mate-
rials such as rubber hoses or insulation material.
WARNINGNever use circular spray nozzles or dirt cutters!
CAUTION
■ Do not aim the water jet directly at the lock cylinders or the door or opening
joints when washing the vehicle in the winter using a hose or high-pressure
cleaner – there is a risk of freezing.■
To avoid damaging the parking aid sensors while cleaning with high-pressure
cleaners or steam jets, the sensors must only be directly sprayed for short pe-
riods while a minimum distance of 10 cm must be observed.
■ The temperature of the water used for cleaning must not exceed 60 °C –
there is a risk of damaging the vehicle.■
See also Washing a vehicle with decorative film trim using a high-pressure
cleaner » page 131 .
Vehicle exterior care
Introduction
This chapter contains information on the following subjects:
Caring for vehicle paintwork
130
Plastic parts
130
Rubber seals
130
Chrome parts
130
Decorative films
131
Windows and exterior mirrors
131
Headlight lenses
131
Door lock cylinders
131
Underbody waxing
132
Jack
132
Wheels
132
Underbody protection
132
Regular and proper care help to retain the efficiency and value of your vehicle.
It may also be one of the requirements for the acceptance of warranty claims
relating to corrosion damage and paint defects on the bodywork.
We recommend using care products from ŠKODA Original Accessories that are
available from ŠKODA Partners. The instructions for use on the package must
be observed.
WARNING■ Care products may be harmful to your health if not used according to the
instructions.■
Always keep the automobile care products safe from people who are not
completely independent, e.g. children - there is a danger of poisoning!
■
Protect your hands and arms from sharp-edged metal parts when clean-
ing the underfloor, the inside of the wheel housings or the wheel trims –
there is a risk of cuts.
129Car care
Page 179 of 197

The operating weight also contains the weight of the driver (75 kg), the weight
of the operating fluids, the tool kit, and a fuel tank filled to 90 % capacity.
Operating weight of the vehicle » page 179, Vehicle-specific details according
to engine type .
Payload
It is possible to calculate the approximate loading capacity from the difference
between the permissible total weight and the operating weight.
The payload consists of the following weights.
› The weight of the passengers.
› The weight of all items of luggage and other loads.
› The weight of the roof, including the roof rack system.
› The weight of the equipment that is excluded from the operating weight.
› Trailer drawbar load when towing a trailer (max. 50 kg).
Note
If required, you can find out the precise weight of your vehicle by contacting a
specialist garage.
measurement of fuel consumption and CO 2 emissions according to
ECE Regulations and EU Directives
The data on fuel consumption and CO 2 emissions were not available at the
time of going to press.
The data on fuel consumption and CO 2 emissions are given on the ŠKODA
websites or in the sales and technical vehicle documentation.
The measurement of the intra-urban cycle begins with a cold start of the en-
gine. Afterwards urban driving is simulated.
In the extra-urban driving cycle, the vehicle is accelerated and decelerated in
all gears, corresponding to daily routine driving conditions. The driving speed
varies between 0 and 120 km/h.
The calculation of the combined fuel consumption considers a weighting of
about 37 % for the intra-urban cycle and 63 % for the extra-urban cycle.
Note■ The fuel consumption and emission levels given on the Škoda websites or in
the commercial and technical vehicle documentation have been established in
accordance with rules and under conditions that are set out by legal or techni-
cal rules for the determination of operational and technical data of motor vehi-
cles.■
Depending on the extent of the equipment, the driving style, traffic condi-
tions, weather influences and vehicle condition, consumption values can in
practice result in fuel economy figures in the use of the vehicle that differ from
the fuel consumption values listed on the ŠKODA websites or in the commer-
cial and technical vehicle documentation.
177Technical data
Page 191 of 197
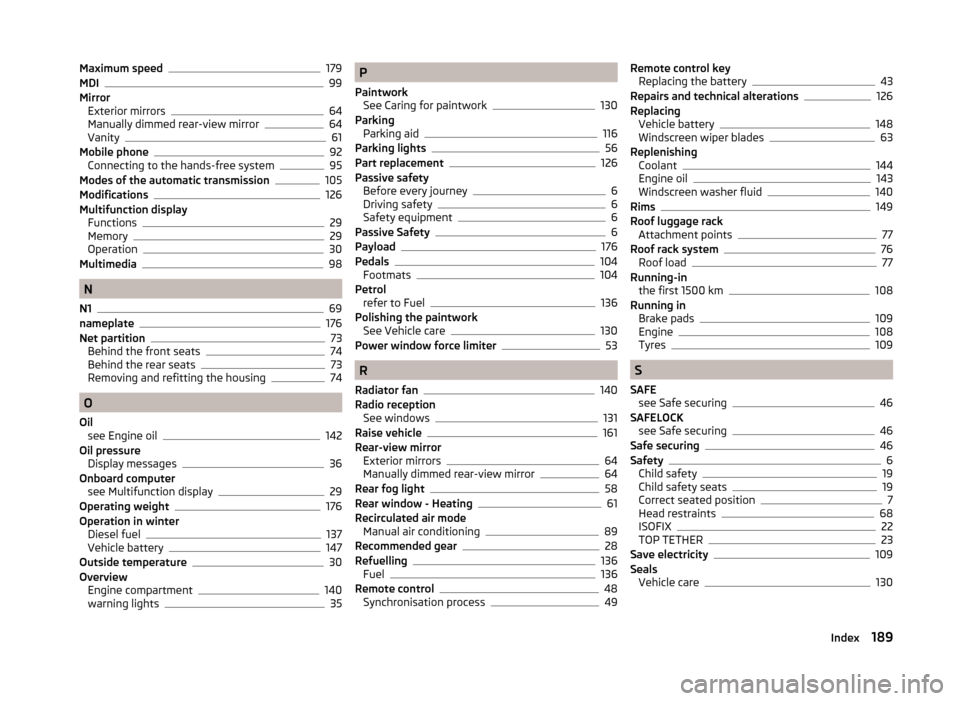
Maximum speed179
MDI99
Mirror Exterior mirrors
64
Manually dimmed rear-view mirror64
Vanity61
Mobile phone92
Connecting to the hands-free system95
Modes of the automatic transmission105
Modifications126
Multifunction display Functions
29
Memory29
Operation30
Multimedia98
N
N1
69
nameplate176
Net partition73
Behind the front seats74
Behind the rear seats73
Removing and refitting the housing74
O
Oil see Engine oil
142
Oil pressure Display messages
36
Onboard computer see Multifunction display
29
Operating weight176
Operation in winter Diesel fuel
137
Vehicle battery147
Outside temperature30
Overview Engine compartment
140
warning lights35
P
Paintwork See Caring for paintwork
130
Parking Parking aid
116
Parking lights56
Part replacement126
Passive safety Before every journey
6
Driving safety6
Safety equipment6
Passive Safety6
Payload176
Pedals104
Footmats104
Petrol refer to Fuel
136
Polishing the paintwork See Vehicle care
130
Power window force limiter53
R
Radiator fan
140
Radio reception See windows
131
Raise vehicle161
Rear-view mirror Exterior mirrors
64
Manually dimmed rear-view mirror64
Rear fog light58
Rear window - Heating61
Recirculated air mode Manual air conditioning
89
Recommended gear28
Refuelling136
Fuel136
Remote control48
Synchronisation process49
Remote control key Replacing the battery43
Repairs and technical alterations126
Replacing Vehicle battery
148
Windscreen wiper blades63
Replenishing Coolant
144
Engine oil143
Windscreen washer fluid140
Rims149
Roof luggage rack Attachment points
77
Roof rack system76
Roof load77
Running-in the first 1500 km
108
Running in Brake pads
109
Engine108
Tyres109
S
SAFE see Safe securing
46
SAFELOCK see Safe securing
46
Safe securing46
Safety6
Child safety19
Child safety seats19
Correct seated position7
Head restraints68
ISOFIX22
TOP TETHER23
Save electricity109
Seals Vehicle care
130
189Index
Page 193 of 197

TransportBoot68
Roof rack system76
Transporting children safely19
Turn signals57
Two-way radio systems92
Tyre load-bearing capacity see Wheels
152
Tyre pressure monitor Setting
154
Tyre repair Check pressure
164
Preparations163
Sealing and inflating the tyre164
Tyres149
Pressure151
Sizes151
Wear indicator151
U
Underbody protection
132
Underbody waxing132
Unleaded petrol113
unlock Central locking system
47
Unlocking Remote control
48
without central locking45
Unlocking and locking42
USB99
Useful equipment77
12-volt power outlet79
Ashtray78
Car park ticket holder80
Cigarette lighter79
Clothes hood80
Cupholders78
Using the selector lever105
V
Variable loading floor
72
Dividing the luggage compartment72
Removing and refitting72
Vehicle battery Automatic load deactivation
149
Charging148
Checking the battery electrolyte level147
Cover147
Disconnecting and reconnecting148
Operation in winter147
Replacing148
Safety instructions145
Vehicle care Alcantara
134
Care of the interior132
Decorative films131
Fabrics134
Polishing130
Rubber seals130
Seat covers134
Synthetic leather134
Underbody waxing132
Vehicle exterior care129
Waxing130
Vehicle data sticker176
Vehicle dimensions178
Vehicle Identification Number (VIN)176
Vehicle key42
Vehicle status see Auto Check Control
34
Vehicle tool kit159
Visors61
W
Warning lights
35
Warning symbols see warning lights
35
Warning triangle158
Washing126
Automatic car wash system129
by hand128
Chrome parts130
High-pressure cleaner129
Water Driving through
112
Waxing See Vehicle care
130
Wheel bolts Anti-theft wheel bolt
162
Caps156
Loosening and tightening161
Wheels Back-up wheel
155
Bolts156
Changing159
Full trim156
General information149
Load index152
Snow chains157
Spare wheel155
Speed symbol152
Storing wheels151
Swapping wheels around151
Tire size152
Tyre pressure151
Tyre service life151
Tyre wear indicator151
Unidirectional tyres154
Wheel sizes151
Winter tyres156
Window convenience operation53
Windows131
Deicing131
See Electrical power windows51
Window wipers Replacing the rear window wiper blade
63
Windscreen Deicing
131
191Index