start stop button SKODA FABIA 2014 2.G / 5J Owner's Manual
[x] Cancel search | Manufacturer: SKODA, Model Year: 2014, Model line: FABIA, Model: SKODA FABIA 2014 2.G / 5JPages: 197, PDF Size: 13.56 MB
Page 33 of 197
The display is updated regularly while you are driving.
Range
The estimated range is displayed in kilometres. It indicates the distance you can still drive with your vehicle based on the level of fuel in the tank and the
same style of driving.
The display is shown in steps of 10 km. The value is displayed in steps of 5 km
after the
warning light has come on.
The fuel consumption over the preceding 50 km is used to calculate the infor-
mation. The range will increase if you drive in a more economical manner.
If the memory is set to zero (after the battery has been disconnected), a fuel
consumption of 10 l/100 km is used initially, then the value is adapted accord-
ing to the style of driving.
Distance travelled
The distance travelled since the memory was last erased is displayed. Reset
the memory to zero if you want to measure the distance travelled from a par-
ticular moment » page 30, Operation .
The maximum distance indicated in both memories is 1999 km or 9999 km on
vehicles with a MAXI DOT display. The indicator is reset to zero when this val-
ue is exceeded.
Average speed
The average speed since the memory was last erased is displayed in km/hour .
Set the memory to zero at the start of measurement to determine the average
speed over a certain period » page 30, Operation .
No value will appear in the display until you have driven approximately 300 m after this information has been deleted.
The display is updated regularly while you are driving.
Current speed
The current speed, identical to the display on the speedometer 3
» Fig. 19 on
page 26 , is displayed.
Oil temperature 1)
The current engine oil temperature is displayed. If the oil temperature is lower
than 50 °C or if a fault in the system for checking the oil temperature is
present, only - -.- is displayed instead of the oil temperature.
Warning against speeding
The warning that the speed limit is being exceeded can be enabled/disabled in
the display » page 31.
Warning against speeding
Read and observe
on page 29 first.
Adjust the speed limit while the vehicle is stationary
›
Press button
A
» Fig. 22 on page 30 to select the Warning at (MAXI DOT
display) or
(segment display) menu item.
›
Press button
B
to activate the ability to set the speed limit 2)
(value flashes).
›
Use the button
A
to set the required speed limit, e.g. 50 km/h.
›
Confirm the speed limit that was set with button
B
, or wait approx. 5 sec-
onds until the setting is saved automatically (the value stops flashing).
This allows you to set the speed in 5 km/h intervals.
Adjusting the speed limit while the vehicle is moving
›
Press button
A
» Fig. 22 on page 30 to select the Warning at (MAXI DOT
display) or (segment display) menu item.
›
Drive at the desired speed, e.g. 50 km/h.
›
Press button
B
to accept the current speed as the speed limit (the value
flashes).
If you wish to adjust the set speed limit, you can do so in 5 km/h intervals (e.g. the accepted speed of 47 km/h increases to 50 km/h or decreases to 45 km/h).
›
Confirm the speed limit that was set by pressing button
B
again, or wait ap-
prox. 5 seconds until the setting is saved automatically (the value stops
flashing).
Change or delete speed limit
›
Press button
A
» Fig. 22 on page 30 to select the Warning at (MAXI DOT
display) or (segment display) menu item.
›
Pressing button
B
disables the speed limit.
›
Pressing the button
B
activates the ability to change the speed limit.
If the set speed limit is exceeded, an audible signal will sound as a warning.
The Warning at (MAXI DOT display) or
(segment display) menu item appears
in the display with the limit set.
1)
Applies for vehicles equipped with the MAXI DOT display.
2)
An initial value of 30 km/h is displayed automatically if no value has been specified.
31Instruments and Indicator Lights
Page 43 of 197
WARNINGWhen a fault of the airbag system occurs, there is a risk of the system not
being triggered in the event of an accident. Therefore, this is to be checked
immediately by a specialized company.
Tyre pressure
Read and observe
on page 35 first.
The warning light lights up, if there is a substantial drop in inflation pres-
sure in one of the tyres. Check and adjust the pressure in all tyres.
If the indicator light flashes, there is a fault in the tyre pressure monitoring
system. Stop the car, turn the ignition off and on again.
If the warning light flashes again after re-starting the engine, then the help
of a professional service provider is to be sought.
Further information » page 154, Tyre pressure monitor .
WARNINGIf you have to stop for technical reasons, then park the vehicle at a safe
distance from the traffic, switch off the engine and activate the hazard
warning lights system » page 59.
Note
If the battery has been disconnected, the warning light illuminates after the
ignition is switched on. The warning light should go out after driving a short
distance.
Windscreen washer fluid level
Read and observe
on page 35 first.
If the windscreen washer fluid level is too low, the warning light comes on.
The following message is shown in the MAXI DOT display. Top up wash fluid!
Top up with liquid » page 140.
Traction control (TCS) switched off
Read and observe
on page 35 first.
The ASR is switched off by pressing the button » page 115 and the warning
light
illuminates.
The following message is shown in the MAXI DOT display.
Traction control (ASR) deactivated.
Turn signal system
Read and observe
on page 35 first.
Either the left or right
warning light flashes depending on the position of
the turn signal lever.
If a turn signal light fails, the warning light flashes at twice its normal rate.
Switching off the hazard warning light system is switched on will cause all of
the turn signal lights as well as both warning lights to flash.
Further information » page 57, Turn signal and main beam lights .
Low beam
Read and observe
on page 35 first.
The warning light comes on when low beam is selected
» page 56.
Fog lights
Read and observe
on page 35 first.
The warning light comes on when the fog lights are operating
» page 58.
Cruise control system
Read and observe
on page 35 first.
The warning light comes on when the cruise control is operat-
ing » page 117 .
41Instruments and Indicator Lights
Page 52 of 197
Interior monitor and towing protectionFig. 34
Button for interior monitor and
towing protection
The interior monitor detects movements inside the car and then triggers the
alarm.
Switching off
›
Switch off the ignition.
›
Open the driver door.
›
Press the
» Fig. 34 button in the driver's door.
›
Lock the vehicle within 30 seconds.
The interior monitor and the towing protection are switched on again auto-
matically the next time the car is locked.
Note
■ Deactivate the interior monitor and the towing protection if there is a possi-
bility of the alarm being triggered by movements (e.g. by children or animals)
within the vehicle interior or if the vehicle has to be transported (e.g. by train
or ship) or towed.■
The opened glasses storage compartment reduces the effectiveness of the
interior monitor. To ensure the full functionality of the interior monitor, the
glasses storage compartment must always be closed before locking the vehi-
cle.
Tailgate
Introduction
This chapter contains information on the following subjects:
Opening/closing
50
Automatic locking of the boot lid
51
Emergency unlocking
51WARNING■ Ensure that the lock is properly engaged after closing the boot lid. Other-
wise, the lid might open suddenly while the vehicle is moving, even if the
lid was locked – risk of accident!■
Never drive with the tailgate fully opened or slightly ajar otherwise ex-
haust gases may get into the interior of the vehicle – risk of poisoning.
■
Do not press on the rear window when closing the tailgate, as otherwise
this could crack – there is a risk of injury.
Note
■ After closing the boot lid, it is automatically locked within 1 second and the
anti-theft alarm system is activated. This applies only if the vehicle was
locked before closing the boot lid.■
The function of the handle above the licence plate is deactivated when start-
ing off or at a speed of 5 km/hour or more for vehicles with central locking. The
function of the handle is activated again when the vehicle has stopped and a
door is opened.
Opening/closing
Fig. 35
Unlock the boot lid/boot lid handle
Read and observe
on page 50 first.
After unlocking the vehicle, you can open the lid by pushing the handle located
above the licence plate.
Opening the boot lid for vehicles without central locking
›
Press the
button » Fig. 35 in the driver's door -
and open the boot lid in
the direction of arrow » Fig. 35 -
.
50Using the system
Page 89 of 197
Setting
Recommended basic settings of the heating controls.SettingControl dial settings » Fig. 95 on page 86Symbol Key » Fig. 95
on page 86Air outlet vents 4 » Fig. 94 on
page 85ABCDefrosting the windshield and side
windowsTo the right up to the stop3Do not switch onOpen and align with the side windowFree windshield and side windows
from mistDesired temperature2 or 3
Do not switch onOpen and align with the side
windowThe fastest heatingTo the stop to theright3Briefly switch onOpeningComfortable heatingDesired temperature2 or 3
Do not switch onOpeningFresh air mode - ventilationTo the stop to the
leftDesired positionDo not switch onOpeningWe recommend that you leave the air outlet vents 3 » Fig. 94 on page 85 in
the open position in all operating modes.
Note
If the air distribution is directed only towards the windows, the total amount
of air is used to defrost the windows and thus no air will be fed to the footwell.
This can limit the heating comfort.
Recirculated air mode
Recirculated air mode prevents polluted air from outside the vehicle getting in-
to the vehicle, for example when driving through a tunnel or when standing in
a traffic jam.
Switching on/off
›
Press the button.
The indicator light in the button lights up.
›
Press the button again.
The indicator light in the button goes out.
Recirculated air mode is switched off automatically if the air distribution con-
trol C » Fig. 95 on page 86 is turned to the position. Recirculated air mode
can be switched on again from this setting by pressing the
button again.WARNINGNever leave recirculated air mode on over a longer period, as “stale air” can
cause fatigue in the driver and the passengers, reduce attention levels and
also cause the windows to mist up. The risk of having an accident increa-
ses. Switch off recirculated air mode as soon as the windows start to mist
up.
Air conditioning system (manual air conditioning system)
Introduction
This chapter contains information on the following subjects:
Operation
88
Setting the air conditioning system
89
Recirculated air mode
89
87Heating and air conditioning
Page 91 of 197
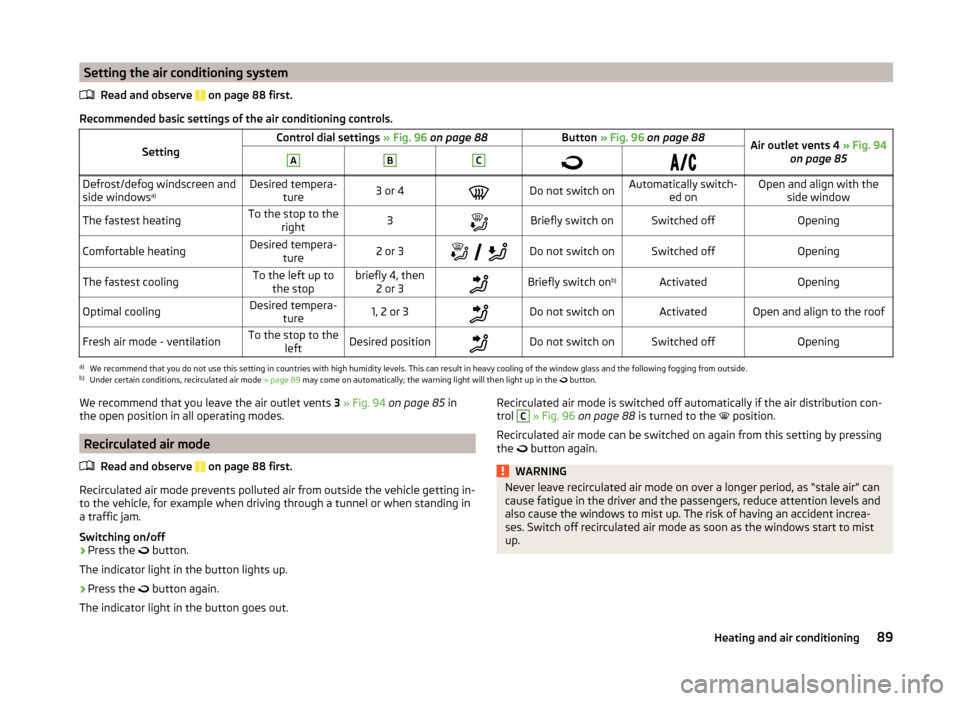
Setting the air conditioning systemRead and observe
on page 88 first.
Recommended basic settings of the air conditioning controls.
SettingControl dial settings » Fig. 96 on page 88Button » Fig. 96 on page 88Air outlet vents 4 » Fig. 94
on page 85ABCDefrost/defog windscreen and
side windows a)Desired tempera-
ture3 or 4Do not switch onAutomatically switch- ed onOpen and align with theside windowThe fastest heatingTo the stop to the right3Briefly switch onSwitched offOpeningComfortable heatingDesired tempera-
ture2 or 3
Do not switch onSwitched offOpeningThe fastest coolingTo the left up to
the stopbriefly 4, then 2 or 3Briefly switch on b)ActivatedOpeningOptimal coolingDesired tempera-
ture1, 2 or 3Do not switch onActivatedOpen and align to the roofFresh air mode - ventilationTo the stop to the leftDesired positionDo not switch onSwitched offOpeninga)
We recommend that you do not use this setting in countries with high humidity levels. This can result in heavy cooling of the window glass and the following fogging from outside.
b)
Under certain conditions, recirculated air mode » page 89 may come on automatically; the warning light will then light up in the
button.
We recommend that you leave the air outlet vents
3 » Fig. 94 on page 85 in
the open position in all operating modes.
Recirculated air mode
Read and observe
on page 88 first.
Recirculated air mode prevents polluted air from outside the vehicle getting in-
to the vehicle, for example when driving through a tunnel or when standing in
a traffic jam.
Switching on/off
›
Press the button.
The indicator light in the button lights up.
›
Press the button again.
The indicator light in the button goes out.
Recirculated air mode is switched off automatically if the air distribution con-
trol C » Fig. 96 on page 88 is turned to the position.
Recirculated air mode can be switched on again from this setting by pressing the
button again.WARNINGNever leave recirculated air mode on over a longer period, as “stale air” can
cause fatigue in the driver and the passengers, reduce attention levels and
also cause the windows to mist up. The risk of having an accident increa-
ses. Switch off recirculated air mode as soon as the windows start to mist
up.89Heating and air conditioning
Page 99 of 197
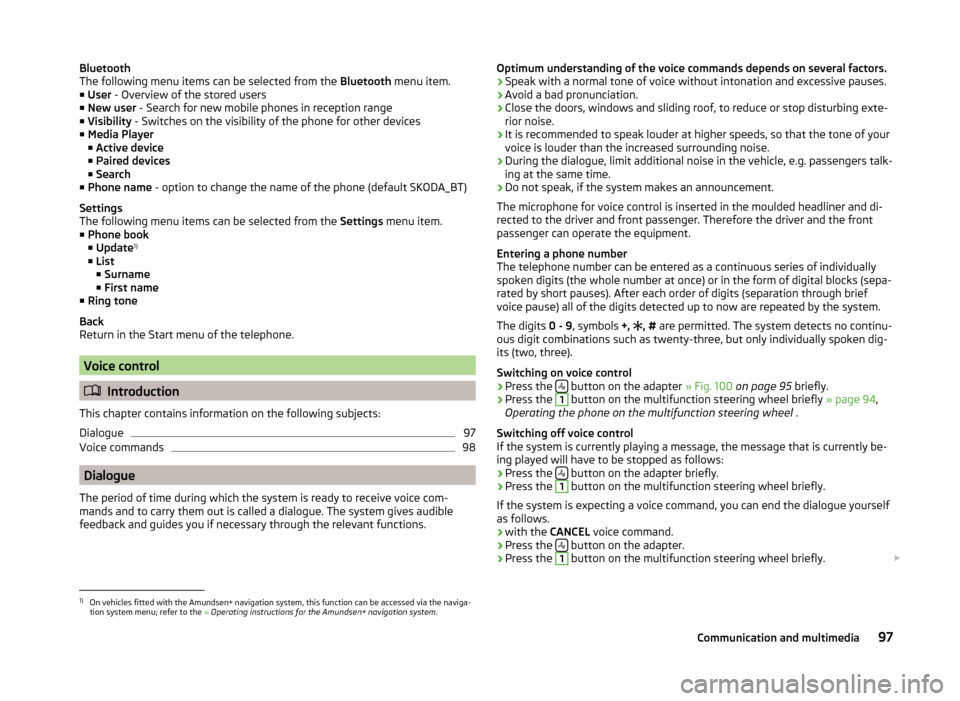
Bluetooth
The following menu items can be selected from the Bluetooth menu item.
■ User - Overview of the stored users
■ New user - Search for new mobile phones in reception range
■ Visibility - Switches on the visibility of the phone for other devices
■ Media Player
■ Active device
■ Paired devices
■ Search
■ Phone name - option to change the name of the phone (default SKODA_BT)
Settings
The following menu items can be selected from the Settings menu item.
■ Phone book
■ Update 1)
■ List
■ Surname
■ First name
■ Ring tone
Back
Return in the Start menu of the telephone.
Voice control
Introduction
This chapter contains information on the following subjects:
Dialogue
97
Voice commands
98
Dialogue
The period of time during which the system is ready to receive voice com-
mands and to carry them out is called a dialogue. The system gives audible
feedback and guides you if necessary through the relevant functions.
Optimum understanding of the voice commands depends on several factors.
› Speak with a normal tone of voice without intonation and excessive pauses.
› Avoid a bad pronunciation.
› Close the doors, windows and sliding roof, to reduce or stop disturbing exte-
rior noise.
› It is recommended to speak louder at higher speeds, so that the tone of your
voice is louder than the increased surrounding noise.
› During the dialogue, limit additional noise in the vehicle, e.g. passengers talk-
ing at the same time.
› Do not speak, if the system makes an announcement.
The microphone for voice control is inserted in the moulded headliner and di-
rected to the driver and front passenger. Therefore the driver and the front
passenger can operate the equipment.
Entering a phone number
The telephone number can be entered as a continuous series of individually
spoken digits (the whole number at once) or in the form of digital blocks (sepa-
rated by short pauses). After each order of digits (separation through brief
voice pause) all of the digits detected up to now are repeated by the system.
The digits 0 - 9, symbols +,
, #
are permitted. The system detects no continu-
ous digit combinations such as twenty-three, but only individually spoken dig-
its (two, three).
Switching on voice control
› Press the
button on the adapter
» Fig. 100 on page 95 briefly.
› Press the
1
button on the multifunction steering wheel briefly
» page 94,
Operating the phone on the multifunction steering wheel .
Switching off voice control
If the system is currently playing a message, the message that is currently be-
ing played will have to be stopped as follows:
› Press the
button on the adapter briefly.
› Press the
1
button on the multifunction steering wheel briefly.
If the system is expecting a voice command, you can end the dialogue yourself
as follows.
› with the
CANCEL voice command.
› Press the
button on the adapter.
› Press the
1
button on the multifunction steering wheel briefly.
1)
On vehicles fitted with the Amundsen+ navigation system, this function can be accessed via the naviga-
tion system menu; refer to the » Operating instructions for the Amundsen+ navigation system .
97Communication and multimedia
Page 109 of 197
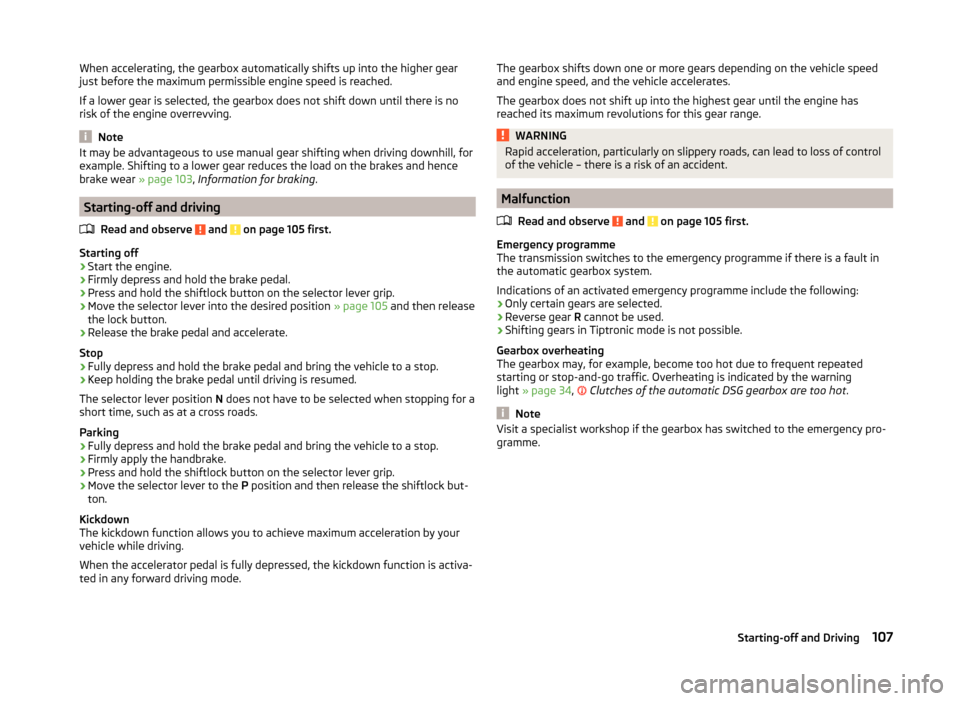
When accelerating, the gearbox automatically shifts up into the higher gear
just before the maximum permissible engine speed is reached.
If a lower gear is selected, the gearbox does not shift down until there is no risk of the engine overrevving.
Note
It may be advantageous to use manual gear shifting when driving downhill, for
example. Shifting to a lower gear reduces the load on the brakes and hence
brake wear » page 103, Information for braking .
Starting-off and driving
Read and observe
and on page 105 first.
Starting off
›
Start the engine.
›
Firmly depress and hold the brake pedal.
›
Press and hold the shiftlock button on the selector lever grip.
›
Move the selector lever into the desired position » page 105 and then release
the lock button.
›
Release the brake pedal and accelerate.
Stop
›
Fully depress and hold the brake pedal and bring the vehicle to a stop.
›
Keep holding the brake pedal until driving is resumed.
The selector lever position N does not have to be selected when stopping for a
short time, such as at a cross roads.
Parking
›
Fully depress and hold the brake pedal and bring the vehicle to a stop.
›
Firmly apply the handbrake.
›
Press and hold the shiftlock button on the selector lever grip.
›
Move the selector lever to the P position and then release the shiftlock but-
ton.
Kickdown
The kickdown function allows you to achieve maximum acceleration by your vehicle while driving.
When the accelerator pedal is fully depressed, the kickdown function is activa-
ted in any forward driving mode.
The gearbox shifts down one or more gears depending on the vehicle speed
and engine speed, and the vehicle accelerates.
The gearbox does not shift up into the highest gear until the engine has
reached its maximum revolutions for this gear range.WARNINGRapid acceleration, particularly on slippery roads, can lead to loss of control
of the vehicle – there is a risk of an accident.
Malfunction
Read and observe
and on page 105 first.
Emergency programme
The transmission switches to the emergency programme if there is a fault in
the automatic gearbox system.
Indications of an activated emergency programme include the following:
› Only certain gears are selected.
› Reverse gear
R cannot be used.
› Shifting gears in Tiptronic mode is not possible.
Gearbox overheating
The gearbox may, for example, become too hot due to frequent repeated
starting or stop-and-go traffic. Overheating is indicated by the warning
light » page 34 ,
Clutches of the automatic DSG gearbox are too hot
.
Note
Visit a specialist workshop if the gearbox has switched to the emergency pro-
gramme.107Starting-off and Driving
Page 120 of 197
›The speed will increase continuously, if the rocker button is pressed and held
in the RES position. Release the rocker button once the desired speed is
reached. The set speed is then stored in the memory.
Decreasing the speed›
The stored speed can be reduced by pressing rocker button
B
» Fig. 114 on
page 117 to the SET position.
›
The speed will decrease continuously, if the rocker button is pressed and
held in the SET position. Release the rocker button once the desired speed is
reached. The set speed is then stored in the memory.
›
If the rocker button is released at a speed below around 25 km/h, the speed
is not stored and the memory is erased. The speed must then be stored
again by pressing rocker button
B
to the SET position after increasing the
speed of the vehicle to more than around 25 km/h.
The speed can also be reduced by depressing the brake pedal, which tempora- rily deactivates the system.
Switching off temporarily
Read and observe
and on page 117 first.
The cruise control system can be temporarily switched off by pushing switch
A
» Fig. 114 on page 117 to the spring-loaded CANCEL position or by depress-
ing the brake or clutch pedal.
The set speed remains stored in the memory.
Briefly push rocker button
B
to the RES position to resume the set speed af-
ter the clutch or brake pedal is released.
Switching off completely
Read and observe
and on page 117 first.
›
Press switch
A
» Fig. 114 on page 117 to the right to the OFF position.
START-STOP
Introduction
This chapter contains information on the following subjects:
Operating conditions for the system
118
Operation
119System conditioned automatic start-up119Manually deactivating/activating119
Information messages
119
The START-STOP system (hereinafter referred to just as the system) reduces
fuel consumption and polluting emissions and CO 2 emissions by turning the
engine off, e.g. when stopping at traffic lights, and starting the engine again
when moving off.
WARNING■ Never let the vehicle roll with the engine switched off.■The brake servo unit and power steering only operate if the engine is run-
ning.
Operating conditions for the system
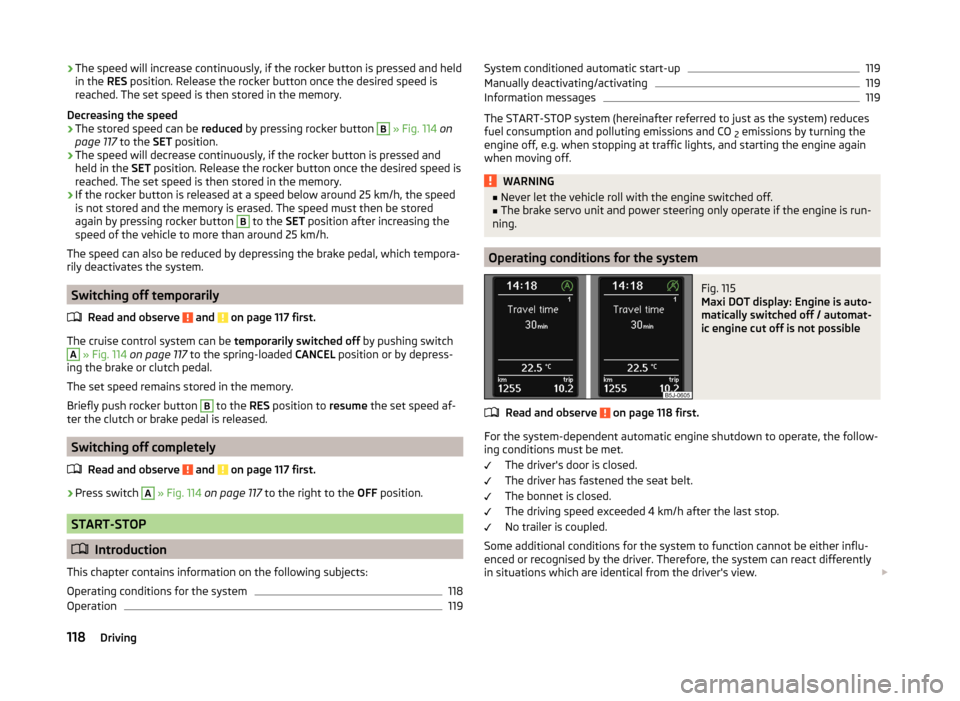
Fig. 115
Maxi DOT display: Engine is auto-
matically switched off / automat-
ic engine cut off is not possible
Read and observe on page 118 first.
For the system-dependent automatic engine shutdown to operate, the follow-
ing conditions must be met.
The driver's door is closed.
The driver has fastened the seat belt.
The bonnet is closed.
The driving speed exceeded 4 km/h after the last stop.
No trailer is coupled.
Some additional conditions for the system to function cannot be either influ-
enced or recognised by the driver. Therefore, the system can react differently
in situations which are identical from the driver's view.
118Driving
Page 121 of 197
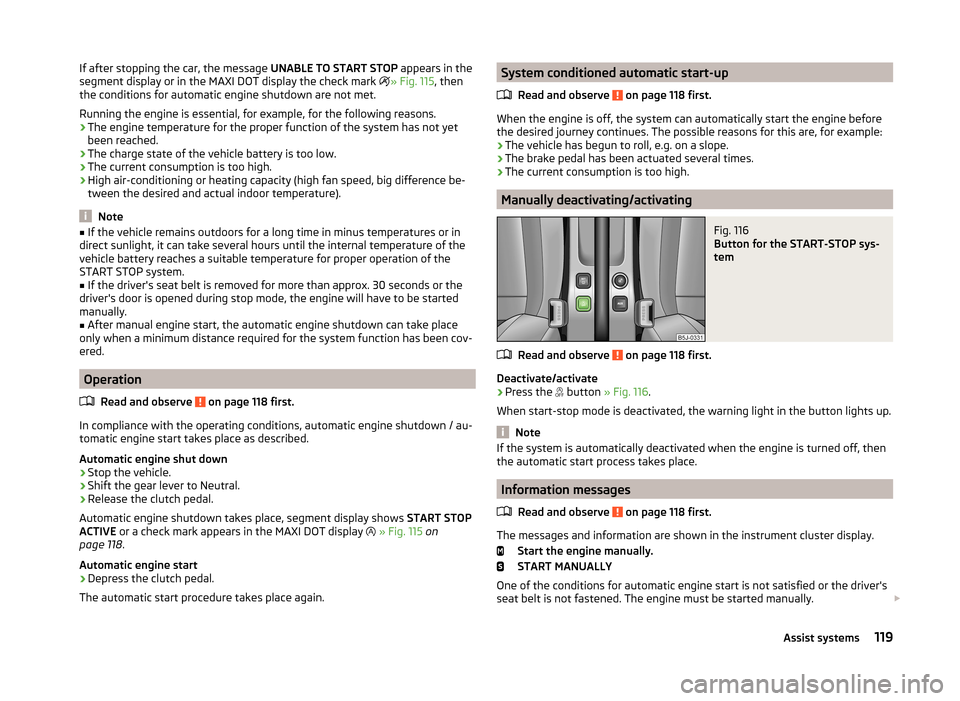
If after stopping the car, the message UNABLE TO START STOP appears in the
segment display or in the MAXI DOT display the check mark » Fig. 115 , then
the conditions for automatic engine shutdown are not met.
Running the engine is essential, for example, for the following reasons.
› The engine temperature for the proper function of the system has not yet
been reached.
› The charge state of the vehicle battery is too low.
› The current consumption is too high.
› High air-conditioning or heating capacity (high fan speed, big difference be-
tween the desired and actual indoor temperature).
Note
■ If the vehicle remains outdoors for a long time in minus temperatures or in
direct sunlight, it can take several hours until the internal temperature of the
vehicle battery reaches a suitable temperature for proper operation of the
START STOP system.■
If the driver's seat belt is removed for more than approx. 30 seconds or the
driver's door is opened during stop mode, the engine will have to be started
manually.
■
After manual engine start, the automatic engine shutdown can take place
only when a minimum distance required for the system function has been cov-
ered.
Operation
Read and observe
on page 118 first.
In compliance with the operating conditions, automatic engine shutdown / au-
tomatic engine start takes place as described.
Automatic engine shut down
›
Stop the vehicle.
›
Shift the gear lever to Neutral.
›
Release the clutch pedal.
Automatic engine shutdown takes place, segment display shows START STOP
ACTIVE or a check mark appears in the MAXI DOT display
» Fig. 115 on
page 118 .
Automatic engine start
›
Depress the clutch pedal.
The automatic start procedure takes place again.
System conditioned automatic start-up
Read and observe
on page 118 first.
When the engine is off, the system can automatically start the engine before
the desired journey continues. The possible reasons for this are, for example:
› The vehicle has begun to roll, e.g. on a slope.
› The brake pedal has been actuated several times.
› The current consumption is too high.
Manually deactivating/activating
Fig. 116
Button for the START-STOP sys-
tem
Read and observe on page 118 first.
Deactivate/activate
›
Press the button
» Fig. 116 .
When start-stop mode is deactivated, the warning light in the button lights up.
Note
If the system is automatically deactivated when the engine is turned off, then
the automatic start process takes place.
Information messages
Read and observe
on page 118 first.
The messages and information are shown in the instrument cluster display. Start the engine manually.
START MANUALLY
One of the conditions for automatic engine start is not satisfied or the driver's
seat belt is not fastened. The engine must be started manually.
119Assist systems
Page 171 of 197
Fuse assignment in the dash panelNo.Power consumer1S-contact2START-STOP, air-conditioning system3Instrument cluster, headlamp beam adjustment4Control unit for ABS, button for START STOP5Petrol engine: Speed regulating system6Reversing light (manual gearbox)7Ignition, engine control unit, automatic gearbox8Brake pedal switch, clutch pedal switch9Operating controls for the heating, control unit for air conditioning
system, parking aid, control unit for cornering lights, radiator fan,
washing nozzles10Windscreen Wiper and Washer System11Mirror adjustment12Control unit for trailer detection13Control unit for automatic gearbox14Motor for halogen projector headlights with cornering light function15PDA navigation system16Electro-hydraulic power steering17Light switch power supply18Mirror heater19S-contact20Alarm21Reversing light, fog lights with the function CORNER
22
Operating controls for the heating, control unit for air conditioning
system, parking aid, mobile phone, instrument cluster, steering an-
gle sender, ESC, vehicle voltage control unit, multifunction steering
wheel23Interior lighting, storage compartment and luggage compartment,
side lights24Central control unit25Seat heaters26Rear window wiperNo.Power consumer27Telephone preinstallation28Petrol engine: AKF valve, Diesel engine: Control flap29Injection, coolant pump30Fuel pump, ignition, Cruise control system, operation of PTC relay31Lambda probe32High pressure fuel pump, pressure valve33Engine control unit34Engine control unit, vacuum pump35Daytime running lights/radio for vehicles with START-STOP36Main beam37Rear fog light, DC/DC converter START-STOP38Fog lights39Air blower for heating40-41Not assigned42Rear window heater43Horn44Windscreen wipers45Central control unit for convenience system46Engine control unit, fuel pump47Cigarette lighter, power socket in the luggage compartment48ABS, START-STOP (DC/DC) converter ESP49Turn signal lights, brake lights50START-STOP (DC/DC) transformer, radio51Electrical power window (front and rear) - left side52Electrical power window (front and rear) - right side53Parking light = left side, electrical sliding/tilting roof54START-STOP (instrument cluster), alarm55Control unit for automatic gearbox56Headlight cleaning system, parking light - right side57Left low beam, headlight range adjustment58Low beam on the right169Fuses and light bulbs