winter tyres SKODA FABIA 2014 2.G / 5J Owner's Manual
[x] Cancel search | Manufacturer: SKODA, Model Year: 2014, Model line: FABIA, Model: SKODA FABIA 2014 2.G / 5JPages: 197, PDF Size: 13.56 MB
Page 5 of 197
Table of Contents
Abbreviations
Safety
Passive Safety
6
General information
6
Correct and safe seated position
7
Seat belts
10
Wearing seat belts
10
Inertia reel and belt pretensioners
13
Airbag system
14
Description of the airbag system
14
Airbag overview
15
Deactivating airbags
17
Transporting children safely
19
Child seat
19
Fastening systems
22
Using the system
Cockpit
25
Overview
24
Instruments and Indicator Lights
26
Instrument cluster
26
Multifunction display (MFD)
29
Service Interval Display
32
MAXI DOT display
33
Warning lights
35
Unlocking and locking
42
Unlocking and locking
42
Central locking system
45
Remote control
48
Anti-theft alarm system
49
Tailgate
50Electrical power windows51Electric sliding/tilting roof53
Lights and visibility
55
Lights
55
Interior lights
59
Visibility
61
Windscreen wipers and washers
61
Rear window
63
Seats and storage
65
Front seats
65
Rear seats
66
Head restraints
67
Boot
68
Variable loading floor in the luggage
compartment (Fabia Estate)
72
Net partition (Fabia Estate)
73
Bicycle carrier in the luggage compartment
75
Roof rack system
76
Useful equipment
77
Storage compartments
80
Heating and air conditioning
84
Heating, ventilation, cooling
84
Heating
86
Air conditioning system (manual air
conditioning system)
87
Climatronic (automatic air conditioning
system)
90
Communication and multimedia
92
Universal telephone preinstallation GSM II
92
Voice control
97
Multimedia
98
Driving
Starting-off and Driving
101
Starting and stopping the engine
101
Brakes
102Manual gear shifting and pedals104Automatic transmission105
Running in
108
Economical driving and respect the
environment
109
Avoiding damage to your vehicle
112
Driving abroad
113
Assist systems
114
Brake assist systems
114
Parking aid
116
Cruise control system
117
START-STOP
118
Towing a trailer
120
Towing device
120
Trailer
124
General Maintenance
Car care
126
Services, modifications and technical
alterations
126
Washing the car
128
Vehicle exterior care
129
Care of the interior
132
Inspecting and replenishing
135
Fuel
135
Engine compartment
138
Engine oil
141
Coolant
143
Brake fluid
145
Vehicle battery
145
Wheels
149
Tyres and rims
149
Winter use
1563Table of Contents
Page 36 of 197
SettingsRead and observe
on page 33 first.
You can change certain settings yourself through the MAXI DOT display. The
current menu item is shown in the top of the display under a line.
You can select the following menu options:
Language
You can set the language for the warning and information texts here.
MFD data
Activate or deactivate certain displays of the multifunction display here.
Time
The time, time format (12 or 24 hour indicator) and the changeover between
summer/winter time can be set here.
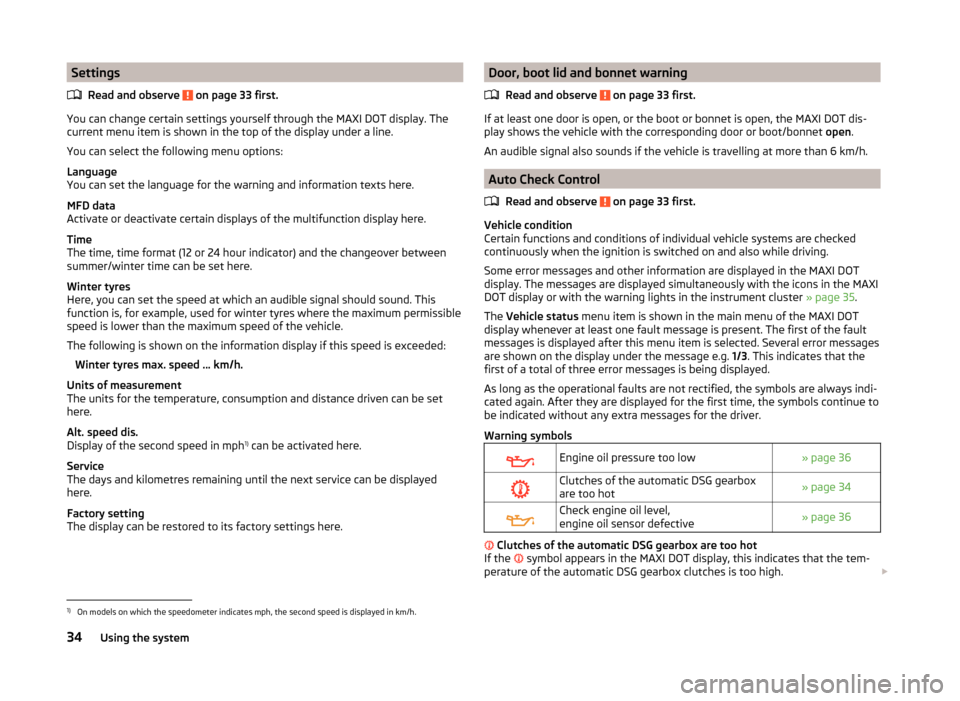
Winter tyres
Here, you can set the speed at which an audible signal should sound. This
function is, for example, used for winter tyres where the maximum permissible
speed is lower than the maximum speed of the vehicle.
The following is shown on the information display if this speed is exceeded: Winter tyres max. speed ... km/h.
Units of measurement
The units for the temperature, consumption and distance driven can be set
here.
Alt. speed dis.
Display of the second speed in mph 1)
can be activated here.
Service
The days and kilometres remaining until the next service can be displayed
here.
Factory setting
The display can be restored to its factory settings here.
Door, boot lid and bonnet warning
Read and observe
on page 33 first.
If at least one door is open, or the boot or bonnet is open, the MAXI DOT dis-
play shows the vehicle with the corresponding door or boot/bonnet open.
An audible signal also sounds if the vehicle is travelling at more than 6 km/h.
Auto Check Control
Read and observe
on page 33 first.
Vehicle condition
Certain functions and conditions of individual vehicle systems are checked
continuously when the ignition is switched on and also while driving.
Some error messages and other information are displayed in the MAXI DOT
display. The messages are displayed simultaneously with the icons in the MAXI
DOT display or with the warning lights in the instrument cluster » page 35.
The Vehicle status menu item is shown in the main menu of the MAXI DOT
display whenever at least one fault message is present. The first of the fault
messages is displayed after this menu item is selected. Several error messages
are shown on the display under the message e.g. 1/3. This indicates that the
first of a total of three error messages is being displayed.
As long as the operational faults are not rectified, the symbols are always indi-
cated again. After they are displayed for the first time, the symbols continue to
be indicated without any extra messages for the driver.
Warning symbols
Engine oil pressure too low» page 36Clutches of the automatic DSG gearbox
are too hot» page 34Check engine oil level,
engine oil sensor defective» page 36
Clutches of the automatic DSG gearbox are too hot
If the symbol appears in the MAXI DOT display, this indicates that the tem-
perature of the automatic DSG gearbox clutches is too high.
1)
On models on which the speedometer indicates mph, the second speed is displayed in km/h.
34Using the system
Page 111 of 197
New tyres
New tyres have to be “run in” since they do not offer optimal grip at first. Drive
especially carefully for the first 500 km or so.
New brake pads
New brake pads initially do not provide optimal braking performance. They first
need to be “run in”. Drive especially carefully for the first 200 km or so.
Economical driving and respect the environment
Introduction
This chapter contains information on the following subjects:
Driving with anticipation
109
Economical gear changing.
109
Avoiding full throttle
110
Reducing idling
110
Avoiding short distances
110
Checking tyre pressure
110
Avoiding unnecessary ballast
111
Regular maintenance
111
Saving electrical energy
111
Environmental compatibility
111
The technical requirements for low fuel usage and economic efficiency of the
vehicle have already been built into the vehicle at the works. ŠKODA places a
particular emphasis on minimising negative effects on the environment.
It is necessary to take note of the guidelines given in this chapter in order to make best use of these characteristics and to maintain their effectiveness.
Fuel consumption, environmental pollution and the wear to the engine, brakes
and tyres depend essentially on the following three factors.
› Your personal driving style
› Operating conditions
› Technical requirements
The fuel economy by can be improved by 10 -15 % by always looking ahead and
driving in an economical way.
Fuel consumption is also be influenced by external factors which are beyond
the driver's control. Consumption increases during the winter or under difficult
conditions, on poor roads, etc.
Fuel consumption can vary considerably from the manufacturer's data, as a re-
sult of outside temperatures, the weather and driving style.
The optimal engine speed should be maintained when accelerating, to avoid a high fuel consumption and resonance of the vehicle.
CAUTION
All the speed and engine revolution figures apply only when the engine is at
its normal operating temperature.
Driving with anticipation
Read and observe
on page 109 first.
A vehicle's highest fuel consumption occurs when accelerating, therefore un-necessary accelerating and braking should be avoided. If looking ahead when
driving, less braking and consequently less accelerating are required.
If possible, let your vehicle coast to a stop, or use the engine brake, if you can see that the next set of traffic lights is on red, for example.
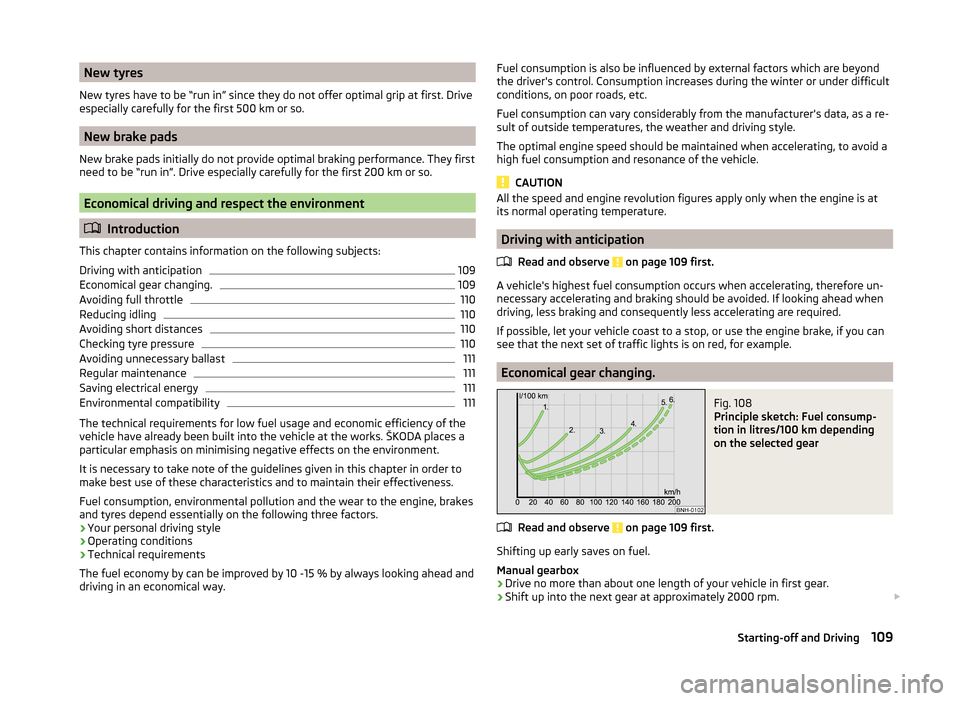
Economical gear changing.
Fig. 108
Principle sketch: Fuel consump-
tion in litres/100 km depending
on the selected gear
Read and observe on page 109 first.
Shifting up early saves on fuel.
Manual gearbox › Drive no more than about one length of your vehicle in first gear.
› Shift up into the next gear at approximately 2000 rpm.
109Starting-off and Driving
Page 154 of 197
Tyre age
Tyres age losing their original characteristics, even if they are not used. There-
fore, we recommend that you do not use summer or winter tyres that are older
than 6 years or 4 years respectively.
Explanation of the tire labelling
Read and observe
and on page 149 first.
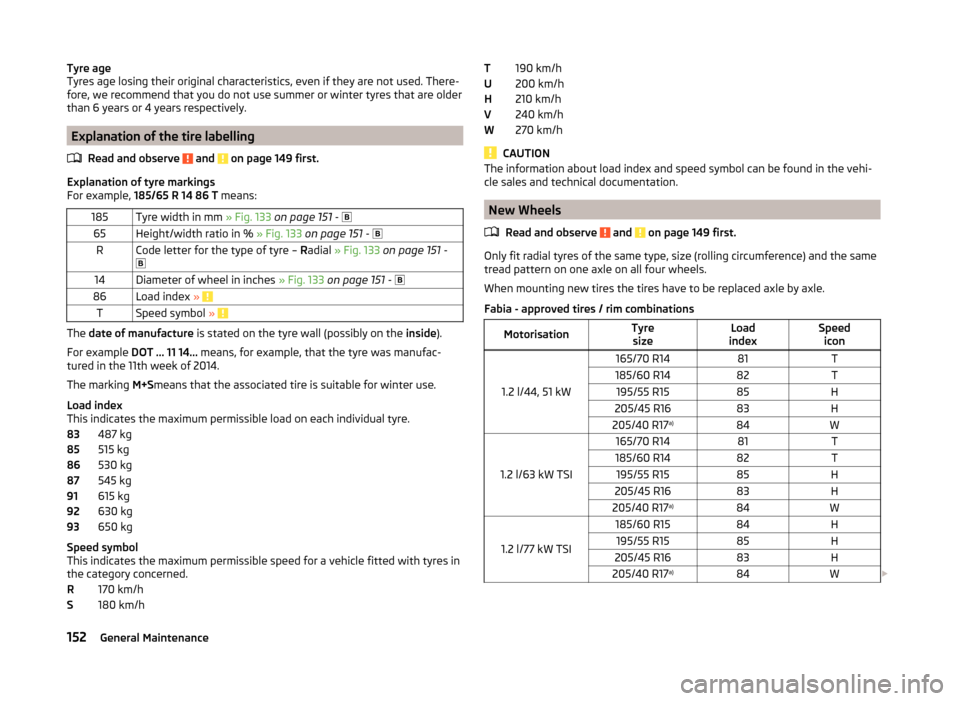
Explanation of tyre markings
For example, 185/65 R 14 86 T means:
185Tyre width in mm » Fig. 133 on page 151 - 65Height/width ratio in % » Fig. 133 on page 151 - RCode letter for the type of tyre – Radial » Fig. 133 on page 151 -
14Diameter of wheel in inches » Fig. 133 on page 151 - 86Load index » TSpeed symbol »
The date of manufacture is stated on the tyre wall (possibly on the inside).
For example DOT ... 11 14... means, for example, that the tyre was manufac-
tured in the 11th week of 2014.
The marking M+Smeans that the associated tire is suitable for winter use.
Load index
This indicates the maximum permissible load on each individual tyre.
487 kg
515 kg
530 kg
545 kg
615 kg
630 kg
650 kg
Speed symbol
This indicates the maximum permissible speed for a vehicle fitted with tyres in
the category concerned.
170 km/h
180 km/h
83858687919293RS190 km/h
200 km/h
210 km/h
240 km/h
270 km/h
CAUTION
The information about load index and speed symbol can be found in the vehi-
cle sales and technical documentation.
New Wheels
Read and observe
and on page 149 first.
Only fit radial tyres of the same type, size (rolling circumference) and the same
tread pattern on one axle on all four wheels.
When mounting new tires the tires have to be replaced axle by axle.
Fabia - approved tires / rim combinations
MotorisationTyre sizeLoad
indexSpeed icon
1.2 l/44, 51 kW
165/70 R1481T185/60 R1482T195/55 R1585H205/45 R1683H205/40 R17 a)84W
1.2 l/63 kW TSI
165/70 R1481T185/60 R1482T195/55 R1585H205/45 R1683H205/40 R17a)84W
1.2 l/77 kW TSI
185/60 R1584H195/55 R1585H205/45 R1683H205/40 R17a)84W
TUHVW152General Maintenance
Page 157 of 197
WARNING■When the warning light illuminates, immediately reduce the speed and
avoid sudden steering and brake manoeuvres. Stop the vehicle as soon as
possible and inspect the tyres and their inflation pressure.■
Under certain circumstances (e.g. sporty style of driving, wintry or un-
paved roads) the warning light
can be delayed or does not light up at all.
CAUTION
■
The system cannot warn in case of very rapid loss of tyre pressure, e.g. in the
event of a sudden puncture. In this case carefully bring the vehicle to a stand-
still without sudden steering movements or sharp braking.■
The basic setting must be repeated every 10,000 km or once a year to ensure
proper functioning of the tyre pressure monitor.
■
The tyre pressure monitor does not replace the need to check tyre pressure
regularly.
Spare and back-up wheel
Fig. 136
Fixing the back-up or spare
wheel
Read and observe and on page 149 first.
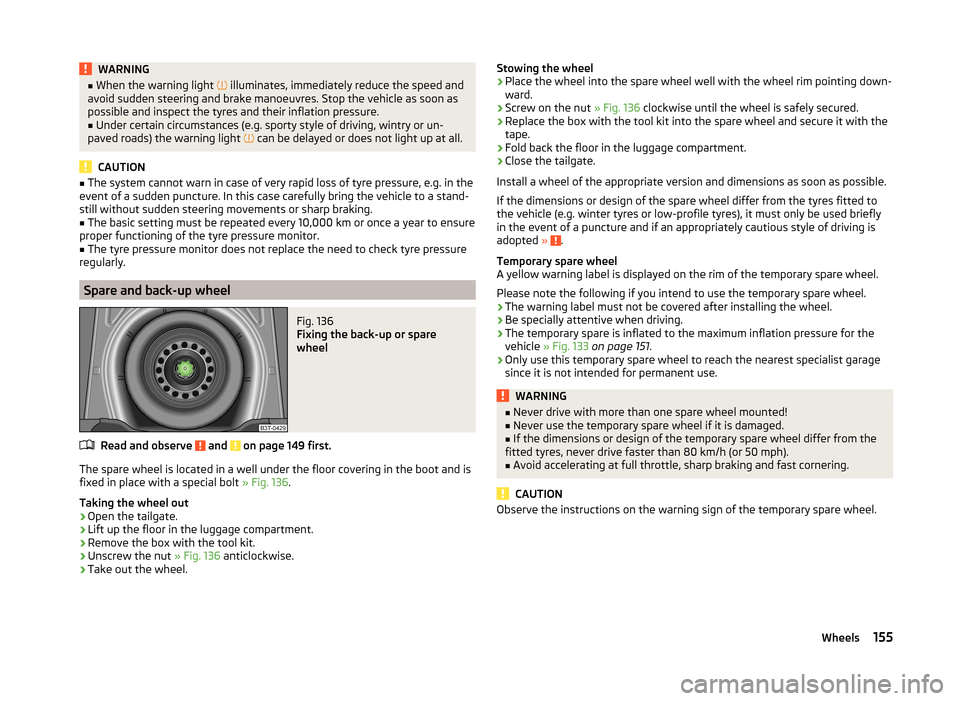
The spare wheel is located in a well under the floor covering in the boot and is fixed in place with a special bolt » Fig. 136.
Taking the wheel out
›
Open the tailgate.
›
Lift up the floor in the luggage compartment.
›
Remove the box with the tool kit.
›
Unscrew the nut » Fig. 136 anticlockwise.
›
Take out the wheel.
Stowing the wheel›Place the wheel into the spare wheel well with the wheel rim pointing down-
ward.›
Screw on the nut » Fig. 136 clockwise until the wheel is safely secured.
›
Replace the box with the tool kit into the spare wheel and secure it with the
tape.
›
Fold back the floor in the luggage compartment.
›
Close the tailgate.
Install a wheel of the appropriate version and dimensions as soon as possible.
If the dimensions or design of the spare wheel differ from the tyres fitted to
the vehicle (e.g. winter tyres or low-profile tyres), it must only be used briefly
in the event of a puncture and if an appropriately cautious style of driving is
adopted »
.
Temporary spare wheel
A yellow warning label is displayed on the rim of the temporary spare wheel.
Please note the following if you intend to use the temporary spare wheel. › The warning label must not be covered after installing the wheel.
› Be specially attentive when driving.
› The temporary spare is inflated to the maximum inflation pressure for the
vehicle » Fig. 133 on page 151 .
› Only use this temporary spare wheel to reach the nearest specialist garage
since it is not intended for permanent use.
WARNING■ Never drive with more than one spare wheel mounted!■Never use the temporary spare wheel if it is damaged.■
If the dimensions or design of the temporary spare wheel differ from the
fitted tyres, never drive faster than 80 km/h (or 50 mph).
■
Avoid accelerating at full throttle, sharp braking and fast cornering.
CAUTION
Observe the instructions on the warning sign of the temporary spare wheel.155Wheels
Page 158 of 197
Full wheel trimRead and observe
and on page 149 first.
Pulling off
›
Hook the clamp found in the vehicle tool kit » page 159 into the reinforced
edge of the wheel trim.
›
Push the wheel wrench through the clamp, support on the tyre and pull off
the wheel trim.
Fitting
›
Press the wheel trim onto the wheel rim at the valve opening provided.
›
Then press the trim into the wheel rim until its entire circumference latches
correctly into position.
CAUTION
■ Use the pressure of your hand only, do not strike the full wheel trim. Avoid
striking the trim heavily when it is not yet inserted in the wheel rim. This could
cause damage to the guide and centring elements of the trim.■
When using the anti-theft wheel bolt, ensure that it is in the hole in the
valve area » page 162, Securing wheels against theft .
■
If wheel trims are retrofitted it must be ensured that an adequate flow of air
is assured to cool the brake system.
Wheel bolts
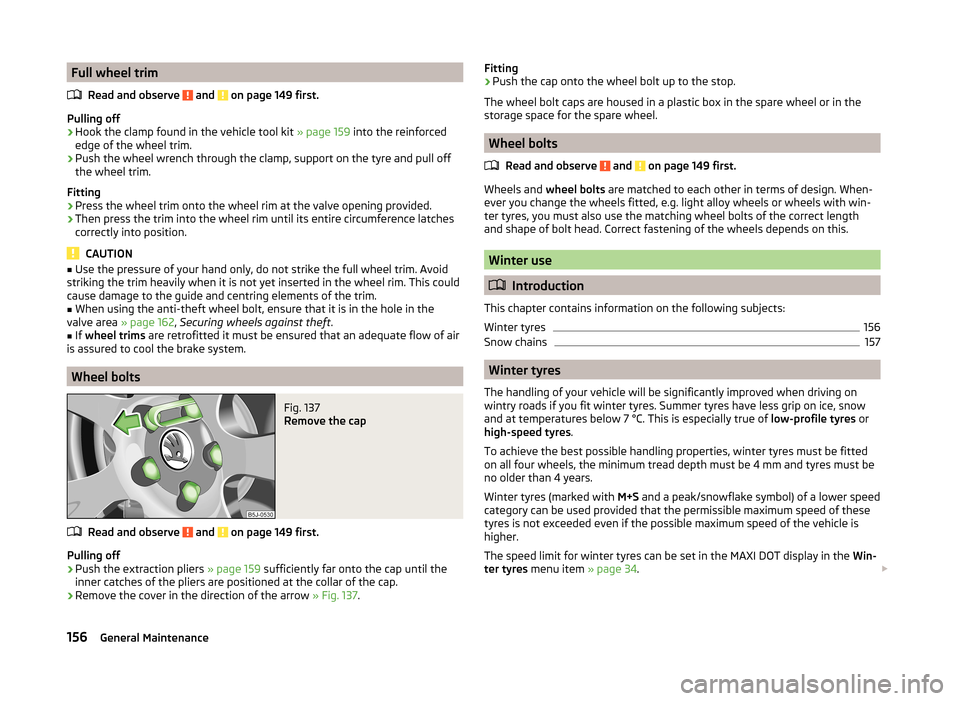
Fig. 137
Remove the cap
Read and observe and on page 149 first.
Pulling off
›
Push the extraction pliers » page 159 sufficiently far onto the cap until the
inner catches of the pliers are positioned at the collar of the cap.
›
Remove the cover in the direction of the arrow » Fig. 137.
Fitting›Push the cap onto the wheel bolt up to the stop.
The wheel bolt caps are housed in a plastic box in the spare wheel or in the
storage space for the spare wheel.
Wheel bolts
Read and observe
and on page 149 first.
Wheels and wheel bolts are matched to each other in terms of design. When-
ever you change the wheels fitted, e.g. light alloy wheels or wheels with win-
ter tyres, you must also use the matching wheel bolts of the correct length
and shape of bolt head. Correct fastening of the wheels depends on this.
Winter use
Introduction
This chapter contains information on the following subjects:
Winter tyres
156
Snow chains
157
Winter tyres
The handling of your vehicle will be significantly improved when driving on
wintry roads if you fit winter tyres. Summer tyres have less grip on ice, snow
and at temperatures below 7 °C. This is especially true of low-profile tyres or
high-speed tyres .
To achieve the best possible handling properties, winter tyres must be fitted
on all four wheels, the minimum tread depth must be 4 mm and tyres must be
no older than 4 years.
Winter tyres (marked with M+S and a peak/snowflake symbol) of a lower speed
category can be used provided that the permissible maximum speed of these
tyres is not exceeded even if the possible maximum speed of the vehicle is
higher.
The speed limit for winter tyres can be set in the MAXI DOT display in the Win-
ter tyres menu item » page 34.
156General Maintenance
Page 191 of 197
Maximum speed179
MDI99
Mirror Exterior mirrors
64
Manually dimmed rear-view mirror64
Vanity61
Mobile phone92
Connecting to the hands-free system95
Modes of the automatic transmission105
Modifications126
Multifunction display Functions
29
Memory29
Operation30
Multimedia98
N
N1
69
nameplate176
Net partition73
Behind the front seats74
Behind the rear seats73
Removing and refitting the housing74
O
Oil see Engine oil
142
Oil pressure Display messages
36
Onboard computer see Multifunction display
29
Operating weight176
Operation in winter Diesel fuel
137
Vehicle battery147
Outside temperature30
Overview Engine compartment
140
warning lights35
P
Paintwork See Caring for paintwork
130
Parking Parking aid
116
Parking lights56
Part replacement126
Passive safety Before every journey
6
Driving safety6
Safety equipment6
Passive Safety6
Payload176
Pedals104
Footmats104
Petrol refer to Fuel
136
Polishing the paintwork See Vehicle care
130
Power window force limiter53
R
Radiator fan
140
Radio reception See windows
131
Raise vehicle161
Rear-view mirror Exterior mirrors
64
Manually dimmed rear-view mirror64
Rear fog light58
Rear window - Heating61
Recirculated air mode Manual air conditioning
89
Recommended gear28
Refuelling136
Fuel136
Remote control48
Synchronisation process49
Remote control key Replacing the battery43
Repairs and technical alterations126
Replacing Vehicle battery
148
Windscreen wiper blades63
Replenishing Coolant
144
Engine oil143
Windscreen washer fluid140
Rims149
Roof luggage rack Attachment points
77
Roof rack system76
Roof load77
Running-in the first 1500 km
108
Running in Brake pads
109
Engine108
Tyres109
S
SAFE see Safe securing
46
SAFELOCK see Safe securing
46
Safe securing46
Safety6
Child safety19
Child safety seats19
Correct seated position7
Head restraints68
ISOFIX22
TOP TETHER23
Save electricity109
Seals Vehicle care
130
189Index
Page 193 of 197

TransportBoot68
Roof rack system76
Transporting children safely19
Turn signals57
Two-way radio systems92
Tyre load-bearing capacity see Wheels
152
Tyre pressure monitor Setting
154
Tyre repair Check pressure
164
Preparations163
Sealing and inflating the tyre164
Tyres149
Pressure151
Sizes151
Wear indicator151
U
Underbody protection
132
Underbody waxing132
Unleaded petrol113
unlock Central locking system
47
Unlocking Remote control
48
without central locking45
Unlocking and locking42
USB99
Useful equipment77
12-volt power outlet79
Ashtray78
Car park ticket holder80
Cigarette lighter79
Clothes hood80
Cupholders78
Using the selector lever105
V
Variable loading floor
72
Dividing the luggage compartment72
Removing and refitting72
Vehicle battery Automatic load deactivation
149
Charging148
Checking the battery electrolyte level147
Cover147
Disconnecting and reconnecting148
Operation in winter147
Replacing148
Safety instructions145
Vehicle care Alcantara
134
Care of the interior132
Decorative films131
Fabrics134
Polishing130
Rubber seals130
Seat covers134
Synthetic leather134
Underbody waxing132
Vehicle exterior care129
Waxing130
Vehicle data sticker176
Vehicle dimensions178
Vehicle Identification Number (VIN)176
Vehicle key42
Vehicle status see Auto Check Control
34
Vehicle tool kit159
Visors61
W
Warning lights
35
Warning symbols see warning lights
35
Warning triangle158
Washing126
Automatic car wash system129
by hand128
Chrome parts130
High-pressure cleaner129
Water Driving through
112
Waxing See Vehicle care
130
Wheel bolts Anti-theft wheel bolt
162
Caps156
Loosening and tightening161
Wheels Back-up wheel
155
Bolts156
Changing159
Full trim156
General information149
Load index152
Snow chains157
Spare wheel155
Speed symbol152
Storing wheels151
Swapping wheels around151
Tire size152
Tyre pressure151
Tyre service life151
Tyre wear indicator151
Unidirectional tyres154
Wheel sizes151
Winter tyres156
Window convenience operation53
Windows131
Deicing131
See Electrical power windows51
Window wipers Replacing the rear window wiper blade
63
Windscreen Deicing
131
191Index
Page 194 of 197
Windscreen washer fluidChecking140
Replenishing140
Warning light41
Winter140
Windscreen washer system140
Windscreen wash system Windscreen washer
62
Windscreen wiper Operate
62
Replacing the windscreen wiper blades63
Windscreen wipers Cleaning the windscreen wiper blades
63
Windscreen washer fluid140
Winter Deicing windows
131
Winter operation Snow chains
157
Winter tyres See Wheels
156
Winter use156
Winter tyres156
X
XDS
115
192Index