radio SKODA OCTAVIA 2008 2.G / (1Z) Columbus Navigation System Manual
[x] Cancel search | Manufacturer: SKODA, Model Year: 2008, Model line: OCTAVIA, Model: SKODA OCTAVIA 2008 2.G / (1Z)Pages: 75, PDF Size: 3.54 MB
Page 17 of 75
Selector key SETUP15
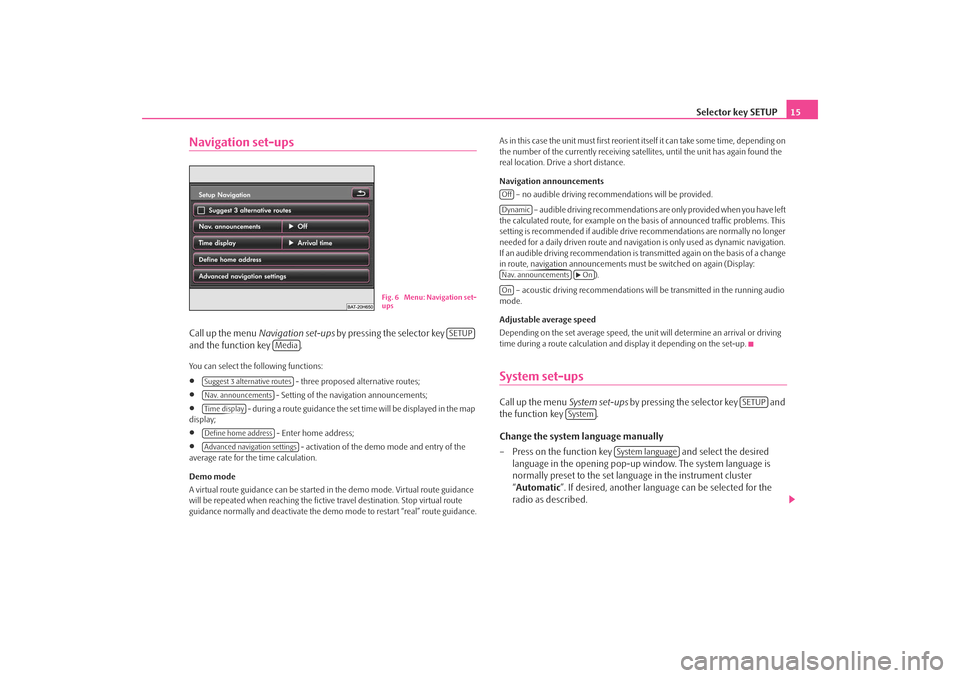
Navigation set-upsCall up the menu Navigation set-ups by pressing the selector key
and the function key .You can select the following functions:•
- three proposed alternative routes;
•
- Setting of the navigation announcements;
•
- during a route guidance the set time will be displayed in the map
display;
•
- Enter home address;
•
- activation of the demo mode and entry of the
average rate for the time calculation.
Demo mode
A virtual route guidance can be started in the demo mode. Virtual route guidance
will be repeated when reaching the fictiv e travel destination. Stop virtual route
guidance normally and deactivate the demo mode to restart “real” route guidance. As in this case the unit must first reorient itself it can take some time, depending on
the number of the currently receiving satellites, until the unit has again found the
real location. Drive a short distance.
Navigation announcements
– no audible driving recomme ndations will be provided.
– audible driving recommendations are only provided when you have left
the calculated route, for example on the basis of announced traffic problems. This
setting is recommended if audible drive recommendations are normally no longer
needed for a daily driven route and navigati on is only used as dynamic navigation.
If an audible driving recommendation is transmitted again on the basis of a change
in route, navigation announcements mu st be switched on again (Display:
).
– acoustic driving recommendations wi ll be transmitted in the running audio
mode.
Adjustable average speed
Depending on the set average speed, the unit will determine an arrival or driving
time during a route calculation and display it depending on the set-up.
System set-upsCall up the menu System set-ups by pressing the selector key and
the function key .
Change the system language manually
– Press on the function key and select the desired
language in the opening pop-up window. The system language is
normally preset to the set language in the instrument cluster
“ Automatic ”. If desired, another langua ge can be selected for the
radio as described.
Fig. 6 Menu: Navigation set-
ups
SETUP
Media
Suggest 3 alternative routesNav. announcementsTime displayDefine home addressAdvanced navigation settings
OffDynamicNav. announcements
On
On
SETUP
System
System language
s2u4.6.book Page 15 Wednesday, August 13, 2008 7:57 AM
Page 18 of 75
Selector key SETUP
16
Changing system set-ups
– Press on one of the function keys and select the desired setting in the pop-up window.
– You will therefore set a voice response for the spoken text and the displays in the touch-screen, chan ge the distance and temperature
setting or the time and date format.
Resetting the factory settings on the unit
– Press on the function key in the menu System set-ups .
– Now find the settings you wish to reset.
– If you press on the function key and confirm the following safety interrogation the selected settings will reset the factory settings
and all the stored data will be erased.
Time display*
– Press on the function key in the menu System set-ups .
– Time display in the operating modes radio, media and map.“ Time ” and “ Date” settings need only be carr ied out manually under certain
circumstances. Time and date will norma lly be accepted automatically from the
vehicle into the unit.Video set-upsVideo set-ups is called up by pressing the selector key and the
function key .
Changing voice response
– Press the function key , or in
the menu Video set-ups and select the desired language in the pop-up
window. – Pressing will fully switch
off the display of sub-titles.
Changing the aspect ratio of the touch-screen display
– The currently set aspect ratio is visible behind the function key .
– Press on the function key and on or in the pop- up window. All video data will now be replayed in the set aspect ratio.
Set-ups for vehicles with TV tuner
If a TV tuner is connected to the unit, you will find here further set-up possibilities.Phone set-upsCall up the menu Phone set-ups by pressing the selector key and
the function key .
Updating phone data in the unit
– Press on the function key to update all entries in
the unit, the phone book of the mobile phone or the SIM card entered
since the last connection. This procedure can take a few minutes.
– Confirm the following safety interrogation. The “old” data in the phone book can still be selected at the unit while the data is being
updated.
Deleting call lists
– Press the function key .
– If you confirm the following safe ty interrogation by pressing ,
the stored call numbers of all calls made and calls accepted in the unit
will be deleted.
Fa c t o r y s e t t i n g s
Reset
Time display
SETUP
Video
Audio language
Menu language
Subtitle
Off
DVD-Format
DVD format
4:3
16:9
SETUP
Te l e p h o n e
Load telephone book
Delete call list
Delete
s2u4.6.book Page 16 Wednesday, August 13, 2008 7:57 AM
Page 20 of 75
RADIO selector key
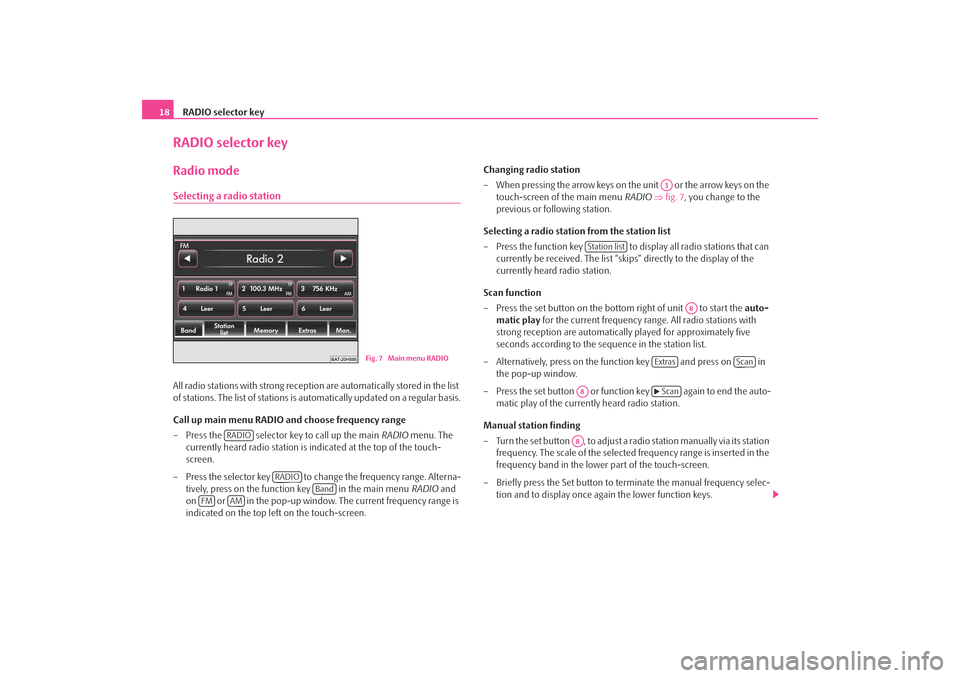
18RADIO selector keyRadio modeSelecting a radio stationAll radio stations with strong reception are automatically stored in the list
of stations. The list of stations is automatically updated on a regular basis.
Call up main menu RADIO and choose frequency range
– Press the selector key to call up the main RADIO menu. The
currently heard radio station is indicated at the top of the touch-
screen.
– Press the selector key to change the frequency range. Alterna- tively, press on the function key in the main menu RADIO and
on or in the pop-up window. The current frequency range is
indicated on the top left on the touch-screen. Changing radio station
– When pressing the arrow keys on th
e unit or the arrow keys on the
touch-screen of the main menu RADIO ⇒ fig. 7 , you change to the
previous or following station.
Selecting a radio station from the station list
– Press the function key to display all radio stations that can currently be received. The list “skips” directly to the display of the
currently heard radio station.
Scan function
– Press the set button on the bottom right of unit to start the auto-
matic play for the current frequency range. All radio stations with
strong reception are automatically played for approximately five
seconds according to the sequence in the station list.
– Alternatively, press on the function key and press on in the pop-up window.
– Press the set button or function key again to end the auto- matic play of the currently heard radio station.
Manual station finding
– Turn the set button , to adjust a radio station manually via its station
frequency. The scale of the selected frequency range is inserted in the
frequency band in the lower part of the touch-screen.
– Briefly press the Set button to terminate the manual frequency selec- tion and to display once again the lower function keys.
Fig. 7 Main menu RADIO
RADIO
RADIO
Band
FM
AM
A3
Station list
A8
Extras
Scan
A8
Scan
A8
s2u4.6.book Page 18 Wednesday, August 13, 2008 7:57 AM
Page 21 of 75
RADIO selector key19
Note
•
If “ memory ” appears at the top left of the touch-screen, you can only change
over to the stations stored in the memory list with the help of the arrow keys.
Storing a radio stationStoring a radio station on a displayed station key
– Continue to press one of the six station keys to displayed in the main menu RADIO until a signal tone sounds. The currently heard
radio station is then stored on this station key.
Storing a radio station
– Press the function key in the main menu RADIO to open the
memory list ⇒page 18, fig. 7 .
– Press the function key to ensure that the displayed radio station (Example: “ Radio 2”) is safely stored in a memory space.
– Select a memory space from the list by pressing the respective key in the menu select memory space. If a memory space is selected, which
already holds a radio station, it will be overwritten.
Deleting a radio station from the memory list
–Open the memory list.
– Press the function key behind the station you wish to delete.
– Confirm the safety interrogation by pressing to remove the station finally from the memory list.
Calling up a stored radio stationIf the currently heard radio station is already stored in the memory list, the
memory space number is displayed behind the description of the
frequency range ( FM or AM).
Calling up a station via the station keys
– Briefly press one of the six station keys to displayed in the main menu RADIO until a signal tone sounds.
Calling up a stored stations from the memory list
– Press to open the memory list.
– Press the display of the desire d station in the memory list.RDS functionRDS (“Radio Data System”) serves to transmit program identification and additional
services therefore also enabling automatic tracking of stations.
In the event of sufficiently satisfactory reception the suitable RDS radio stations will
display the station name instead of the station frequency.
If a radio station sends additional inform ation via the RDS function while a station
is being stored, it can occur that the name of the radio station is later displayed
incorrectly in the memory list.
Changing station name
You can manually adapt the station name.
Choose the stored radio station and wait until the correct name is displayed on the
touch-screen. Continue to press on the display of the station name between the
arrow keys until “ Station name stored ” is displayed.
1 ...
6 ...
Memory
Save
Delete
1 ...
6 ...
Memory
s2u4.6.book Page 19 Wednesday, August 13, 2008 7:57 AM
Page 22 of 75
RADIO selector key
20Traffic information function TPSwitching traffic information TP (Traffic Program) on or off
– Press the selector key to call up the main RADIO menu.
– Press the function key .
– Briefly press on in the opening pop-up window to switch the traffic information on or off. The display “ TP” in combination with a station name (e. g. in the station or memory
list), indicates a traffic information station.
Irrespective of which radio station is heard, an additional receiver part in the unit
ensures that a traffic information station can always be received as long as the traffic
information function is switched on.
The functionality of the function for the traffic information “ TP” is displayed at the
top right in the touchscreen.
If no traffic information st ation can be received becaus e, for example, radio recep-
tion is interrupted in general, “ No TP” will be displayed instead of “TP ”. Remember
that car parks, tunnels, high buildings or mountains can interrupt the radio signal
up to the total loss of reception.
Incoming traffic announcement
If you wish to interrupt the transmission of the traffic announcement, press on the
function key in the pop-up window Traffic announcement. The traffic infor-
mation function remains available and a following traffic announcement is made
again while the audio mode is in op eration. Pressing the function key
will switch off the traffic information function permanently.
RADIO
Extras
TP
Cancel
TP deactivateds2u4.6.book Page 20 Wednesday, August 13, 2008 7:57 AM
Page 23 of 75
Selector key TRAFFIC21
Selector key TRAFFICDisplaying TMC traffic reportsTMC traffic reports are used during route guidance, depending on set-up
for the automatic optimization of the route, to report possible traffic
problems.
– Press the function key to display the current traffic reports in a list.
– Press on the display of a traffic report to show it in a detailed display.
– You can browse though all the traffic information received In the detailed display, also in sequence by using the arrow keys.From which TMC station the reports are to be announced can be determined in the
Radio set-ups .
During route guidance all set-up dependin g TMC traffic reports are displayed in the
surrounding area of the location or only th ose specified on the calculated route list.
Traffic problems are illustrated in the de tailed display and in the map by a corre-
sponding symbol. The direction, in which a traffic problem is found in the map will
be displayed by an arrow in the symbol.
In the event of a traffic problem an alternative route can also be calculated manu-
ally.
Note
•
The unit has a continuous background of TMC traffic reports providing a TMC
station at the current location can be rece ived. The station you are listening to does
not have to be a TMC station.
•
TMC traffic reports can only be evaluate d and displayed by the unit if the navi-
gation data for the currentl y driven area is stored in the unit memory or can be
called up via an inserted navigation DVD.
•
The quality of the dynamic route guidance depends on the transmitted traffic
announcements. The radio stations broadcas ting this information are responsible
for the content.
•
TMC traffic reports are necessary for the dynamic Navigation.
•
There may not be any advantantage in avoiding the traffic jam if, as a result of
the TMC traffic reports, the dive rsion is also heavily congested.
TRAFFIC
s2u4.6.book Page 21 Wednesday, August 13, 2008 7:57 AM
Page 26 of 75
Selector key MEDIA
24restrictions, via the radio navigation unit and depends largely on the type of the
connection.
Selectable video sources in the Video DVD menu
– changes over to an optionally connected external video source.
– if a TV Tuner* is connected, it is changed in the TV mode ⇒page 33.
– changes over to a Video-DVD ⇒page 31 inserted into the internal CD/DVD
drive.
Additional function keys in the audio menu
– changes over into the Video DVD menu and plays the last selected video
source.
– opens a pop-up window in which the repeating function determines
whether the or the (in audio CD operation) respectively the current (in the MP3 operation ⇒page 26) should be repeated.
– opens a pop-up window in which the random play function Mix or the
automatic play Scan can be started or the ca pacity of the hard disk HDD capacity
can be displayed.
– opens the title list of the current audio source in order to choose
another title or audio source.
Additional function keys in the Video DVD menu
– changes to the Audio menu and plays the last selected video source.
– switches over the Video DVD played in the internal CD/DVD drive to the
menu selection of the film and also opens the incorporated menu control.
– opens a set-up menu to adapt the display set-ups for the current film. – opens the chapter selection for th e Video DVD played in the internal
CD/DVD drive.
Inserting or ejecting a CD/DVDInserting a CD/DVD
– Push a CD/DVD with the written side facing up as far as possible into
the CD/DVD case until it is automatically drawn in. The play function
will start automatically.
Ejecting a CD/DVD
– Press the button to move the CD/DVD in the internal CD/DVD drive into the Eject position.If a CD/DVD is not removed when ejected, it will be reinserted after approximately
ten seconds for safety reasons.
Playable MP3 and WMA data can also be stored on the hard disk of the unit
⇒ page 29.
WMA Data (Windows Media Audio)
The copyright of audi o data compressed by Windows Media Audio, can also be
protected by the DRM procedure ( Digital Rights Management). Such WMA data is
not supported by the unit.Inserting or removing a memory card Inserting a memory card
– Push the memory card into the me mory card case with the trimmed
edge to the front right (horizontal case) or to the front top (vertical
case), until it is locked in position . The play function will start automat-
ically.
Taking out a memory card
– Press against the spring resistance of the inserted memory card, the memory card “skips” back into the Eject position.
AVTVDVDVideoRepeat
title
CD
folderExtrasSelectionAudioMenuDisplayChapter
s2u4.6.book Page 24 Wednesday, August 13, 2008 7:57 AM
Page 30 of 75
Selector key MEDIA
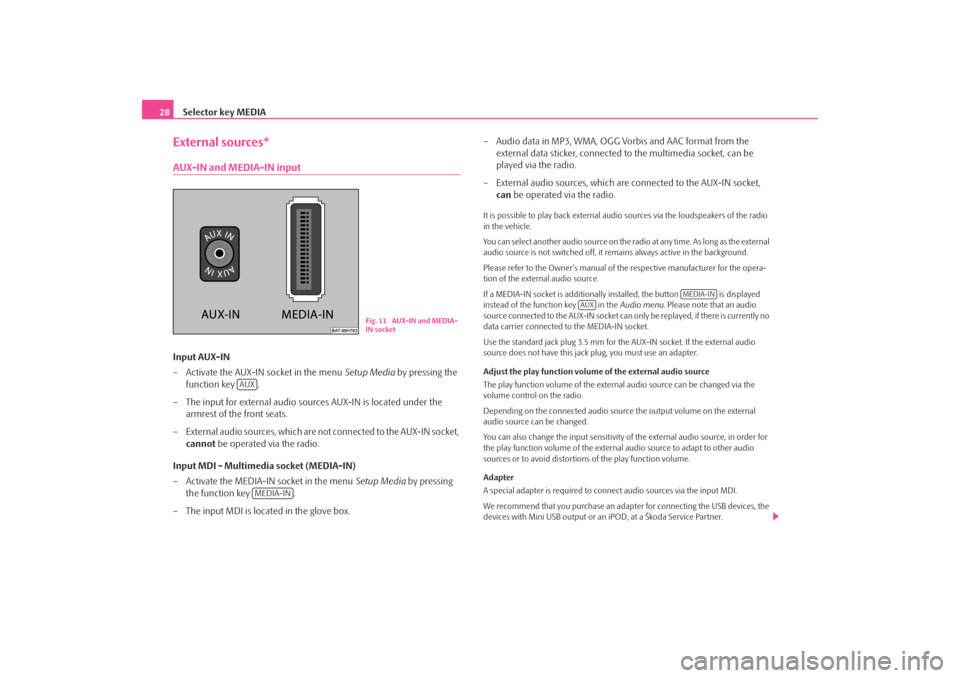
28External sources*AUX-IN and MEDIA-IN inputInput AUX-IN
– Activate the AUX-IN socket in the menu Setup Media by pressing the
function key .
– The input for external audio sources AUX-IN is located under the armrest of the front seats.
– External audio sources, which are no t connected to the AUX-IN socket,
cannot be operated via the radio.
Input MDI - Multimedia socket (MEDIA-IN)
– Activate the MEDIA-IN socket in the menu Setup Media by pressing
the function key .
– The input MDI is located in the glove box. – Audio data in MP3, WMA, OGG Vorbis and AAC format from the
external data sticker, connected to the multimedia socket, can be
played via the radio.
– External audio sources, which are connected to the AUX-IN socket,
can be operated via the radio.
It is possible to play back external audio sources via the loudspeakers of the radio
in the vehicle.
You can select another audio source on the ra dio at any time. As long as the external
audio source is not switched off, it re mains always active in the background.
Please refer to the Owner's manual of the respective manufacturer for the opera-
tion of the external audio source.
If a MEDIA-IN socket is additionally installed, the button is displayed
instead of the function key in the Audio menu. Please note that an audio
source connected to the AUX-IN socket can on ly be replayed, if there is currently no
data carrier connected to the MEDIA-IN socket.
Use the standard jack plug 3.5 mm for the AUX-IN socket. If the external audio
source does not have this jack plug, you must use an adapter.
Adjust the play function volume of the external audio source
The play function volume of the external audio source can be changed via the
volume control on the radio.
Depending on the connected audio source the output volume on the external
audio source can be changed.
You can also change the input sensitivity of the external audio source, in order for
the play function volume of the external audio source to adapt to other audio
sources or to avoid distortions of the play function volume.
Adapter
A special adapter is required to connect audio sources via the input MDI.
We recommend that you purchase an adap ter for connecting the USB devices, the
devices with Mini USB output or an iPOD, at a Škoda Service Partner.
Fig. 11 AUX-IN and MEDIA-
IN socket
AUX
MEDIA-IN
MEDIA-IN
AUX
s2u4.6.book Page 28 Wednesday, August 13, 2008 7:57 AM
Page 31 of 75
Selector key MEDIA29
Conditions for proper connection•
Only USB devices with the spec ification 2.0 can be connected.
•
The version of the file allocation tabl e FAT (File Allocation Table) of the
connected device must be FAT16 (< 2 GB) or FAT32 (> 2 GB).
•
In order to replay from a unit with a hard disk (HDD) which includes a large data
volume, it can lead to a time delay when reading in the overview of the music data.
•
In order to replay from a unit, which includes a complicated folder structure, it
can lead to a time delay when readin g in the overview of the music data.
•
The folder structure in the connected unit must not exceed a depth of 8 levels.
One folder must not contain more than 1°000° data.
•
A USB extension cable or USB distributo r (HUB) must not be used to connect
the unit.
WARNING
•
On no account place an external audio source on the dash panel. You
could make sudden manoeuvres in th e passenger compartment and injure
the occupants.
•
On no account place an external audio source close to the airbags. You
could be thrown back in the passen ger compartment by the airbags being
deployed and injure the occupants.
•
You must not hold the external audio source in the hand or on the knees
while driving. You could make sudden manoeuvres in the passenger
compartment and injure the occupants.
•
Always guide the connection cable of th e external audio source in such a
way that is does not restrict you when driving.Caution
The AUX-IN socket must only be used for audio sources!
Note
•
The external audio source, which is conne cted via AUX-IN, can only be used if
no unit is connected via MDI at the same time.
•
If an external audio source is connected via AUX-IN, which is equipped with an
adapter for external power supply, it can o ccur that the audio signal is interrupted.
This depends on the quality of the adapter which is used.
•
The loudspeakers in the vehicle are matched to a power output of the radio of
30°W.
Storing and processing audio data (HDD)Storing MP3 and WMA data on the hard disk (HDD)Selecting titles or folders to be stored
– Check the available audio sources fo r titles or folders which you may
wish to store on the hard disk. You can select the complete contents of
an installed data carrier for storing on the hard disk in the selection
window of the available audio sources.
– If you press the function key behind the display of a title or folder, a pop-up window will open.
– Pressing in the pop-up window will start the play function.
– Press in the pop-up window to store the respective title or
folder on the hard disk.
– Press in the following pop-up window for confirmation that you have taken note of the message.
Selecting storage space and store titles
– Press , if the title or folder should be stored
directly on the first level, which is the root folder of the hard disk. In
this connection please observe ⇒page 27, “Playing sequence of MP3
data and folders”.
Play
CopyContinueDrop file/folder here
s2u4.6.book Page 29 Wednesday, August 13, 2008 7:57 AM
Page 35 of 75
Selector key MEDIA33
TV mode*Explanation of the technical terms“Terrestrial television” or DVB-T (Digital Video Broadcasting-Terrestric)
With DVB-T, digital television signals are transmitted terrestrially (earthbound) and
can also be received via an aerial. DVB-T therefore offers mobile reception of high
quality without the need of a fixed aerial connection. DVB-T is therefore described
as “Terrestrial television”.
Advantages of DVB-T
In addition to a significant gain in quality, the transmitter capacity of a television
channel can be realised more effectivel y through digital transmitter technology
rather than analog signals. The greater da ta rate enables several programs of one
television channel to be transmitted bund led in one data flow (so called “Multi-
plex”). Part of the transmitter capacity can also be used for additional services, e.g.
electronic program guides or radio.
“Hybrid tuner” for analog and digital reception
The supply of DVB-T has up to now been restricted to densely populated regions,
so that an analog television receiver in the vehicle is still a prerequisite. It is for this
reason that a Hybrid tuner was developed for the unit, which consists of a
common analog TV receiver and a DVB-T receiver.
Display of analog and digital TV stations
The TV stations, which can be received, are indicated in the display of the combina-
tion instrument and when switching over and calling up the TV menus on the
screen. Analog and digital TV stations are displayed differently and are marked
⇒ page 34, “Displays in TV mode” on the touch-screen with “ Analog” or “DVB-
T ”.
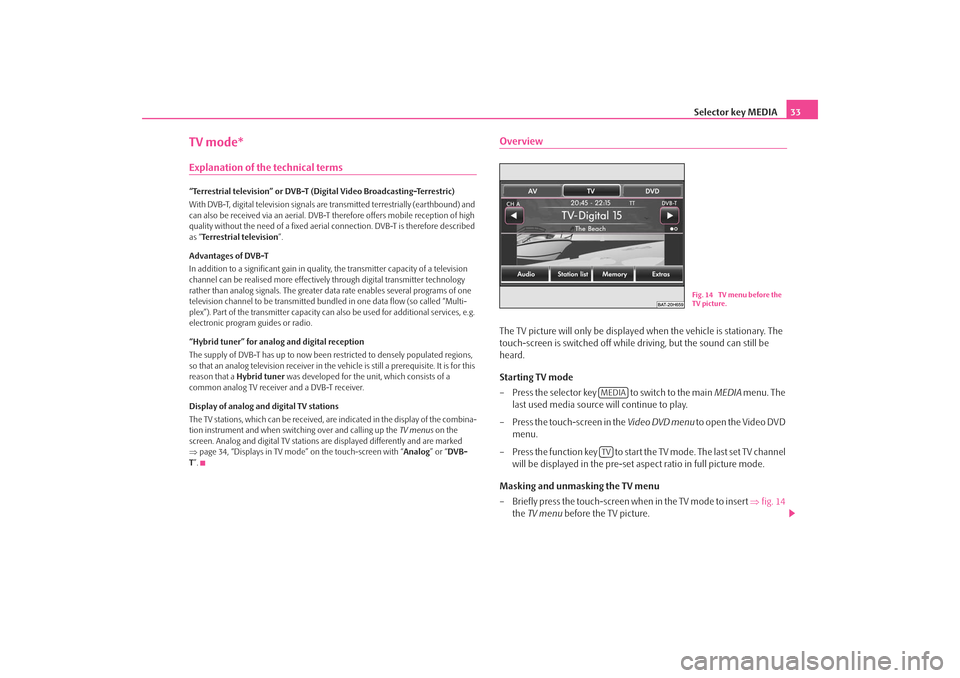
OverviewThe TV picture will only be displaye d when the vehicle is stationary. The
touch-screen is switched off while driving, but the sound can still be
heard.
Starting TV mode
– Press the selector key to switch to the main MEDIA menu. The
last used media source will continue to play.
– Press the touch-screen in the Video DVD menu to open the Video DVD
menu.
– Press the function key to start the TV mode. The last set TV channel will be displayed in the pre-set aspect ratio in full picture mode.
Masking and unmasking the TV menu
– Briefly press the touch-screen when in the TV mode to insert ⇒fig. 14
the TV menu before the TV picture.
Fig. 14 TV menu before the
TV picture.
MEDIATV
s2u4.6.book Page 33 Wednesday, August 13, 2008 7:57 AM