SKODA OCTAVIA 2012 3.G / (5E) Owner's Manual
Manufacturer: SKODA, Model Year: 2012, Model line: OCTAVIA, Model: SKODA OCTAVIA 2012 3.G / (5E)Pages: 222, PDF Size: 13.52 MB
Page 111 of 222
CAUTION■If the lever is held firm and not pushed downwards as far as it can go, it will go
back up after the ball rod is removed and will not latch into the ready position.
The ball rod then needs to be brought into this position before the next time it is installed.■
Stow the ball rod in the ready position with the key inserted in the box. When
doing so, make the side opposite to the inserted key face downwards - risk of damaging the key!
■
Do not use excessive force when handling the operating lever (e.g. do not climb
on it)!
Note
Remove any dirt from the ball rod before stowing it away in the box with the ve-
hicle tool kit.
Operation and maintenance
First read and observe the introductory information and safety warn-ings
on page 106.
Seal the mounting recess with the cap to prevent any ingress of dirt.
Always check the ball head before hitching a trailer. Use a suitable lubricating grease where necessary.
Include the protective cap when stowing away the ball rod to protect the boot
from getting contaminated.
In the event of dirt, clean the surfaces of the mounting recess and treat with a
suitable preservative.
CAUTION
Apply lubricating grease to the upper part of the mounting recess. Make sure you
do not remove any grease.
Loading a trailer
The vehicle/trailer combination must be balanced. whereby the maximum permis- sible drawbar load must be utilised. If the drawbar load is too low, it jeopardisesthe performance of the vehicle/trailer combination.
Distribution of the load
Distribute the load in the trailer in such a way that heavy items are located as
close to the axle as possible. Secure the items from slipping.
The distribution of the weight is very poor if your vehicle is unladen and the trail-
er is laden. Drive at a particularly low speed if you cannot avoid driving with this
combination.
Tyre pressure
Correct the tyre inflation pressure on your vehicle for a “full load” » page 182,
Tyre life .
Trailer load
The permissible trailer load must not be exceeded under any circumstan-
ces » page 207 , Technical data .
The trailer loads specified apply only to altitudes up to 1 000 metres above mean
sea level.
The engine output falls as the height increases, as does the ability to climb.
Therefore, for every additional 1 000 m in height (every one begun), the maximum
permissible towed weight must be reduced by 10 %.
The towed weight comprises the actual weight of the (loaded) towing vehicle and the (loaded) trailer.
The trailer and drawbar load information on the type plate of the towing device are merely test data for the towing device. The vehicle-specific values are de-tailed in the vehicle documents.WARNING■ Do not exceed the maximum permissible axle and drawbar load and the
maximum permissible total or towed weight of the vehicle and the trailer -
risk of accident and serious injuries!■
Always drive particularly carefully with the trailer.
■
Slipping loads can significantly affect the stability and safety of the vehicle/
trailer combination - risk of accident and serious injuries!
109Towing a trailer
Page 112 of 222
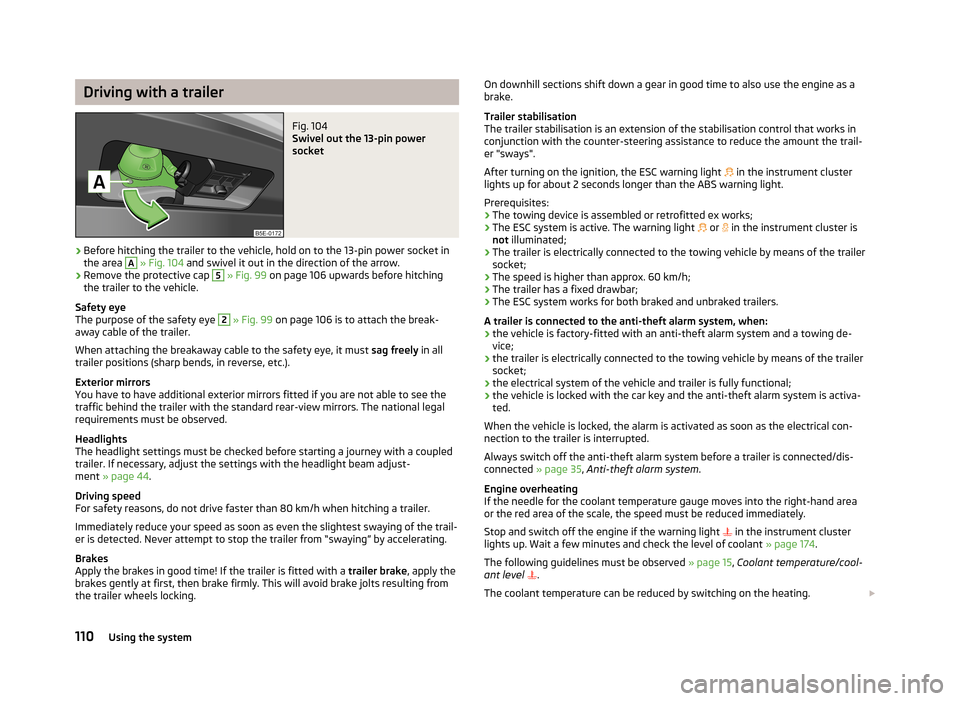
Driving with a trailerFig. 104
Swivel out the 13-pin power
socket
›
Before hitching the trailer to the vehicle, hold on to the 13-pin power socket in the area
A
» Fig. 104 and swivel it out in the direction of the arrow.
›
Remove the protective cap
5
» Fig. 99 on page 106 upwards before hitching
the trailer to the vehicle.
Safety eye
The purpose of the safety eye
2
» Fig. 99 on page 106 is to attach the break-
away cable of the trailer.
When attaching the breakaway cable to the safety eye, it must sag freely in all
trailer positions (sharp bends, in reverse, etc.).
Exterior mirrors
You have to have additional exterior mirrors fitted if you are not able to see the
traffic behind the trailer with the standard rear-view mirrors. The national legal
requirements must be observed.
Headlights
The headlight settings must be checked before starting a journey with a coupled
trailer. If necessary, adjust the settings with the headlight beam adjust-
ment » page 44 .
Driving speed
For safety reasons, do not drive faster than 80 km/h when hitching a trailer.
Immediately reduce your speed as soon as even the slightest swaying of the trail- er is detected. Never attempt to stop the trailer from “swaying” by accelerating.
Brakes
Apply the brakes in good time! If the trailer is fitted with a trailer brake, apply the
brakes gently at first, then brake firmly. This will avoid brake jolts resulting from
the trailer wheels locking.
On downhill sections shift down a gear in good time to also use the engine as a
brake.
Trailer stabilisation
The trailer stabilisation is an extension of the stabilisation control that works in
conjunction with the counter-steering assistance to reduce the amount the trail-
er "sways".
After turning on the ignition, the ESC warning light in the instrument cluster
lights up for about 2 seconds longer than the ABS warning light.
Prerequisites: › The towing device is assembled or retrofitted ex works;
› The ESC system is active. The warning light
or in the instrument cluster is
not illuminated;
› The trailer is electrically connected to the towing vehicle by means of the trailer
socket;
› The speed is higher than approx. 60 km/h;
› The trailer has a fixed drawbar;
› The ESC system works for both braked and unbraked trailers.
A trailer is connected to the anti-theft alarm system, when: › the vehicle is factory-fitted with an anti-theft alarm system and a towing de-
vice;
› the trailer is electrically connected to the towing vehicle by means of the trailer
socket;
› the electrical system of the vehicle and trailer is fully functional;
› the vehicle is locked with the car key and the anti-theft alarm system is activa-
ted.
When the vehicle is locked, the alarm is activated as soon as the electrical con-
nection to the trailer is interrupted.
Always switch off the anti-theft alarm system before a trailer is connected/dis- connected » page 35, Anti-theft alarm system .
Engine overheating
If the needle for the coolant temperature gauge moves into the right-hand area or the red area of the scale, the speed must be reduced immediately.
Stop and switch off the engine if the warning light
in the instrument cluster
lights up. Wait a few minutes and check the level of coolant » page 174.
The following guidelines must be observed » page 15, Coolant temperature/cool-
ant level
.
The coolant temperature can be reduced by switching on the heating. 110Using the system
Page 113 of 222
WARNING■Never use the safety eye to tow a vehicle!■The increased safety offered by the trailer stabilisation must not tempt you
to take greater risks than otherwise.■
Adapt your speed to the conditions of the road surface and to the traffic sit-
uation.
■
Improper or incorrectly connected electric cables can energise the trailer and
cause functional faults to the vehicle's entire electrical system as well as acci-
dents and severe injuries.
■
All work on the electrical system must be carried out only by ŠKODA special-
ist garages.
■
Never directly connect the trailer's electrical system with the electrical con-
nections for the tail lights or other current sources.
CAUTION
■ The trailer stabilisation need not be able to correctly detect all of driving situa-
tions.■
Trailers that sway slightly are not always detected by the trailer stabilisation
and thus are not stabilised accordingly.
■
Release the pressure on the accelerator pedal if the system is being regulated.
■
Avoid abrupt and sudden driving/braking manoeuvres.
Note
■ Contact between the breakaway cable and the safety eye can result in mechan-
ical wear on the protective surface of the eye. Such wear does not impair the
functioning of the safety eye and is not a fault. It is excluded from the warranty
coverage.■
If you tow a trailer frequently, have your car inspected between service inter-
vals too.
■
The handbrake on the towing vehicle must be put on when coupling and decou-
pling the trailer.
■
For technical reasons, trailers with rear LED lights cannot be connected to the
anti-theft alarm system.
111Towing a trailer
Page 114 of 222
Assist systems
Brake assist systems
Introduction
This chapter contains information on the following subjects:
Stabilisation Control (ESC)
112
Antilock brake system (ABS)
113
Traction control system (TCS)
113
Electronic differential lock (EDL)
114WARNING■ A lack of fuel can cause irregular engine running or cause the engine to shut
down. The brake assist systems would then be without function – risk of acci-
dent!■
Adjust the speed and driving style to the current visibility, weather, road and
traffic conditions. The increased safety offered by the brake assist systems must not tempt you to take greater risks than otherwise – risk of an accident!
■
In the event of an ABS fault, visit a ŠKODA specialist garage immediately.
Adjust your style of driving according to the damage to the ABS as you will not know how great the damage is and the limitation it is placing on the braking
efficiency.
CAUTION
■ All four wheels must be fitted with the same tyres approved by the manufactur-
er to ensure the brake assist systems operate correctly.■
Changes to the vehicle (e.g. to the engine, brakes, chassis) can influence the
functionality of the brake assist systems » page 165.
Note
If a fault occurs in the ABS system, the ESC, ASR and EDL also do not work. An
ABS fault is indicated with the warning light » page 17 .
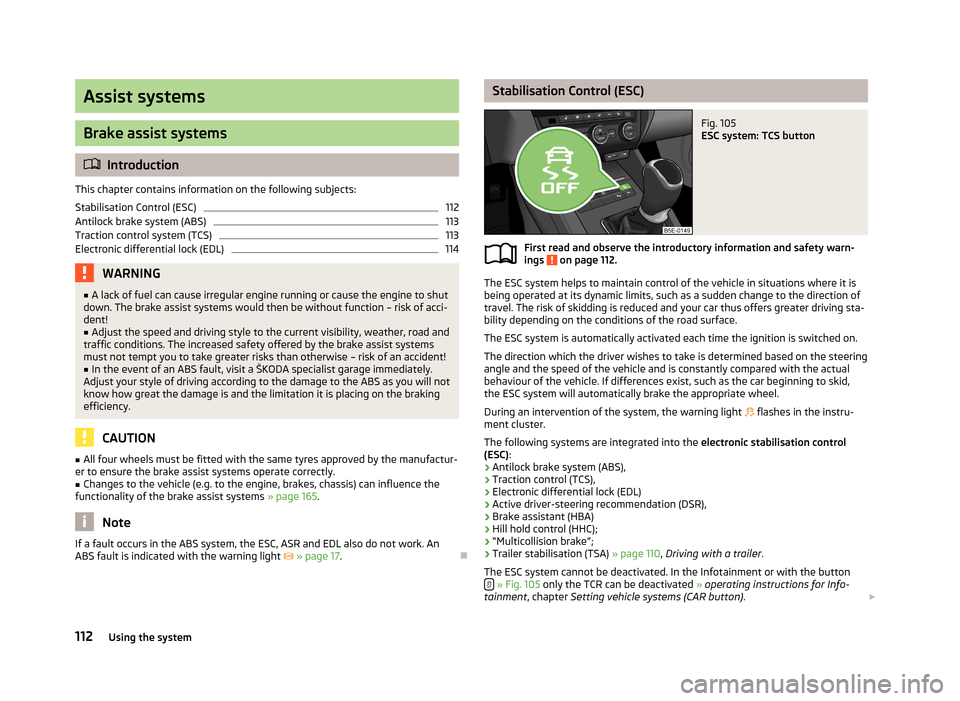
Stabilisation Control (ESC)Fig. 105
ESC system: TCS button
First read and observe the introductory information and safety warn-
ings on page 112.
The ESC system helps to maintain control of the vehicle in situations where it is
being operated at its dynamic limits, such as a sudden change to the direction of
travel. The risk of skidding is reduced and your car thus offers greater driving sta-
bility depending on the conditions of the road surface.
The ESC system is automatically activated each time the ignition is switched on.The direction which the driver wishes to take is determined based on the steering angle and the speed of the vehicle and is constantly compared with the actualbehaviour of the vehicle. If differences exist, such as the car beginning to skid,
the ESC system will automatically brake the appropriate wheel.
During an intervention of the system, the warning light
flashes in the instru-
ment cluster.
The following systems are integrated into the electronic stabilisation control
(ESC) :
› Antilock brake system (ABS),
› Traction control (TCS),
› Electronic differential lock (EDL)
› Active driver-steering recommendation (DSR),
› Brake assistant (HBA)
› Hill hold control (HHC);
› “Multicollision brake”;
› Trailer stabilisation (TSA)
» page 110, Driving with a trailer .
The ESC system cannot be deactivated. In the Infotainment or with the button
» Fig. 105 only the TCR can be deactivated » operating instructions for Info-
tainment , chapter Setting vehicle systems (CAR button) .
112Using the system
Page 115 of 222
The warning light lights up in the instrument cluster when the TCR is deactiva-
ted.
Active driver-steering recommendation (DSR) The DSR indicates to the driver in critical situations a steering recommendation in
order to stabilise the vehicle. The DSR is activated, for example, on the right and
left vehicle side when braking sharply on different road surfaces.
Hydraulic brake assist (HBA)
The HBA is activated by the very quick operation of the brake pedal. HBA increa- ses the braking effect and helps to shorten the braking distance. To achieve the
shortest possible braking distance, the brake pedal must be applied firmly until the vehicle has come to a complete standstill.
The ABS is activated faster and more effectively with the intervention of the HBA. The HBA is automatically switched off when the brake pedal is released.
Hill hold control (HHC)
The HHC makes it easier to start off on steep hills. The system holds the brake
pressure produced by the activation of the brake pedal for approx. 2 seconds af-
ter the brake pedal is released. The driver can therefore move his foot from the
brake pedal to the accelerator pedal and start off on the slope, without having to
actuate the handbrake.
The brake pressure drops gradually the more you operate the accelerator pedal. If the vehicle does not start off within 2 seconds, it starts to roll back.
The HHC is active as of a 5 % slope, if the driver door is closed. HHC is always ac- tive on slopes when in forward or reverse start off. When driving downhill, it is in-
active.
“Multicollision brake”
The multifunction brake deploys automatic braking after a collision in order to re-
duce the risk of further collisions. Automatic braking can only be deployed at
speeds of over 10 km/h in the event of a frontal or side impact.
The vehicle is slowed down automatically by the ESC system as long as the brakes, the ESC and the requisite electrical system remains operational post-im-
pact.
Automatic braking is not applied if the driver presses the accelerator during the
accident.
Antilock brake system (ABS)
First read and observe the introductory information and safety warn-
ings
on page 112.
ABS prevents the wheels locking when braking. Thus helping the driver to main-
tain control of the vehicle.
The intervention of the ABS is noticeable from the pulsating movements of the
brake pedal which is accompanied by noises.
When the ABS system is active, do not brake periodically or reduce the pressure
on the brake pedal.
Traction control system (TCS)
Fig. 106
TCS button
First read and observe the introductory information and safety warn- ings on page 112.
If the wheels are slipping, the TCS system adapts the engine speed to the condi-
tions of the road surface. The TCS makes it much easier to start off, accelerate
and climb steep hills even if the conditions of the road surface are unfavourable.
The TCS function is automatically activated each time the ignition is switched on.
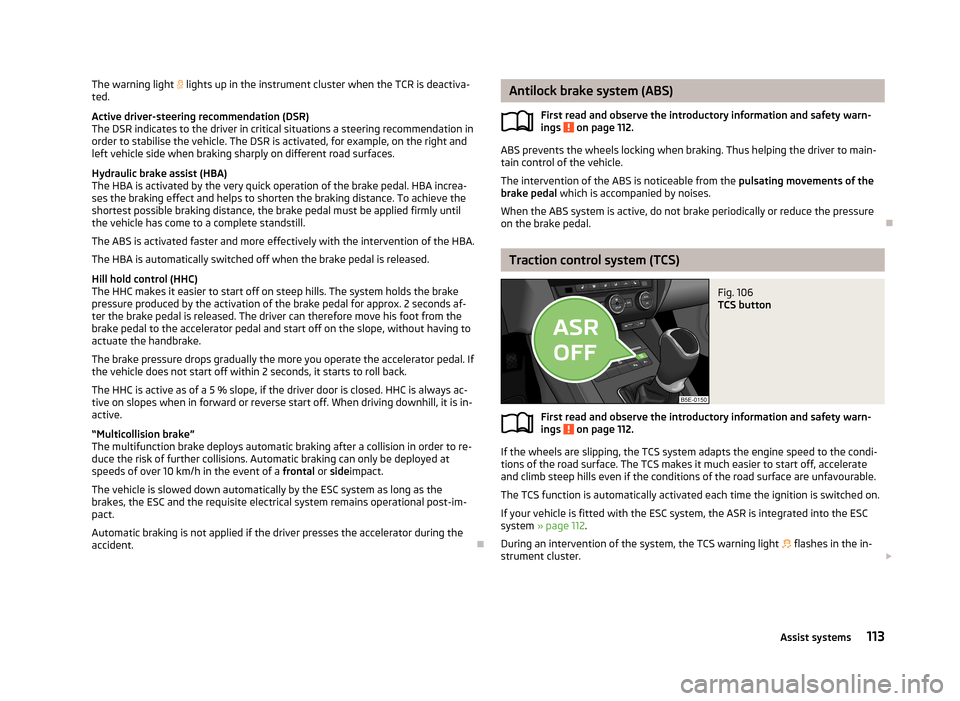
If your vehicle is fitted with the ESC system, the ASR is integrated into the ESC
system » page 112 .
During an intervention of the system, the TCS warning light flashes in the in-
strument cluster.
113Assist systems
Page 116 of 222
The TCS should normally always be switched on. It may be advisable to switch off
the system only in exceptional circumstances, such as:
› when driving with snow chains;
› when driving in deep snow or on a very loose surface;
› when it is necessary to “rock a vehicle free” when it has got stuck.
The TCR can be deactivated in the Infotainment or with the button
» Fig. 106 » operating instructions for Infotainment , chapter Setting vehicle
systems (CAR button) .
The warning light lights up in the instrument cluster when the TCR is deactiva-
ted.
Ensure the TCS is activated again afterwards.
Electronic differential lock (EDL)
First read and observe the introductory information and safety warn-ings
on page 112.
If one of the wheels starts to spin, the EDL system brakes the spinning wheel and transfers the driving force to the other wheels. This ensures the stability of the
vehicle and a quick journey.
The EDL switches off automatically if severe stresses exist in order to avoid ex- cessive heat generation in the disc brake on the wheel which is being braked. The
vehicle can continue to be driven and has the same characteristics as a vehicle
not fitted with EDL. The EDL switches on again automatically as soon as the
brake has cooled down.
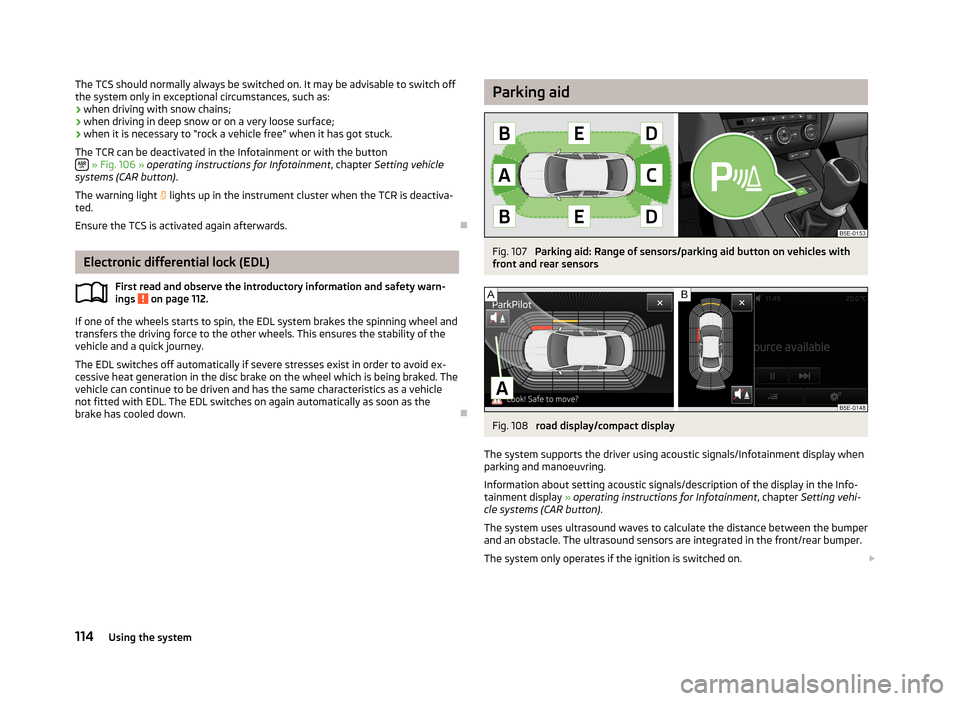
Parking aidFig. 107
Parking aid: Range of sensors/parking aid button on vehicles with
front and rear sensors
Fig. 108
road display/compact display
The system supports the driver using acoustic signals/Infotainment display when parking and manoeuvring.
Information about setting acoustic signals/description of the display in the Info-
tainment display » operating instructions for Infotainment , chapter Setting vehi-
cle systems (CAR button) .
The system uses ultrasound waves to calculate the distance between the bumper
and an obstacle. The ultrasound sensors are integrated in the front/rear bumper.
The system only operates if the ignition is switched on.
114Using the system
Page 117 of 222
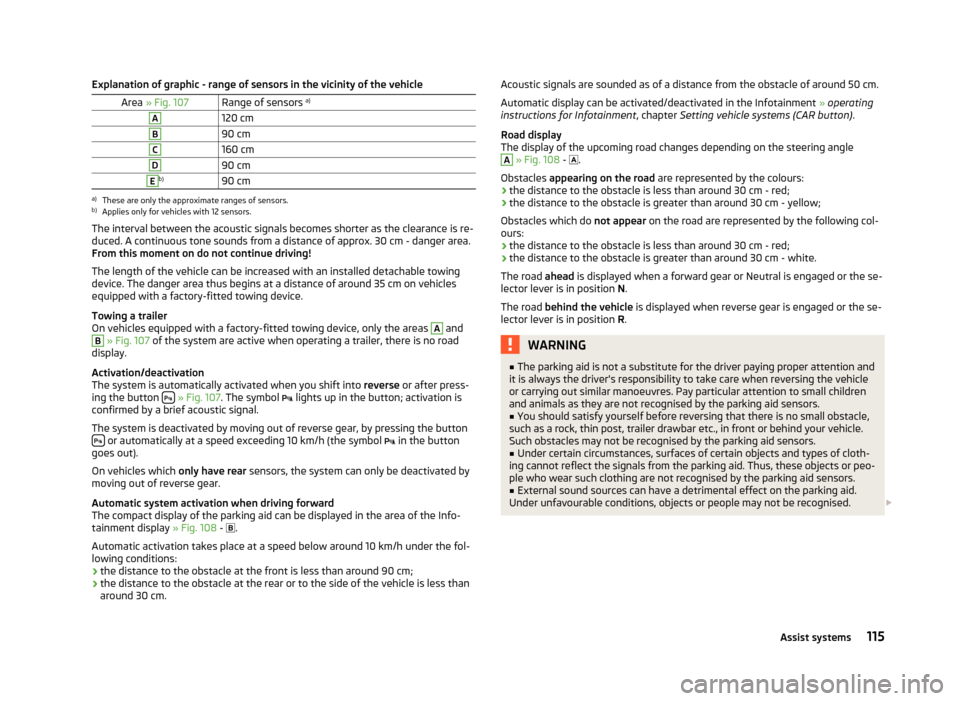
Explanation of graphic - range of sensors in the vicinity of the vehicleArea » Fig. 107Range of sensors a)A120 cmB90 cmC160 cmD90 cmEb)90 cma)
These are only the approximate ranges of sensors.
b)
Applies only for vehicles with 12 sensors.
The interval between the acoustic signals becomes shorter as the clearance is re-
duced. A continuous tone sounds from a distance of approx. 30 cm - danger area.
From this moment on do not continue driving!
The length of the vehicle can be increased with an installed detachable towing
device. The danger area thus begins at a distance of around 35 cm on vehicles
equipped with a factory-fitted towing device.
Towing a trailer
On vehicles equipped with a factory-fitted towing device, only the areas
A
and
B
» Fig. 107 of the system are active when operating a trailer, there is no road
display.
Activation/deactivation
The system is automatically activated when you shift into reverse or after press-
ing the button
» Fig. 107 . The symbol
lights up in the button; activation is
confirmed by a brief acoustic signal.
The system is deactivated by moving out of reverse gear, by pressing the button
or automatically at a speed exceeding 10 km/h (the symbol
in the button
goes out).
On vehicles which only have rear sensors, the system can only be deactivated by
moving out of reverse gear.
Automatic system activation when driving forward
The compact display of the parking aid can be displayed in the area of the Info- tainment display » Fig. 108 -
.
Automatic activation takes place at a speed below around 10 km/h under the fol- lowing conditions:
› the distance to the obstacle at the front is less than around 90 cm;
› the distance to the obstacle at the rear or to the side of the vehicle is less than
around 30 cm.
Acoustic signals are sounded as of a distance from the obstacle of around 50 cm.
Automatic display can be activated/deactivated in the Infotainment » operating
instructions for Infotainment , chapter Setting vehicle systems (CAR button) .
Road display
The display of the upcoming road changes depending on the steering angleA
» Fig. 108 - .
Obstacles appearing on the road are represented by the colours:
› the distance to the obstacle is less than around 30 cm - red;
› the distance to the obstacle is greater than around 30 cm - yellow;
Obstacles which do not appear on the road are represented by the following col-
ours:
› the distance to the obstacle is less than around 30 cm - red;
› the distance to the obstacle is greater than around 30 cm - white.
The road ahead is displayed when a forward gear or Neutral is engaged or the se-
lector lever is in position N.
The road behind the vehicle is displayed when reverse gear is engaged or the se-
lector lever is in position R.
WARNING■
The parking aid is not a substitute for the driver paying proper attention and
it is always the driver's responsibility to take care when reversing the vehicle or carrying out similar manoeuvres. Pay particular attention to small children
and animals as they are not recognised by the parking aid sensors.■
You should satisfy yourself before reversing that there is no small obstacle,
such as a rock, thin post, trailer drawbar etc., in front or behind your vehicle.
Such obstacles may not be recognised by the parking aid sensors.
■
Under certain circumstances, surfaces of certain objects and types of cloth-
ing cannot reflect the signals from the parking aid. Thus, these objects or peo-
ple who wear such clothing are not recognised by the parking aid sensors.
■
External sound sources can have a detrimental effect on the parking aid.
Under unfavourable conditions, objects or people may not be recognised.
115Assist systems
Page 118 of 222
CAUTION■If a warning signal sounds for about 3 seconds after activating the system and
there is no obstacle close to your car, this indicates a system fault. The fault is
confirmed additionally when the symbol flashes in the button
.
! is displayed
in the error area of the Infotainment display. Have the fault rectified by a ŠKODA
specialist garage.
■
The sensors must be kept clean (free of ice, etc.) to enable the parking aid to
operate properly.
Note
■ The signal tones for front obstacle recognition are factory-set to be higher than
for rear obstacle recognition.■
If not all fields around the vehicle are shown after the system is activated, the
vehicle will need to be moved a few metres forwards or in reverse.
■
If the parking aid is activated and the selector lever of the automatic gearbox is
in the position P (the vehicle cannot move), the warning signal is interrupted and
no obstacles are displayed.
■
Additional mounted modules, such as a bicycle carrier, can impair the function of
the parking aid.
Park Assist
Introduction
This chapter contains information on the following subjects:
finding a parking space
117
Parking the vehicle
117
Manoeuvring out of a parallel parking space
118
Automatic brake assist
118
Information for the driver
119
The parking aid is part of the park assist system, therefore the information and
safety guidelines » page 114, Parking aid must be read and observed.
Park Assist (in the following referred to as the system) helps drivers park in suita- ble parallel and perpendicular parking places and also to manoeuvre out of paral- lel parking spaces.
The system only operates if the ignition is switched on.
During the parking procedure the system only takes over the steering move- ments, the pedals continue to be operated by the driver.
When the system is activated,
the warning light
» Fig. 109 on page 117 -
lights up in the button.
The traction control system (TCS) must always be switched on when parking.
The function of the system is based on: › the measurement and evaluation of the size of parking spaces when driving,
› the determination of the correct position of the vehicle for parking,
› the calculation of the line on which the vehicle drives backwards into the park-
ing space or forwards from the parking space;
› the automatic turning of the front wheels when parking in, or manoeuvring out
of the parking space.
WARNING■ The system does not exempt the driver from his/her responsibility for park-
ing in and manoeuvring out of the parking space.■
External sound sources can have a detrimental effect on parking in and ma-
noeuvring out of the parking space. Under unfavourable conditions, objects or
people may not be recognised.
■
When parking in, and manoeuvring out of parking spaces, the system auto-
matically executes quick steering movements. While it is doing so, do not place your hands between the steering wheel - risk of injury!
CAUTION
■ If other vehicles are parked behind or on the kerb, the system guides your vehi-
cle beyond the kerb or onto it. Ensure that the wheels or the wheel rims of your
vehicle are not damaged and if necessary intervene in time.■
Under certain circumstances, surfaces or structures of certain objects such as
wire mesh fences, powder snow, etc., cannot be recognised by the system.
■
The evaluation of the parking space and the parking procedure depends on the
circumference of the wheels. The system only works correctly if the vehicle is fit-
ted with the wheel size approved by the manufacturer. If wheels other than those approved by the manufacturer are mounted, the resulting position of the
vehicle in the parking space can differ slightly. This can be avoided by readjusting
the system at a ŠKODA specialist garage. Under certain circumstances, the sys-
tem may not function correctly, for example, if the vehicle is fitted with snow chains or a temporary spare wheel.
116Using the system
Page 119 of 222
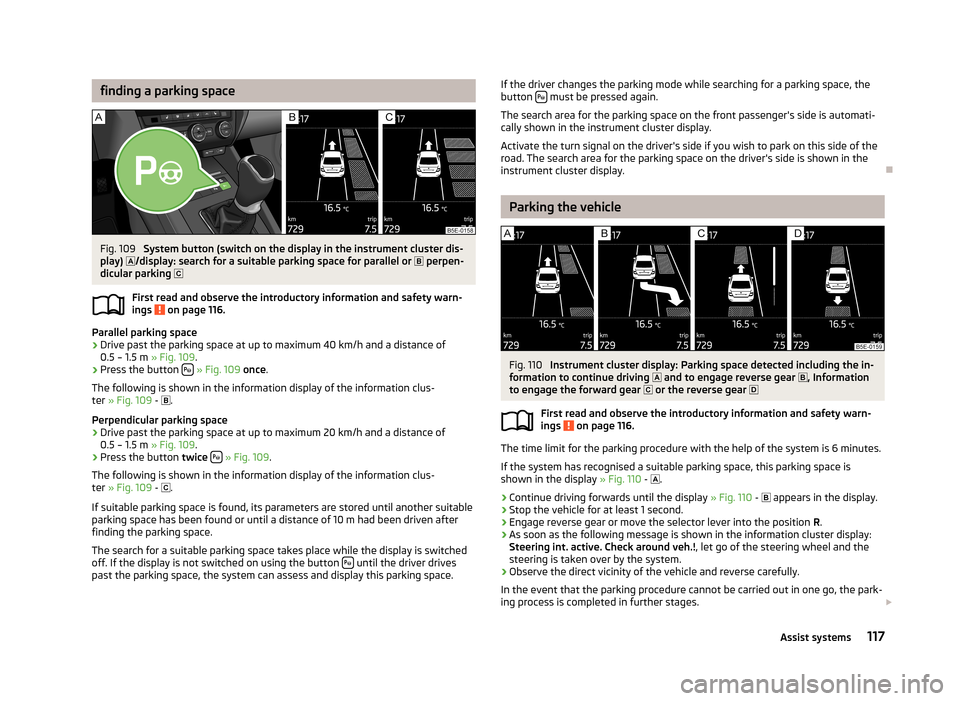
finding a parking spaceFig. 109
System button (switch on the display in the instrument cluster dis-
play) /display: search for a suitable parking space for parallel or
perpen-
dicular parking
First read and observe the introductory information and safety warn- ings
on page 116.
Parallel parking space
›
Drive past the parking space at up to maximum 40 km/h and a distance of 0.5 – 1.5 m » Fig. 109.
›
Press the button
» Fig. 109 once .
The following is shown in the information display of the information clus- ter » Fig. 109 -
.
Perpendicular parking space
›
Drive past the parking space at up to maximum 20 km/h and a distance of 0.5 – 1.5 m » Fig. 109.
›
Press the button twice
» Fig. 109 .
The following is shown in the information display of the information clus-
ter » Fig. 109 -
.
If suitable parking space is found, its parameters are stored until another suitable
parking space has been found or until a distance of 10 m had been driven after finding the parking space.
The search for a suitable parking space takes place while the display is switched
off. If the display is not switched on using the button
until the driver drives
past the parking space, the system can assess and display this parking space.
If the driver changes the parking mode while searching for a parking space, the
button must be pressed again.
The search area for the parking space on the front passenger's side is automati-
cally shown in the instrument cluster display.
Activate the turn signal on the driver's side if you wish to park on this side of the road. The search area for the parking space on the driver's side is shown in the
instrument cluster display.
Parking the vehicle
Fig. 110
Instrument cluster display: Parking space detected including the in-
formation to continue driving and to engage reverse gear
, Information
to engage the forward gear or the reverse gear
First read and observe the introductory information and safety warn- ings
on page 116.
The time limit for the parking procedure with the help of the system is 6 minutes.
If the system has recognised a suitable parking space, this parking space is
shown in the display » Fig. 110 -
.
›
Continue driving forwards until the display » Fig. 110 -
appears in the display.
›
Stop the vehicle for at least 1 second.
›
Engage reverse gear or move the selector lever into the position R.
›
As soon as the following message is shown in the information cluster display:
Steering int. active. Check around veh.! , let go of the steering wheel and the
steering is taken over by the system.
›
Observe the direct vicinity of the vehicle and reverse carefully.
In the event that the parking procedure cannot be carried out in one go, the park- ing process is completed in further stages.
117Assist systems
Page 120 of 222
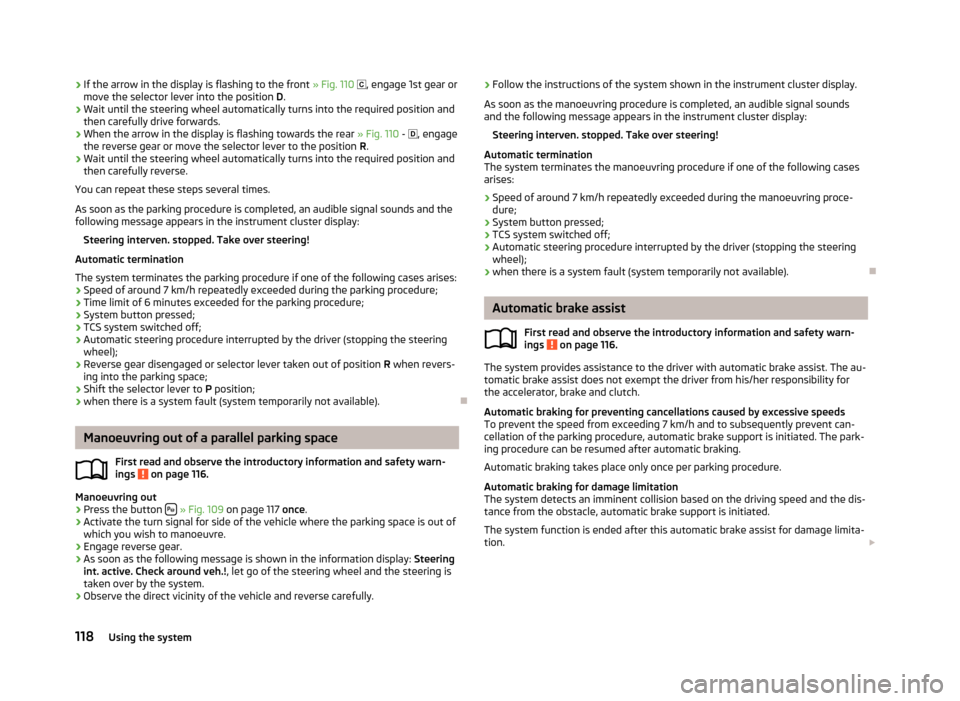
›If the arrow in the display is flashing to the front
» Fig. 110 , engage 1st gear or
move the selector lever into the position D.›
Wait until the steering wheel automatically turns into the required position and
then carefully drive forwards.
›
When the arrow in the display is flashing towards the rear » Fig. 110 - , engage
the reverse gear or move the selector lever to the position R.
›
Wait until the steering wheel automatically turns into the required position and
then carefully reverse.
You can repeat these steps several times.
As soon as the parking procedure is completed, an audible signal sounds and the
following message appears in the instrument cluster display:
Steering interven. stopped. Take over steering!
Automatic termination
The system terminates the parking procedure if one of the following cases arises: › Speed of around 7 km/h repeatedly exceeded during the parking procedure;
› Time limit of 6 minutes exceeded for the parking procedure;
› System button pressed;
› TCS system switched off;
› Automatic steering procedure interrupted by the driver (stopping the steering
wheel);
› Reverse gear disengaged or selector lever taken out of position
R when revers-
ing into the parking space;
› Shift the selector lever to
P position;
› when there is a system fault (system temporarily not available).
Manoeuvring out of a parallel parking space
First read and observe the introductory information and safety warn-
ings
on page 116.
Manoeuvring out
›
Press the button
» Fig. 109 on page 117 once.
›
Activate the turn signal for side of the vehicle where the parking space is out of
which you wish to manoeuvre.
›
Engage reverse gear.
›
As soon as the following message is shown in the information display: Steering
int. active. Check around veh.! , let go of the steering wheel and the steering is
taken over by the system.
›
Observe the direct vicinity of the vehicle and reverse carefully.
› Follow the instructions of the system shown in the instrument cluster display.
As soon as the manoeuvring procedure is completed, an audible signal sounds
and the following message appears in the instrument cluster display:
Steering interven. stopped. Take over steering!
Automatic termination
The system terminates the manoeuvring procedure if one of the following cases
arises:
› Speed of around 7 km/h repeatedly exceeded during the manoeuvring proce-
dure;
› System button pressed;
› TCS system switched off;
› Automatic steering procedure interrupted by the driver (stopping the steering
wheel);
› when there is a system fault (system temporarily not available).
Automatic brake assist
First read and observe the introductory information and safety warn-
ings
on page 116.
The system provides assistance to the driver with automatic brake assist. The au-
tomatic brake assist does not exempt the driver from his/her responsibility for
the accelerator, brake and clutch.
Automatic braking for preventing cancellations caused by excessive speeds
To prevent the speed from exceeding 7 km/h and to subsequently prevent can-
cellation of the parking procedure, automatic brake support is initiated. The park-
ing procedure can be resumed after automatic braking.
Automatic braking takes place only once per parking procedure.
Automatic braking for damage limitationThe system detects an imminent collision based on the driving speed and the dis-
tance from the obstacle, automatic brake support is initiated.
The system function is ended after this automatic brake assist for damage limita-tion.
118Using the system