service indicator SKODA OCTAVIA TOUR 2009 1.G / (1U) Owner's Manual
[x] Cancel search | Manufacturer: SKODA, Model Year: 2009, Model line: OCTAVIA TOUR, Model: SKODA OCTAVIA TOUR 2009 1.G / (1U)Pages: 226, PDF Size: 13.11 MB
Page 4 of 226
Contents3
ContentsLayout of this Owner's Manual
(explanations)
. . . . . . . . . . . . . . . . . . . . . . . . . .
Using the system
. . . . . . . . . . . . . . . . . . . . . .
Cockpit
. . . . . . . . . . . . . . . . . . . . . . . . . . . . . . . . . . . . . . . .
Overview . . . . . . . . . . . . . . . . . . . . . . . . . . . . . . . . . . . .
The brief instruction
. . . . . . . . . . . . . . . . . . . . . . . . . .
Basic functions and important information . . . . .
Instruments and Indicator/Warning Lights
. . .
General view of the instrument cluster . . . . . . . . .
Engine revolutions counter . . . . . . . . . . . . . . . . . . . .
Coolant temperature gauge . . . . . . . . . . . . . . . . . . .
Fuel gauge . . . . . . . . . . . . . . . . . . . . . . . . . . . . . . . . . . .
Speedometer . . . . . . . . . . . . . . . . . . . . . . . . . . . . . . . .
Counter for distance driven . . . . . . . . . . . . . . . . . . .
Service Interval Display . . . . . . . . . . . . . . . . . . . . . . .
Digital clock . . . . . . . . . . . . . . . . . . . . . . . . . . . . . . . . . .
Multi-functional indicator (onboard computer)*
Information display* . . . . . . . . . . . . . . . . . . . . . . . . . .
Auto Check Control . . . . . . . . . . . . . . . . . . . . . . . . . . .
Warning lights . . . . . . . . . . . . . . . . . . . . . . . . . . . . . . . .
Unlocking and locking
. . . . . . . . . . . . . . . . . . . . . . . .
Key . . . . . . . . . . . . . . . . . . . . . . . . . . . . . . . . . . . . . . . . . .
Changing the battery of the radio remote control
Electronic immobiliser . . . . . . . . . . . . . . . . . . . . . . . .
Locking . . . . . . . . . . . . . . . . . . . . . . . . . . . . . . . . . . . . . .
Child safety lock . . . . . . . . . . . . . . . . . . . . . . . . . . . . . .
Central locking system* . . . . . . . . . . . . . . . . . . . . . . .
Remote control* . . . . . . . . . . . . . . . . . . . . . . . . . . . . . .
Synchonisation of the remote control . . . . . . . . . .
Anti-theft alarm system* . . . . . . . . . . . . . . . . . . . . . . Power windows* . . . . . . . . . . . . . . . . . . . . . . . . . . . . .
Electric sliding/tilting roof* . . . . . . . . . . . . . . . . . . . .
Lights and Visibility
. . . . . . . . . . . . . . . . . . . . . . . . . . .
Lights . . . . . . . . . . . . . . . . . . . . . . . . . . . . . . . . . . . . . . . .
Interior lighting . . . . . . . . . . . . . . . . . . . . . . . . . . . . . . .
Visibility . . . . . . . . . . . . . . . . . . . . . . . . . . . . . . . . . . . . .
Windshield wiper and wash system . . . . . . . . . . . .
Rear-view mirror . . . . . . . . . . . . . . . . . . . . . . . . . . . . .
Seats and Storage
. . . . . . . . . . . . . . . . . . . . . . . . . . . . .
Front seats . . . . . . . . . . . . . . . . . . . . . . . . . . . . . . . . . . .
Adjusting front seats electrically* . . . . . . . . . . . . . .
Head restraints . . . . . . . . . . . . . . . . . . . . . . . . . . . . . . .
Rear seats . . . . . . . . . . . . . . . . . . . . . . . . . . . . . . . . . . . .
Pedals . . . . . . . . . . . . . . . . . . . . . . . . . . . . . . . . . . . . . . .
luggage compartment . . . . . . . . . . . . . . . . . . . . . . . .
Net partition (Combi)* . . . . . . . . . . . . . . . . . . . . . . . .
The roof rack* . . . . . . . . . . . . . . . . . . . . . . . . . . . . . . . .
Note holder . . . . . . . . . . . . . . . . . . . . . . . . . . . . . . . . . .
Ashtray* . . . . . . . . . . . . . . . . . . . . . . . . . . . . . . . . . . . . .
Cigarette lighter*, power sockets . . . . . . . . . . . . . . .
Storage compartments . . . . . . . . . . . . . . . . . . . . . . . .
Heating and air conditioning system
. . . . . . . . .
Air outlet vents . . . . . . . . . . . . . . . . . . . . . . . . . . . . . . .
Heating . . . . . . . . . . . . . . . . . . . . . . . . . . . . . . . . . . . . . .
Air conditioning system* . . . . . . . . . . . . . . . . . . . . . .
Climatronic* (automatic air conditioning) . . . . . .
Starting-off and Driving
. . . . . . . . . . . . . . . . . . . . . . .
Setting steering wheel position . . . . . . . . . . . . . . . .
Ignition lock . . . . . . . . . . . . . . . . . . . . . . . . . . . . . . . . . .
Starting the engine . . . . . . . . . . . . . . . . . . . . . . . . . . .
Switching off the engine . . . . . . . . . . . . . . . . . . . . . . .
Shifting . . . . . . . . . . . . . . . . . . . . . . . . . . . . . . . . . . . . . .
Handbrake . . . . . . . . . . . . . . . . . . . . . . . . . . . . . . . . . . . Rear parking aid* . . . . . . . . . . . . . . . . . . . . . . . . . . . . .
Cruise control system (CCS)* . . . . . . . . . . . . . . . . . .
Communication
. . . . . . . . . . . . . . . . . . . . . . . . . . . . . .
Multifunction steering wheel* . . . . . . . . . . . . . . . . .
Mobile phone, handsfree-system* . . . . . . . . . . . . .
Mobile phones and two-way radio systems . . . . .
Safety
. . . . . . . . . . . . . . . . . . . . . . . . . . . . . . . . . . . . . .
Passive Safety
. . . . . . . . . . . . . . . . . . . . . . . . . . . . . . . . .
Basic information . . . . . . . . . . . . . . . . . . . . . . . . . . . .
Correct seated position . . . . . . . . . . . . . . . . . . . . . . .
Seat belts
. . . . . . . . . . . . . . . . . . . . . . . . . . . . . . . . . . . . . .
Why seat belts? . . . . . . . . . . . . . . . . . . . . . . . . . . . . . .
The physical principle of a frontal collision . . . . .
Important safety information regarding the use of
seat belts . . . . . . . . . . . . . . . . . . . . . . . . . . . . . . . . . . . .
How are seat belts correctly fastened? . . . . . . . . .
Belt tensioners . . . . . . . . . . . . . . . . . . . . . . . . . . . . . . .
Airbag system
. . . . . . . . . . . . . . . . . . . . . . . . . . . . . . . . .
Description of the airbag system . . . . . . . . . . . . . . .
Front airbag . . . . . . . . . . . . . . . . . . . . . . . . . . . . . . . . . .
Side airbags* . . . . . . . . . . . . . . . . . . . . . . . . . . . . . . . . .
Deactivating an airbag . . . . . . . . . . . . . . . . . . . . . . . .
Transporting children safely
. . . . . . . . . . . . . . . . . .
What you should know about transporting
children! . . . . . . . . . . . . . . . . . . . . . . . . . . . . . . . . . . . . .
Child seat . . . . . . . . . . . . . . . . . . . . . . . . . . . . . . . . . . . .
Attaching a child seat using the “ISOFIX” system
6
7
9
9
10
10
16
16
16
16
17
17
18
18
19
19
23
25
27
35
35
36
36
37
37
38
41
42
43 44
46
49
49
53
54
55
58
60
60
61
64
65
67
68
73
75
77
77
78
79
83
83
83
85
89
94
94
95
95
97
97
9898
99
102
102
103
104
105
105
105
106
110
110
111
111
112
115
117
117
118
121
122
125
125
128
131
s2ig.book Page 3 Monday, November 10, 2008 11:20 AM
Page 17 of 226
Instruments and Indicator/Warning Lights
16Instruments and Indicator/Warning LightsGeneral view of the instrument cluster
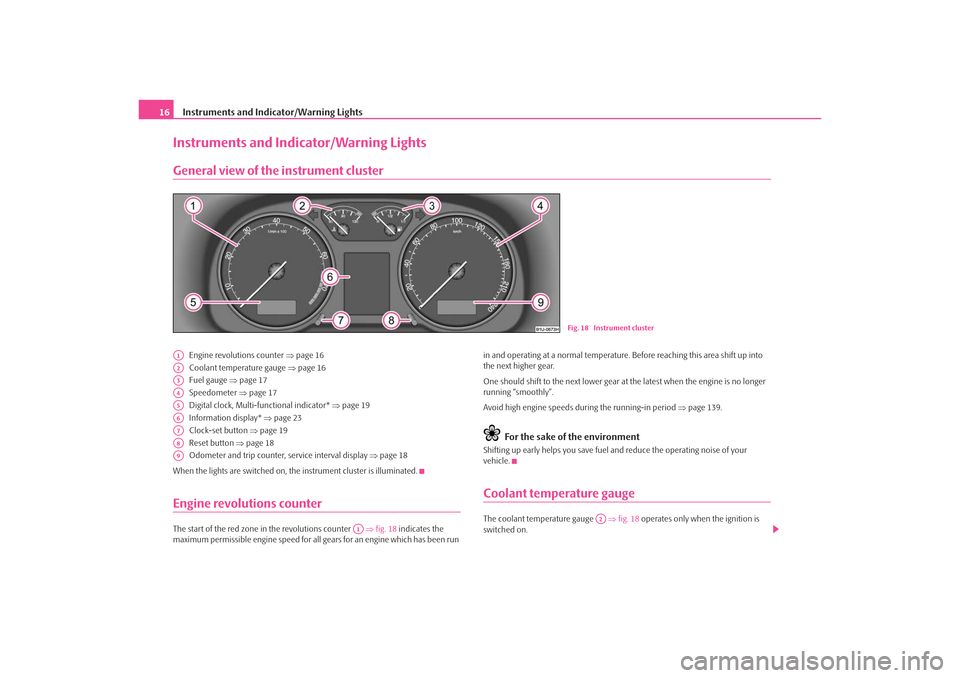
Engine revolutions counter ⇒ page 16
Coolant temperature gauge ⇒page 16
Fuel gauge ⇒ page 17
Speedometer ⇒page 17
Digital clock, Multi-functional indicator* ⇒page 19
Information display* ⇒page 23
Clock-set button ⇒page 19
Reset button ⇒page 18
Odometer and trip counter, service interval display ⇒page 18
When the lights are switched on, the instrument cluster is illuminated.
Engine revolutions counterThe start of the red zone in the revolutions counter ⇒fig. 18 indicates the
maximum permissible engine speed for all gears for an engine which has been run in and operating at a normal temperature.
Before reaching this area shift up into
the next higher gear.
One should shift to the next lower gear at the latest when the engine is no longer
running “smoothly”.
Avoid high engine speeds du ring the running-in period ⇒page 139.
For the sake of the environment
Shifting up early helps yo u save fuel and reduce the operating noise of your
vehicle.Coolant temperature gaugeThe coolant temperature gauge ⇒fig. 18 operates only when the ignition is
switched on.
Fig. 18 Instrument cluster
A1A2A3A4A5A6A7A8A9
A1
A2
s2ig.book Page 16 Monday, November 10, 2008 11:20 AM
Page 19 of 226
Instruments and Indicator/Warning Lights
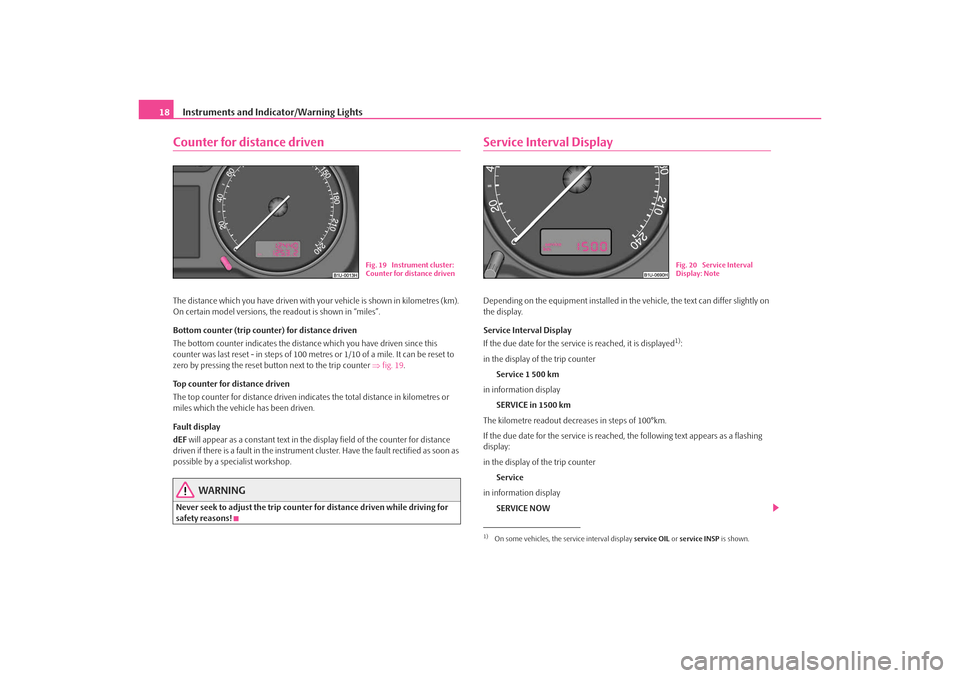
18Counter for distance drivenThe distance which you have driven with yo ur vehicle is shown in kilometres (km).
On certain model versions, the readout is shown in “miles”.
Bottom counter (trip counter) for distance driven
The bottom counter indicates the distan ce which you have driven since this
counter was last reset - in steps of 100 metr es or 1/10 of a mile. It can be reset to
zero by pressing the reset butt on next to the trip counter ⇒fig. 19 .
Top counter for distance driven
The top counter for distance driven indica tes the total distance in kilometres or
miles which the vehicl e has been driven.
Fa ult di spl ay
dEF will appear as a constant text in the display field of the counter for distance
driven if there is a fault in the instrument cluster. Have the fault rectified as soon as
possible by a specialist workshop.
WARNING
Never seek to adjust the trip counter for distance driven while driving for
safety reasons!
Service Interval DisplayDepending on the equipment installed in the vehicle, the text can differ slightly on
the display.
Service Interval Display
If the due date for the service is reached, it is displayed
1):
in the display of the trip counter Service 1 500 km
in information display SERVICE in 1500 km
The kilometre readout decreases in steps of 100°km.
If the due date for the service is reached, the following text appears as a flashing
display:
in the display of the trip counter
Service
in information display SERVICE NOW
Fig. 19 Instrument cluster:
Counter for distance driven
1)On some vehicles, the service interval display service OIL or service INSP is shown.
Fig. 20 Service Interval
Display: Note
s2ig.book Page 18 Monday, November 10, 2008 11:20 AM
Page 20 of 226
Instruments and Indicator/Warning Lights19
Using the system
Safety
Driving Tips
General Maintenance
Breakdown assistance
Technical Data
The display disappears within 20 seconds after switching on the ignition. The trip
counter is also displayed af
ter pressing the reset button for the trip counter (for
more than 0,5 second).
Resetting Service Interval Display
It is only possible to reset the Service Interval Display, if a service message or at least
a pre-warning is shown on the display of the instrument cluster.
We recommend having this resetting performed by a specialist garage.
The specialist garage:
•
resets the memory of the display after the appropriate inspection,
•
makes an entry in the Service schedule,
•
affix the sticker with the entry of the following service interval to the side of the
dash panel on the driver's side.
Reset the service interval displays as follows by using the reset button
⇒ page 16, fig. 18 on the trip counter:
•
Press the reset button with the ignition switched off and and hold it down.
•
Switch the ignition on, release the reset button. The text Service or SERVICE
NOW appears in the display.
•
Turn the button for setting the clock to the right - as a result of this the display
is reset.Caution
We recommend that you do not reset the Service Interval Display yourself other-
wise this can result in the service interval display being incorrectly set, which may
also result in problems with operation of your vehicle.
Note
•
Never reset the display between service intervals otherwise this may result in
incorrect readouts.
•
information is retained in the Service Interval Display also after the battery of
the vehicle is disconnected.
•
it is necessary to re-code the Service Interval Display if a new instrument cluster
is installed during repair work. This work is carried out by a specialist garage.
•
The data displayed is the same after rese tting the display with flexible service
intervals (QG1) using the reset button as th at for a vehicle with fixed service inter-
vals (QG2). We therefore recommend having the Service Interval Display reset only
by a specialist garage which is familiar with the procedure for resetting the display
with a vehicle system tester.
•
Please refer to the brochure Service schedule for extensive information about
the service intervals.
Digital clockA clock-set button is installed on the bottom left beside the speedom-
eter for adjusting the clock ⇒page 16, fig. 18 .
Set hours
– Turn the reset button to the left.
Setting minutes
– Turn the reset button to the right.
WARNING
The clock should not be adjusted while driving for safety reasons but only
when the vehicle is stationary!Multi-functional indicator (onboard computer)*IntroductionThe multi-functional indicator appears in the display of the revolutions counter or
in the information display depending on the equipment fitted to your vehicle
⇒ page 23, fig. 23 .
A8
A7
s2ig.book Page 19 Monday, November 10, 2008 11:20 AM
Page 24 of 226
Instruments and Indicator/Warning Lights23
Using the system
Safety
Driving Tips
General Maintenance
Breakdown assistance
Technical Data
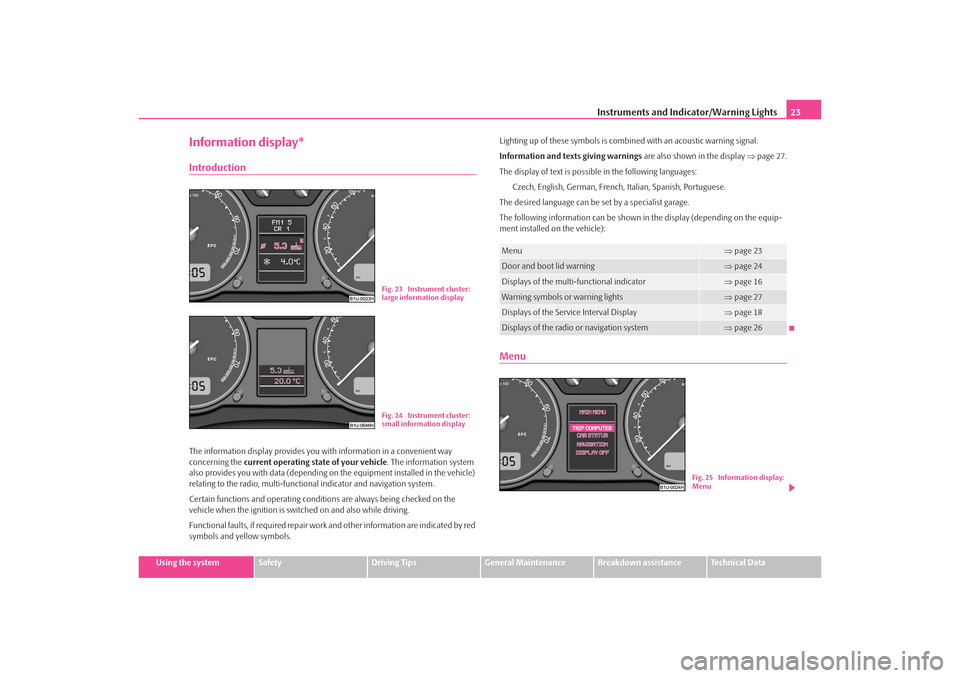
Information display*IntroductionThe information display provides you with information in a convenient way
concerning the current operating state of your vehicle . The information system
also provides you with data (depending on the equipment installed in the vehicle)
relating to the radio, multi-function al indicator and navigation system.
Certain functions and oper ating conditions are always being checked on the
vehicle when the ignition is switched on and also while driving.
Functional faults, if required repair work and other information are indicated by red
symbols and yellow symbols. Lighting up of these symbols is combined with an acoustic warning signal.
Information and texts giving warnings
are also shown in the display ⇒page 27.
The display of text is possible in the following languages: Czech, English, German, French, Italian, Spanish, Portuguese.
The desired language can be set by a specialist garage.
The following information can be shown in the display (depending on the equip-
ment installed on the vehicle):
Menu
Fig. 23 Instrument cluster:
large information displayFig. 24 Instrument cluster:
small information display
Menu
⇒ page 23
Door and boot lid warning
⇒page 24
Displays of the multi-functional indicator
⇒page 16
Warning symbols or warning lights
⇒page 27
Displays of the Service Interval Display
⇒page 18
Displays of the radio or navigation system
⇒page 26
Fig. 25 Information display:
Menu
s2ig.book Page 23 Monday, November 10, 2008 11:20 AM
Page 26 of 226
Instruments and Indicator/Warning Lights25
Using the system
Safety
Driving Tips
General Maintenance
Breakdown assistance
Technical Data
Auto Check ControlCar stateThe Auto Check Control carries out a check of certain functions and vehicle compo-
nents. The check is performed constantly when the ignition is switched on, both
when the vehicle is stationary, as well as when driving.
Operational faults, urgent repairs, service work or other information appear in the
display of the instrument cluster. The disp lays are shown with a red or yellow light
symbol depending on the priority of the message.
The red symbols indicate danger (priority 1) while the yellow symbols indicate a
warning (priortity 2). Information for the driver may also appear in addition to the
symbols ⇒page 27.
Investigate the displayed faults as soon as possible. If several operational faults
exist at the same time, the symbols will appear one after the other and are each
visible for about 2 seconds.
The error messages are faded out after 10 seconds or by actuating the rocker switch ⇒ page 24, fig. 26 and are stored under the information CAR STATUS.
There is at least one error message to be read when the term CAR STATUS is
flashing in the menu. The display will show STATUS 1/2 (for example) if a number
of error messages are present. This display indicates that the first of a total of two
error messages should be displayed.
Actuate the rocker switch , to call up the individual error messages.
If a fault occurs, a warning signal will also sound in addition to the symbol and text
in the display:•
Priority 1 - three warning signals
•
Priority 2 - one warning signal
Red symbols
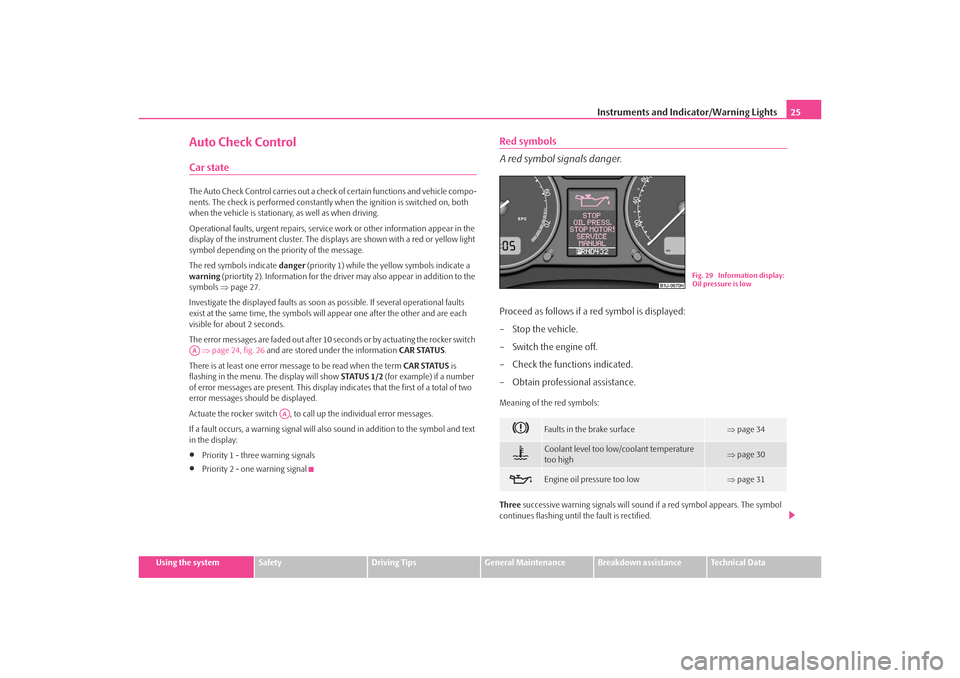
A red symbol signals danger.Proceed as follows if a red symbol is displayed:
– Stop the vehicle.
– Switch the engine off.
– Check the functions indicated.
– Obtain professional assistance.Meaning of the red symbols:
Three successive warning signals will sound if a red symbol appears. The symbol
continues flashing until the fault is rectified.
AA
AA
Faults in the brake surface
⇒page 34
Coolant level too low/coolant temperature
too high
⇒page 30
Engine oil pressure too low
⇒page 31
Fig. 29 Information display:
Oil pressure is low
s2ig.book Page 25 Monday, November 10, 2008 11:20 AM
Page 32 of 226
Instruments and Indicator/Warning Lights31
Using the system
Safety
Driving Tips
General Maintenance
Breakdown assistance
Technical Data
obtain professional assistance from a specialist garage, otherwise it could lead to
severe engine damage.
If the coolant is within the specified
range, the increased temperature may be
caused by an operating problem at the coolant fan. Check the fuse for the coolant
fan, replace it if necessary ⇒page 195, “Fuse assignment in engine compartment -
version 1” or ⇒ page 196, “Fuse assignment in en gine compartment - version 2”.
Do not continue driving if the warning light does not go off although the fluid is at
the correct level and also the fuse of the fa n is in proper order. Contact a specialist
garage to obtain assistance.
Please also refer to the additional instructions ⇒page 167, “Cooling system”.
The following text will be displayed in the information display*: STOP CHECK COOLANT SERVICE MANUAL
WARNING
•
If you must stop for technical reasons, then park the vehicle at a safe
distance from the traffic and switch off the engine and switch on the hazard
warning light system ⇒page 51.
•
Take care when opening the coolant expansion bottle. If the engine is
hot, the cooling system is pressurized - risk of scalding! It is best to allow the
engine to cool down before removing the cap.
•
Do not touch the coolant fan The coolant fan may switch on automati-
cally even if the ignition is off.
Thickness of the brake pads*
The warning light
comes on for a few seconds when the ignition is switched on.
If the warning light comes on, contact a specialist garage immediately and have
the brake pads on all of the wheels inspected.
A peep sounds as an addi tional warning signal.
The following text will be displayed in the information display*: CHECK BRAKE PADS
Windshield washer fluid level*
The warning light
comes on when the ignition is switched on if there is insuffi-
cient fluid in the windshield washer system. Top up with liquid ⇒page 174.
A peep sounds as an additional warning signal.
The following text will be displayed in the information display*: TOP UP WASH FLUID
Fuel reserve
The warning light
comes on, if the fuel level is still below 7 litres.
A peep sounds as an additional warning signal.
The following text will be displayed in the information display*: PLEASE REFUEL
Note
The Text in the information display* goes out only after refuelling and driving a
short distance.Engine oil
The warning light
lights up red (low oil pressure)
The warning light comes on for a few seconds when the ignition is switched on
3).
Stop the vehicle and switch the engine off if the warning light does not go off
within a few seconds after switching on the ignition or flashes while driving. Check
the oil level and top up with oil as necessary ⇒page 165.
3 peeps sound as an additional warning signal.
3)The warning light on vehicles fitted with information display does not come on after
switching the ignition on, but only if a fault exists or the engine oil level is too low.
s2ig.book Page 31 Monday, November 10, 2008 11:20 AM
Page 33 of 226
Instruments and Indicator/Warning Lights
32Do not continue your journey if for some reason it is not possible under the
conditions prevailing to top up with oil. Keep the engine switched off and obtain
professional assistance from a specialist garage, otherwise it could lead to severe
engine damage.
Do not drive any further if the warning light remains on even if the oil is at the
correct level. Do not run the engine not at idling speed either. Contact the nearest
specialist garage to obtain professional assistance.
The following text will be displayed in the information display*:
STOP! OIL PRESS. STOP MOTOR! SERVICE MANUAL
The warning light
lights up yellow* (oil quantity too low)
If the warning light lights up yellow, there is not the correct quantity of oil in the
engine. Check as soon as possible the oil level or top up ⇒page 165 with engine
oil.
A peep sounds as an additional warning signal.
The following text will be displayed in the information display*:
CHECK OIL LEVEL
When opening the bonnet, the warning light goes out. If no engine oil has been
replenished, the warning light will come on again after driving about 100 km.
The warning light
flashes yellow* (engine oil level sensor faulty)
A fault on the engine oil level sensor is in dicated additionally by an audible signal
and the warning light coming on several times after the ignition has been switched
on.
In this case have the engine inspecte d without delay by a specialist garage.
The following text will be displayed in the information display*: OIL SENSOR WORKSHOP!
WARNING
•
If you must stop for technical reasons, then park the vehicle at a safe
distance from the traffic and switch off the engine and switch on the hazard
warning light system ⇒ page 51.
•
The red oil pressure light
is not an oil level indicator! One should
therefore check the oil level at regular intervals, preferably after every refu-
eling stop.
Open door*
The warning light
comes on, if one or several doors are opened.
The warning light on vehicles fitted with information display comes on when
switching the ignition off. If a door or the boot lid is opened.
The warning light on vehicles fitted with information display goes out after
switching the ignition off.
Antilock brake system (ABS) *
The warning light
shows the functionality of the ABS and the Electronic Differ-
ential Lock (EDL)*.
The warning light comes on for a few seconds after the ignition has been switched
on or when starting the engine. The warnin g light goes out after an automatic check
sequence has been completed.
A fault in the ABS
The system is not functioning properly if the ABS warning light
does not go out
within a few seconds after switching on the ig nition, does not light up at all or lights
up while driving. The vehicle will only be braked by the normal brake system. Visit
a specialist garage as quickly as possible and adjust your style of driving in the
meantime since you will not know how great the damage is.
Further information about ABS ⇒page 137, “Antilock brake system (ABS)*”.
A fault in the entire brake system
If the ABS warning light
comes on together with the brake system warning light
(handbrake must be released), there is a fault not only in the ABS but also in
another part of the brake system ⇒.WARNING (continued)
s2ig.book Page 32 Monday, November 10, 2008 11:20 AM
Page 35 of 226
Instruments and Indicator/Warning Lights
34If the warning light does not go out after the engine has started, or comes on when
driving, drive to the nearest specialist garage. The vehicle battery will be discharged
in this case so switch off all non-essential electrical components.
A peep sounds as an additional warning signal.
Caution
If the warning light
comes on when driving and in addition the warning light
(cooling system fault) also comes on in display, you must then stop the car imme-
diately and switch the engine off - risk of engine damage!
Brake system
The warning light
comes on for several seconds after the ignition is switched on.
If the warning light stays on when the ignition is switched on or comes on while
driving, there is a fault in the brake system. Visit the nearest specialist garage imme-
diately and have the brake system inspected.
The following text will be displayed in the information display*:
STOP BRAKE FLUID SERVICE MANUAL
3 peeps sound as an additional warning signal.
One should get used to high pedal forces, long braking distances and long free play
of the brake pedal when driving to the next specialist garage.
For further information on the brake system ⇒page 135, “Brakes”.
Handbrake applied
The warning light
also comes on if the handbrake is applied. An audible warning
is also given if you drive the vehicle for at least 3 seconds at a speed of more than 5
km/h.
The following text will be displayed in the information display*:
HANDBRAKE ON
WARNING
•
Pay attention to the following instru ctions before checking the brake
fluid level and opening the bonnet ⇒page 162, “Working in the engine
compartment”.
•
If the brake system warning light
does not go out a few seconds after
switching on the ignition or comes on when driving, stop immediately and
check the brake fluid in the reservoir ⇒page 169, “Brake fluid”. If the fluid
level has dropped below the MIN marking, do not drive any further - risk of
accident! Obtain prof essional assistance.
Seat belt warning light*
The warning light
comes on after the ignition is switched on as a reminder to
fasten the seat belt.
In the event that the driver is not restrained, a warning signal sounds for 6 seconds.
The following text will be displayed in the information display*:
FASTEN SEATBELT
Further information on the seat belts ⇒page 110, “Seat belts”.
s2ig.book Page 34 Monday, November 10, 2008 11:20 AM
Page 167 of 226
Inspecting and replenishing
166
– Inspect the oil level ⇒page 165.
– Carefully screw on the cap of the filler opening and push the dipstick
in fully.
WARNING
•
Avoid dripping oil onto hot parts of the engine when topping up will oil -
a risk of fire!
•
Read and observe the warning notes ⇒page 162, “Working in the engine
compartment” before working in the engine compartment.For the sake of the environment
The oil level must on no account be above the range ⇒page 165. Oil will other-
wise be drawn in through the crankcase ventilation and may pass through the
exhaust system to atmosphere. The oil ma y combust in the catalytic converter and
damage it.Changing engine oilThe engine oil must be changed at the intervals stated in the Service schedule or
according to the service interval indicator ⇒page 18.
WARNING
•
Only carry out the engine oil change, if you have the required profes-
sional knowledge!
•
Read and observe the warning notes ⇒page 162, “Working in the engine
compartment” before working in the engine compartment.
•
Let the engine cool down - risk of burning from hot oil.
•
Wear an eye protection - risk of caustic burns due to oil splashes.
•
Oil is toxic! Store old oil in a safe place out of the reach of children and
unauthorized persons until you dispose of it properly.
Caution
You must not pour any additives into th e engine oil - risk of engine damage!
Damage, which results from such produc t, are excluded from the warranty.
For the sake of the environment
•
You must on no account pour oil into the ground or into the sewage system.
•
In view of the problems involved in prop erly disposing of old oil, the material,
equipment and the knowledge required fo r such work, we recommend that you
have the oil and oil filter change carried out by a specialist garage.Note
After your skin has come in contact with the oil, you must thoroughly wash your
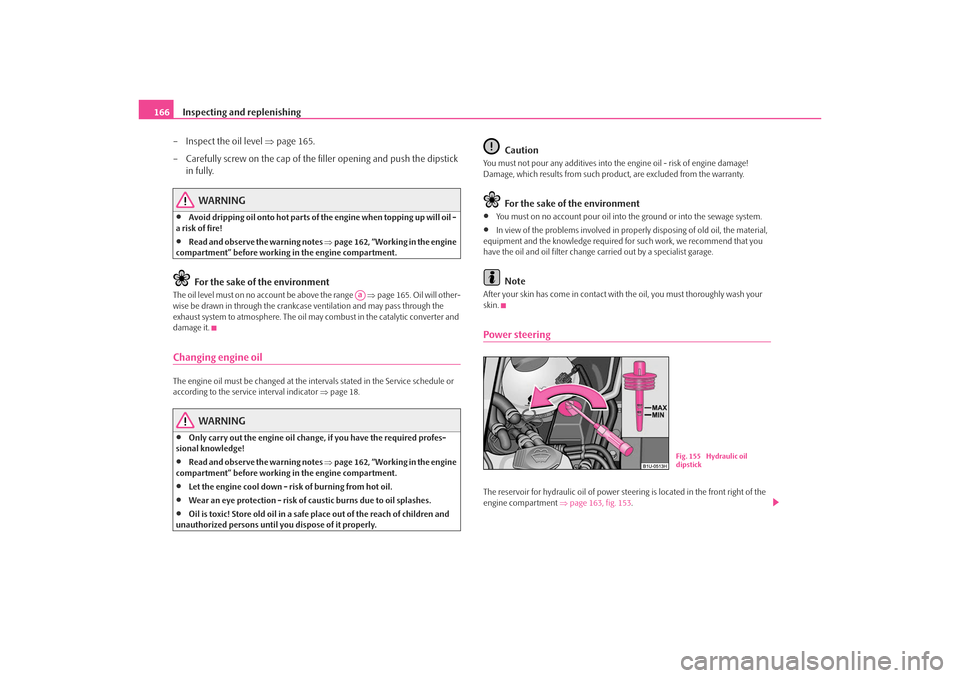
skin.Power steeringThe reservoir for hydraulic oil of power stee ring is located in the front right of the
engine compartment ⇒ page 163, fig. 153.
Aa
Fig. 155 Hydraulic oil
dipstick
s2ig.book Page 166 Monday, November 10, 2008 11:20 AM