SKODA SUPERB 2003 1.G / (B5/3U) Owners Manual
Manufacturer: SKODA, Model Year: 2003, Model line: SUPERB, Model: SKODA SUPERB 2003 1.G / (B5/3U)Pages: 259
Page 91 of 259

Seats and Stowage
90
Drinks can holder
Drinks can holder in front compartment
You can place two cups or beverage cans into the recesses ⇒fig. 78 .
Drinks can holder in armrest of the rear seats*
The drinks can holder is provided in the stowage compartment.
Access to drinks can holder
– Raise the cover of the armrest.
– You can take off the drinks can holder. Unlock it ⇒fig. 79 and
attach it to the cover of the armrest.
Only place cans into the drinks can holder which are held tight in the
holder.
It is possible to place up to two beverage cans in the drinks can holder of
the armrest.
WARNING
•Do not place any hot beverages into the cup holder while the car
is moving. The hot beverages may spill - risk of scalding!
•Do not use any cups or beakers which are made of hard or
brittle material (e.g. glass, porcelain). You might be injured by them
in the event of an accident.
Fig. 78 Centre
console: Drinks can
holder
Fig. 79 Drinks can
holder in rear armrest
Page 92 of 259

Seats and Stowage91
Using the systemSafetyDriving TipsGeneral MaintenanceBreakdown assistanceTechnical Data
Ashtray
Ashtray at the front
Opening ashtray
– Press on the bottom part of the cover of the ashtray - refer to
⇒ fig. 80. Removing the ashtray insert
– Grasp the ashtray insert
⇒fig. 80 at the side recesses and
pull it out.
Replacing the ashtray insert
– Press the ashtray insert into the mount.
Ashtray at the rear*
Opening ashtray
– Press on the top part of the cover of the ashtray.
WARNING
•Do not place any hot beverages into the can holder while the car
is moving. The hot beverages may spill - risk of scalding!
•Do not use any cups or beakers which are made of hard or
brittle material (e.g. glass, porcelain). You might be injured by them
in the event of an accident.
Fig. 80 Centre
console: opened
ashtray
AA
WARNING
Never lay flammable objects in the ashtray basin - risk of fire!
AB
Fig. 81 Ashtray at the
rear
Page 93 of 259

Seats and Stowage
92
Removing the ashtray insert
– Press the cover of the ashtray down slightly as far as the stop.
– Grasp the ashtray insert and pull it out at an angle of about 45°.
Replacing the ashtray insert
– Position the ashtray insert at an angle of about 45° and press it into the mount as far the stop.
Ashtray in the armrest*
Ashtray located in the armrest of the rear right door
Opening ashtray
– Press on the middle part of the cover of the ashtray.
Removing the ashtray insert
– Press on the top part of the opened ashtray in position , the ashtray insert is raised ⇒fig. 82 .
Replacing the ashtray insert
– Press the ashtray insert into the armrest.
WARNING
Never lay flammable objects in the ashtray basin - risk of fire!
Fig. 82 Ashtray in the
armrest of the rear right
door
WARNING
Never lay flammable objects in the ashtray basin - risk of fire!
AA
AB
Page 94 of 259

Seats and Stowage93
Using the systemSafetyDriving TipsGeneral MaintenanceBreakdown assistanceTechnical Data
Cigarette lighters and power sockets
Cigarette lighter
You can also use the socket on the cigarette lighter for
other electrical appliances.
Using the cigarette lighter
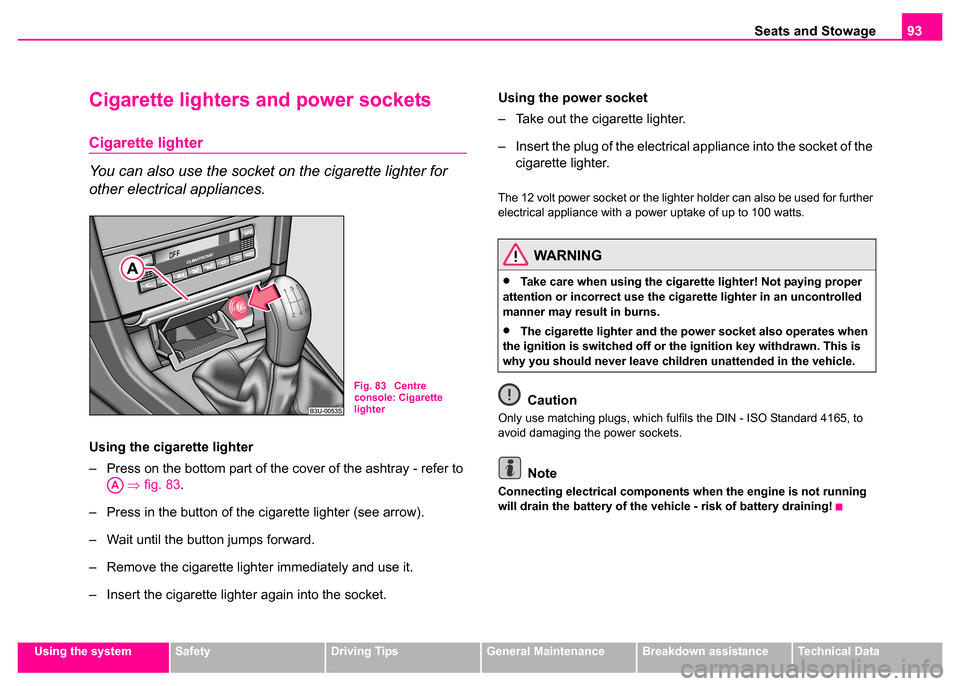
– Press on the bottom part of the cover of the ashtray - refer to
⇒ fig. 83.
– Press in the button of the cigarette lighter (see arrow).
– Wait until the button jumps forward.
– Remove the cigarette lighter immediately and use it.
– Insert the cigarette lighter again into the socket. Using the power socket
– Take out the cigarette lighter.
– Insert the plug of the electrical appliance into the socket of the
cigarette lighter.
The 12 volt power socket or the lighter holder can also be used for further
electrical appliance with a power uptake of up to 100 watts.
Caution
Only use matching plugs, which fulfils the DIN - ISO Standard 4165, to
avoid damaging the power sockets.
Note
Connecting electrical components when the engine is not running
will drain the battery of the vehicle - risk of battery draining!
Fig. 83 Centre
console: Cigarette
lighter
AA
WARNING
•Take care when using the cigarette lighter! Not paying proper
attention or incorrect use the cigarette lighter in an uncontrolled
manner may result in burns.
•The cigarette lighter and the power socket also operates when
the ignition is switched off or th e ignition key withdrawn. This is
why you should never leave children unattended in the vehicle.
Page 95 of 259

Seats and Stowage
94
Cigarette lighter in rear compartment
Operating and further information regarding the use of the cigarette lighter
⇒page 93.
Power socket in the luggage compartment
– Open the cover of the power socket ⇒fig. 85.
– Connect the plug of the electrical appliance to the socket.
It fulfils the requirements of DIN standard ISO 4165 and must only be used
for connecting approved electrical accessories with a power uptake of up
to 100 watts. The vehicle battery will be discharged in the process if the
engine is stationary.
Further information concerning use of the power socket ⇒page 93.
Fig. 84 Centre
console: Cigarette
lighterFig. 85 Luggage
compartment: Power
socket
Page 96 of 259

Seats and Stowage95
Using the systemSafetyDriving TipsGeneral MaintenanceBreakdown assistanceTechnical Data
Storage facilities
An overview
You will find the following storage facilities in your vehicle:
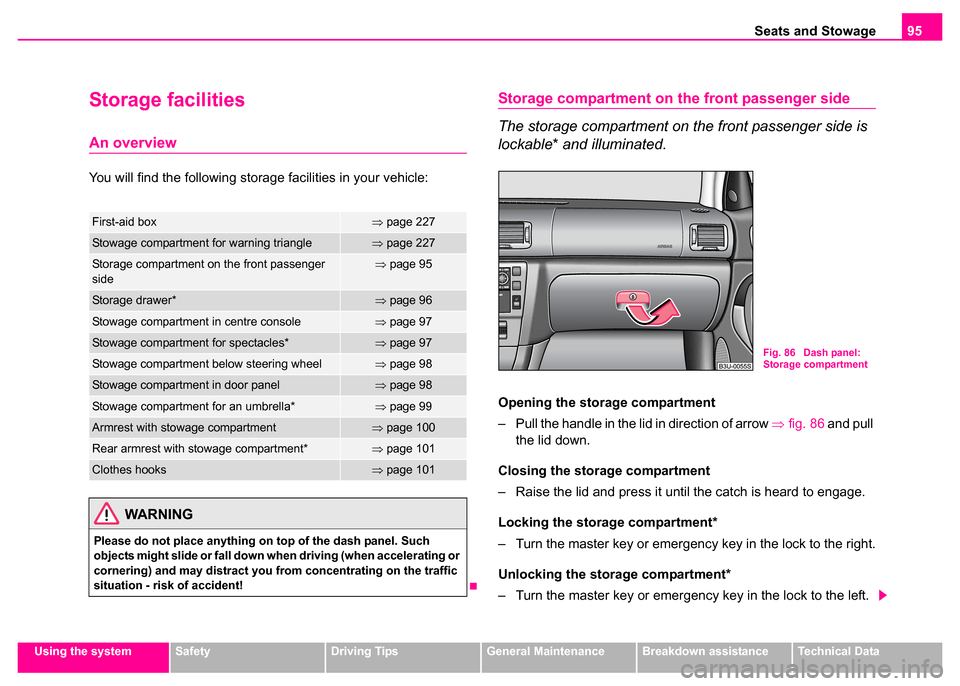
Storage compartment on the front passenger side
The storage compartment on the front passenger side is
lockable* and illuminated.
Opening the storage compartment
– Pull the handle in the lid in direction of arrow ⇒fig. 86 and pull
the lid down.
Closing the stor age compartment
– Raise the lid and press it until the catch is heard to engage.
Locking the storage compartment*
– Turn the master key or emergency key in the lock to the right.
Unlocking the stor age compartment*
– Turn the master key or emergency key in the lock to the left.
First-aid box⇒ page 227
Stowage compartment for warning triangle⇒page 227
Storage compartment on the front passenger
side⇒page 95
Storage drawer*⇒page 96
Stowage compartment in centre console⇒page 97
Stowage compartment for spectacles*⇒page 97
Stowage compartment below steering wheel⇒page 98
Stowage compartment in door panel⇒page 98
Stowage compartment for an umbrella*⇒page 99
Armrest with stowage compartment⇒page 100
Rear armrest with stowage compartment*⇒page 101
Clothes hooks⇒page 101
WARNING
Please do not place anything on top of the dash panel. Such
objects might slide or fall down when driving (when accelerating or
cornering) and may distract you from concentrating on the traffic
situation - risk of accident!
Fig. 86 Dash panel:
Storage compartment
Page 97 of 259

Seats and Stowage
96
Two holders for placing drink cans are located on the inside of the lid.
Cooling of storage compar tment on front passenger
side
– You can switch the cooling system on or off using the control
dial ⇒fig. 87 .
The cooling of the storage compartment operates only if the air condi-
tioning system is switched on. We recommend that you switch off the cooling (opening concealed) if it is operating in the heating mode or if you
are not using the cooling system for the storage compartment.
Storage drawer*
– Press in the middle of the storage compartment
⇒fig. 88 and
the storage compartment will come out.
WARNING
•The storage compartment must always be closed when driving
for safety reasons.
•The drinks can holder should not be used while driving.
Fig. 87 Storage
compartment: Control
dial for the cooling
system
WARNING
•The storage compartment is not a substitute for the ashtray and
must also not be used for such purposes. Risk of fire!
•The storage compartment must always be closed when driving
for safety reasons.
Fig. 88 Dash panel:
Storage drawer
Page 98 of 259

Seats and Stowage97
Using the systemSafetyDriving TipsGeneral MaintenanceBreakdown assistanceTechnical Data
Stowage compartment in centre console
Opening
– Press on the top part of the cover in direction of arrow. The
drawer will come out.
Pulling out compartment
– Press the compartment in the opening direction as far as the stop. Grasp the compartment at the sides and pull it up and
out.
Inserting compartment
– Insert the compartment back into its mount and close the cover.
Stowage compartment for spectacles*
The stowage compartment is located above the front left window.
– The storage compartment is opened by folding it out in the direction of the arrow ⇒fig. 90 .
Fig. 89 Centre
console: Storage
compartment
WARNING
•The storage compartment is not a substitute for the ashtray and
must also not be used for such purposes. Risk of fire!
•The storage compartment must always be closed when driving
for safety reasons.
Fig. 90 Stowage
compartment for spec-
tacles
Page 99 of 259

Seats and Stowage
98
Stowage compartment below steering wheel
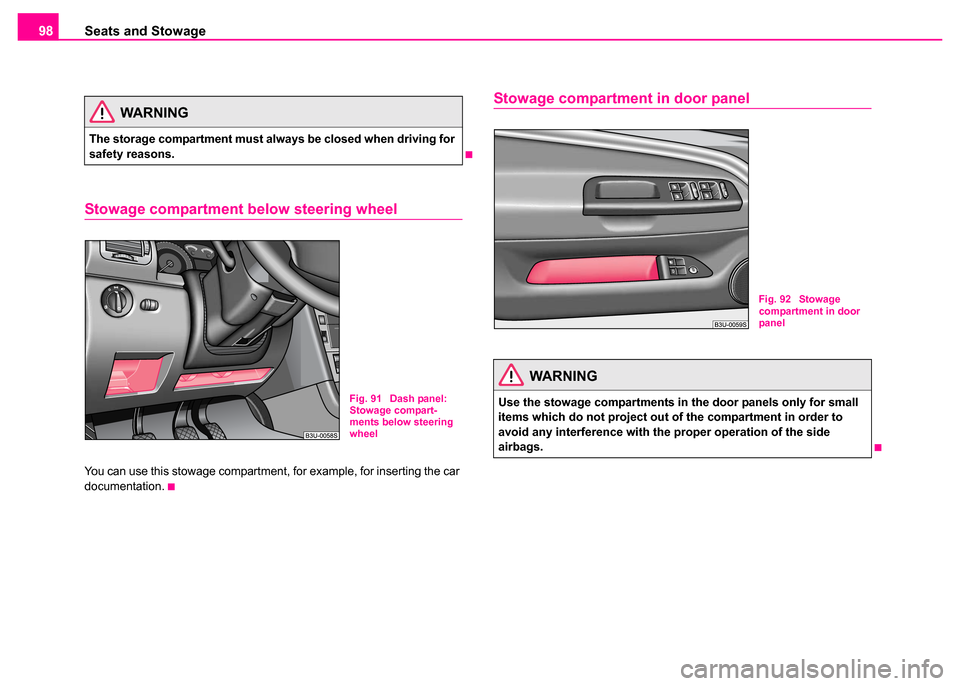
You can use this stowage compartment, for example, for inserting the car
documentation.
Stowage compartment in door panelWARNING
The storage compartment must always be closed when driving for
safety reasons.
Fig. 91 Dash panel:
Stowage compart-
ments below steering
wheel
WARNING
Use the stowage compartments in the door panels only for small
items which do not project out of the compartment in order to
avoid any interference with the proper operation of the side
airbags.
Fig. 92 Stowage
compartment in door
panel
Page 100 of 259

Seats and Stowage99
Using the systemSafetyDriving TipsGeneral MaintenanceBreakdown assistanceTechnical Data
Stowage compartment for an umbrella*
The umbrella supplied with the car is stowed in the compartment
in the rear left door ⇒fig. 93 . Opening umbrella
– Press the knob in direction of arrow
⇒fig. 94 .
Closing umbrella
– Press the knob in direction of arrow . The umbrella first of all closes partially in direction of arrow .
– Press the umbrella together in direction of arrow in order to fold it closed completely.
There is a water drain facility in the stowage compartment for a wet
umbrella.
The stowage compartment can also be used for stowing small objects.
The compartment features a foldable partition. When the umbrella is
removed the rear part of the compartment closes - thus no object can fall
inside the door. The partition is automatically folded back in position when
the umbrella is again placed in the compartment.
Fig. 93 Left rear door:
Storage compartment
Fig. 94 Opening and
closing umbrella
A1
A2
AA
AB