tow SKODA SUPERB 2009 2.G / (B6/3T) User Guide
[x] Cancel search | Manufacturer: SKODA, Model Year: 2009, Model line: SUPERB, Model: SKODA SUPERB 2009 2.G / (B6/3T)Pages: 294, PDF Size: 21.33 MB
Page 64 of 294

Lights and Visibility
63
Using the system
Safety
Driving Tips
General Maintenance
Breakdown assistance
Technical Data
•
You can change the illumination period
for the Coming Home Function by
means of the information display*.Leaving Home FunctionThis function makes it possible to switch on the lights when approaching the vehicle. Switching on Leaving Home Function – Unlock the vehicle with the radio remote control - the lights come on.Depending on equipment fitted the function Leaving Home switches on the following lights:•
Parking lights,
•
Low beam,
•
Entry lighting in the exterior mirrors,
•
Licence plate light.
Leaving Home Function The function Leaving Home is controlled wi
th the light sensor in the mount of the
interior rear mirror. If the light intensity is higher than the set value of the light sensor, the Leaving Home Function is not
switched on after unlocking the vehicle
with the radio remote control. After unlocking the vehicle with the radio remote control, the lights come on for 30 seconds. The Leaving Home Function is also switched off after the ignition is switched on and after locking the vehicle. If no door is opened within
30 seconds, the lights go out and the vehicle is locked
automatically.
Note
•
If the Leaving Home Function is switch
ed on constantly, the battery will be
heavily discharged particular
ly in short-haul traffic.
•
The switching on of the described lights
should only be und
ertaken in accord-
ance with the legal requirements.•
You can change the illumination period
for the Leaving Home Function by
means of the information display*.Adaptive headlights (AHL)*Switch on Adaptive headlights (AHL)* – Turn the light switch
⇒
page 61, fig. 56
into position
.
The outer illumination switches on if:•
the light sensor recognizes the low light intensity,
•
no reverse gear is engaged,
•
the operation “tourist light” is not switched on.
The light sensor switches on the full ou
ter illumination at low light intensity.
System AHL* makes it possible to change
the length and width of illumination of
the headlight. The length and width of i
llumination changes automatically in rela-
tion to the vehicle speed and the use of the windscreen wiper. System AHL* operates in the following modes. Mode out of town The mode “out of town” is a basic mode. The dispersion of the cone of light in front of the vehicle is similar to the low beam. The mode is active if none of the following modes are active. Mode rain In the mode “rain” the dispersion of the cone of light in front of the vehicle is wider and the width of illumination is shorter,
so that during bad weather (rain) the
dazzling of the oncoming drivers can be reduced. The mode is activated at speeds of 15 - 70 km/h and if the windscreen wi
pers continuously operate for a period of
time longer than 2 minutes. The mode
is deactivated when dropping below or
exceeding the set speed limit or if the windscreen wipers have been switched off for a period of time longer than 8 minutes.
s2dk.1.book Page 63 Wednesday, April 8, 2009 12:23 PM
Page 66 of 294
Lights and Visibility
65
Using the system
Safety
Driving Tips
General Maintenance
Breakdown assistance
Technical Data
•
the vehicle is stationary an
d the engine is running or
it moves with a speed of
maximum 40 km/h,•
the daylight driving lights are not switched on,
•
the low beam is switched on or th
e light switch is in the position
and the
intensity of the ambient light causes
the low beam to be switched on,
•
the fog lights are not switched on,
•
no reverse gear is engaged.Note
If you engage the reverse gear during the
active function “Corner”, both fog lights
illuminate.Rear fog light
Switching on the rear fog light – First of all turn the light switch into position
or
⇒
page 64,
fig. 57
.
– Pull the switch into position .The rear fog light warning light
⇒page 33 lights up in the instrument cluster
when the fog light is switched off. Only the rear fog light of the trailer lights up automatically when you are towing a trailer
using a factory-fitted towing device
which is fitted with the rear fog light.
The rear fog light is located in the rear light array on the driver's side.
Caution
The rear fog light should only be switched
on if visibility is
particularly poor
(conform with any varying legal provisions)
to avoid dazzling vehicles behind your
vehicle.
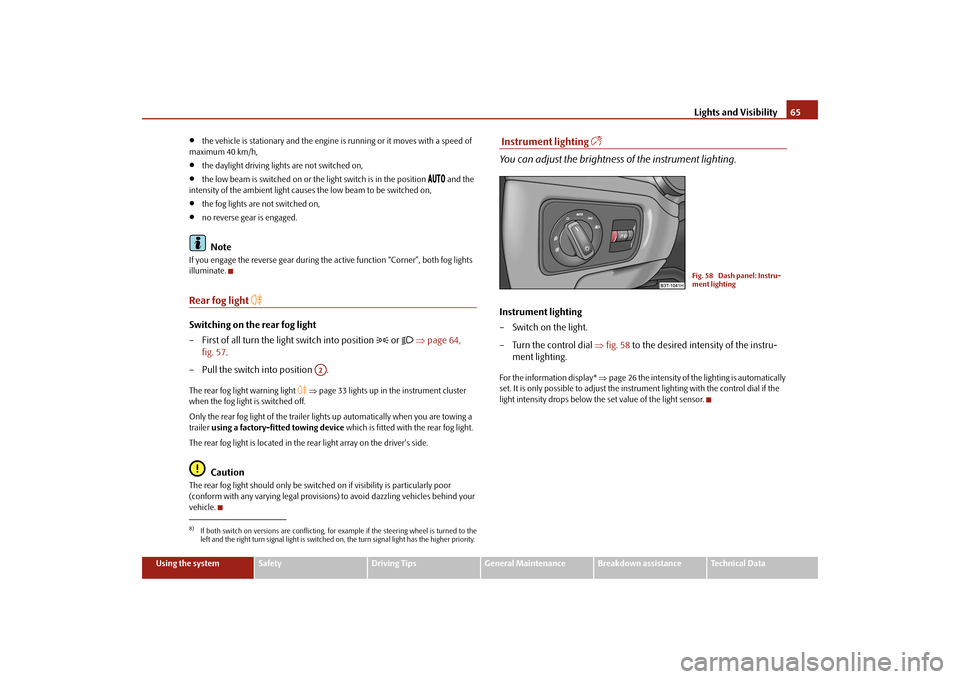
Instrument lighting
You can adjust the brightness
of the instrument lighting.
Instrument lighting – Switch on the light. – Turn the control dial
⇒
fig. 58
to the desired intensity of the instru-
ment lighting.
For the information display*
⇒page 26 the intensity of the lighting is automatically
set. It is only possible to adjust the inst
rument lighting with the control dial if the
light intensity drops below the set value of the light sensor.
8)If both switch on versions are conflicting, fo
r example if the steering wheel is turned to the
left and the right turn signal light is switched on, the turn signal light has the higher priority.
A2
Fig. 58 Dash panel: Instru-ment lighting
s2dk.1.book Page 65 Wednesday, April 8, 2009 12:23 PM
Page 68 of 294
Lights and Visibility
67
Using the system
Safety
Driving Tips
General Maintenance
Breakdown assistance
Technical Data
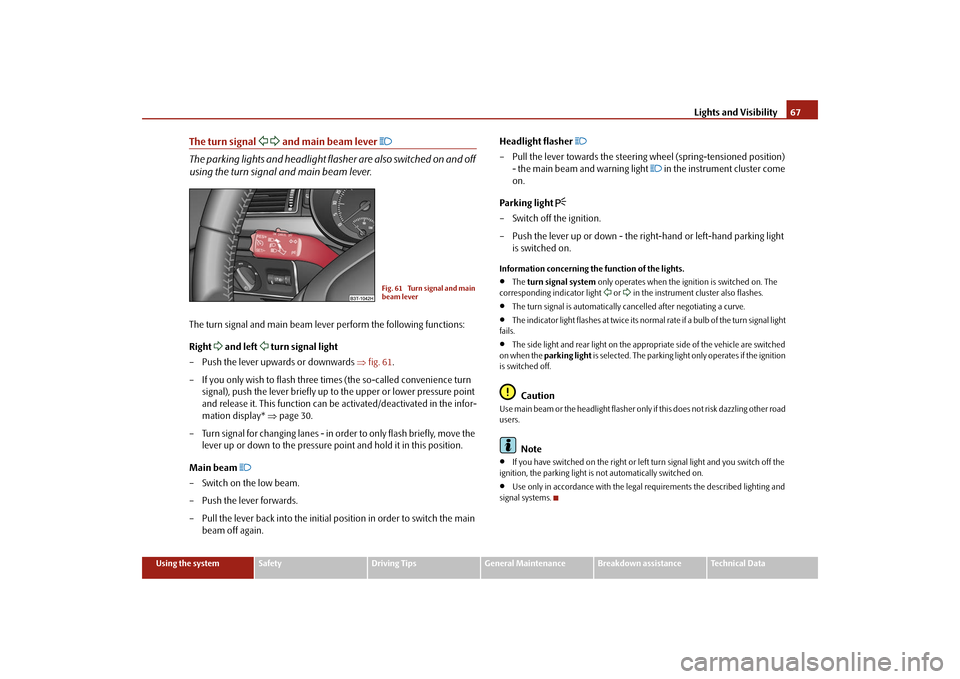
The turn signal
and main beam lever
The parking lights and headlight flas
her are also switched on and off
using the turn signal and main beam lever.The turn signal and main beam lever perform the following functions: Right
and left
turn signal light
– Push the lever upwards or downwards
⇒
fig. 61
.
– If you only wish to flash three ti
mes (the so-called convenience turn
signal), push the lever briefly up to the upper or lower pressure point and release it. This function can be activated/deactivated in the infor-mation display*
⇒
page 30.
– Turn signal for changing lanes - in or
der to only flash briefly, move the
lever up or down to the pressure po
int and hold it in this position.
Main beam
– Switch on the low beam. – Push the lever forwards.– Pull the lever back into the initial position in order to switch the main
beam off again.
Headlight flasher
– Pull the lever towards the steering
wheel (spring-tensioned position)
- the main beam and warning light
in the instrument cluster come
on.
Parking light
– Switch off the ignition. – Push the lever up or down - the right-hand or left-hand parking light
is switched on.
Information concerning the function of the lights.•
The
turn signal system
only operates when the ignition is switched on. The
corresponding indicator light
or in the instrument cluster also flashes.
•
The turn signal is automatically cancelled after negotiating a curve.
•
The indicator light flashes at twice its normal
rate if a bulb of the turn signal light
fails.•
The side light and rear light on the appropriate side of the vehicle are switched
on when the
parking light
is selected. The parking light only operates if the ignition
is switched off.
Caution
Use main beam or the headlight flasher only if this does not risk dazzling other road users.
Note
•
If you have switched on the right or left
turn signal light and you switch off the
ignition, the parking light is not automatically switched on.•
Use only in accordance with the legal requirements the described lighting and
signal systems.
Fig. 61 Turn signal and main beam lever
s2dk.1.book Page 67 Wednesday, April 8, 2009 12:23 PM
Page 71 of 294

Lights and Visibility
70
The warning light is located in
the door trim panel below
⇒page 69, fig. 67
.
The warning light goes on every time the door is opened. The light goes out about 10 minutes after opening the door in orde
r to avoid discharging the battery of the
vehicle.Luggage compartment lightThe lighting comes on automatically when the boot lid is opened. The luggage compartment lighting will switch off agai
n automatically if the boot lid remains
open for more than about 30 minutes.Entry lighting*The lighting is positioned on the bottom edge of the exterior mirror. The light beam is directed towards
the entry area of the front door.
The light comes on after the doors have been
locked or on opening the boot lid. The
light goes out after switching on the ignition or up to 30 seconds after closing all the doors, the bonnet and the boot lid. If a door, the bonnet or the boot lid remains open, the light goes out within 2 minutes if the ignition is switched off.
WARNING
If the entry light comes on, do not touch its cover - risk of burns!
VisibilityWindscreen and rear window heaterWindscreen heater* – You can switch the windscreen heater on or off by pressing the switch
⇒
fig. 68
- the indicator light in the switch comes on or goes out.
Fig. 68 Switch for wind- screen heaterFig. 69 Switch for rear window heater
s2dk.1.book Page 70 Wednesday, April 8, 2009 12:23 PM
Page 72 of 294

Lights and Visibility
71
Using the system
Safety
Driving Tips
General Maintenance
Breakdown assistance
Technical Data
Rear window heater – You can switch the rear window heater on or off by pressing the switch
⇒
page 70, fig. 69
- the indicator light in the switch comes on or
goes out.
The windscreen and rear window heater only operates when the engine is running. The windscreen and rear window heater
switches
off automatically after 10
minutes.
For the sake of the environment
As soon as the window is de-iced or free from mist, the heating should be switched off. The reduced current consumption will have a favourable effect on fuel economy
⇒page 205, “Saving electricity”.
Note
•
If the on-board voltage drops, the wi
ndscreen or rear window heater is
switched off automatica
lly, in order to provide sufficient electrical energy for the
engine control.•
The position and the shape of the switch for rear window heater can differ
depending on the equipment installed in the vehicle.
Sun visorsYou can pull the sun visor for the driver or
front passenger out of the fixture and
swivel it toward the door in the direction of the arrow
⇒fig. 70
.
The vanity mirrors in the sun visors are provided with covers. When you slide open the cover in the direction of the arrow , the vanity mirror lighting in the headliner switches on automatically. It switches off again when you slide the cover closed or when you raise the sun visor.
WARNING
The sun visors must not be swivelled to the side windows into the deploy-ment area of the head airbags if any ob
jects, such as ball-point pens etc. are
attached to them. This might result in injuries to the occupants if the head airbag is deployed.
Fig. 70 Sun visor: swivelling outA1
A2
s2dk.1.book Page 71 Wednesday, April 8, 2009 12:23 PM
Page 74 of 294
Lights and Visibility
73
Using the system
Safety
Driving Tips
General Maintenance
Breakdown assistance
Technical Data
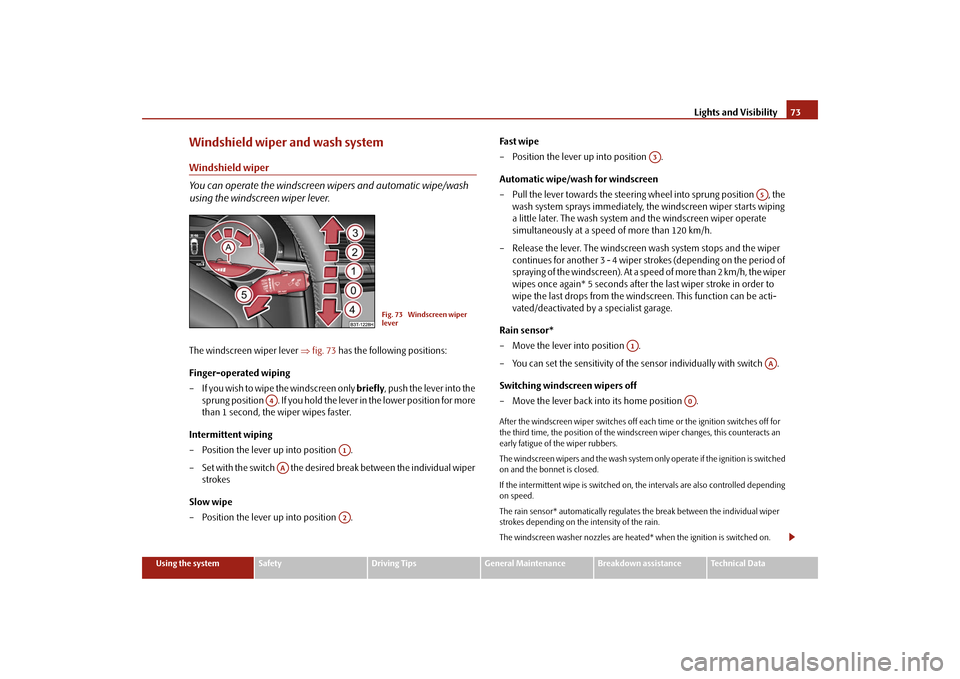
Windshield wiper and wash systemWindshield wiper You can operate the windscreen wipers and automatic wipe/wash using the windscreen wiper lever.The windscreen wiper lever
⇒
fig. 73
has the following positions:
Finger-operated wiping – If you wish to wipe the windscreen only
briefly
, push the lever into the
sprung position . If you hold the le
ver in the lower position for more
than 1 second, the wiper wipes faster.
Intermittent wiping – Position the lever up into position . – Set with the switch the desired break between the individual wiper
strokes
Slow wipe – Position the lever up into position .
Fa s t w ip e – Position the lever up into position . Automatic wipe/wash for windscreen – Pull the lever towards the steering
wheel into sprung position , the
wash system sprays immediately, the windscreen wiper starts wiping a little later. The wash system and the windscreen wiper operate simultaneously at a speed of more than 120 km/h.
– Release the lever. The windscreen wash system stops and the wiper
continues for another 3 - 4 wiper strokes (depending on the period of spraying of the windscreen). At a speed of more than 2 km/h, the wiper wipes once again* 5 seconds after the last wiper stroke in order to wipe the last drops from the windscreen. This function can be acti-vated/deactivated by a specialist garage.
Rain sensor* – Move the lever into position . – You can set the sensitivity of the sensor individually with switch . Switching windscreen wipers off – Move the lever back into its home position .After the windscreen wiper switches off each
time or the ignition switches off for
the third time, the position of the windscreen wiper changes, this counteracts an early fatigue of the wiper rubbers. The windscreen wipers and the wash system only operate if the ignition is switched on and the bonnet is closed. If the intermittent wipe is switched on, the intervals are also controlled depending on speed. The rain sensor* automatically regulates
the break between the individual wiper
strokes depending on the intensity of the rain. The windscreen washer nozzles are heated* when the ignition is switched on.
Fig. 73 Windscreen wiper lever
A4
A1
AA
A2
A3
A5
A1
AA
A0
s2dk.1.book Page 73 Wednesday, April 8, 2009 12:23 PM
Page 79 of 294
Seats and Stowage
78
Seats and StowageFront seatsBasic informationThe front seats have a wide range of different settings and can thus be matched to the physical characteristics of the driver and front passenger. Correct adjustment of the seats is particularly important for:•
safely and quickly reaching the controls,
•
a relaxed, fatigue-free body position,
•
achieving the maximum protection offere
d by the seat belts and the airbag
system.
WARNING
•
Never transport more occupants than the maximum seating in the
vehicle.•
Each occupant must correctly fasten
the seat belt belonging to the seat.
Children must be fastened
⇒page 185, “Transporting children safely” with
a suitable restraint system.•
The front seats and the head restraints must always be adjusted to match
the body size of the seat occupant as well as the seat belts must always be correctly fastened in order to provide an optimal protection for you and your occupants.•
Always keep your feet in the footwell
when the car is being driven - never
place your feet on the instrument panel, out of the window or on the surfaces of the seats. This is particularly important for the front seat passenger. You will be exposed to increased risk of injury if it becomes necessary to apply the brake or in the event of an accident. If an airbag is deployed, you may suffer fatal injuries
when adopting an incorrect seated
position!•
It is important for the driver and front passenger to maintain a distance
of at least 25 cm from the steering wheel
or dash panel. Not maintaining this
minimum distance will mean that the airbag system will not be able to prop- erly protect you - hazard! The front
seats and the head restraints must
always also be correctly adjusted to match the body size of the occupant.•
Ensure that there are no objects in
the footwell as any objects may get
behind the pedals during a driving or
braking manoeuvre. You would then
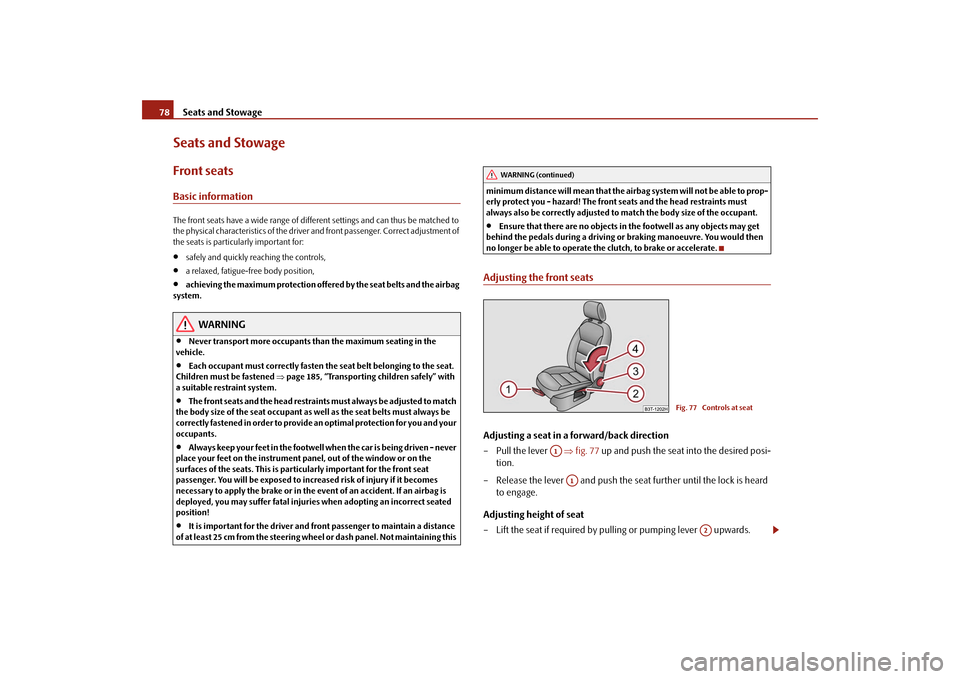
no longer be able to operate the clutch, to brake or accelerate.Adjusting the front seatsAdjusting a seat in a forward/back direction – Pull the lever
⇒
fig. 77
up and push the seat into the desired posi-
tion.
– Release the lever and push the seat further until the lock is heard
to engage.
Adjusting height of seat – Lift the seat if required by pulling or pumping lever upwards.
WARNING (continued)
Fig. 77 Controls at seat
A1
A1
A2
s2dk.1.book Page 78 Wednesday, April 8, 2009 12:23 PM
Page 80 of 294
Seats and Stowage
79
Using the system
Safety
Driving Tips
General Maintenance
Breakdown assistance
Technical Data
– Lower the seat if required by pushing or pumping lever down-
wards.
Adjust the angle of the seat backrest – Relieve any pressure on the seat backrest (do not lean on it) and turn
the handwheel
⇒
page 78, fig. 77
to adjust the desired angle of the
backrest.
Adjusting lumbar support – Turn the lever until you have se
t the most comfortable curvature
of the seat upholstery in the area of your spine.
The driver's seat should be adjusted in
such a way that the pedals can be pressed
to the floor with slightly bent legs. The seat backrest on the driver's seat sh
ould be adjusted in such a way that the
upper point of the steering wheel can be
easily reached with slightly bent arms.
WARNING
•
Only adjust the driver seat when the ve
hicle is stationary - risk of injury!
•
Take care when adjusting the seat! Adjusting the seat without care can
lead to bruises or injuries.•
The seat backrests must not be angled too far back when driving other-
wise this will affect proper operation of the seat belts and of the airbag system - risk of injury!
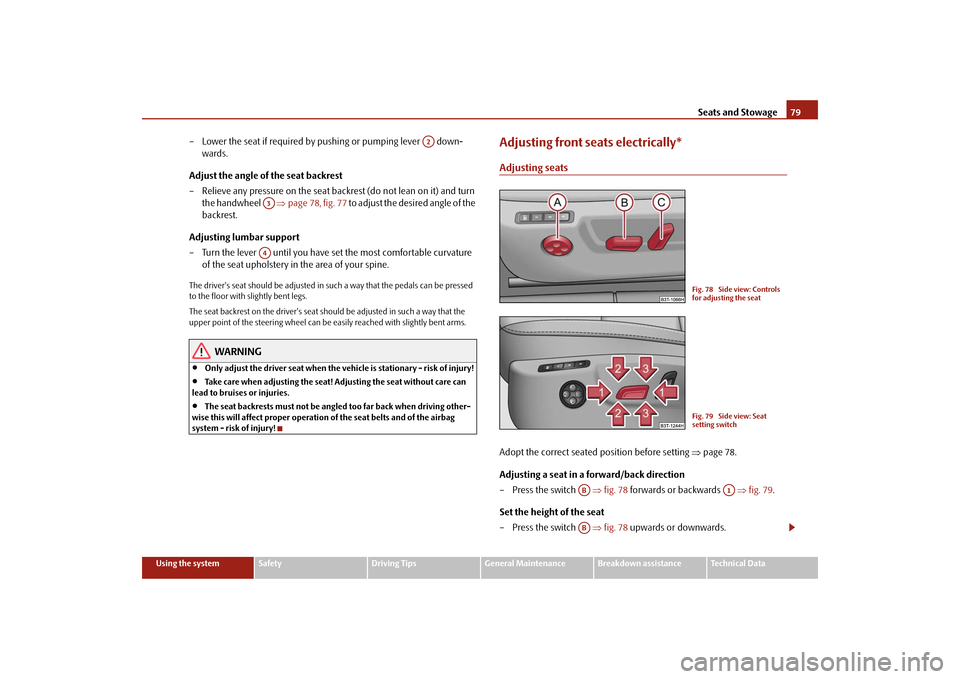
Adjusting front seats electrically*Adjusting seatsAdopt the correct seated position before setting
⇒
page 78.
Adjusting a seat in a forward/back direction – Press the switch
⇒
fig. 78
forwards or backwards
⇒
fig. 79
.
Set the height of the seat – Press the switch
⇒
fig. 78
upwards or downwards.
A2
A3A4
Fig. 78 Side view: Controls for adjusting the seatFig. 79 Side view: Seat setting switch
AB
A1
AB
s2dk.1.book Page 79 Wednesday, April 8, 2009 12:23 PM
Page 81 of 294
Seats and Stowage
80
Adjust the angle of the seat – Press the switch at the front
⇒
page 79, fig. 79
or at the back
⇒
page 79, fig. 79
.
Adjusting the seat backrest – Press the switch
⇒
page 79, fig. 78
in the direction of the desired
setting.
Adjusting lumbar support – Press the switch front
⇒
page 79, fig. 78
in order to enlarge the
curvature of the lumbar support.
– Press the switch rear in order to reduce the curvature of the lumbar
support.
– Press the switch top in order to adjust the curvature of the lumbar
support higher.
– Press the switch bottom in order to adjust the curvature of the
lumbar support lower.
Switch is operated in order to move the seat up/down and forward/back, while switch is operated in order to move the backrest forward or back.
WARNING
•
Only adjust the driver seat when the ve
hicle is stationary - risk of injury!
•
Caution when adjusting the seat! You ma
y suffer injuries or bruises as a
result of adjusting the seat without paying proper attention.•
In view of the fact that the seats can
also be adjusted when the ignition is
switched off (even when ignition key withdrawn), you should never leave children unattended in the car.•
The seat backrests must not be angl
ed too far back when driving other-
wise this will affect proper operation of the seat belts and of the airbag system - risk of injury!
Note
If the movement of the seat is inadvertently interrupted during an adjustment, once again press the switch in the appropriate
direction and continue with the adjust-
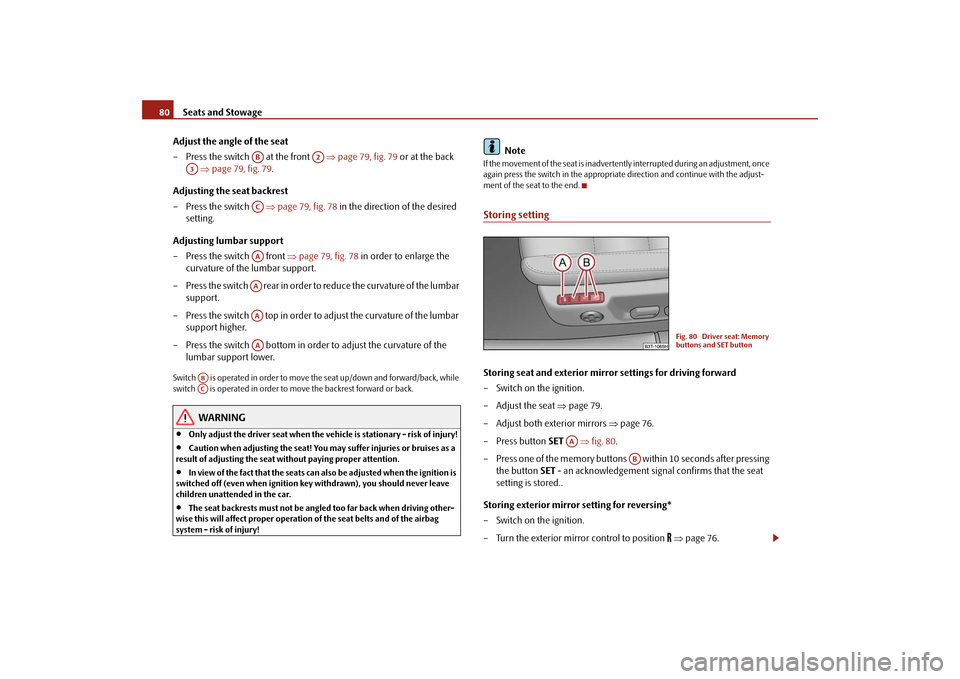
ment of the seat to the end.Storing settingStoring seat and exterior mirror settings for driving forward – Switch on the ignition. – Adjust the seat
⇒
page 79.
– Adjust both exterior mirrors
⇒
page 76.
– Press button
SET
⇒
fig. 80
.
– Press one of the memory buttons within 10 seconds after pressing
the button
SET
- an acknowledgement signal
confirms that the seat
setting is stored..
Storing exterior mirror setting for reversing* – Switch on the ignition. – Turn the exterior mirror control to position
⇒
page 76.
AB
A2
A3
ACAAAAAAAA
ABAC
Fig. 80 Driver seat: Memory buttons and SET button
AA
AB
s2dk.1.book Page 80 Wednesday, April 8, 2009 12:23 PM
Page 82 of 294
Seats and Stowage
81
Using the system
Safety
Driving Tips
General Maintenance
Breakdown assistance
Technical Data
– Engage reverse gear. – Move the right exterior mirror into the desired position
⇒
page 76.
– Take the vehicle out of gear. The set position of the exterior mirror is
stored.
Memory buttons Memory for the seat offers the possibility
to store the individual driver seat and
external mirror position. An individual posi
tion can be allocated to each of the three
memory buttons
⇒page 80, fig. 80
, that is three in tota
l. After pressing the
corresponding memory button , the seat and the exterior mirror are automati-cally moved into the positions which
have been allocated to this button
⇒page 81.
Emergency Off You can interrupt the setting operation at any time, if you operate any button of the driver seat.
Note
•
For safety reasons, it is not possible to store this position if the inclination angle
of the seat backrest is more than 102° in relation to the seat cushion.•
When storing settings with the memory buttons, we recommend that you begin
with the front button and assign a memo
ry button to each additional driver.
•
Each new setting stored with the same
button erases the previous setting.
•
Each time you store the seat and exterior mirror settings for driving forward you
also have to re-store the individual setting
of the exterior mirror on the passenger
side for reversing.Assigning remote control to the memory buttonsAfter storing the settings of the seat
and exterior mirrors, you have 10
seconds in order to assign the radio remote control to the appropriate memory button. – Withdraw the ignition key.
– Press the unlock button
⇒
page 51, after the successful assignment
an audible signal will sound. The setting is stored with the memory button which you have selected.
If you wish to be able to retrieve the settings which are stored in the memory by also using the radio remote control, you have
to assign the radio remote control to a
memory button in each case. If you wish, you can obtain an additional
remote control key from an authorised
Škoda Service partner and then assign th
e remote control key to another memory
button.
Note
•
If the radio remote control had previous
ly been assigned
to another memory
button, this setting is then erased by the new assignment.•
If you assign the radio remote control
to a memory button which has already
been assigned to a radio remote control,
the old assignment is also replaced by a
new assignment in this case.•
The assignment of the radio remote cont
rol to a memory button is retained,
however, after reassigning the seats and exterior mirrors.Retrieving settings of the seat and mirrors You can retrieve the stored settings either with the memory buttons or with the remote control*.Retrieving settings with memory buttons – In order to retrieve the stored setting, you have two possibilities: –
One-touch automatic memory:
Briefly press the desired memory
button
⇒
page 80, fig. 80
. The seat and exterior mirror are moved
automatically into the stored position
s (this applies only if the ignition
is switched on and the speed is less than 5 km/h).
AB
AB
AB
s2dk.1.book Page 81 Wednesday, April 8, 2009 12:23 PM