towing SKODA SUPERB 2013 2.G / (B6/3T) Owner's Manual
[x] Cancel search | Manufacturer: SKODA, Model Year: 2013, Model line: SUPERB, Model: SKODA SUPERB 2013 2.G / (B6/3T)Pages: 274, PDF Size: 17.31 MB
Page 6 of 274
Table of Contents
Materials defect liability and ŠKODA warranty for
new cars5
Mobility warranty and ŠKODA extended
warranty
6
Abbreviations
Using the system
Cockpit
9
Overview
8
Instruments and Indicator Lights
10
Instrument cluster
10
Warning Lights
14
Information system
23
Driver information system
23
Multifunction display (MFA)
25
MAXI DOT display
28
Service Interval Display
30
Unlocking and opening
32
Unlocking and locking
32
KESSY
37
Anti-theft alarm system
38
Luggage compartment lid
39
Electric boot lid (Superb Combi)
41
Electric power windows
44
Electric sliding/tilting roof
47
Panoramic sliding roof (Superb Combi)
48
Lights and visibility
51
Lights
51
Interior lights
57
Visibility
59Windscreen wipers and washers61Rear mirror63
Seats and useful equipment
66
Adjusting the seats
66
Seat features
70
Practical equipment
74
Luggage compartment
84
Removable light (Superb Combi)
90
Variable loading floor in the luggage
compartment (Estate)
92
Extending variable loading floor with integrated
aluminium rails and faseting elements (Superb Combi)
92
Net partition (Superb Combi)
95
Roof rack system
96
Air conditioning system
98
Heating, ventilation and cooling
98
Air conditioning system (manual air conditioningsystem)
100
Climatronic (automatic air conditioningsystem)
103
Auxiliary heating (auxiliary heating andventilation)
107
Communication and multimedia
110
General information
110
Universal telephone preinstallation GSM II
113
Universal telephone preinstallation GSM IIl
115
WLAN
119
Voice control
122
Multimedia
126
Driving
Starting-off and Driving
130
Steering
130
Starting and stopping the engine using the key
131
Starting and stopping the engine - KESSY
133Brakes137Manual gear changing and pedals138
Automatic transmission
139
Running in
142
Economical driving and environmental
sustainability
143
Avoiding damage to your vehicle
147
Driving abroad
148
Assist systems
150
Brake assist systems
150
Parking aid
152
Park assist
153
Cruise Control System
157
START-STOP
159
Fatigue detection (break recommendation)
161
Towing a trailer
162
Towing device
162
Trailer
165
Safety
Passive Safety
169
General information
169
Correct seated position
170
Seat belts
173
Using seat belts
173
Inertia reels and belt tensioners
176
Airbag system
178
Description of the airbag system
178
Airbag overview
179
Deactivating airbags
183
Transporting children safely
186
Child seat
186
Fastening systems
1883Table of Contents
Page 7 of 274
General Maintenance
Car care191
Service intervals
191
Services, modifications, and technical
alterations
193
Washing your car
196
Taking care of your vehicle exterior
198
Taking care of the interior
201
Inspecting and replenishing
204
Fuel
204
Engine compartment
206
Engine oil
210
Coolant
212
Brake fluid
214
Vehicle battery
215
Wheels
220
Tyres and wheel rims
220
Winter operation
226
Do-it-yourself
Emergency equipment and self-help
227
Emergency equipment
227
Changing a wheel
229
Tyre repair
232
Jump-starting
234
Towing the vehicle
236
Radio remote control
238
Emergency unlocking/locking
240
Emergency operation of the sliding/tilting roof
241
Replacing windscreen wiper blades
242
Fuses and light bulbs
244
Fuses
244
Bulbs
247Technical data
Technical data252
Vehicle data
252
Index
4Table of Contents
Page 9 of 274

Mobility warranty and ŠKODA extendedwarranty
Mobility warranty
Mobility warranty provides a sense of security when travelling in your vehicle.
Should your car break down when you're on the move one day as a result of an
unexpected fault, you will be eligible for services to ensure your continued mobili-
ty as part of the mobility warranty, which includes the following: Breakdown serv-ice at the breakdown location and towing off to the ŠKODA service partner, tech-
nical assistance by phone or on-site operation.
If your vehicle is not repaired on the same day, the ŠKODA service partner may
provide further services as required, such as replacement transportation (bus,
train, etc.), a courtesy vehicle, etc.
You can obtain more information regarding terms and conditions for the provision of mobility warranty for your vehicle from your ŠKODA partner. Here you will also
be given detailed terms and conditions for the mobility warranty with respect to
your vehicle. In the event that there is no mobility warranty coverage available for
your vehicle, you should check with any ŠKODA service partner about the possibil-
ity of a subsequent agreement.
Note
The mobility warranty is only available for some countries.
Optional ŠKODA extended warranty
If you received an extended ŠKODA warranty when purchasing your new car, the
two-year ŠKODA warranty for damages to your ŠKODA vehicle will be extended
by the time you chose or until the chosen mileage limit has been reached.
The previously mentioned paint warranty and the warranty against rust perfora-
tion stay unaffected by the extended warranty.
Detailed conditions for the extended warranty are included in the extended war- ranty terms and conditions, which your ŠKODA partner will have given to you
upon purchasing your new vehicle.
Note
The mobility guarantee and optional extended warranty ŠKODA are only available
for some countries.
6Mobility warranty and ŠKODA extended warranty
Page 41 of 274
Fault in KESSY system
If there is a fault in the KESSY system, the following message will appear in the
display of the instrument cluster.
Keyless access system faulty.CHECK KEYLESS
Low voltage of the key battery
If the voltage of the battery in the remote control key is too low, the following
message appears in the display of the instrument cluster.
Change the key battery!
KEY BATTERY
Change the key battery » page 239!
Parking vehicle
First read and observe the introductory information given on page 37.
If the vehicle is not unlocked within 60 hours/ 90 hours, the sensors in the handleof the driver /front passenger's door are deactivated automatically » Fig. 14 on
page 34.
Activation after 60 hours
›
Unlock the driver's door using the sensor
2
» Fig. 14 on page 34.
›
Press the handle of the boot lid.
›
Unlock the vehicle using the symbol button
on the remote control key.
›
Unlocking the driver's door in an emergency » page 240.
Activation after 90 hours
›
Unlock the vehicle using the symbol button
on the remote control key.
›
Unlocking the driver's door in an emergency » page 240.
Anti-theft alarm system
Introduction
This chapter contains information on the following subjects:
Activating/deactivating
39
Interior monitor and towing protection
39
The anti-theft alarm system increases the level of protection against people
seeking to break into the vehicle. The system triggers audible and visual warning
signals if an attempt is made to break into the vehicle (hereafter referred to only
as alarm).
An alarm is triggered when the following monitored areas of the vehicle have a
fault.
› Bonnet.
› Boot lid.
› Doors.
› Ignition lock.
› Vehicle inclination
» page 39.
› Interior of car
» page 39.
› A drop in voltage of the on-board power supply.
› Socket of the factory-fitted towing device
» page 162, Towing a trailer .
An alarm is immediately triggered if either of the two battery terminals is discon-
nected while the anti-theft alarm system is activated.
The alarm is switched off by unlocking the vehicle or switching on the ignition.
CAUTION
Before leaving the vehicle, it must be checked that all of the doors and windows
including the sliding/tilting roof are locked in order to ensure the full functionality
of the anti-theft alarm system.
Note
The working life of the alarm siren is 5 years.
38Using the system
Page 42 of 274
Activating/deactivatingFirst read and observe the introductory information and safety warn-ings
on page 38.
Activating
The anti-theft alarm system is activated automatically approximately 30 seconds
after the vehicle is locked.
If you unlock the vehicle and do not open a door or the boot lid within the next
30 seconds, the vehicle will lock again automatically and the safelock system or
anti-theft alarm system will be switched on. This function is intended to prevent
the car being unlocked unintentionally.
Deactivating
The anti-theft alarm system is deactivated automatically after the vehicle is un-
locked. If the vehicle is not opened within 30 seconds, the anti-theft alarm sys-
tem is automatically activated again.
The alarm system is also deactivated if you unlock the driver door using the key
within 45 seconds of locking the vehicle.
Note
If the car is unlocked with the key in the driver door, insert the key into the igni-
tion and switch the ignition to deactivate the alarm system.
Interior monitor and towing protection
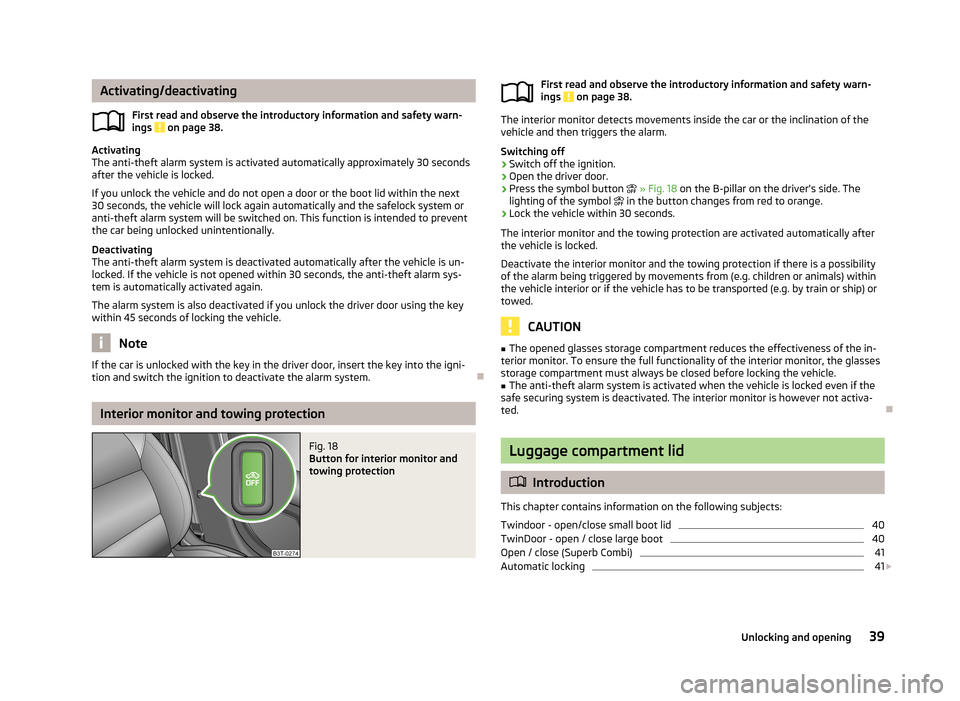
Fig. 18
Button for interior monitor and
towing protectionFirst read and observe the introductory information and safety warn- ings on page 38.
The interior monitor detects movements inside the car or the inclination of thevehicle and then triggers the alarm.
Switching off
›
Switch off the ignition.
›
Open the driver door.
›
Press the symbol button » Fig. 18 on the B-pillar on the driver's side. The
lighting of the symbol in the button changes from red to orange.
›
Lock the vehicle within 30 seconds.
The interior monitor and the towing protection are activated automatically after
the vehicle is locked.
Deactivate the interior monitor and the towing protection if there is a possibility
of the alarm being triggered by movements from (e.g. children or animals) within
the vehicle interior or if the vehicle has to be transported (e.g. by train or ship) or towed.
CAUTION
■ The opened glasses storage compartment reduces the effectiveness of the in-
terior monitor. To ensure the full functionality of the interior monitor, the glasses storage compartment must always be closed before locking the vehicle.■
The anti-theft alarm system is activated when the vehicle is locked even if the
safe securing system is deactivated. The interior monitor is however not activa-
ted.
Luggage compartment lid
Introduction
This chapter contains information on the following subjects:
Twindoor - open/close small boot lid
40
TwinDoor - open / close large boot
40
Open / close (Superb Combi)
41
Automatic locking
41
39Unlocking and opening
Page 58 of 274
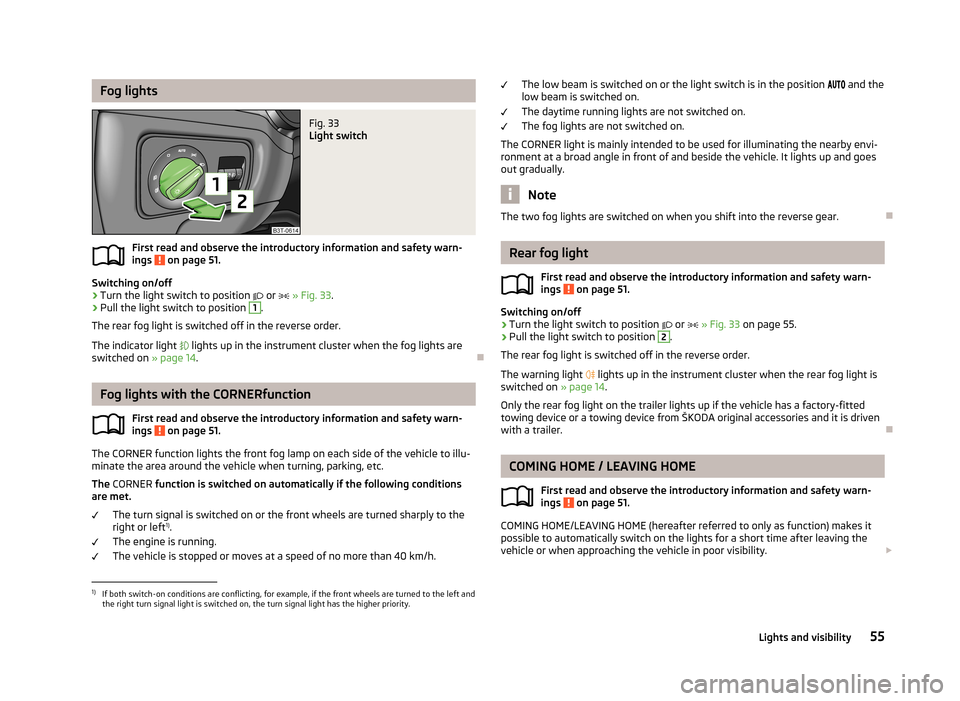
Fog lightsFig. 33
Light switch
First read and observe the introductory information and safety warn-
ings on page 51.
Switching on/off
›
Turn the light switch to position
or
» Fig. 33 .
›
Pull the light switch to position
1
.
The rear fog light is switched off in the reverse order.
The indicator light
lights up in the instrument cluster when the fog lights are
switched on » page 14.
Fog lights with the CORNERfunction
First read and observe the introductory information and safety warn-ings
on page 51.
The CORNER function lights the front fog lamp on each side of the vehicle to illu-
minate the area around the vehicle when turning, parking, etc.
The CORNER function is switched on automatically if the following conditions
are met.
The turn signal is switched on or the front wheels are turned sharply to the
right or left 1)
.
The engine is running.
The vehicle is stopped or moves at a speed of no more than 40 km/h.
The low beam is switched on or the light switch is in the position and the
low beam is switched on.
The daytime running lights are not switched on. The fog lights are not switched on.
The CORNER light is mainly intended to be used for illuminating the nearby envi-
ronment at a broad angle in front of and beside the vehicle. It lights up and goes out gradually.
Note
The two fog lights are switched on when you shift into the reverse gear.
Rear fog light
First read and observe the introductory information and safety warn-
ings
on page 51.
Switching on/off
›
Turn the light switch to position
or
» Fig. 33 on page 55.
›
Pull the light switch to position
2
.
The rear fog light is switched off in the reverse order.
The warning light
lights up in the instrument cluster when the rear fog light is
switched on » page 14.
Only the rear fog light on the trailer lights up if the vehicle has a factory-fitted
towing device or a towing device from ŠKODA original accessories and it is driven
with a trailer.
COMING HOME / LEAVING HOME
First read and observe the introductory information and safety warn-ings
on page 51.
COMING HOME/LEAVING HOME (hereafter referred to only as function) makes it
possible to automatically switch on the lights for a short time after leaving the
vehicle or when approaching the vehicle in poor visibility.
1)
If both switch-on conditions are conflicting, for example, if the front wheels are turned to the left and
the right turn signal light is switched on, the turn signal light has the higher priority.
55Lights and visibility
Page 96 of 274
Fit and remove variable loading floor94Fixing set94
Movable lashing eyes
95
The variable loading floor makes handling of bulky items of luggage easier.
CAUTION
The maximum permissible load of the variable loading floor is 75 kg.
Note
The space below the variable loading floor can be used for stowing objects, for
example the fastening elements, removed foldable boot cover, etc.
Partial extension of variable load floor
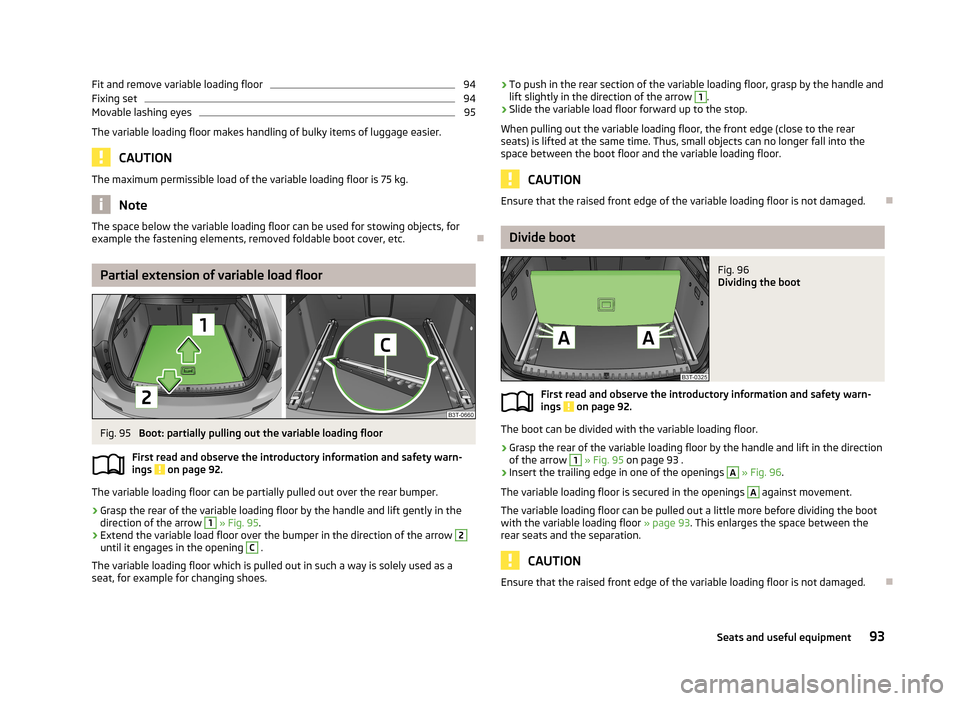
Fig. 95
Boot: partially pulling out the variable loading floor
First read and observe the introductory information and safety warn- ings
on page 92.
The variable loading floor can be partially pulled out over the rear bumper.
›
Grasp the rear of the variable loading floor by the handle and lift gently in the direction of the arrow
1
» Fig. 95 .
›
Extend the variable load floor over the bumper in the direction of the arrow
2
until it engages in the opening
C
.
The variable loading floor which is pulled out in such a way is solely used as a seat, for example for changing shoes.
› To push in the rear section of the variable loading floor, grasp by the handle and
lift slightly in the direction of the arrow 1.›
Slide the variable load floor forward up to the stop.
When pulling out the variable loading floor, the front edge (close to the rear seats) is lifted at the same time. Thus, small objects can no longer fall into the
space between the boot floor and the variable loading floor.
CAUTION
Ensure that the raised front edge of the variable loading floor is not damaged.
Divide boot
Fig. 96
Dividing the boot
First read and observe the introductory information and safety warn- ings on page 92.
The boot can be divided with the variable loading floor.
›
Grasp the rear of the variable loading floor by the handle and lift in the direction
of the arrow
1
» Fig. 95 on page 93 .
›
Insert the trailing edge in one of the openings
A
» Fig. 96 .
The variable loading floor is secured in the openings
A
against movement.
The variable loading floor can be pulled out a little more before dividing the boot
with the variable loading floor » page 93. This enlarges the space between the
rear seats and the separation.
CAUTION
Ensure that the raised front edge of the variable loading floor is not damaged.
93Seats and useful equipment
Page 134 of 274
Power steeringFirst read and observe the introductory information and safety warn-ings
on page 130.
The power steering enables you to steer the vehicle with less physical force.
The power steering only works when the engine is running. It is still fully possible to steer the vehicle if the power steering fails or if the en-gine is not running (e.g. when towing). However, greater physical effort is re-
quired to turn the steering wheel.
Starting and stopping the engine using the key
Introduction
This chapter contains information on the following subjects:
Electronic immobilizer
132
Ignition Switch
132
Starting the engine
132
Stopping the engine
133
Starting and stopping the engine on vehicles with the KESSY system » page 133.
The engine can only be started using a correctly coded original key. The engine running noises may louder at first be louder for a short time afterstarting the cold engine. This is quite normal and is not an operating problem.
WARNING■ When driving, the ignition key must always be in the position 2 » Fig. 118 on
page 132 (ignition switched on) without the engine running. This position is
confirmed by the appearance of certain indicator lamps in the instrument clus-
ter. ■ If the key is not in position 2,
it could unexpectedly lock the steering -
danger of accident!
■
Only pull the ignition key from the ignition lock when the vehicle has come
to a complete stop (by applying the handbrake). Otherwise, the steering could
be blocked – risk of accident!
■
When leaving the vehicle, the ignition must always be removed. This is par-
ticularly important if children are left in the vehicle. Children could otherwise
start the engine for example – risk of accident or injury!
■
Never leave the vehicle unattended with the engine running.
■
Never switch off the engine before the vehicle is stationary – risk of acci-
dent!
WARNING■ Never leave the engine running in unventilated or closed rooms. The ex-
haust gases from the engine contain substances such as odourless and col-
ourless carbon monoxide (a poisonous gas) – risk to life! ■ Carbon monoxide can cause unconsciousness and death.
CAUTION
■The starter must only be operated when the engine is not running and the vehi-
cle is at a standstill. The starter or engine can be damaged if the starter is activa-
ted when the engine is running 3
» Fig. 118 on page 132.
■
Do not tow start the engine – there is a risk of damaging the engine and the
catalytic converter. The battery from another vehicle can be used as a jump-start
aid » page 234 , Jump-starting .
CAUTION
■
Avoid high engine revolutions, full throttle and high engine loads before the en-
gine has reached its operating temperature – risk of damaging the engine!■
Do not switch the engine off immediately at the end of your journey after the
engine has been operated over a prolonged period at high loads but leave it to
run at an idling speed for about 1 minute. This prevents any possible accumulation
of heat when the engine is switched off.
131Starting-off and Driving
Page 153 of 274
Assist systems
Brake assist systems
Introduction
This chapter contains information on the following subjects:
Electronic Stability Control (ESC)
150
Antilock Braking System (ABS)
151
Traction Control System (TCS)
151
Electronic Differential Lock (EDL)
151
Driver Steering Recommendation (DSR)
151
Hydraulic Brake Assist (HBA)
151
Hill Hold Control (HHC)
152WARNING■ A lack of fuel can cause irregular engine running or cause the engine to shut
down. The brake assist systems would then fail to function – risk of accident!■
Adjust the speed and driving style to the current visibility, weather, road and
traffic conditions. The increased safety provided by the brake assist systems
must not tempt you to take safety risks – risk of accident!
■
In the event of an ABS fault, visit a specialist garage immediately. Adjust
your style of driving according to the damage to the ABS, as you will not know
the exact extent of the damage or the extent to which this is limiting the
braking efficiency.
CAUTION
■ All four wheels must be fitted with the same tyres approved by the manufactur-
er to ensure the brake assist systems operate correctly.■
Changes to the vehicle (e.g. to the engine, brakes, chassis) can influence the
functionality of the brake assist systems » page 193, Services, modifications, and
technical alterations .
■
If a fault occurs in the ABS system, the ESC, ASR and EDL will also not work. An
ABS fault is indicated by the warning light » page 19 .
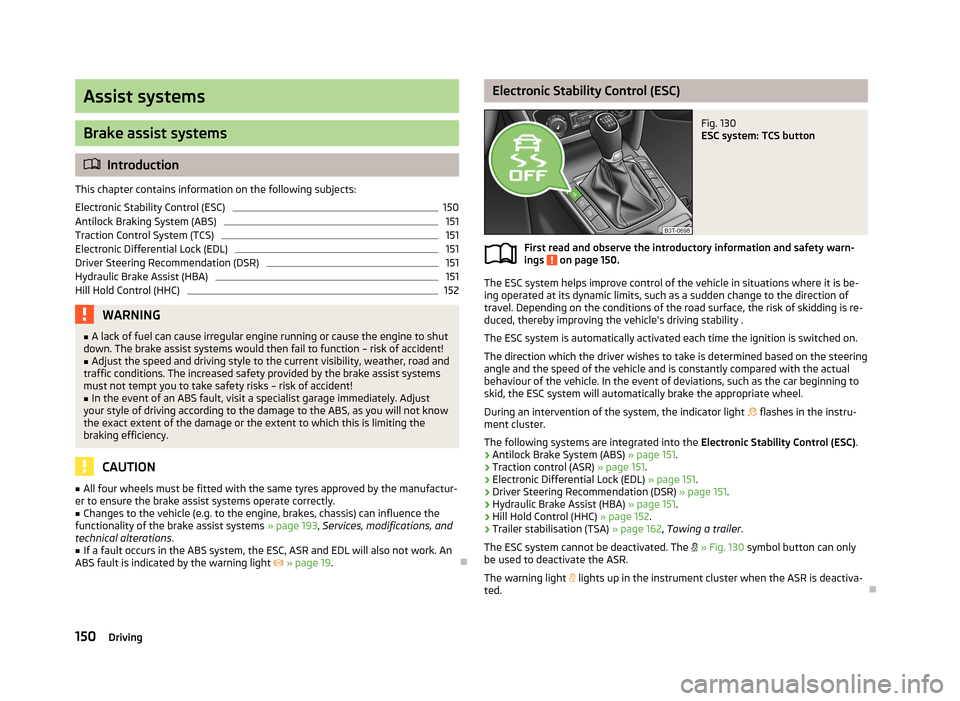
Electronic Stability Control (ESC)Fig. 130
ESC system: TCS button
First read and observe the introductory information and safety warn-
ings on page 150.
The ESC system helps improve control of the vehicle in situations where it is be-
ing operated at its dynamic limits, such as a sudden change to the direction of
travel. Depending on the conditions of the road surface, the risk of skidding is re-
duced, thereby improving the vehicle's driving stability .
The ESC system is automatically activated each time the ignition is switched on.The direction which the driver wishes to take is determined based on the steering angle and the speed of the vehicle and is constantly compared with the actualbehaviour of the vehicle. In the event of deviations, such as the car beginning to
skid, the ESC system will automatically brake the appropriate wheel.
During an intervention of the system, the indicator light
flashes in the instru-
ment cluster.
The following systems are integrated into the Electronic Stability Control (ESC).
› Antilock Brake System (ABS)
» page 151.
› Traction control (ASR)
» page 151.
› Electronic Differential Lock (EDL)
» page 151.
› Driver Steering Recommendation (DSR)
» page 151.
› Hydraulic Brake Assist (HBA)
» page 151.
› Hill Hold Control (HHC)
» page 152.
› Trailer stabilisation (TSA)
» page 162, Towing a trailer .
The ESC system cannot be deactivated. The
» Fig. 130 symbol button can only
be used to deactivate the ASR.
The warning light lights up in the instrument cluster when the ASR is deactiva-
ted.
150Driving
Page 156 of 274
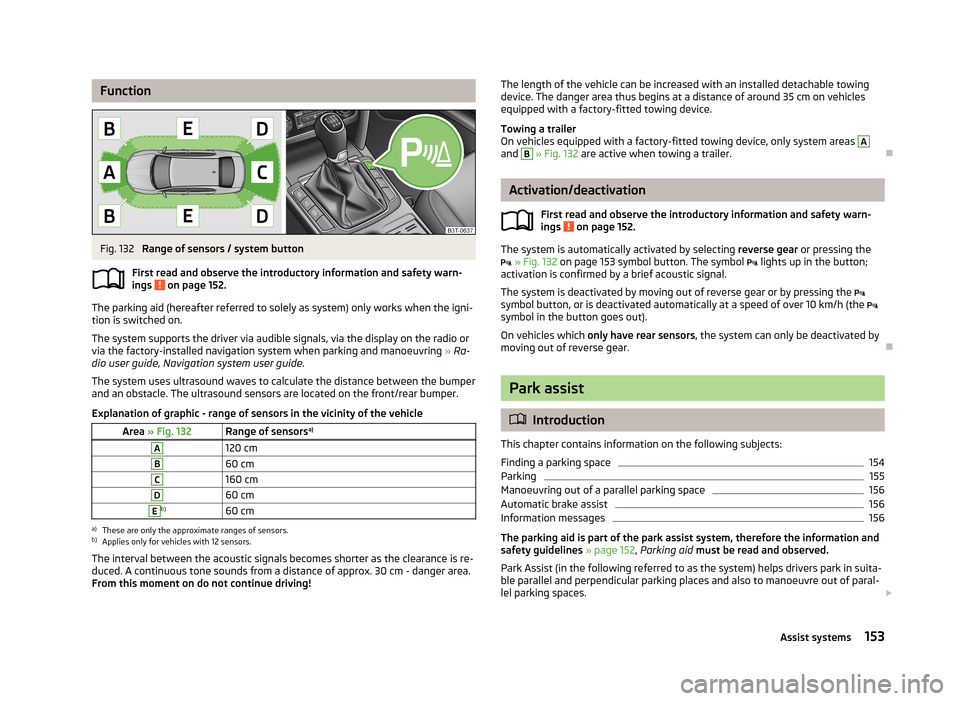
FunctionFig. 132
Range of sensors / system button
First read and observe the introductory information and safety warn- ings
on page 152.
The parking aid (hereafter referred to solely as system) only works when the igni- tion is switched on.
The system supports the driver via audible signals, via the display on the radio or via the factory-installed navigation system when parking and manoeuvring » Ra-
dio user guide, Navigation system user guide.
The system uses ultrasound waves to calculate the distance between the bumper
and an obstacle. The ultrasound sensors are located on the front/rear bumper.
Explanation of graphic - range of sensors in the vicinity of the vehicle
Area » Fig. 132Range of sensors a)A120 cmB60 cmC160 cmD60 cmEb)60 cma)
These are only the approximate ranges of sensors.
b)
Applies only for vehicles with 12 sensors.
The interval between the acoustic signals becomes shorter as the clearance is re-
duced. A continuous tone sounds from a distance of approx. 30 cm - danger area.
From this moment on do not continue driving!
The length of the vehicle can be increased with an installed detachable towing device. The danger area thus begins at a distance of around 35 cm on vehicles
equipped with a factory-fitted towing device.
Towing a trailer
On vehicles equipped with a factory-fitted towing device, only system areas A
and
B
» Fig. 132 are active when towing a trailer.
Activation/deactivation
First read and observe the introductory information and safety warn-
ings
on page 152.
The system is automatically activated by selecting reverse gear or pressing the
» Fig. 132 on page 153 symbol button. The symbol
lights up in the button;
activation is confirmed by a brief acoustic signal.
The system is deactivated by moving out of reverse gear or by pressing the
symbol button, or is deactivated automatically at a speed of over 10 km/h (the
symbol in the button goes out).
On vehicles which only have rear sensors , the system can only be deactivated by
moving out of reverse gear.
Park assist
Introduction
This chapter contains information on the following subjects:
Finding a parking space
154
Parking
155
Manoeuvring out of a parallel parking space
156
Automatic brake assist
156
Information messages
156
The parking aid is part of the park assist system, therefore the information and
safety guidelines » page 152, Parking aid must be read and observed.
Park Assist (in the following referred to as the system) helps drivers park in suita- ble parallel and perpendicular parking places and also to manoeuvre out of paral-lel parking spaces.
153Assist systems