set clock SKODA YETI 2014 1.G / 5L Amundsen Infotainment Navigation System Manual
[x] Cancel search | Manufacturer: SKODA, Model Year: 2014, Model line: YETI, Model: SKODA YETI 2014 1.G / 5LPages: 88, PDF Size: 8.18 MB
Page 23 of 88

Menu Setup
Introduction
This chapter contains information on the following subjects:
Main Menu
20
Screen settings
20
Setting the device language
20
Keyboard settings
21
Additional keypad language settings
21
Voice control settings
21
Data transmission of mobile devices
21
Safe removal of the audio source
21
Restore factory settings
21
Bluetooth ®
settings
21
System Information
22
First and foremost, pay attention to the safety instructions » page 7 , Impor-
tant notes .
This chapter covers the device settings.
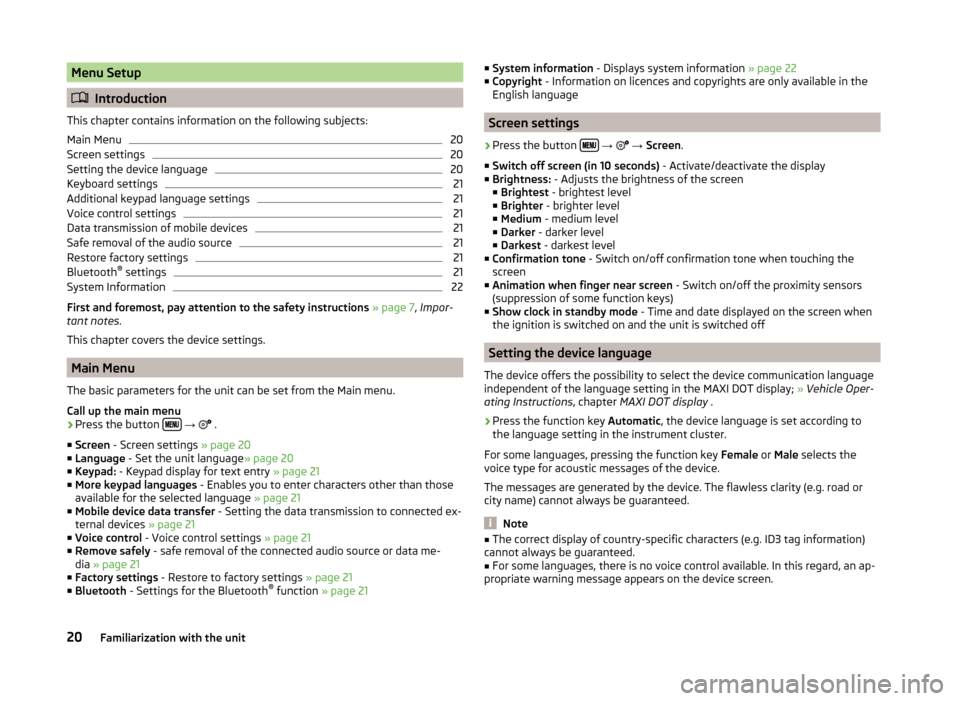
Main Menu
The basic parameters for the unit can be set from the Main menu.
Call up the main menu
›
Press the button
→
.
■ Screen - Screen settings » page 20
■ Language - Set the unit language » page 20
■ Keypad: - Keypad display for text entry » page 21
■ More keypad languages - Enables you to enter characters other than those
available for the selected language » page 21
■ Mobile device data transfer - Setting the data transmission to connected ex-
ternal devices » page 21
■ Voice control - Voice control settings » page 21
■ Remove safely - safe removal of the connected audio source or data me-
dia » page 21
■ Factory settings - Restore to factory settings » page 21
■ Bluetooth - Settings for the Bluetooth ®
function » page 21
■
System information - Displays system information » page 22
■ Copyright - Information on licences and copyrights are only available in the
English language
Screen settings
›
Press the button
→
→ Screen .
■ Switch off screen (in 10 seconds) - Activate/deactivate the display
■ Brightness: - Adjusts the brightness of the screen
■ Brightest - brightest level
■ Brighter - brighter level
■ Medium - medium level
■ Darker - darker level
■ Darkest - darkest level
■ Confirmation tone - Switch on/off confirmation tone when touching the
screen
■ Animation when finger near screen - Switch on/off the proximity sensors
(suppression of some function keys)
■ Show clock in standby mode - Time and date displayed on the screen when
the ignition is switched on and the unit is switched off
Setting the device language
The device offers the possibility to select the device communication language
independent of the language setting in the MAXI DOT display; » Vehicle Oper-
ating Instructions , chapter MAXI DOT display .
›
Press the function key Automatic, the device language is set according to
the language setting in the instrument cluster.
For some languages, pressing the function key Female or Male selects the
voice type for acoustic messages of the device.
The messages are generated by the device. The flawless clarity (e.g. road or
city name) cannot always be guaranteed.
Note
■ The correct display of country-specific characters (e.g. ID3 tag information)
cannot always be guaranteed.■
For some languages, there is no voice control available. In this regard, an ap-
propriate warning message appears on the device screen.
20Familiarization with the unit
Page 40 of 88

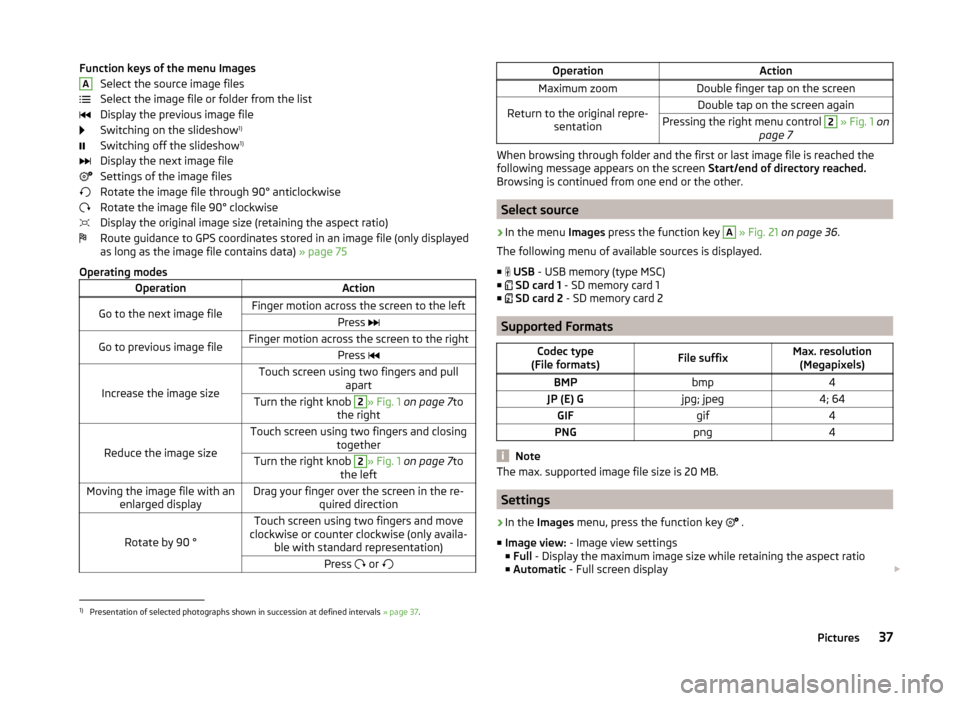
Function keys of the menu ImagesSelect the source image files
Select the image file or folder from the list
Display the previous image file
Switching on the slideshow 1)
Switching off the slideshow 1)
Display the next image file
Settings of the image files
Rotate the image file through 90° anticlockwise
Rotate the image file 90° clockwise
Display the original image size (retaining the aspect ratio)
Route guidance to GPS coordinates stored in an image file (only displayed as long as the image file contains data) » page 75
Operating modesOperationActionGo to the next image fileFinger motion across the screen to the leftPress Go to previous image fileFinger motion across the screen to the rightPress
Increase the image size
Touch screen using two fingers and pull
apartTurn the right knob 2» Fig. 1 on page 7 to
the right
Reduce the image size
Touch screen using two fingers and closing togetherTurn the right knob 2» Fig. 1 on page 7 to
the leftMoving the image file with an enlarged displayDrag your finger over the screen in the re- quired direction
Rotate by 90 °
Touch screen using two fingers and move
clockwise or counter clockwise (only availa- ble with standard representation)Press or AOperationActionMaximum zoomDouble finger tap on the screenReturn to the original repre-
sentationDouble tap on the screen againPressing the right menu control 2 » Fig. 1 on
page 7
When browsing through folder and the first or last image file is reached the
following message appears on the screen Start/end of directory reached.
Browsing is continued from one end or the other.
Select source
›
In the menu Images press the function key
A
» Fig. 21 on page 36 .
The following menu of available sources is displayed. ■
USB - USB memory (type MSC)
■
SD card 1 - SD memory card 1
■
SD card 2 - SD memory card 2
Supported Formats
Codec type
(File formats)File suffixMax. resolution (Megapixels)BMPbmp4JP (E) Gjpg; jpeg4; 64GIFgif4PNGpng4
Note
The max. supported image file size is 20 MB.
Settings
›
In the Images menu, press the function key
.
■ Image view: - Image view settings
■ Full - Display the maximum image size while retaining the aspect ratio
■ Automatic - Full screen display
1)
Presentation of selected photographs shown in succession at defined intervals
» page 37.
37Pictures