ECU SKODA YETI 2015 1.G / 5L Owner's Guide
[x] Cancel search | Manufacturer: SKODA, Model Year: 2015, Model line: YETI, Model: SKODA YETI 2015 1.G / 5LPages: 232, PDF Size: 30.84 MB
Page 96 of 232
›Place the empty through-loading bag in the gap between the front and rear
seats in such a way that the end of the bag with the zip lies in the boot.›
Open the boot lid.
›
Push the skis into the through-loading bag from the boot » .
›
Close the through-loading bag.
Securing through-loading bag and skis
›
Pull the securing belt with both lock tongues out of the pocket of the
through-loading bag.
›
Insert the lock tongues
A
» Fig. 99 in the belt locks of the rear middle seat
belt
C
, first on the one side and then on the other side.
›
Place the securing belt in the middle of the skis between the heel and the tip
of the bindings and pull the securing belt tight at the free end of the belt
B
.
WARNING■ After placing the skis into the through-loading bag, you must secure the
through-loading bag with the securing belt.■
The securing belt must hold the skis tight.
■
Ensure that the securing belt for skis grasps the middle between the tip
and the heel element of the binding (see also marking on the through-load-
ing bag).
■
The total weight of the skis which are transported must not exceed 10 kg.
CAUTION
■ Never fold and stow the through-loading bag wet - risk of damaging the
through-loading bag.■
The through-loading bag is designed for the transportation of a maximum of
two pairs of skis.
■
Place the skis and sticks in the through-loading bag with the tips facing to
the rear.
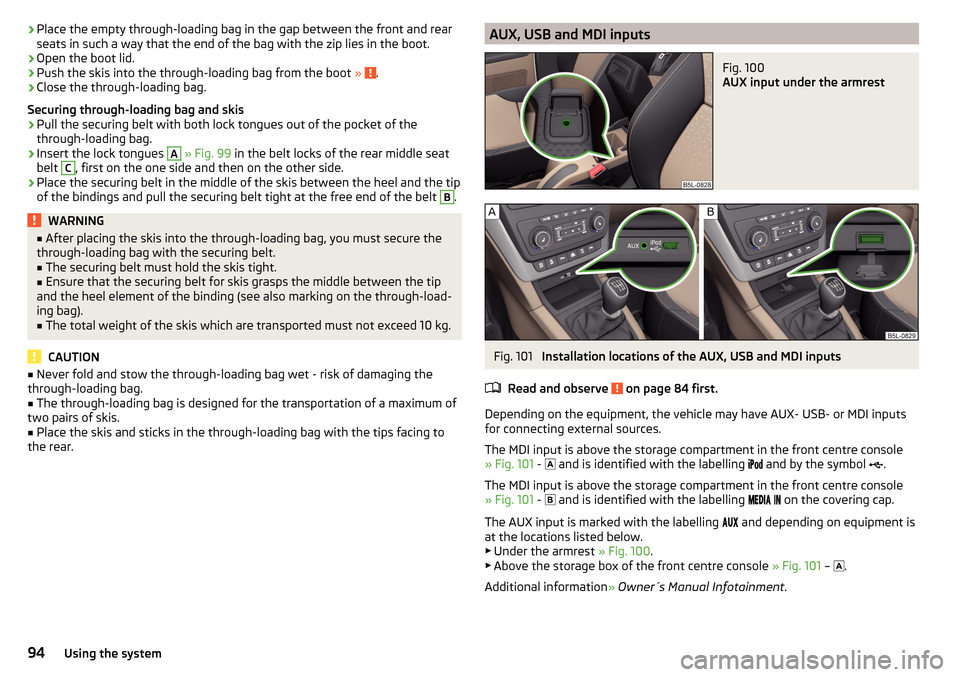
AUX, USB and MDI inputsFig. 100
AUX input under the armrest
Fig. 101
Installation locations of the AUX, USB and MDI inputs
Read and observe
on page 84 first.
Depending on the equipment, the vehicle may have AUX- USB- or MDI inputs
for connecting external sources.
The MDI input is above the storage compartment in the front centre console
» Fig. 101 -
and is identified with the labelling
and by the symbol
.
The MDI input is above the storage compartment in the front centre console
» Fig. 101 -
and is identified with the labelling
on the covering cap.
The AUX input is marked with the labelling
and depending on equipment is
at the locations listed below. ▶ Under the armrest » Fig. 100.
▶ Above the storage box of the front centre console » Fig. 101 –
.
Additional information » Owner´s Manual Infotainment .
94Using the system
Page 97 of 232
Multimedia holder
Introduction
This chapter contains information on the following subjects:
Install/remove
95
Handle holder
95
External devices (e.g. tablet, smartphone, etc.) measuring min. 122 mm and
max. 195 mm can be secured in the support.
The maximum permissible load of the compartment is 750 g.
CAUTION
Never exceed the maximum permissible load of the holder - there is a risk of
damage or functional impairment.
Install/remove
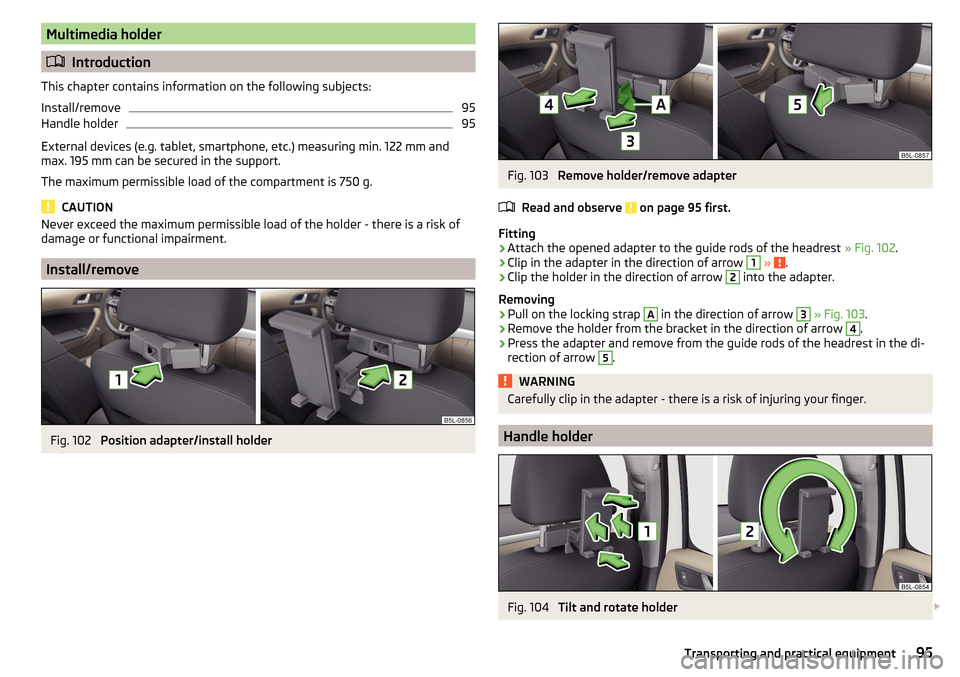
Fig. 102
Position adapter/install holder
Fig. 103
Remove holder/remove adapter
Read and observe
on page 95 first.
Fitting
›
Attach the opened adapter to the guide rods of the headrest » Fig. 102.
›
Clip in the adapter in the direction of arrow
1
» .
›
Clip the holder in the direction of arrow
2
into the adapter.
Removing
›
Pull on the locking strap
A
in the direction of arrow
3
» Fig. 103 .
›
Remove the holder from the bracket in the direction of arrow
4
.
›
Press the adapter and remove from the guide rods of the headrest in the di-
rection of arrow
5
.
WARNINGCarefully clip in the adapter - there is a risk of injuring your finger.
Handle holder
Fig. 104
Tilt and rotate holder
95Transporting and practical equipment
Page 98 of 232
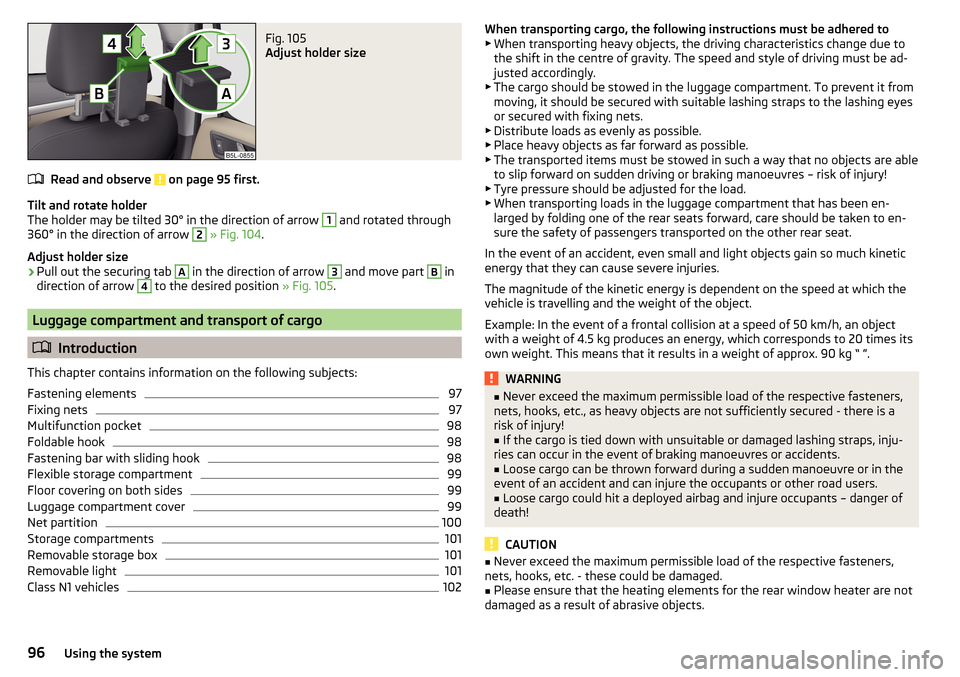
Fig. 105
Adjust holder size
Read and observe on page 95 first.
Tilt and rotate holder
The holder may be tilted 30° in the direction of arrow
1
and rotated through
360° in the direction of arrow
2
» Fig. 104 .
Adjust holder size
›
Pull out the securing tab
A
in the direction of arrow
3
and move part
B
in
direction of arrow
4
to the desired position » Fig. 105.
Luggage compartment and transport of cargo
Introduction
This chapter contains information on the following subjects:
Fastening elements
97
Fixing nets
97
Multifunction pocket
98
Foldable hook
98
Fastening bar with sliding hook
98
Flexible storage compartment
99
Floor covering on both sides
99
Luggage compartment cover
99
Net partition
100
Storage compartments
101
Removable storage box
101
Removable light
101
Class N1 vehicles
102When transporting cargo, the following instructions must be adhered to ▶ When transporting heavy objects, the driving characteristics change due to
the shift in the centre of gravity. The speed and style of driving must be ad-
justed accordingly.
▶ The cargo should be stowed in the luggage compartment. To prevent it from
moving, it should be secured with suitable lashing straps to the lashing eyes
or secured with fixing nets.
▶ Distribute loads as evenly as possible.
▶ Place heavy objects as far forward as possible.
▶ The transported items must be stowed in such a way that no objects are able
to slip forward on sudden driving or braking manoeuvres – risk of injury!
▶ Tyre pressure should be adjusted for the load.
▶ When transporting loads in the luggage compartment that has been en-
larged by folding one of the rear seats forward, care should be taken to en-
sure the safety of passengers transported on the other rear seat.
In the event of an accident, even small and light objects gain so much kinetic
energy that they can cause severe injuries.
The magnitude of the kinetic energy is dependent on the speed at which the
vehicle is travelling and the weight of the object.
Example: In the event of a frontal collision at a speed of 50 km/h, an object
with a weight of 4.5 kg produces an energy, which corresponds to 20 times its
own weight. This means that it results in a weight of approx. 90 kg “ ”.WARNING■ Never exceed the maximum permissible load of the respective fasteners,
nets, hooks, etc., as heavy objects are not sufficiently secured - there is a
risk of injury!■
If the cargo is tied down with unsuitable or damaged lashing straps, inju-
ries can occur in the event of braking manoeuvres or accidents.
■
Loose cargo can be thrown forward during a sudden manoeuvre or in the
event of an accident and can injure the occupants or other road users.
■
Loose cargo could hit a deployed airbag and injure occupants – danger of
death!
CAUTION
■ Never exceed the maximum permissible load of the respective fasteners,
nets, hooks, etc. - these could be damaged.■
Please ensure that the heating elements for the rear window heater are not
damaged as a result of abrasive objects.
96Using the system
Page 99 of 232
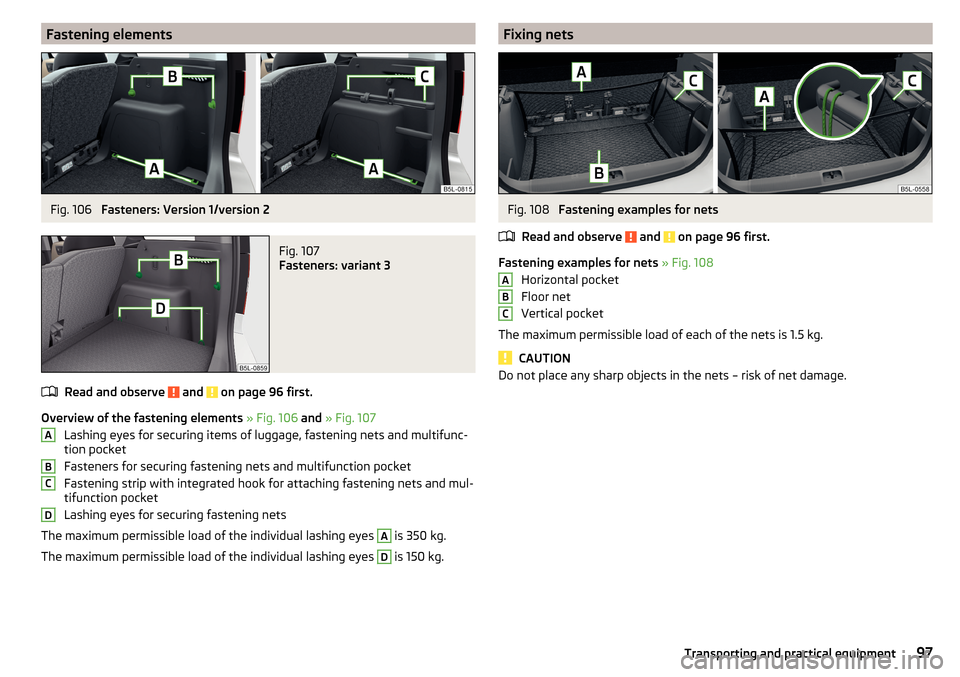
Fastening elementsFig. 106
Fasteners: Version 1/version 2
Fig. 107
Fasteners: variant 3
Read and observe and on page 96 first.
Overview of the fastening elements » Fig. 106 and » Fig. 107
Lashing eyes for securing items of luggage, fastening nets and multifunc-
tion pocket
Fasteners for securing fastening nets and multifunction pocket
Fastening strip with integrated hook for attaching fastening nets and mul-
tifunction pocket
Lashing eyes for securing fastening nets
The maximum permissible load of the individual lashing eyes
A
is 350 kg.
The maximum permissible load of the individual lashing eyes
D
is 150 kg.
ABCDFixing netsFig. 108
Fastening examples for nets
Read and observe
and on page 96 first.
Fastening examples for nets » Fig. 108
Horizontal pocket
Floor net
Vertical pocket
The maximum permissible load of each of the nets is 1.5 kg.
CAUTION
Do not place any sharp objects in the nets – risk of net damage.ABC97Transporting and practical equipment
Page 100 of 232
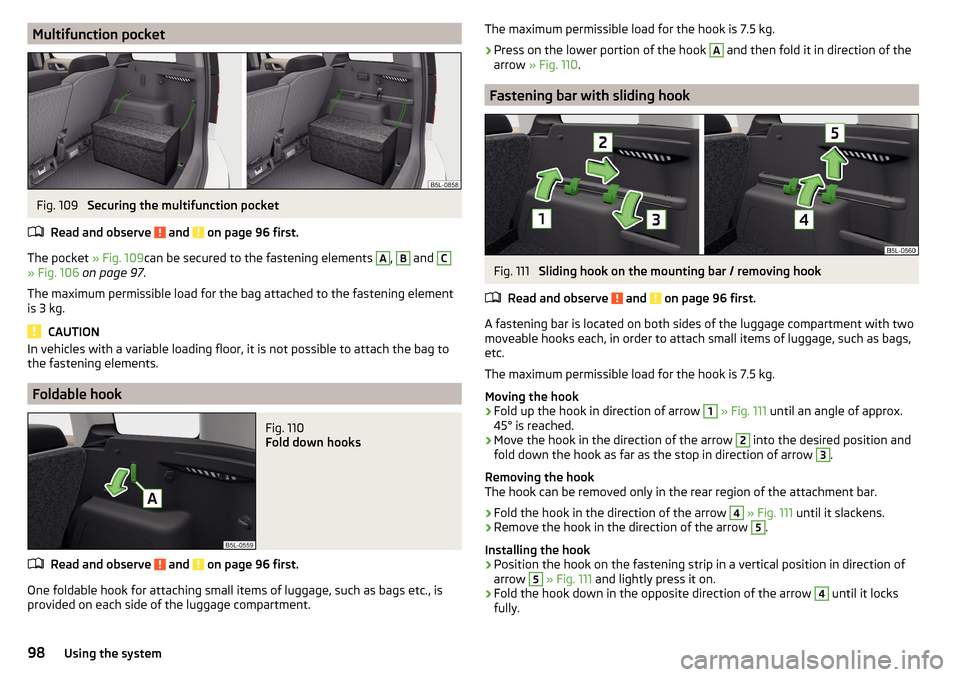
Multifunction pocketFig. 109
Securing the multifunction pocket
Read and observe
and on page 96 first.
The pocket » Fig. 109can be secured to the fastening elements
A
,
B
and
C
» Fig. 106 on page 97 .
The maximum permissible load for the bag attached to the fastening element
is 3 kg.
CAUTION
In vehicles with a variable loading floor, it is not possible to attach the bag to
the fastening elements.
Foldable hook
Fig. 110
Fold down hooks
Read and observe and on page 96 first.
One foldable hook for attaching small items of luggage, such as bags etc., is
provided on each side of the luggage compartment.
The maximum permissible load for the hook is 7.5 kg.›
Press on the lower portion of the hook
A
and then fold it in direction of the
arrow » Fig. 110 .
Fastening bar with sliding hook
Fig. 111
Sliding hook on the mounting bar / removing hook
Read and observe
and on page 96 first.
A fastening bar is located on both sides of the luggage compartment with two moveable hooks each, in order to attach small items of luggage, such as bags,
etc.
The maximum permissible load for the hook is 7.5 kg.
Moving the hook
›
Fold up the hook in direction of arrow
1
» Fig. 111 until an angle of approx.
45° is reached.
›
Move the hook in the direction of the arrow
2
into the desired position and
fold down the hook as far as the stop in direction of arrow
3
.
Removing the hook
The hook can be removed only in the rear region of the attachment bar.
›
Fold the hook in the direction of the arrow
4
» Fig. 111 until it slackens.
›
Remove the hook in the direction of the arrow
5
.
Installing the hook
›
Position the hook on the fastening strip in a vertical position in direction of
arrow
5
» Fig. 111 and lightly press it on.
›
Fold the hook down in the opposite direction of the arrow
4
until it locks
fully.
98Using the system
Page 104 of 232
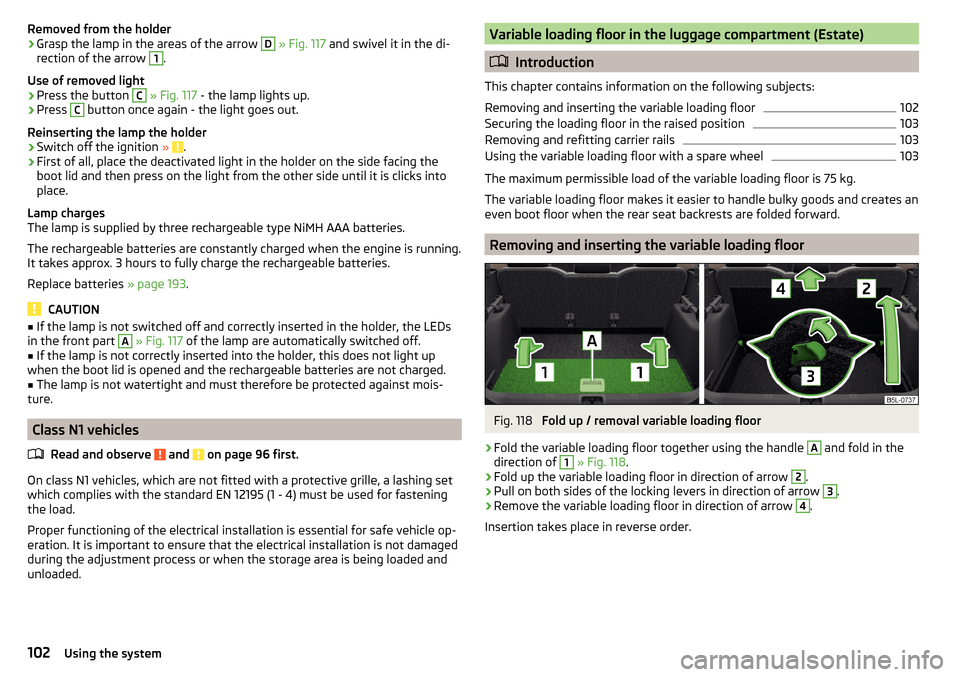
Removed from the holder›Grasp the lamp in the areas of the arrow D » Fig. 117 and swivel it in the di-
rection of the arrow 1
.
Use of removed light
›
Press the button
C
» Fig. 117 - the lamp lights up.
›
Press
C
button once again - the light goes out.
Reinserting the lamp the holder
›
Switch off the ignition » .
›
First of all, place the deactivated light in the holder on the side facing the
boot lid and then press on the light from the other side until it is clicks into
place.
Lamp charges
The lamp is supplied by three rechargeable type NiMH AAA batteries.
The rechargeable batteries are constantly charged when the engine is running.
It takes approx. 3 hours to fully charge the rechargeable batteries.
Replace batteries » page 193.
CAUTION
■
If the lamp is not switched off and correctly inserted in the holder, the LEDs
in the front part A » Fig. 117 of the lamp are automatically switched off.■
If the lamp is not correctly inserted into the holder, this does not light up
when the boot lid is opened and the rechargeable batteries are not charged.
■
The lamp is not watertight and must therefore be protected against mois-
ture.
Class N1 vehicles
Read and observe
and on page 96 first.
On class N1 vehicles, which are not fitted with a protective grille, a lashing set
which complies with the standard EN 12195 (1 - 4) must be used for fastening
the load.
Proper functioning of the electrical installation is essential for safe vehicle op-
eration. It is important to ensure that the electrical installation is not damaged
during the adjustment process or when the storage area is being loaded and
unloaded.
Variable loading floor in the luggage compartment (Estate)
Introduction
This chapter contains information on the following subjects:
Removing and inserting the variable loading floor
102
Securing the loading floor in the raised position
103
Removing and refitting carrier rails
103
Using the variable loading floor with a spare wheel
103
The maximum permissible load of the variable loading floor is 75 kg.
The variable loading floor makes it easier to handle bulky goods and creates an even boot floor when the rear seat backrests are folded forward.
Removing and inserting the variable loading floor
Fig. 118
Fold up / removal variable loading floor
›
Fold the variable loading floor together using the handle
A
and fold in the
direction of
1
» Fig. 118 .
›
Fold up the variable loading floor in direction of arrow
2
.
›
Pull on both sides of the locking levers in direction of arrow
3
.
›
Remove the variable loading floor in direction of arrow
4
.
Insertion takes place in reverse order.
102Using the system
Page 105 of 232
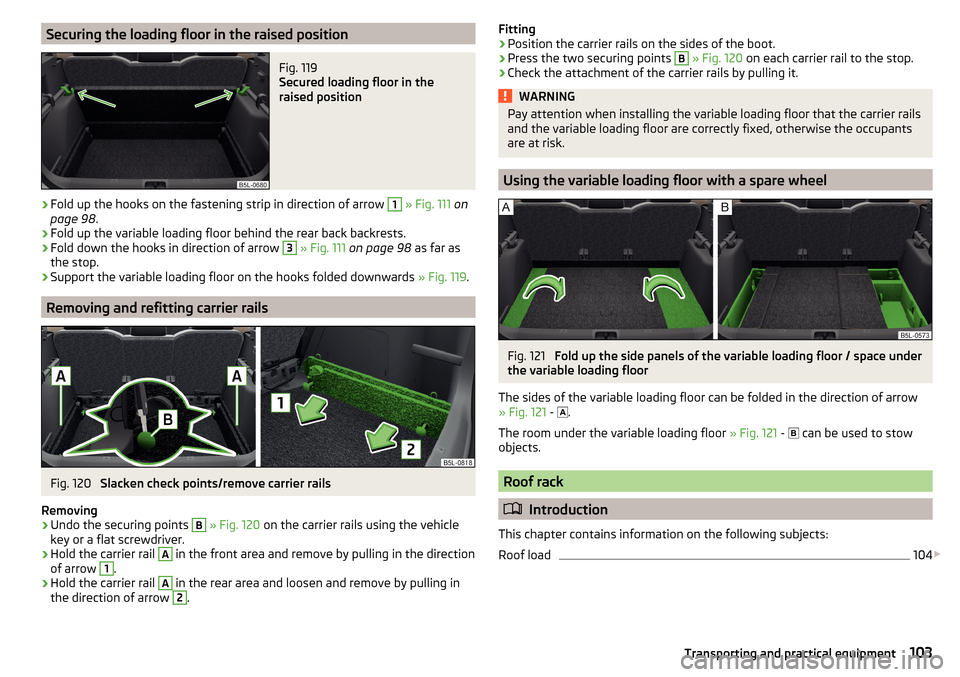
Securing the loading floor in the raised positionFig. 119
Secured loading floor in the
raised position
›
Fold up the hooks on the fastening strip in direction of arrow
1
» Fig. 111 on
page 98 .
›
Fold up the variable loading floor behind the rear back backrests.
›
Fold down the hooks in direction of arrow
3
» Fig. 111 on page 98 as far as
the stop.
›
Support the variable loading floor on the hooks folded downwards » Fig. 119.
Removing and refitting carrier rails
Fig. 120
Slacken check points/remove carrier rails
Removing
›
Undo the securing points
B
» Fig. 120 on the carrier rails using the vehicle
key or a flat screwdriver.
›
Hold the carrier rail
A
in the front area and remove by pulling in the direction
of arrow
1
.
›
Hold the carrier rail
A
in the rear area and loosen and remove by pulling in
the direction of arrow
2
.
Fitting›Position the carrier rails on the sides of the boot.›
Press the two securing points
B
» Fig. 120 on each carrier rail to the stop.
›
Check the attachment of the carrier rails by pulling it.
WARNINGPay attention when installing the variable loading floor that the carrier rails
and the variable loading floor are correctly fixed, otherwise the occupants
are at risk.
Using the variable loading floor with a spare wheel
Fig. 121
Fold up the side panels of the variable loading floor / space under
the variable loading floor
The sides of the variable loading floor can be folded in the direction of arrow
» Fig. 121 -
.
The room under the variable loading floor » Fig. 121 -
can be used to stow
objects.
Roof rack
Introduction
This chapter contains information on the following subjects:
Roof load
104
103Transporting and practical equipment
Page 106 of 232

WARNINGWhen transporting cargo, the following instructions must be adhered to.■The transported items on the roof rack must always be securely attached
– risk of accident!■
Always secure the load with appropriate and undamaged lashing straps
or tensioning straps.
■
Distribute the load evenly over the roof rack system.
■
When transporting heavy objects or objects which take up a large area on
the roof rack system, the handling of the car may change as a result of the
displacement of the centre of gravity. The style of driving and speed must
therefore be adapted to the current circumstances.
■
Avoid abrupt and sudden driving/braking manoeuvres.
■
The permissible roof load, permissible axle loads and permissible total ve-
hicle weight must not be exceeded under any circumstances – risk of acci-
dent!
CAUTION
■ On vehicles with a panoramic sunroof, make sure that the panorama roof
does not strike any items which are transported when it is tilted.■
Ensure that the boot lid does not hit the roof load when opened.
Note
We recommend that you use a roof rack from ŠKODA Original Accessories.
Roof load
Read and observe
and on page 104 first.
Do not exceed the permissible roof load of 100 kg – this includes the carrier
system.
The full permissible roof load cannot be used if a roof rack system with a lower
load carrying capacity is used. The maximum capacity of the carrier system
should never be exceeded.
Heating and ventilation
Heating, manual air conditioning system, Climatronic
Introduction
This chapter contains information on the following subjects:
Heating and manual air conditioning
105
Climatronic (automatic air conditioning)
106
Climatronic - automatic operation
107
Air distribution control
107
Air outlet vents
108
The heating and air conditioning ventilate and heat the vehicle interior. The air
conditioning system also cools and dehumidifies the vehicle interior.
The heating effect is dependent upon the coolant temperature, thus full heat
output only occurs when the engine has reached its operating temperature.
The cooling system only operates if the following conditions are met: The cooling system is switched on.
The engine is running.
The outside temperature is above approx. +2 °C.
The blower is switched on.
If the cooling system is switched on, the temperature and air humidity drops in the vehicle. The cooling system prevents the windows from misting up during
the cold season of the year.
It is possible to briefly activate recirculated air mode to enhance the cooling
effect » page 107 .
Health protection
To reduce health risks (e.g. common colds), the following instructions for the
use of the cooling system are to be observed. ▶ The difference between the indoor temperature and the outdoor air temper-
ature should not be greater than about 5 ° C.
▶ The cooling system is to be turned off about 10 minutes before the end of
the journey.
▶ Once a year, have the manual air conditioner or the Climatronic disinfected by
a specialist company.
104Using the system
Page 122 of 232
Long or steep slopes
Before travelling a long distance with a steep gradient, reduce speed and shift
into the next lowest gear. As a result, the braking effect of the engine will be
used, reducing the load on the brakes. Any additional braking should be com-
pleted intermittently, not continuously.
Emergency brake display
If the brakes are applied in full and the vehicle systems evaluate the situation
as dangerous for the traffic following behind, the brake light flashes automati-
cally.
After the speed was reduced below around 10 km/h or the vehicle was stop-
ped, the brake light stops flashing and the hazard warning light system
switches on. The hazard warning light system is switched off automatically af-
ter accelerating or driving off again.
Faults in the brake surface
If it is found that the braking distance has suddenly become longer and that
the brake pedal can be depressed further, the brake system may be faulty.
Visit a specialist garage immediately and adjust your style of driving appropri-
ately, as you will not know the exact extent of the damage.
Low brake fluid level
An insufficient level of brake fluid may result in problems in the brake system.
The level of the brake fluid is monitored electronically » page 33,
Brake sys-
tem .
Brake booster
The brake booster increases the pressure generated with the brake pedal. The
brake booster only operates when the engine is running.WARNINGOnly apply the brakes for the purpose of drying and cleaning the brake
discs if the traffic conditions permit this. Do not place any other road users
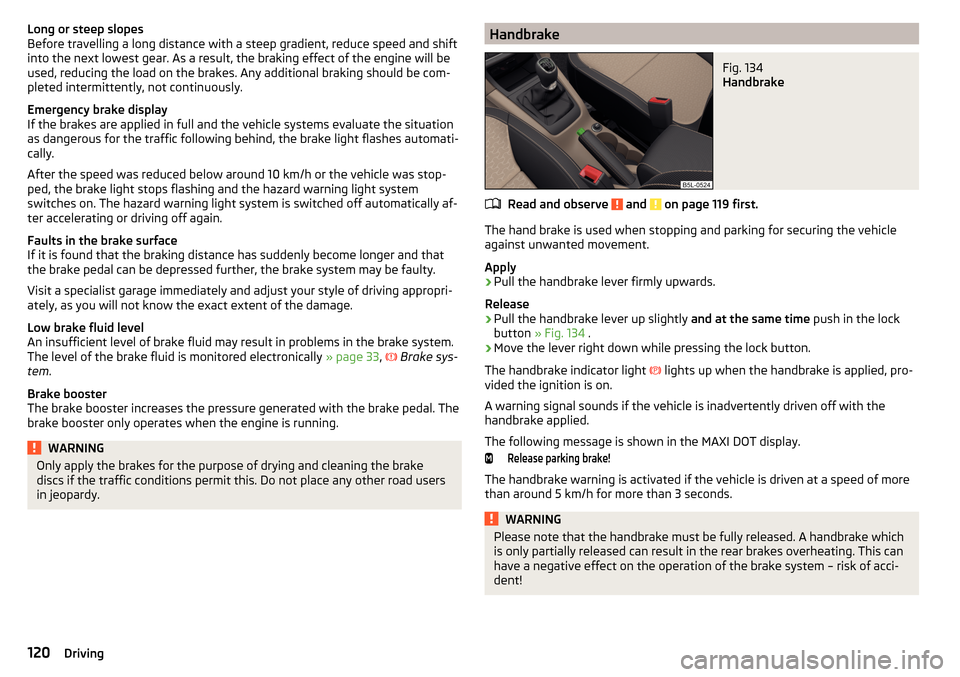
in jeopardy.HandbrakeFig. 134
Handbrake
Read and observe and on page 119 first.
The hand brake is used when stopping and parking for securing the vehicle
against unwanted movement.
Apply
›
Pull the handbrake lever firmly upwards.
Release
›
Pull the handbrake lever up slightly and at the same time push in the lock
button » Fig. 134 .
›
Move the lever right down while pressing the lock button.
The handbrake indicator light lights up when the handbrake is applied, pro-
vided the ignition is on.
A warning signal sounds if the vehicle is inadvertently driven off with the
handbrake applied.
The following message is shown in the MAXI DOT display.
Release parking brake!
The handbrake warning is activated if the vehicle is driven at a speed of more
than around 5 km/h for more than 3 seconds.
WARNINGPlease note that the handbrake must be fully released. A handbrake which
is only partially released can result in the rear brakes overheating. This can
have a negative effect on the operation of the brake system – risk of acci-
dent!120Driving
Page 143 of 232
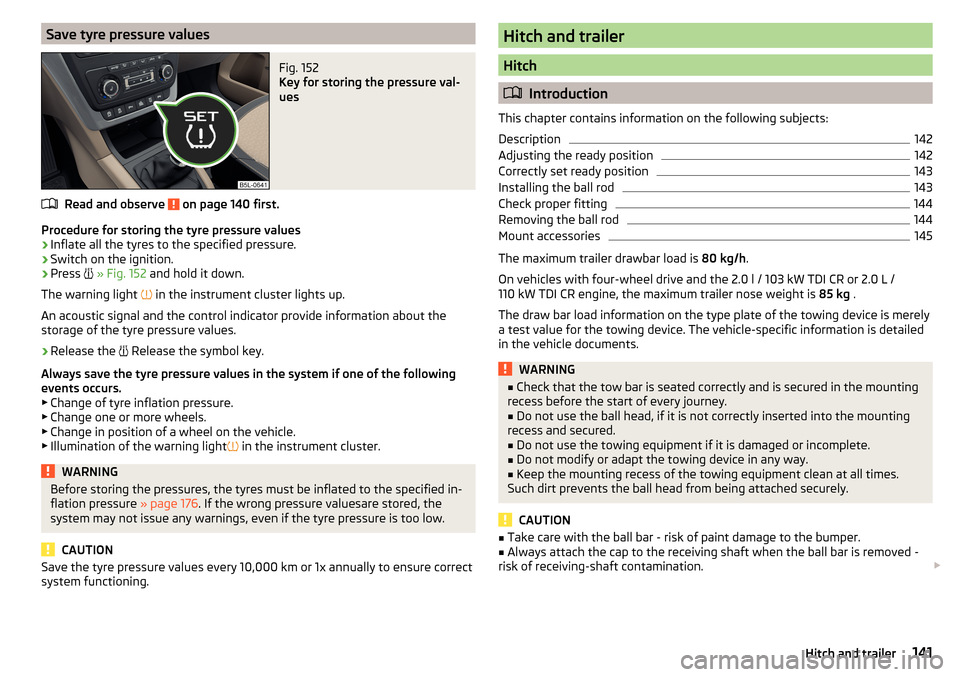
Save tyre pressure valuesFig. 152
Key for storing the pressure val-
ues
Read and observe on page 140 first.
Procedure for storing the tyre pressure values
›
Inflate all the tyres to the specified pressure.
›
Switch on the ignition.
›
Press
» Fig. 152 and hold it down.
The warning light in the instrument cluster lights up.
An acoustic signal and the control indicator provide information about the
storage of the tyre pressure values.
›
Release the Release the symbol key.
Always save the tyre pressure values in the system if one of the following
events occurs.
▶ Change of tyre inflation pressure.
▶ Change one or more wheels.
▶ Change in position of a wheel on the vehicle.
▶ Illumination of the warning light in the instrument cluster.
WARNINGBefore storing the pressures, the tyres must be inflated to the specified in-
flation pressure » page 176. If the wrong pressure valuesare stored, the
system may not issue any warnings, even if the tyre pressure is too low.
CAUTION
Save the tyre pressure values every 10,000 km or 1x annually to ensure correct
system functioning.Hitch and trailer
Hitch
Introduction
This chapter contains information on the following subjects:
Description
142
Adjusting the ready position
142
Correctly set ready position
143
Installing the ball rod
143
Check proper fitting
144
Removing the ball rod
144
Mount accessories
145
The maximum trailer drawbar load is 80 kg/h.
On vehicles with four-wheel drive and the 2.0 l / 103 kW TDI CR or 2.0 L /
110 kW TDI CR engine, the maximum trailer nose weight is 85 kg .
The draw bar load information on the type plate of the towing device is merely
a test value for the towing device. The vehicle-specific information is detailed
in the vehicle documents.
WARNING■ Check that the tow bar is seated correctly and is secured in the mounting
recess before the start of every journey.■
Do not use the ball head, if it is not correctly inserted into the mounting
recess and secured.
■
Do not use the towing equipment if it is damaged or incomplete.
■
Do not modify or adapt the towing device in any way.
■
Keep the mounting recess of the towing equipment clean at all times.
Such dirt prevents the ball head from being attached securely.
CAUTION
■ Take care with the ball bar - risk of paint damage to the bumper.■Always attach the cap to the receiving shaft when the ball bar is removed -
risk of receiving-shaft contamination. 141Hitch and trailer