engine SSANGYONG KORANDO 1997 Service Repair Manual
[x] Cancel search | Manufacturer: SSANGYONG, Model Year: 1997, Model line: KORANDO, Model: SSANGYONG KORANDO 1997Pages: 2053, PDF Size: 88.33 MB
Page 260 of 2053
M162 ENGINE CONTROLS 1F1 -- 97
D AEW OO M Y_2000
KAA1F370
FUEL TANK
Removal and Installation Procedure
Caution: The fuel system is under pressure. To
avoid fuel spillage and the risk of personal injury or
fire, it is necessary to relieve the fuel system pres -
sure before disconnecting the fuel lines.
1. Relieve the fuel pressure. Refer to “Discharging the
Pressure in Fuel System” in this section.
2. Disconnect the negative battery cable.
3. Drain the fuel tank.
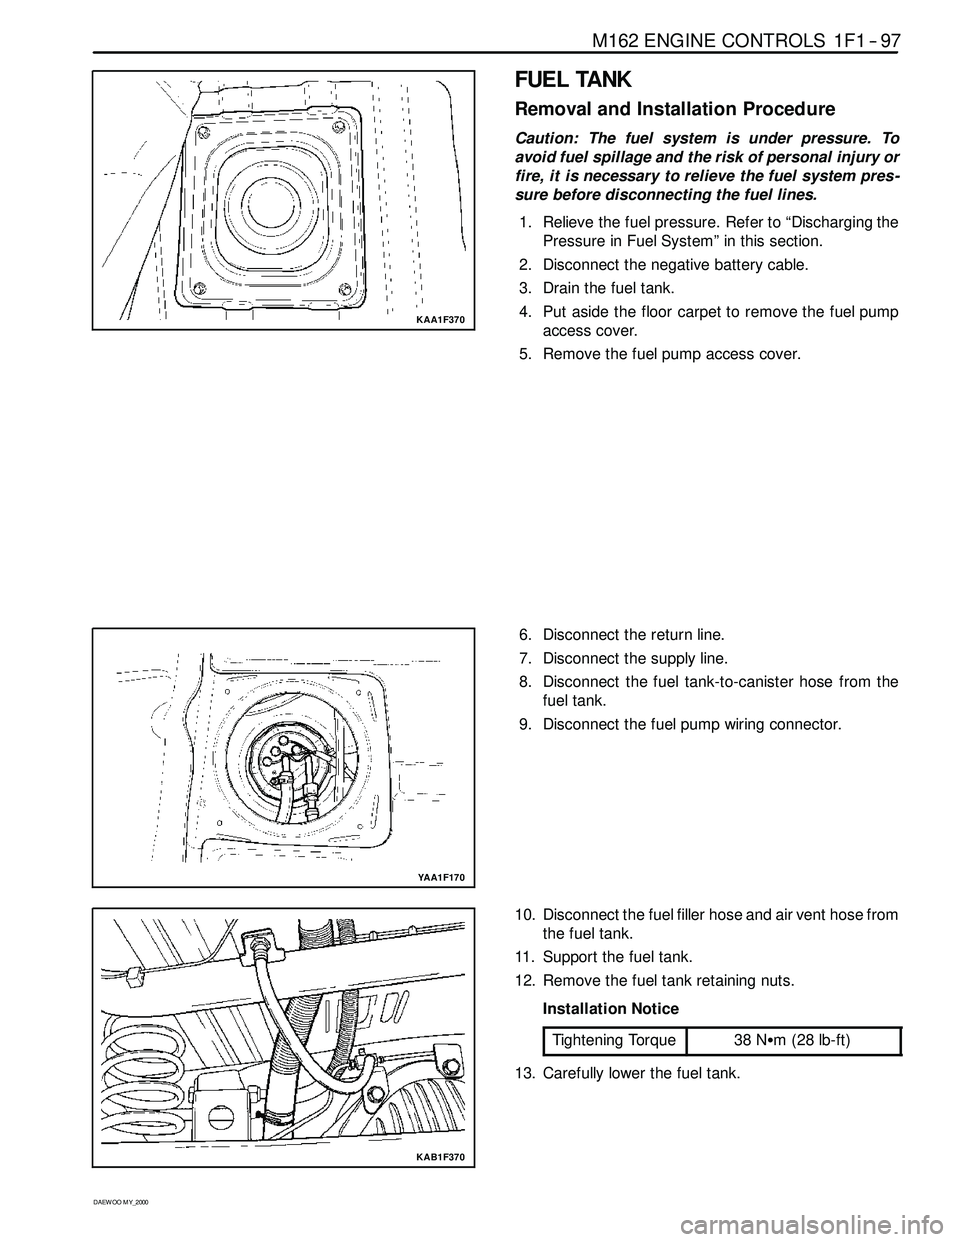
4. Put aside the floor carpet to remove the fuel pump
access cover.
5. Remove the fuel pump access cover.
YAA1F170
6. Disconnect the return line.
7. Disconnect the supply line.
8. Disconnect the fuel tank-to-canister hose from the
fuel tank.
9. Disconnect the fuel pump wiring connector.
KAB1F370
10. Disconnect the fuel filler hose and air vent hose from
the fuel tank.
11. Support the fuel tank.
12. Remove the fuel tank retaining nuts.
Installation Notice
Tightening Torque
38 NSm (28 lb-ft)
13. Carefully lower the fuel tank.
Page 261 of 2053
1F1 -- 98 M162 ENGINE CONTROLS
D AEW OO M Y_2000
YAA1F180
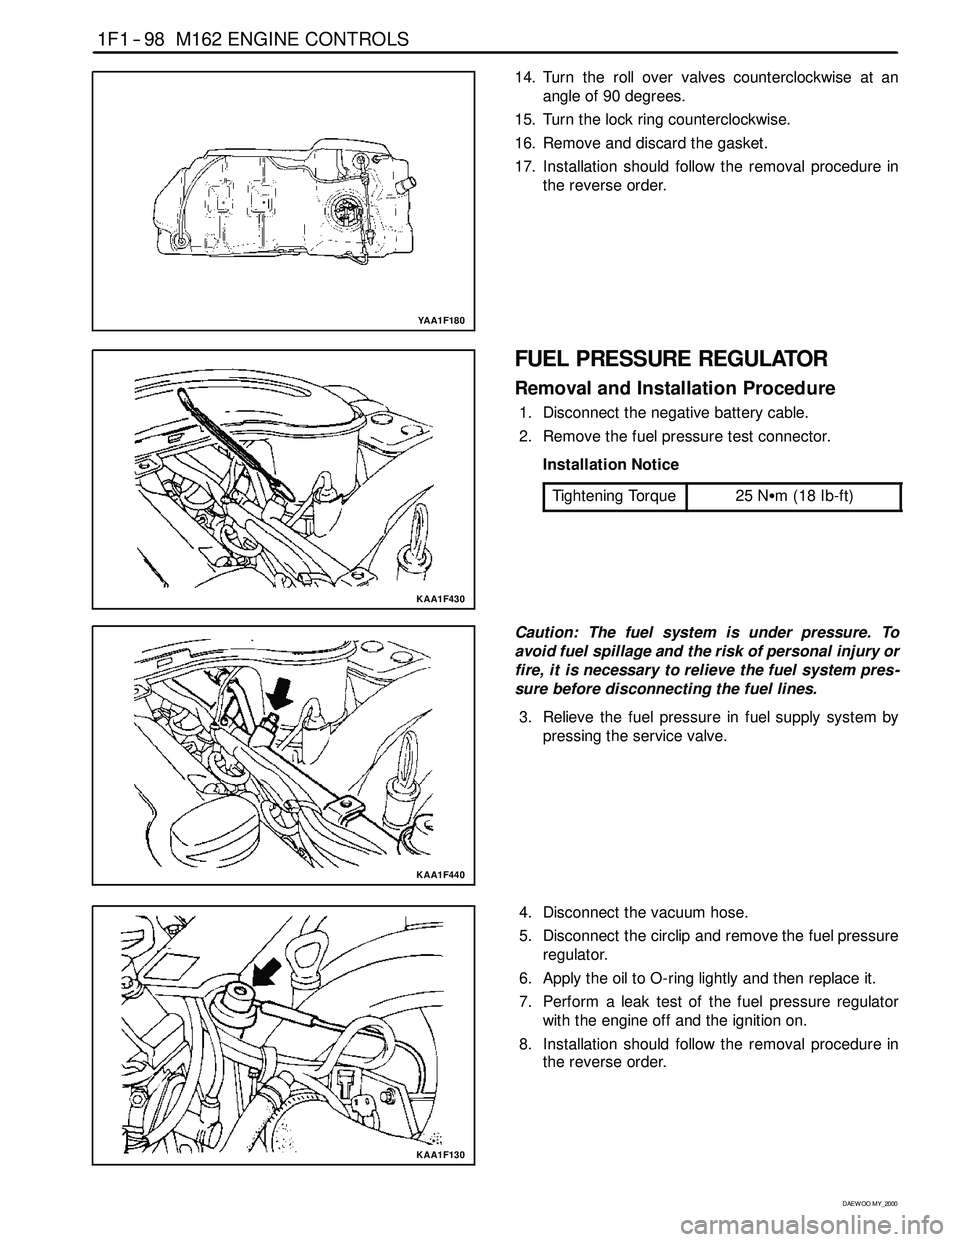
14. Turn the roll over valves counterclockwise at an
angle of 90 degrees.
15. Turn the lock ring counterclockwise.
16. Remove and discard the gasket.
17. Installation should follow the removal procedure in
the reverse order.
KAA1F430
FUEL PRESSURE REGULATOR
Removal and Installation Procedure
1. Disconnect the negative battery cable.
2. Remove the fuel pressure test connector.
Installation Notice
Tightening Torque
25 NSm (18 Ib-ft)
KAA1F440
Caution: The fuel system is under pressure. To
avoid fuel spillage and the risk of personal injury or
fire, it is necessary to relieve the fuel system pres -
sure before disconnecting the fuel lines.
3. Relieve the fuel pressure in fuel supply system by
pressing the service valve.
KAA1F130
4. Disconnect the vacuum hose.
5. Disconnect the circlip and remove the fuel pressure
regulator.
6. Apply the oil to O-ring lightly and then replace it.
7. Perform a leak test of the fuel pressure regulator
with the engine off and the ignition on.
8. Installation should follow the removal procedure in
the reverse order.
Page 262 of 2053
M162 ENGINE CONTROLS 1F1 -- 99
D AEW OO M Y_2000
KAA1F440
FUEL RAIL AND INJECTORS
Removal and Installation Procedure
Caution: The fuel system is under pressure. To
avoid fuel spillage and the risk of personal injury or
fire, it is necessary to relieve the fuel system pres -
sure before disconnecting the fuel lines.
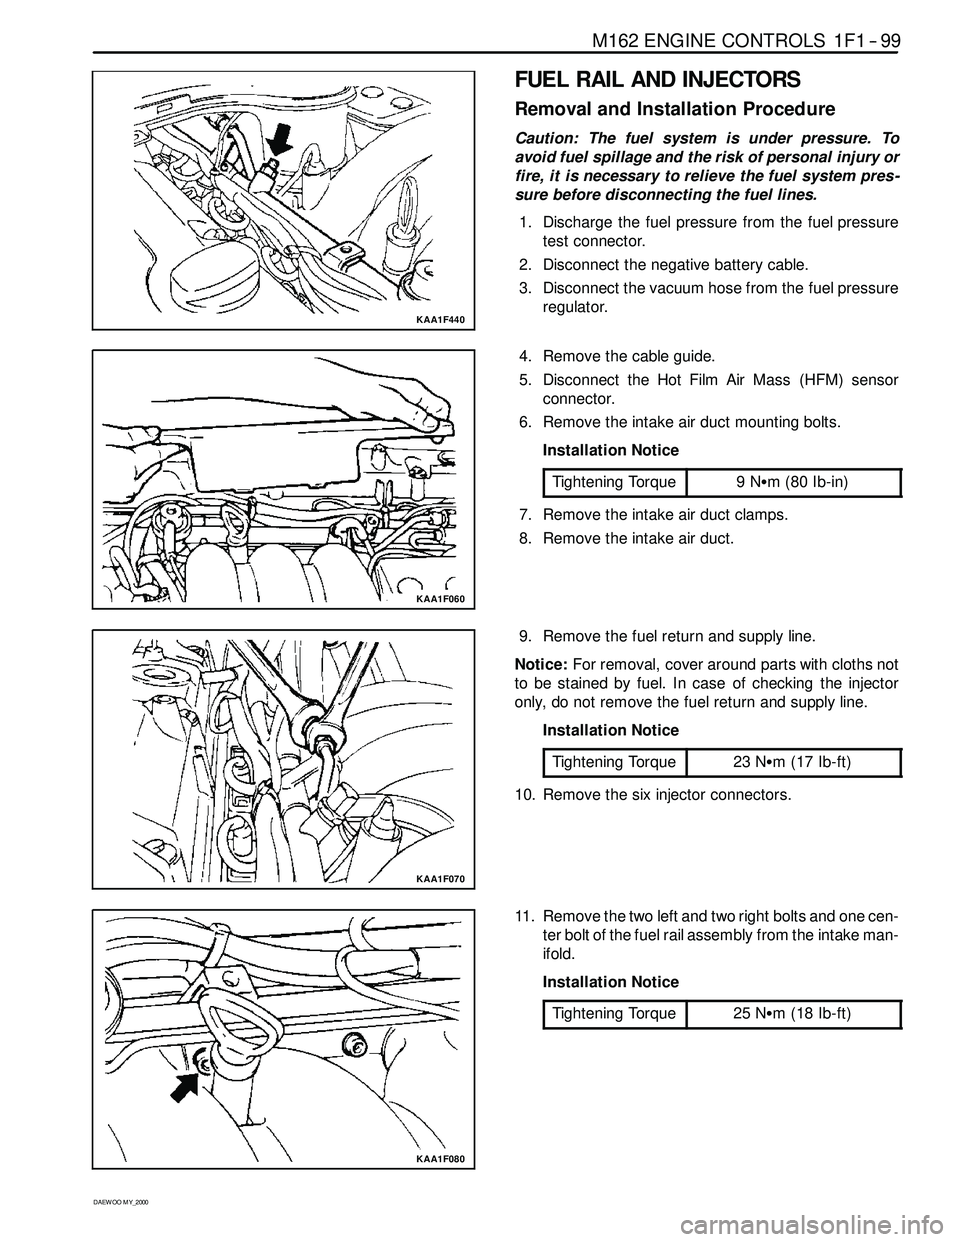
1. Discharge the fuel pressure from the fuel pressure
test connector.
2. Disconnect the negative battery cable.
3. Disconnect the vacuum hose from the fuel pressure
regulator.
KAA1F060
4. Remove the cable guide.
5. Disconnect the Hot Film Air Mass (HFM) sensor
connector.
6. Remove the intake air duct mounting bolts.
Installation Notice
Tightening Torque
9NSm (80 Ib-in)
7. Remove the intake air duct clamps.
8. Remove the intake air duct.
KAA1F070
9. Remove the fuel return and supply line.
Notice:For removal, cover around parts with cloths not
to be stained by fuel. In case of checking the injector
only, do not remove the fuel return and supply line.
Installation Notice
Tightening Torque
23 NSm (17 Ib-ft)
10. Remove the six injector connectors.
KAA1F080
11. Remove the two left and two right bolts and one cen-
ter bolt of the fuel rail assembly from the intake man-
ifold.
Installation Notice
Tightening Torque
25 NSm (18 Ib-ft)
Page 263 of 2053
1F1 -- 100 M162 ENGINE CONTROLS
D AEW OO M Y_2000
KAA1F090
Notice:Before removal, the fuel rail assembly may be
cleaned with a spray-type cleaner, following package in-
structions. Do not immerse the fuel rails in liquid clean-
ing solvent. Use care in removing the fuel rail assembly
to prevent damage to the electrical connectors and in-
jector spray tips. Prevent dirt and other contaminants
from entering open lines and passages. Fittings should
be capped and holes plugged during service.
Important:If an injector becomes separated from the
rail and remains in the cylinder head, replace the injector
O-ring seals and the retaining clip.
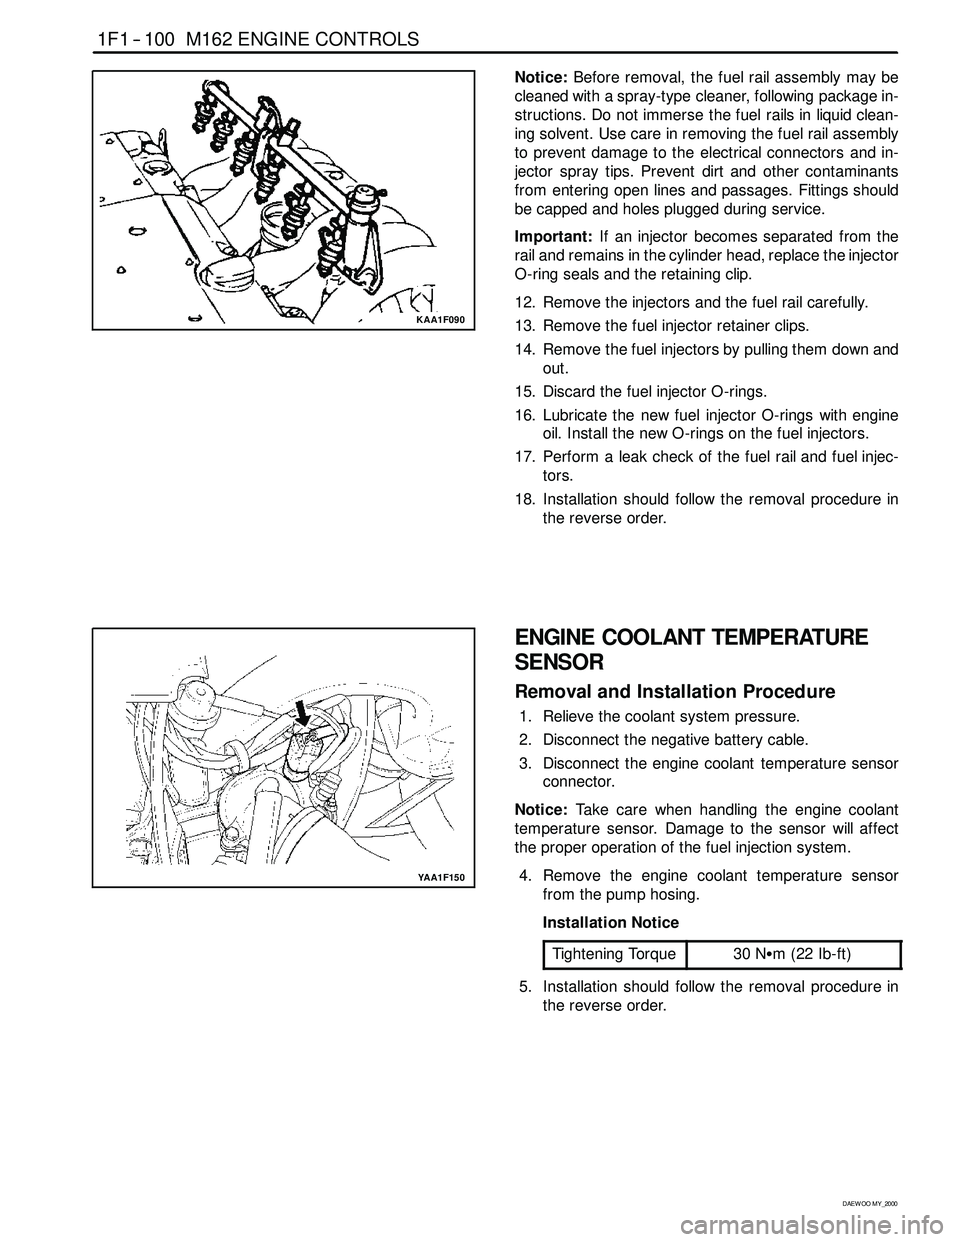
12. Remove the injectors and the fuel rail carefully.
13. Remove the fuel injector retainer clips.
14. Remove the fuel injectors by pulling them down and
out.
15. Discard the fuel injector O-rings.
16. Lubricate the new fuel injector O-rings with engine
oil. Install the new O-rings on the fuel injectors.
17. Perform a leak check of the fuel rail and fuel injec-
tors.
18. Installation should follow the removal procedure in
the reverse order.
YAA1F150
ENGINE COOLANT TEMPERATURE
SENSOR
Removal and Installation Procedure
1. Relieve the coolant system pressure.
2. Disconnect the negative battery cable.
3. Disconnect the engine coolant temperature sensor
connector.
Notice:Take care when handling the engine coolant
temperature sensor. Damage to the sensor will affect
the proper operation of the fuel injection system.
4. Remove the engine coolant temperature sensor
from the pump hosing.
Installation Notice
Tightening Torque
30 NSm (22 Ib-ft)
5. Installation should follow the removal procedure in
the reverse order.
Page 264 of 2053
M162 ENGINE CONTROLS 1F1 -- 101
D AEW OO M Y_2000
KAA1C010
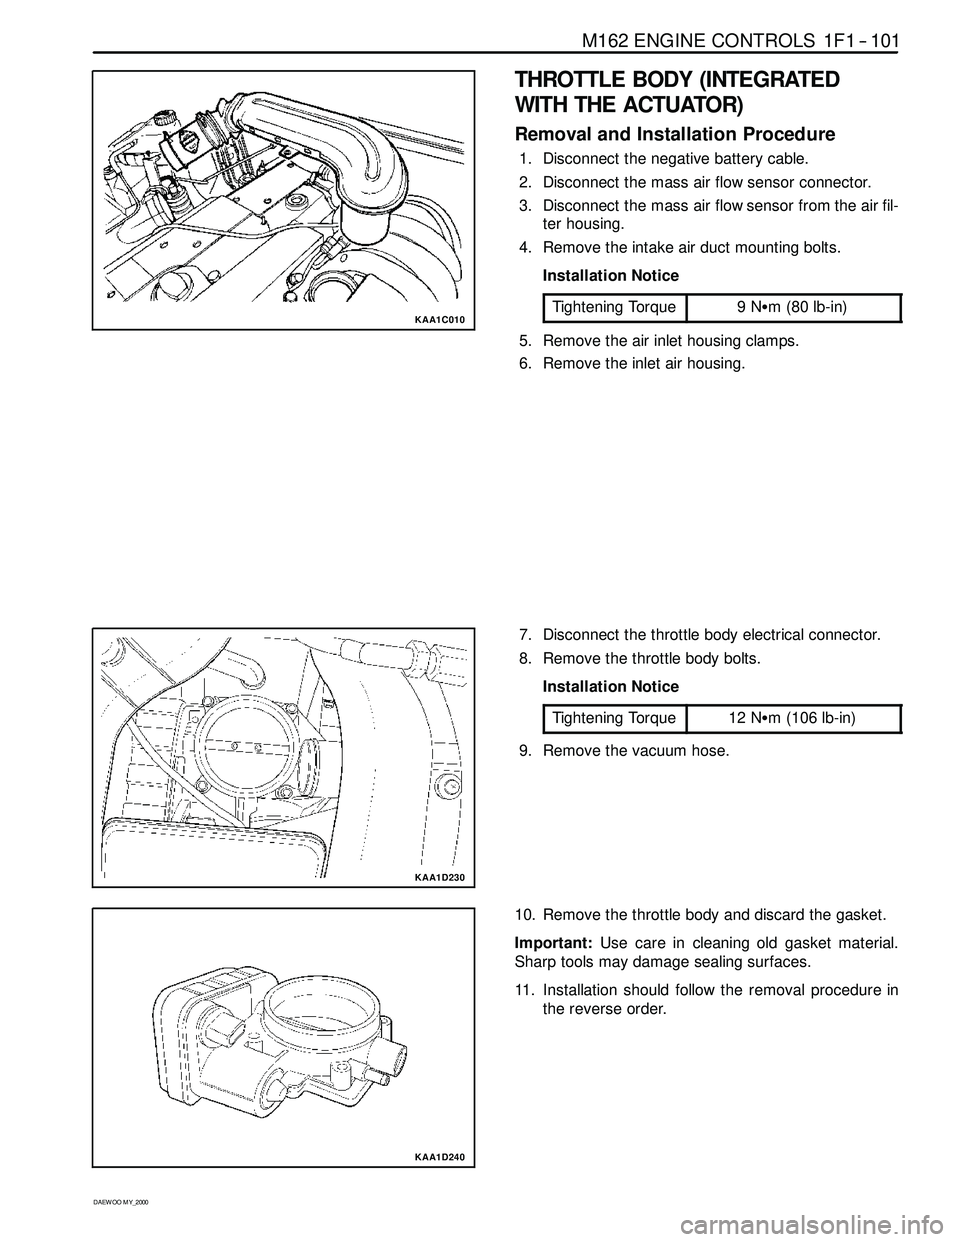
THROTTLE BODY (INTEGRATED
WITH THE ACTUATOR)
Removal and Installation Procedure
1. Disconnect the negative battery cable.
2. Disconnect the mass air flow sensor connector.
3. Disconnect the mass air flow sensor from the air fil-
ter housing.
4. Remove the intake air duct mounting bolts.
Installation Notice
Tightening Torque
9NSm (80 lb-in)
5. Remove the air inlet housing clamps.
6. Remove the inlet air housing.
KAA1D230
7. Disconnect the throttle body electrical connector.
8. Remove the throttle body bolts.
Installation Notice
Tightening Torque
12 NSm (106 lb-in)
9. Remove the vacuum hose.
KAA1D240
10. Remove the throttle body and discard the gasket.
Important:Use care in cleaning old gasket material.
Sharp tools may damage sealing surfaces.
11. Installation should follow the removal procedure in
the reverse order.
Page 265 of 2053
1F1 -- 102 M162 ENGINE CONTROLS
D AEW OO M Y_2000
KAA1F190
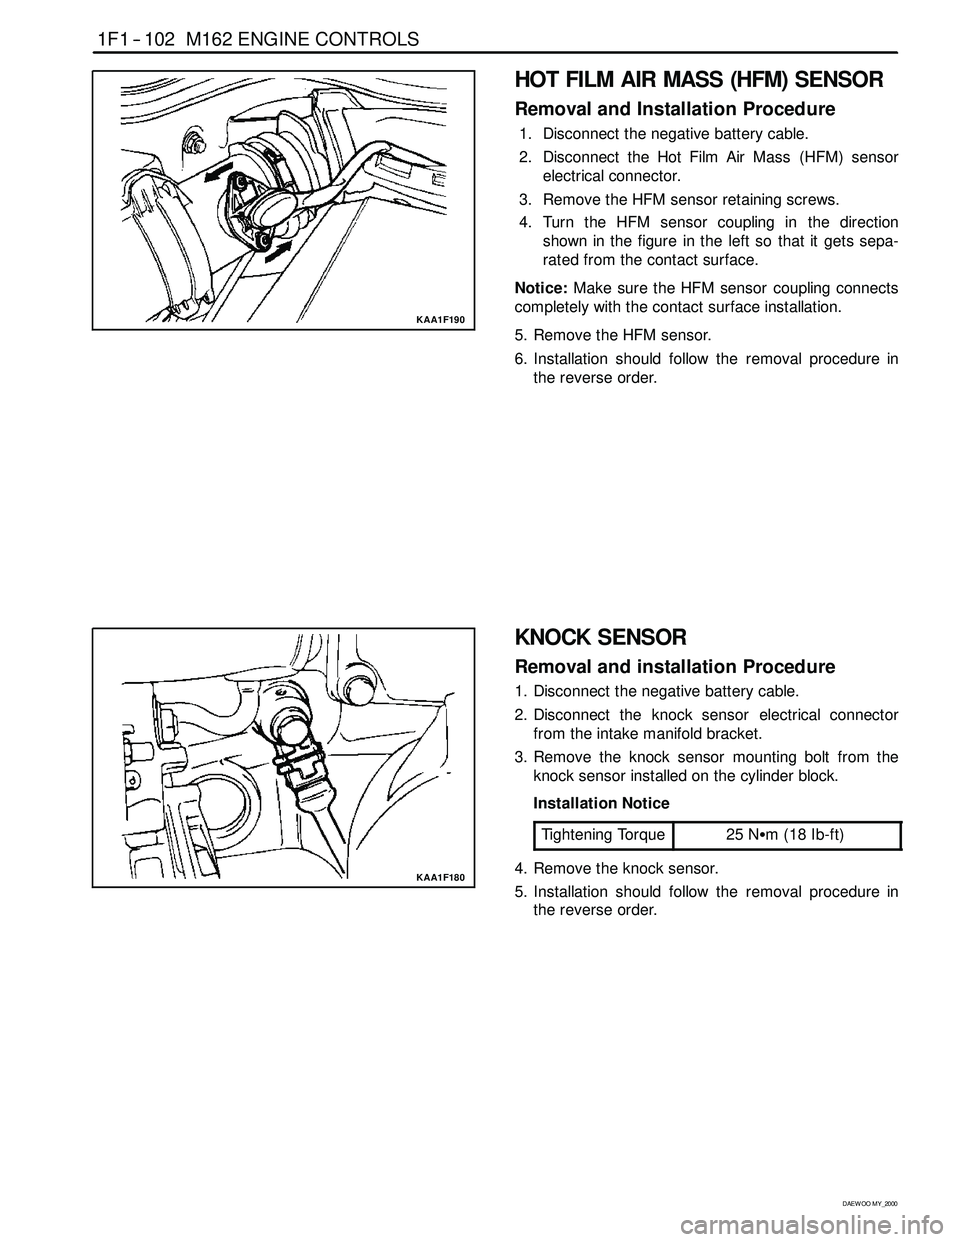
HOT FILM AIR MASS (HFM) SENSOR
Removal and Installation Procedure
1. Disconnect the negative battery cable.
2. Disconnect the Hot Film Air Mass (HFM) sensor
electrical connector.
3. Remove the HFM sensor retaining screws.
4. Turn the HFM sensor coupling in the direction
shown in the figure in the left so that it gets sepa-
rated from the contact surface.
Notice:Make sure the HFM sensor coupling connects
completely with the contact surface installation.
5. Remove the HFM sensor.
6. Installation should follow the removal procedure in
the reverse order.
KAA1F180
KNOCK SENSOR
Removal and installation Procedure
1. Disconnect the negative battery cable.
2. Disconnect the knock sensor electrical connector
from the intake manifold bracket.
3. Remove the knock sensor mounting bolt from the
knock sensor installed on the cylinder block.
Installation Notice
Tightening Torque
25 NSm (18 Ib-ft)
4. Remove the knock sensor.
5. Installation should follow the removal procedure in
the reverse order.
Page 266 of 2053
M162 ENGINE CONTROLS 1F1 -- 103
D AEW OO M Y_2000
KAA1F410
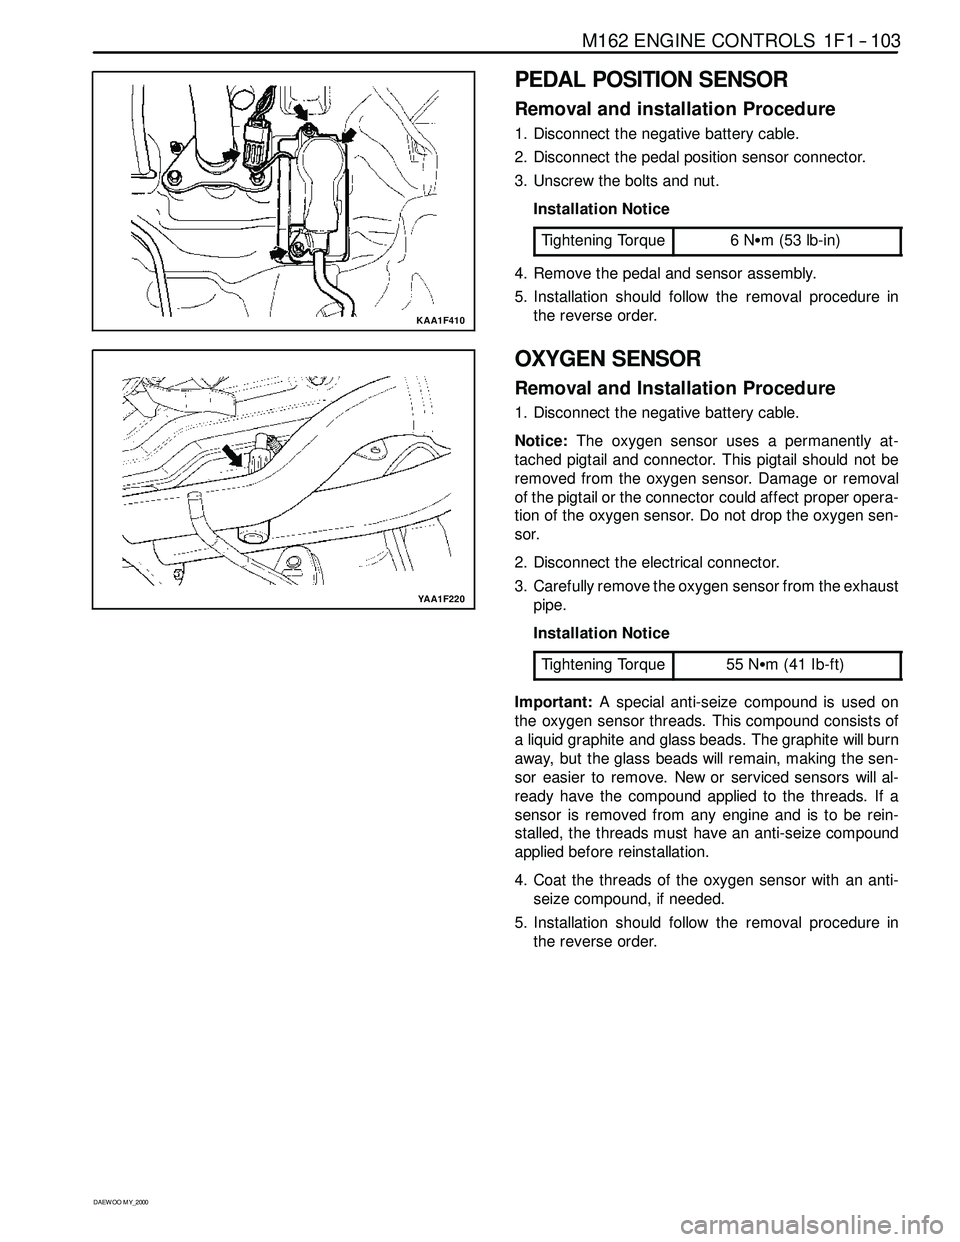
PEDAL POSITION SENSOR
Removal and installation Procedure
1. Disconnect the negative battery cable.
2. Disconnect the pedal position sensor connector.
3. Unscrew the bolts and nut.
Installation Notice
Tightening Torque
6NSm (53 lb-in)
4. Remove the pedal and sensor assembly.
5. Installation should follow the removal procedure in
the reverse order.
YAA1F220
OXYGEN SENSOR
Removal and Installation Procedure
1. Disconnect the negative battery cable.
Notice:The oxygen sensor uses a permanently at-
tached pigtail and connector. This pigtail should not be
removed from the oxygen sensor. Damage or removal
of the pigtail or the connector could affect proper opera-
tion of the oxygen sensor. Do not drop the oxygen sen-
sor.
2. Disconnect the electrical connector.
3. Carefully remove the oxygen sensor from the exhaust
pipe.
Installation Notice
Tightening Torque
55 NSm (41 Ib-ft)
Important:A special anti-seize compound is used on
the oxygen sensor threads. This compound consists of
a liquid graphite and glass beads. The graphitewill burn
away, but the glass beadswill remain, making the sen-
sor easier to remove. New or serviced sensors will al-
ready have the compound applied to the threads. If a
sensor is removed from any engine and is to be rein-
stalled, the threads must have an anti-seize compound
applied before reinstallation.
4. Coat the threads of the oxygen sensor with an anti-
seize compound, if needed.
5. Installation should follow the removal procedure in
the reverse order.
Page 267 of 2053
1F1 -- 104 M162 ENGINE CONTROLS
D AEW OO M Y_2000
KAB1F380
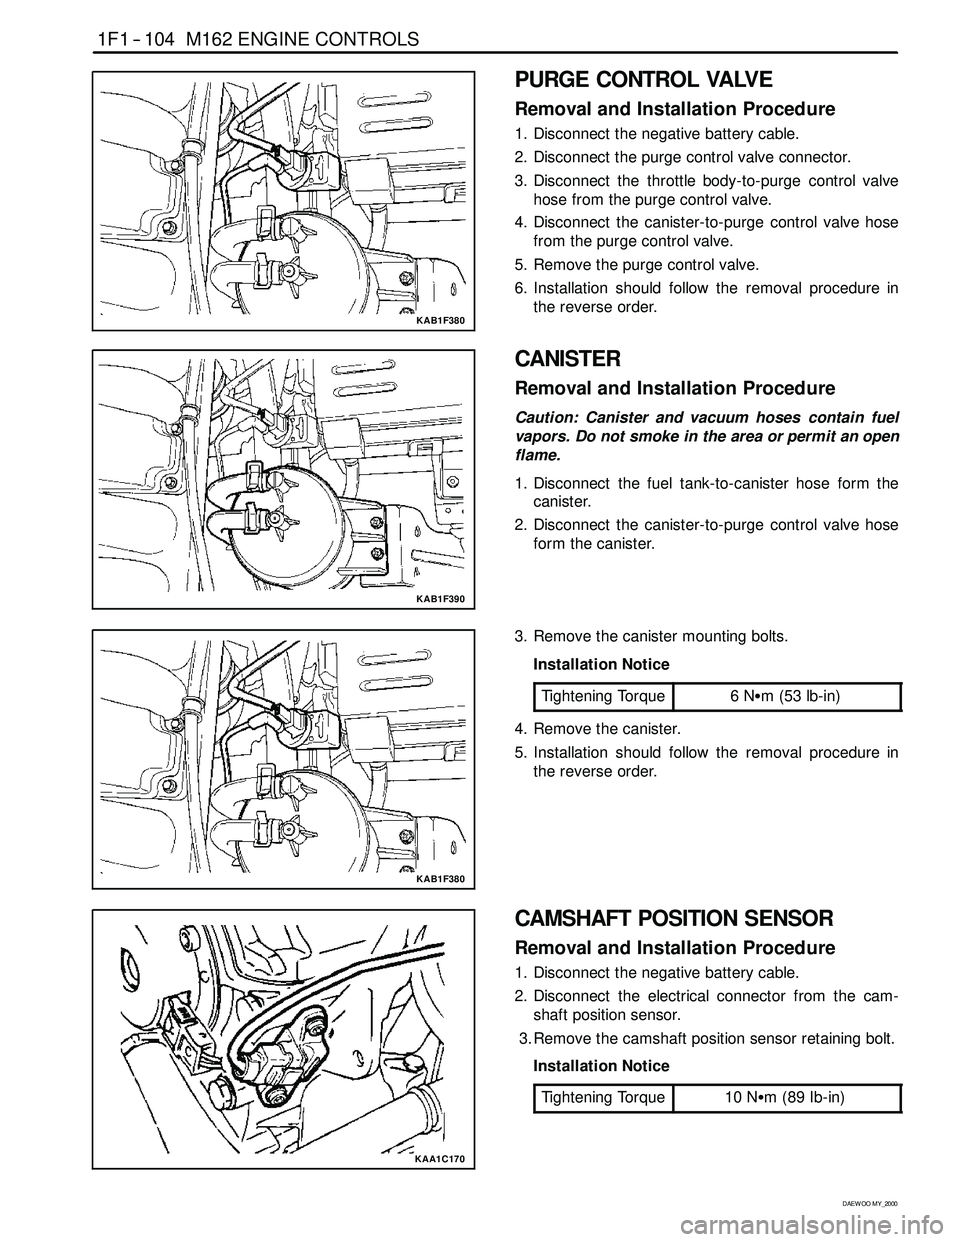
PURGE CONTROL VALVE
Removal and Installation Procedure
1. Disconnect the negative battery cable.
2. Disconnect the purge control valve connector.
3. Disconnect the throttle body-to-purge control valve
hose from the purge control valve.
4. Disconnect the canister-to-purge control valve hose
from the purge control valve.
5. Remove the purge control valve.
6. Installation should follow the removal procedure in
the reverse order.
KAB1F390
CANISTER
Removal and Installation Procedure
Caution: Canister and vacuum hoses contain fuel
vapors. Do not smoke in the area or permit an open
flame.
1. Disconnect the fuel tank-to-canister hose form the
canister.
2. Disconnect the canister-to-purge control valve hose
form the canister.
KAB1F380
3. Remove the canister mounting bolts.
Installation Notice
Tightening Torque
6NSm (53 lb-in)
4. Remove the canister.
5. Installation should follow the removal procedure in
the reverse order.
KAA1C170
CAMSHAFT POSITION SENSOR
Removal and Installation Procedure
1. Disconnect the negative battery cable.
2. Disconnect the electrical connector from the cam-
shaft position sensor.
3. Remove the camshaft position sensor retaining bolt.
Installation Notice
Tightening Torque
10 NSm (89 Ib-in)
Page 268 of 2053
M162 ENGINE CONTROLS 1F1 -- 105
D AEW OO M Y_2000
4. Check the O-ring for damage and replace it if neces-
sary.
5. Installation should follow the removal procedure in
the reverse order.
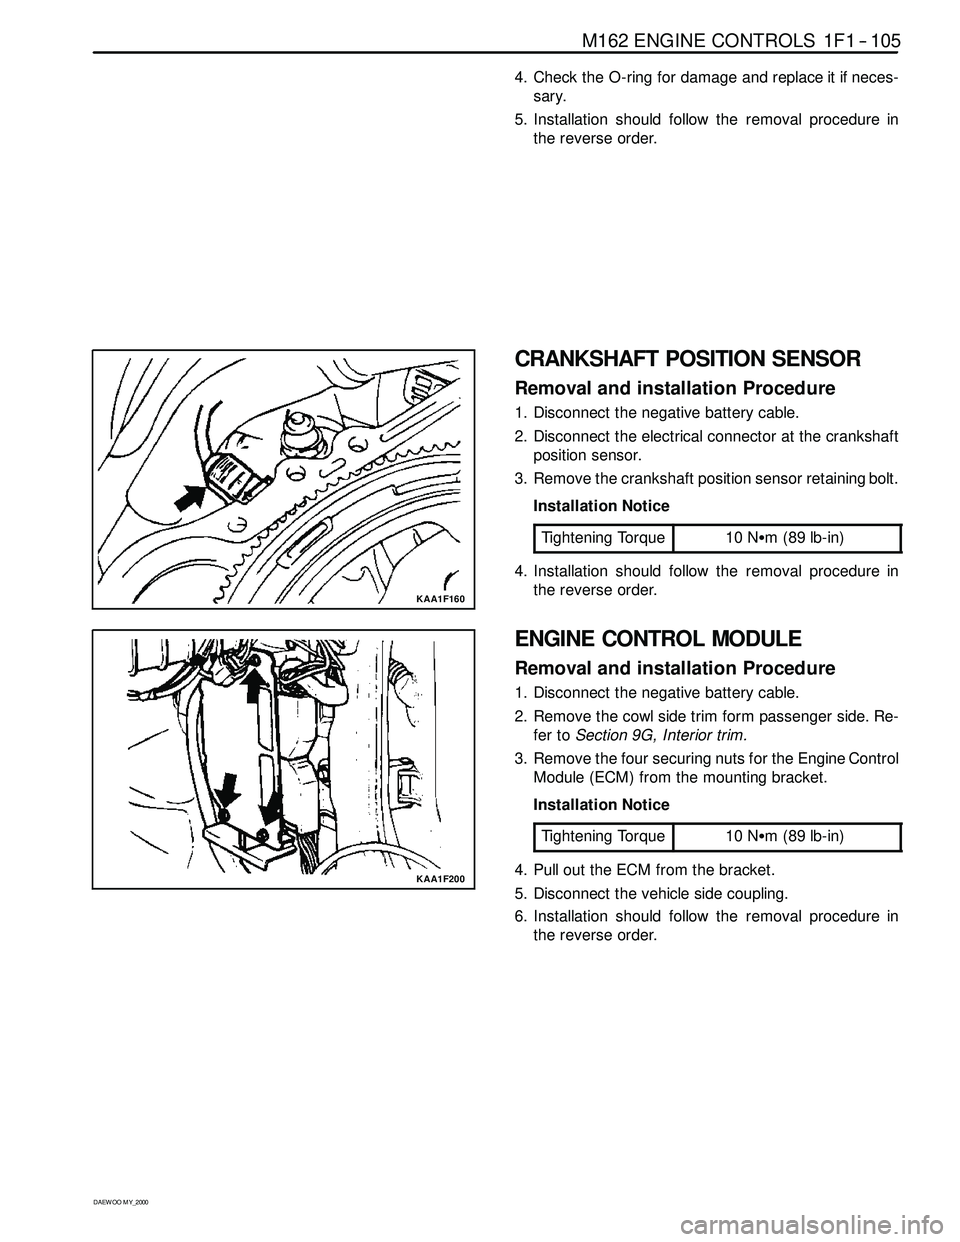
KAA1F160
CRANKSHAFT POSITION SENSOR
Removal and installation Procedure
1. Disconnect the negative battery cable.
2. Disconnect the electrical connector at the crankshaft
position sensor.
3. Remove the crankshaft position sensor retaining bolt.
Installation Notice
Tightening Torque
10 NSm (89 lb-in)
4. Installation should follow the removal procedure in
the reverse order.
KAA1F200
ENGINE CONTROL MODULE
Removal and installation Procedure
1. Disconnect the negative battery cable.
2. Remove the cowl side trim form passenger side. Re-
fer toSection 9G, Interior trim.
3. Remove the four securing nuts for the Engine Control
Module (ECM) from the mounting bracket.
Installation Notice
Tightening Torque
10 NSm (89 lb-in)
4. Pull out the ECM from the bracket.
5. Disconnect the vehicle side coupling.
6. Installation should follow the removal procedure in
the reverse order.
Page 269 of 2053
D AEW OO M Y_2000
SECTION 1G1
M162 ENGINE INTAKE & EXHAUST
CAUTION: Disconnect the negative battery cable before removing or installing any electrical unit or when a
tool or equipment could easily come in contact with exposed electrical terminals. Disconnecting this cable
will help prevent personal injury and damage to the vehicle. The ignition must also be in LOCK unless other -
wise noted.
TABLE OF CONTENTS
Specifications 1G1 -- 2...........................
Fastener Tightening Specifications 1G1 -- 2.........
Maintenance and Repair 1G1 -- 3..................
On-- Vehicle Service 1G1-- 3........................
Air Cleaner 1G1-- 3.............................Intake Air Duct 1G1--5..........................
Intake Manifold 1G1--7.........................
Resonance Flap 1G1-- 9.........................
Exhaust Manifold 1G1-- 11.......................